

Bell Bearing Hunter |
|
|---|---|
 |
|
| Locations & Drops | |
| Warmaster's Shack: Church of Vows: Hermit Merchant's Shack: Isolated Merchant's Shack (Dragonbarrow): |
|
| Stronger VS | Weaker to |
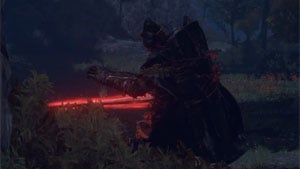
Bell Bearing Hunter is a recurring Field Boss in Elden Ring. He is a hunter of shopkeepers who only appears at night and features long-distance melee attacks. This is an optional boss as players don't need to defeat it to advance in Elden Ring.
In order for the Bell Bearing Hunter to appear, you must have already entered Stormveil Castle at least once. He will appear only at night, so if you don't see him, make sure to rest again at the nearby Site of Grace after passing time to nightfall.
See Elemer of the Briar for the Great Enemy version of this boss. Defeating the real Elemer will not prevent the Bell Bearing Hunters from appearing, however. Despite his fearsome reputation, the Bell Bearing Hunter cannot permanently kill merchants.
Elemer murdered numerous instructors and merchants, and was known as the Bell Bearing Hunter.
Elden Ring Bell Bearing Hunter Locations
- Warmaster's Shack [More Info] [Map Link]
- Church of Vows [More Info] [Map Link]
- Hermit Merchant's Shack [More Info] [Map Link]
- Isolated Merchant's Shack (Dragonbarrow) [More Info] [Map Link]
- Bell Bearing Hunter only spawns provided 3 requirements (in this order it will be faster): 1.it must be night; 2.the player needs to trigger the title of the specific location (like "Warmaster's Shack"); 3.the player needs to rest at the near site of grace.
- If it isn't night, the player needs to change the time to night first, then they can start from step 1 here above, which is already done.
- There are no other particular requirements generally speaking, like someone claims they first need to meet Margit in Stormveil.
Bell Bearing Hunter Combat information
- Stance: 80
- Parryable: Yes, but 2 parries are required per stance break
- Is vulnerable to a critical hit after being stance broken or parried
- Damage:
 Standard,
  Strike,
  Pierce,
  Magic
Magic - See Elemer of the Briar for a full boss guide
- If you can climb on nearby scenery and get above the Bell Bearing Hunter's head, none of his attacks can hit you. Use spells like Night Maiden's Mist that can hit through structures to damage him. Even if it seems like he's going out of range, you can simply wait and he will be back in a moment.
- If you have sufficient health, you can use Lion's Claw to tank his hits as the startup animation has superarmor which means you can't be staggered out of it by most attacks. Hit him enough times to stance break him, perform a critical and then heal while he is getting up. You will still need enough health to tank his hits and enough damage to kill him before you run out of flasks.
Negations (or Absorption)
The negation numbers are the % of your damage that gets blocked. For example, if a negation is 60, 40% of that damage by that type will go through and 60% will be negated. Bigger number = less damage. A negation of 100 means no damage goes through, and a negation of -100 means the enemy takes 2x damage from that source. 0 means damage goes pretty much as is.
Bell Bearing HunterWarmaster's Shack |
|
|---|---|
| __image__ | |
| Drops |  2,700 2,700Bone Peddler's Bell Bearing |
| HP | 2,495 |
Elden Ring Bell Bearing Hunter Boss (Warmaster's Shack)
- This is an optional boss
- Closest Site of Grace: Warmaster's Shack
- Multiplayer is allowed for this boss
- You cannot summon Spirit Ashes for this boss in its normal location, but if you draw it northeast to the guard post you can summon it there.
Bell Bearing Hunter Combat information
- Health: 2,495 HP
- Defense: 103
- Drops 2,700, Bone Peddler's Bell Bearing
Resistances
 Poison: 316 / 414 / 704 / 1161
 Scarlet Rot: 316 / 414 / 704 / 1161
 Hemorrhage: 517 / 807 / 1264
 Frostbite: 517 / 807 / 1264
The resistance numbers are the buildup amount to trigger it. For example, if a resistance is 100 you must deal 100 points of the given buildup to trigger it. Note that these go down over time, and increase each time the effect procs. The values after the "/"s indicate the increased resistances after each successive proc.
NG+ and Beyond (click to reveal)
| NG | NG+ | NG+2 | NG+3 | NG+4 | NG+5 | NG+6 | NG+7 | |
|---|---|---|---|---|---|---|---|---|
| HP | 2,495 | 5,875 | 6,462 | 6,756 | 7,050 | 7,637 | 7,931 | 8,225 |
| Defense | 103 | 117 | 120 | 123 | 129 | 135 | 141 | 152 |
| 2,700 | 13,500 | 14,850 | 15,187 | 16,200 | 16,537 | 16,875 | 17,212 | |
Resistances |
||||||||
| 316 / 414 / 704 / 1161 | 344 / 442 / 732 / 1189 | 349 / 447 / 737 / 1194 | 354 / 452 / 742 / 1199 | 359 / 457 / 747 / 1204 | 364 / 462 / 752 / 1209 | 369 / 467 / 757 / 1214 | 374 / 472 / 762 / 1219 | |
| 316 / 414 / 704 / 1161 | 344 / 442 / 732 / 1189 | 349 / 447 / 737 / 1194 | 354 / 452 / 742 / 1199 | 359 / 457 / 747 / 1204 | 364 / 462 / 752 / 1209 | 369 / 467 / 757 / 1214 | 374 / 472 / 762 / 1219 | |
| 517 / 807 / 1264 | 564 / 854 / 1311 | 572 / 862 / 1319 | 580 / 870 / 1327 | 589 / 879 / 1336 | 597 / 887 / 1344 | 606 / 896 / 1353 | 614 / 904 / 1361 | |
| 517 / 807 / 1264 | 564 / 854 / 1311 | 572 / 862 / 1319 | 580 / 870 / 1327 | 589 / 879 / 1336 | 597 / 887 / 1344 | 606 / 896 / 1353 | 614 / 904 / 1361 | |
| 316 / 414 / 704 / 1161 | 344 / 442 / 732 / 1189 | 349 / 447 / 737 / 1194 | 354 / 452 / 742 / 1199 | 359 / 457 / 747 / 1204 | 364 / 462 / 752 / 1209 | 369 / 467 / 757 / 1214 | 374 / 472 / 762 / 1219 | |
| Immune | ||||||||
Bell Bearing HunterChurch of Vows |
|
|---|---|
| __image__ | |
| Drops | 6,000 Meat Peddler's Bell Bearing |
| HP | 4,050 |
Elden Ring Bell Bearing Hunter Boss (Church of Vows)
- This is an optional boss
- Closest Site of Grace: Church of Vows
- Multiplayer is allowed for this boss
- You cannot summon Spirit Ashes for this boss
Bell Bearing Hunter Combat information
- Health: 4,050 HP
- Defense: 110
- Damage: Standard, Strike, Pierce, Magic
- Drops 6,000, Meat Peddler's Bell Bearing
Resistances
- Poison: 329 / 427 / 717 / 1174
- Scarlet Rot: 329 / 427 / 717 / 1174
- Hemorrhage: 539 / 829 / 1286
- Frostbite: 539 / 829 / 1286
The resistance numbers are the buildup amount to trigger it. For example, if a resistance is 100 you must deal 100 points of the given buildup to trigger it. Note that these go down over time, and increase each time the effect procs. The values after the "/"s indicate the increased resistances after each successive proc.
NG+ and Beyond (click to reveal)
| NG | NG+ | NG+2 | NG+3 | NG+4 | NG+5 | NG+6 | NG+7 | |
|---|---|---|---|---|---|---|---|---|
| HP | 4,050 | 5,989 | 6,587 | 6,887 | 7,186 | 7,785 | 8,085 | 8,384 |
| Defense | 110 | 118 | 120 | 123 | 129 | 135 | 141 | 153 |
| 6,000 | 18,000 | 19,800 | 20,250 | 21,600 | 22,050 | 22,500 | 22,950 | |
Resistances |
||||||||
| 329 / 427 / 717 / 1174 | 355 / 453 / 743 / 1200 | 360 / 458 / 748 / 1205 | 365 / 463 / 753 / 1210 | 370 / 468 / 758 / 1215 | 376 / 474 / 764 / 1221 | 381 / 479 / 769 / 1226 | 386 / 484 / 774 / 1231 | |
| 329 / 427 / 717 / 1174 | 355 / 453 / 743 / 1200 | 360 / 458 / 748 / 1205 | 365 / 463 / 753 / 1210 | 370 / 468 / 758 / 1215 | 376 / 474 / 764 / 1221 | 381 / 479 / 769 / 1226 | 386 / 484 / 774 / 1231 | |
| 539 / 829 / 1286 | 582 / 872 / 1329 | 590 / 880 / 1337 | 599 / 889 / 1346 | 608 / 898 / 1355 | 616 / 906 / 1363 | 625 / 915 / 1372 | 634 / 924 / 1381 | |
| 539 / 829 / 1286 | 582 / 872 / 1329 | 590 / 880 / 1337 | 599 / 889 / 1346 | 608 / 898 / 1355 | 616 / 906 / 1363 | 625 / 915 / 1372 | 634 / 924 / 1381 | |
| 329 / 427 / 717 / 1174 | 355 / 453 / 743 / 1200 | 360 / 458 / 748 / 1205 | 365 / 463 / 753 / 1210 | 370 / 468 / 758 / 1215 | 376 / 474 / 764 / 1221 | 381 / 479 / 769 / 1226 | 386 / 484 / 774 / 1231 | |
| Immune | ||||||||
Bell Bearing HunterHermit Merchant's Shack |
|
|---|---|
| __image__ | |
| Drops | 20,000 Medicine Peddler's Bell Bearing |
| HP | 6,216 |
Elden Ring Bell Bearing Hunter Boss (Hermit Merchant's Shack)
- This is an optional boss
- Closest Site of Grace: Hermit Merchant's Shack
- Multiplayer is allowed for this boss
- You cannot summon Spirit Ashes for this boss
Bell Bearing Hunter Combat information
- Health: 6,216 HP
- Defense: 114
- Damage: Standard, Strike, Pierce, Magic
- Drops 20,000, Medicine Peddler's Bell Bearing
Resistances
- Poison: 337 / 435 / 725 / 1182
- Scarlet Rot: 337 / 435 / 725 / 1182
- Hemorrhage: 552 / 842 / 1299
- Frostbite: 552 / 842 / 1299
The resistance numbers are the buildup amount to trigger it. For example, if a resistance is 100 you must deal 100 points of the given buildup to trigger it. Note that these go down over time, and increase each time the effect procs. The values after the "/"s indicate the increased resistances after each successive proc.
NG+ and Beyond (click to reveal)
| NG | NG+ | NG+2 | NG+3 | NG+4 | NG+5 | NG+6 | NG+7 | |
|---|---|---|---|---|---|---|---|---|
| HP | 6,216 | 7,788 | 8,566 | 8,956 | 9,345 | 10,124 | 10,513 | 10,903 |
| Defense | 114 | 118 | 121 | 124 | 130 | 136 | 141 | 153 |
| 20,000 | 60,000 | 66,000 | 67,500 | 72,000 | 73,500 | 75,000 | 76,500 | |
Resistances |
||||||||
| 337 / 435 / 725 / 1182 | 362 / 460 / 750 / 1207 | 367 / 465 / 755 / 1212 | 372 / 470 / 760 / 1217 | 378 / 476 / 766 / 1223 | 383 / 481 / 771 / 1228 | 389 / 487 / 777 / 1234 | 394 / 492 / 782 / 1239 | |
| 337 / 435 / 725 / 1182 | 362 / 460 / 750 / 1207 | 367 / 465 / 755 / 1212 | 372 / 470 / 760 / 1217 | 378 / 476 / 766 / 1223 | 383 / 481 / 771 / 1228 | 389 / 487 / 777 / 1234 | 394 / 492 / 782 / 1239 | |
| 552 / 842 / 1299 | 593 / 883 / 1340 | 601 / 891 / 1348 | 610 / 900 / 1357 | 619 / 909 / 1366 | 628 / 918 / 1375 | 637 / 927 / 1384 | 646 / 936 / 1393 | |
| 552 / 842 / 1299 | 593 / 883 / 1340 | 601 / 891 / 1348 | 610 / 900 / 1357 | 619 / 909 / 1366 | 628 / 918 / 1375 | 637 / 927 / 1384 | 646 / 936 / 1393 | |
| 337 / 435 / 725 / 1182 | 362 / 460 / 750 / 1207 | 367 / 465 / 755 / 1212 | 372 / 470 / 760 / 1217 | 378 / 476 / 766 / 1223 | 383 / 481 / 771 / 1228 | 389 / 487 / 777 / 1234 | 394 / 492 / 782 / 1239 | |
| Immune | ||||||||
Bell Bearing HunterIsolated Merchant's Shack (Dragonbarrow) |
|
|---|---|
| __image__ | |
| Drops | 50,000 Gravity Stone Peddler's Bell Bearing |
| HP | 10,619 |
Elden Ring Bell Bearing Hunter Boss (Isolated Merchant's Shack)
- This is an optional boss
- Closest Site of Grace: Isolated Merchant's Shack (Dragonbarrow)
- Multiplayer is allowed for this boss
- You cannot summon Spirit Ashes for this boss
Bell Bearing Hunter Combat information
- Health: 10,619 HP
- Defense: 121
- Damage: Standard, Strike, Pierce, Magic
- Drops 50,000, Gravity Stone Peddler's Bell Bearing
Resistances
- Poison: 383 / 481 / 771 / 1228
- Scarlet Rot: 383 / 481 / 771 / 1228
- Hemorrhage: 627 / 917 / 1374
- Frostbite: 627 / 917 / 1374
The resistance numbers are the buildup amount to trigger it. For example, if a resistance is 100 you must deal 100 points of the given buildup to trigger it. Note that these go down over time, and increase each time the effect procs. The values after the "/"s indicate the increased resistances after each successive proc.
NG+ and Beyond (click to reveal)
| NG | NG+ | NG+2 | NG+3 | NG+4 | NG+5 | NG+6 | NG+7 | |
|---|---|---|---|---|---|---|---|---|
| HP | 10,619 | 10,629 | 11,691 | 12,223 | 12,754 | 13,817 | 14,349 | 14,880 |
| Defense | 121 | 120 | 123 | 126 | 132 | 138 | 144 | 156 |
| 50,000 | 100,000 | 110,000 | 112,500 | 120,000 | 122,500 | 125,000 | 127,500 | |
Resistances |
||||||||
| 383 / 481 / 771 / 1228 | 409 / 507 / 797 / 1254 | 415 / 513 / 803 / 1260 | 421 / 519 / 809 / 1266 | 427 / 525 / 815 / 1272 | 433 / 531 / 821 / 1278 | 439 / 537 / 827 / 1284 | 445 / 543 / 833 / 1290 | |
| 383 / 481 / 771 / 1228 | 409 / 507 / 797 / 1254 | 415 / 513 / 803 / 1260 | 421 / 519 / 809 / 1266 | 427 / 525 / 815 / 1272 | 433 / 531 / 821 / 1278 | 439 / 537 / 827 / 1284 | 445 / 543 / 833 / 1290 | |
| 627 / 917 / 1374 | 670 / 960 / 1417 | 680 / 970 / 1427 | 690 / 980 / 1437 | 700 / 990 / 1447 | 710 / 1000 / 1457 | 720 / 1010 / 1467 | 730 / 1020 / 1477 | |
| 627 / 917 / 1374 | 670 / 960 / 1417 | 680 / 970 / 1427 | 690 / 980 / 1437 | 700 / 990 / 1447 | 710 / 1000 / 1457 | 720 / 1010 / 1467 | 730 / 1020 / 1477 | |
| 383 / 481 / 771 / 1228 | 409 / 507 / 797 / 1254 | 415 / 513 / 803 / 1260 | 421 / 519 / 809 / 1266 | 427 / 525 / 815 / 1272 | 433 / 531 / 821 / 1278 | 439 / 537 / 827 / 1284 | 445 / 543 / 833 / 1290 | |
| Immune | ||||||||
Trivia
- If Miriel continues to appear, try the following:
- Talk to Miriel. Try listening to each of his lore dialogue options and resting again at Site of Grace.
- Attack Miriel. If Miriel takes any amount of damage, he will hide in his shell and refuse to speak. Perform a light attack on Miriel and rest once more at the Site of Grace, and the boss encounter will trigger. When Miriel reappears, he will not be hostile.
- Note: Defeating Elemer of the Briar has no impact on encounters with the Bell Bearing Hunter.
Bell Bearing Hunter Image Gallery
[screenshots and artwork go here]
 Anonymous
Good news. The DLC hunter will allow you to buy starlight shards and golem arrows upon his defeat. The bad news - he's got a rune bear companion.
- Anonymous
I just found out that if you rest at the site of grace, pass time to night, then fast-travel to that same site of grace, it'll trigger his fight as well.
- Anonymous
I parried this guy like 20 times and did the critical hits only to get stuck on a rock, unable to dodge roll and die. He had like 2% HP left.
- Anonymous
I killed all of them, would have been nice to get an achievement at least.
- Anonymous
"In order for the Bell Bearing Hunter to appear, you must have already entered Stormveil Castle at least once" This is inaccurate.
- Anonymous
Had a hard time fighting him after respeccing to moonveil build.. Apparently I only need to spam night comet while walking backwards lolol
- Anonymous
actually never ran into any of these, I started thinking Elmer was a unique encounter
- Anonymous
Just stay close, like everyone else says. Otherwise my dude here will just ignore the game's rules and attack nigh on nonstop, even animation canceling to adapt to what you're doing. Easier to deal with close-up swings than figuring out which jedi trick he's gonna pull out next with that sword.
- Anonymous
- Anonymous
I think he's pretty fair, but like most Elden Ring bosses I dislike the delayed attacks that look identical to the fast attacks. Also I got him into a near infinite shield slam when circling his right side (sword arm). He didn't do the shield explosion just kept slamming his shield like 20 times.
To people having trouble: the best way to do this is up close (or by completely cheesing the fight by climbing something tall and taking him down from range if you can swing that). Assuming you want to do it legit, and you either don't want to or can't parry him, the way I would recommend doing the fight is grabbing a quick weapon (preferably a fist weapon but daggers work well), staying pressed up against him, rolling into him to avoid attacks, and after every combo do 1-2 normal hits or one charged hit depending on the speed of your attacks. It might take a bit to learn the roll timing, but this can reliably chip him down if you can't stance break him and if you can stance break him it can be a pretty quick fight (and he is one of the easiest bosses to stance break with practice by keeping the pressure up and using charged heavies when possible). Presumably this also works for carian slicer, catch flame, or bestial sling, but I haven't tried. Remember to get in as many charged R2s while he's spawning in as possible to basically get one stance break free.
If you are parrying, you can still throw in fist r2's for extra stance breaks, since the first parry gives enough time for a full charged r2 on fists and normal stance breaks don't reset the parry count.
- Anonymous
Cheese dragonbarrow every time. Whoever balanced this bossfight is a lobotomy patient.
- Anonymous
I beat this guy with no visible health left. He has ridiculous range and combos. It was terrifying. But a win is a win.
- Anonymous
Of course I find out about this guy right after I respec to a non-parry playstyle. You wanna get cheesed, fine, take the cheese into your mouth. Rock sling, lightning spear, and suck it.
This dude has no business being harder than Mohg. Wtf are you smoking, From?
- Anonymous
So "must have entered stormveil castle at least once" is not true. I am on a fresh character that has not been there and I just killed him at the warmaster's shack.
- Anonymous
- Anonymous
This guy, Just like crucible knights, are the most fun enemies to parry
- Anonymous
the one in caelid give me a hard time as a melee magic build and i've tried multiple things just to fail again and again. then i decided to stick to my roots and carrian sliced his ass first try. guess the trick was get close and personal all along
- Anonymous
straightforward cheese:
Heavy Thrusting sword skill x2 + r1 = stagger
Rush him during spawn. Wait slightly while he is getting up but you can damage him during the riposte recovery. Repeat above
Higher HP ones will obviously require more attempts and depending on your upgrade level, you may or may not run out of fp. For melee, staying on his body and dodging towards his blow during his normal swing combo helps. If you can bait the shield slam, especially the red one, it's a good time to use above if you don't manage to stagger him.
- Anonymous
- Anonymous
If you're struggling with the hunter in Dragonbarrow and don't want to necessarily cheese your way through the fight, the best way to approach him is to stay as close as possible to him during the entire fight, unless you have to replenish health.
His close range combat is much more predictable, as he has a 2-hit or 3-hit combo, or does a shield bash or ground AOE slam, all of which give you adequate time to move out of the way to avoid damage and even get a hit in afterwards.
It also helps to get 2-3 power shots in as he's spawning. If you get 3 hits in, you stun him and can get a crit hit on him, which is the best start to the fight that you can get.
- Anonymous
Why does this guy deal so much damage? I can tank most endgame bosses with the right talismans no problem, but this guy always take 30-40% of my health every hit. It's a bit insane how overtuned he is.
- Anonymous
why the hell do these guys take 2 parries to riposte for piss damage, when the main boss in altus takes 1 parry to riposte and is much easier, from soft has 0 idea wtf they are doing
- Anonymous
This guy is the pvp invader that uses a meta weapon but once you learn a viable counter you can beat him easy every time.
- Anonymous
This enemy and Crucible Knight convinced me that From has lost their way. No more they adhere to their principle of "difficult but fair". Uninterruptible, consecutive, long range, tracking attacks faster than your recovery frames is NOT what you call fair.
- Anonymous
Cheese all of them
War master shack: after he spawns take torrent up to the cliff overlooking the two shacks.
Jump onto roof them night maiden mist the dude.
Hermit shack: once he spawns rotten breath once then ride away to safety. Once he is back in shack
Ride back with one more rotten breath. Rinse and repeat until the dude is dead.
Dragon barrow: make him spawn then ride away quickly on torrent to safety. Wait for him to go back
To his resting place. Ride up close enough to ancient rancor him a bit till he agro. Ride away again rinse and repeat till dead. Easy.
Church of Vows: run into church and make him spawn. Quickly turn around and run up the right hand
Side of the church and hop up a broken bit of the wall until you reach a platform you can stand nicely
From here he can’t get to you now you can spam him with a spell or incantation you like. easy.
Save your sanity trying to fight these guys toe to toe. Not worth the rubbish they drop….
Hope this helps some out there not wanting to waste their time. cheers.
- Anonymous
hey i got no idea if it applies to other graces but
to get him to spawn at warmasters shack
you must rest to set it to night
then fast travel
he will not invade if you just rested
- Anonymous
This guy was giving me a lot of trouble until i found a glitch in the matrix, if you stand right in his face he won't use any of his bullshit flying sword moves and just attack you melee which you can parry. left sweep has little delay so parry when you see his hand reach above his head, right sweep is faster so parry when you see him start the animation and overhead smash is identical to left swing with little delay. with little practice he can't do anything and just dies stuck in perpetual parry loop.
- Anonymous
- Anonymous
For anyone having trouble making him spawn: I've never gotten a spawn until I 1. Rest til night. 2. Go in and TALK TO THE NPC (you don't have to buy anything). 3. Rest at grace again. I assume it's a safe-guard to prevent you wanting to buy something from the npc and getting caught in a boss fight instead.
- Anonymous
He takes a long time to start attacking when he first spawns. If you have a heavy weapon you can stance break him and get him down to half health before the fight even starts. Best attack to punish is the corkscrew sword thrust due to the huge recovery time. Never try to punish the ground slam due to the potential AOE.
Pretty fun boss, although resting at the bonfire twice when you lose is a little annoying.
- Anonymous
"In order for the Bell Bearing Hunter to appear, you must have already entered Stormveil Castle at least once." What? This is completely false. I've killed the one at the Warmasters Shack before I ever fought Margit.
- Anonymous
- Anonymous
Just summon him and go on roof of shack use serpent arrows to inflict poison. Easy
- Anonymous
I fail to beat the one at dragonbarrow many time because i 2hand some big slow ass weapons, only when i change to good old bloodhound fang and a shield the fight became easy.
- Anonymous
Learning how to fight/parry these mad shaggers made me finally get gud at ER. The game is a breeze now.
- Anonymous
You can cheese dragonbarrow one from a tree. Hop on torrent, jump on the tree, easy life
- Anonymous
One of the worst bosses, but not so much difficult as annoying. For one attempt you need:
- Sit on the bonefire
- Skip time until night
- Get up and sit on the bonefire again, then get up and wait for his invasion.
This causes fatigue and reluctance to learn.
Stay on torrent as far as possible, cast Night Maiden mist (even prophet can cast it with some talismans and/or glintstone crown) and circle so that he spins in place changing directions in the cloud while menacingly looking at you. Not a single arrow wasted, the whole deal is like 2-3 minutes of intense circling. Gg ez. An absolute cancer to fight fair, tho (the Dragonbarrow one)
- Anonymous
- Anonymous
Patience is key with this guy, just stay close to him and focus on dodging, even if it feels like you're barely getting any attacks in.
- Anonymous
- Anonymous
I think its kinda strange that he does physical damage only
- Anonymous
Finally figured this guy out. Don’t give him any space. If you stay close he won’t do his flying sword techniques which I could just not time for some reason.. You can then just dodge his normal attacks 2-3 times and then heavy hit once. Rinse and repeat.
- Anonymous
I frequently cheese this guy with mimic veil and poison mist, I would rather fight fire giant at all his spawn points
- Anonymous
Should have been a remembrance boss. I honestly think the only reason people have trouble with him is psychological, since I've been right there with ya. He's a side boss, and Elden Ring side bosses are push overs.
He fits in best alongside mid-late game humanoid bosses and is easily comparable to mandetory bosses in DS2 and DS3.
With his long range, he's intimidating and forces you to play aggressively, but his combos are decently easy to dodge through hitless.
If you're struggling to beat the caelid version, consider making your survivability as high as possible with defence and healing buffs, and practicing dodging his moves at the warmasters shack
- Anonymous
Kill the dragonbarrow one early, especially if you get the golden scarab early which is very doable by grabbing demi-human ashes and the glovewort to get them to +5. Takes no time, I left a detailed note on the Abandoned Cave page. They'll shred those cleanrot knights with a little help from you. Then you can kill the big dragon with the scarab and the gold foot stacked, then kill the dragonbarrow bell hunter with extra gooey cheese by standing on the smaller of the two buildings here and raining arrows on him. This merchant sells poison arrows so invest in plenty of them and 99 regular arrows, then be patient and poison him first, then use your lock on to hammer regular arrows on him while he fights the tiny house you are standing on. Rinse and repeat and this guy is toast very, very early in the game. Grab another gold foot from patches and use it with the scarab here as well, you'll be rolling in cash and a little bit of shame but the cash will make that go away.
- Anonymous
It's an inside Vs outside fight, when he goes for weapon arts, jump in close and moonveil him, when his sword comes back to him roll out away from him and repeat, just nailed all 3-4 spawns
- Anonymous
- Anonymous
- Anonymous
woah, that was a hard boss. what did I unlock? ...ah, the ability to buy animal bones
- Anonymous
Found him after i defeated the game. One tough cookie. Tried everything, all my fancy weapons, even the sacred great sword with the Wave of Gold. Finally had to pull out the +10 Bloodhound fang and weapon arted him to death.
- Anonymous
- Anonymous
Icy Spear and a good shield is a really good strat against this boss.
- Anonymous
So probably after 40 deaths, (no I'm not kidding maybe more), I started to try parrying on the Hunter with the really big dog...I mean turtle. Church of Vows. That got me the closest to ever beating the guy. Got him to like 1/4 health. Was using a +8 noble slender sword I think with holy affinity.
Saw someone mention something about a greatsword somewhere so I got that claymore I been hanging onto and never used out. Upgraded it to like +4 or something and just Lion Clawed the bloody thing to death. So after 2 attempts with that greatsword I finally beat this freakin guy.
I'm way over leveled. By like a lot I say. I just suck. And I'm okay with that. But finally learned how to parry also. Oh and I used electrify armaments on the Claymore also. Not sure if it mattered. But out of everything I tried. This was what finally got the guy down for me.
YMMV
P.S. I hated this thing!!! Hahah
- Anonymous
cheese worthy foe, would be more enjoyable and manageable if he did not spam the damn weapon skill to the point it ends up feeling like it's the only move he knows, especially the one in both capital outskirts and dragonbarrow, better off cheese these two instances by poison mist and wait it does its job, rinse and repeat
- Anonymous
Imagine how progressively pissed Elemer must get when every time he invades a merchant he instead finds us again
- Anonymous
A trick to spawn bell hunters that i discovered is this: pass time until night at the closest site of grace, then immediately rest at the same site again, then exit and the bell hunter will appear. If im the first to discover this and you're feeling generous give credit to CPB lol
- Anonymous
grafted blade greatsword +9...stagger once, then twice, then...dead.
- Anonymous
These guys are a little spicy but heavy infused poison mist AoW on GreatSword did the job
- Anonymous
- Anonymous
I'm late to the party but.. I cheesed him with backpedaling and 99 bolts
- Anonymous
This boss is set to spawn a little later after midnight and not exactly at 12 o clock so if you are struggling making him spawn fast forward to midnight and wait a couple minutes then rest again at the bonfire, fast traveling to his closest sit of grace helps too, this will force the NPC to dissapear if Bernal is still there and will allow the boss to spawn.
- Anonymous
Found this guy after beating elden beast just befor ng+. The bigest challenge so far. Unstoppable mother****er with infinite poise. Tried everything on him, In the end had to hide behind the shield and slowly chip away his hp.
- Anonymous
why does the caelid one have more health than elemer, the real version?
ok i tried lightning, died, i tried blashphemous blade, died
i tried cold spiked spear with ice spear ash. quite effective.. good shield and just poked him when he got close. he only used the sword ash on my no other majic. it was very close but i finally got him first time with the ice spear on the cold spike spear.
- Anonymous
There are two bosses that I struggle with in Caelid, Ezykies (the rot dragon) and this guy. Radahn ain't **** compared to this ****er, he two-shots me and I had no trouble with health until now, since I prioritize endurance(for armor) and vigor extremely. Completely unbalanced and unfair for a normal field boss in caelid, his difficulty is more tuned with Farum Azula or Mountaintops.
- Anonymous
The easiest way to beat him is to stagger him with 3 charged heavy attacks from the grafted dragon fist weapon with the spiked cracked crystal tear while he's spawning in. Then after you repost you hit him with another charged r2, dodge one string of attacks and give him another charged r2 or two until he staggers again.
The grafted dragon head is kinda op with how fast it's charged r2s come out
- Anonymous
I'm playing on NG+ (reached Leyndell already) and just met this guy for the first time when I visited the Church of Vows, I was caught by surprise and he killed me. 300 hours playing Elden Ring and this game still surprises me.
- Anonymous
If you're like me and couldn't figure out why the hell he won't spawn at the shack with Bernahl despite resting again, not exhausting his dialogue is what preventing the boss from spawning.
- Anonymous
i absolutely love how you can't stagger these mother****ers even with a jump attack of 2 powerstanced greatswords
- Anonymous
This Dragonbarrow f*cker took me more tries than Hoarah Loux with same build at same level
Ouchie
- Anonymous
If you kill him with a riposte, his corpse will remain on the ground instead of disappearing, very useful for teabagging him.
- Anonymous
If you rotate to the left of his attack he will just spam shield bash attack after which you can do uncharged heavy and repeat.
- Anonymous
He is over leveled in every area you find him, you cannot change my mind on that.
- Anonymous
- Anonymous
I hate dodging into one of his attacks and getting pinned in the shifty little cabin he spawns in off the start and CANT ESCAPE
- Anonymous
I read the comments and i thought im the only one who hates him at Dragonbarrow. Little piece of shat tested my patience at gaming and took me like 45 attempts before giving up
- Anonymous
You can't back stab this a**h0le
Source: the stack of my dead bodies
- Anonymous
- Anonymous
- Anonymous
I want to love this guy, but his Dragonbarrow version makes so mad every time i want to kill him. Just shows that certain kits should not be scaled above certain levels. Same with Runebears, the ones in Liurnia and Limgrave are fine, but those in Consacrated are pure bullshit, having more HP than 90% of the bosses.
- Anonymous
Pulley crossbow grab recipe for rot and poison bolts, teleport to mohgs dynasty and buy burred bolts from the merchant there for bleed. Torrent and be patient.
- Anonymous
the one in dragonbarrow on ng+7 is hell. worst boss in any video game. i love getting two shot with morgott's great rune, dragoncrest greatshield talisman, and 80 vigor. fun game.
- Anonymous
- Anonymous
new to the game.
gave up on closing the distance and just i) hookclawed him at spawn for 1/2 of its HP, then ii) rode torrent and poked at him with a katana when running in. a bit cheesy but worked pretty easily
- Anonymous
Just stay close to him and learn to dodge precisely instead of panic rolling and when he tries to grab you try to stay behind him.
- Anonymous
"In order for the Bell Bearing Hunter to appear, you must have already entered Stormveil Castle at least once."
Well that's a ****ing lie! I just got ambushed by him when talking to Bernahl at the warmaster shack on a brand new character! I never even touched the castle at this point.
- Anonymous
You can't use this method without dodging and actually fighting (so you will have to git gud)
but my strategy is to use Carian retaliation, then get 2 jumping heavies in with a weapon that does at least 20 stance damage on jump attack. That I've found guarantees a poise break and successful riposte.
- Anonymous
I love when his grab attack hits me ten ****ing feet past the end of his hand, great hitboxes Miyazaki
- Anonymous
He can't attack up so if you can use torrent to jump up on top of the shacks he won't be able to hit you so you can just range him from safety.
- Anonymous
this guy is reminds me of Pursuer from DS2 but with different motive
- Anonymous
I absolutely love how Elemer has this huge shield, but never once uses it for defense. Only attack.
- Anonymous
I think the one at the church of vows is broken after the most recent update. He is the only one I can’t get to spawn after hours of messing with it over 3 characters. I have it on another 3 so idk why this is happening.
- Anonymous


Why do you think Malenia left Caelid?
0
+10
-1