

Crucible Knights |
|
|---|---|
 |
|
| Drops | |
| Stormhill Evergaol: Stormveil Castle: Siofra River: Siofra Aqueduct: Leyndell, Royal Capital: Crumbling Farum Azula: |
|
| Strong VS
All
Status Effects
Immune to |
Weaker to |
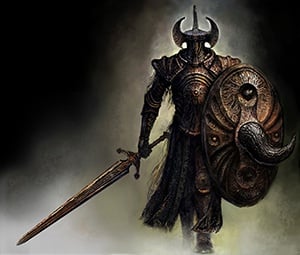
Crucible Knight is a Field Boss in Elden Ring. These heavily-armored warriors take patience and practice to defeat. This is an optional boss as players don't need to defeat it to advance in Elden Ring.
Other Crucible Knights appear in the Crucible Knight and Misbegotten Warrior, Tanith's Knight, Crucible Knight Ordovis, and Crucible Knight Siluria boss fights. Two Crucible Knight spirits can also be summoned by the Spirit-Caller Snail boss of the the Road's End Catacombs.
16 Crucible Knights in total can be fought throughout the Lands Between, though two of them have evidently died and can only be fought post mortem in spirit form.
Elden Ring Crucible Knight Locations
- Stormhill Evergaol [More Info] [Map Link]
- Stormveil Castle [More Info]
- Siofra River [More Info]
- 2 in Siofra Aqueduct [More Info]
- 2 in Leyndell, Royal Capital [More Info]
- 2 in Crumbling Farum Azula [More Info]
Crucible Knight Combat information
- Stance: 80
- Parryable: Yes
- Is vulnerable to a critical hit after being stance broken or parried
- Damage:
 Standard,
  Strike,
  Pierce,
  Holy (Phase 2)
Negations (or Absorptions)
The negation numbers are the % of your damage that gets blocked. For example, if a negation is 60, 40% of that damage by that type will go through and 60% will be negated. Bigger number = less damage. A negation of 100 means no damage goes through, and a negation of -100 mean the enemy takes 2x damage from that source. 0 means damage goes pretty much as is.
Notes
- Attacks are very difficult to block
- Giant Hunt, Stamp Upper and Lion's Claw will stagger them
- Stamp Upper can dodge some of their attacks by crouching under the blade
- Lion's Claw will grant you extra poise to prevent you from being interrupted by their attacks, using this skill 3 times in a row will stance break them, allowing you to perform a critical hit and heal before they can get up.
- In certain areas, they can fly off a cliff and die if they use the wing swoop attack
Elden Ring Crucible Knight (Sword) Boss Guide
Crucible Knight (Sword) Boss Video Guide
Crucible Knight (Sword) Fight Strategy
The Best Tips for Crucible Knight:
- Use Cuckoo Glintstones to hit their back when its shield is facing you.
- Giant Hunt and Stamp (Upward Cut) can stagger it out of many of its moves.
- For co-op, Ancient Lightning Spear (Bolt of Gransax skill) is useful - when fully charged, it makes Crucible Knight flinch.
- Jumping attacks can be a good counter to their charge attack.
Melee Users
Crucible Knight's attacks are slow and easy to predict, but hit very hard when they land. Take your time, don't panic, and don't go for more attacks than you have time for—trading damage is not the way to win this fight. Dodge multiple times until its combo is done, then counterattack. Don't be afraid to dodge forward through attacks, as this can put you in better position. Be particularly careful of its Seismic Wave attack, which hits a wide area but can easily be jumped and (with more difficulty) rolled.
Parrying: Because its attacks are quite easy to predict, Parrying is a great way to get in damage consistently. Most of its Phase 1 attacks are parriable and you can often parry several in a row, but be prepared to roll if you see it preparing to do a Shield Bash or Seismic Wave.
Avoid Status: Not only does Crucible Knight have high resistance to all status ailments, its aggressive attack patterns make it hard to land frequent hits. This makes status ailments a poor strategy. It's much better to use a weapon that does a high amount of raw damage than one whose power comes from building up Poison or Hemorrhage.
Heal Decisively: Crucible Knight has a tendency to do an attack when you try to heal with your flask when it isn't in an attack or recovery animation. This makes it very risky to heal even at a large distance between you and it. Heal only during recovery animations you KNOW the Crucible Knight can't get out of, such as Flying Dive and Seismic Combo.
Magic and Ranged Users
Roll directly away from its attacks to keep your distance. Seismic Wave is the most challenging, because it's hard to reliably dodge by rolling away; you can instead jump away to avoid this, or roll to either side.
Chip Away: Although the Crucible Knight's shield will block many magic spells, it'll still take chip damage. You can whittle away its health very effectively by spamming spells if you have enough Cerulean Flasks. In addition to the chip damage through the shield, you'll be able to get some full hits in when its guard is down during an attack or recovery.
Crucible Knight (Sword) Attacks & Counters
| Attack | Description | Counter |
| Swing | Dodge diagonally forward to avoid follow-ups, then land a hit if you're in a safe location | |
| Lunging Stab | Dodge to your left so you can counterattack on the side without the shield. | |
| Running Slash | Dodge diagonally forward to prevent its follow-up, then land a hit if you're in a safe location. | |
| Shield Bash | Hunches down behind its shield and takes a few steps towards you before lifting it up in the air | Dodge into or around its shield, then attack back during the long recovery period |
| Grinding Swing | Dodge in any direction. Or, a well-timed parry. Or, get a few attacks in, and parry at the last second. | |
| Seismic Wave | Raises its left knee with its sword out to one side, then stomps creating a shockwave along the ground | Jumping is the most reliable way to avoid this, but can take some practice if you're used to rolling. Rolling left, right, or forwards also works, but rolling backwards has much tighter timing and is not recommended. |
| Seismic Combo | It's safest to jump backwards and get out of range for the rest of the combo, but you can also dodge once to the side and then again backwards. Only the sword swings are parriable | |
| Ordovis's Vortex | Run back during the long windup. If you time it correctly, you can dodge around them to get in a hit or two. Also, the attack is slow enough that you can get in some hits and still have enough time to parry. | |
| Phase 2 | ||
| Phase Transition | Raises its right knee and stomps, releasing a small blast of holy energy. This is always the first attack it does in Phase 2, and always followed by a Flying Dive. | Walk backwards, or roll if you're wanting to be careful, and prepare for a Flying Dive. |
| Flying Dive | Grows a pair of golden wings and leaps into the sky, then dives towards you with sword outstretched | Roll towards it once its sword is level with the ground. This attack can be jumped over |
| Tail Spin | Grows a small golden tail and swings it in a circle counterclockwise. Usually uses this attack after any combo if you're in melee range in Phase 2 once but can also rarely do 2 of these in a row or begin a combo with this attack. | Roll to your right as soon as you see the tail. The attack comes out very quickly so make sure you are focused so you have enough reaction time to dodge. Do NOT try to punish any other attack in Phase 2, especially if you are using a melee weapon. However, you can punish this attack by doing a light attack once after you dodge, easier to do this with fast weapons like daggers. |
| Great Tail Spin | Grows a large golden tail and swings it in a circle clockwise. The tail then gets even larger and spins in another circle. Only used below 40% health and also only ever used after Flying Dive. | If you don't immediately chase after the Crucible Knight after Flying Dive, the first tail swing will automatically miss you. However, you will usually always be in range of the second tail swing. If you are further than approximately 5 metres away, dodge to your right after seeing the second tail. Otherwise dodge roll twice as soon as you see both tails respectively. |
| Fire Breath | Grows a large throat sac and walks forward while breathing fire in a conical area in front of it. | Run away when you see the bag on its throat inflate. |
| Fire Breath Retreat | It will grow a large throat sac, jump backwards, and breathes a short-ranged burst of fire. | Roll away when you see it jump back. |
![]() : Attack can be parried
: Attack can be parried
Crucible Knight Lore, Notes & Other Trivia
- Late-game Crucible Knight are affected by healing incantations.
- Other Notes & Tips go here
Crucible Knight (Sword) Combo Chart

Crucible Knight (Spear) Boss Guide
Crucible Knight (Spear) Fight Strategy
The Best Tips for Crucible Knight:
- Use Rock Sling (3-4 hits will break its stance)
Melee Users
The fight against this boss is hard but very well balanced, it makes quick heavy attacks and moves around the field very quickly. But your advantage is that it does not have a great pool of Health. When you face a spear knight with melee, try to keep close and stay behind. You can summon spirit ashes if you choose to. Keep circling to avoid their line of sight, therefore avoiding their hit range making it easier for you to parry or roll through any attacks. This will also put you in a better position to attack.
With the knights, it is recommended to parry their attacks rather than avoid due to their poise and stamina. At mid range, make sure to back up and roll away from these hits. If it performs a stab, block it with your shield if you brought one with you. It is possible to interrupt some of its attacks. If given a window, deal a critical hit then when they are down, follow up with a series of attacks. Their hp should deplete quickly due to their smaller health pool.
Use a combination of baiting and waiting for these windows while parrying other attacks and dodging into another position until its hp its depleted. If it comes in for a grab attack, avoid it to refrain from taking a great a mount of damage.
Magic and Ranged Users
The Knight can be attacked from a far distance before it comes into battle. Ride your mount. Keep distance, reload and drink mana potions while keeping distance. This boss takes a lot of damage against Spells. Use your heavy handed spells and continue to circle and reposition behind it. If you want to keep a further distance, there is a roof nearby where you can position yourself where it can't reach you. You can continue to deal any kind of ranged attacks from here.
If not, be weary of its quick lunges and dashes that are quick actions. Be ready to dash back and continue to attack until its health bar is depleted.
Crucible Knight (Spear) Attacks & Counters
| Attack | Description | Counter |
| Swing | Dodge diagonally forward to avoid follow-ups, then land a hit if you're in a safe location; or guard and attack back quickly before it combos | |
| Thrust | Dodge to the side | |
| Lunging Thrust | Dodge to the side and land a quick hit | |
| Spear Slam | Dodge to the side and land a quick hit | |
| Double Strike | Dodge towards its right side and land a hit while it's still locked into the attack | |
| Seismic Wave | Raises its left knee with its sword out to one side, then stomps creating a shockwave along the ground | Jumping is the most reliable way to avoid this, but can take some practice if you're used to rolling. Rolling left, right, or forwards also works, but rolling backwards has much tighter timing and is not recommended. |
| Siluria's Woe | Roll as soon as it begins to step forward. | |
| Phase 2 | ||
| Phase Transition | Raises its right knee and stomps, releasing a small blast of holy energy. This is always the first attack it does in Phase 2, and always followed by a Flying Dash | Walk backwards, or roll if you're nervous, and prepare for a Flying Dash |
| Flying Dash | Grows a pair of golden wings and leaps into the sky with holy energy whirling around its spear, then quickly dives forward and creates an explosion where it lands | Roll forward as you see its wings become vertical |
| Horn Impale | Summons a long horn of holy light on its hand and swings it forward, impaling you if it hits. Since this is a grab attack, it cannot be blocked. | Dodge back and to your left. This attack can come out very quickly and deals a lot of damage. |
| Horn Shoulder Charge | Summons horns on its shoulder and shoves them towards you, dashing to cover distance if necessary. | Dodge forward and to your right when you see it start to move |
![]() : Attack can be parried
: Attack can be parried
Crucible Knight (Spear) Combo Chart

Crucible KnightStormhill Evergaol |
|
|---|---|
 |
|
| Drops |  2,100 2,100Aspects of the Crucible: Tail |
| HP | 2,782 |
Elden Ring Crucible Knight Boss (Stormhill Evergaol)
- This is an optional boss
- Closest Site of Grace: Stormhill Shack
- Multiplayer is not allowed for this boss
- You cannot summon Spirit Ashes for this boss
Elden Ring Crucible Knight Location
This Crucible Knight can be found in Stormhill Evergaol, which is the circular mark clearly visible on the map to the southeast of Stormhill Shack. [Map Link]
Crucible Knight Combat information
- Health: 2,782 HP
- Defense: 103.9
- This Knight wields Ordovis's Greatsword and Crucible Hornshield. It cannot use the Fire Breath or Fire Leap attacks
- Drops 2,100, Aspects of the Crucible: Tail
Resistances
 Poison: 517 / 807 / 1264
 Scarlet Rot: 517 / 807 / 1264
 Hemorrhage: Immune
 Frostbite: 517 / 807 / 1264
The resistance numbers are the buildup amount to trigger it. For example, if a resistance is 100 you must deal 100 points of the given buildup to trigger it. Note that these go down over time, and increase each time the effect procs. The values after the "/"s indicate the increased resistances after each successive proc.
NG+ and Beyond (click to reveal)
| NG | NG+ | NG+2 | NG+3 | NG+4 | NG+5 | NG+6 | NG+7 | |
|---|---|---|---|---|---|---|---|---|
| HP | 2,782 | 6,551 | 7,206 | 7,533 | 7,861 | 8,516 | 8,843 | 9,171 |
| Defense | 103 | 117 | 120 | 123 | 129 | 135 | 141 | 152 |
| 2,100 | 10,500 | 11,550 | 11,812 | 12,600 | 12,862 | 13,125 | 13,387 | |
Resistances |
||||||||
| 517 / 807 / 1264 | 564 / 854 / 1311 | 572 / 862 / 1319 | 580 / 870 / 1327 | 589 / 879 / 1336 | 597 / 887 / 1344 | 606 / 896 / 1353 | 614 / 904 / 1361 | |
| 517 / 807 / 1264 | 564 / 854 / 1311 | 572 / 862 / 1319 | 580 / 870 / 1327 | 589 / 879 / 1336 | 597 / 887 / 1344 | 606 / 896 / 1353 | 614 / 904 / 1361 | |
| Immune | ||||||||
| 517 / 807 / 1264 | 564 / 854 / 1311 | 572 / 862 / 1319 | 580 / 870 / 1327 | 589 / 879 / 1336 | 597 / 887 / 1344 | 606 / 896 / 1353 | 614 / 904 / 1361 | |
| 517 / 807 / 1264 | 564 / 854 / 1311 | 572 / 862 / 1319 | 580 / 870 / 1327 | 589 / 879 / 1336 | 597 / 887 / 1344 | 606 / 896 / 1353 | 614 / 904 / 1361 | |
| Immune | ||||||||
Crucible KnightStormveil Castle |
|
|---|---|
 |
|
| Drops | 1,613 Aspect of the Crucible: Horns |
| HP | 1,391 |
Elden Ring Crucible Knight (Stormveil Castle)
- This enemy does not have a boss bar, but it will not respawn when killed
- Closest Site of Grace: Rampart Tower
- Multiplayer is allowed for this boss
- You can summon Spirit Ashes for this boss
Elden Ring Crucible Knight Location
This Crucible Knight is at the top of a seaside cliff in a hidden corner of Stormveil Castle. From the Rampart Tower Site of Grace, head northwest along the ramparts until you see a small area to your left where a Warhawk comes from. Drop off this to a ledge below and follow the route until you reach a ledge overlooking the sea. This should crumble beneath your feet; if it doesn't, roll or swing your weapon to trigger it. Once you fall down, you should see the Crucible Knight. Note that there's a lift back to the Rampart Tower Site of Grace immediately after this Knight, which may be worth activating so you can return more easily if you die. This lift can also be used to instantly defeat the Cruicible Knight by luring it towards it and then either riding the lift upwards so the Knight will perform a sword lunge into the resulting bottomless pit beneath it, or sending the knight itself upwards, which will cause it to walk off the platform and die.

Crucible Knight Combat information
- Health: 1,391 HP
- Defense: 103.9
- This Knight wields Ordovis's Greatsword and Crucible Hornshield. It cannot use the Fire Breath or Fire Breath Retreat attacks
- Drops 1,613, Aspect of the Crucible: Horns
Resistances
- Poison: 517 / 807 / 1264
- Scarlet Rot: 517 / 807 / 1264
- Hemorrhage: Immune
- Frostbite: 517 / 807 / 1264
The resistance numbers are the buildup amount to trigger it. For example, if a resistance is 100 you must deal 100 points of the given buildup to trigger it. Note that these go down over time, and increase each time the effect procs. The values after the "/"s indicate the increased resistances after each successive proc.
NG+ and Beyond (click to reveal)
| NG | NG+ | NG+2 | NG+3 | NG+4 | NG+5 | NG+6 | NG+7 | |
|---|---|---|---|---|---|---|---|---|
| HP | 1,391 | 3,275 | 3,602 | 3,766 | 3,930 | 4,257 | 4,421 | 4,585 |
| Defense | 103.9 | 117.5 | 120.4375 | 123.375 | 129.25 | 135.125 | 141 | 152.75 |
| 1,613 | 8,065 | 8,871 | 9,073 | 9,678 | 9,879 | 10,081 | 10,282 | |
Resistances |
||||||||
| 517 / 807 / 1264 | 564 / 854 / 1311 | 572 / 862 / 1319 | 580 / 870 / 1327 | 589 / 879 / 1336 | 597 / 887 / 1344 | 606 / 896 / 1353 | 614 / 904 / 1361 | |
| 517 / 807 / 1264 | 564 / 854 / 1311 | 572 / 862 / 1319 | 580 / 870 / 1327 | 589 / 879 / 1336 | 597 / 887 / 1344 | 606 / 896 / 1353 | 614 / 904 / 1361 | |
| Immune | ||||||||
| 517 / 807 / 1264 | 564 / 854 / 1311 | 572 / 862 / 1319 | 580 / 870 / 1327 | 589 / 879 / 1336 | 597 / 887 / 1344 | 606 / 896 / 1353 | 614 / 904 / 1361 | |
| 517 / 807 / 1264 | 564 / 854 / 1311 | 572 / 862 / 1319 | 580 / 870 / 1327 | 589 / 879 / 1336 | 597 / 887 / 1344 | 606 / 896 / 1353 | 614 / 904 / 1361 | |
| Immune | ||||||||
Crucible KnightSiofra River |
|
|---|---|
 |
|
| Drops | 3,080 |
| HP | 2,730 |
Elden Ring Crucible Knight (Siofra River)
- This enemy does not have a boss bar, but it will not respawn when killed
- Closest Site of Grace: The Four Belfries
- Multiplayer is not allowed for this boss
- You cannot summon Spirit Ashes for this boss
Crucible Knight Location
This Crucible Knight is only reachable from the Four Belfries. Use an Imbued Sword Key to unlock the Waygate labeled "Night Sky Unceasing" and traverse it. You'll find yourself on a tall cliff overlooking Siofra River. Make your way down the cliff and onto the stone walkway to find the Crucible Knight.
Crucible Knight Combat information
- Health: 2,730 HP
- Defense: 111.9
- This Knight wields Ordovis's Greatsword and Crucible Hornshield. It can't use the Tail Spin or Great Tail Spin attacks
- Drops 3,080
Resistances
- Poison: 543 / 833 / 1290
- Scarlet Rot: 543 / 833 / 1290
- Hemorrhage: Immune
- Frostbite: 543 / 833 / 1290
The resistance numbers are the buildup amount to trigger it. For example, if a resistance is 100 you must deal 100 points of the given buildup to trigger it. Note that these go down over time, and increase each time the effect procs. The values after the "/"s indicate the increased resistances after each successive proc.
NG+ and Beyond (click to reveal)
| NG | NG+ | NG+2 | NG+3 | NG+4 | NG+5 | NG+6 | NG+7 | |
|---|---|---|---|---|---|---|---|---|
| HP | 2,730 | 3,988 | 4,386 | 4,586 | 4,785 | 5,184 | 5,383 | 5,583 |
| Defense | 111.9 | 118.1 | 121.0525 | 124.005 | 129.91 | 135.815 | 141.72 | 153.53 |
| 3,080 | 9,240 | 10,164 | 10,395 | 11,088 | 11,319 | 11,550 | 11,781 | |
Resistances |
||||||||
| 543 / 833 / 1290 | 585 / 875 / 1332 | 593 / 883 / 1340 | 602 / 892 / 1349 | 611 / 901 / 1358 | 620 / 910 / 1367 | 628 / 918 / 1375 | 637 / 927 / 1384 | |
| 543 / 833 / 1290 | 585 / 875 / 1332 | 593 / 883 / 1340 | 602 / 892 / 1349 | 611 / 901 / 1358 | 620 / 910 / 1367 | 628 / 918 / 1375 | 637 / 927 / 1384 | |
| Immune | ||||||||
| 543 / 833 / 1290 | 585 / 875 / 1332 | 593 / 883 / 1340 | 602 / 892 / 1349 | 611 / 901 / 1358 | 620 / 910 / 1367 | 628 / 918 / 1375 | 637 / 927 / 1384 | |
| 543 / 833 / 1290 | 585 / 875 / 1332 | 593 / 883 / 1340 | 602 / 892 / 1349 | 611 / 901 / 1358 | 620 / 910 / 1367 | 628 / 918 / 1375 | 637 / 927 / 1384 | |
| Immune | ||||||||
Crucible KnightsSiofra Aqueduct |
|
|---|---|
 |
|
| Drops | |
| 3,080 each Sword: Crucible Hornshield Spear: Somber Smithing Stone [6] |
|
| HP | 2,730 each |
Elden Ring Crucible Knights (Siofra Aqueduct)
- These enemies do not have boss bars, but they will not respawn when killed
- Closest Site of Grace: Aqueduct-Facing Cliffs
- Multiplayer is allowed for these bosses
- You can summon Spirit Ashes for these bosses
- Each Crucible Knight can be fought and defeated separately
- The sword and shield wielding Crucible Knight can launch itself off the bridge or out of one of the pavillion windows when performing its wing-dive attack.
Crucible Knight Location
- Sword: From the Aqueduct-Facing Cliffs Site of Grace, jump down into the circular room with open sides. The Crucible Knight paces the walkway between this room and the adjoining room.
- Spear: Cross the walkway from the circular room and continue northeast. You'll see the Crucible Knight looking out over a waterfall. To reach it, walk up the stairs in front of you and turn right through the doorway.
Crucible Knight Combat information
- Health: 2,730 HP
- Defense: 111.9
- Siofra Aqueduct contains two Knights:
- The one with Ordovis's Greatsword and Crucible Hornshield can't use the Tail Spin or Great Tail Spin attacks
- The one with Siluria's Tree can't use the Horn Impale attack
- Both Knights have the same stats
- Drops 3,080 each, Crucible Hornshield (Sword), Somber Smithing Stone [6] (Spear)
Resistances
- Poison: 543 / 833 / 1290
- Scarlet Rot: 543 / 833 / 1290
- Hemorrhage: Immune
- Frostbite: 543 / 833 / 1290
The resistance numbers are the buildup amount to trigger it. For example, if a resistance is 100 you must deal 100 points of the given buildup to trigger it. Note that these go down over time, and increase each time the effect procs. The values after the "/"s indicate the increased resistances after each successive proc.
NG+ and Beyond (click to reveal)
| NG | NG+ | NG+2 | NG+3 | NG+4 | NG+5 | NG+6 | NG+7 | |
|---|---|---|---|---|---|---|---|---|
| HP | 2,730 | 3,988 | 4,386 | 4,586 | 4,785 | 5,184 | 5,383 | 5,583 |
| Defense | 111.9 | 118.1 | 121.0525 | 124.005 | 129.91 | 135.815 | 141.72 | 153.53 |
| 3,080 | 9,240 | 10,164 | 10,395 | 11,088 | 11,319 | 11,550 | 11,781 | |
Resistances |
||||||||
| 543 / 833 / 1290 | 585 / 875 / 1332 | 593 / 883 / 1340 | 602 / 892 / 1349 | 611 / 901 / 1358 | 620 / 910 / 1367 | 628 / 918 / 1375 | 637 / 927 / 1384 | |
| 543 / 833 / 1290 | 585 / 875 / 1332 | 593 / 883 / 1340 | 602 / 892 / 1349 | 611 / 901 / 1358 | 620 / 910 / 1367 | 628 / 918 / 1375 | 637 / 927 / 1384 | |
| Immune | ||||||||
| 543 / 833 / 1290 | 585 / 875 / 1332 | 593 / 883 / 1340 | 602 / 892 / 1349 | 611 / 901 / 1358 | 620 / 910 / 1367 | 628 / 918 / 1375 | 637 / 927 / 1384 | |
| 543 / 833 / 1290 | 585 / 875 / 1332 | 593 / 883 / 1340 | 602 / 892 / 1349 | 611 / 901 / 1358 | 620 / 910 / 1367 | 628 / 918 / 1375 | 637 / 927 / 1384 | |
| Immune | ||||||||
Crucible KnightLeyndell, Royal Capital |
|
|---|---|
 |
|
| Drops | 3,840 each |
| HP | 3,110 each |
Elden Ring Crucible Knight Boss (Leyndell, Royal Capital)
- These enemies do not have boss bars, but they will not respawn when killed
- Closest Site of Grace: Avenue Balcony, Erdtree Sanctuary
- Multiplayer is allowed for these bosses
- You cannot summon Spirit Ashes for these bosses
Crucible Knight Location
One crucible knight is in a chamber on the east side of a courtyard with a fountain, just off the main avenue. The other is down the elevator near the Erdtree Sanctuary Site of Grace.

Crucible Knight Combat information
- Health: 3,110 HP
- Defense: 113
- Leyndell contains two Knights, both of which wield Siluria's Tree
- The one by the main avenue can't use Horn Impale
- The one by the Erdtree Sanctuary Site of Grace can't use Horn Shoulder
- Both Knights have the same stats
- Drops 3,840
Resistances
- Poison: 548 / 838 / 1295
- Scarlet Rot: 548 / 838 / 1295
- Hemorrhage: Immune
- Frostbite: 548 / 838 / 1295
The resistance numbers are the buildup amount to trigger it. For example, if a resistance is 100 you must deal 100 points of the given buildup to trigger it. Note that these go down over time, and increase each time the effect procs. The values after the "/"s indicate the increased resistances after each successive proc.
NG+ and Beyond (click to reveal)
| NG | NG+ | NG+2 | NG+3 | NG+4 | NG+5 | NG+6 | NG+7 | |
|---|---|---|---|---|---|---|---|---|
| HP | 3,110 | 4,030 | 4,433 | 4,634 | 4,836 | 5,239 | 5,440 | 5,642 |
| Defense | 113 | 118 | 121 | 124 | 130 | 135 | 141 | 153 |
| 3,840 | 11,520 | 12,672 | 12,960 | 13,824 | 14,112 | 14,400 | 14,688 | |
Resistances |
||||||||
| 548 / 838 / 1295 | 590 / 880 / 1337 | 598 / 888 / 1345 | 607 / 897 / 1354 | 616 / 906 / 1363 | 625 / 915 / 1372 | 634 / 924 / 1381 | 643 / 933 / 1390 | |
| 548 / 838 / 1295 | 590 / 880 / 1337 | 598 / 888 / 1345 | 607 / 897 / 1354 | 616 / 906 / 1363 | 625 / 915 / 1372 | 634 / 924 / 1381 | 643 / 933 / 1390 | |
| Immune | ||||||||
| 548 / 838 / 1295 | 590 / 880 / 1337 | 598 / 888 / 1345 | 607 / 897 / 1354 | 616 / 906 / 1363 | 625 / 915 / 1372 | 634 / 924 / 1381 | 643 / 933 / 1390 | |
| 548 / 838 / 1295 | 590 / 880 / 1337 | 598 / 888 / 1345 | 607 / 897 / 1354 | 616 / 906 / 1363 | 625 / 915 / 1372 | 634 / 924 / 1381 | 643 / 933 / 1390 | |
| Immune | ||||||||
Crucible KnightsCrumbling Farum Azula |
|
|---|---|
 |
|
| Drops | 7,360 each |
| HP | 5,512 each |
Elden Ring Crucible Knights (Crumbling Farum Azula)
- These enemies do not have boss bars, but they will not respawn when killed
- Closest Sites of Grace: Dragon Temple Lift, Dragon Temple Rooftop
- Multiplayer is allowed for these bosses
- You can summon Spirit Ashes for these bosses
- Each Crucible Knight can be fought and defeated separately
Crucible Knight Location
- From the Dragon Temple Lift Site of Grace, go down the lift, turn east, and start heading down the large spiral staircase. About halfway down, drop off the side onto some floating chunks of rock. Follow these to another large building, and head straight through the hallway to a large open area with a dragon's corpse and the Crucible Knight.
- From the Dragon Temple Rooftop Site of Grace, follow the main path towards the arena where the Farum Azula Dragon sits (or used to, if you've defeated it). Drop off the southeastern edge of the dragon's arena onto a series of platforms that lead down to a building that houses several Banished Knights. Make your way through the hall to a balcony and climb the ladder on the western wall. Take the lift directly in front of you, then head straight until you find the Crucible Knight locked in combat with several Azula Beastmen.
Crucible Knight Combat information
- Health: 5,512 HP
- Defense: 118.6
- Crumbling Farum Azula contains two Knights, both wielding Ordovis's Greatsword and Crucible Hornshield. They can't use the Tail Spin or Great Tail Spin attacks
- Both Knights have the same stats
- Drops 7,360
Resistances
- Poison: 565 / 855 / 1312
- Scarlet Rot: 565 / 855 / 1312
- Hemorrhage: Immune
- Frostbite: 565 / 855 / 1312
The resistance numbers are the buildup amount to trigger it. For example, if a resistance is 100 you must deal 100 points of the given buildup to trigger it. Note that these go down over time, and increase each time the effect procs. The values after the "/"s indicate the increased resistances after each successive proc.
NG+ and Beyond (click to reveal)
| NG | NG+ | NG+2 | NG+3 | NG+4 | NG+5 | NG+6 | NG+7 | |
|---|---|---|---|---|---|---|---|---|
| HP | 5,512 | 5,556 | 6,111 | 6,389 | 6,667 | 7,222 | 7,500 | 7,778 |
| Defense | 118.6 | 118.6 | 121.565 | 124.53 | 130.46 | 136.39 | 142.32 | 154.18 |
| 7,360 | 14,720 | 16,192 | 16,560 | 17,664 | 18,032 | 18,400 | 18,768 | |
Resistances |
||||||||
| 565 / 855 / 1312 | 603 / 893 / 1350 | 612 / 902 / 1359 | 621 / 911 / 1368 | 630 / 920 / 1377 | 639 / 929 / 1386 | 648 / 938 / 1395 | 657 / 947 / 1404 | |
| 565 / 855 / 1312 | 603 / 893 / 1350 | 612 / 902 / 1359 | 621 / 911 / 1368 | 630 / 920 / 1377 | 639 / 929 / 1386 | 648 / 938 / 1395 | 657 / 947 / 1404 | |
| Immune | ||||||||
| 565 / 855 / 1312 | 603 / 893 / 1350 | 612 / 902 / 1359 | 621 / 911 / 1368 | 630 / 920 / 1377 | 639 / 929 / 1386 | 648 / 938 / 1395 | 657 / 947 / 1404 | |
| 565 / 855 / 1312 | 603 / 893 / 1350 | 612 / 902 / 1359 | 621 / 911 / 1368 | 630 / 920 / 1377 | 639 / 929 / 1386 | 648 / 938 / 1395 | 657 / 947 / 1404 | |
| Immune | ||||||||
Crucible Knight Image Gallery


 Anonymous
The one from Redmane castle cannot be fought after defeating Elden Beast, boss is not present in Castle anymore.
- Anonymous
Just updated the Crucible Knight's "Tail Spin" attack description and counters. I know a lot of players find this hard to deal with, so I hope it helps. :)
- Anonymous
The boss one at Redmayne Castle after the Radahn festival has the poise of about 5 Havels. He was eating up my Giant Crusher shots.
Hey guys, just to let all of you know, if you didn't know already, the Crucible Knights that can do the Great Tail Spin attack will ONLY do this after the Flying Dive attack and even then they will only do it merely sometimes. Also, there are a few attacks where you can safely heal while they are recovering, like Seismic Combo and even Lunging Stab, assuming you are somehow able to outrange it.
Hey guys, just to let all of you know, if you didn't know already, the Crucible Knights that can do the Great Tail Spin attack will ONLY do this after the Flying Dive attack and even then they will only do it merely sometimes. Also, there are a few attacks where you can safely heal while they are recovering, like Seismic Combo and even Lunging Stab, assuming you are somehow able to outrange it.
The Kick skill will open them to a crit if you hit them while they're guarding. Also, Lifesteal Fist works on them.
- Anonymous
I really like them, but they're very demanding at first because their stats are comparatively much higher than other enemies sharing their area. Still, there's an answer for every move and every playstyle.
First off, if you're a ranger, you can just keep your distance and keep firing. Unlike many other enemies, these guys don't evade ranged attacks. True, they'll block most spells, but they'll still take chip damage, and they can't run as fast as you can. Keep moving at all times and firing when it's safe, bring enough cerulean flasks. No skill required outside stamina management and dodging if they get too close.
For mele, as many pointed out, you can parry most of their attacks. I suck at that and even I was able to do it with a little practice and the Buckler. If you don't like parrying, focus on rolling, always better to the side (your left, so their shield doesn't get in the way) and sneak a hit or two. You can even hit them between attacks if your weapon is fast, except if they are in their tail sweep phase, in which case you should expect it to trigger as soon as you hug them and roll again immediately, then attack.
For healing, you can make some distance and do it only if they're far away or during one of their attack animations. If you try to heal otherwise you'll get hit, so timing and positioning is key, but it can be done consistently.
Again, there's an answer for everything. You can jump during their seismic AoE, roll through their lunge, delay your roll during their shield bash (or just run away). Complaining means you don't want to bother learning this fight, which is fine, but you have spirit ashes for that.
- Anonymous
This Ash of War grants no affinity to an armament, but imparts the following skill: "Parry: Use this skill in time with a foe's melee attack to deflect it and break that foe's stance. This provides an opening to perform a critical hit." Usable on daggers, curved swords, thrusting swords, fists, claws, and small and medium shields.
- Anonymous
The problem with parrying is that it's a high-risk strat that doesn't pay off against most bosses. Yeah it's great here but all bosses have a gank skill that can't be parried. So you spend a bunch of time learning to parry only to find out that it's mostly only good against small time bosses like this.
The smarter play is to roll through his attacks and use Impaling Thrust to hit him while he's recovering. Learning this will get you through a lot more fights than parry will, with the only downside being that you miss out on the satisfaction of humble-bragging about your parries in the comments.
- Anonymous
Parrying these little *****es 3+ times in a row is so funny. I swear to god their weapons ****ing magnetize to your shield.
- Anonymous
The first time i see one under Stormveil Castle, i immediately know this guys are on par with Dark Souls's Black Knight, when i read the item.. yep they serve a lord just like Black Knight.
- Anonymous
The absolute BEST enemy in the game, this guy has everything going for him, great moveset, cool design, fun to dodge/parry, great spectacle, challenging but fair, and isn't a pushover.
- Anonymous
I despise these guys.
The only way I could get the one from Azula was by passing him, taking the grace, going up to the ledge on the wall and spamming magic against him.
Not proud but it feels good after getting stun-lock killed several times.
Adding onto my previous comment:
They have so many flaws it's insane.
-Immune to bleed, high resistances to other effects
-Insane dmg and health scaling (the horn attack can instakill even with high vigor)
-Cannot be backstabbed
-Damage from crits sucks
Down vote me all you want, but these guys are MUCH more annoying than Godskin Duo.
Stupidly hard. The only way to fight them is either Lion's Claw or parrying which is just bullshit
- Anonymous
You CANNOT summon spirit ashes for the Dragon Te.ple lift Knight in Farum Azula
- Anonymous
- Anonymous
These guys are super easy to parry, and people are very quick to point that out, but I don't think that really excuses the other flaws they have, like overtuned stats. They're resistant to physical and magical damage. They have massive poise and take a ton of effort to stagger. Status is useless against them. Their damage is ridiculous. The tail spin attack is so stupidly quick it can easily hit you even if you're ready for it, and it happens in places where normally you would get your own window to attack. They input read your heals which means that you effectively can't heal against them unless you can put a ton of space between you, even if you are giving up chances to attack in order to heal. You fight them over a dozen times every playthrough. And Fromsoft likes putting them in awful group fights for some reason. All of this makes them absolutely terrible bosses, IMO. The cracks really begin to show if you skip using spirit ashes or co-op, I try to avoid this stuff because they trivialize most fights but those duo fights with these guys are just miserable like that.
- Anonymous
These have critical resistance. Fought the redmane castle duo and the crucible knght took 1/2 the damage from riposte the misbegotten took.
- Anonymous
As someone mentioned before, guard counters on the tail variant works really well. Since this one mostly does it after 1-2 swings of their sword, I found dodging behind them and waiting for the tail to appear, blocked, and GC. don't forget if you want to spice things up as well you can jump over some of their sword swings.
- Anonymous
- Anonymous
if you have some heavy weapon they're pain to fight, almost impossible to r1 without getting hit (very short window to attack between theirs)
Buy Buckler and train parry at the STORMHILL EVERGAOL, trivialise the fight
Don't go hollow
- Anonymous
- Anonymous
The Crucible Knight at Sifora River accessed from wasting 1 key at the The Four Belfries.
You cannot summon Spirit Ashes for this boss
Drops 3,080 runes
WHAT A DISAPPOINTMENT, why even bother making this fight accessible for such a **** reward, even costs 1 key for the portal.
It was a total disappointment. As a new player, I counted this as 30 minutes of wasted time figuring out how to beat him. (You can safely grab the dead corpse item from the edge and leave, don't even bother killing this one)
This is gwyn uhhhh I think 5.0, yes. I mean like gwyn gets trivialize with parring, the Pursuer also gets trivialized, lady Maria gets trivialized, pontiff gets trivialized, and then this guy also gets trivialized with parring. I’m starting to think it’s going to be trend.
- Anonymous
Somehow manages to be the worst enemy in the game in a game that has imps in it
- Anonymous
- Anonymous
You don't even need parry, you can dodge everything and still get a hit or two in. I admit it's easier with strength build but you just have to be patient, I think a lot of players forget to be more patient when fighting fierce enemies. You can't always rely on poise break either. These crucible guys aren't that bad they're a joke once you memorize their limited set of moves. It becomes fun as well imo.
- Anonymous
Ahh another Alt+F4 Knight. I force myself until its dead cause return means more pain :D
- Anonymous
Easily the worst designed boss in the game. Nothing ever come close.
- Everything is unblockable
- Everything is undodgeable
- Infinite poise
- Insane tracking
Whoever approved this design should never design another boss in their life.
- Anonymous
Holy **** i lost hrs to first CFA near rooftop grace as meele..... once again the greatest cheese is NIGHT MAIDEN'S MIST (from the lower tiny floating platform to the higher tiny one with target lock)
- Anonymous
Give me one good reason why theese guys are immune to hemorrhage
- Anonymous
The sword one in farum azula is easily the hardest in the game just because of that godawful arena.
- Anonymous
so the one you get to with the imbued key is a complete waste of time fighting because he drops nothing besides a measly 3000 runes and he's hanging out at a literal dead end.
- Anonymous
I must have put 100’s of hours into these *******s. And just discovered the trick.
Kick.
- Anonymous
I swear Crucible Knight always attacks you when you try to heal. (Or at least the one in the evergaol.)
- Anonymous
The second one you find in Crumbling Farum Azula that's fighting the beastmen before where the Boltdrake Talisman can just yeet himself off of the edge where the covered tunnel/hallway section is. He tried to use his firebreath attack and fell right off.
- Anonymous
Why is the tail spin attack so goddamn hard to time the roll for?
- Anonymous
You don't need to parry to beat anything in this game. But if you want to turn these guys into barely more than a standard Mook from being some of the hardest enemies in the game, I highly recommend learning how to parry them. Their attacks are all relatively slow and easy to see coming, and putting any parry assist AoW (Storm Wall, Golden Parry, etc.) on a shield makes them even easier to parry.
- Anonymous
Yea these guys are a pain in the nut sometimes but they're actually fun to fight against, I suppose because their attacks are ACTUALLY dodgeable.
- Anonymous
- Anonymous
A very good strat for sword knights is to bait out their shield attack: Hit their shield, and if they do the attack, run to the right. Then they will leave a big gap to do a heavy attack or two normal attacks (or something around the same speed). Hope this helps you
- Anonymous
I'll start off by saying that I'm not very good at this game. I love it but I suck at it. But through the strategy of being way over-leveled for whatever area I'm in I made it to Crumbling Farum Azula. Eventually I encountered the first Crucible Knight in that open area before the Dragon Temple Rooftop site of grace. And that was my biggest stumbling block so far. As a melee character I couldn't get past it. It was harder for me than any boss or other enemy I've encountered so far. I suck at parrying so that wasn't an option. Finally after a million attempts, the first time I tried it with a maxed out Zweihander with the Giant Hunt ash of war, I beat him on that first try, only taking one hit in the process. Lesson learned - there is a viable strategy for every enemy in this game no matter how lame I am otherwise.
- Anonymous
- Anonymous
I don't see my prior comment, but on my first playthrough, the first crucible knight I encountered appeared at the top of the second ladder after the stobesword gate ar the back of the Stormveil rat-cellar. There was a voice line associated with it. I only note it because I have not encountered it on my current playthrough at daytime or night, although this time I did not go up there until killing Godrick and Gostoc, bothching the Castle Morne quest, killing the two invaders in the roundtable hold and and making peace with Patches. Not sure what other quests/sidequests could have affected the knight's spawn, but there were just two banished knights when I got up there this playthrough
- Anonymous
On my first playthrough, there was a crucible knight on the Stormveil rooftops at the top of the second ladder after the Stonesword Imp behind the rat cellar. It had a shimmery red animation as it phased in on the roof out of the ground, and I think there was a voice line too. I tried again on a new playthrough, and just had a pair of Carian knights up there. Not sure if quest/sidequest progress toggled its spawn or what.
- Anonymous
I still can’t believe this guy and the night’s cavalry in limgrave are worth fewer runes than anastasia in the smoldering church
- Anonymous
Pretty fun hard as **** mini boss, wish it was just him in redmane
- Anonymous
When I start playing a game prophet and 15-ish level, see a stormhill Evergaol.
see a message "time to parry".
I hate parrying in soul game but decide to practice parrying with the guy anyway for full-experience.
Eventually "complete" a training with the guy after 4 hour.
"I'm going phalanx style" is what I thought after that.
- Anonymous
Cerulean Hidden Tear, cast Terra Magica on the steps on the edge of the arena, then Comet Azur till cooked. He just stands there and lets his face melt off.
- Anonymous
"I'm far enough from him now, time to take a sip" -Famous last words
- Anonymous
The ones with spears can laser you for most of your health no matter how many walls are in the eay
For the one at Stormveil:
-Get 1 dragon breath spell (any is fine but rot is the best as always)
-Change all of your flask to blue but leave 1 as red, just in case.
-Get a bow (any is fine) and shoot it to get its attention when it shows up
-Go stand in the middle of the ledge between the 2 platforms, it will just jump from its platform onto its end of the ledge and then jump back but won't go any further than that.
-Use your dragon breath spell and profit.
This is my first time playing Elden Ring and I have only meet 2 of these knights, this and the one in the Stormhill Evergao but as far as I'm aware, this is the only instance, where your dragon breath spell can effectively damages a Crucible Knight, any other case they would just block the whole spell with their shield and get hurt for like 50 dmg.
- Anonymous
They look great, but are poorly and cheaply designed. Having a input reader on your healing- flasks has to be one of the cheapest decisions in the entire series... 100% doable, but insufferably annoying. Make them slightly slower and with slightly lower range and it would be fine. No blood build- up made me lose it tho tbh.
- Anonymous
If you heal in front of him after riposting, his standup animation just cancels and he goes from the ground to an attack animation in a single frame.
- Anonymous
Sekiro's dual ape gank was shockingly better than this pile of garbage. Wait till the combo ends to hit the punching bag ONCE. Next phase, wait till the combo ends and either trade damage because the tail punishes punishes of wait while it flies away. This is some dogshit
- Anonymous
Balanced enough, but not one of From's best. It's a punching bag and painfully slow. Just wait, dodge, hit once, repeat for 5 minutes straight. Phase two plays the same as the first, the combos are just add a tail attack so you spend more time dodging.
- Anonymous
Who is working at From putting this as the 3rd boss. I beat Sekiro without even a fraction of this frustration. ****ing kill me now
- Anonymous
Gotta love when from relies on the old "enemy spins like a record player" **** from ds2 botched design. End of story.
- Anonymous
The input reading on the Stormhill one is blatant af. For new players this guy will test if you got your parrying down.
- Anonymous
- Anonymous
I mostly like these enemies but man that shoulder charge is ridiculous
- Anonymous
The article doesn't list Crucible Knight in Mt. Gelmir that appears after attacking Lady Tanith omomoming daddy Rykard
I don't care what anyone says, I love this enemy and wish we had more of them.
- Anonymous
Parry riposte only does like 50% damage against them so forget about it.
- Anonymous
Heal punishments are connected to the flask drinking animation. If you heal with an incant, you won't ever get punished for heals from nobody.
- Anonymous
I watched Crucis fight bosses and the satisfaction to see Mohg's stupid NIHIL not working on them and the two Crucis just crushing him was everything. Imagine Godfrey having an army of them under his command all stomping in sync. I wished we could see that. Crucis and Godfrey were one of my favs fights. The movements, the music, the vibe. Even if all of them are super hard, I love all of their clean semi slow attack pattern.
- Anonymous
- Anonymous
- Anonymous
Such a boring boss fight… Took me like 5+ minutes to kill just because I had to wait for the ONE SINGLE ATTACK that leaves him open long enough for me to strike
- Anonymous
the crucible knights in crumbling farum azula will yeet themselves off the edge. Have your back towards the edge and when they do there flying dash dodge (they spawn wings jump then charge at you) and they will fly to there deaths off the edge
- Anonymous
"ELDEN RING CRUCIBLE KNIGHTS (SIOFRA AQUEDUCT) You can summon Spirit Ashes for these bosses" incorrect. There's no rebirth monument until the twin gargoyles' arena. Cannot summon for either Siofra Aqueduct Crucible Knight. I just did these fights and there's no summon until the arena doorway.
- Anonymous
honestly that first crucible knight is probably a top 10 elden ring boss for me. clean, clearly telegraphed attacks that actually give you enough time to recover and roll again inbetween combos, a second phase that builds on what you learned from phase 1, but introduces a new quick combo-ender to keep you on your toes. And to top it off, the dude just looks dope. loved all of its variations except for the duo one.
- Anonymous
Can't use summons against the two in Siofra Aqueduct. No icon is showing for summon availability, no summon item will highlight for use.
List showing crucible knights and their rewards is missing Tanith's knight, which rewards the breath spell.
- Anonymous
didn’t like these boss fights, so I learnt to parry them. Guess what? They’re still a slog fest. They’re not good.
- Anonymous
Boring boss. Hard as **** in the beginning, easy once you learn but always annoying. It takes 3-4 consevutive impaling thrusts to stagger (the same as giant bosses) and since they read your inputs it just forces you to play reactively, waiting for openings instead of getting stuck in. If I wanted to wait for enemy attacks i'd be playing a shield build.
- Anonymous
"Man these asses surely are hard to beat, if there was only a single weapon to cheese them..."
Buckler:
- Anonymous
Why in Marika's sopping wet fat milky tits do people have trouble with these guys???
On the input reading when you chug - Enemies have been doing that since at least Dark Souls 1. I never had a problem with it, as to me, it would make sense for enemies to react like that to healing. That, and you can outspace them easily enough.
I swear I'm not trying to be an asshat, I'm just confused as to why THESE guys get so much hate
- Anonymous
The Stormhill Evergaol variant gave me much more trouble than I would like to admit. That input reading cheater!
Redmane Castle boss is the bane of my existence. On the plus side, crucible knight improved my parry timing ^^
- Anonymous
for mage builds out there gavel of haima consistently stuns these guys
- Anonymous
Long as their combos are, at least everything (except for the tail swipe but even then you can kind of work around it) is telegraphed. Never really manic/fast enough to make you panic either. You can get used to fighting them and beating them with reasonable enough practice. I can't say the same for Runebears and Revenants, who just have zero semblance of combat flow of any kind.
- Anonymous
- Anonymous
- Anonymous
- Anonymous
- Anonymous
More than a decade later, the Black Knight may have acquired the ability to go frog mode, but he still gets wrecked by my nipple-looking portable arm plating.
- Anonymous
Not a shred of lore on this page. Pitiful. As far as Fextralife is concerned, this enemy should be called 'numbers', like all the other ones, and simply rated for difficulty.
- Anonymous
ANON Mar 13, 2023
Crucible Build *update*
Vigor 56
Mind 15
Endurance 36
Strength 50
Dexterity 14
Intelligence 9
Faith 42
Arcane 7
- Anonymous
One word solution for the ones on Nokron on the way to the gargoyles fight: Rejection. One off the waterfall, and the other off the bridge or lip of the building. You'll have to chain it, and don't do it when his shield is up. Aside from that works like a charm. If they stun lock you get away and catch them in a gap between their movements. Rejection stun locks them, just edge forward to keep pushing them off.
- Anonymous
- Anonymous
I'm presently playing a no-magic build. Just a rapier, parry shield, short bow, consumables. Crucible Knights went from being my least favorite fights to fights I seek out even when there's no reward like that Tree Crucible before Valiant Gargoyles. The reach on that spear thrust is so easy to mis-judge but it feels so nice to parry them and take them down.
I was at one time entirely incapable of parrying anything. Pages, Soldiers, and Crucible Knights are a great way to learn. It feels great turning what was once a slog into a "4 parries and they're dead" fight.
I'm thinking when I take this character to NG+ she's coming back as a Crucible Knight.
You can Straight Up Cheese these guys' first phase with life steal fist, Walk to behind them base on where their attacks will miss the most and just spam lifesteal fist, The shield ones can't do anything until second phase if you do it correctly
- Anonymous
- Anonymous
i hate the tree ones jab attack i always think im out of range but i never am
- Anonymous
Men only want one thing and it’s ****ing crucible knight spirit ashes
- Anonymous
The only thing I would change about these is how long you stay down when they do an attack that knocks you off your feet. The later game ones have a tendency to do a sword thrust that knocks you down, then they do the ground stomp while you still can't defend yourself or even roll, then follow up with the double sword swipe. Basically a guaranteed kill if they get you with the initial knock down thrust. You really should be able to roll away faster after the thrust, the stomp, or both. It's not really a "challenge" per se when I can't defend myself to the point I could unplug my controller and it would be the same level of difficulty. You could say just learn to dodge the strikes but come on, as much as people like to talk as if they were high level players there's only a handful of legit no hit runners irl. Chances are, the average player is going to get hit at some point in these fights and having a sequence like this is just kinda crazy. Even Malenia's waterfowl dance has openings for rolls even after you get hit. It's hard but it's possible. Everything else can stay the same, just give me normal recovery time. I've recovered faster from a hit from Rykard ffs!


I'm trying to count em and I know I'm missing some: 1 Limgrave Evergaol, 2 Stormveil pit, 3 Spirit Caller Cave, 4 Siofra, 5 Aquaduct, 6 Aquaduct, 7 Hero Grave, 8 Hero Grave, 9 Tanith, 10 Redmane, 12 Deep Roots, 13 Farum, 14 Farum... I'm missing two?
0
+10
-1