Dragon-Burnt Ruins |
|---|
 |
|
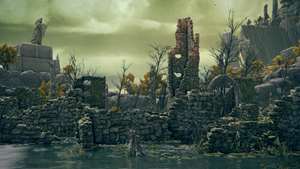
Dragon-Burnt Ruins are what remains of the housing area among Agheel Lake, long lost to the deadly attacks of the fierce Agheel Dragon |
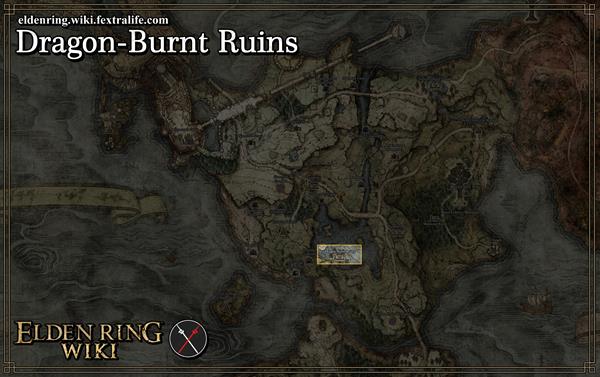
Dragon-Burnt Ruins is a Location in Elden Ring. The Dragon-Burnt Ruins is found in Limgrave, around the center area of Agheel Lake.
Dragon-Burnt Ruins Map for Elden Ring
Elden Ring NPCs and Merchants in Dragon-Burnt Ruins
- No NPCs within this location
- Yura - can be found just outside the ruin perimeter [Elden Ring Map Link]
All Items in Elden Ring's Dragon-Burnt Ruins
Gather & Farm Items
- Mushroom
- Crab Eggs
- Arteria Leaf
- Poisonbloom
- Golden Rune [1]
- Golden Rune [2]
- Great Dragonfly Head
- Rowa Fruit
Upgrade Materials
- No Upgrade Materials
Dragon-Burnt Ruins Creatures, Enemies and Bosses in Elden Ring
Regular Creatures and Enemies
Field Bosses and Bosses
Walkthrough for Dragon-Burnt Ruins in Elden Ring
The Dragon-Burnt Ruins in Elden Ring can be found around the center section of the Agheel Lake. Within the ruins, are such creatures like Rats, Dogs, Zombie Dogs, and Undead Soldiers. Outside the small room, on the right side, there is a Golden Rune (2) on the ground, near the campsite.
Atop a set of rocks usually found with a swarm of Giant Bat creatures, players can loot Golden Rune (1). [Elden Ring Map Link] Shoo the bats away to gain access, clear them if you can. Head into the Ruins.
Boss: Flying Dragon Agheel
Be careful here since there are multiple servant enemies around the campsite. Approaching the group will trigger the Flying Dragon Agheel Boss to appear, flying down from the sky and killing the whole group. It's best to fight the dragon if you have your mount available, since you will need to be sprinting around the dragon as you also try to avoid its wide ranged attacks. While mounted, using ranged spells is a good start to lessen its HP. Keep an eye out for its movements, since it will fly up in the air and swoop in while it breathes out flames onto the ground. The flames do not remain in the area, so you can just wait a few seconds, and they will extinguish on their own. Just don't try to walk through it and keep away from the flames.
The Flying Dragon Agheel will also charge up and breathe out flames in a straight line. To identify this, you'll notice the dragon charging up as if it is inhaling, and its mouth in flames. Be ready to sprint around it and head over to its back, while it releases the flames, you can land a few melee attacks, and then be ready to move away after it telegraphs its flame throwing attack. Do not position yourself or move to its side, since the dragon will try to follow you while spitting fire.
Loot
Head to the very center of the ruins on the map. If you find an entrance to the basement, just to the left of it should be a body to loot. Pillage remains to gain Golden Rune (2). [Elden Ring Map Link] In the same area, directly behind the entrance, there will be a a ruin wall that looks somewhat enclosed. Move past the basement entrance, get to the other side of the wall where there will be an opening, to be greeted by a large Rat. Clear the rat and loot the body in the corner to obtain a Stonesword Key. [Elden Ring Map Link] Hold off using the basement entrance in this area for last. There will be one other cellar entrance within this location. Finish looting in the ruins before you decide to go down this route as it is laced with a transporter trap. You can identify this cellar in particular since it it is filled with rats.
Towards the southeast part of the ruins, you may encounter a dog. You will also see some ruin walls are shorter. There will be another body at the corner of some ruined walls. This will contain Crab Eggs. You may come cross one of the other cellar entrances nearby. This entrance is in a more obscure spot and is completely walled off. [Elden Ring Map Link] Click on the link for the coordinates to this cellar entrance, You may need to double jump in order to reach it. Head down the other entrance, open the chest. This one should contain a Twinblade. If you descend the set of stairs and the first room is teeming with rats, this is the wrong cellar and should first be avoided.
Going further north, within the shallow waters are a group of Land Squirts about northeast of the main ruin site. You may come across a group of Land Squirts to clear to be able to loot 1x Arteria Leaf, 1x Poisonbloom.
Lastly, you can now descend the first basement cellar you came across. Clear the rats and enter the next room. If you open this chest, it will notify you: "Ensnared in a transporter trap!" as a pinkish mist coming from the Teleporter Chest surrounds you. You will be then taken the Sellia Crystal Tunnel. [To be confirmed] Visiting the Sellia Crystal Tunnel before opening the chest will make the chest be open next time you visit it.
Elden Ring Dragon-Burnt Ruins Gallery and Notes
[other images go here]
 Anonymous
So I just did this. I'm on Xbox, as well. I've been to Selluvia tunnels before being trapped by the chest, had the grace for it and everything. The chest recloses itself every time, regardless of whether you get trapped by it or not. It also doesn't matter if you've been trapped by, at least this one, this chest before. It will close itself again. On top of that, you can't fast travel if you've been trapped. You have to rest at a site of grace first. It will tell you so if you try to fast travel, after having been trapped. Already went to Selluvia tunnels twice using the same chest. Closed each time I came back.

 Anonymous
This has Reduvia listed as loot in dragon burnt ruins, but I got mine after eventually killing nerijius. That invasion is outside murkwater cave, even if you can pull nerijius back towards the lake for Yura to get to you sooner he will go back to his own world long before you get anywhere near the dragon burnt ruins.

 Anonymous
 Anonymous
The Often so mentioned chest gave ma a double blade, maybe it's because I far more into the game now, since I rolled out of the trap the first time I encountered it.
Someone esle who happened this?
 Anonymous
something tells me that the undead nobles here maybe have an unfound secret with their dialogue and all, or maybe some other enemies have dialogue and we just don't know?

 Anonymous
Also there are Trina's Lily x2 in some bushes on the north side of the ruins.

 Anonymous
Did anyone else hear someone talking while in these? I heard something like "Flame of Agheel, burn true"

 Anonymous
 Anonymous
You get teleported to Sellia Crystal Tunnel if you take the teleport trap.

 Anonymous
If you don't attack them, the random undead solders here can actually be heard muttering about Agheel, saying things like "Oh flame of Agheel burn true" and "Agheel, Oh Agheel"

 Anonymous
In my play though, I got teleported in a trap chest more south in the morne area, so when I saw the smoke in this area I backrolled and was able to avoid the trap. I did it twice in a row but idk how reliable it is, but you can attempt to backroll from the trapped chests

 Anonymous
It may suck to accidentally get chest trapped, but it may actually be useful to get to places earlier than intended. This chest trap in Limgrave leads directly to Caelid. It makes me wonder what other places can be travelled to like this.

 Anonymous
Ahhh, yes. Dragon-burnt ruins, home of the Brazil chest. Be careful when exploring, or you might end up in hell.

 Anonymous
I thought it was interesting, one of the deadfolk speaks english about the dragon. I hadn't heard any of them speak before.

 Anonymous
 Anonymous
The trap is useful by taking you close to where you can get the meteorite staff.

 Anonymous
 Anonymous
There are two underground areas here. The more obvious underground path leads to rats and the transporter trap, the second underground area where you get the Twinblade isn't as obvious. There will be one ruined building on the South side of these ruins that you can't enter by foot, you must use Torrent to double jump over the wall and there will be the other underground entrance.

 Anonymous
The teleportation chest trap in the basement sends you off to Sellia Crystal Tunnel. I was unprepared for it, so struggled to get out of there when I got whisked away. You can't fast travel from there either, and I met Melina there after finding a site of grace and then was sent to the Roundtable Hold. I don't know if this is all the intended path or not since I'm going in blind. Just wanted to share my experience with others as I was very confused when it happened and still haven't really done any story stuff. In fact, I just got Torrent, so I'm very early on.

 Anonymous
 Anonymous
There's also a Stonesword Key guarded by a rat, in the tower by the cellar full of rats

 Anonymous
This area is different now. Be careful of the chest inside the dungeon!!

 Anonymous
How is there no mention here of the Mimic 2.0 that gets you to an area in the other side of the map?


I can't believe that just a few rats saved me from the ordeal that is Caelid. Back when I first started playing, I would ransack this place but would lose all my healing flasks to the dogs. Then I noticed the entrance to the cellar, went in expecting some good stuff, saw the rats, said "**** it" (I was already acquainted with how strong the rats are in early game) and went away. And I am so glad that I did.
2
+10
-1