Giants' Mountaintop Catacombs |
|---|
 |
|
A labyrinth of tunnels deep underground, teeming with enemies and creatures |
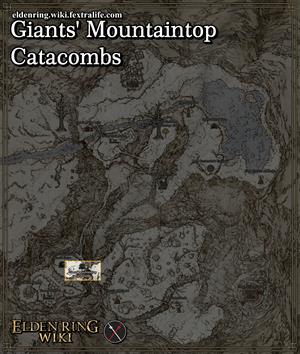
Giants' Mountaintop Catacombs is a Location in Elden Ring. The Giants' Mountaintop Catacombs is found in the Mountaintops of the Giants region. To find this dungeon, go north from Zamor Ruins until you reach the bridge with fire monks, then turn south east and follow the slope down to the door.
Giants' Mountaintop Catacombs Map
To find this dungeon, start at the Zamor Ruins Grace. Continue forwards (heading through the ruins eastward, then going underneath the mountain as you turn north). You'll find a bridge with a group of fire monks. There's a ledge on the east side of the encounter area, with the door at the end of said ledge. [Elden Ring Map Location].
All NPCs and Merchants in Giants' Mountaintop Catacombs
- There are no merchants or NPCs here.
All Items in Elden Ring's Giants' Mountaintop Catacombs
Upgrade Materials
- Golden Seed
- Grave Glovewort (7)
- Grave Glovewort (8)
- Grave Glovewort (9)
- Smithing Stone (7) (from Imps)
Equipment and Magic
- There are no equipment items in this location
Elden Ring Giants' Mountaintop Catacombs Creatures, Enemies, and Bosses
Regular Creatures and Enemies
Field Bosses and Bosses
Giants' Mountaintop Catacombs Walkthrough
This dungeon can be disorienting due to traversing very similar sets of rooms more than once. Similar rooms will be numbered to help.
From the Site of Grace go down two flights of stairs, an Imp will be hanging off the far wall to jump onto you. The room straight ahead will have another imp on the wall, a second one will ambush you from the right once you enter. Pick up the Grave Glovewort (7), then turn around and to the left.
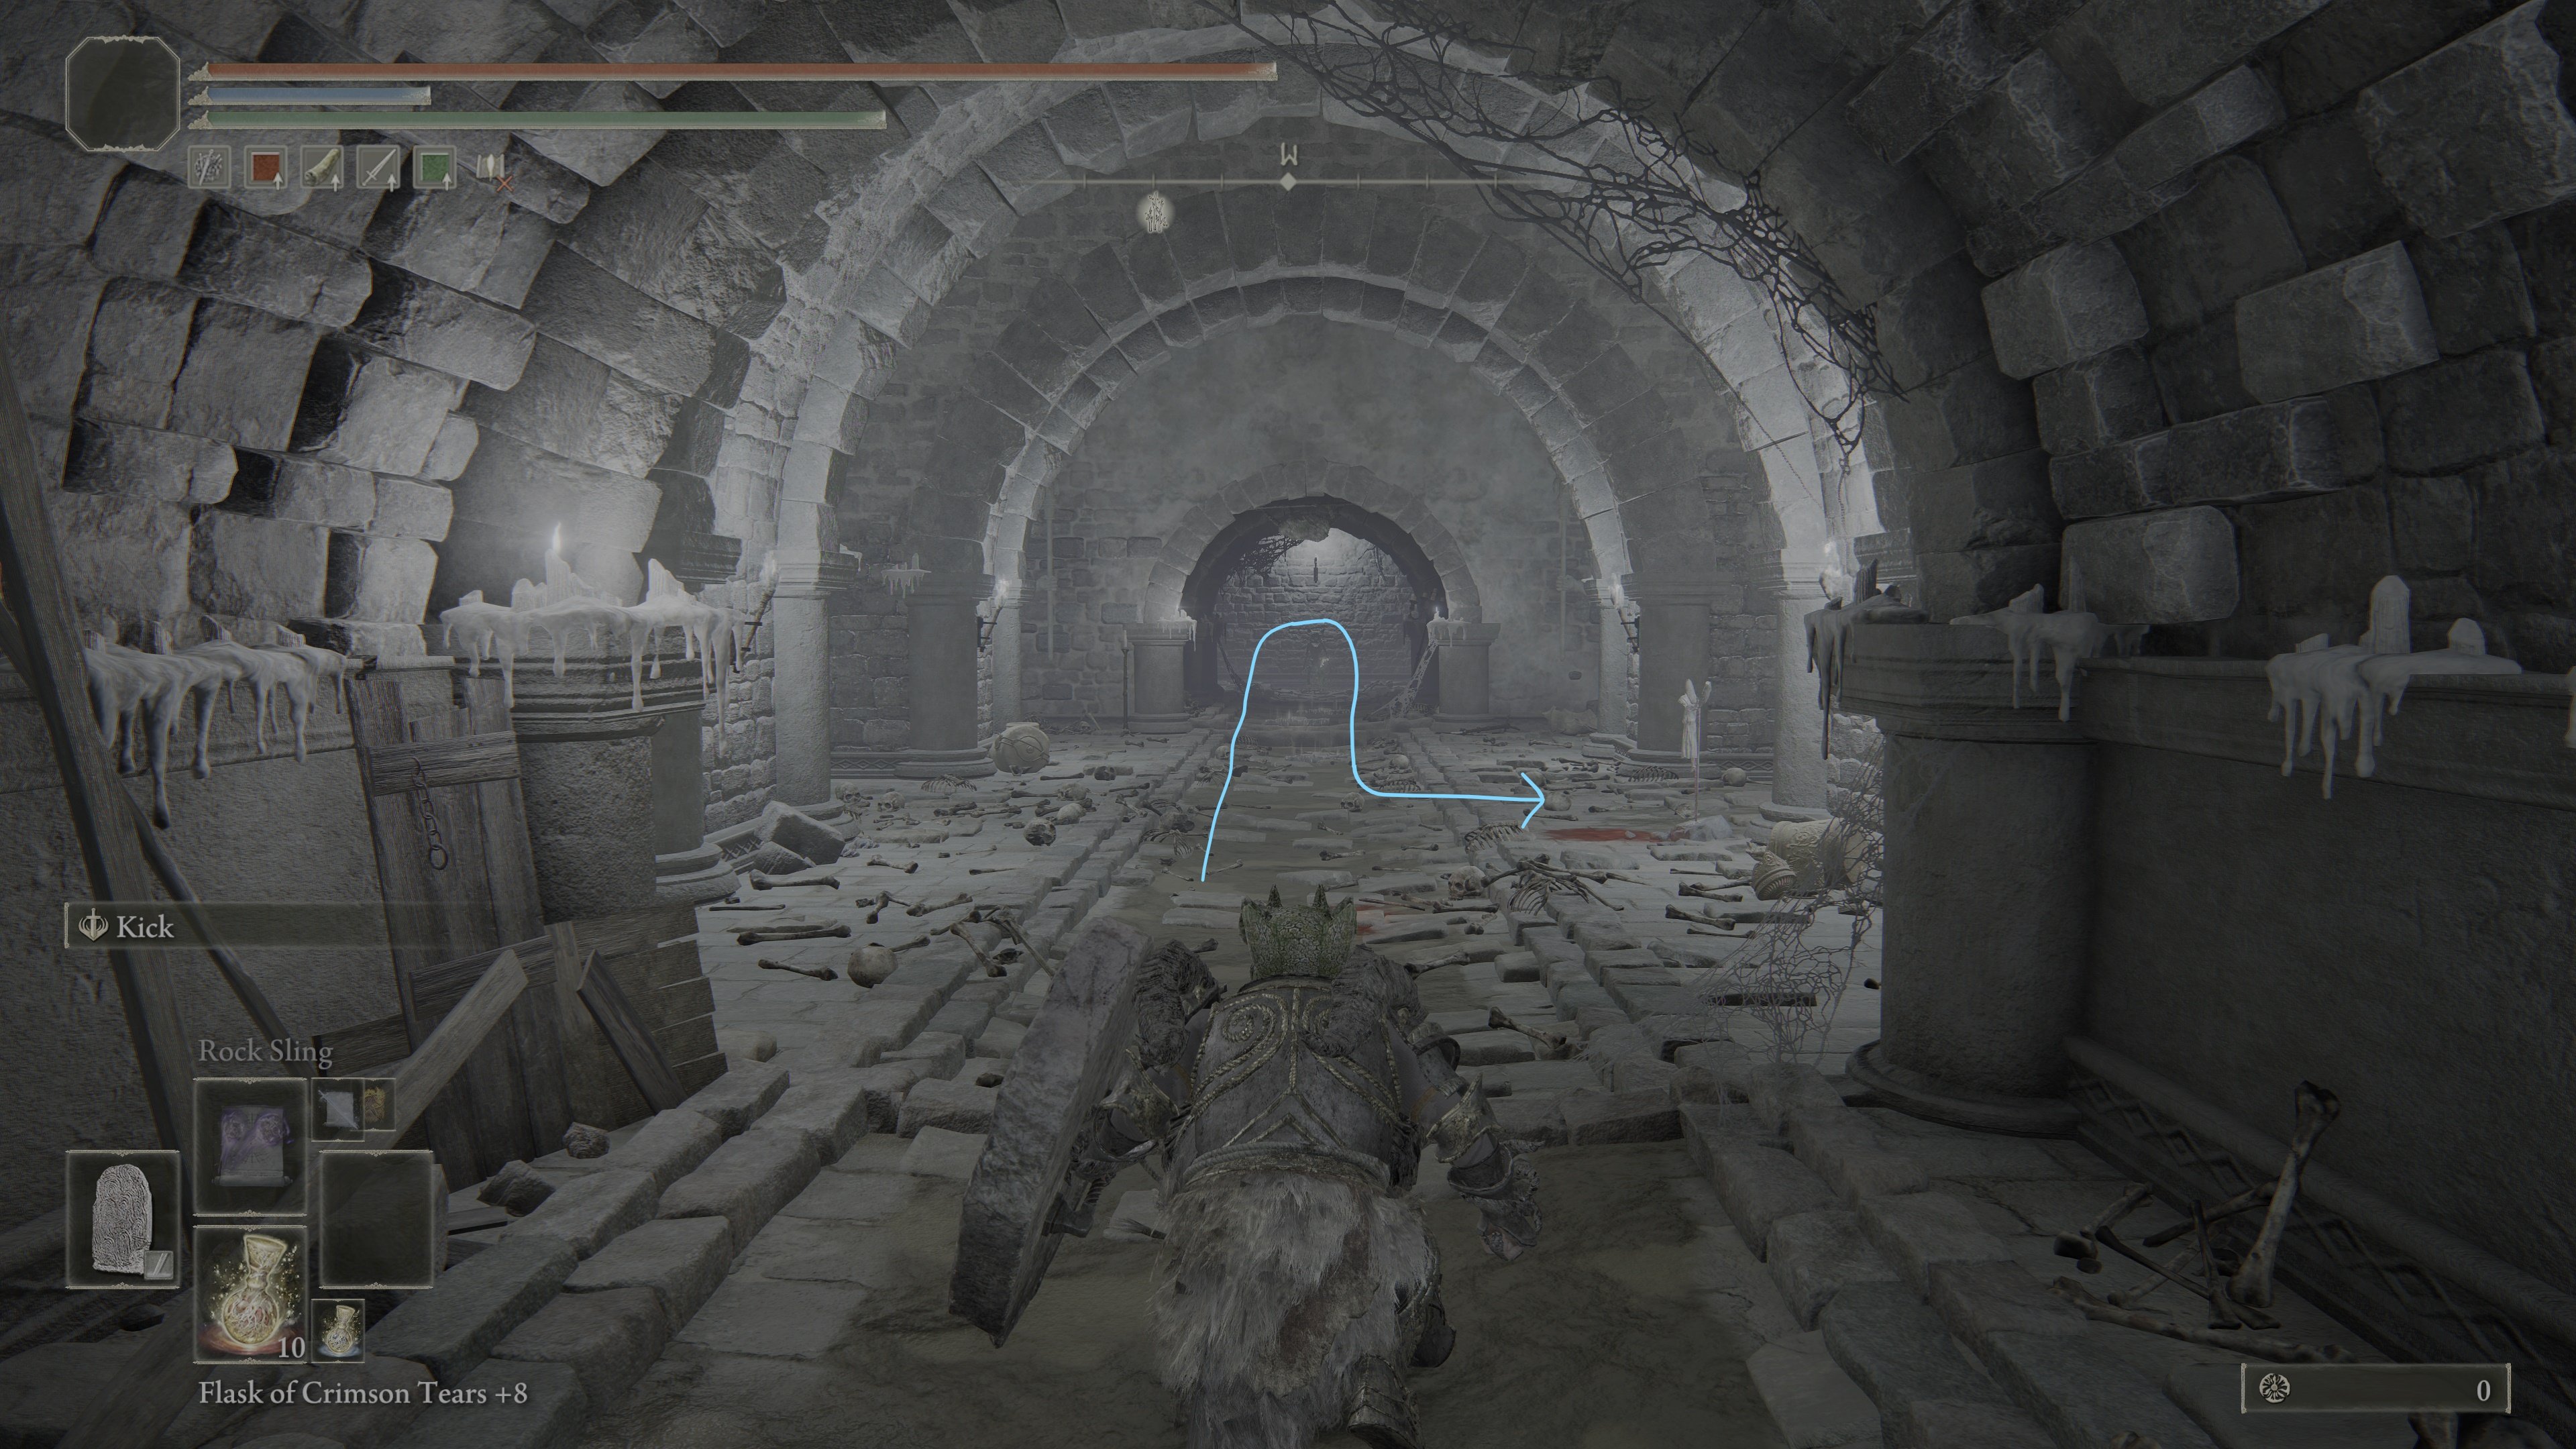
After fighting past two more imps, you will reach an elevator (Elevator 1) which you should take down.
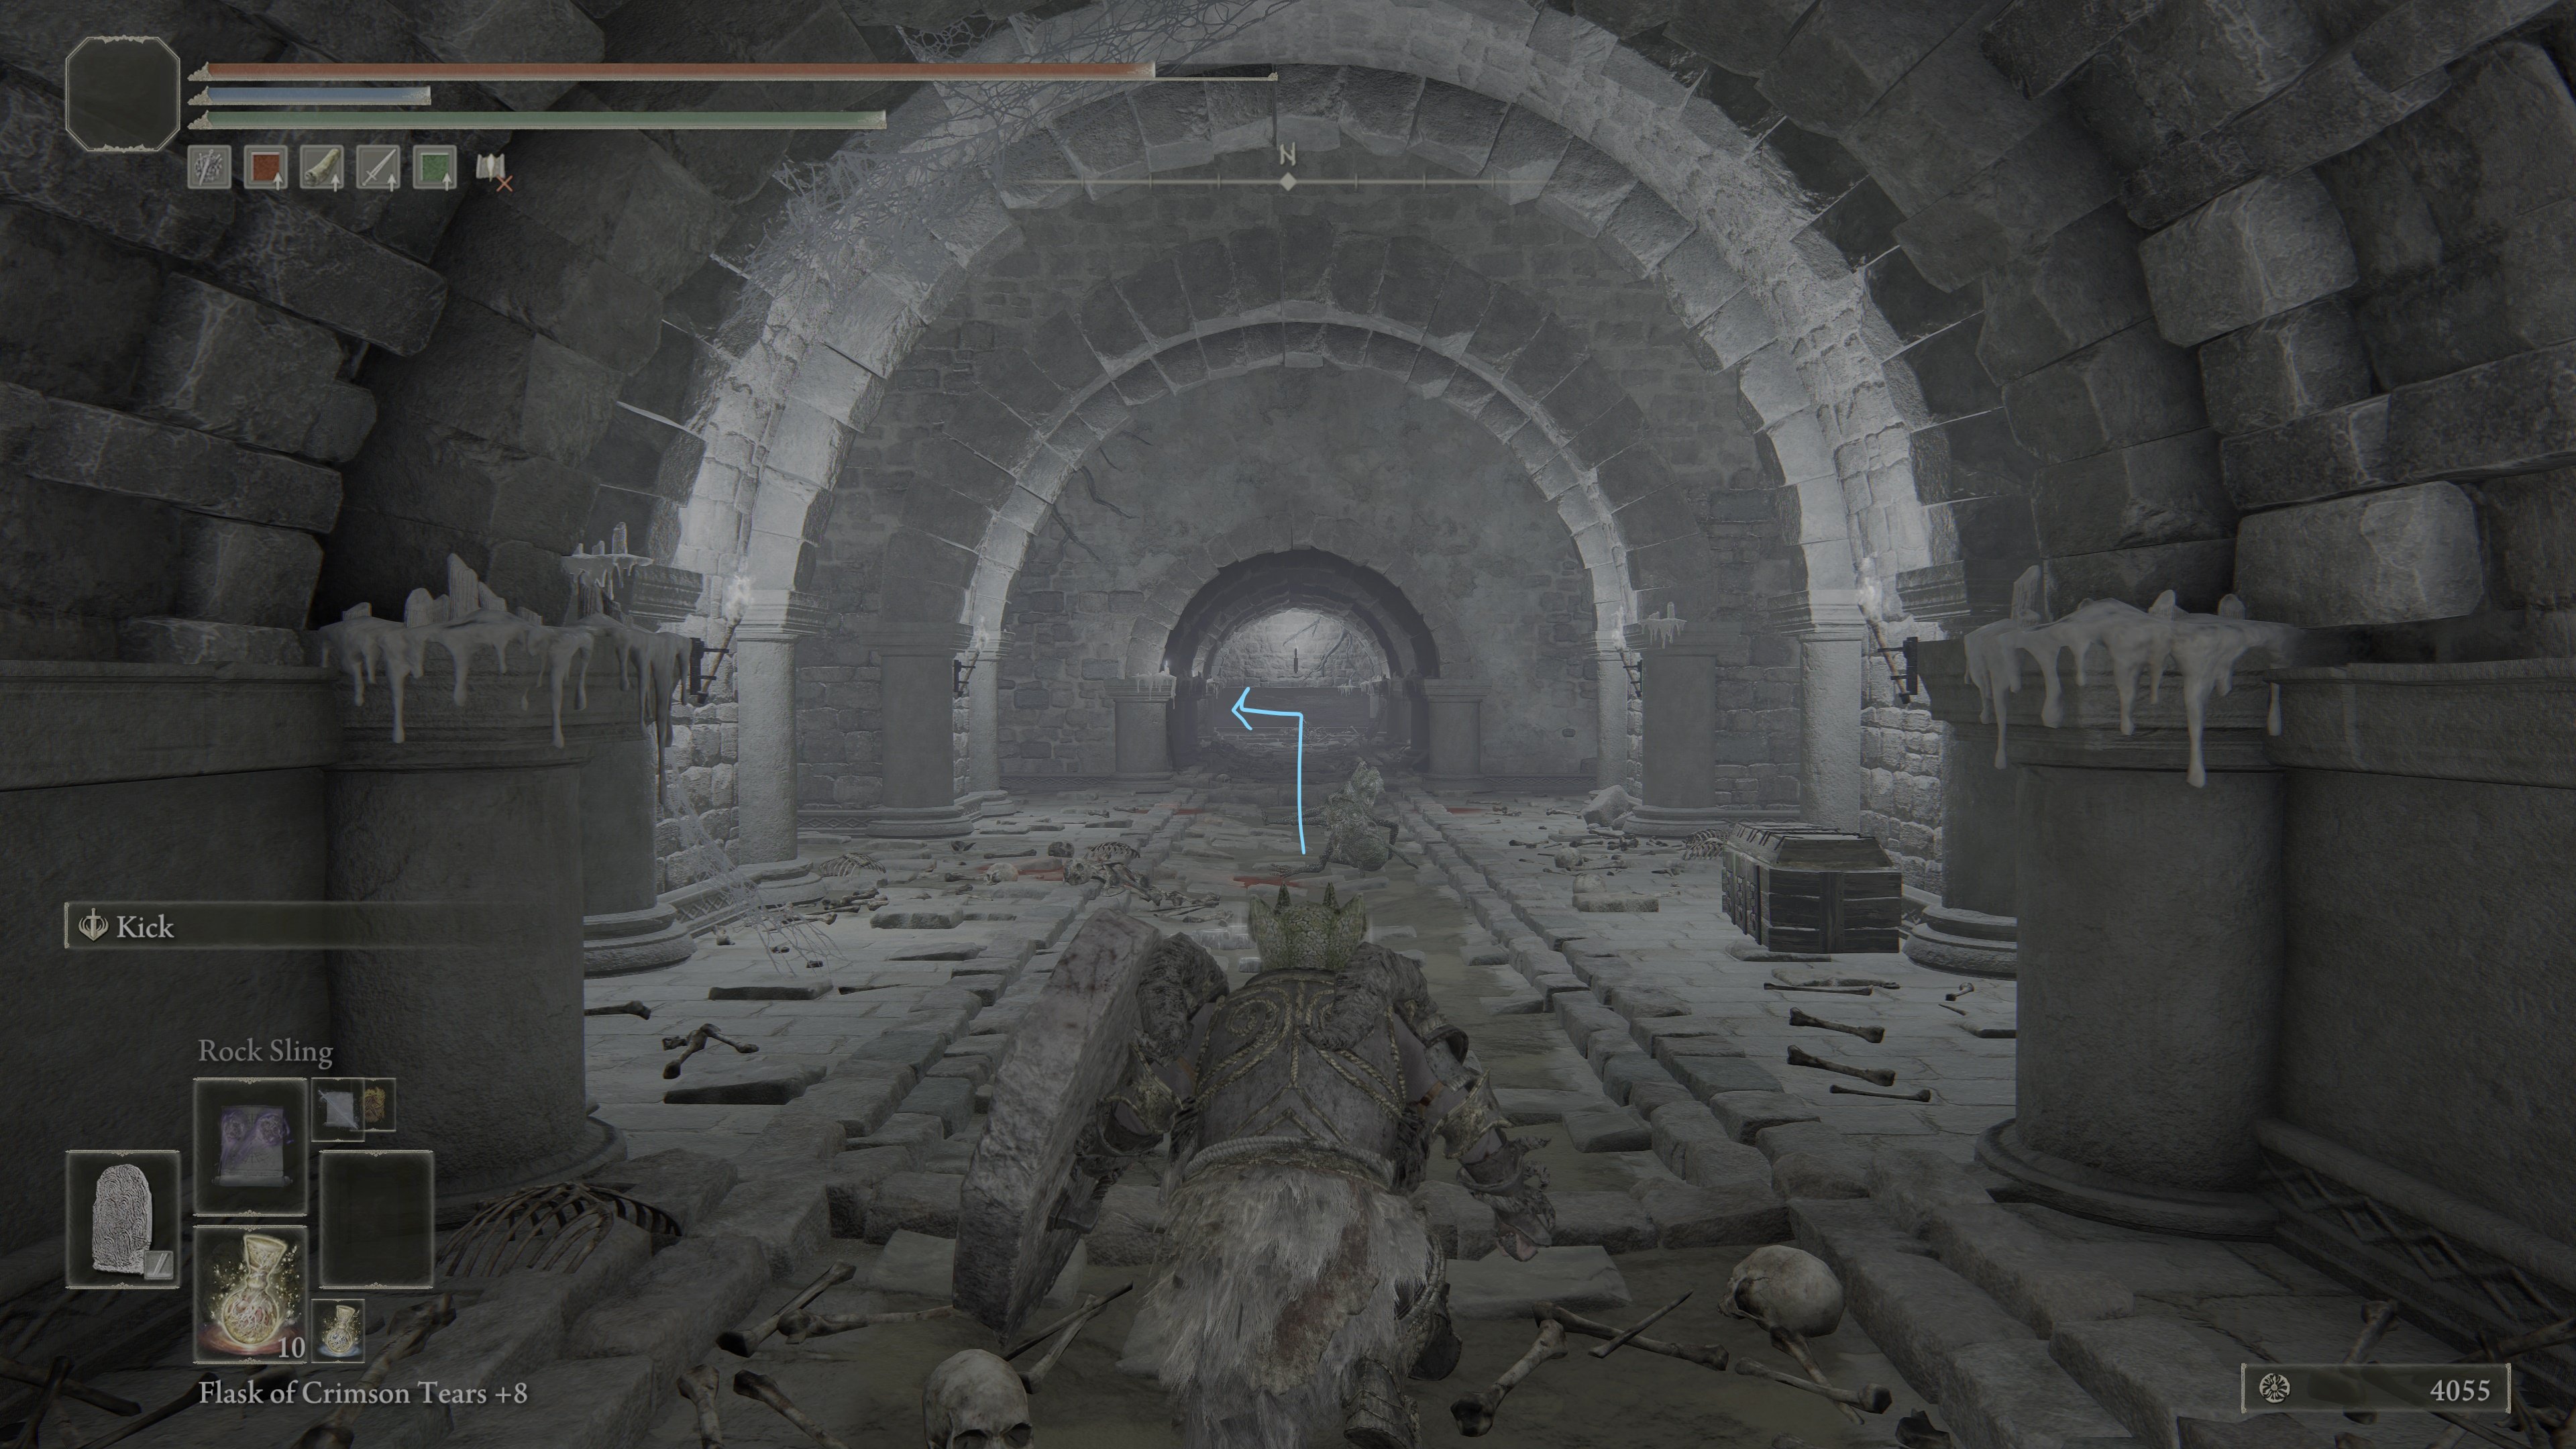
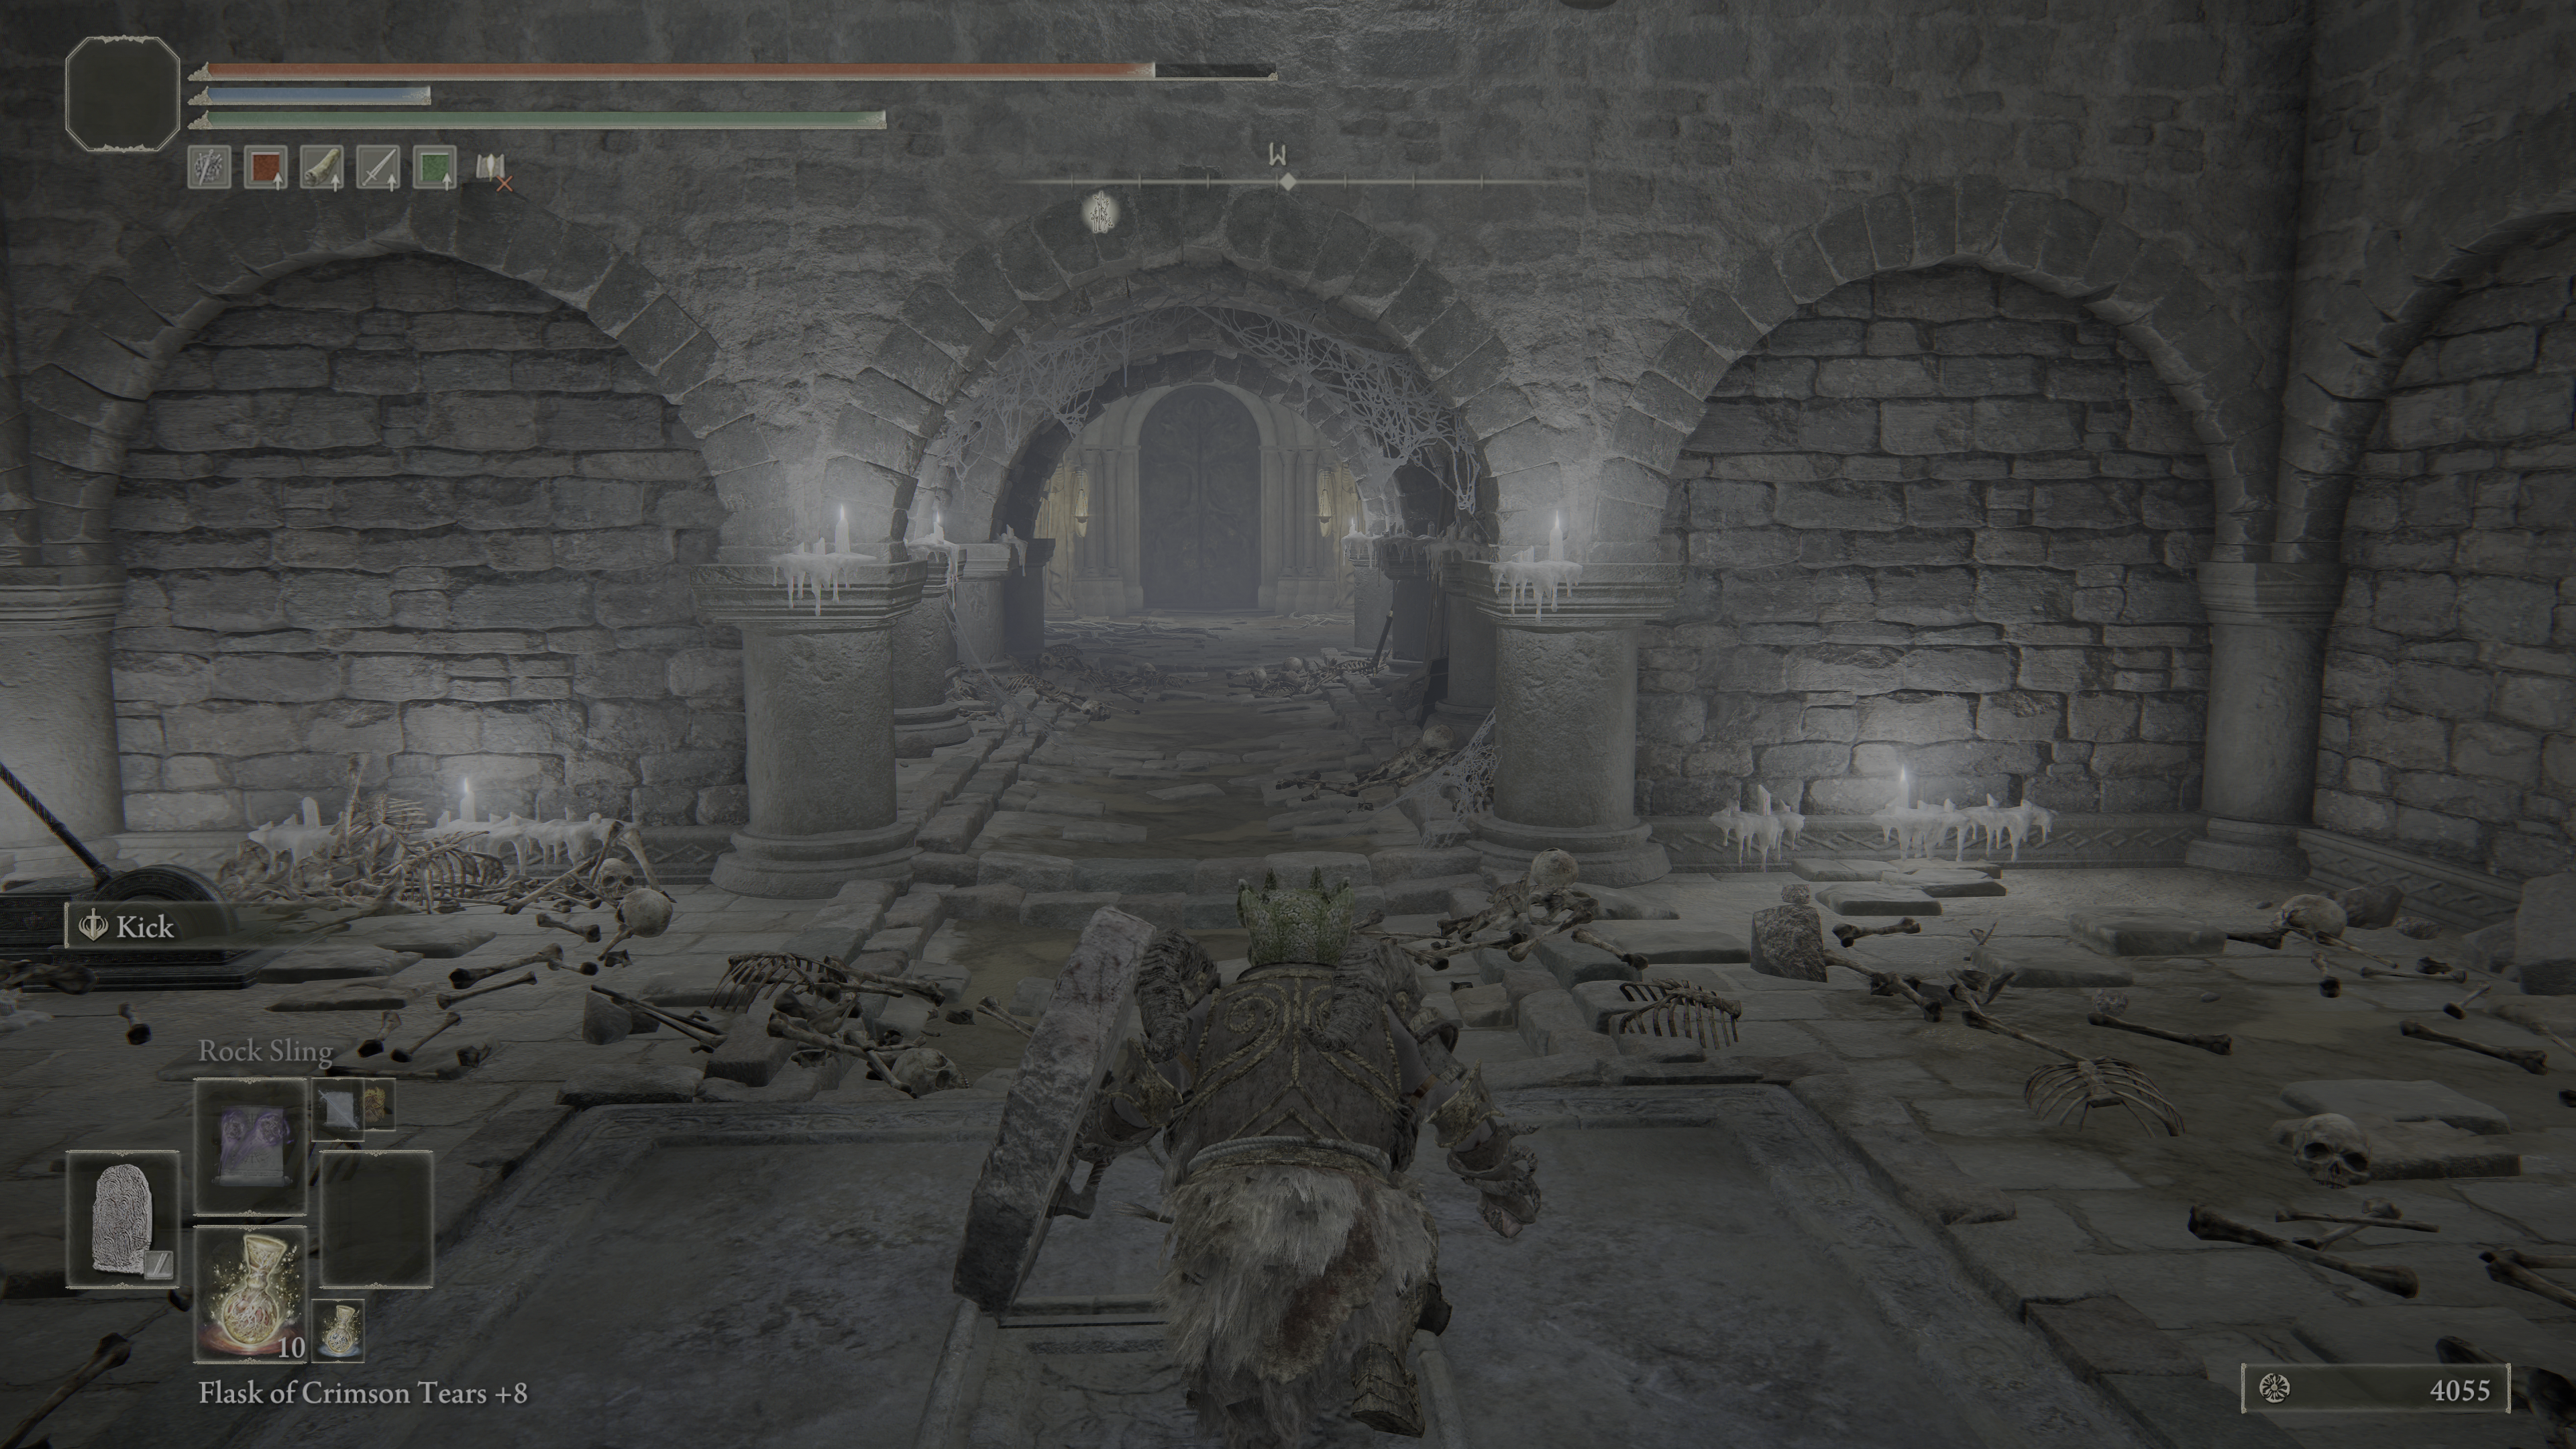
Optional Route 1 (Reward: Spirit Ashes): Send Elevator1 back up but stay on the lower level. The elevator has another platform which will be accessible to you now. Take it down to reach the lowest level of the catacombs. There is an imp here and a Lesser Burial Watchdog, the magical variant. You can cheese it slightly using the stairs. Pick up the Grave Glovewort (8) below the stairs, then proceed, but be careful since a statue will spit frostbite-inflicting dust at you. Duck into the corridor on the left, but avoid stepping on the pressure plate there. Take the statue out by hitting it, then go back to the corridor on the left to pick up Grave Glovewort (8) while being ambushed by two imps. Ahead, there is another statue, this time you have to turn right to avoid it. However, the corridor is behind an illusory wall (identifyable by being "flat" without the usual rims) and an imp hides inside. In the room with the second statue is another Lesser Burial Watchdog (physical variant). Consider using the statue by luring the watchdog into the corridor to take it out. Afterwards, pick up the Fire Monk Ashes from a chest behind the statue. This route is a dead-end to make your way back up Elevator 1.
On the main route, past Elevator 1, take a left past the locked doors to the boss. Fight past some imps until you reach another elevator with ropes attaching it to the ceiling (Elevator 2).
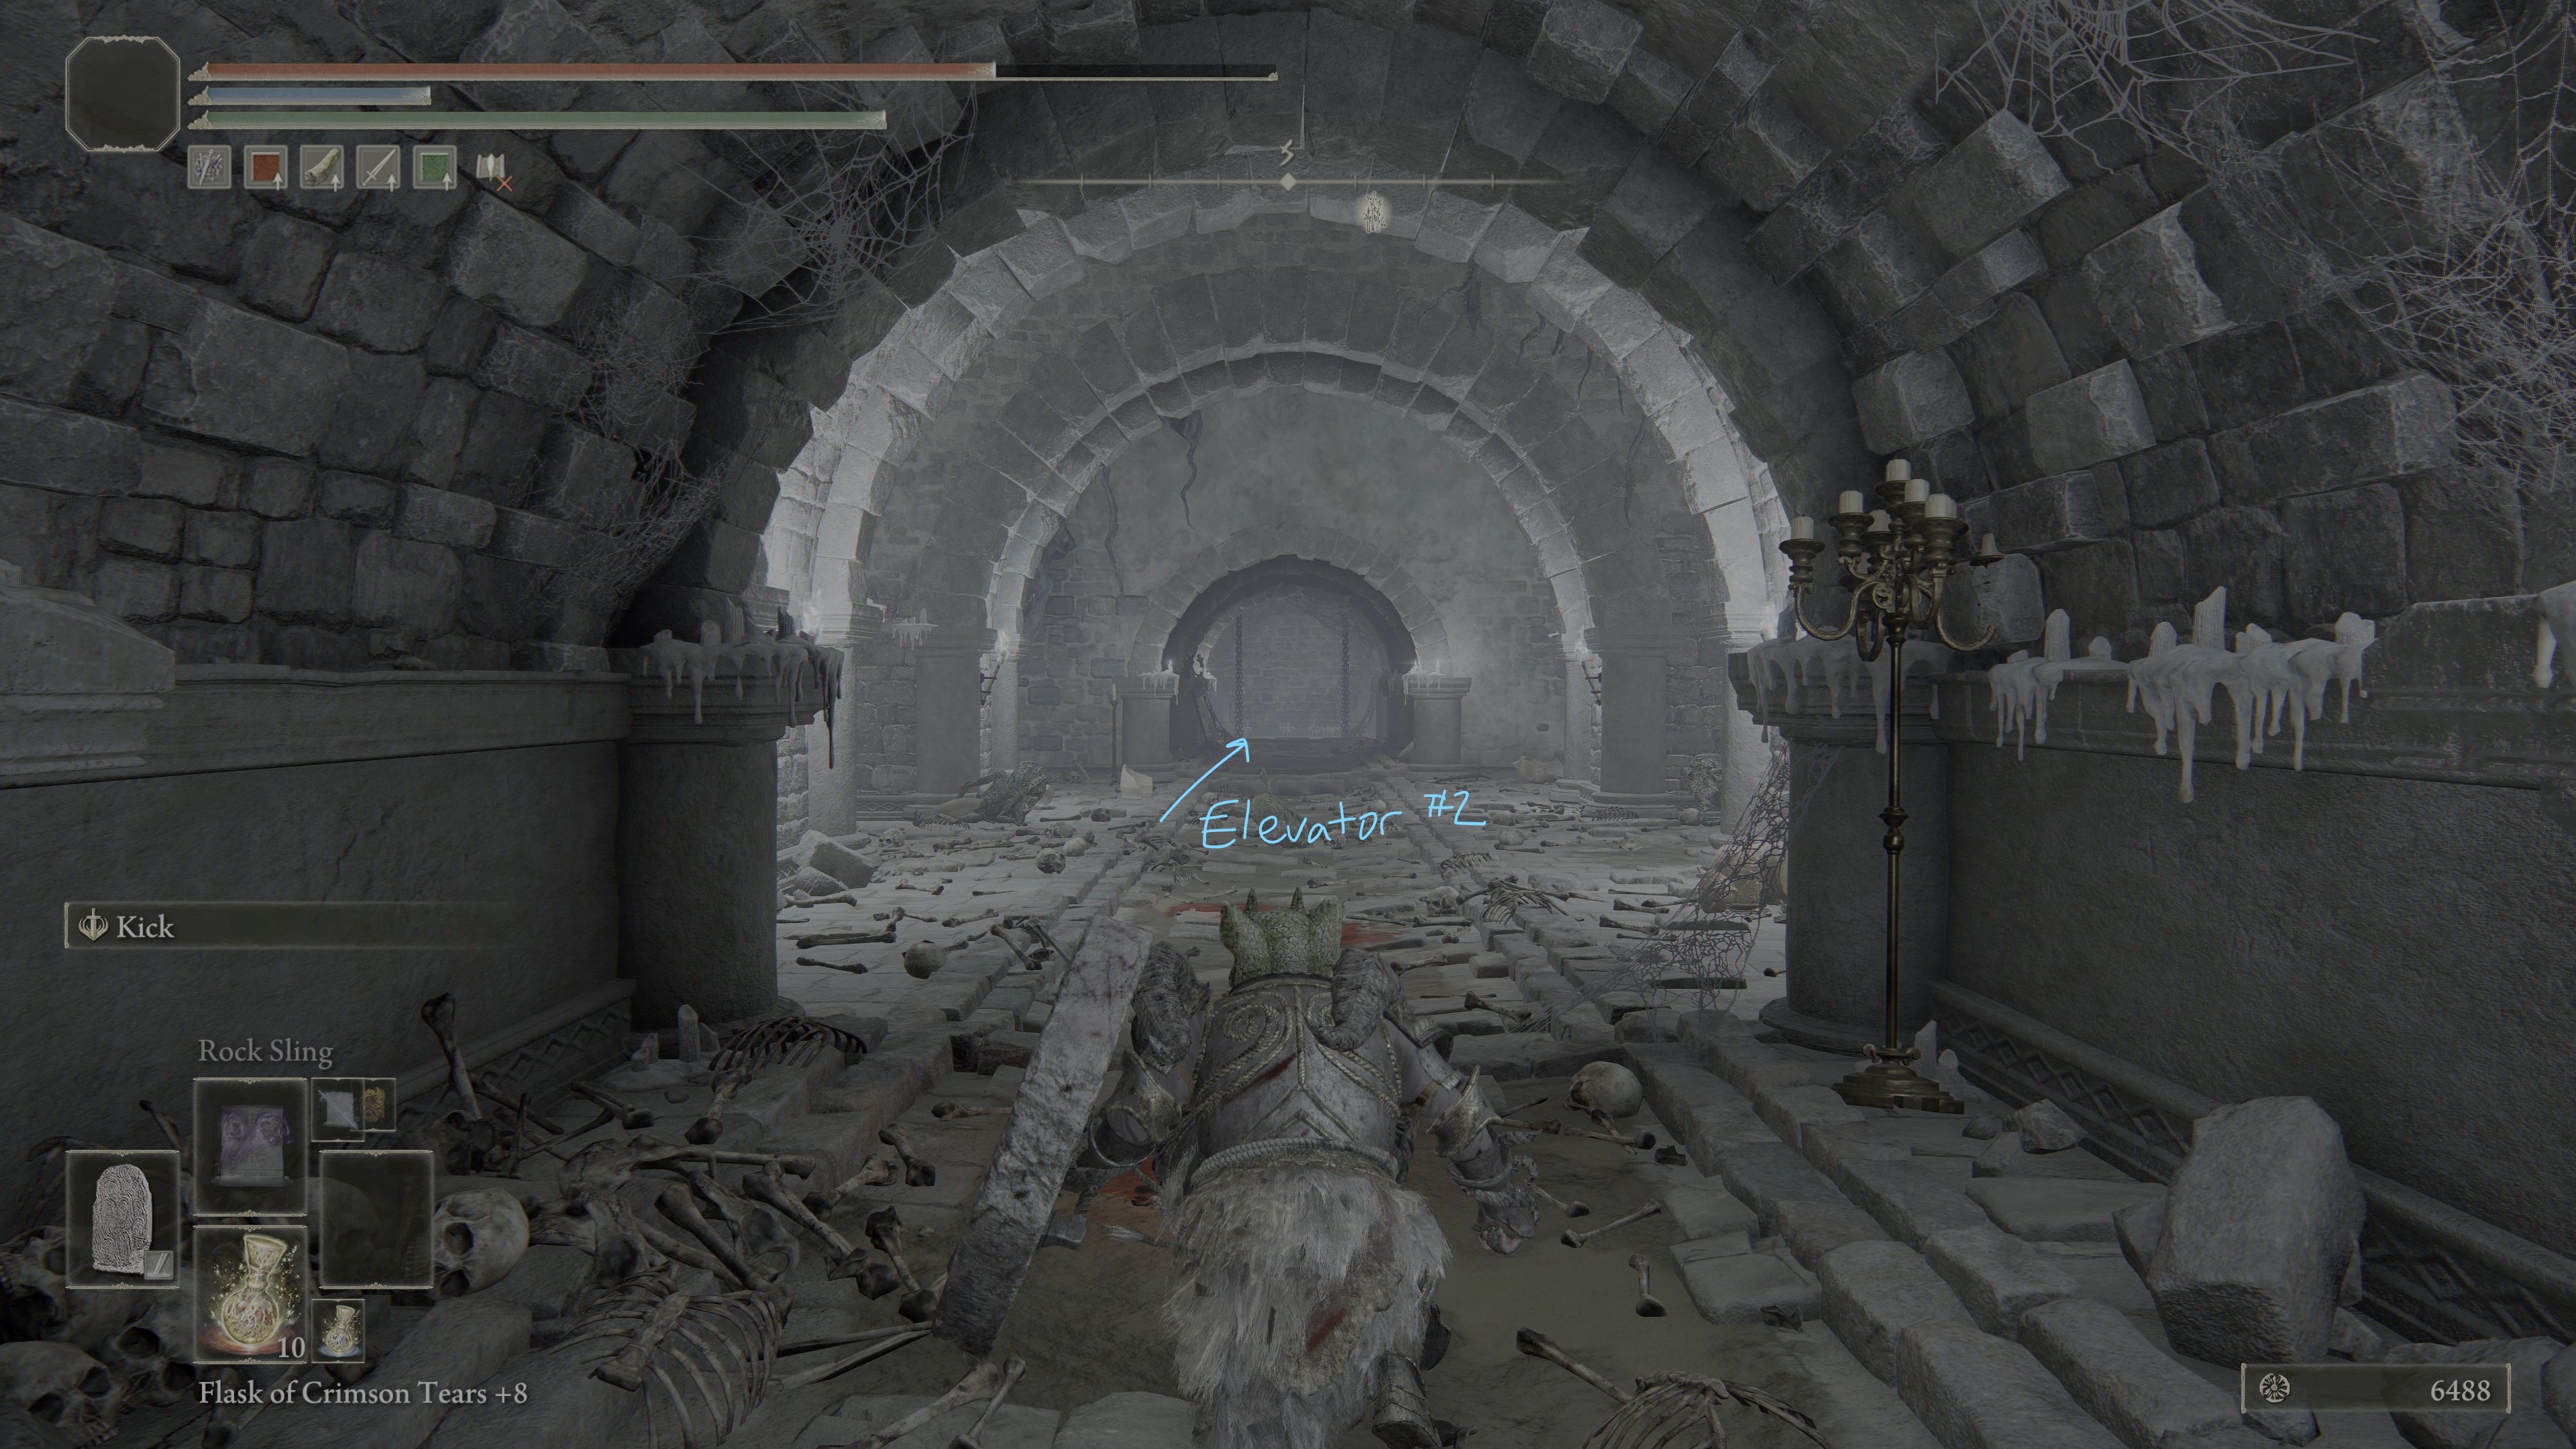
Take this elevator down, and proceed forward, you will find a square room with a green statue (Statue Room 1)
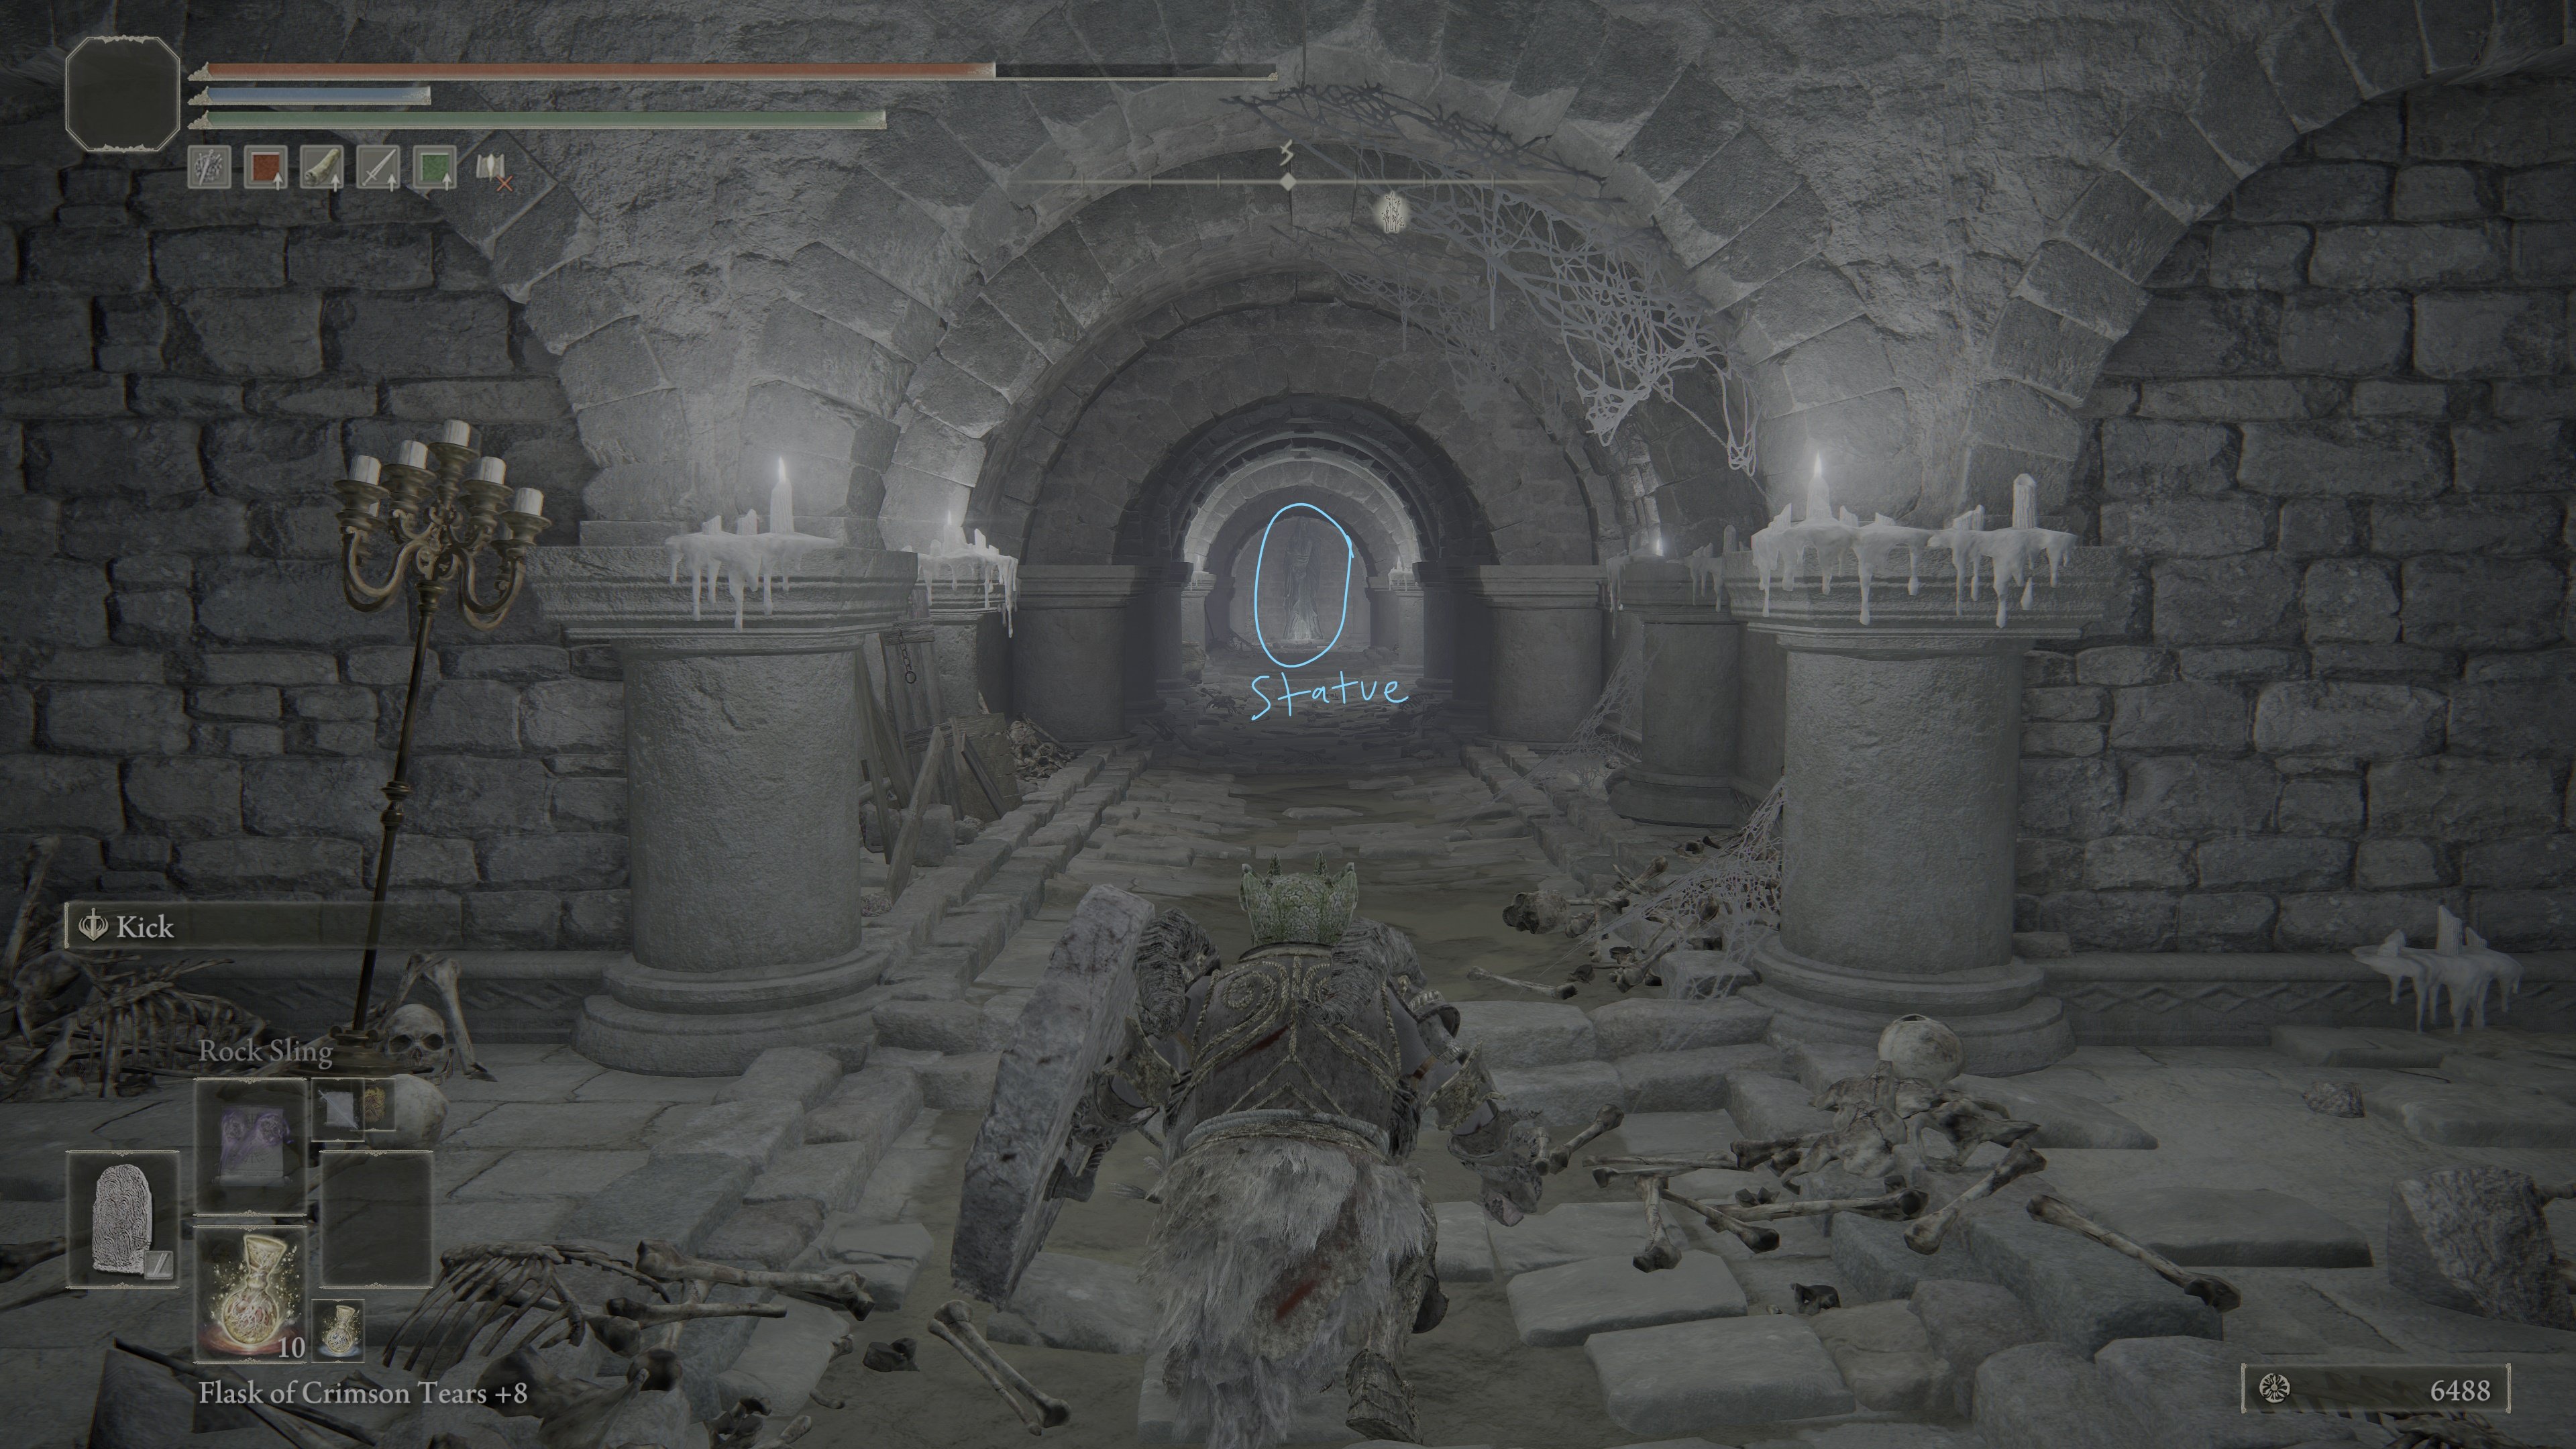
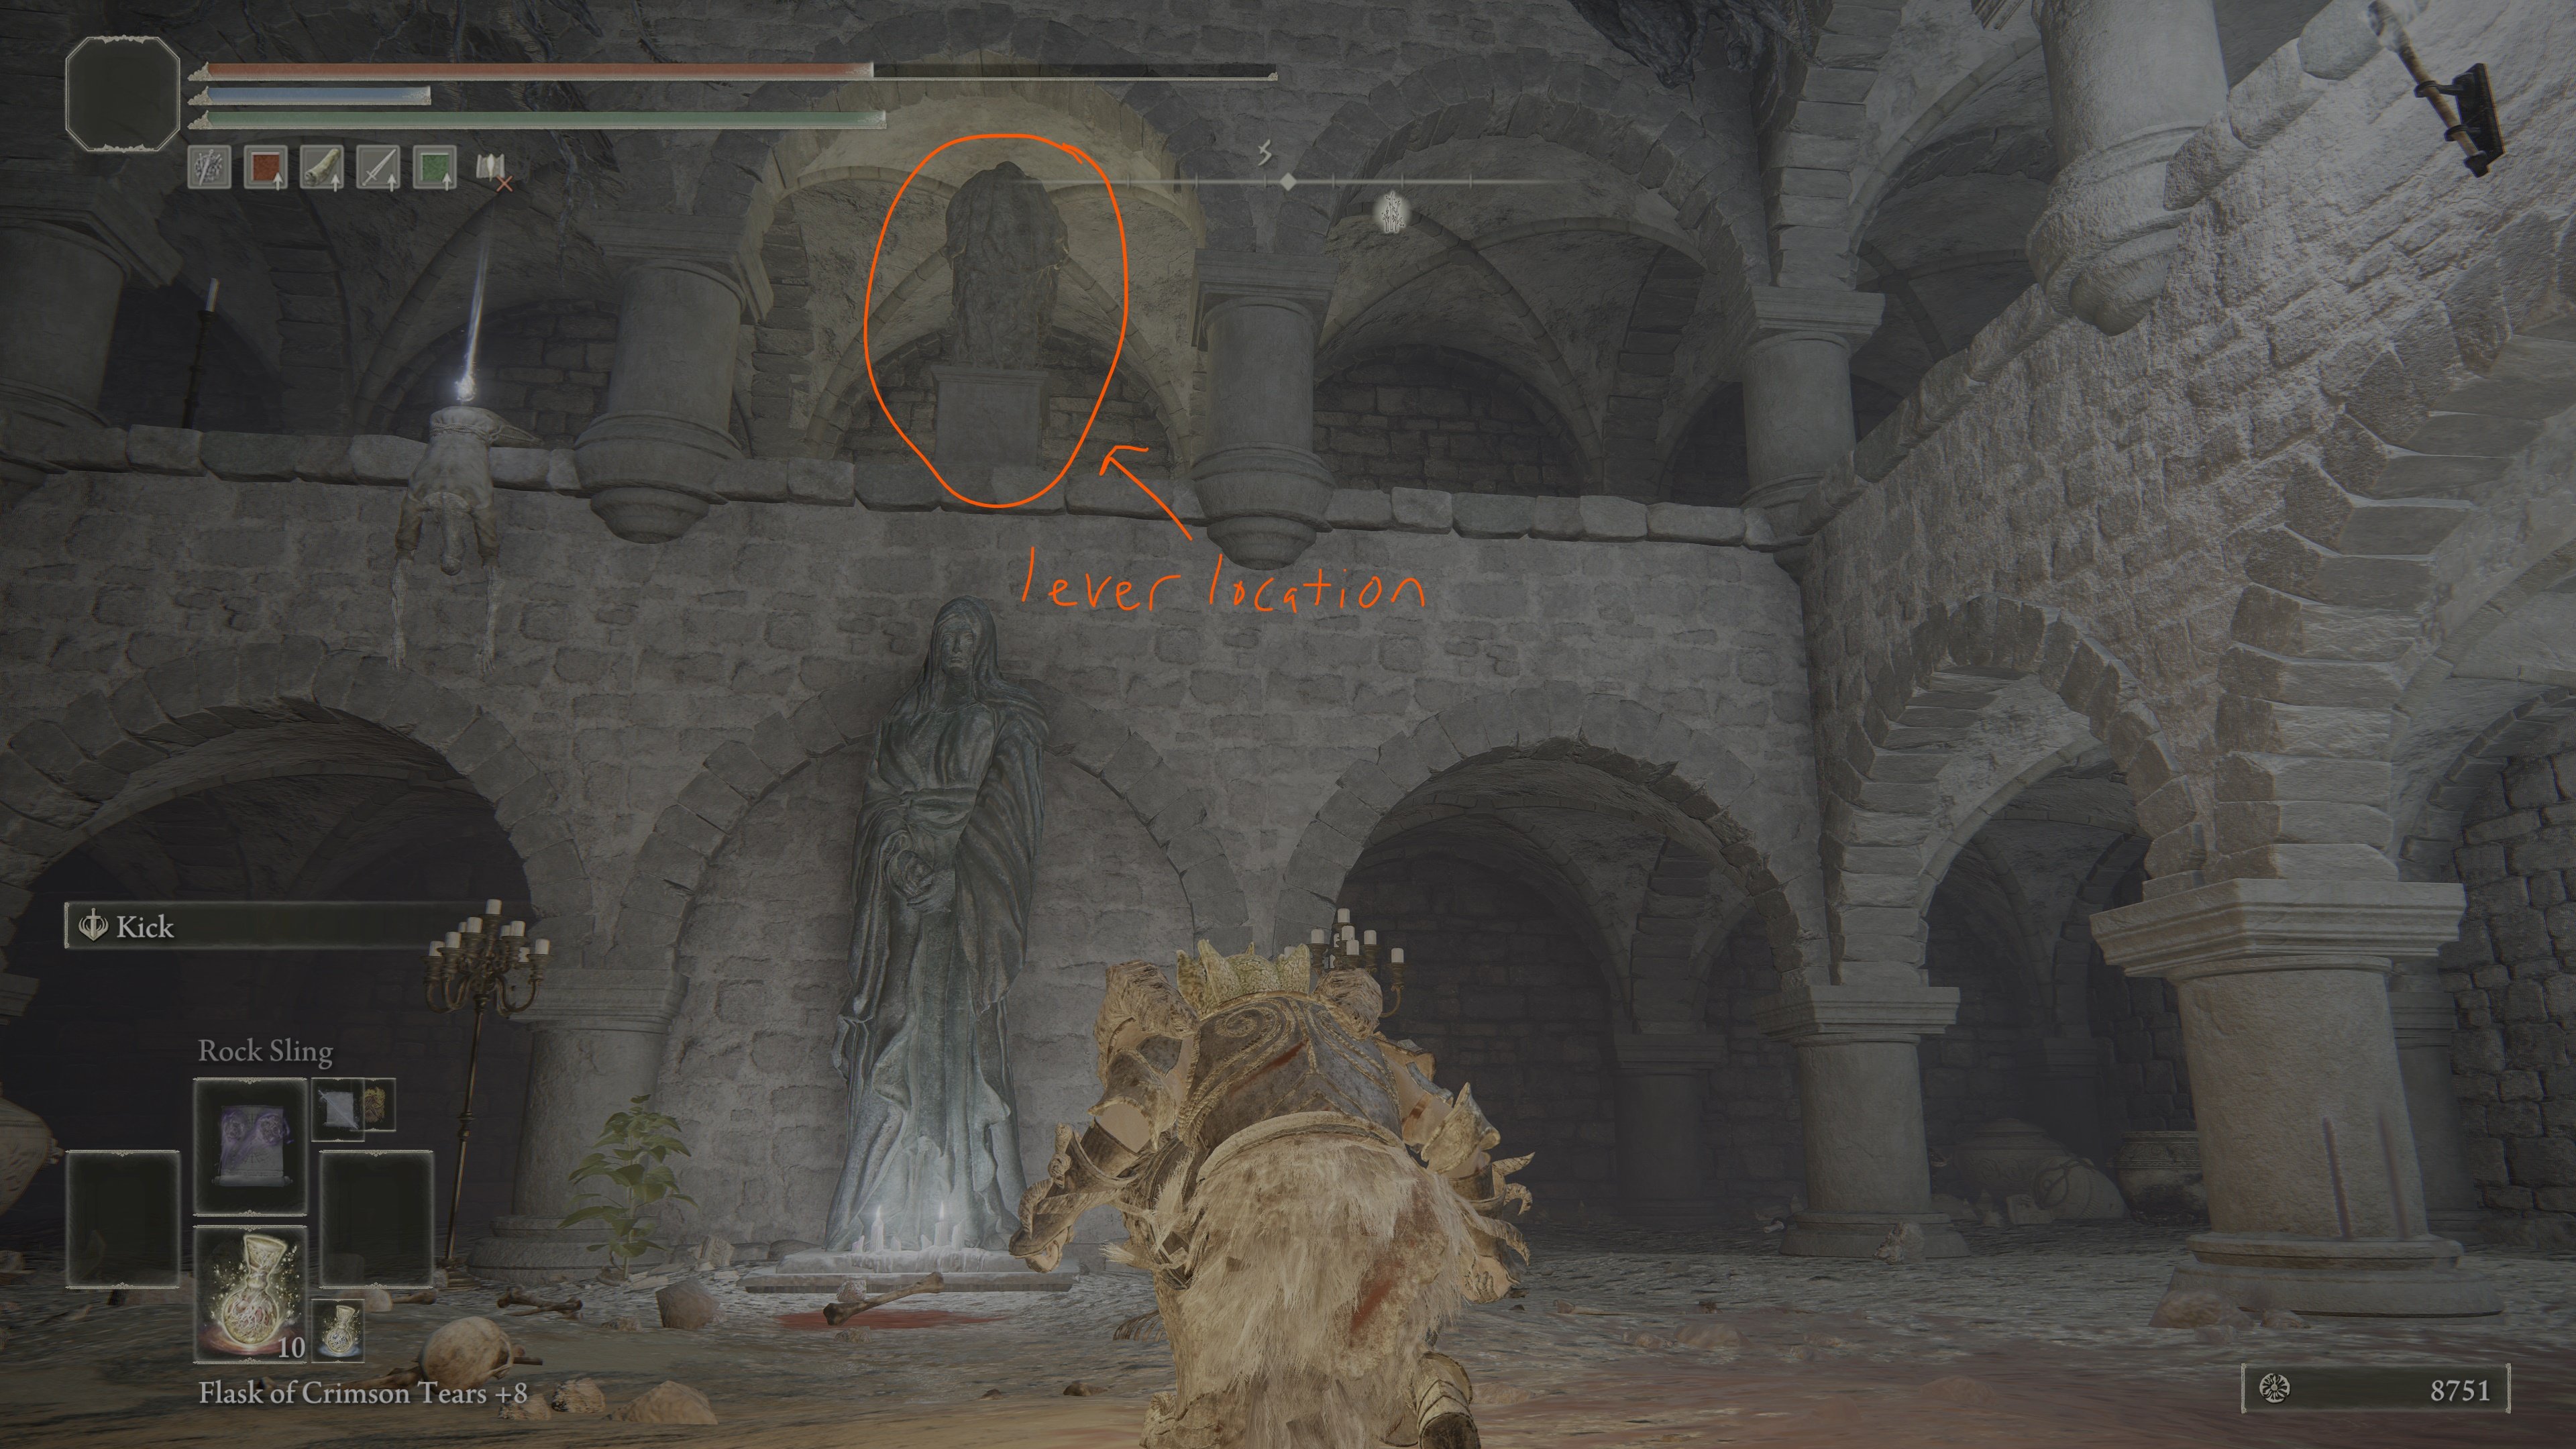
Here you will then encounter a Giant Living Jar, defeat it -- if you look up, you will see a corpse with loot hanging off, and a smaller statue facing the wall. This is the location of the lever that opens the boss doors, which we'll reach later.
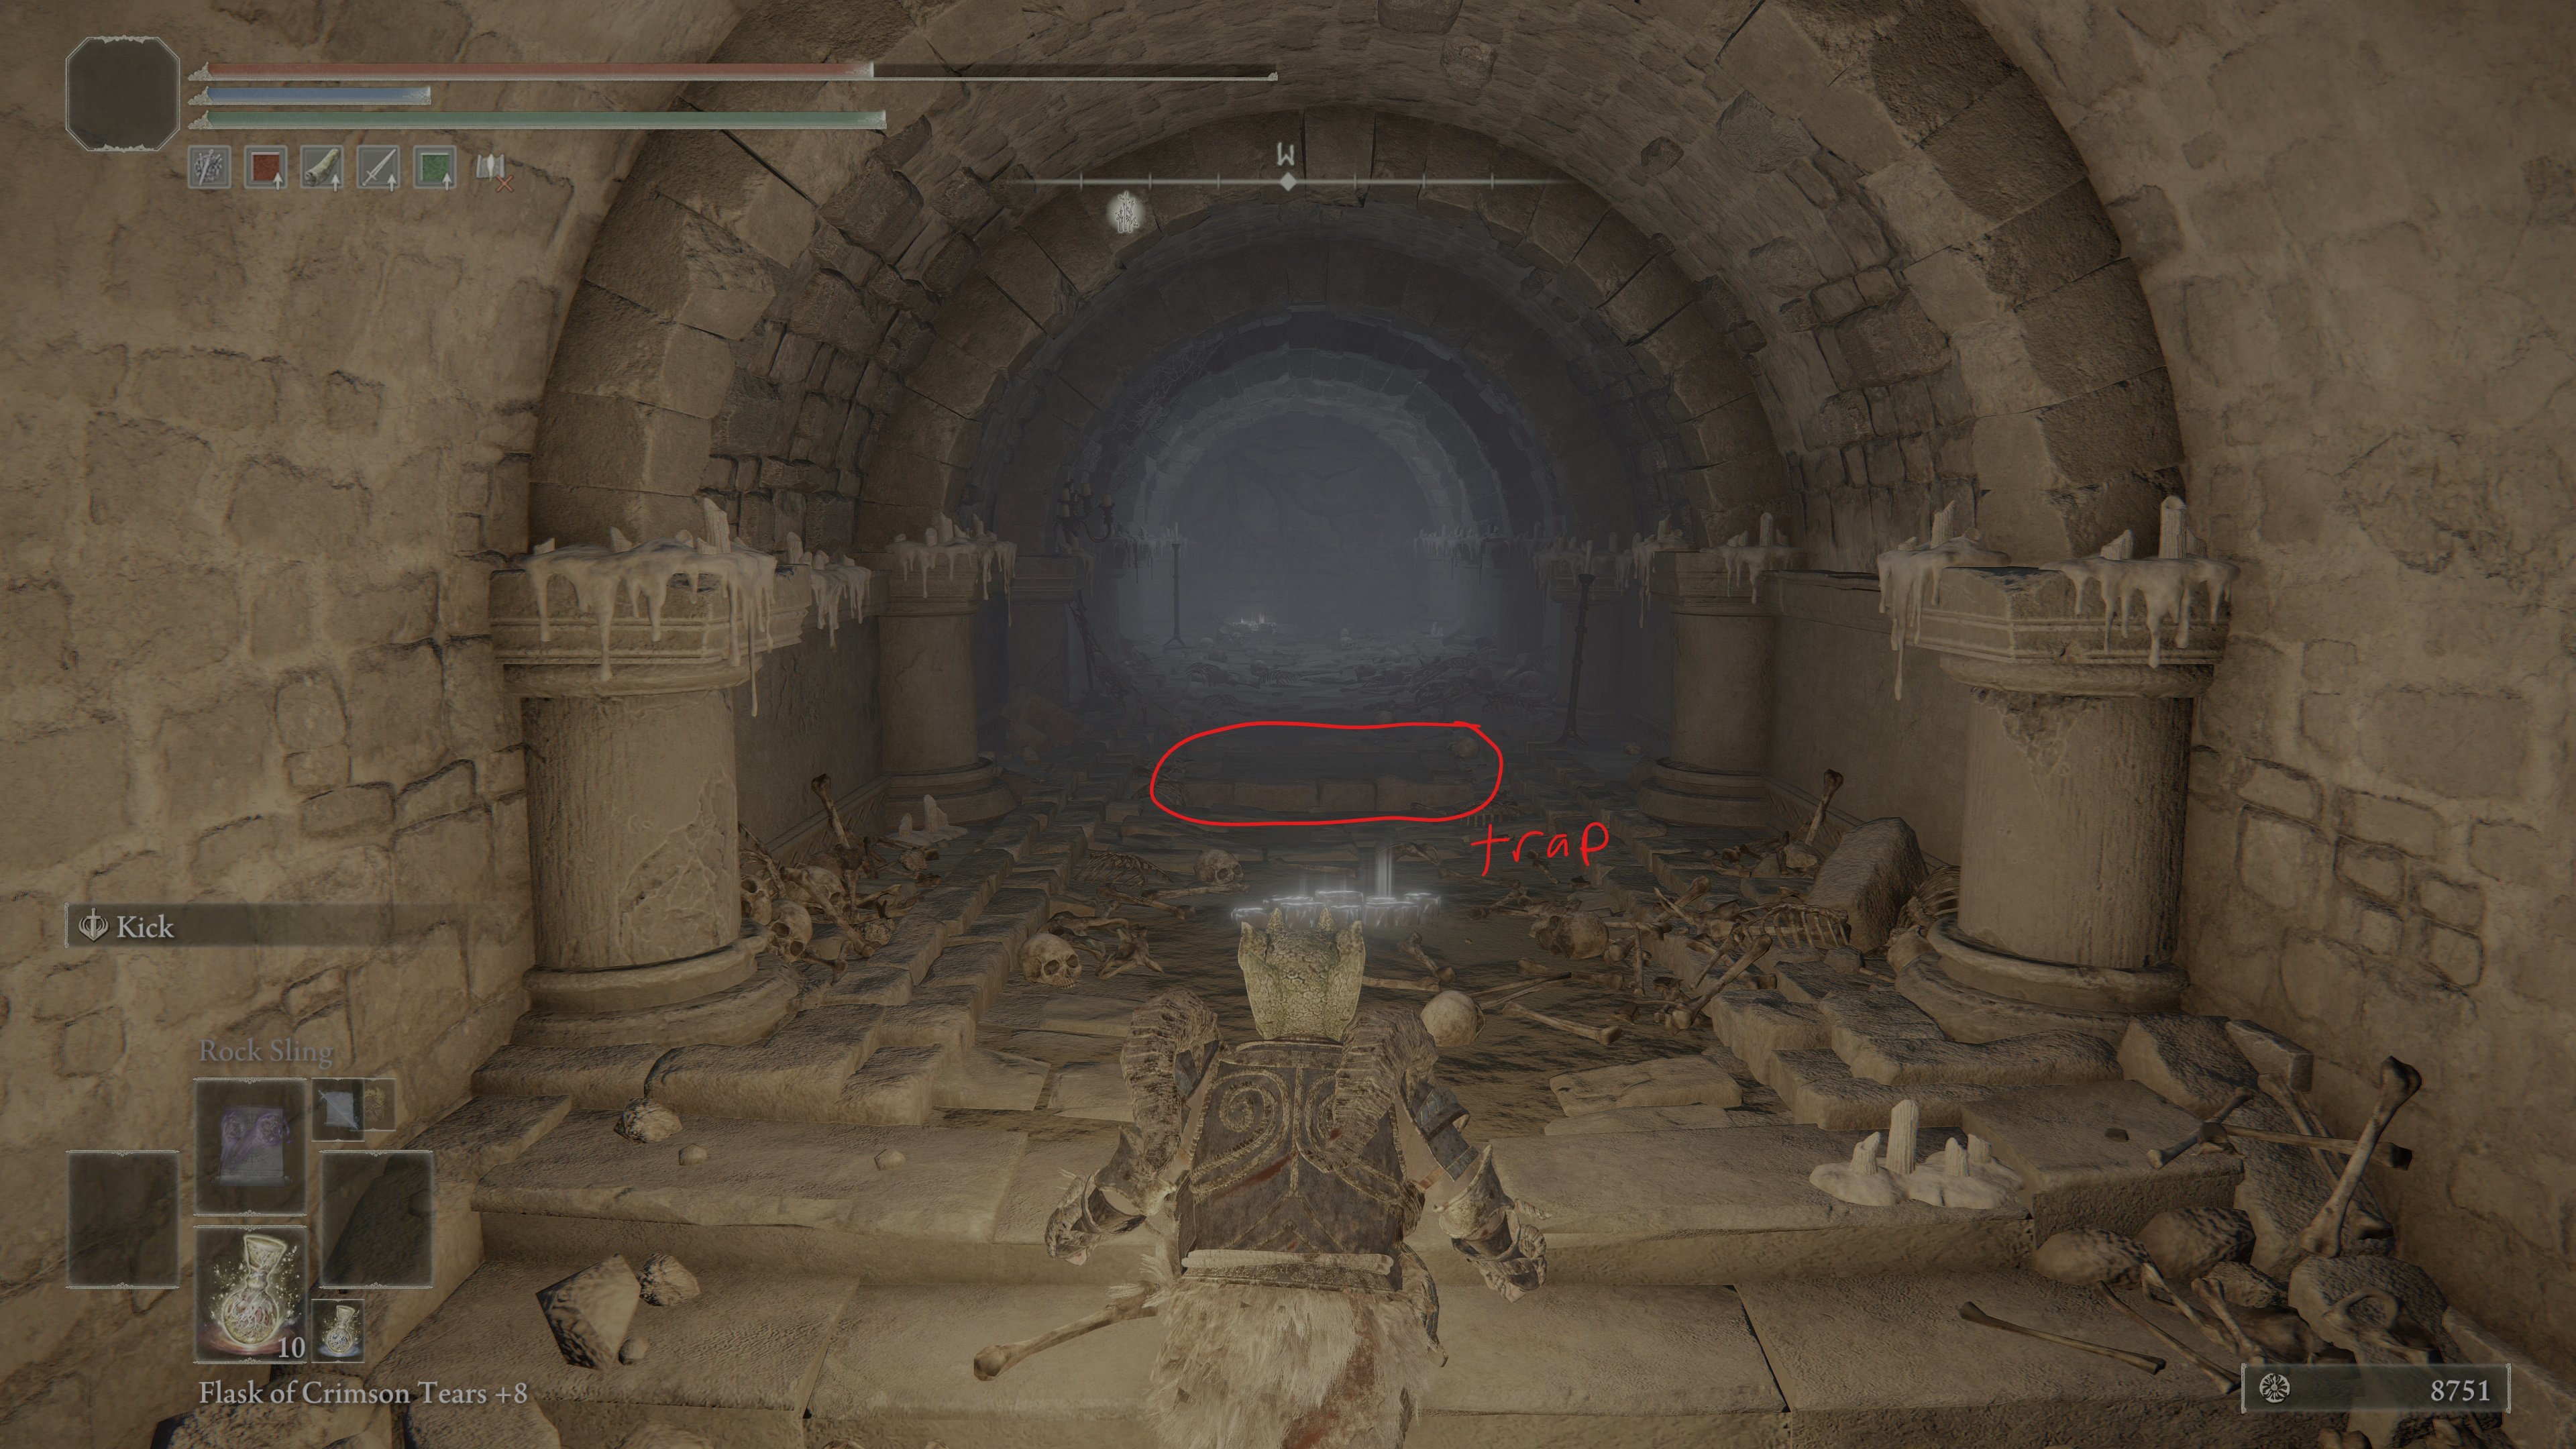
From here, turn right, proceeding up the stairs. Be careful with the pressure plated dart trap. Once you reach the edge of the hallway, turn left, and you'll see another set of steps taking you into a room with multiple guillotine blades.
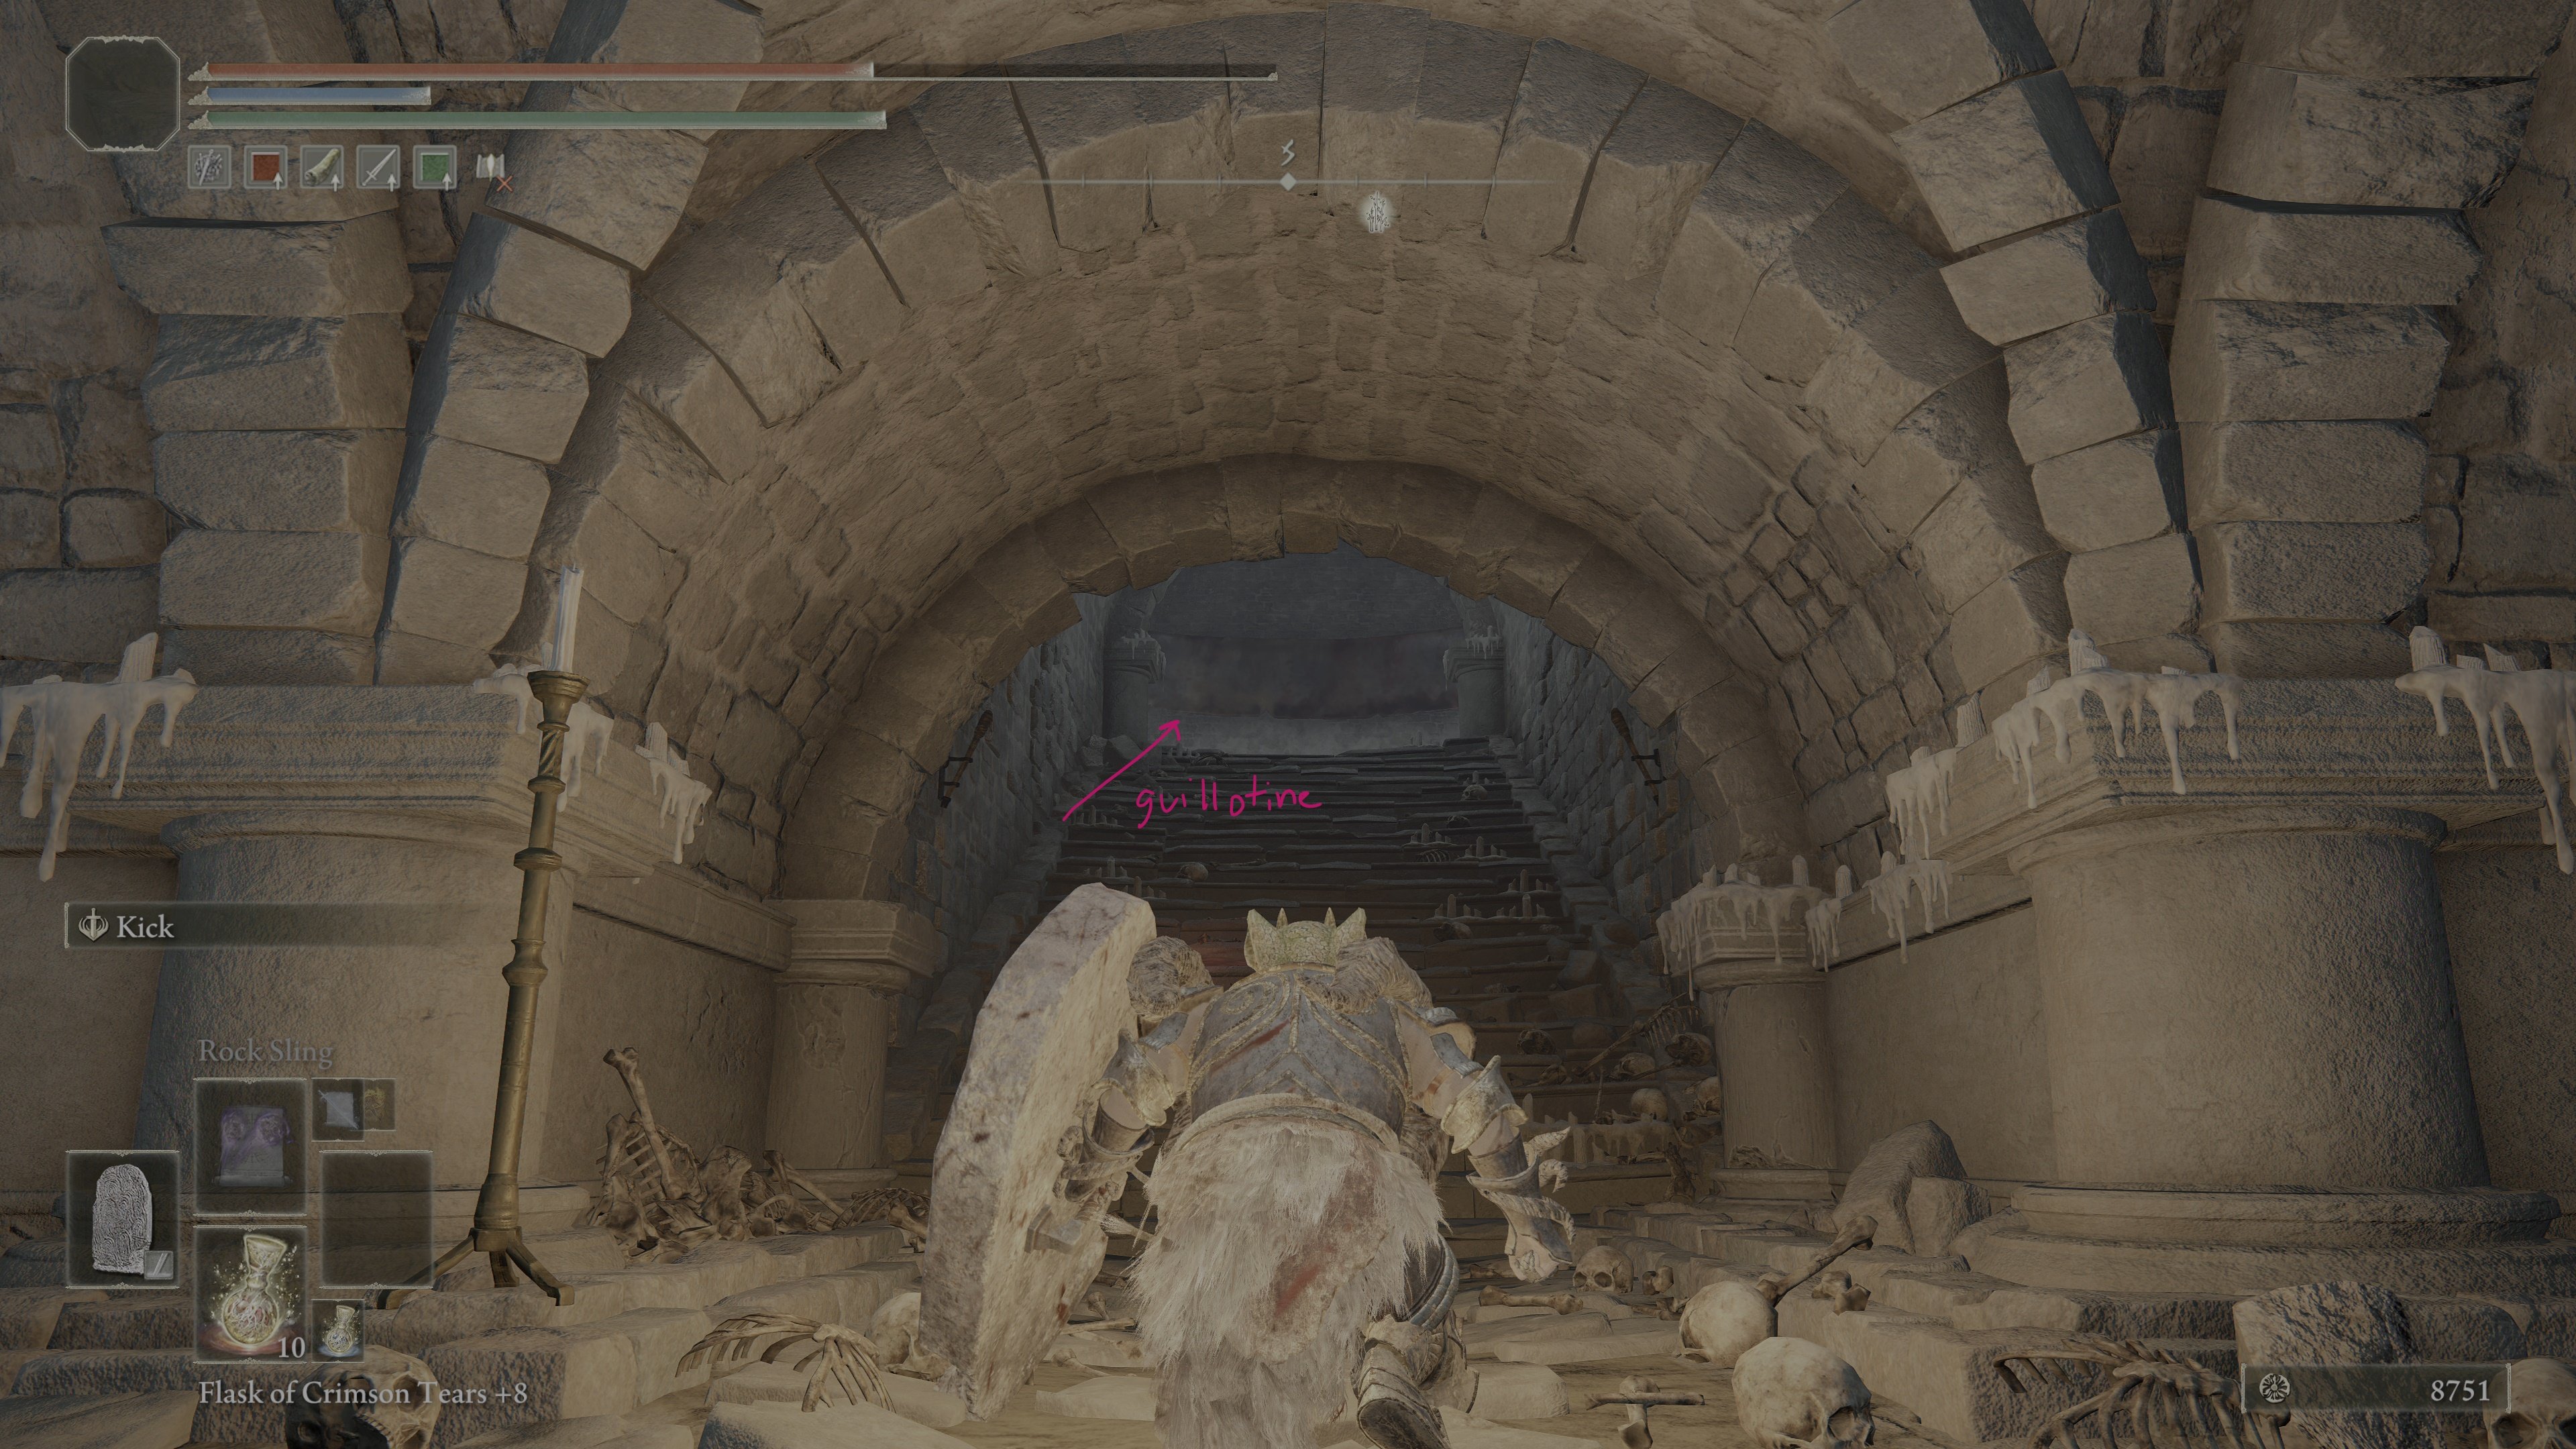
This contains multiple guillotines and exploding living jars.
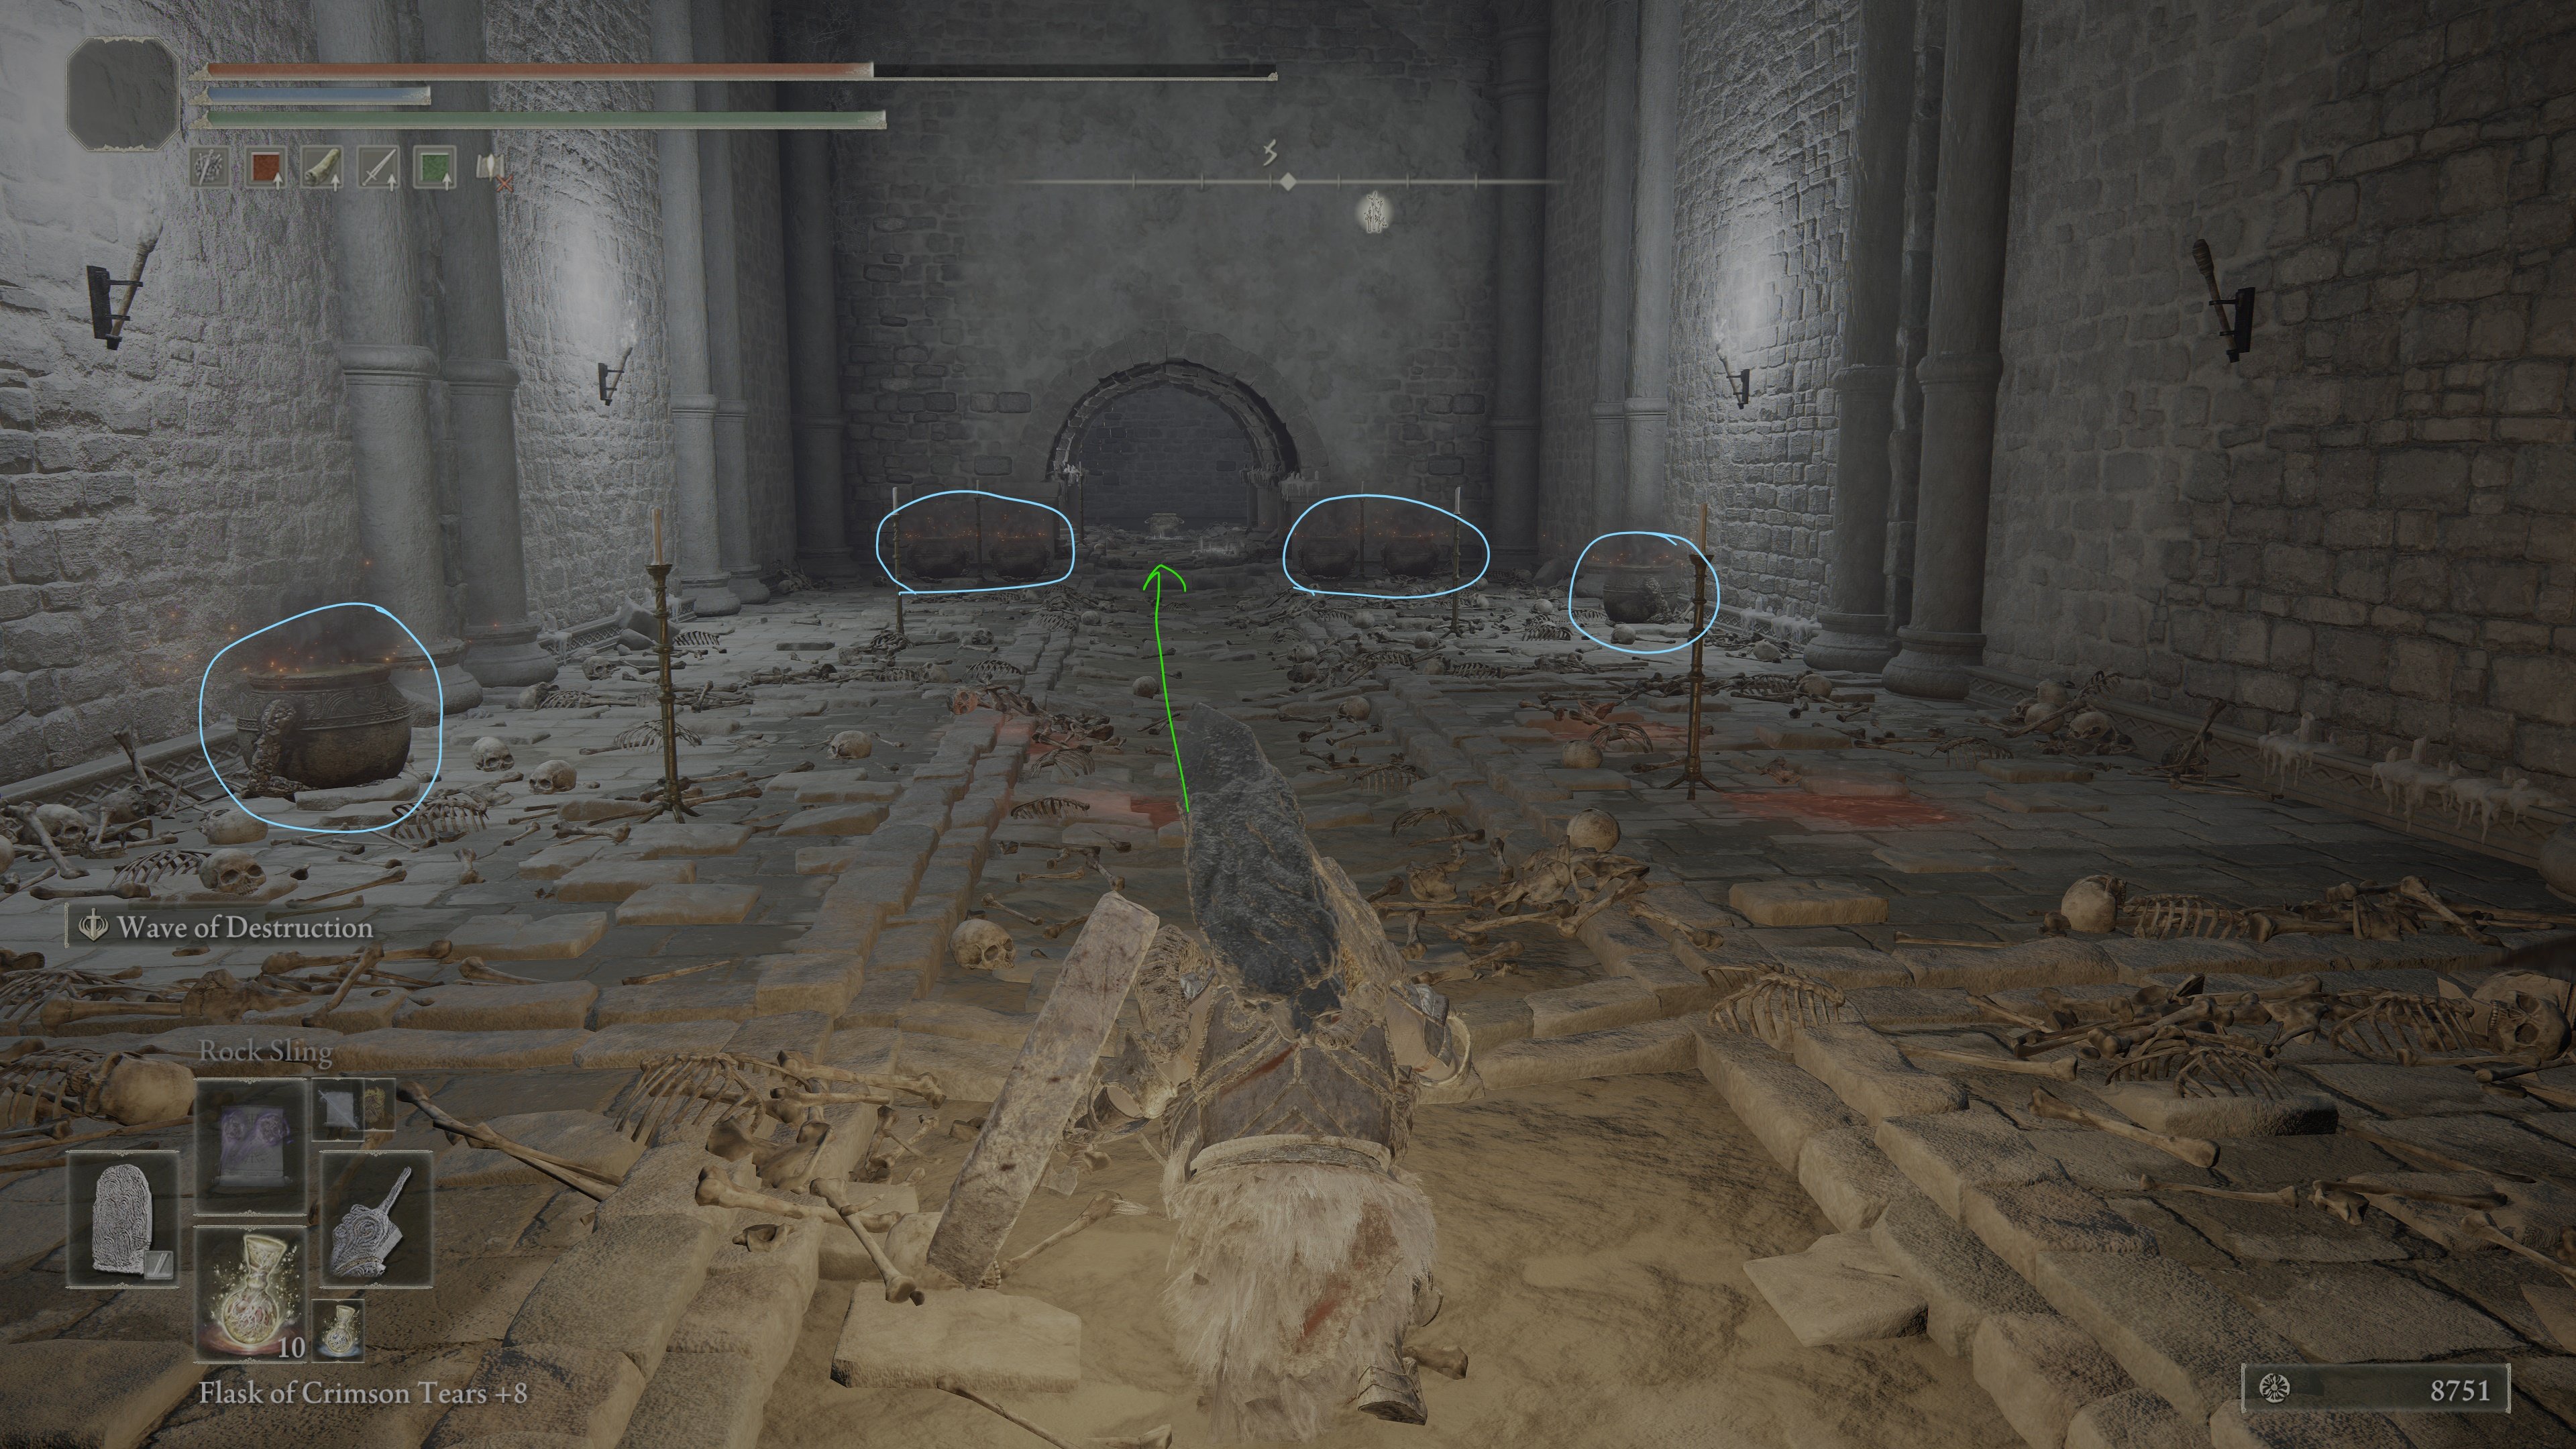
Make your way through to the living jar, defeat it, and then on your way out, turn right and proceed up the stairs.
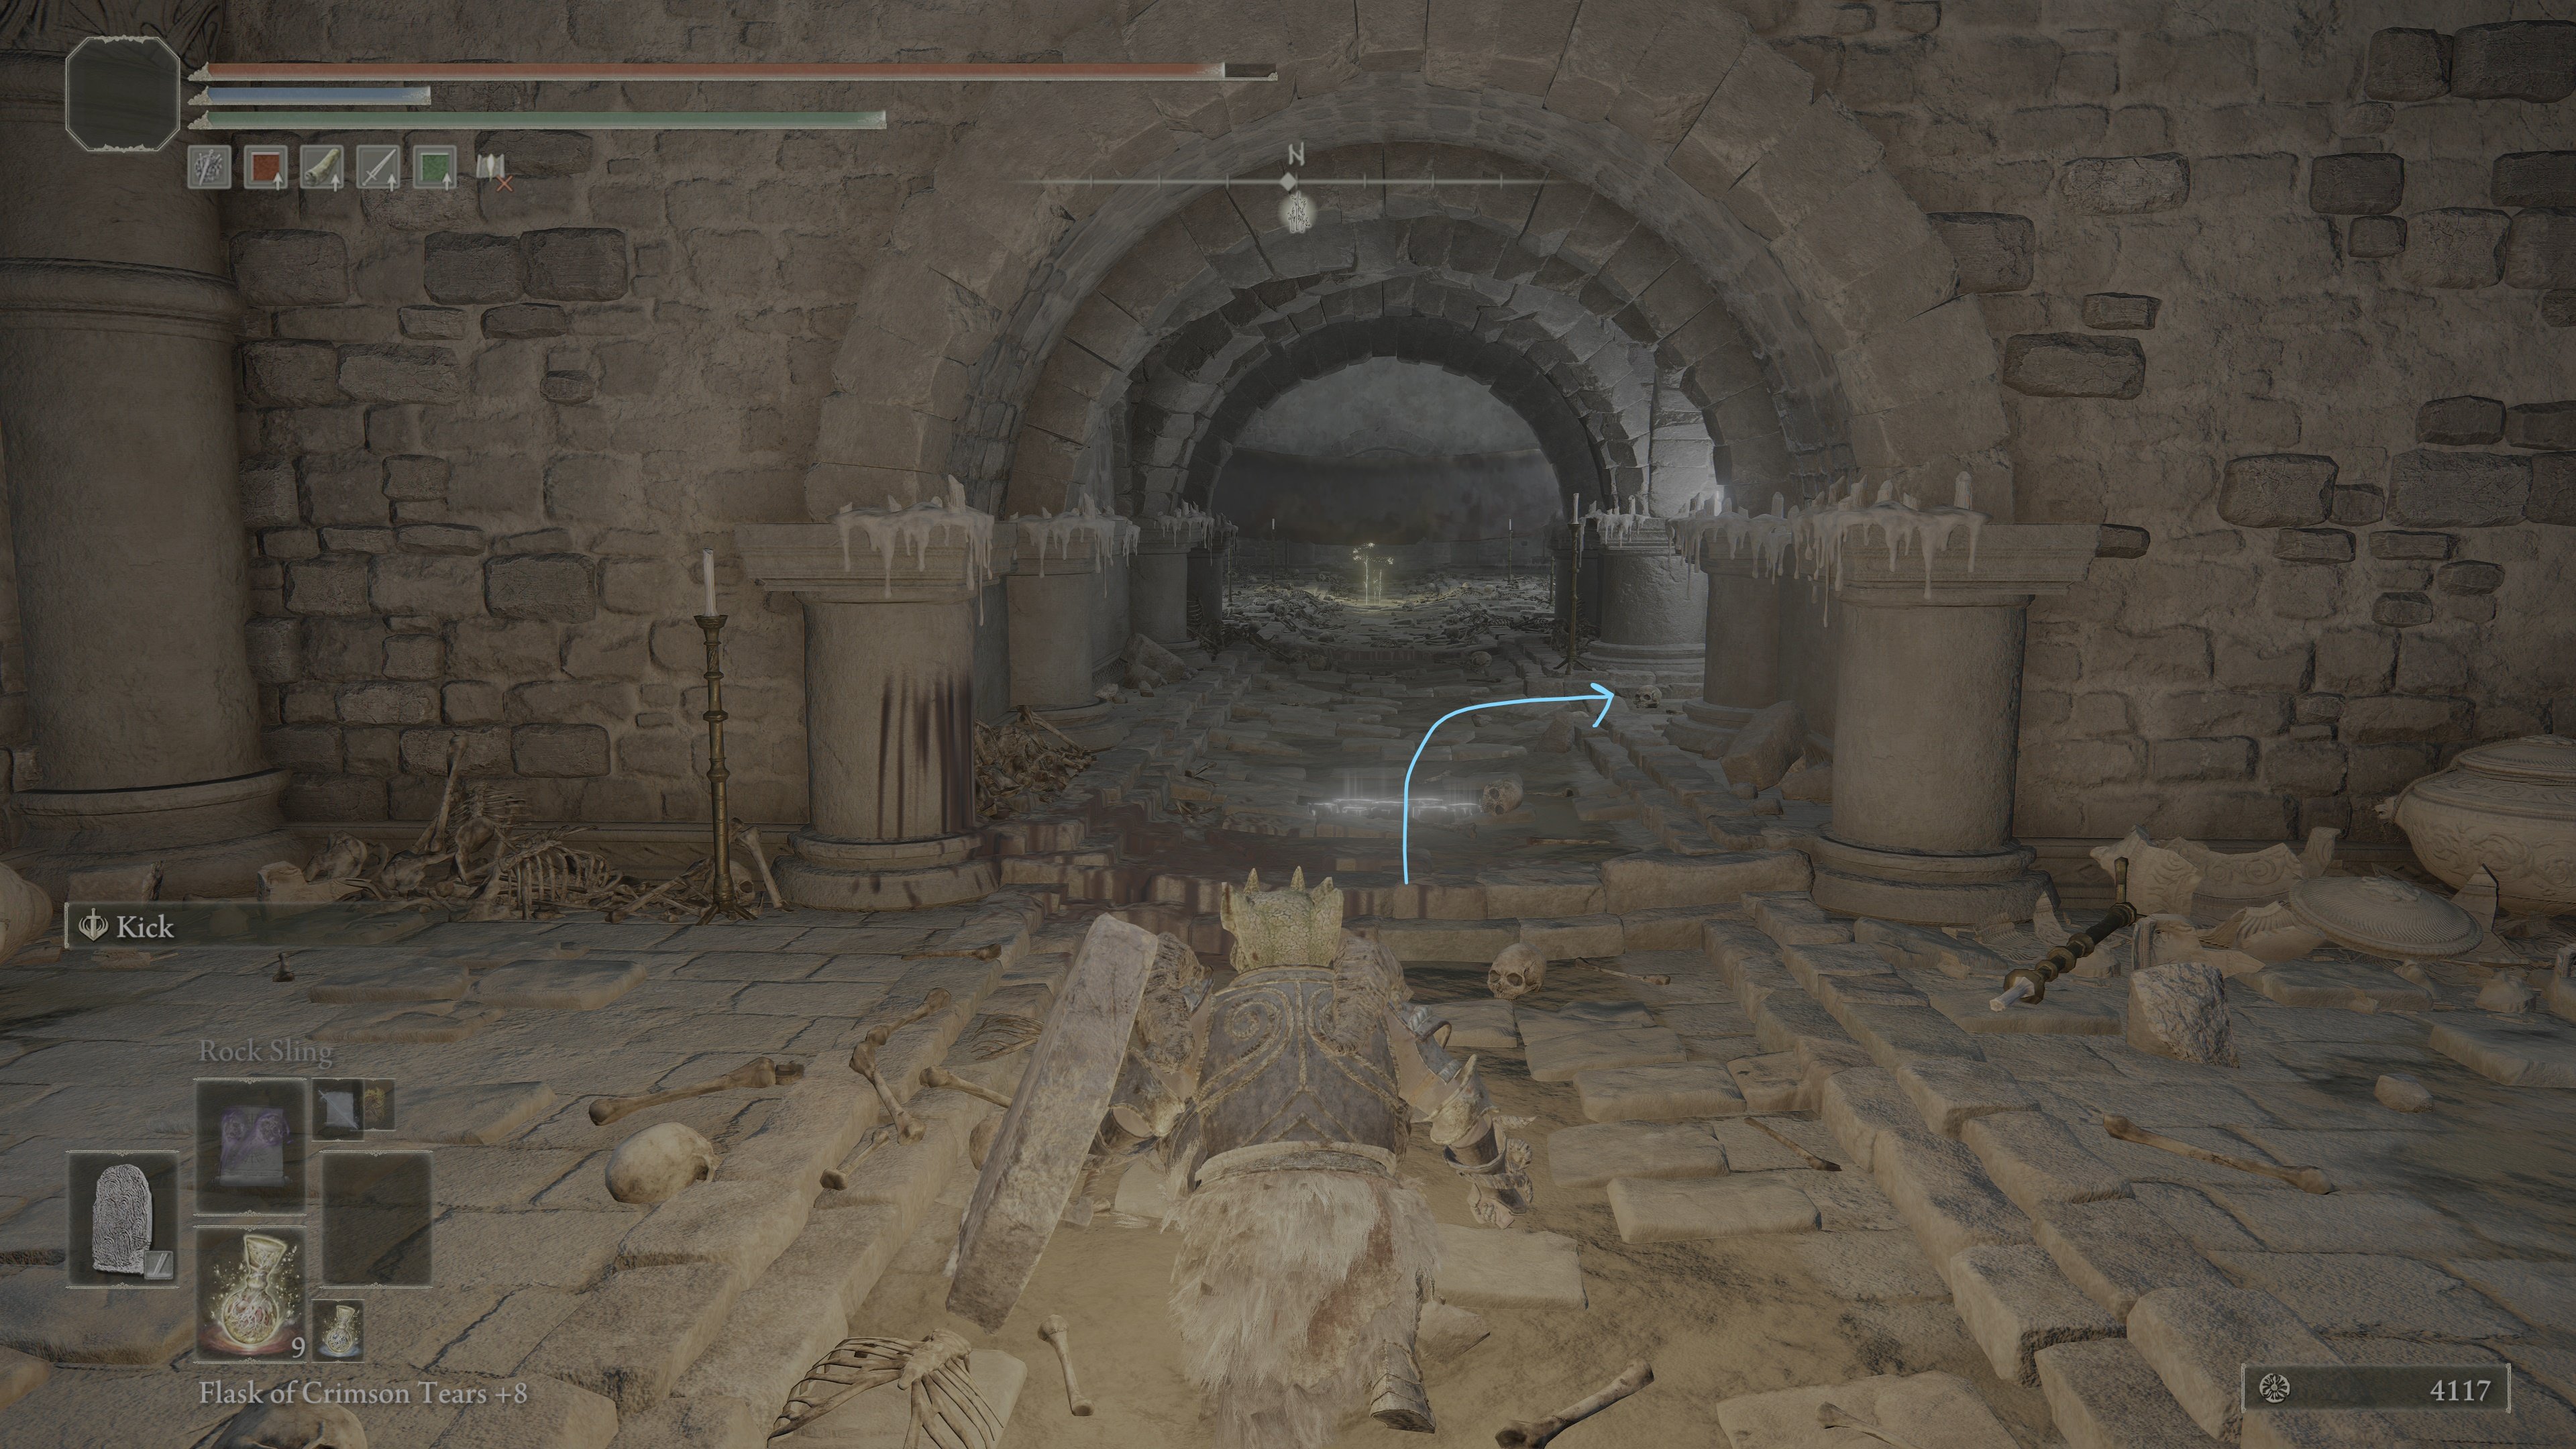
You'll find many more enemies in the next corridor -- 6 Land Squirts to be exact. Defeat them, then turn left and go up the stairs.
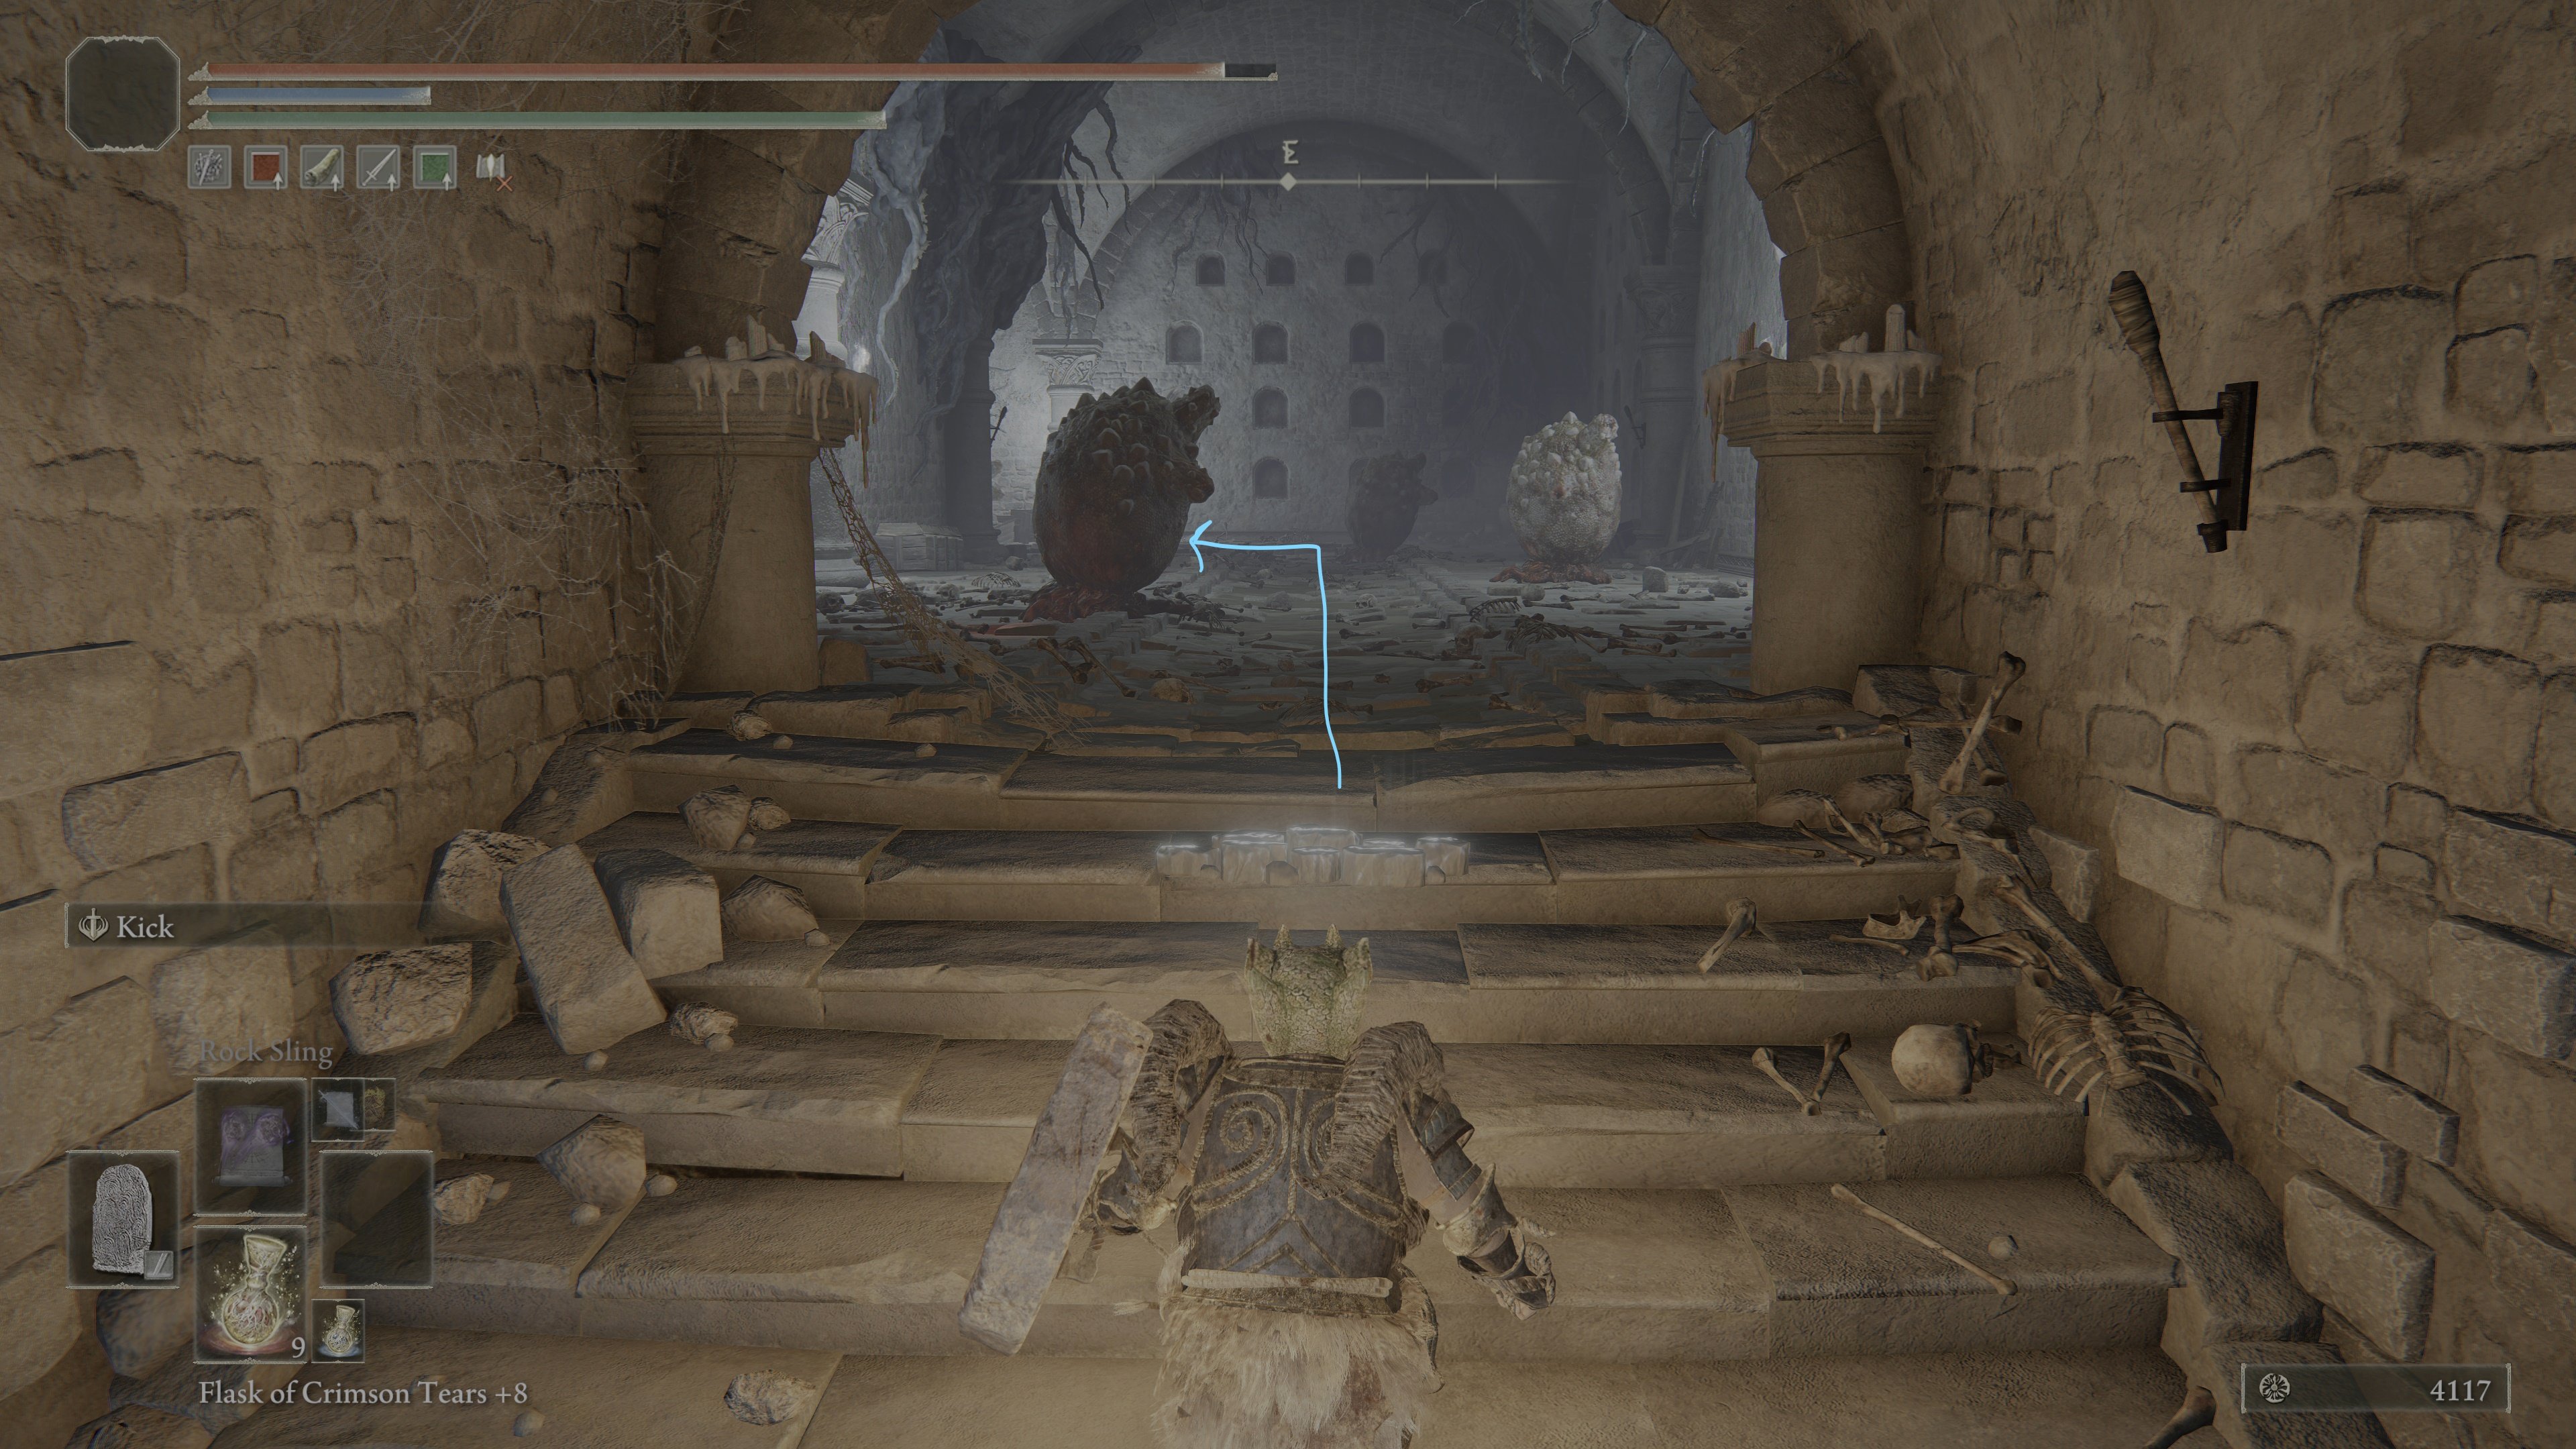
Avoid the pressure plate in front of you, then continue a few paces forward to fight another giant living jar in the last and pick up a Grave Glovewort (7) (you can also use the dart trap that is activated by the pressure plate to take out the living jar). Between the squirts room and the room with the jar (the room with the pressure plate), look for an alcove on the side (it's on your left if you're approaching the room, or on your right if you're exiting it) and drop down there -- but before you fall, grab the Stimulating Boluses from the corpse to the left.
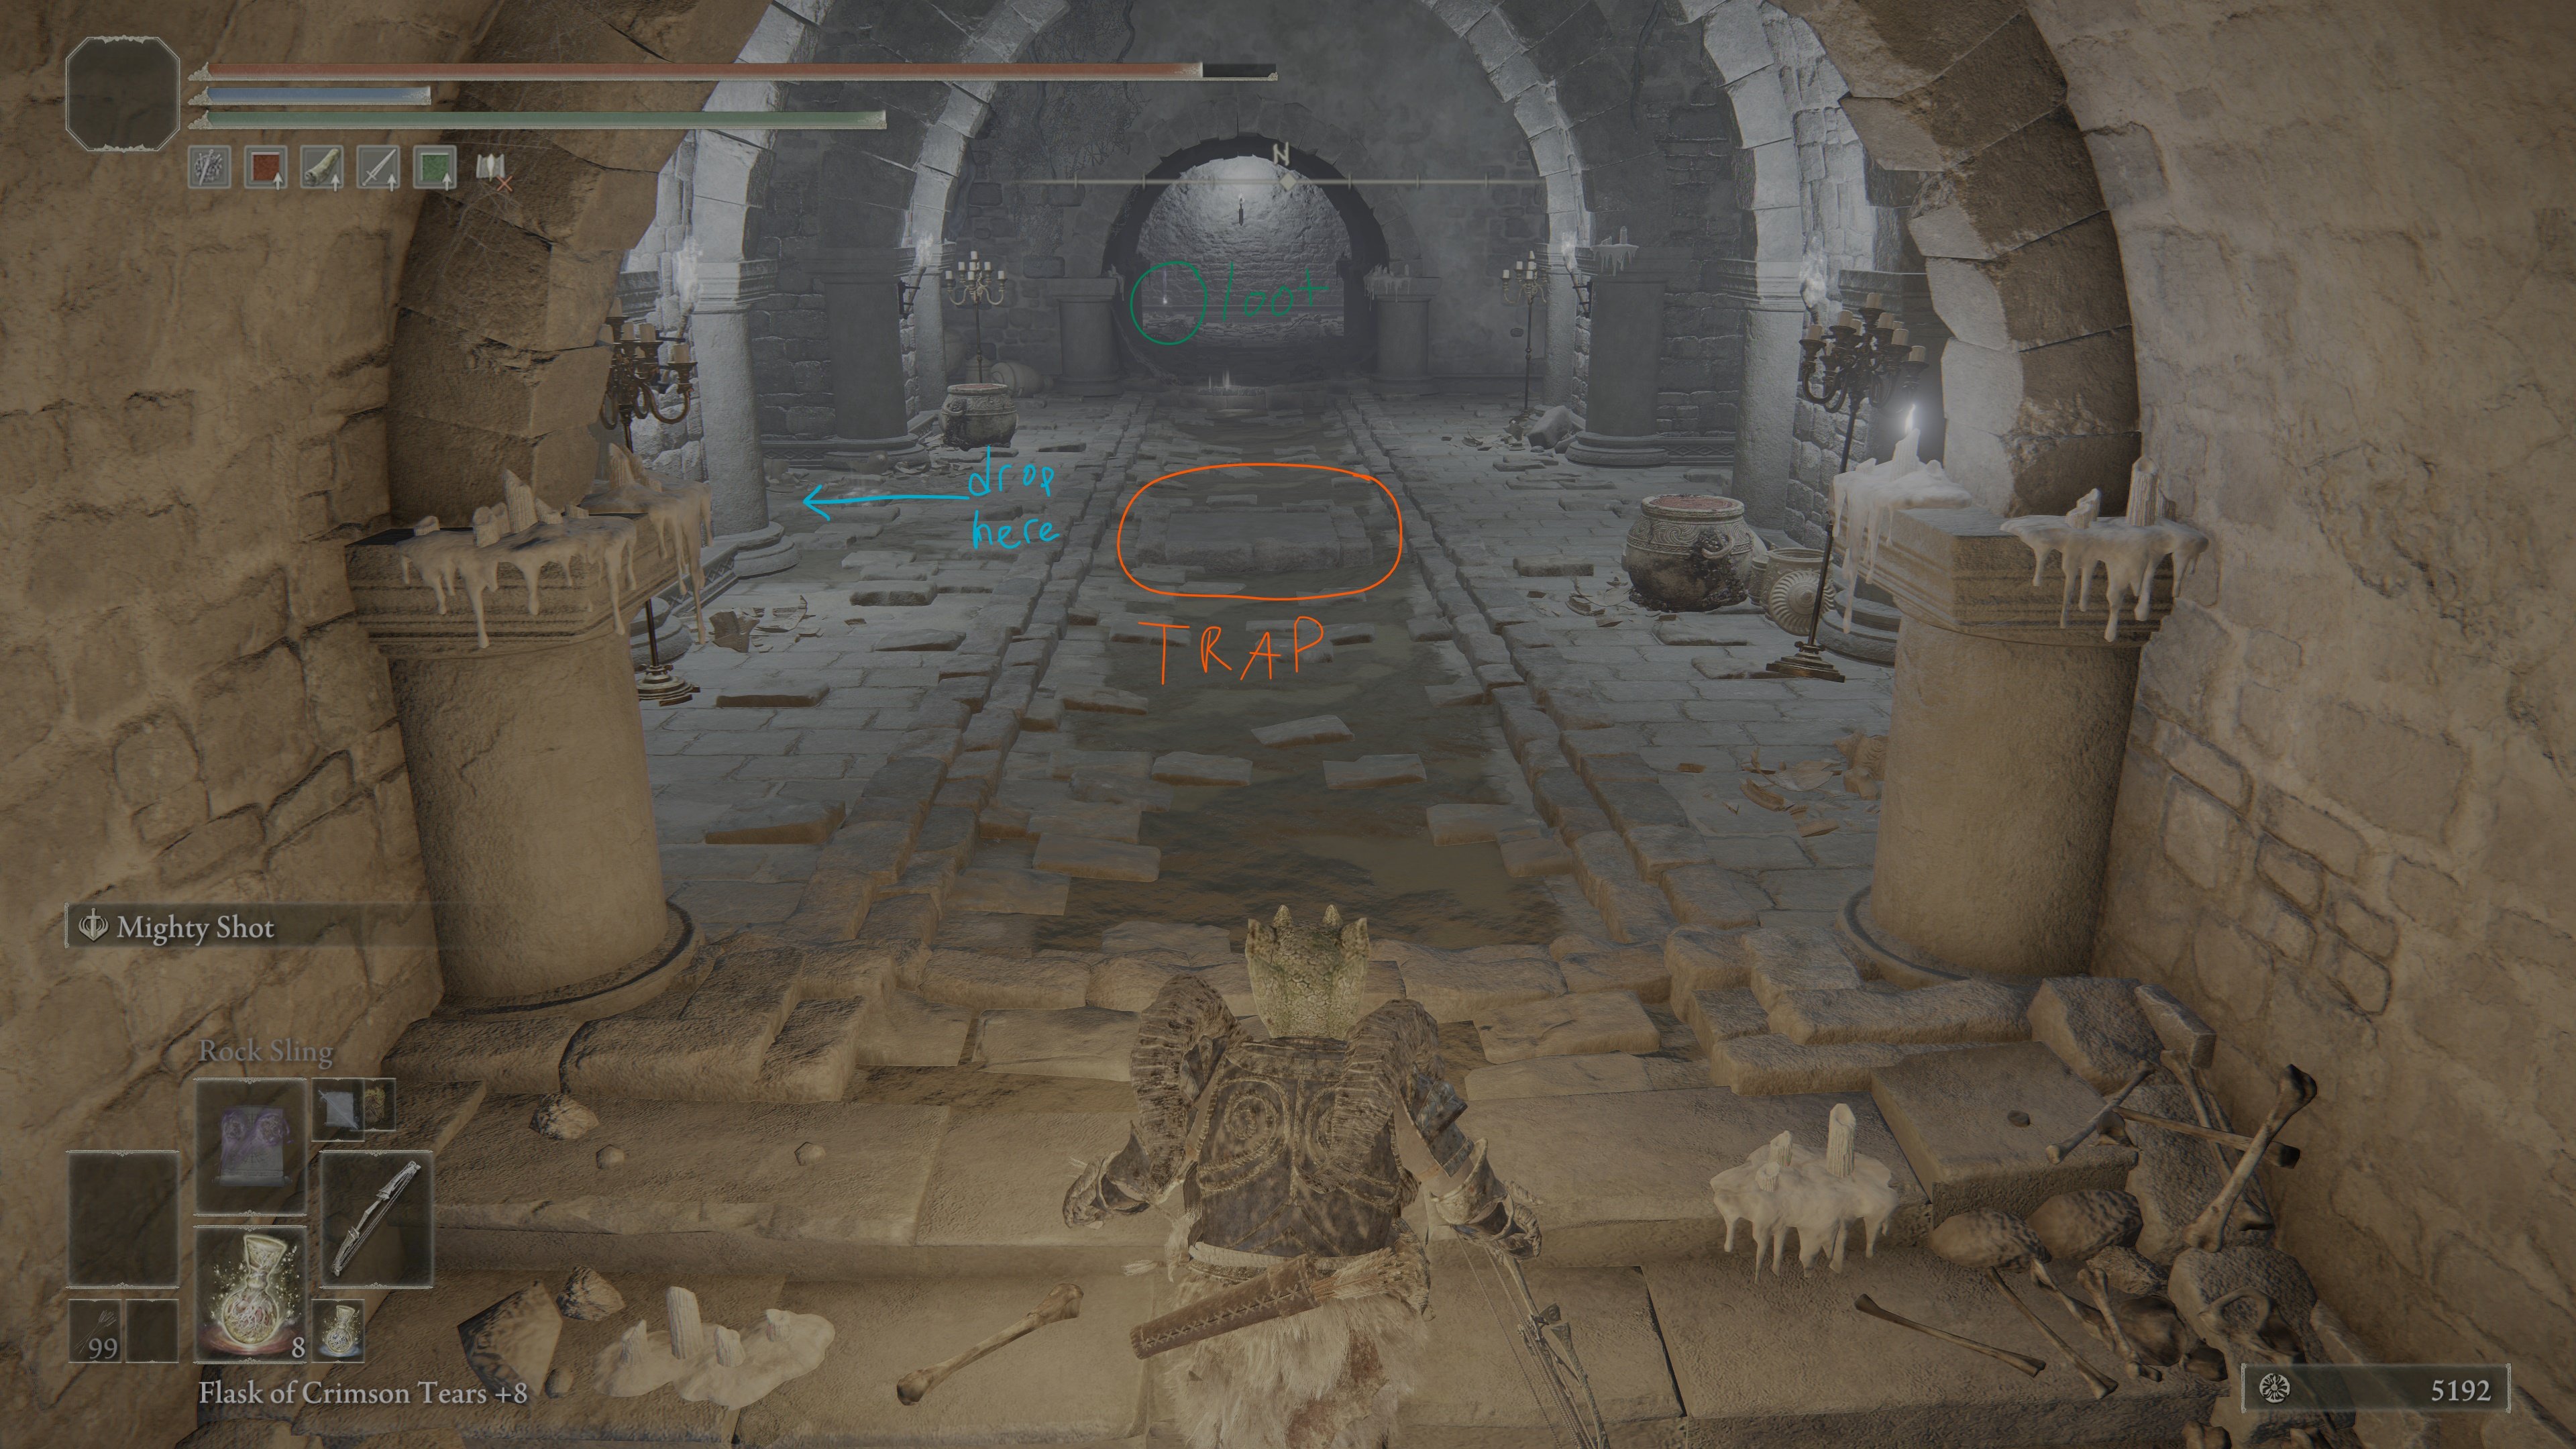
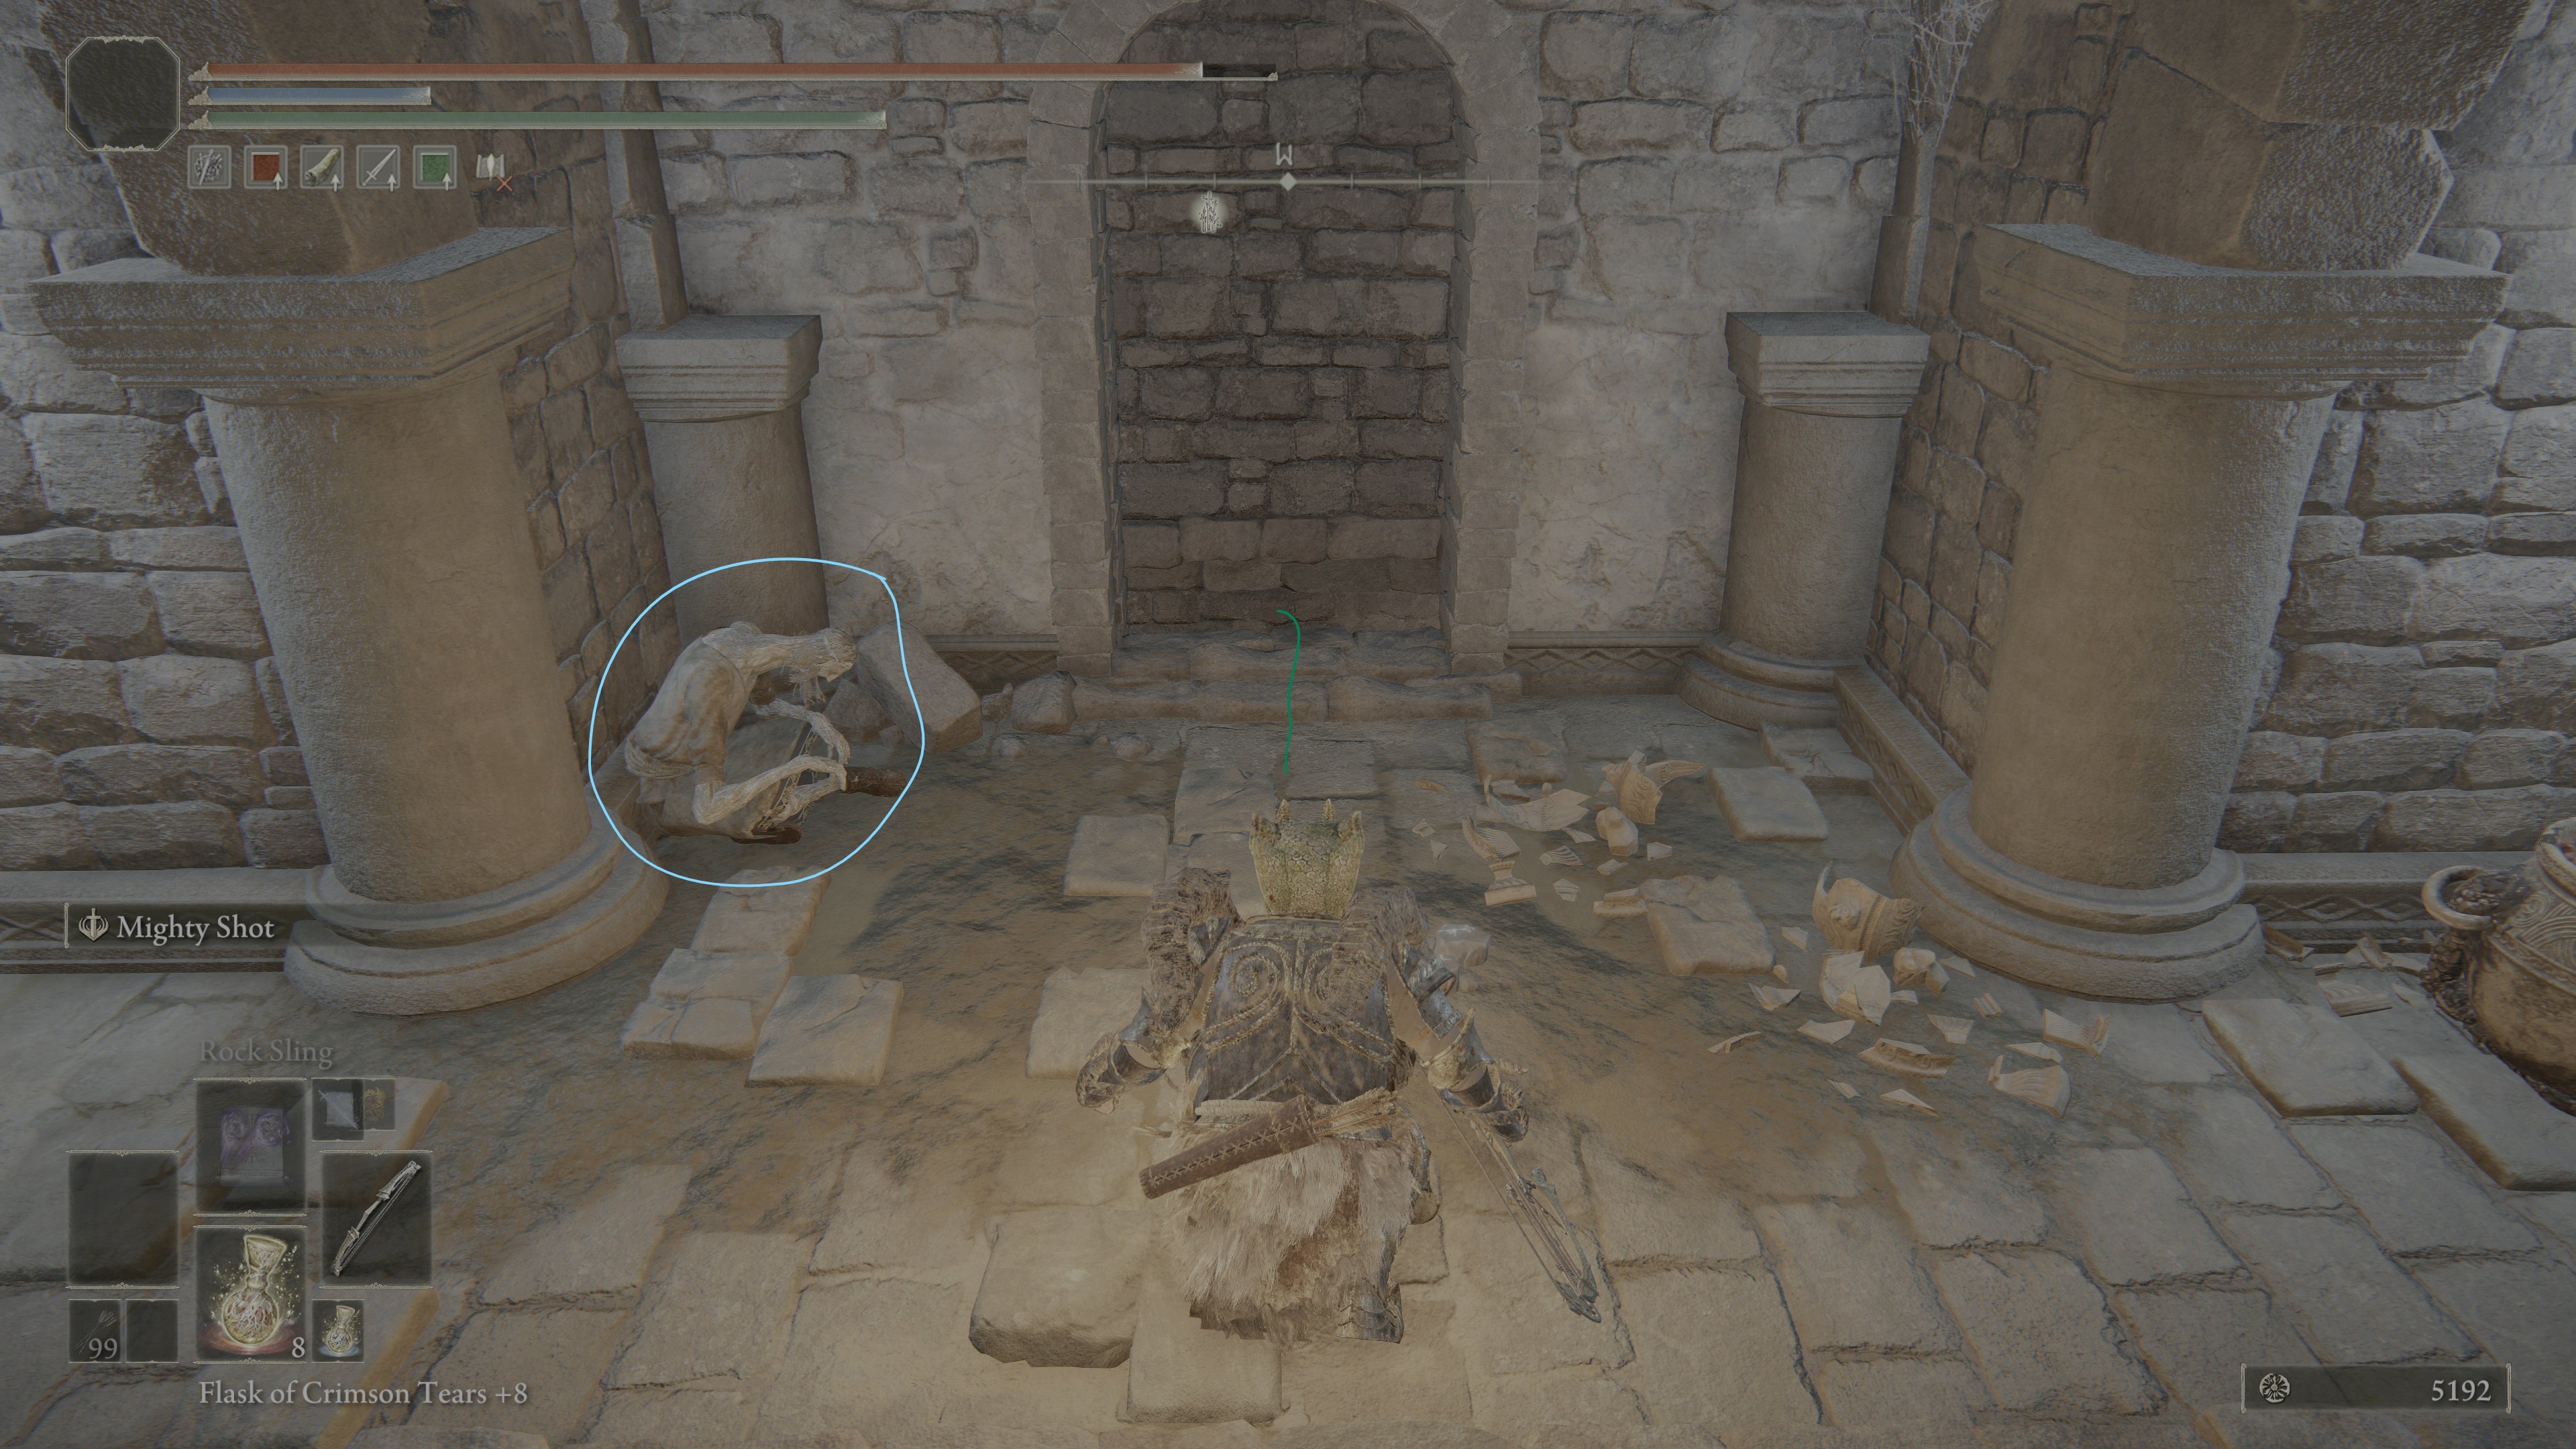
When you land, you'll be on a rectangular platform -- to your left, you should immediately see a corpse holding a Nascent Butterfly.
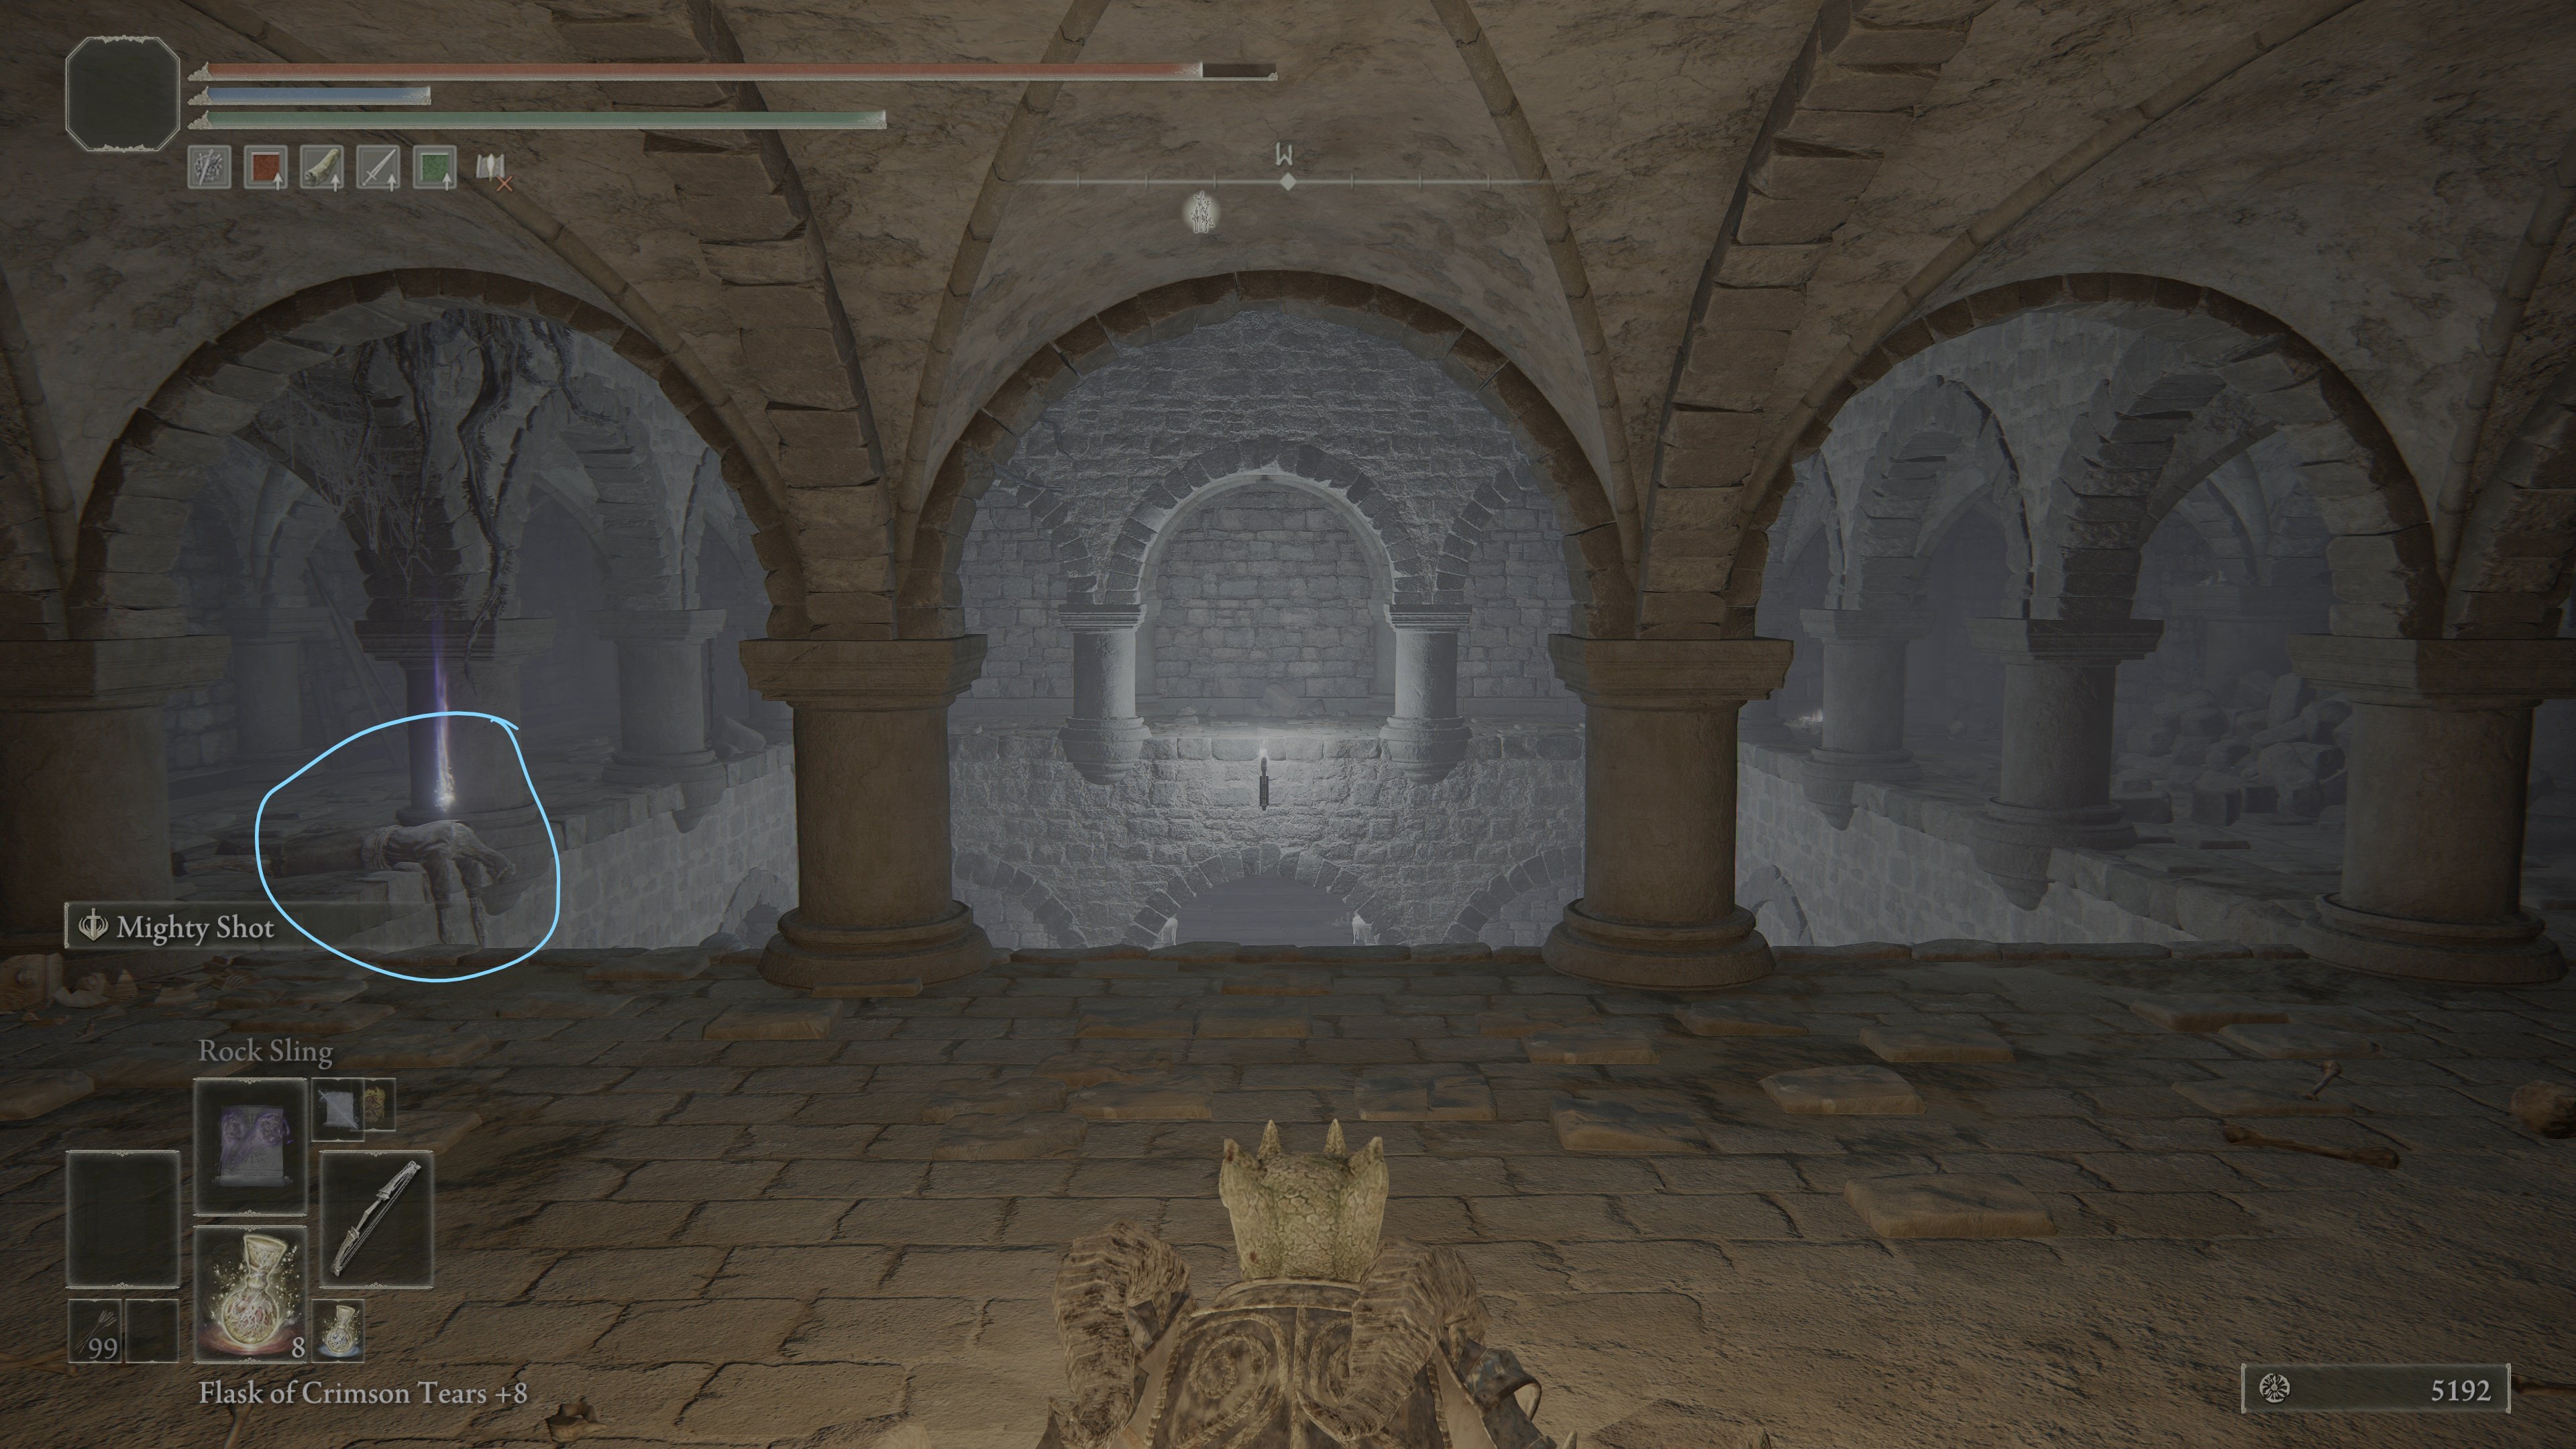
Below you is different square room with the same statue that you saw before -- this room shall be referred as (Statue Room 2). This room has multiple Exploding Living Jars, so if you have ranged weapons, it's recommended to take them out from the safety of the platform.
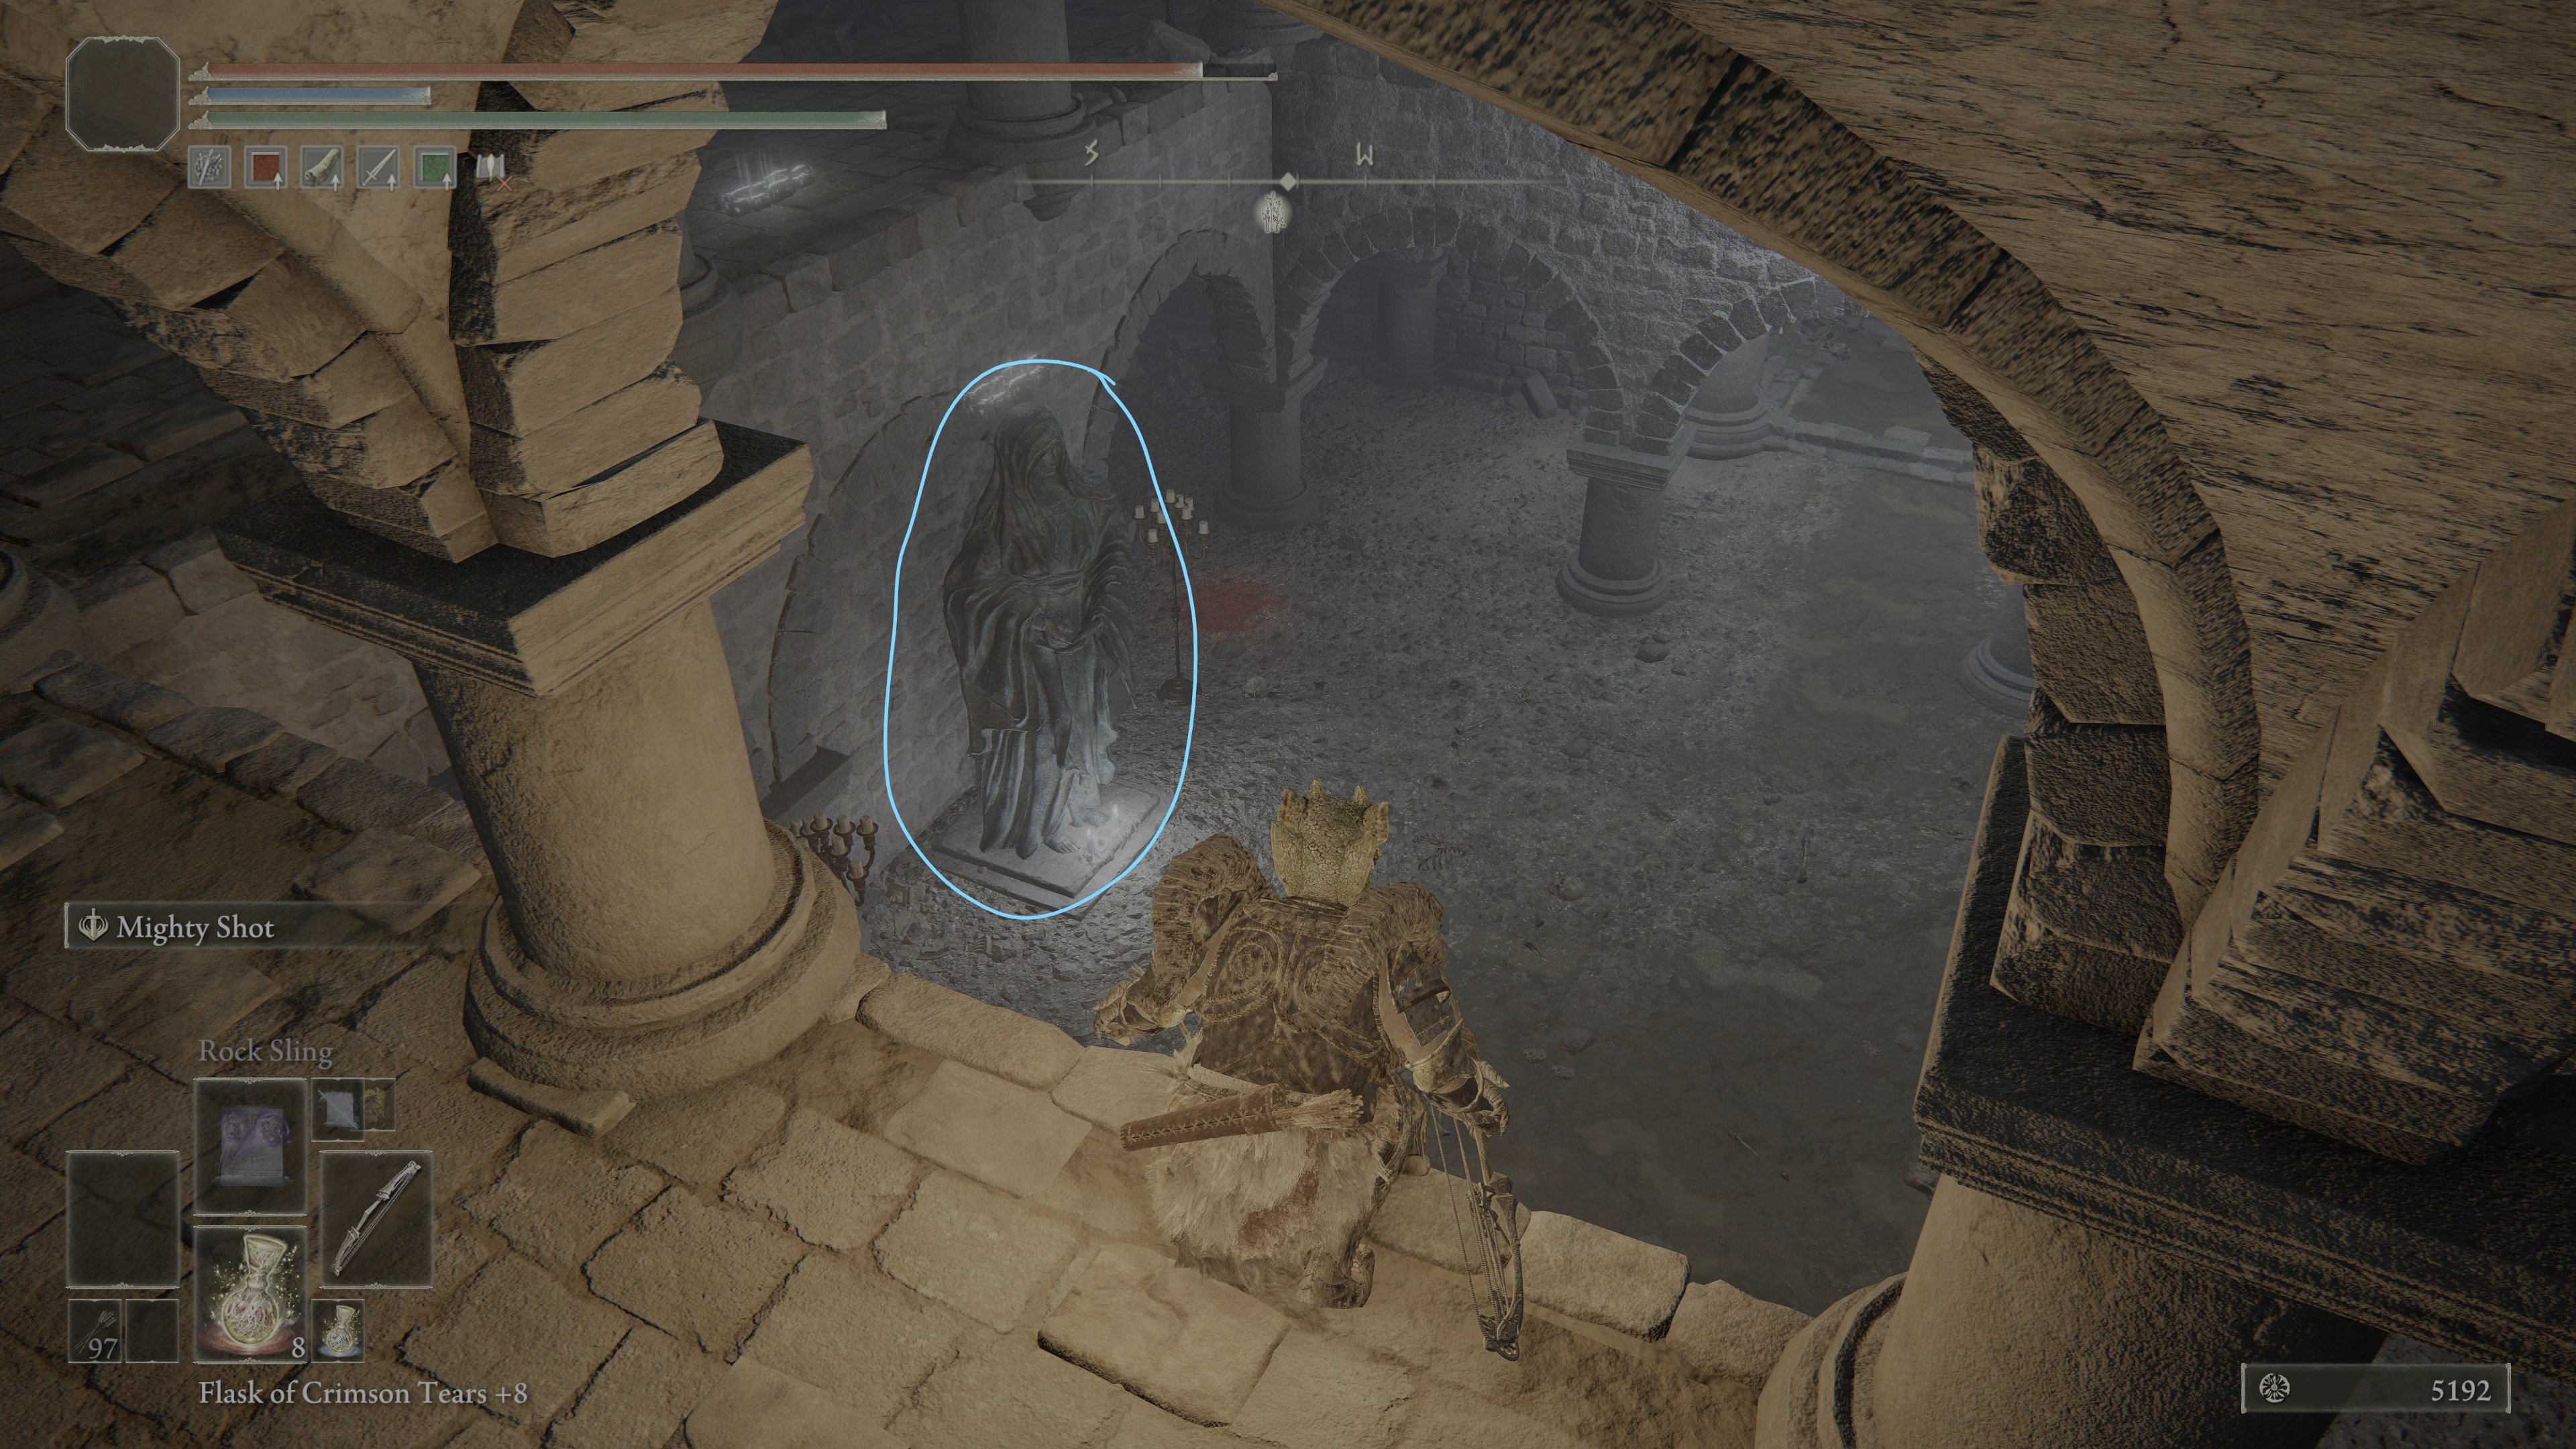
Optional Route 2: Take the path to the right when facing the statue, then pass the guillotines to find another giant living jar, guarding a Grave Glovewort (8). Make your way up again past more land squirts, including a giant variety, watch out for the pressure plate, take out another living jar and pick up Grave Glovewort (7). Again, between the squirts and the jar, there is an alcove to drop down, this time dropping down multiple ledges. You have gone in a small circle and are back to Statue Room 2.
From Statue Room 2, take the path which the statue is facing. You will find an elevator which looks identical to Elevator 2 (it has the same chain design), this is Elevator 3.
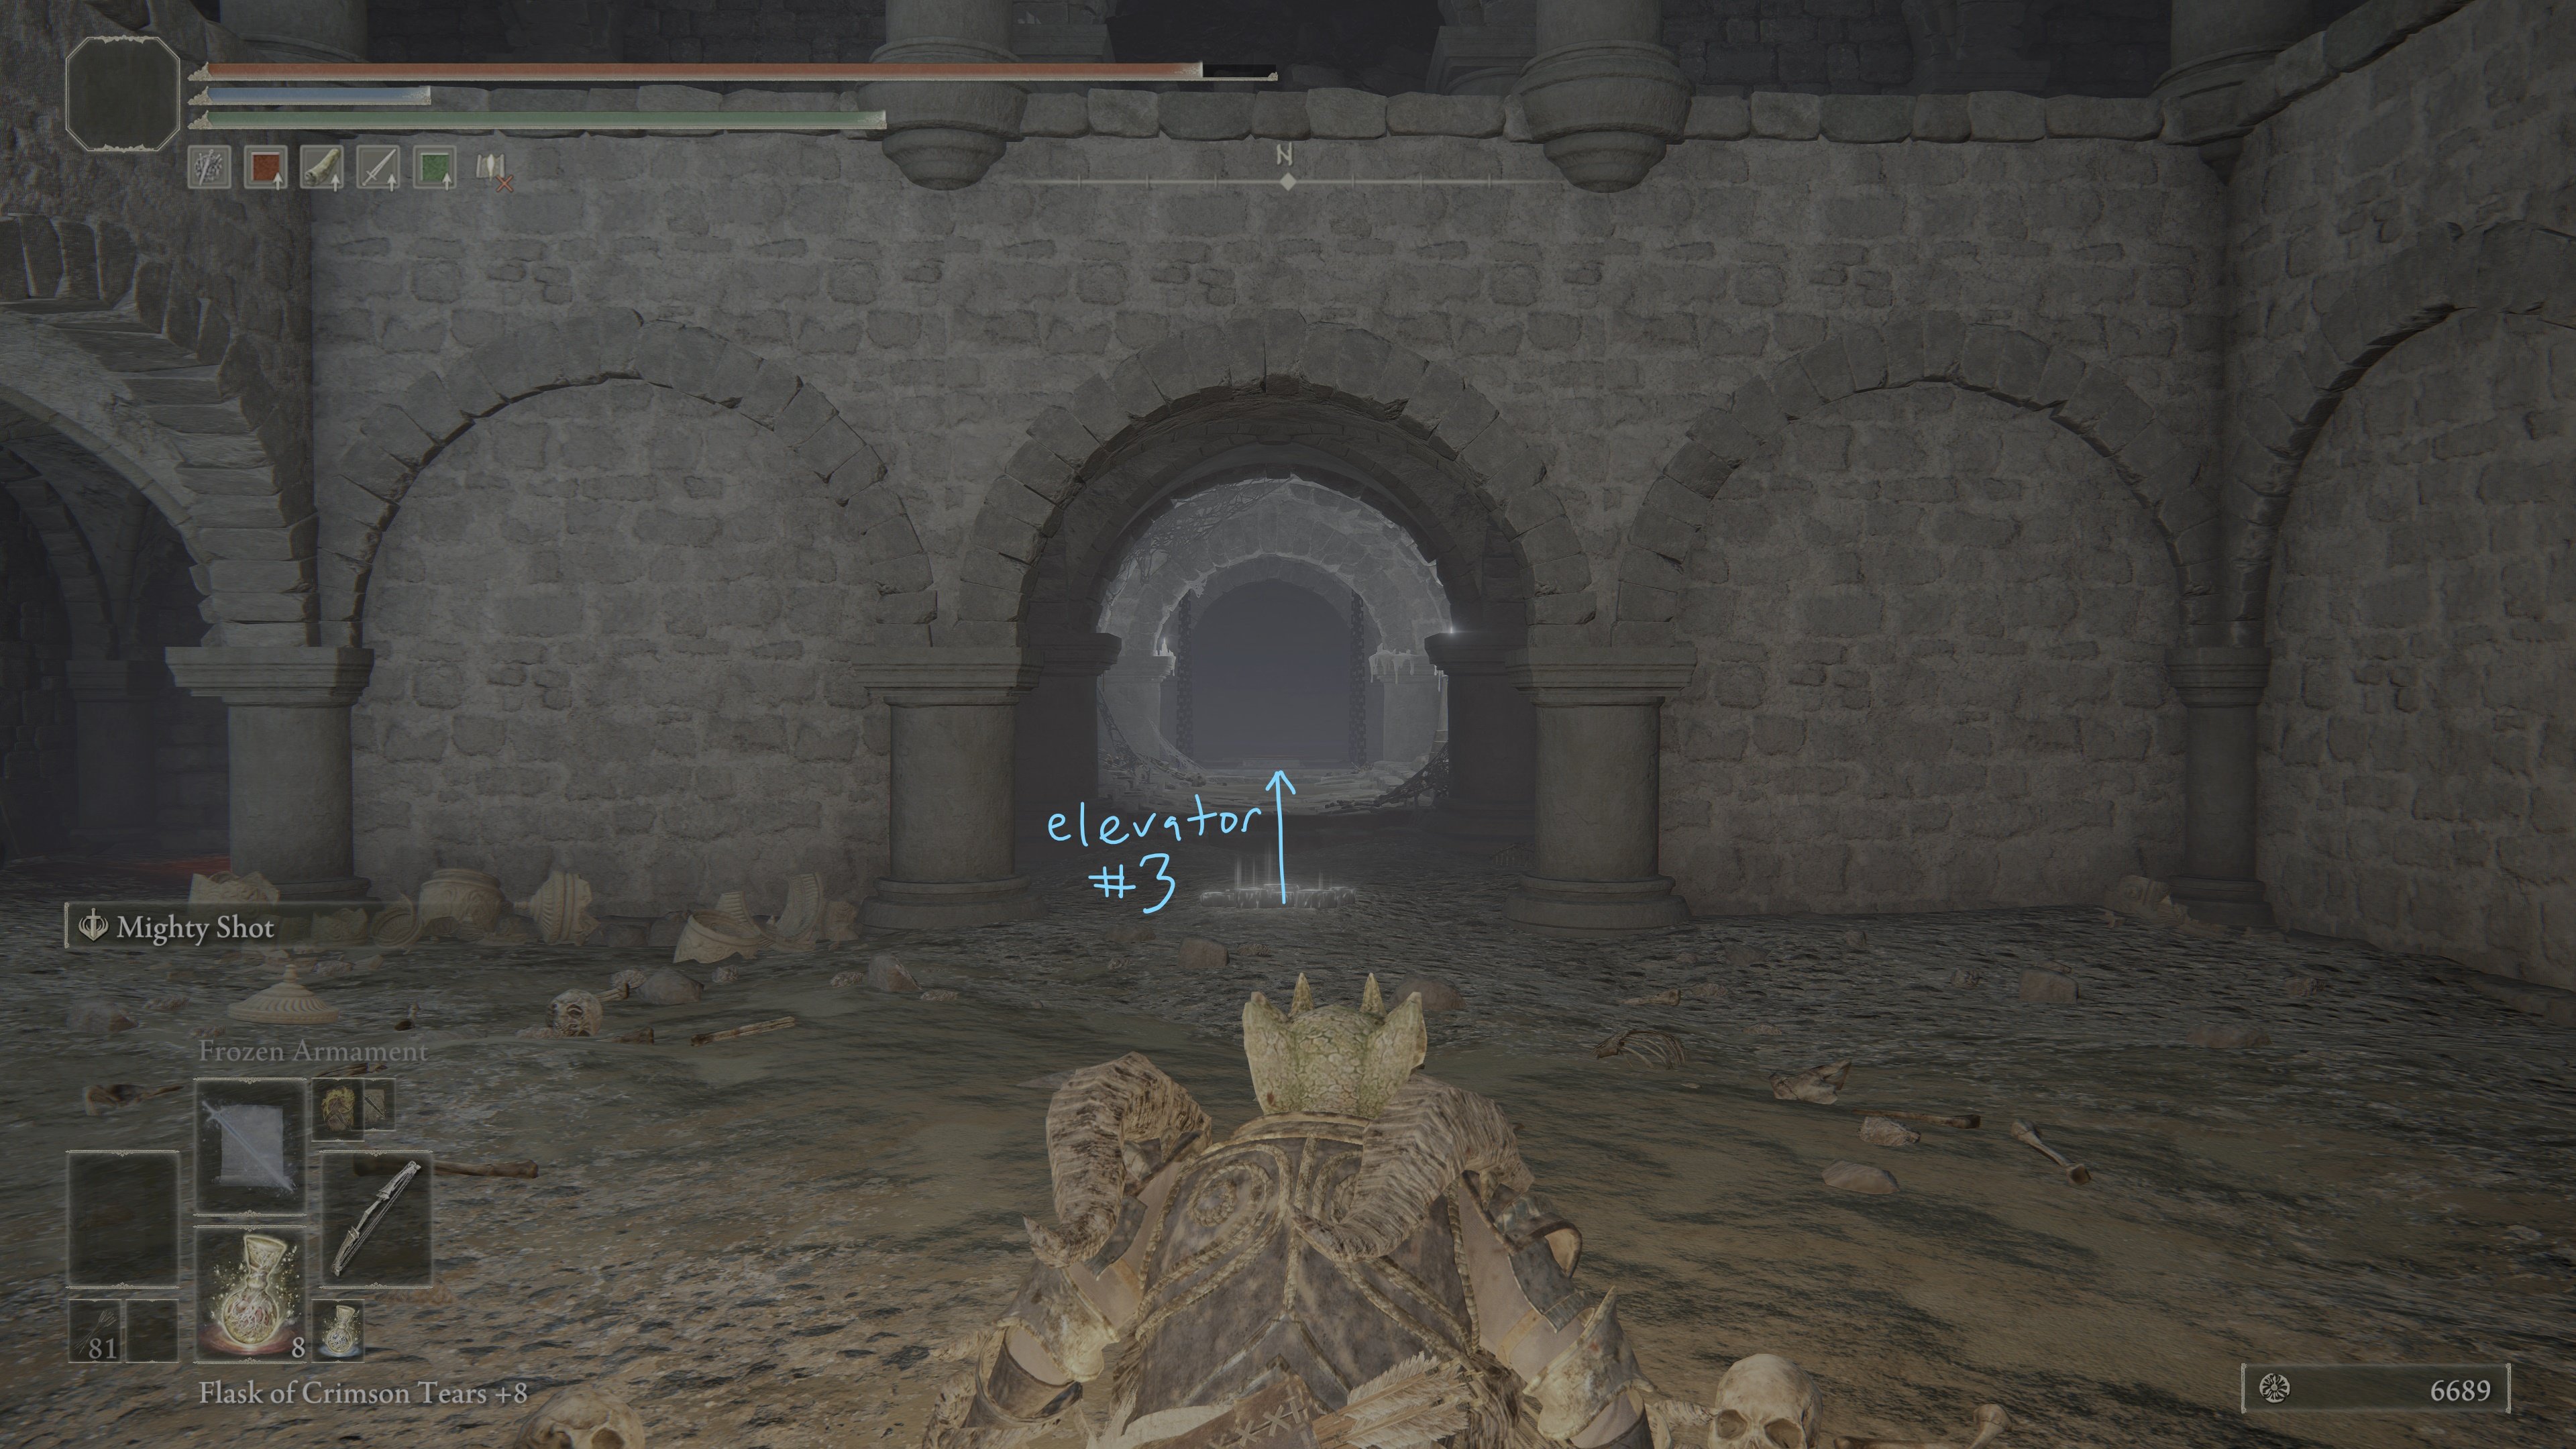
Optional Route 3: Go up Elevator 3. Take out the three imps in the following room before engaging the upcoming burial watchdog (frostbite variant). Pick up Root Resin x5 and Grave Glovewort (9), then make your way back to the elevator and take it down.
Send the Elevator 3 up and look down into the "hole" in the floor where the elevator's platform was. There is another Giant Living Jar here, as well as holes which are easy to fall into. However if you fall into them you will end up in Statue Room 1 and will have to traverse the entire loop again.
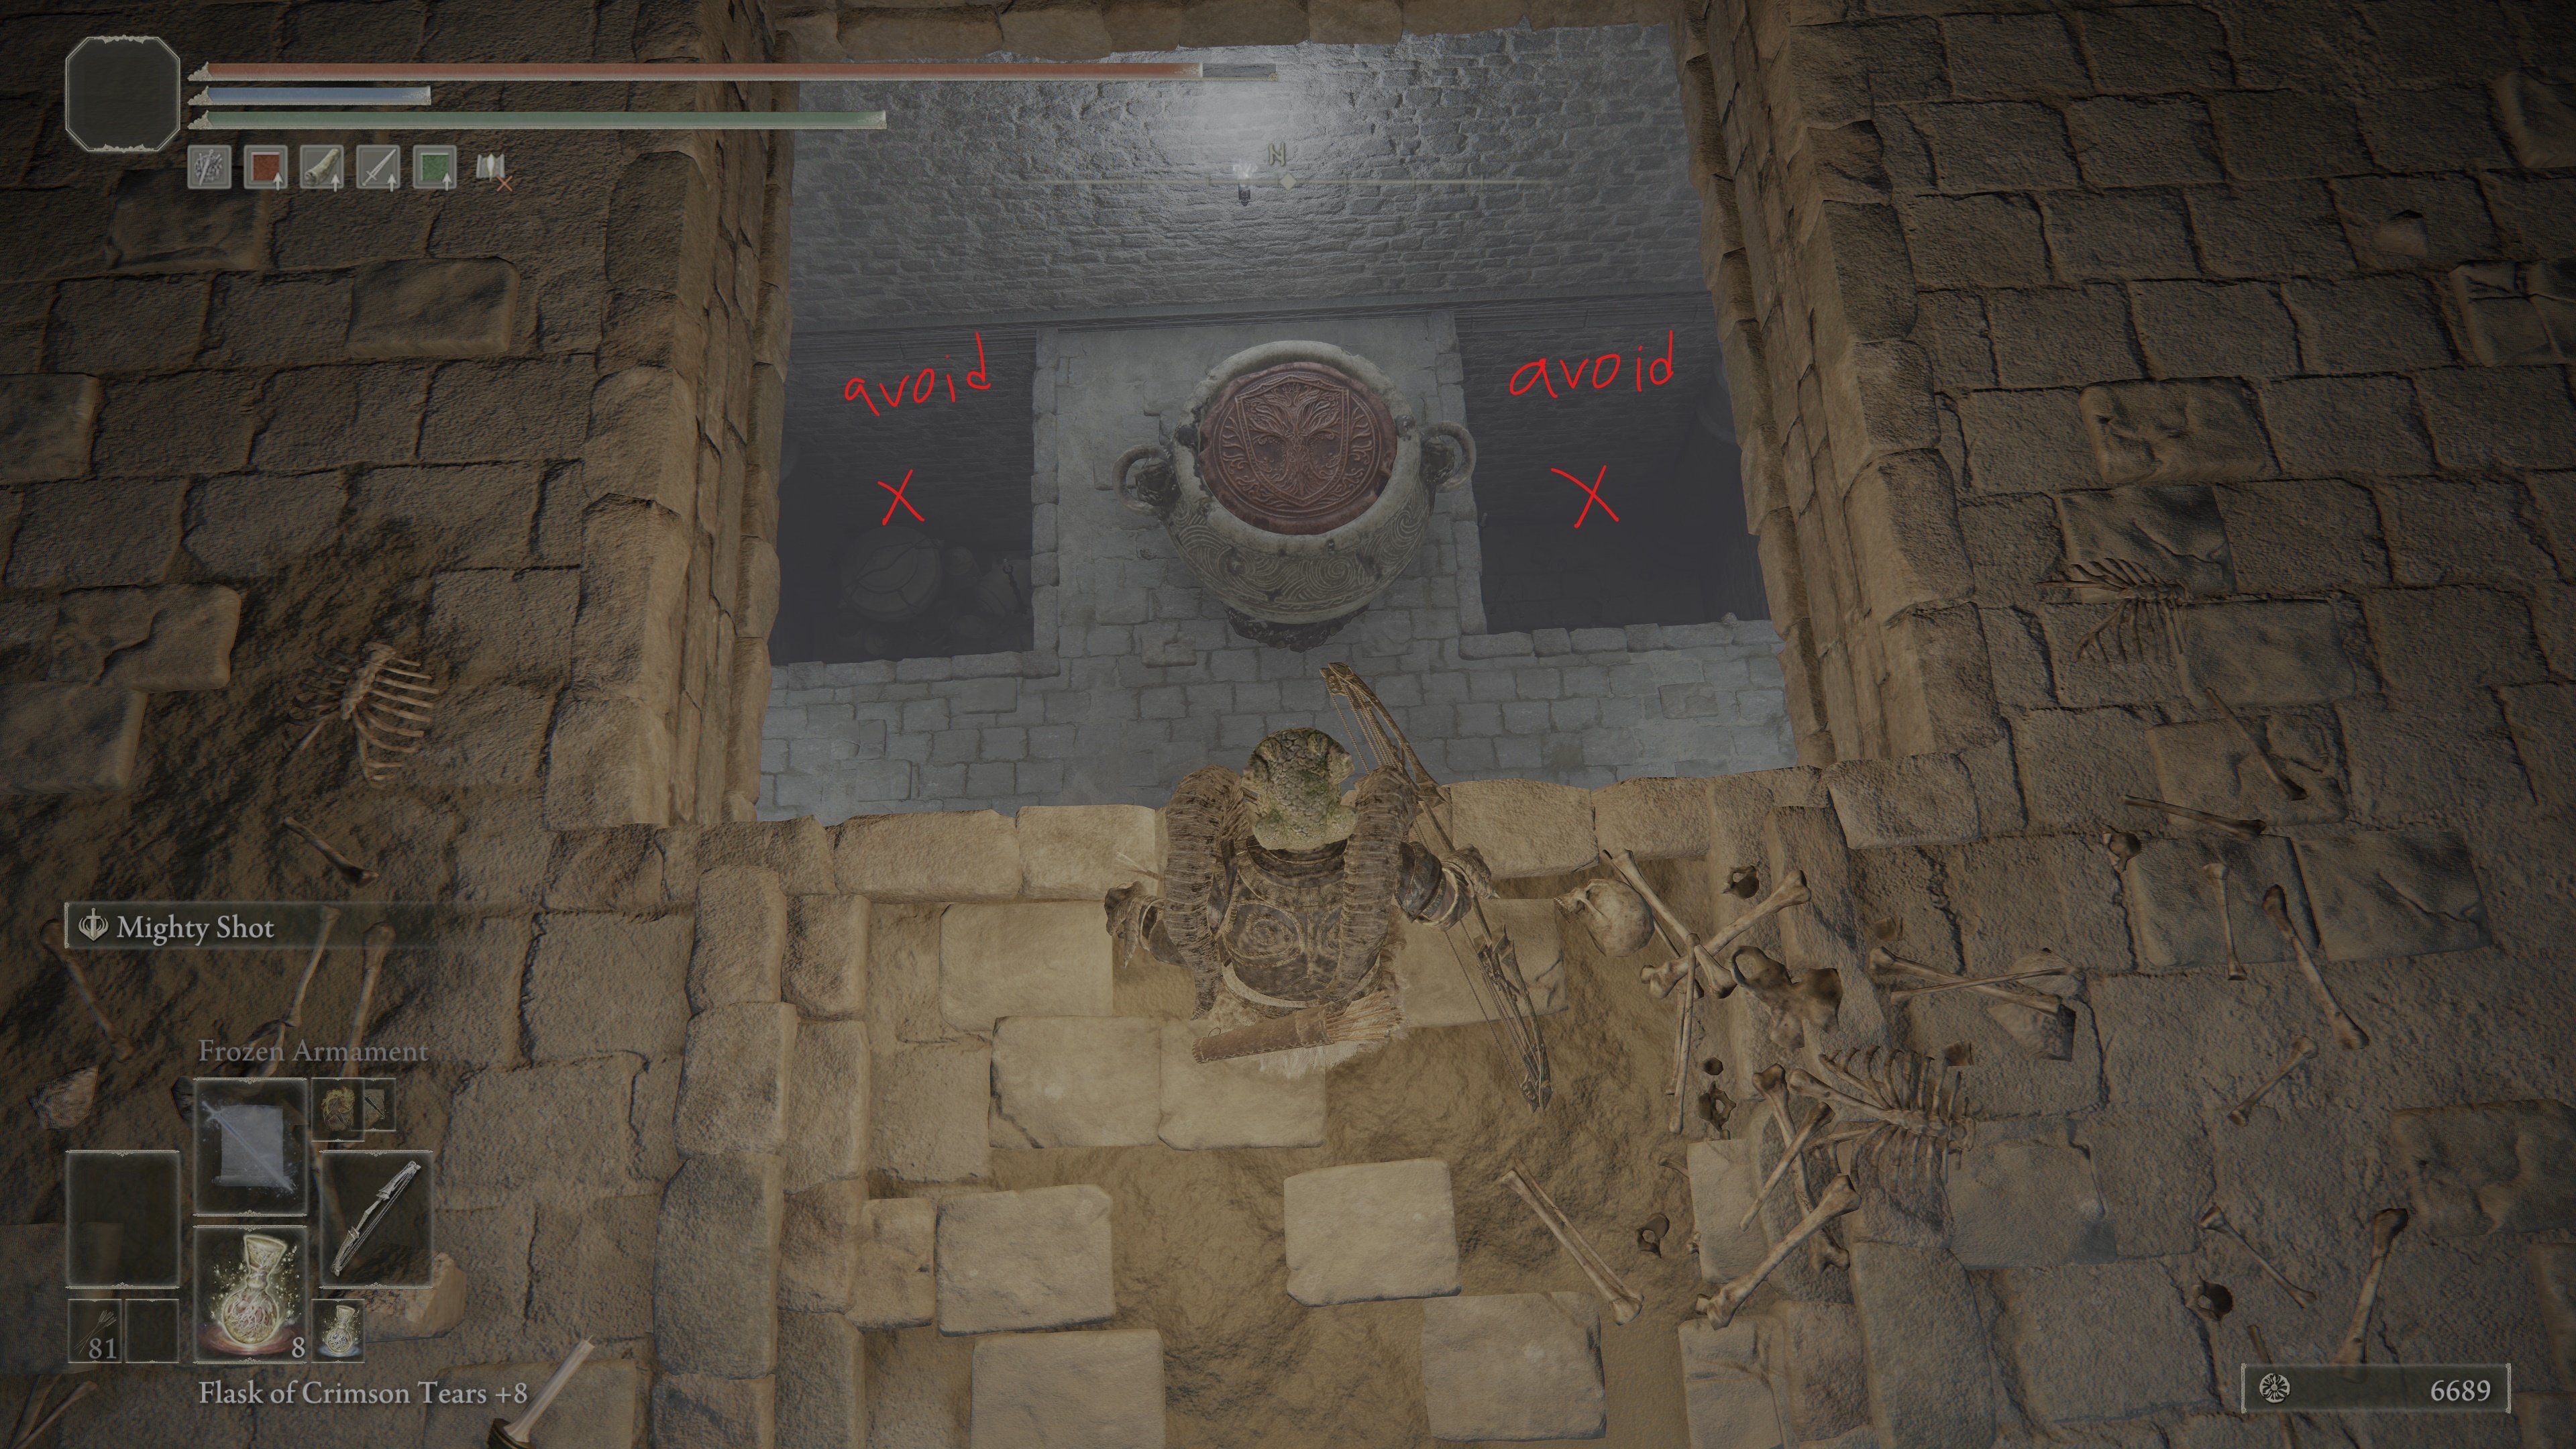
Fall down the hold and either fight the pot without falling or you can turn around and run for the opposite side of the room. There, next to a corpse holding Golden Rune (10), you will find the lever which opens the boss doors.
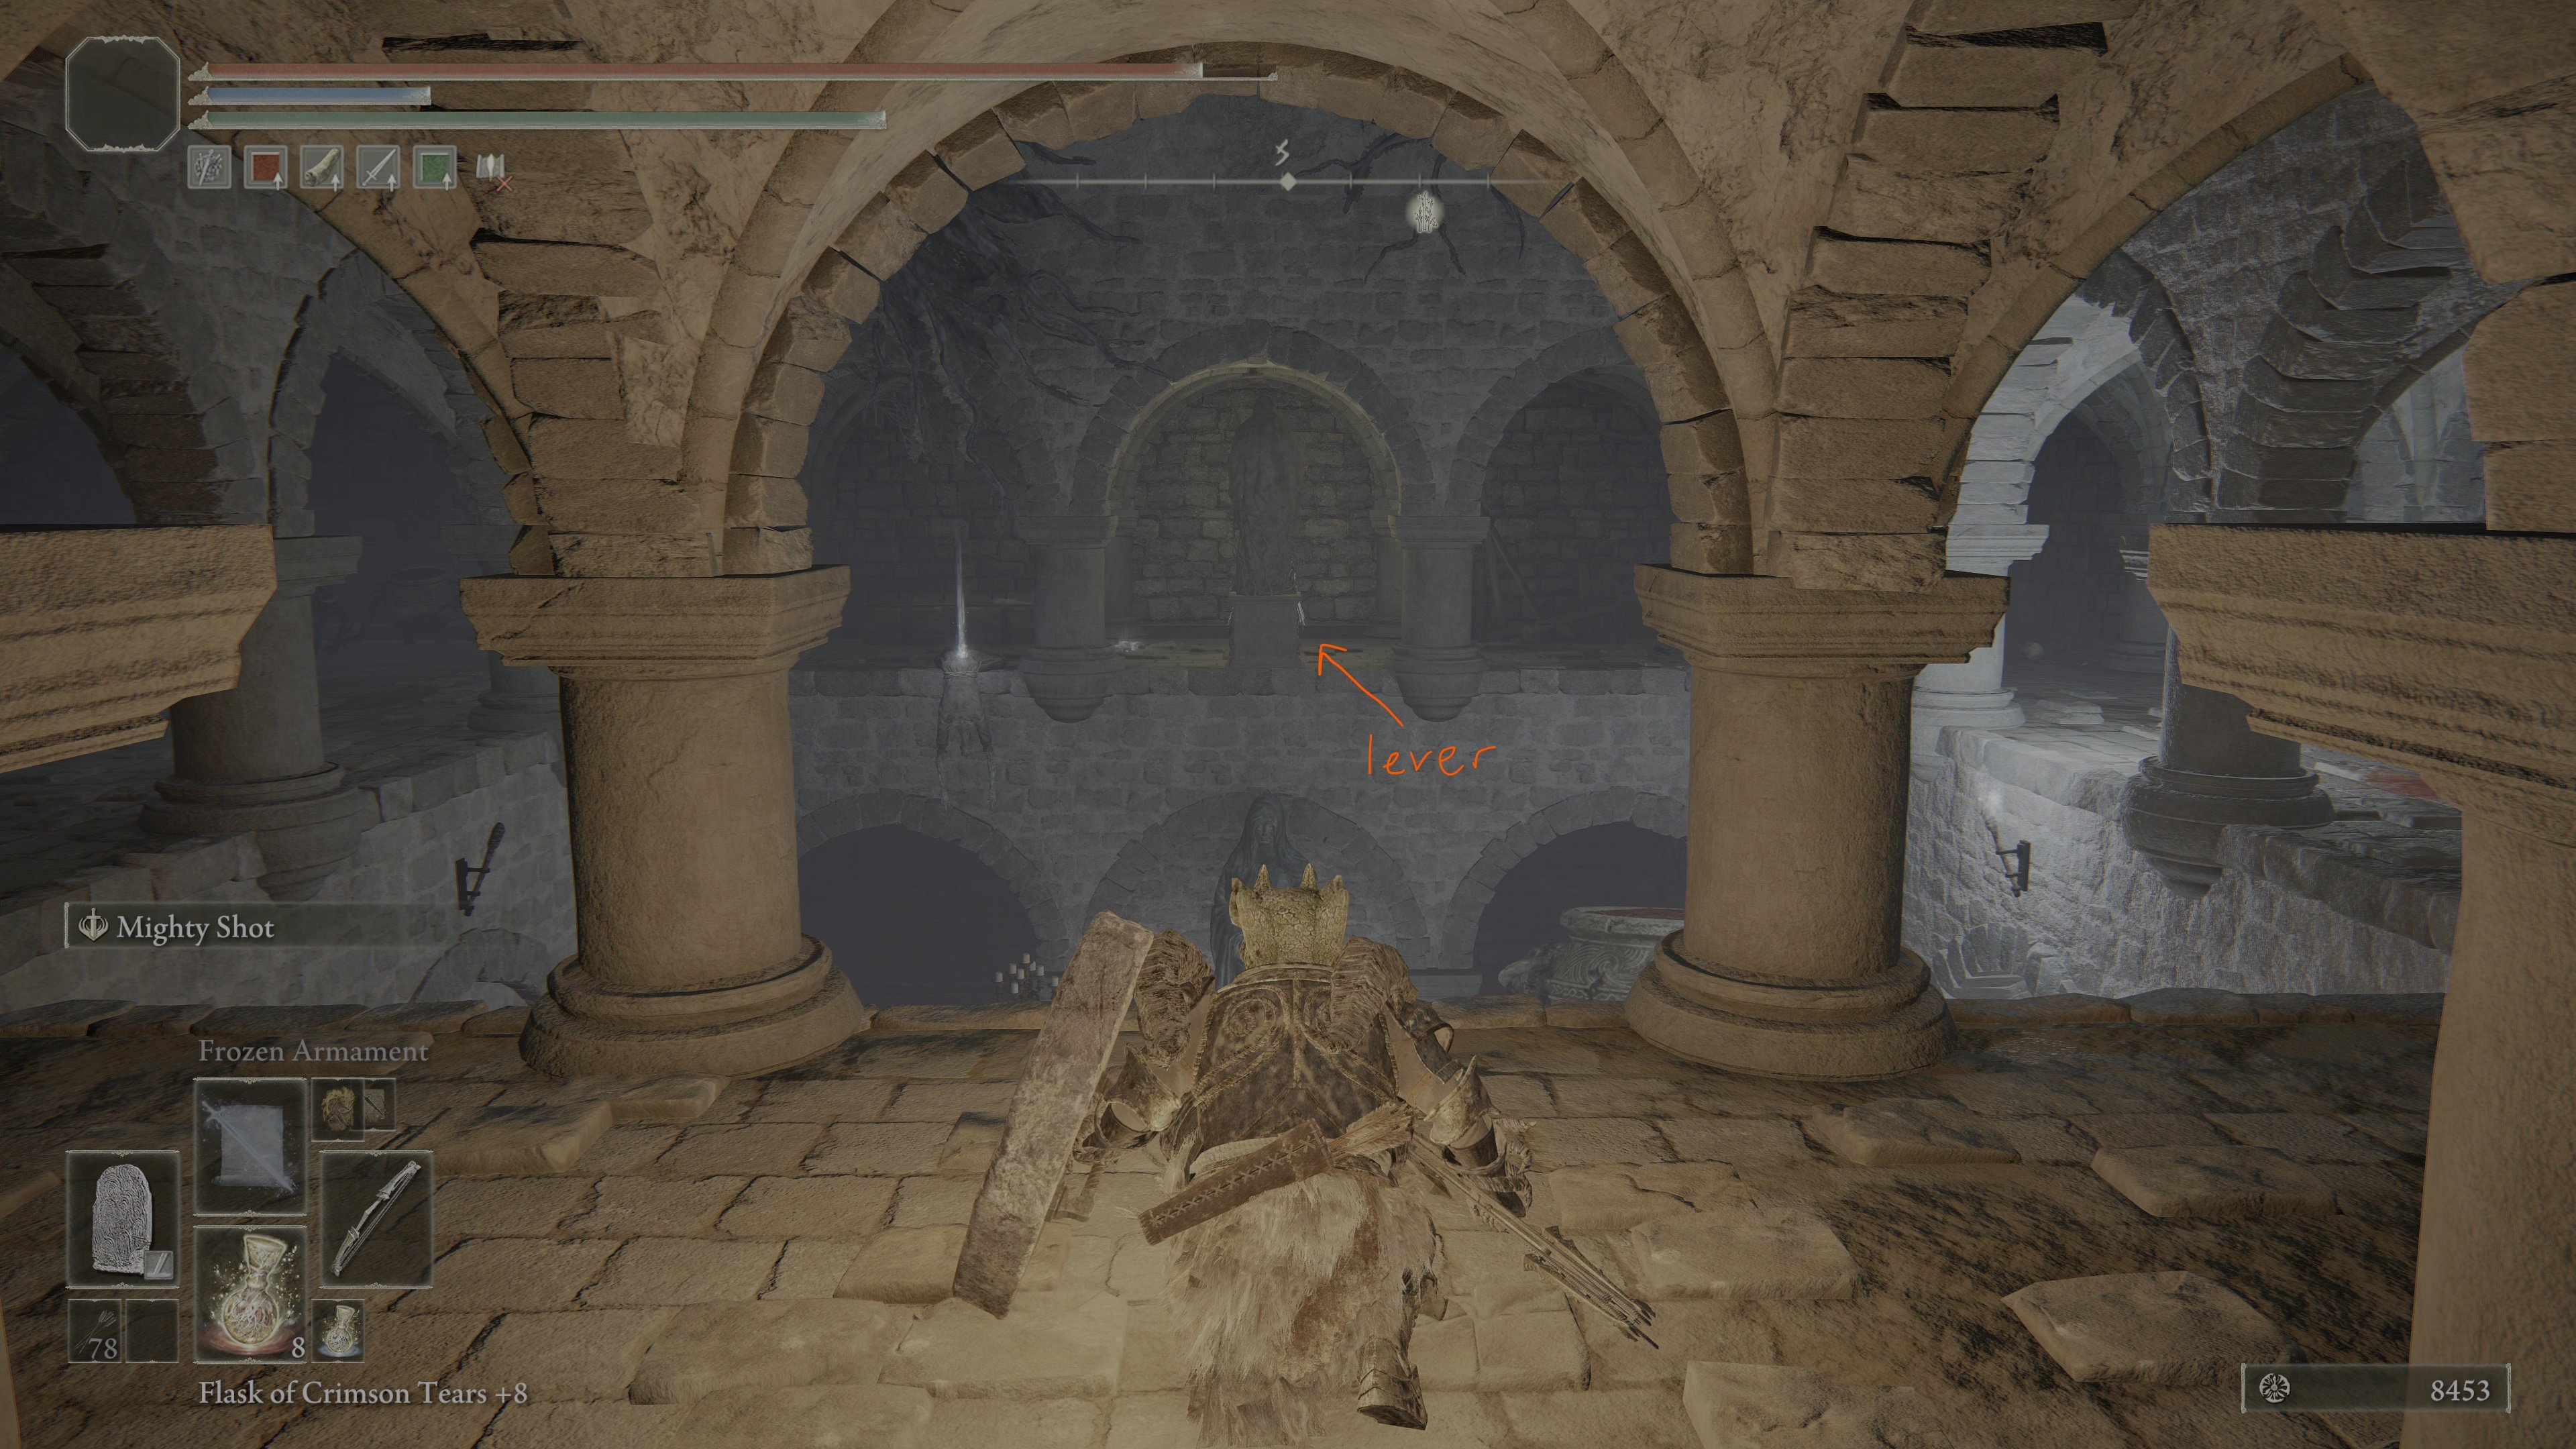
After pulling the lever, drop down into Statue Room 1, take the path the statue is facing and after a ride up Elevator 2, you should be ready to fight the boss, an Ulcerated Tree Spirit. He drops a Golden Seed and Glovewort Picker's Bell Bearing (2). A chest in the boss room contains a Deathroot.
Elden Ring Giants' Mountaintop Catacombs Gallery and Notes
 Anonymous
Why is everyone hating on the best catacomb design in the game

 Anonymous
 Anonymous
 Anonymous
Pointless halls, laughable loot and no stakes of Marika to be found, all thrown together into a dungeon that goes on for far too long. Should be renamed Giant's Garbage Pit Catacombs, 10/10 would skip again

 Anonymous
 Anonymous
 Anonymous
Elden Ring players when they do a couple early catacombs: "these are all the same, boring, wish there was more variety"
Elden Ring players when late game catacombs have more variety: "wait no not like this"
Well, yea its not much fun. But Watchdogs are much less problem if you got good shield and know how to use it. Only thing that needs to be avoided is that frostbreath, but they turn slowly, so just move with them and stay behind them.
And get some fire arrows to deal with those pesky exploding jars.
 Anonymous
Whatever idiot intern they let design this turd of a dungeon needs to be slapped across the mouth and forced to go make TF2 hats for the rest of his miserable career. It's almost impressive how he managed to cram so many unfun encounters in one dungeon.

 Anonymous
 Anonymous
This place is absolute torture. The rewards are hardly worthwhile for the trouble... Save the deathroot. I'll pass unless I need something for a specific character.

This dungeon is just another prime example of just how little would have to be changed for this game to be so much more enjoyable, as the dodge roll in this game just has the worst game mechanics I have ever seen, and I really mean that. When those Watchdogs start flying over your head dodging is usually just pointless, not just because of their awkward landing timers (goes with most enemy attacks in the game tbh), but even if you somehow get the timing right half the time the AoE just hits you anyway.
By now I've learned that the trick to this game is just to figure out how to 'cheese' anything. Make it less of a 'realistic' fight. In the Watchdogs' case. trick seems to be to just rush in on them and get right up close so they'll start hitting you with their weaker skills. Then just guard counter over and over until you break their poise and can deal some decent damage with a stun finisher.
Alternatively, for the first one, you can actually just stay on top of the platform facing him from above and just throw lightning or rocks or whatever you have on him indefinitely until he's dead. Those guys' AI are luckily programmed so poorly they don't actually follow you up the ladder if you aggro him from above with whatever you got.
This dungeon took me the better part of an hour to finish and I came here just to make sure I had everything so I'd never have to come back again. Thankfully I had gotten it all... ugh.
Peace out!
 Anonymous
Holy crap was this not fun. I somehow died TWICE on the second set of falling blades (with 150k souls in the bag), adding insult to injury. These long ass confusing routes with elevators, traps and obnoxious enemy placements definitely made this one of the worst dungeons in the game for me. Drops also sucked (dung ahead!).
When I stepped through the boss fog in hope of a nice final duel and saw the tree spirit, I just summoned Tiche and ganked it. I just wanted to be done with this.
 Anonymous
this is the closest elden ring ever got to just having us do a Daggerfall dungeon

 Anonymous
whole time i was like "wouldnt it be funny if you had to go thru this bs dungeon and the boss is a tree spirit?" guess what

 Anonymous
i knew about the confusing loop elevator trick because someone compared this to the leyndell catacombs -- i went in like yeah, i know the deal and i still got lost and mad

 Anonymous
I very much died near the Miranda flowers section and don’t even remember how I got there. Better yet, Fextra has the enemies listed as appearing in the dungeon but I haven’t found any guides referring to how to get back there. I’ve cleared this place multiple times and have accrued over 150k runes looking for the 125k I dropped earlier. About to just give up and say they’re lost.

 Anonymous
Everything is easier than Auriza Hero's Grave, so this is NBD.

 Anonymous
Not looking forward to this but I need to collect the final deathroot to get the final ancient dragon smithing stone I can get in NG before beginning journey 2. Don't want have to do Gurranq again in NG or this dungeon. I'll only have two left after as I'm not planning on doing a single dungeon again in NG+

 Anonymous
died to the watchdog in the basement, lost 100k runes, didn't even consider getting them back. **** that.

 Anonymous
everyone hating on this catacomb
auriza hero grave: allow me to introduce myself
 Anonymous
Bout as fun as the one I reme er in Radahns boss area. I hate confusion with misplaced enemies and re used bosses. 0 out of 10 for crap rewards to end it with.

 Anonymous
 Anonymous
Why is this easier than the one in mt gelmir is what i don't understand?

 Anonymous
By this point usually i feel comfortable to try not to use summon ash and just beat the boss with my fists. But this time i can barely see any attack that's coming and what's worse, i must repeat the long elevator ride each time. So I say **** it and summon luthel and smite this mother ****ing worm to the ground with granssax from distance.

 Anonymous
I don't get the big deal about this, the only annoying part is the basement level with the watchdogs, the rest of the mobs are very easily dealt with, for me at least, using a sword and shield build and creating poison items to deal with the land squirts (you should know that they're weak to poison by now). There's a bit of a puzzle, sure, but it really doesn't take a genius to figure it out.

 Anonymous
Interesting design , fun enemy’s and no stake of marika ,10/10 would visit again

 Anonymous
Not another annoying maze dungeon. None of these are fun, wish the game would stop reusing the concept like it's unique or enjoyable, because it isn't.

 Anonymous
Not another annoying maze dungeon. None of these are fun, wish the game would stop reusing the concept like it's unique or enjoyable, because it isn't.

 Anonymous
The damage those watchdogs in the basement do on NG+2 is ungodly..

 Anonymous
I’m in a real sunk cost fallacy situation with this catacomb. We’ve all had moments like this, so moving past “get good.” For some reason this place is just giving me the business. This is my second night. I probably tried for 3 hours last night.
Now I’m wasting perfectly good psychedelic mushrooms wanting to progress the storyline, but unwilling to move on past this catacomb, because I have spent so much time on it. I don’t even need any of the rewards.
 Anonymous
 Anonymous
Okay, let me sum this up:
- Confusing design
- Imp infested
- Exploding jars
- Poison land squirts
- Watchdogs in tiny rooms
- Little to zero reward
- Stepping traps
- Frost spitting pillars
And you still got the nerve on you to put a goddamn Erd Tree Spirit as final boss?!
Wow...
0/10 wouldn't re-visit.
 Anonymous
 Anonymous
unironically worst catacomb in the game, whoever the **** put that many watchdogs in those shitty tiny rooms should be fired
i love having to ride down the longest ****ing elevator to then run all the way back through imp and frost infested catacombs cus some dipshit watchdog in a tiny room nonstop buttslams
second least fun enemy tied with cemetary shades, after the bullshit revenants
 Anonymous
The fist time I've tried Co-op since my first time at Stormveil, and I got invaded both times within the minute of starting co-op, RL 115. Just a heads up, seems to be a hot area, fun fights down there with all the traps.

 Anonymous
Actually **** whoever decided to put a burial watchdog in that tiny ass room

 Anonymous
 Anonymous
Contrary to what the wiki says, there are no Miranda Sprouts in this dungeon, only Land Squirts

 Anonymous
Well I guess since almost everyone here played blindly, it was a confusing dungeon, but I followed the guide and it's ironically my favourite dungeon design. The hidden elevators was really cool, the traps, ice breathing columns, they were very well placed to **** with your mind.
Also the burial watchdogs felt sorta easy to me? Do note that I am already level 165 or so when facing them, and I used a GreatShield, so it was quite easy to block their attacks. 3 guard counters with my Claymore stance-broke them, after that it was just rinse and repeat.
At this point i was even used to the ulcerated tree spirit, the fight didn't really feel difficult just block it's major attacks with my GreatShield and dodge when necessary.
10/10 dungeon design, and the rewards aren't bad either (Bell Bearing, Golden Seed, Fire Monk Ashes, Deathroot)
 Anonymous
I like this place, but not for the enemies or anything. I just like the suddenly massive land squirt lol

 Anonymous
 Anonymous
Imps here can drop both Smithing 6's and 7's (though 7s seem to be more common)

I got the Watchdog Greatsword in NG+ on first try. Feels good. Blasphemous Blade's skill (add proper buffs is even better) can help you beat these basturds easily.

 Anonymous
Come come ladies and gentlemen. If you follow the guide above it's not too bad. Don't do optional route 2 and 3. Kill the watchdogs using the frost statues. If you are having trouble with the imps and the boss then you're probably too low level for this place.

 Anonymous
Easily one of the longest most annoying catacombs in the game, and yet it's literally only worth speed running through, since every ****ing thing if real value is from the boss... what a ****ing waste of time

 Anonymous
 Anonymous
As someone who likes to clear enemies, it's disappointing that it's just not worth it in the endgame areas. The Watchdogs have insane health pools and hit like a truck. Slam spam and that lingering hitbox on the stab is the worst.

 Anonymous
Imo: don't fight the Watchdogs. Run past and cheese with those freezing pillars. There is a 3rd at the top of a flight of stairs with some Glovewort which you can either
a) loot&run
b) shoot with a big bow/elevator escape and repeat until dead.
Watch out for x3 gargoyle-gang-bang on your way out with the 'wort though.
I swear to god if I don't get something like a "Free sloppy from Marika token" or some other **** at the end of all this Im gonna be mad. This BS better be worth it.

 Anonymous
There is another illusory wall leading to a single level 7 grave glovewort and an imp in the right side of the corridor just before the room with the fire monk ashes (looking towards the room).
I found it while checking for a possible lever to move the statue in case it worked like the one in Leyndell's sewers. Did a second passthrough of the whole dungeon casting law of regression everywhere and found nothing else.
 Anonymous
 Anonymous
If these are the lesser burial watchdogs, I dread coming into an encounter with the greater sort.

Whoever designed this deserves a swift kick in the bell bearings

 Anonymous
The identical room copy reminded me of old school super Mario one castles where the maze would just repeat the same screen and you had to know to take a different path through it

Whichever intern designed this dungeon should switch career paths. This dungeon is designed to punish people for purchasing the game.

 Anonymous
I've just been in here and I fancied myself a bit of smart arse after getting through it without reading its page. Except I didn't see a lesser burial watchdog, a miranda sprout or a giant miranda. I also see I didn't get firemonk ashes, looks like I've got to go back.

 Anonymous
The developers made this dungeon to make up for the lack of difficulty of all the other dungeons.

 Anonymous
 Anonymous
This is the most fun and well designed catacomb in the game. Its meant to play with your knowledge of how these dungeons work, showing you the location of the lever but then dropping you into an identical copy of the room with no lever and different more dangerous enemies. This was so trippy, i loved it. It also lets you easily turn every arrow, blade and freezing mist trap against the dungeon enemies.

 Anonymous
Use the traps against the Jars and Cat Statue Mage things. Pretty easily done. Took two attempts

 Anonymous
 Anonymous
It's not as bad as you'd think, the guide here is pretty good but these catacombs are still really confusing. I used rainbow stones, dropped them in the first statue room as a point of reference (you can drop them all along your way). Keep in mind they don't last forever, so if you wind up back where you were drop another one, they're on a timer. Fire arrows worked great on the exploding pots, and if they're clustered one exploding kills the rest. I forgot something that cam in handy with the land squirts, especially the big one: If you poison them they overload and explode. Rotten breath on the big one wiped out even more of them. Biggest help from the guide is to recognize when you're close, the big jar with the two pits around it that take you back to room one. That's the time to stop and be careful because you're there. Drop down, kill the pot (avoiding the holes) and the lever is on that level. Holy damage negation buff for the tree spirit and it's not bad, got it on the first try. Hope this helps someone!

 Anonymous
Just don’t do this. Unless you’re doing gurranq’s thing it’s absolutely not worth it

 Anonymous
 Anonymous
Several of my favorites here. A huge impossibly fast boss in an enclosed space, and no Stake of Marika forcing you to go past effing imps again to get to the boss door.

 Anonymous
Excellent walkthrough, thank you. Only real problem I had was the 'Somewhere a Heavy Door Opened' message stopped me from swinging my sword at the darn little jar that woke up and started beating on me. I did attempt to target but these little buggers don't target until they wake up. Good UI having the message block other inputs until it is cleared. Yay From!

 Anonymous
 Anonymous
I'm fine with the weirdness of the dungeon but the Watchdogs being able to randomly one shot you with plunging attacks is pure BS. 40 Vigor and dragoncrest talisman and still they randomly take 90 percent of my health with that move. Having to re-tread the whole dungeon because of one hit is sadistic.

 Anonymous
I look at it as a love and hate relationship.. this dungeon pissed me the **** off.. but I respect it greatly

 Anonymous
Imps drop Smithing Stone (6). I have personally got one but not a (7)

 Anonymous
I don't mind the enemies but how the **** would you ever navigate this without a guide? they literally copied the same room multiple times.

 Anonymous
hitting the little incendiary jars with fire arrows will instantly make them explode and can be done from a safe distance

 Anonymous
Really resent the little exploding pots that are not targetable and damage you through stone walls, not kewl

Yet another crypt where they repeat floors to try and confuse you. It's fine to do that once, but I've seen this like 3 times now.

 Anonymous
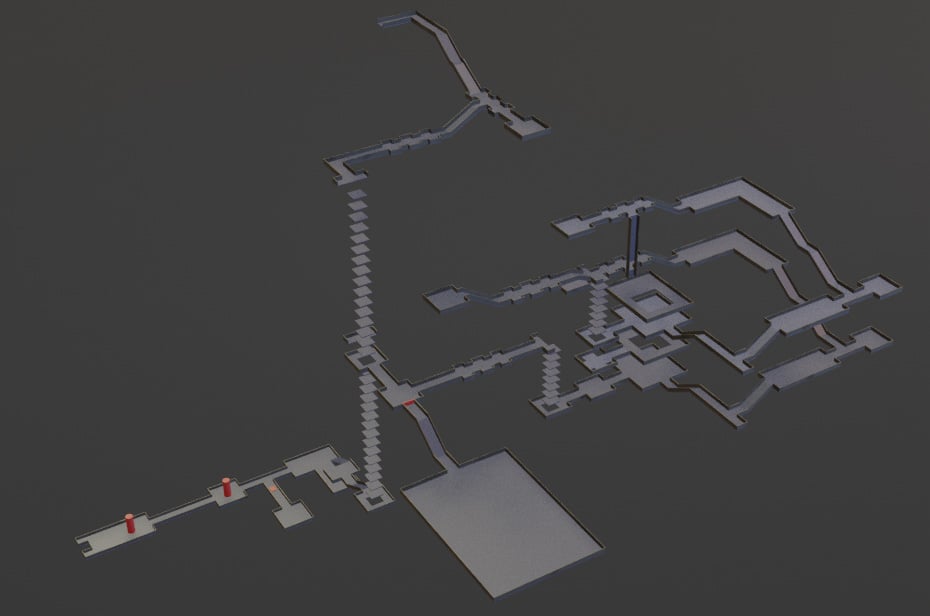
This map is wrong. The left before the boss room... after going down the small elevator and up a couple stairs and stuff, you're on the middle floor. The little drop down is there, and the longer hall with a watchdog is on the top floor.

 Anonymous
These imps are freaking nasty, watchdog freeze cheese is a necessity.

 Anonymous
Any one else notice in the room after the land squids, where you fall on a rectangular platform and end back to the statue number 2, after falling from the second platform there's an open door while you fall, but I cant get on it, is it possible to get there? If so, what's in there?

 Anonymous
 Anonymous
Ezykes's Decay and Tiche. Boss battle was over before I knew it. Rest of dungeon did $$ck though.

 Anonymous
 Anonymous
Am I the only one that genuinely likes these maze-like catacombs? I could live without the repeated boss here, but the labyrinths are so fun to get through, it feels nice to have a non-combat challenge from time to time

 Anonymous
So let me get this straight. After you do all the BS you can't even go back to the grace to reset your flasks?

 Anonymous
"You'll find more enemies in the next corridor. 6 Land Squids to be exact."
Five. Five Land Squids. 'twas the "to be exact" that caught my eye.
 Anonymous
 Anonymous
Man the boss sucks, but overall this is one of the most memorable catacombs, even as a frustrating one. I think of this as a maze which is designed to make you mad, which it did. I didn't even bother to backtrack to keep runes, but straight up used Memory of Grace just to get it done with.

 Anonymous
Jesus lord getting slapped in the face by this catacomb right after clearing underground leyndell catacomb was not a pleasant experience. Mobs are tanky and hit like a truck, asshat imps. At least there's no poison or rot swamp in this catacomb I guess. Though it's not totally unfair if you utilize your stuff. Exploding pots are free kills with fire arrows, watchdogs can be cheesed or just ignored since they are worth jack ****, just watch out for your usual imps and traps. Nothing can save you from the awful boss though.

 Anonymous
This is not the giants mountaintop catacombs. This is the giant-conquering hero's grave.

 Anonymous
huge thank you to whoever wrote this guide. went so crazy i had to come look it up and it got me through in one go.

 Anonymous
In general I don't mind bosses being recycled but with Ulcerated Tree Spirit they took it too far.

 Anonymous
Do not bother to farm Imps here for Smithing Stone (7). Killed 30, did not get any stones. Considering the type of enemy, you better farm elsewhere.

 Anonymous
This is the only dungeon since Demon's Souls' Valley of Defilement that was so extensive that once I died, I gave up on searching for my massive amount of runes. It was just that confusing. I feel absolutely mind-****ed on the layout of this dungeon but I guess that was the point. Well done!

 Anonymous
What a goddamn hellhole. Up there with Gelmir Hero's Grave as most painful torture chambers.

 Anonymous
I got lost for like an hour trying to make it back to my frickin' runes

 Anonymous
Place ****ing sucks. Can’t even mad dash to get through to where you dropped your runes because the imps throw **** at you, the guillotines keep you from dashing past the exploding jars, and by the time you get to either of the watchdogs you’re out of flasks.

 Anonymous
Not confusing but this is probably one of the worst dungeons in the game just because you have to start at the very start while going throuhg numerous enemies, multiple elevators and drops, and dealing with three hidden gatcha imps at the end of one far path and a giant lesser watchdog they didn't bother to animate properly so it can hit you 180 degrees behind it instantly and you can't even visibly see signs to dodge. Not exactly fun. Just a slog.

 Anonymous
Tip for exploding jars. Fire arrow on bow and they will self-destruct.


I won't lie, I hated this going through it, but after discovering how it works, I think it's absolutely brilliant design. One of the watchdogs bullied me into backdodging away from it and into "Elevator 3", which I took down and it followed. I tried to step back on it to go back up and run away, but the lift went up and left us. I saw the pot below the lift shortly before I met my demise. I then knew that that was where they hid the rest of the level.
0
+10
-1