Info Items in Elden Ring are a category of items which detail a wide variety of tutorials, clues, and other guiding information. These are commonly provided after being introduced to a new game mechanic, but some are in the form of notes or clues found while exploring the Lands Between. This page covers their names, type of information, description, and Locations.
See Paintings for each artists' paintings' solution and reward.
Elden Ring Info Items
Elden Ring Info Items Table
Quick Search of All Info Items
Recommended Search Terms:
Tutorials, Notes, Paintings, Clues
| Name | Type | Information | Location |
|---|---|---|---|
|
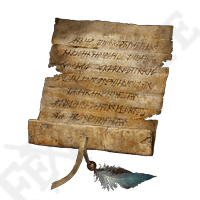
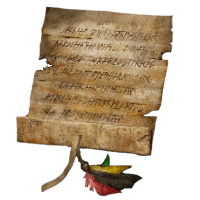
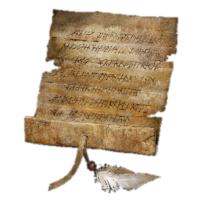
Notes | You can find crystal tears at the bases of Minor Erdtrees and elsewhere throughout the Lands Between. At sites of grace, you can mix two crystal tears in the Flask of Wondrous Physick. This will allow you to create elixirs with various custom effects. | Can be purchased from Merchant Kalé at the Church of Elleh, Limgrave |
|
Notes | Someone lurks among the waypoint ruins on the roads through Limgrave. | Can be purchased from Merchant Kalé at the Church of Elleh, Limgrave |
|
Notes | Fort Gael in Caelid houses a gateway that leads to Redmane Castle. | Sold by the Isolated Merchant Dragonbarrow for 1200 |
|
Notes | There is a hidden cave in the town of Sellia. Look beyond the graveyard at the precipice. | Can be purchased from the Isolated Merchant Dragonbarrow |
|
Notes | Preceptor Seluvis is hiding a dirty secret in a cellar among the ruins not far from the sisters three. The vile Graven Witch seems to be a frequent visitor to that place. | Purchased from Isolated Merchant Raya Lucaria for 1,200 Runes. |
|
Notes | Below the royal capital of Leyndell is a vast network of sewers. The well in the city below reaches deep into its tunnels. | Sold by Hermit Merchant |
|
Notes | Gravitational power that pulls can bring flying foes low. | Sold by Nomadic Merchant Caelid South for 800 |
|
Notes | Slay the demi-human mob's leader first, and the rest will lose hope and panic. | Sold by Nomadic Merchant Castle Morne Rampart for 500 |
|
Notes | Land squirts are soft where they touch the ground, and poison will cause them to rupture. | Sold by the Nomadic Merchant West Limgrave for 400 |
|
Notes | The heads of the stonedigger trolls bear old wounds. | Sold by the Nomadic Merchant West Limgrave for 200 |
|
Notes | The crawling royal revenants and their followers are all cursed. Healing powers will harm rather than mend. | Sold by the Isolated Merchant Raya Lucaria for 800 |
|
Notes | Beware the Fire Monks' chariots bearing the faces of giants. A well-aimed blow to the chimney on top may prove effective, but opportunities for a plunging attack will be rare indeed. | Sold by the Nomadic Merchant in northern Limgrave |
|
Notes | To stop the mausoleum's stride, you'll need to clean up around its feet first. | Sold by the Isolated Merchant Weeping Peninsula for 600 |
|
Notes | Some assassins cannot be seen with the naked eye. Seems the Erdtree sentries once carried torches that could cast light on these prowlers. | Sold by the Nomadic Merchant West Altus Plateau for 2000 |
|
Notes | Nothing can touch the shades of imps in the heroes' graveyard. Only Rosus's light can give them form. | Sold by the Nomadic Merchant West Altus Plateau for 1200 |
|
Notes | South of the Grand Lift of Dectus lies the Frenzied Flame Village, inhabited by the sick. Stay well away. | Sold by the Isolated Merchant Raya Lucaria for 800 |
|
Notes | Beneath Leyndell, at the very bottom lies our lord, lord of the frenzied. The Three Fingers who holds us in thrall. | Found on a corpse in Frenzied Flame Village. |
|
Notes | The Empyrean Miquella crafted a needle to resist the influence of outer gods. Those who have inherited the flame of frenzy, yet wish not to become its lord would do well to see Miquella's needle. | Found in Cathedral of the Forsaken |
|
Quest Info |
Letter given by Rya as thanks for retrieving her necklace. Contains an invitation to Volcano Manor. "Brave Tarnished, Seek the Altus Plateau in the realm of the Erdtree. Prove yourself by making this journey, and the Volcano Manor will fully extend its invitation. To fight, amongst a family of champions." | Can be obtained by purchasing Rya's Necklace for |
|
Quest Info |
A written request from Volcano Manor disclosing the name of a Tarnished to be hunted. "Old Knight Istvan" He can be found in Limgrave. Find the red mark on your map for the exact location. | Found in Volcano Manor's Drawing Room |
|
Quest Info |
A written request from Volcano Manor disclosing the name of a Tarnished to be hunted. "Rileigh the Idle" He can be found in Altus Plateau. Find the red mark on your map for the exact location. | Found in Volcano Manor's Drawing Room |
|
Quest Info | A written request from Volcano Manor disclosing the name of a Tarnished to be hunted. As the final request, the letter is vivid red. "Juno Hoslow, Knight of Blood" He can be found in the Mountaintops of the Giants. Find the red mark on your map for the exact location. | Found in Volcano Manor's Drawing Room after completing two Volcano Manor quests |
|
Quest Info | A written request from Volcano Manor addressed to Patches disclosing the name of a Tarnished to be hunted. "Great Horned Tragoth" He can be found at the Ruin-Strewn Precipice. Find the red mark on your map for the exact location. | Given by Patches after completing one Volcano Manor quest |
|
Quest Info | A written request from Volcano Manor addressed to Bernahl disclosing the names of two Tarnished to be hunted. "Vargram the Raging Wolf" "Errant Sorcerer Wilhelm" Both men can be found in the Royal Capital of Leyndell. Find the red mark on your map for the exact location. | Given by Bernahl after completing two Volcano Manor quests |
|
Quest Info | Farewell letter written in an inexpert hand. "I wish to set out on a journey. So that one day, I can carry on Mother's work. Be the proud daughter of Tanith of Volcano Manor. Farewell. You've always been so kind. So uncompromising. My champion." | Rya's questline after you choose to not to kill her or put her to sleep |
|
Clues & |
Simple map found on a corpse. Seems to point to a meeting place. The man it came from surely desired one. The sole means of gaining entry into the academy: a glintstone key. | Can be found at the entrace of the Raya Lucarian academy, on lying corpse. Elden Ring Interactive Map Link |
|
Quest Info | Note given by Sage Gowry detailing the secret he promised. The Town of Sellia hides the source. Light three flames atop the candle towers to break the seal. | Received from Gowry in his shack after retrieving the an Unalloyed Gold Needle dropped by Commander O'Neil located in the deep scarlet Swamp of Aeonia. |
|
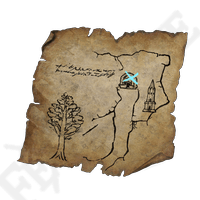
Clues & Puzzles | Simple map taken from an imp statue. A riddle concerning a rise that vanishes like a mirage. | Found on an imp statue outside of a sealed church in the Altus Plateau. |
|
Clues & Puzzles |
A simple, badly weathered map. Left discarded and forgotten for some time. Depicts streaks of amber light. | Can be bought from Pidia, Carian Servant. (Needs info what the requirement is, talking enough or after starting a quest with Ranni)Can be bought from Twin Maiden Husks after giving Pidia's Bell Bearing to them. |
|
Quest Info | A simple map given by Fia. A clue to the whereabouts of a black knifeprint. | Given by Fia after talking with her in secret. |
|
Info Item | Letter written in a trembling hand. "I forgot to tell you, but it seems D has a younger brother. I heard he lies in a deep sleep in the aqueduct beside the Eternal City of Nokron. And it's said he stood before the Prince of Death not far beyond that spot." | Obtained from Rogier's corpse in Roundtable Hold after he passes away. |
|
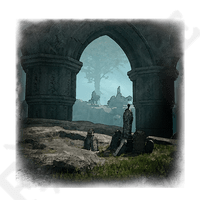
Paintings | Work of a wandering artist. Reminiscence of a painting titled "Homing Instinct." This painter is said have captured the landscapes seen during the last moments of those welcomed into death's embrace. The soul of the painter, and vestiges of the dead's last moments can be discovered by visiting the location depicted even now. | Artist's Shack, Limgrave [Map Link] |
|
Paintings |
Work of a wandering artist. Reminiscence of a painting titled "Flightless Bird." This painter is said have captured the landscapes seen during the last moments of those welcomed into death's embrace. The soul of the painter, and vestiges of the dead's last moments can be discovered by visiting the location depicted even now. | Found the Fortified manor in Leyndell, Royal Capital |
|
Paintings | Work of a wandering artist. Reminiscence of a painting titled "Resurrection." This painter is said have captured the landscapes seen during the last moments of those welcomed into death's embrace. The soul of the painter, and vestiges of the dead's last moments can be discovered by visiting the location depicted even now. | Found at Artist's Shack. |
|
Paintings | Work of a wandering artist. Reminiscence of a painting titled "Prophecy." This painter is said have captured the landscapes seen during the last moments of those welcomed into death's embrace. The soul of the painter, and vestiges of the dead's last moments can be discovered by visiting the location depicted even now. | Found in Stormveil Castle |
|
Paintings |
Work of a wandering artist. Reminiscence of a painting titled "Champion's Song." This painter is said have captured the landscapes seen during the last moments of those welcomed into death's embrace. The soul of the painter, and vestiges of the dead's last moments can be discovered by visiting the location depicted even now. | Found in The Shaded Castle |
|
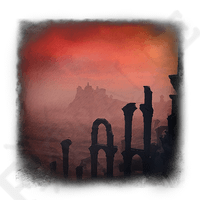
Paintings | Work of a wandering artist. Reminiscence of a painting titled "Redmane." This painter is said have captured the landscapes seen during the last moments of those welcomed into death's embrace. The soul of the painter, and vestiges of the dead's last moments can be discovered by visiting the location depicted even now. | Found in Sellia, Town of Sorcery |
|
Paintings |
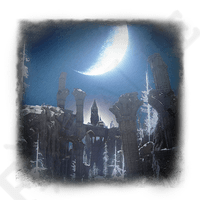
Work of a wandering artist. Reminiscence of a painting titled "Sorcerer." This painter is said have captured the landscapes seen during the last moments of those welcomed into death's embrace. The soul of the painter, and vestiges of the dead's last moments can be discovered by visiting the location depicted even now. | Found in Castle Sol. |
About the Cave of Knowledge |
Tutorials | Jump down the hole ahead, and you will find the Cave of Knowledge. There, you can learn more about game controls and basic actions, as well as other tips that may be helpful during your adventures in the Lands Between. |
Automatically added to inventory after concept introduction. |
|
Tutorials | Resting at a site of grace will restore your HP, PP, and cleanse any status ailments. It will also refill your sacred flasks. However, most of the enemies you've defeated will be revived. You can find sites of grace by going where light converges. | Automatically added to inventory after concept introduction. |
|
Tutorials | Grace exists to guide the Tarnished and lead them along the proper path. Even now, some sites of grace retain that power. Their golden rays, will guide you along your way. | Automatically added to inventory after concept introduction. |
|
Tutorials | Use your map to check your current position, as well as the terrain. and surrounding structures. You can update your map with new information by finding map fragments at steles along the road. You can also use the map to freely place beacons of light to serveas landmarks as you explore. | Automatically added to inventory after concept introduction. |
|
Tutorials | Through your map, you can instantly travel to any sites of grace i that you've discovered. However, there are some dungeons and other areas where this, cannot be done. | Automatically added to inventory after concept introduction. |
|
Tutorials | The Roundtable Hold is a place where Tarnished gather, guided by grace. Combat is prohibited on the premises due to a pact of non-aggression. (This rule is in effect when the Roundtable icon is displayed.) The Roundtable Hold is located outside of this world. It can only be reached through sites of grace. (Can also be accessed by using the map to travel.) | Automatically added to inventory after concept introduction. |
|
Tutorials | Upon dying, you will be revived at the last site of grace that you visited. You will drop any runes in your possession at the site of your death. If you die again before reclaiming those runes, they will be lost forever. The compass at the top of the screen indicates the direction of the lost runes. | Automatically added to inventory after concept introduction. |
|
Tutorials | Upon dying, you will be revived at the last site of grace that you visited. However, if there is a Stake of Marika near where you died, you I can choose to be revived there instead. | Automatically added to inventory after concept introduction. |
|
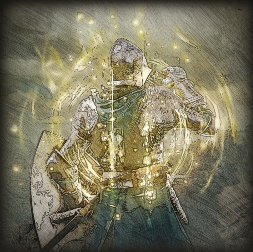
Tutorials | Use an armament in your left hand or both hands to guard against incoming attacks. Guarding is especially effective when done with a shield. Guarding consumes stamina. If your stamina runs out, your stance will be broken. | Automatically added to inventory after concept introduction. |
|
Tutorials | You can avoid enemy attacks with a dodge roll or backstep. Both of these actions consume stamina. | Automatically added to inventory after concept introduction. |
|
Tutorials | Each hand can be equipped with up to three armaments, allowing you to toggle between them. Armaments can also be two-handed, making attacks more difficult to repel with shields and boosting effective strength by 50%. | Automatically added to inventory after concept introduction. |
|
Tutorials | Some attacks may break an enemy's stance, giving you a chance to perform a critical hit. Charge attacks and jump attacks make it particularly easy to break an enemy's stance | Automatically added to inventory after concept introduction. |
|
Tutorials | You can perform a counterattack immediately after blocking an enemy attack. Guard counters make it easy to break an enemy's stance. | Automatically added to inventory after concept introduction. |
|
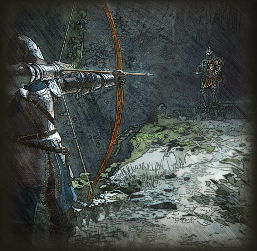
Tutorials | Equip a bow to fire arrows. You can equip up to two types of arrows to choose from at once. | Automatically added to inventory after concept introduction. |
|
Tutorials | Armaments have special abilities called skills. Skills are highly varied, and range from powerful attacks to temporary effects. Using skills consumes FP. | Automatically added to inventory after concept introduction. |
|
Tutorials | You can memorize sorceries and incantations at sites of grace. You must have a staff equipped to cast sorceries, or a sacred seal equipped to cast incantations. Casting sorceries and incantations consumes FP. | Automatically added to inventory after concept introduction. |
|
Tutorials | With a Spirit Calling Bell, you can use ashes to summon various spirits. Summoning typically consumes FP. You can only summon one type of spirit at a time. You cannot summon spirits during multiplayer. | Automatically added to inventory after concept introduction. |
|
Tutorials | You must be near a rebirth monument to summon spirits from ashes. When you are close to a rebirth monument and able to summon, a monument icon will appear on the left side of the screen. | [NOT OBTAINABLE AFTER VERSION 1.0] Automatically added to inventory after concept introduction. |
|
Tutorials | Use the Spectral Steed Whistle to summon and ride your spectral steed. If your spectral steed dies, you can summon it again, but it will cost one Flask of Crimson Tears to do so. | Automatically added to inventory after concept introduction. |
|
Tutorials | Jump while on horseback near a spiritspring to ride its current high into the air. You won't take damage from jumping into a spiritspring while on horseback, even from a great height. | Automatically added to inventory after concept introduction. |
|
Tutorials | Crouch to make it harder for enemies to discover you. Especially effective in tall grass. Attacking an enemy that hasn't noticed you will cause more damage than usual. | Automatically added to inventory after concept introduction. |
|
Tutorials | Use the Birdseye Telescopes in each area to see into the distance like a bird and get a better view of your destination. | Automatically added to inventory after concept introduction. |
|
Tutorials | There are both Crimson and Cerulean Teardrop Scarabs. Defeat them to replenish the flasks that match their type. However, you cannot replenish more flasks than your maximum amount allows. | Automatically added to inventory after concept introduction. |
|
Tutorials | Vanquishing an enemy group will replenish your flasks. The number and type of flasks to be replenished varies, depending on the enemy group. You cannot replenish more flasks than your maximum amount allows. | Automatically added to inventory after concept introduction. |
|
Tutorials | If you have a Crafting Kit, you can make various items from materials that you find. Select "Item Crafting" from the main menu to make items. You can learn to craft more items by finding cookbooks. | Automatically added to inventory after concept introduction. |
|
Tutorials | In every corner of the Lands Between, you will find fruits and flowers, mushrooms and butterflies, and various other useful materials. These materials can be used for item crafting. | Automatically added to inventory after concept introduction. |
|
Tutorials | You will need cracked pots or other containers to craft certain items. You will not be able to make more of those items than you have containers. Containers will be consumed when crafting, but they can be reused when emptied. | Automatically added to inventory after concept introduction. |
|
Tutorials | You can find crystal tears at the bases of Minor Erdtrees and elsewhere throughout the Lands Between. At sites of grace, you can mix two crystal tears in the Flask of Wondrous Physick. This will allow you to create elixirs with various custom effects | Automatically added to inventory after concept introduction. |
|
Tutorials | At a smithing table, you can spend runes and smithing stones to strengthen your armaments. Somewhere in the Lands Between, you may meet a blacksmith who can make your armaments even stronger. | Automatically added to inventory after concept introduction. |
|
Tutorials | With a Whetstone Knife, you can use ashes of war to grant your armaments new skills at sites of grace. An armament can only have one skill. Any skill it previously had will be removed. An armament's type determines what skills it can have. Some special armaments have unique skills and cannot be granted new ones. | Automatically added to inventory after concept introduction. |
|
Tutorials | With a Whetstone Knife, you can use ashes of war to grant affinities to your armaments at sites of grace. This way, you can alter an armament's attack affinity, boost attribute scaling, and more. An armament's type determines what affinities it can have. Some special armaments, like those with unique skills, cannot be granted new affinities. | Automatically added to inventory after concept introduction. |
|
Tutorials | From "Pouch" in the main menu, you can equip six items to your pouches. Four of those items can be used without opening the main menu. | Automatically added to inventory after concept introduction. |
|
Tutorials | The Great Runes you receive by defeating shardbearers have lost their beneficial power. However, their power can be restored at Divine Towers throughout the Lands Between. See the description of each Great Rune to discover which Divine Tower you should visit. | Automatically added to inventory after concept introduction. |
|
Tutorials | Use Furlcalling Finger Remedy to reveal summon signs of players from other worlds. | Automatically added to inventory after concept introduction. |
|
Tutorials | Use Tarnished's Furled Finger to write a gold summon sign. Cooperative multiplayer will begin once you have been summoned by a player from another world. You will take the role of an ally (Furled Finger) and your objective is to defeat the area boss. The compass at the top of the screen indicates the direction of the summoner (Host of Fingers). | Automatically added to inventory after concept introduction. |
|
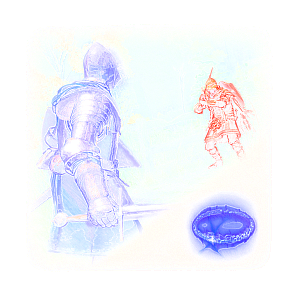
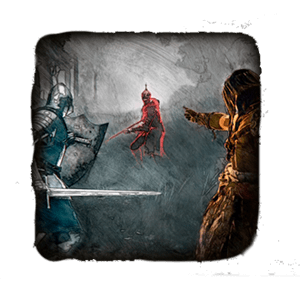
Tutorials | Use Duelist's Furled Finger to write a red summon sign. Competitive multiplayer will begin once you have been summoned by a player from another world. You will take the role of an adversary (Duelist) and your objective is to defeat the Host of Fingers who summoned you. | Automatically added to inventory after concept introduction. |
|
Tutorials | Use Festering Bloody Finger to attempt to invade the world of another player. | Automatically added to inventory after concept introduction. |
|
Tutorials | If you use a White Cipher Ring, you will automatically request for a hunter from another world to come to your rescue when your world is invaded. (Can also be used after you are invaded.) The hunter will be summoned once the request succeeds, and their objective is to defeat the invader of your world. | Automatically added to inventory after concept introduction. |
|
Tutorials | If you use a Blue Cipher Ring, you will make yourself open to summons for rescue from other worlds. The multiplayer session will begin once you have been summoned as a hunter, and your objective is to defeat the invader of that world. The compass at the top of the screen indicates the direction of the summoner (Host of Fingers). | Automatically added to inventory after concept introduction. |
|
Tutorials | Use Festering Bloody Finger to attempt to invade the world of another player. | Automatically added to inventory after concept introduction. |
|
Tutorials | If you use a White Cipher Ring, you will automatically request for a hunter from another world to come to your rescue when your world is invaded. (Can also be used after you are invaded.) The hunter will be summoned once the request succeeds, and their objective is to defeat the invader of your world. | Automatically added to inventory after concept introduction. |
|
Tutorials | If you use a Blue Cipher Ring, you will make yourself open to summons for rescue from other worlds. The multiplayer session will begin once you have been summoned as a hunter, and your objective is to defeat the invader of that world. The compass at the top of the screen indicates the direction of the summoner (Host of Fingers) | Automatically added to inventory after concept introduction. |
|
Tutorials | In each area, you may find effigies of martyrs. These effigies are summoning pools. You'll find it easy to summon other players at these locations, as co-op and hostile summoning signs created with small effigies gather at summoning pools. | Automatically added to inventory after concept introduction. |
|
Tutorials | To engage in combat with other players, touch the effigy of Marika in a Colosseum. Duels, in which combatants fight one on one, can be undertaken in this venue. | Obtained automatically when you learn about this in Colosseums. Added to the game in Patch 1.08 |
|
Tutorials | To engage in combat with other players, touch the effigy of Marika in a Colosseum. United Combat and Combat Ordeals can be undertaken in this venue. In United Combat two teams of fighters clash. Combat Ordeals are all-out brawls in which every combatant is out for themselves. | Obtained automatically when you learn about this in Colosseums. Added to the game in Patch 1.08 |
|
Tutorials | To engage in combat with other players, touch the effigy of Marika in a Colosseum. In this venue spirit ashes are permitted for use in battle. | Obtained automatically when you learn about this in Colosseums. Added to the game in Patch 1.08 |
|
Tutorials | The effigy of Marika at the Roundtable Hold can be used to enter Colosseum combat. Your preferred ruleset may be chosen from those of Colosseums already visited. | Found at the Rountable Hold, the first time you interact with it. Can be found next to Roderika's location. Added to the game with Patch 1.08. |
|
Tutorials | You will need certain items to participate in each type of multiplayer: cooperative, invasion, or competitive. Select "Multiplayer" from the main menu to see your multiplayer items. You can also use them directly from this menu. | [NOT OBTAINABLE] Automatically added to inventory after concept introduction. |
Elden Ring Info Items Gallery
_300px.png)
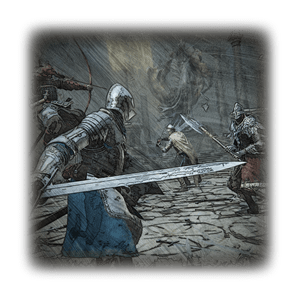
About Duels
To engage in combat with other players, touch the effigy of Marika in a Colosseum.
Duels, in which combatants fight one on one, can be undertaken in this venue.
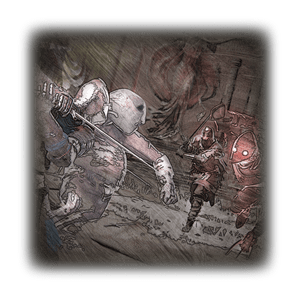
About United Combat and Combat Ordeals
To engage in combat with other players, touch the effigy of Marika in a Colosseum.
United Combat and Combat Ordeals can be undertaken in this venue.
In United Combat two teams of fighters clash. Combat Ordeals are all-out brawls in which every combatant is out for themselves.
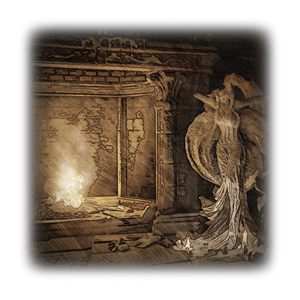
About Combat with Spirit Ashes
To engage in combat with other players, touch the effigy of Marika in a Colosseum.
In this venue spirit ashes are permitted for use in battle.
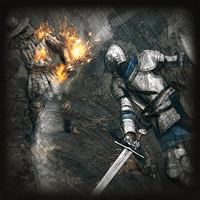
About Marika's Effigy at the Roundtable
The effigy of Marika at the Roundtable Hold can be used to enter Colosseum combat.
Your preferred ruleset may be chosen from those of Colosseums already visited.
About Adding Affinities
With a Whetstone Knife, you can use ashes of war to grant affinities to your armaments at sites of grace.
This way, you can alter an armament's attack affinity, boost attribute scaling, and more.
An armament's type determines what affinities it can have. Some special armaments, like those with unique skills, cannot be
granted new affinities.
About Adding Skills
With a Whetstone Knife, you can use ashes of war to grant your armaments new skills at sites of grace. An armament can only have one skill. Any skill it previously had will be removed. An armament's type determines what skills it can have. Some
special armaments have unique skills and cannot be granted new ones.
About Containers
You will need cracked pots or other containers to craft certain items. You will not be able to make more of those items than you have containers. Containers will be consumed when crafting, but they can be reused when emptied.
About Cooperative Multiplayer
Use Tarnished's Furled Finger to write a gold summon sign. Cooperative multiplayer will begin once you have been summoned by a player from another world. You will take the role of an ally (Furled Finger) and your objective is to defeat the area boss. The compass at the top of the screen indicates the direction of the summoner (Host of Fingers).
About Crouching
Crouch to make it harder for enemies to discover you. Especially effective in tall grass. Attacking an enemy that hasn't noticed you will cause more damage than usual.
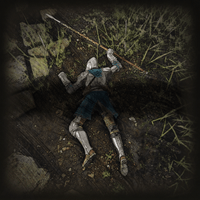
About Death
Upon dying, you will be revived at the last site of grace that you visited. You will drop any runes in your possession at the site of your death. If you die again before reclaiming those runes, they will be lost forever. The compass at the top of the screen indicates the direction of the lost runes.
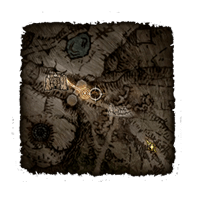
About Fast Travel to Sites of Grace
Through your map, you can instantly travel to any sites of grace that you've discovered. l However, there are some dungeons and other areas where this, cannot be done.
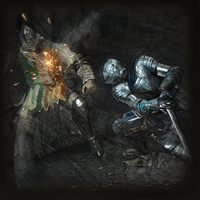
About Guard Counters
You can perform a counterattack immediately after blocking an enemy attack. Guard counters make it easy to break an enemy's stance.
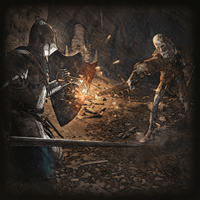
About Guarding
Use an armament in your left hand or both hands to guard against incoming attacks.Guarding is especially effective when done with a shield. Guarding consumes stamina. If your stamina runs out, your stance will be broken.
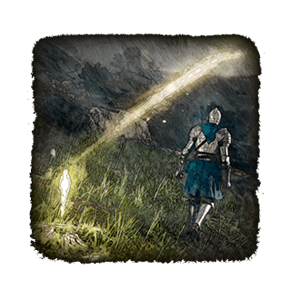
About Guidance of Grace
Grace exists to guide the Tarnished and lead them along the proper path. Even now, some sites of grace retain that power. Their golden rays, will guide you along your way.
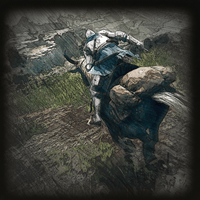
About Horseback Riding
Use the Spectral Steed Whistle to summon and ride your spectral i steed. ‘ If your spectral steed dies, you can summon it again, but it will cost one Flask of Crimson Tears to do so.
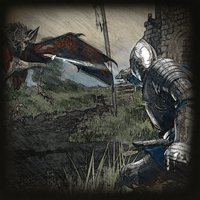
About Item Crafting
If you have a Crafting Kit, you can make various items from materials that you find. Select "Item Crafting" from the main menu to make items. ' You can learn to craft more items by finding cookbooks.
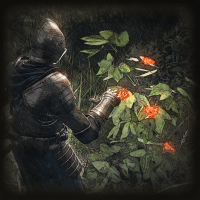
About Materials
In every corner of the Lands Between, you will find fruits and flowers, mushrooms and butterflies, and various other useful materials. These materials can be used for item crafting.
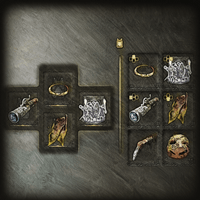
About Pouches
From "Pouch" in the main menu, you can equip six items to your pouches.Four of those items can be used without opening the main menu.
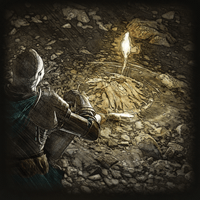
About Sites of Grace
Resting at a site of grace will restore your HP, PP, and cleanse any . status ailments. It will also refill your sacred flasks. However, most of the enemies you've defeated will be revived. You can find Sites of grace by gorng where light converges.

About Skills
Armaments have special abilities called skills. Skills are highly varied, and range from powerful attacks to temporary effects. Using skills consumes FP.
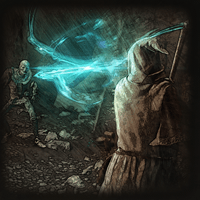
About Sorceries and Incantations
You can memorize sorceries and incantations at sites of grace. You must have a staff equipped to cast sorceries, or a sacred seal
l equipped to cast incantations.Casting sorceries and incantations consumes FP.
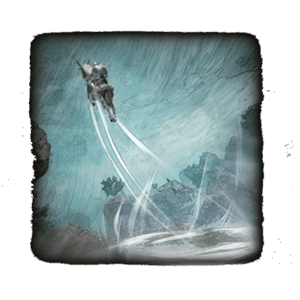
About Spiritspring Jumping
Jump while on horseback near a spiritspring to ride its current high into the air. You won't take damage from jumping into a piritspring while on horseback, even from a great height.
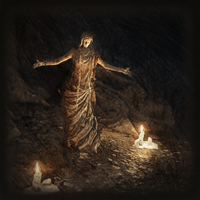
About Stakes of Marika
Upon dying, you will be revived at the last site of grace that you visited. However, if there is a Stake of Marika near where you died, you I can choose to be revived there instead.
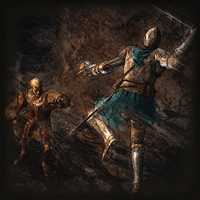
About Stance-Breaking
Some attacks may break an enemy's stance, giving you a chance to perform a critical hit. Charge attacks and jump attacks make it particularly easy to break an enemy's stance
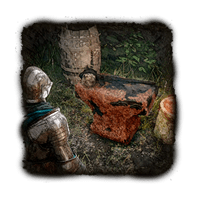
About Strengthening Armaments
At a smithing table, you can spend runes and smithing stones to strengthen your armaments. Somewhere in the Lands Between, you may meet a blacksmith who can make your armaments even stronger.
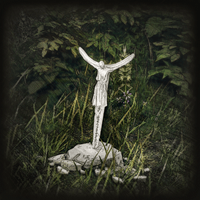
About Summoning Pools
In each area, you may find effigies of martyrs. These effigies are summoning pools. You'll find it easy to summon other players at these locations, as co-op and hostile summoning signs created with small effigies gather at summoning pools.
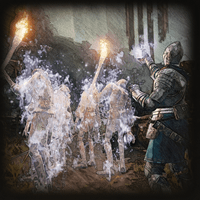
About Summoning Spirits
With a Spirit Calling Bell, you can use ashes to summon various spirits. Summoning typically consumes FP. You can only summon one type of spirit at a time.You cannot summon spirits during multiplayer.
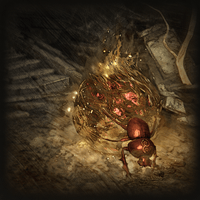
About Teardrop Scarabs
There are both Crimson and Cerulean Teardrop Scarabs. Defeat them to replenish the flasks that match their type. However, you cannot replenish more flasks than your maximum amount allows.
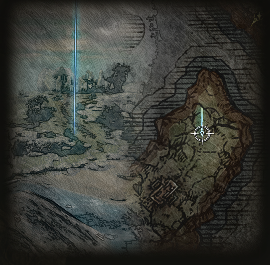
About the Map
Use your map to check your current position, as well as the terrain. and surrounding structures. You can update your map with new information by finding Map fragments at steles along the road. You can also use the map to freely place beacons of light to serve
as landmarks as you explore.
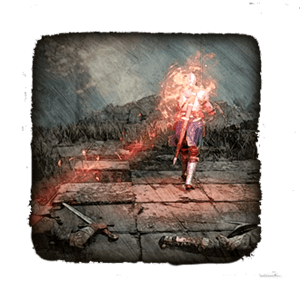
About Vanquishing Enemy Groups
Vanquishing an enemy group wrll replenish your flasks. The number and type of flasks to be replenished varies, depending
on the enemy group. You cannot replenish more flasks than your maximum amount allows.
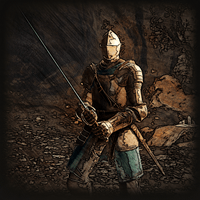
About Wielding Armaments
Each hand can be equipped with up to three armaments, allowing ; you to toggle between them. Armaments can also be two-handed, making attacks more difficult to repel with shields and boosting effective strength by 50%.
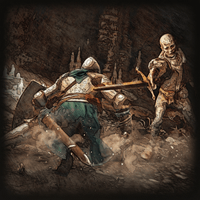
About Dodging
You can avoid enemy attacks with a dodge roll or backstep. Both of these actions consume stamina.
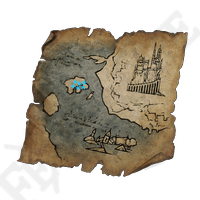
Meeting Place Map
Simple map found on a corpse. Seems to point to a meeting place. The man it came from surely desired one. The sole means of
gaining entry into the academy: a glintstone key.

Note: Demi-human Mobs
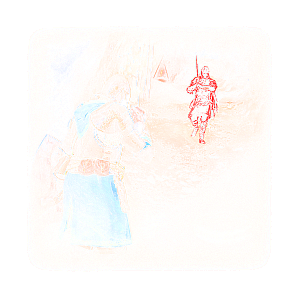
"Slay the demi—human mob's leader first, and the rest will lose
hope and panic."
Note: Flame Chariots
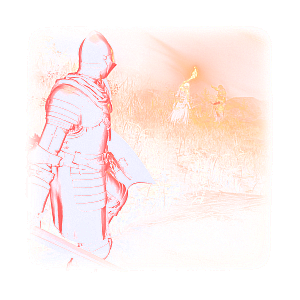
"Beware the Fire Monks' chariots bearing the faces of giants. A well-aimed blow to the chimney on top may prove effective, but opportunities for a plunging attack will be rare indeed."
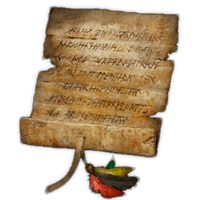
Note: Wandering Mausoleum
"To stop the mausoleum's stride, you'll need to clean up around its feet first."
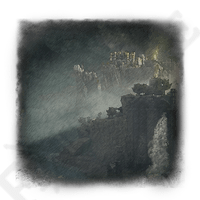
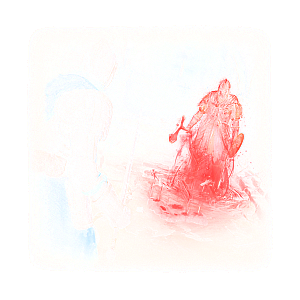
Prophecy Painting
Work of a wandering artist. Reminiscence of a painting titled "Prophecy."
This painter is said have captured the landscapes seen during the last moments of those welcomed into death's embrace.
The soul of the painter, and vestiges of the dead's last moments can be discovered by visiting the location depicted even now.
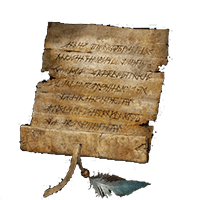
Note: Flask of Wondrous Physic
You can find crystal tears at the bases of Minor Erdtrees and elsewhere throughout the Lands Between.
At sites of grace, you can mix two crystal tears in the Flask of Wondrous Physick. This will allow you to create elixirs with various custom effects.
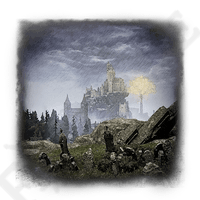
Resurrection Painting
Work of a wandering artist. Found at
Artist's Shack.
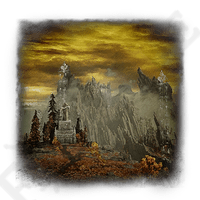
Champion's Song Painting
Work of a wandering artist. Found at
The Shaded Castle.
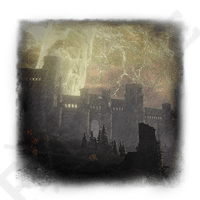
Flightless Bird Painting
Work of a wandering artist. Found at the Fortified Manor.
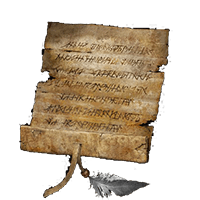
Note: Land Squirts
 Anonymous
 Anonymous
"Note: Walking Mausoleum" should be "Note: Wandering Mausoleum".
Missing info items:
About Competitive Multiplayer
About Great Runes
Note: The Preceptor's Secret
Zorayas' Letter
 Anonymous
 Anonymous
 Anonymous
These are all missing. I can't recall where I got them from, however:
Note: Gateway
Note: Below the Capital
Note: Gravity's Advantage
Note: Land Squirts
Note: Stonedigger Trolls
Note: Revenants
Note: Unseen Assassins
Note: Imp Shades
Note: Frenzied Flame Village
Note: The Lord of the Frenzied Flame
 Anonymous
There are at least 60 Info Items in the game but this wiki only lists 45…

 Anonymous
[ "Homecoming" Painting ] should be titled [ "Homing Instinct" Painting ].

 Anonymous
Need to examine the Homecoming Painting at Artist's Shack first. The Incantation Scarab can be found Southwest of the Dragon Burnt Ruins, there will be a gravestone with a ghost sitting in front of it. Interact with the ghost, and it will drop the Incantation Scarab.

 Anonymous
Need to examine the Homecoming Painting at Artist's Shack first. The Incantation Scarab can be found Southwest of the Dragon Burnt Ruins, there will be a gravestone with a ghost sitting in front of it. Interact with the ghost, and it will drop the Incantation Scarab.

 Anonymous
These are all the paintings I found:
Homing instinct
Flightless bird
Resurrection
Prophecy
Champion's song
Redmane
Sorcerer
 Anonymous
These are all the paintings I found:
Homing instinct
Flightless bird
Resurrection
Prophecy
Champion's song
Redmane
Sorcerer
 Anonymous
Missing Redmane a painting found in Caelid. Go to Selia Under-Stairs Grace, take the stairs going up, then take a right. The painting is underneath some collapsed arches of the building immediately on your left.

 Anonymous
There is a painting called the "Sorcerer" found in Castle Sol, in the Mountaintops of the Giants region. It's in a locked room accessed from above.
The painter can be found on the bridge west of Stargazers' Ruins, gives the Greathood iirc.
 Anonymous
There is another painting called Redmane. I'm not sure where I found it, but the location for the depiction is off the cliff of the minor Erdtree near Dragonbarrow Cave. There is a branch sticking out you can fall onto safely.
It provides the Ash of War: Rain of Arrows. There is also a stone giant there wielding a magic weapon that has more health than normal. (No drops though)
 Anonymous
There is another painting titled "Homing Instinct". I don't know where I found it, but I know the location it depicts:
It is north of the "Seaside Ruins" site of grace in southern Limgrave, south of the lake. More detailed: north-west of the site of grace and east of the start of the game (Stranded Graveyard, Cave of Knowledge), right at the corner of that cliff. The site itself is looking south towards a minor erdtree through some bridge like structure.
It rewards the "Incantation Scarab" Head. A golden scarab you can wear which slightly reduces FP cost of incantations while increasing the damage you take.







Missing:
Mirage Riddle (Altus Plateau tower riddle)
1
+10
-1