The Academy of Raya Lucaria is a Legacy Dungeon in Elden Ring. Quite a different area as it has a variety of blue hues, compared to the green open spaces of Limgrave, covered in crystals not only in its environment but also the creatures that inhabit it. These range from snails to more vicious animals to the underwater crustaceans such as crabs and are heavily guarded by the academy's scholars.

Academy of Raya Lucaria Guide
- Previous: Stormveil Castle
- Next: Volcano Manor
- Recommended Levels: 50-60
- Bosses: Red Wolf of Radagon, Rennala, Queen of the Full Moon
- Site of Grace:
Academy Gate Town [Map Link]
South Raya Lucaria Gate [Map Link]
Church of the Cuckoo [Map Link]
Schoolhouse Classroom [Map Link]
Debate Parlor[Map Link]
Raya Lucaria Grand Library [Map Link]
Video Walkthrough
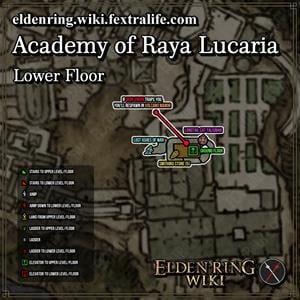
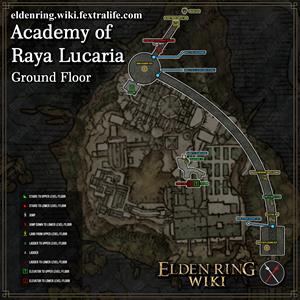
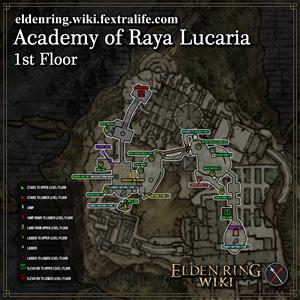
Academy of Raya Lucaria Map
Lower Floor
Ground Floor
1st Floor
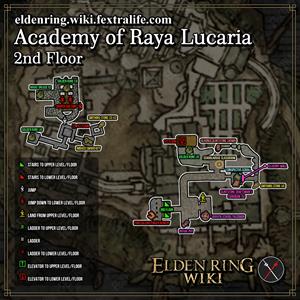
2nd Floor
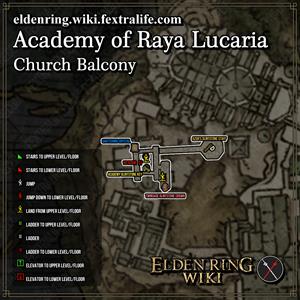
Church Balcony
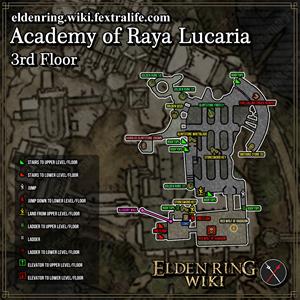
3rd Floor
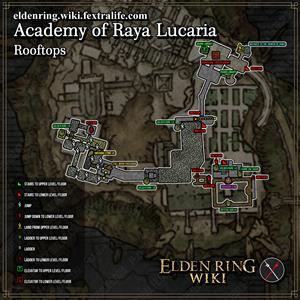
Rooftops
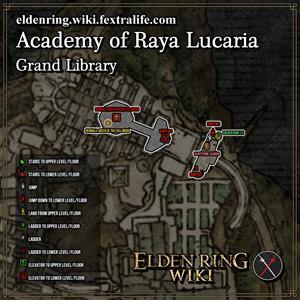
Grand Library
NPCs in Raya Lucaria
- Thops (Deceased)
- Bloody Finger Hunter Yura
- Sorceress Sellen
- Witch-Hunter Jerren
- Boc (if you gave him a Larval Tear)
- Rennala (after defeating her as a boss)
Raya Lucaria Academy Bosses
All Items in Raya Lucaria
Talismans
Consumables
- 5x Meteor Bolts
- 18x Crystal Dart
- 5x Magic Grease
- 5x Perfumer's Bolt
- 3x Golden Rune (2)
- 2x Golden Rune (3)
- 8x Golden Rune (4)
- 3x Grace Mimic
- 1x Spellproof Dried Liver
- 1x Rune Arc
Weapons & Shields
Armor
- Carian Knight Set
- Glintstone Scarab
- Karolos Glintstone Crown
- Olivinus Glintstone Crown
- Twinsage Glintstone Crown
- Lazuli Glintstone Crown
Spells
Crafting Materials
- Herba
- Crab Eggs
- Rowa Fruit
- Ruin Fragment
- Trina's Lily
- 5x Crystal Bud
- 2x Golden Seed
- 3x Living Jar Shard
- 4x Glintstone Firefly
Upgrade Materials
- 3x Smithing Stone (2)
- 3x Smithing Stone (3)
- 1x Smithing Stone (4)
- 2x Smithing Stone (5)
- 2x Somber Smithing Stone (3)
- 1x Somber Smithing Stone (4)
Ashes
- Marionette Soldier Ashes
- Avionette Soldier Ashes
- Ash of War: Charge Forth
- Ash of War: Spectral Lance
Keys & Other
- 1x Ritual Pot
- 1x Cracked Pot
- 3x Grace Mimic
- x1 Memory Stone
- x2 Stonesword Key
- x1 Conspectus Scroll
- x1 Imbued Sword Key
- x1 Thops's Bell Bearing
- x1 Glintstone Whetblade
- x1 Academy Glintstone Key
- x1 Silver-Pickled Fowl Foot
- x1 Great Rune of the Unborn
- x2 Furlcalling Finger Remedy
- Glintstone Craftsman's Cookbook [5]
- Remembrance of the Full Moon Queen
Creatures & Enemies
- Abductor Virgin
- Alabaster Lord
- Avionette Soldier
- Crab
- Flame Chariot
- Giant Crab
- Glintstone Sorcerer
- High Page
- Land Squirt
- Lazuli Sorcerer
- Lesser Mad Pumpkin Head
- Living Jar
- Magic Putrid Corpse
- Marionette Soldier
- Moongrum, Carian Knight
- Noble Sorcerer
- Raya Lucaria Foot Soldier
- Raya Lucaria Soldier
- Rotten Stray
- Teardrop Scarab
- Wandering Nobles
Notes
Important Discoveries
- Find the Academy Glintstone Key.
- Investigate the two bridges leading to the academy's main gate.
- Explore the academy.
- Defeat the Monolith Guardian.
- Collect the Carian Knight Set
- Fight the Red Wolf of Radagon.
- Keep an eye out for Crystallized Crabs.
- Explore the Rooftops of the academy.
- Obtain the Academy Glintstone Key.
- Find the Radagon Icon Talisman.
- Acquire the Azur's Glintstone Staff.
- Successfully pass through the Iron Ball trap.
- Fight the hostile NPC Knight.
- Face Rennala, Queen of the Full Moon.
- Give the Academy Glintstone Key to Thops
Full Academy of Raya Lucaria Walkthrough
How to Unlock the Academy of Raya Lucaria
First thing you will need to know is that there is no secret entrance to infiltrating Raya Lucaria Academy, the only way in is through the main gate that is currently sealed with a barrier. The only way in is by finding the Academy Glintstone Key and using it to pass through the barrier. To find it, grab the map that has the coordinates of the key which can be looted off a body that can be found near the main gate that is sealed with a barrier. This will lead you to an island that is situated on the west side from the academy.
On that island, you'll find that it is guarded by a field boss, the Glintstone Dragon Smarag. Fighting this dragon is optional since you can simply sneak behind it and loot the key from a Glintstone Sorcerer's corpse. Once you have it, return to the South Raya Lucaria Gate and you can pass through the barrier. The nearest site of grace is the Crystalline Woods site [Map Coordinates].
Academy Gate Town

Start by exploring the Academy Gate Town from its site of grace. Check the southwest section and you can find a glowing sapling where you can pick up a Golden Seed [Map Coordinates Here]. You'll want to clear out the outer area first before you head to the academy's gate. Go west and you'll see a Giant Crab that you can kill, this drops 1x Crab Eggs. At the same section where the Giant Crab was, you'll find a body that can be looted to find 3x Smithing Stone (2) [Map Coordinates Here].
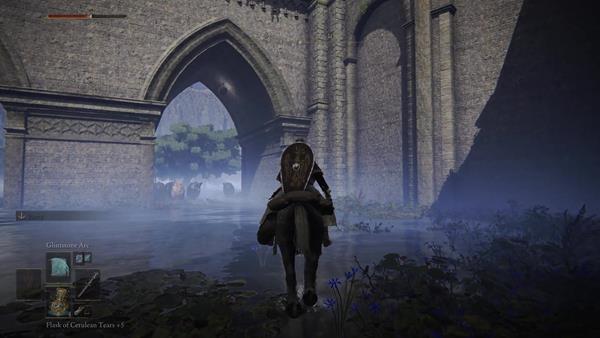
In the same section, look behind and you'll see a couple of Land Squirts, and above it is a Teardrop Scarab hanging on the wall. Kill all the Land Squirts first and make sure you're using ranged attacks since attacking these things will release a poisonous mist. When that's done, you can hit shoot down the scarab and finish it off. This scarab drops the Ash of War: Charge Forth item. After grabbing the item you can now proceed to the heavily guarded front side of the gate which is at the west section of the Academy Gate Town.

We suggest you tread carefully since the path is blocked with barricades and is guarded by Raya Lucaria Soldiers and Foot Soldiers; apart from that you have to watch out for one of the Foot Soldiers that are operating a flamethrower which you can find at the top of each set of stairs. To your advantage, you can also bait the Soldiers to stand in front of the flamethrower so that they get hit. At the top, you'll reach the Soldier's stronghold where you'll also encounter the Flame Chariot.
As you take out the enemies in this section, don't forget to grab a Smithing Stone (3) that can be looted from the ground. Continue moving north through the enemies to reach the gate or you can go around it by moving east where you'll find a corpse that you can loot to find 4x Glintstone Fireflies - the end of this path is where you'll find the South Raya Lucaria Gate Site of Grace and the entrance to the academy, when you're ready, go through the sigil of the gate. Important: If you do not see the prompt to pass through the sigil, try standing under the sigil itself rather than against the physical gate.
Entering the Academy of Raya Lucaria
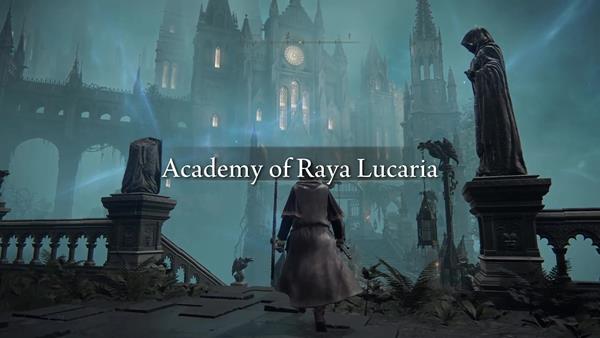
On the other side, you'll still be within Liurnia of the Lakes, however, you'll find the Main Academy Gate Site of Grace at the center and on the left is a lift that you can ride to formally arrive at Raya Lucaria Academy. Move through the runway and when you reach the other end that has a fountain, look to your left to find 1x Trina's Lily, while on the right, you'll find a corpse next to a tree that you can loot to find 1x Magic Grease.
Go back, and head up the stairs where you'll see two Glintstone Sorcerers at the top, be mindful when you are fighting these enemies since they can use sorcery and bombard you with glintstone sorcery from afar; use your shield, time your dodges right, or even close the gap and attack them with your melee weapon since they react slow towards close-quarter combat. Kill the two Glintstone Sorcerers and open the door to continue onto the next section, the Church of the Cuckoo.
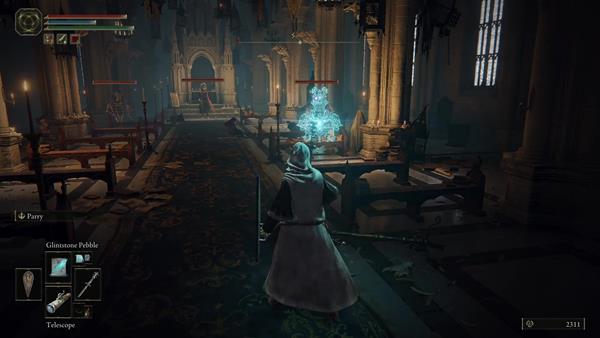
In the next room, walk slowly and you'll see two Marionette Soldiers that will drop from above, you'll also see one Glintstone Sorcerer at the far end of the room by the altar. We recommend killing the sorcerer first since it will provide the Marionettes with covering fire. You can lure the two soldiers outside, deal with them first, and then take out the sorcerer, or, use the pillars in the room as cover from the sorcerer's attacks and fight the Marionettes simultaneously. There are also two more Marionettes that will drop from the ceiling if you walk on the left or right side of the room.
You can easily spot them if you look up and press the auto-lock button. Upon clearing the section, make sure to check behind the altar, there is a wall, and behind it is a corpse that you can loot to find a Somber Smithing Stone (3), while on the right side, resting against a wall, is another corpse that has a Golden Rune (2). Before Moving on there is also a hidden room on the right side as you enter. The first wall segment on the right side is an Illusory Wall. Break the illusion to reveal a small side area filled with stone coffins. On the other end of the area is a corpse with a Rune Arc. Now, there is another room that you can find on the left side that has the Church of the Cuckoo Site of Grace, just turn left as you pass through the arch doorway to find it - activate it and rest if needed.
Academy Graveyard

When you are ready, go down the corridor, opposite of the site of grace and turn left to find an exit that will lead you to a graveyard section. You will need to be cautious of your surroundings since the area is filled with Magic Putrid Corpses that wander, although they have high resistance to Magic Damage, they move slow and are not difficult to kill. Always check corners too since they can grab you, and if bitten, can fully drain your FP. If you get overwhelmed by their numbers, you can easily run past them or even try to dodge roll into them to knock them back, to create some space, and even interrupt their attacks. Alternatively, attacking them with your melee weapon will interrupt their moves.

From the door, you'll first see two of these Putrid Corpses ahead, you can take them out first, and when it's killed, go east from the door and go straight to find a corpse that you can loot. Just be careful since, by the corner of the path on the left, there is one Putrid Corpse hiding and waiting to ambush you. And just before you walk up to the corpse, there is one more, and two more that will burrow out from the ground. Once you've cleared the path, loot the corpse sitting by the ledge to find x3 Grace Mimic - retrace your steps and head down the slope.

As you're heading down the slope, look to your left and you'll see another corpse that you can loot by the tombstones. Walk carefully as you approach it and look to your right, there is a Putrid Corpse that is (again) waiting to ambush you, and more ahead as you get near the bootable corpse. Clear the path and loot the body to find x1 Spellproof Dried Liver. Next, look to your right and you'll see a wooden bridge, cross it, and be ready to clear the area since more Putrid Corpses will burrow out from the ground as you approach the other end of the bridge.

The other end of the bridge has multiple enemies such as the undead, a Rotten Stray, and two archer Marionette Soldier on high ground that are ready to shoot you if you come rushing in. Now, as you approach the other end of the bridge, turn left immediately and jump down from the ledge to find a path that curves to where the Marionette Soldiers are, kill the two soldiers and then loot the corpse that is hanging by the ledge to find x1 Marionette Soldier Ashes. By the large tree, if you're looking ahead, is the Rotten Stray that's eating the corpse that you can loot to find x1 Silver-Pickled Fowl Foot. As you continue forward there will be more Putrid Corpses and Rotten Strays around, so we would recommend you to move slowly and take out the enemies one at a time since you can easily die if you are outnumbered.

As you reach the arch doorway, you'll notice that there is another body that you can pillage to find x2 Magic Grease, it's on the right side near a lit torch and some tombstones.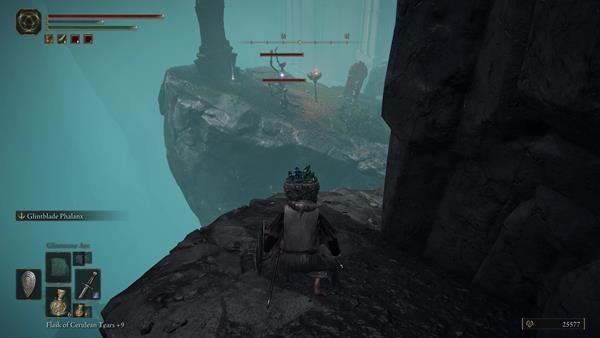 If you look down, you can find a platform that you can drop to. Kill the group of Putrid Corpses worshipping a statue and pick up the glowing item to receive the Carian Knight Set. Following the path, you can find a corpse that can be looted to find x1 Golden Rune (4). Go back and jumping down from the narrow path on your right side will lead you to the arch doorway again.
While on the left side of the arch doorway, you'll see a path that is lit with a torch, down the slope, you'll find a Teardrop Scarab, kill it to obtain x1 Ash of War: Spectral Lance. If you continue going down the slope, you'll see another corpse that you can loot that is being guarded by another Putrid Corpse. Kill the enemy and loot the corpse at the end of the slope to find x1 Golden Rune (4) - retrace your steps back to the arch doorway and pass through the hall.

As you exit the hall, you'll notice that there is a large rotating lift on the right, don't ride it first, but instead, go straight towards the section where you'll notice some maiden statues and a monolith at the center. On the right side of the monolith, you'll notice a small dark purple portal. As you get near it, an Alabaster Lord will appear from the portal and start to attack you; it will use a gravity type sorcery that pulls you in, as well as plunging its weapon into the ground to release a pulse of energy. Using sorcery such as the Glintblade Phalanx and Glintstone Pebble sorceries whilst maintaining distance is effective. If a player is pulled in, they should immediately dodge backwards to avoid its follow-up attack. Successfully defeating the Alabaster Lord rewards you with 3235 Runes and you can loot its corpse to find Gravity Well. Before leaving this section, make sure to jump on the monolith and pick up 2x Somber Smithing Stones (3).

Retrace your steps to the rotating lift, jump on the platform and ride it to the top. Jump onto the platform at the highest point and you'll see a Wandering Noble digging the ground; you can sneak behind to backstab it. Nearby, you'll see the arch doorway that leads indoors. Ignore that for now, and instead go right inside the small cave with crystals that is guarded with two more Wandering Nobles where you'll find 5x Crystal Darts on the ground, behind some grass and flowers.
By the arch doorway, look to your right and you'll see a slope that goes up, to a corner, there is another Wandering Nobles with a torch here, kill it and walk up a bit, on the right side, there's a body hanging by the ledge, loot it to find a Golden Rune (4) - after grabbing the Golden Rune, go back down and head through the arch doorway where you'll find the Schoolhouse Classroom Site of Grace.
Now go back where you left the rotating lift. Turn left and kill a Wandering Noble at the end to take the lift going down. Take off when you see the ground sticking out. Defeat the group containing 2 Avionette Soldiers and Wandering Nobles to get the Avionette Soldier Ashes.
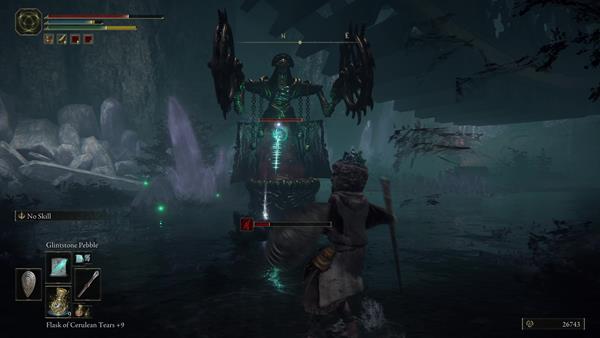
If you ride the lift further to the bottom, you will encounter an Abductor Virgin, that is, the Iron Virgin, mentioned by Patches at the Scenic Isle. If you are eaten, then you will be trapped and teleported to the inquisition chambers of Volcano Manor, so you have to be careful if you don't want this to happen. One safe way to defeat the statue is going into the narrow path and trying a ranging battle. Defeat the enemy and loot the corpses here to find x1 Smithing Stone (5) and x1 Longtail Cat Talisman. There are also some Glintstone Firefly materials that you can loot here. If you look around, there is a small building that you can reach by jumping onto crystals. Grab the Lost Ashes of War in front of the building. Go back to the narrow path and ride the lift back to the top; on the way up, if you want, you can also grab x1 Trina's Lily on your left side with a well-timed running jump.
The Great Hall
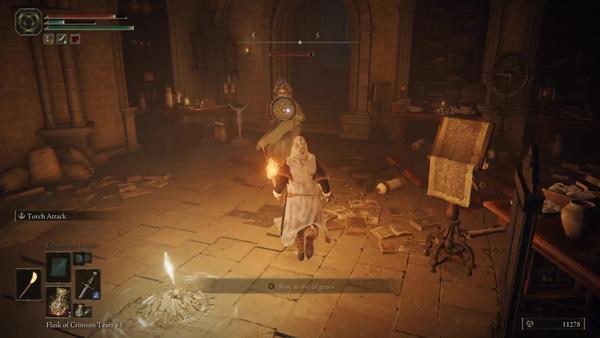
Before you head to the great hall of the institute, make sure you've used the site of grace to rest, upgrade if needed, but most importantly, for it to be marked as your checkpoint. The area ahead is swarming with enemies such as Glintstone Sorcerers and Lazuli Sorcerers. The melee-focused Lazuli Sorcerers can be easily identified by their sword, shield, and light blue robe, but they will also use sorcery to aid themselves in combat. You can sneak behind and backstab it once it turns its back. From the doorway, go left and you'll find a room where you can loot x1 Conspectus Scroll, as well as a treasure chest containing x1 Glintstone Craftsman's Cookbook [5].
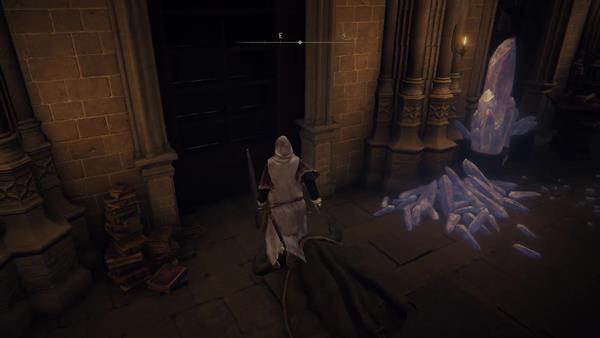
Before going out, there is an illusory wall in the same room. Where the corpse is, you'll see an empty bookshelf behind it. Hit it to reveal the secret passage. Go to the balcony and check the right side to find another corpse you can pillage to find x1 Smithing Stone [4], on the left side, you can jump down to the narrow path, walk to the end, around the corner, to find x2 Trina's Lily. From here, look northwest and climb up a few rocks to reach a ledge. At the end, you'll find x1 Olivinus Glintstone Crown that you can loot off a corpse. Grab the item and head back to the Schoolhouse Classroom site of grace.

As you return to the hallway, you'll see two Glintstone Sorcerers studying, one on the left, and one on the right. You can sneak behind them and pass through if you want to avoid fighting them, or sneak behind one and backstab it, then fight the other. Next, continue forward, up the steps, and you'll see four more Glintstone Sorcerers. If you peak at the corner on the left, you'll see a large Living Jar (similar to Alexander). The three Glintstone Sorcerers won't notice you since they all have their backs facing you. The Living Jar, however, will see you as soon as you walk forward.

You can bait it back down to the hallway or by the short stairs and fight it there so that you don't get outnumbered and you can focus on fighting the Living Jar. Defeating it yields 514 Runes and drops x1 Living Jar Shard and x1 Raw Meat Dumpling. Once you've defeated the Living Jar, take out the Glintstone Sorcerers and open the treasure chest to find x1 Ritual Pot before heading up the stairs on the right. Note: the sorcerer has a chance to drop x1 Academy Glintstone Staff that can be looted off its body.
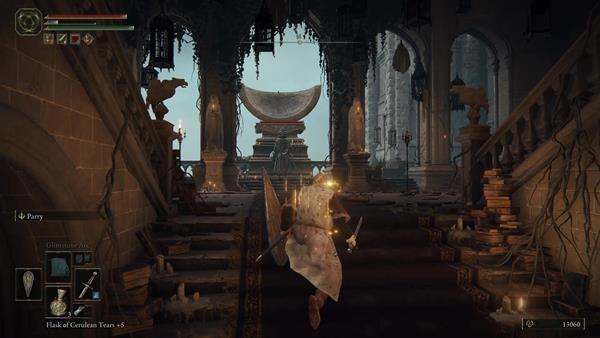
You'll notice as well that there is a door opposite of the stairs - this is locked and can only be opened from the other side using an passage on the third floor via an illusory wall, so ignore this first and head up the stairs where you'll encounter another Lazuli Sorcerer standing in between two maiden statues. There is also another Glintstone Sorcerer on the left side, standing by the bookshelf, while two more patrolling by the other set of stairs, on the third floor. The one patrolling will notice you so bait the enemy to the lower floor and kill them, while the one standing by the bookshelf, you can sneak behind to backstab it.
We suggest that you kill both sorcerers first and then shift your attention towards the Lazuli Sorcerer. Upon defeating the enemies on the second floor, walk towards the balcony with large arc-looking statue, look to the left, and you'll see a corpse that's hanging by the balcony's fence, loot it to find x1 Furlcalling Finger Remedy - you've cleared the second floor.
Secret Wall: Upon reaching the top of the stairs (just before the boss room door), the first empty bookshelf on the left of the staircase is an illusionary wall. See picture below. This leads to a chest containing the spell Comet and a corpse behind the altar containing a Stonesword Key. Climb the ladder in this room and make your way to the terrace along the back wall. There is a hole that will drop you into another room containing the Graven-School Talisman. The pots will come alive once you approach the talisman.
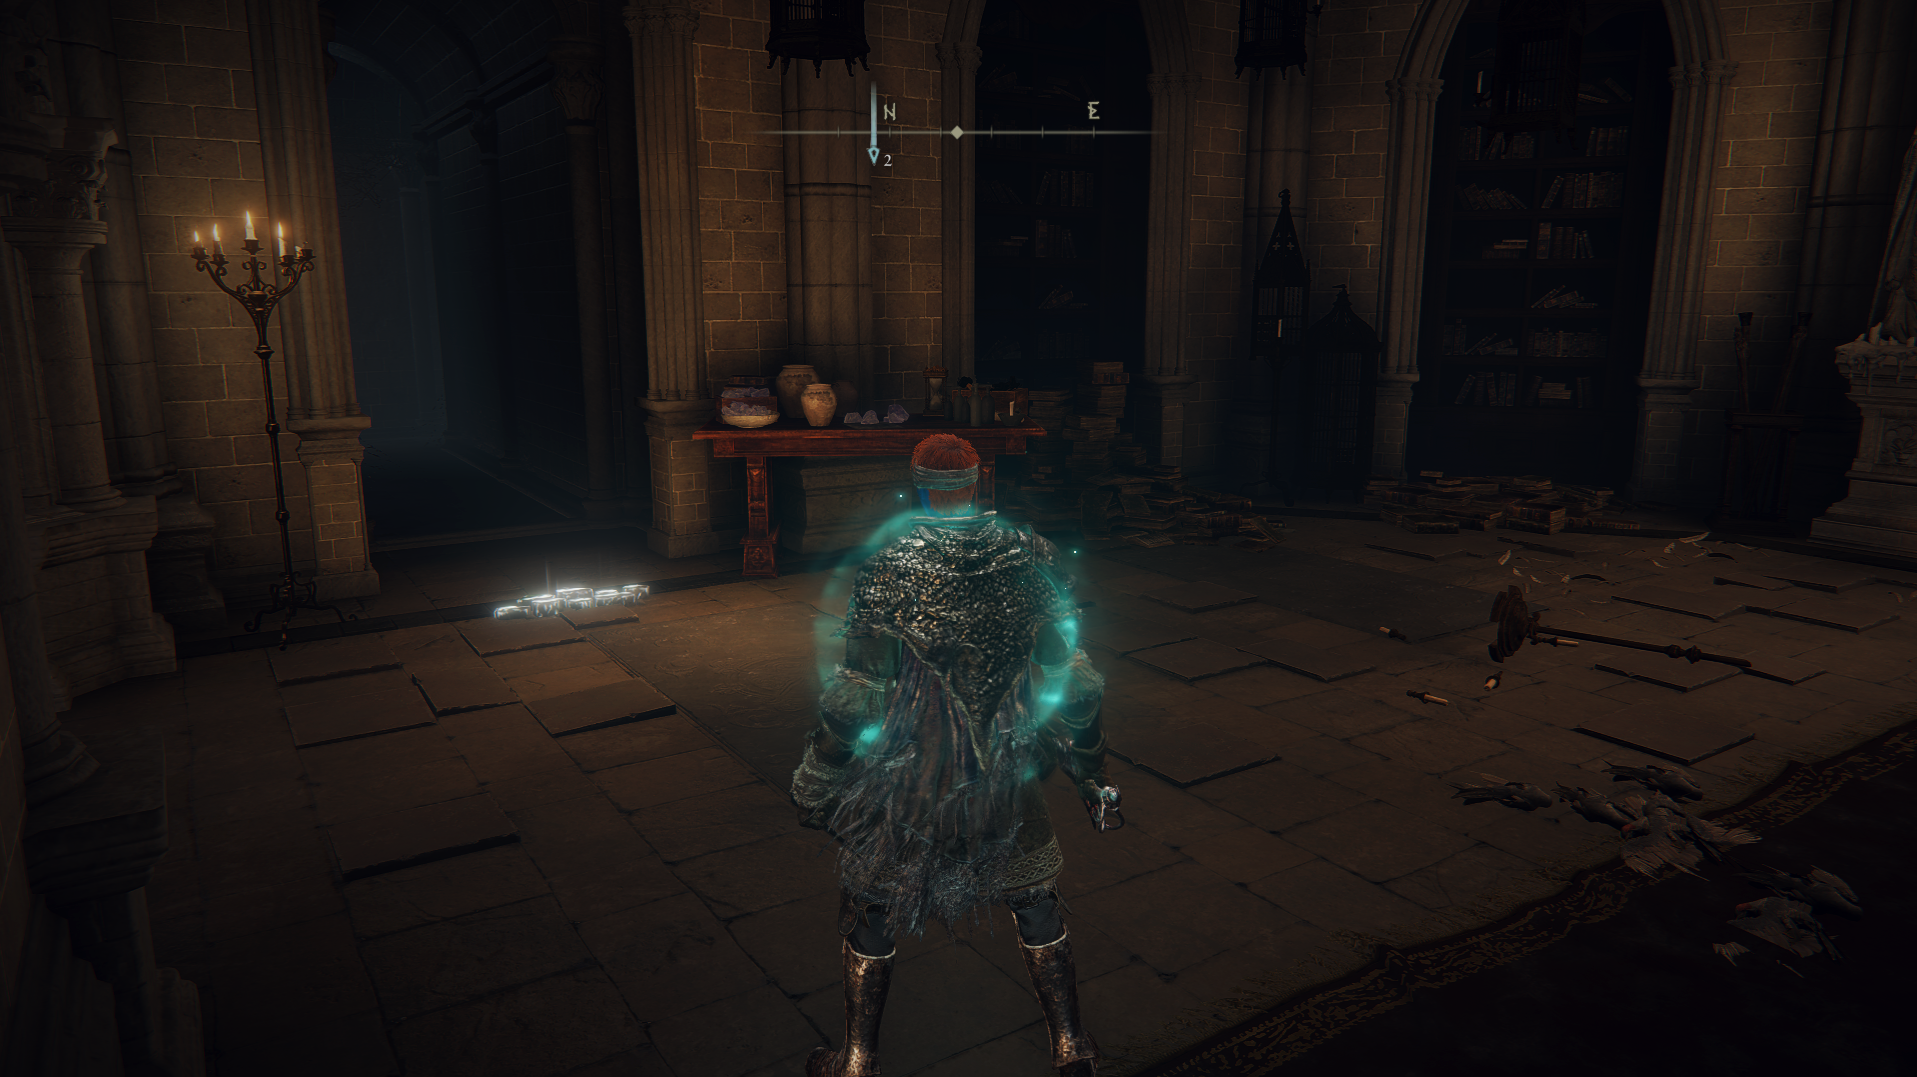
If you're ready, you can find the gold mist door at the third floor that leads to the boss arena (Debate Parlor) of the Red Wolf of Radagon.
Greater Enemy: Red Wolf of Radagon
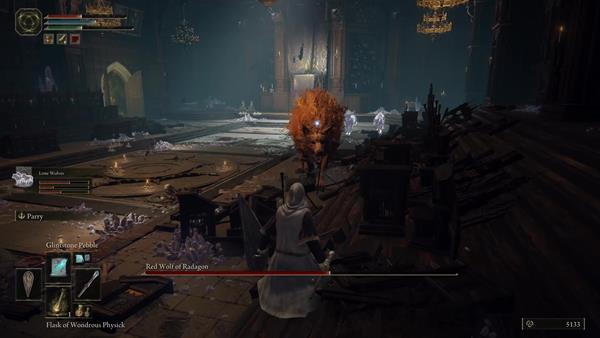
We suggest preparing before going through the mist to fight the Red Wolf of Radagon. The Red Wolf of Radagon Greater Enemy (Mini-Boss) is a big red wolf that uses its agility to leap around and to attack you. (1) This greater enemy can also use the Glintblade Phalanx spell. It can also manifest a large red glowing sword from its mouth and attack in a swinging motion on the ground or in the air.
During our encounter with this mini-boss, at the start of the battle, we used the Lone Wolf Ashes to summon three wolves to help in combat. They help in attacking the Red Wolf, and most importantly, they can catch its attention, allowing our character to attack it with ranged magical attacks while it is busy fighting the wolves. The wolf has low health and it is slightly weak against Slash Damage and/or Pierce Damage.
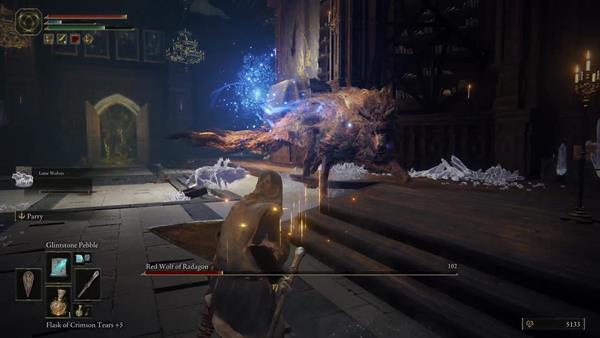
To determine when the Red Wolf uses sorcery, you'll see either one or more blue energy projectiles behind its trail. When this happens make sure you are far away and around a second or two, dodge or sprint sideways as it shoots at you. If you are in a position where you are near the Red Wolf, you'll have to try and dodge back after evading the projectiles since it will follow up with a few strikes. The best strategy is to wait patiently and look for that small window to counterattack it when it fully commits to a striking move.
This either happens when it uses a lunging bite attack, this move usually has a max of three hits, and after the third lunge, you can counterattack. Another will be after it leaps into the air and lands on the ground with the magical sword in its mouth, there is a chance for you to land one to two hits before it fully recovers. Just don't be greedy and remember to back away after landing your counters - as you defeat this greater enemy, it rewards you with 14000 Runes and x1 Memory Stone, you'll also find the Debate Parlor Site of Grace in this arena.

From the doorway leading to the courtyard, make a right, go around the corner and you'll see that there's a platform below. Jump over the fence, and climb the ladder. At the top, you'll see a window that is broken that you can go through. You'll find yourself on the upper level of the Debate Parlor.
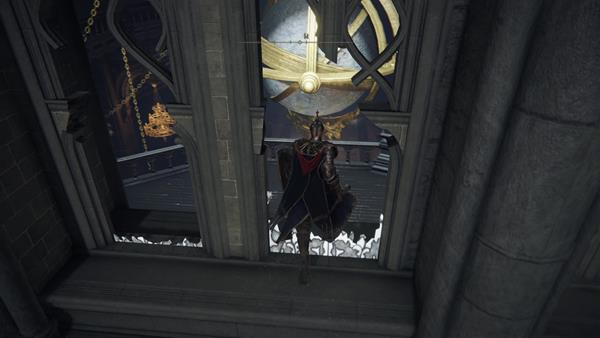
Go to the left, and you'll find a body that you can pillage to find x5 Crystal Bud. Head to the opposite side on the right, and you'll find a treasure chest containing x1 Radagon Icon. Exit through the arch doorway near the chest, but be careful, there is a Lazuli Sorcerer hiding by the corner at the left side of the doorway and a Glintstone Sorcerer ahead. From where the sorcerer is standing, you'll find a corpse against a wall, next to a barrel. Loot it to find x1 Golden Rune (4) - jump back down to the Debate Parlor site of grace and continue towards the courtyard.
Academy of Raya Lucaria
Courtyard

From the Debate Parlor site of grace, exit through the doorway on the left to find the institute's courtyard. There are small Crabs here by the fountain and Wandering Nobles. From the doorway, turn left and head up the stairs to find a dead-end, along with five Living Jar enemies and one Glintstone Sorcerer. Kill the enemies and loot the corpse on the left for x3 Living Jar Shard, while on the right you can pick up x1 Cracked Pot. Go back down to the courtyard and jump on the large fountain at the center to find another body that can be pillaged for x1 Stonesword Key.
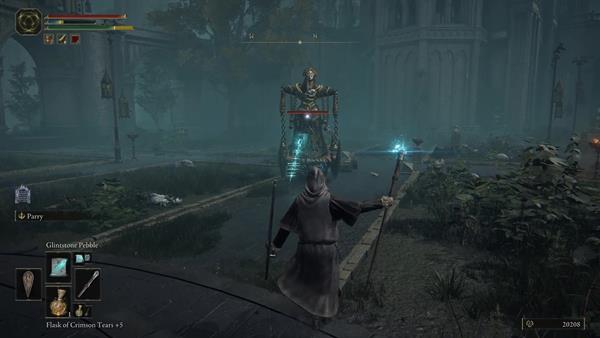
At the far north side of the courtyard, you'll find more Wandering Nobles, small Crabs, a Noble Sorcerer, and a moving Abductor Virgin. Be careful of this statue since it can extend its chain arms to reach out and attack you. If it gets close, the center part of its body will open, revealing some tentacle-like arms that will try to grab you. After you clear out the enemies within the courtyard, loot the body resting against some small cages on the northern side for x5 Glintstone Firefly.
If you check around as well, there are some materials that you can grab such as Rowa Fruit, Herba, and Trina's Lily. If you check the northwest section of the courtyard, you'll encounter a Giant Crab that will burrow out from the ground. Killing it yields Runes and drops x1 Crab Eggs. Head west of the courtyard and you'll see a glowing sapling that is guarded by three Wandering Nobles. Kill the enemies and check the glowing sapling to find x1 Golden Seed on the ground.

Also on the west, you'll notice a slope that goes down and around the corner of the building's walls. This leads to a dead-end where you'll notice another Wandering Noble sitting by the ledge on the right and hiding behind the grass bush by the corner on the left is a special-looking Crab that has crystals on its back. Upon death, this Crystallized Crab drops x1 Karolos Glintstone Crown.
Go back to where the glowing sapling is and check the right-side corner where you'll spot a corpse that you can loot. Tread carefully as you approach it since a Giant Crab will ambush you from the ground. Kill the enemy and loot to the body to find x1 Golden Rune (2). Also near this body, if you go check the ledge of the cliff on the left side of the body, there's another corpse that you can pillage to find x1 Golden Rune (4).
Academy Rooftops
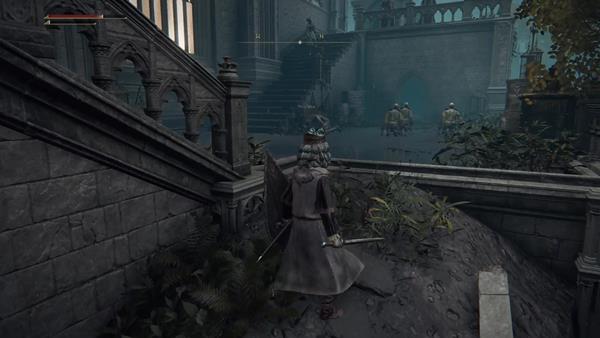
After clearing the west side of the courtyard, return to the center area where the fountain is and you'll see a slope on the right (facing the doorway leading back to the Debate Parlor). At the top, there are multiple enemies here such as more Glintstone Sorcerers and Wandering Nobles. You'll see the Wandering Nobles kneeling, a Wandering Noble standing on the steps, two Glintstone Sorcerers standing by the balcony fence at the top of the steps, while another Glintstone Sorcerer is inside the room in front of the kneeling Wandering Nobles. Take caution since the moment you approach the group, the sorcerers will bombard you with magical attacks.
Sprint across the group of Wandering Nobles, up the stairs, and take out the two sorcerers first. Remember that they react slowly when you close the gap and fight them upfront. Next, kill the Wandering Noble, which has a chance to drop Aristocrat Coat, and kill the rest of the Wandering Nobles. Go back down and head up the steps opposite to it where you'll encounter more Wandering Nobles and another Glintstone Sorcerer. Clear this area and loot the nearby corpse to find x1 Golden Rune (2). Next, go back and head towards the arch doorway that was in front of the group of kneeling Wandering Nobles. You'll find an office where you can loot a body that is hanging on the fence of the window balcony - the body contains x1 Glintstone Whetblade.

Return to the upper balcony where you encountered the Wandering Noble and two sorcerers and jump over the fence on the left to reach the other side of a locked door. There is another Glintstone Sorcerer here as you jump down. Kill the enemy and open the nearby door to unlock a shortcut leading back to the central section of the courtyard. Next, continue going up the steps and you'll see another Glintstone Sorcerer roaming, wait for it to turn around, backstab it, then finish it off. Around the corner, you'll see another body hanging on the balcony's fence, pillaging the body to find x1 Golden Rune (3).

Now tread carefully since you will be traversing the rooftops of the academy, the slightest misstep could lead to death. You'll first encounter two Marionette Soldier enemies here. From where the Marionette Soldiers were standing, move to the right and jump onto the narrow platform that circulates the wall. You'll immediately notice the ladder here, go left to find a body sitting on the ledge and loot it to acquire x1 Golden Rune (4).
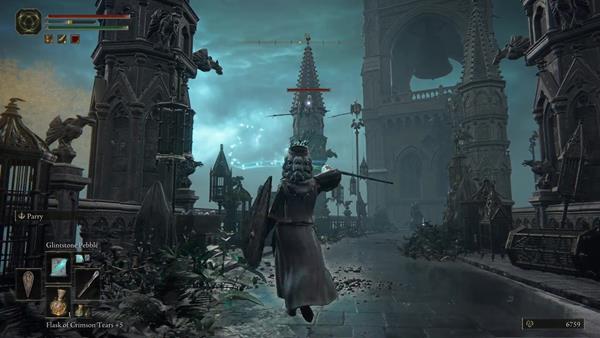
Go back to the ladder and climb to the top where you'll see a runway leading to a tower. As you walk towards the runway, look up and press the auto-lock button where you'll notice a new type of enemy. These are Avionette Soldier. They use their wings to fly through the air. Using long-range attacks such as sorcery will work well against these reanimated enemies. There is also one Glintstone Sorcerer that is patrolling the runway. Clear the path and along the runway, on the right, there is a corpse that you can pillage to find 5x Crystal Darts. Go towards the narrow platform circulating the tower's walls, turn left and you'll see another corpse that can be looted to find 5x Meteor Bolts. From where you looted the Meteor Bolts, walk to the ledge and jump down onto the rooftop.
Looking up, you will notice a corpse on the roof. To reach it, jump down once more and look to your left. There is another roof with a fair amount of gap but still reachable. Perform a careful running jump to step onto the roof and prepare for an immediate ambush a Avionette Soldier. Head left and follow the spiral path of rooftops, inhabited by several Marionette Soldiers. After a jump over a gap once again, you will see a ladder on your left. Just don't go into the ladder room naively since two Marionette Soldiers are each looking for an ambush from the left and right wall. The ladder leads to the top of a bell tower, in which you can obtain the Full Moon Crossbow. Now jump down to a rooftop, on the left of which you will see the forementioned corpse bearing a Smithing Stone (4).
Jump down from the corpse and you are back to where you were before. Do the hard jump again, but this time, go straight to perform another jump. Go to the tower that you see on your right; an Avionette Soldier will ambush in the middle. Go down through broken wooden floors until you see a Crystallized Crab, which can be looted for the Lazuli Glintstone Crown. Eventually, you will reach a small room with some crabs and a body holding a Somber Smithing Stone (4).

Leaving the room, go around to your left to climb the ladder. On your left, you will see a body that you can loot to find x1 Imbued Sword Key inside a tower. Looking across from the key, and you'll see a nearby narrow platform of another towering building. Jump across and go around the platform to find another body that's sitting by the edge, to pillage and acquire x2 Smithing Stone (3).
Retrace your steps back to the ladder to see two Marionette Soldier enemies roaming the rooftops north of you. Jump across the rooftop in front of the ladder. Move North, and then look to your right, there's a dead-end by the rooftop where you'll see a corpse that can be pillaged to acquire x2 Magic Grease. Just be careful since two Avionette Soldiers will ambush you.
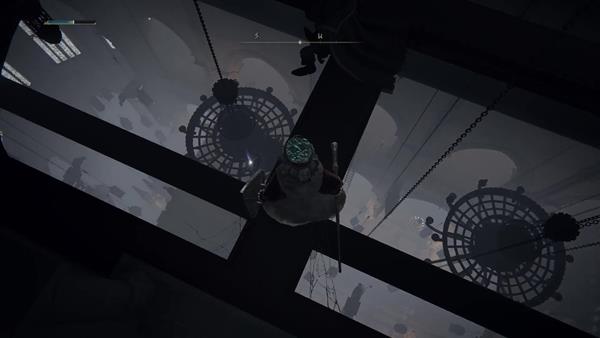
Next, turn around and you'll see an arch window that you can pass through (this is the ceiling of the Church of the Cuckoo). Tread carefully as you will be walking on narrow beams of the church's ceiling. Look to the right and you'll see another body that can be looted to obtain x1 Golden Rune (3). Now from where the body is, if you look down, you'll see there's a glowing item on the chandelier. There's another vertical beam below that you can jump onto, and then jump to the top of the chandelier. Loot the body to find x1 Academy Glintstone Key.
Jump down onto the short bridge from the chandelier and tread carefully since the upper section of the church is guarded by Lazuli Sorcerers and Glintstone Sorcerers. Check the northwest side after killing the enemies to find a corpse that is sitting against a wall, you can pillage the body to find x1 Shattering Crystal. Make sure to kick the ladder down that's at the opposite side of the short bridge, this unlocks a shortcut leading back to the Church of the Cuckoo site of grace (take note that the enemies here respawn). Head east to see an arch doorway and a balcony, each at the end of a bridge.
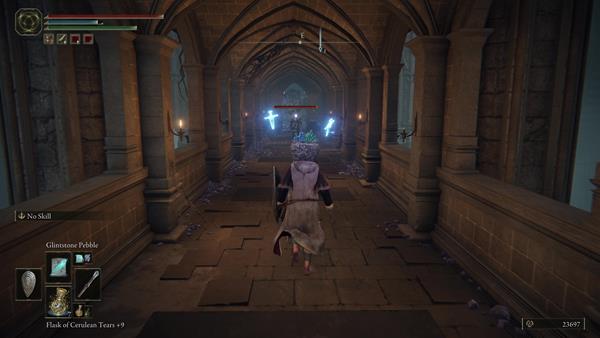
Step into the corridor first and defeat the High Page guarding the entrance on the other side of the runway, but be ready to dodge since it will shoot you with a crossbow. Defeating the High Page drops 5x Perfumer's Bolt. Behind the High Page is a room covered with glintstone. You'll find the Azur's Glintstone Staff on the ground, next to the crystal formation with the dead School of Graven Mages at the center of the room.
Retrace back to go out to the balcony, and check the right side by the corner of the scaffolding to find another Crystallized Crab. This is similar to the one you first encountered at the west side of the academy's courtyard. If you want to save FP, you can strike it with your melee weapon and dodge it once it's close to you. It moves slow but it will use its pinchers to try and hit you once it's close enough. Killing it rewards you with the Twinsage Glintstone Crown. Finally, it's time to fast travel to the Debate Parlor site and head back to the courtyard.
You can go again to the rooftop area to get a missing item, Golden Rune (4), but probably you will just want to skip it. To reach it, go to the roof where you had to make a hard jump over the big gap. Go straight this time and at the very bottom, you'll encounter another Marionette Soldier on the right side. Kill it and continue west where you'll see another Marionette Soldier roaming the narrow rooftop. Jump across the next rooftop and you'll see another body here that you can loot to pick up x1 Golden Rune (4).
The Metal Ball Trap

At the courtyard, look east and you' 'll see a tall set of stairs. You'll notice (as shown in the image above) that there is a corpse that is hanging by the edge of a broken platform on the left. You need to cross the other side, towards the stairs, and then quickly jump onto the platform where the body is, loot it to find x8 Crystal Dart. The moment you step on the stairs, a large, smooth metal ball (not to be confused with Silver Spheres) continuously summoned by some out-of-sight Glintstone Sorcerers will roll down the stairs. This will not stop and it will keep spawning the large metal ball to stop you from reaching the top of the stairs.
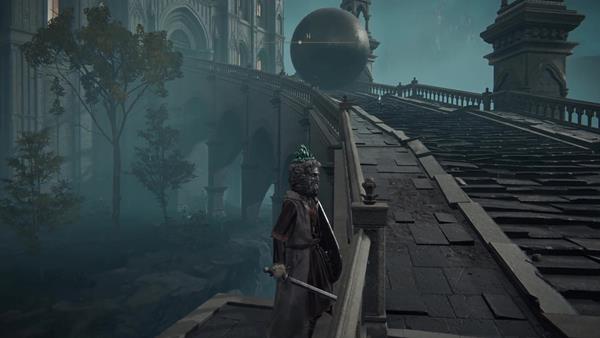
At the bottom-most part of the stairs, by the edge, there is also another body here that you can pillage to find x1 Smithing Stone (5) - to avoid getting hit, stand by the side of the stairs and hug the fence. At the mid-section, there is another corpse that you can loot to find x1 Furlcalling Finger Remedy. Head to the top section and enter the room that has three door ways. The one on the right leads to a balcony with a sending gate. This sending gate takes you back to the Church of Vows. The one on the left is locked, while straight ahead, leads to a garden that is being protected by a hostile enemy NPC, Moongrum, Carian Knight.
Grand Library Outskirts

You'll want to fight this hostile NPC carefully since it has a few tricks up its sleeves. The Carian Knight, Moongrum can auto-parry your attacks if he is not doing any moves, and he will play defensively if you continuously use melee attacks, he can also block projectiles if he has his shield out, so watch out for that. Second, he can swap between his shield for a staff weapon, allowing him to conjure the Carian Greatsword sorcery. If he has swapped to the staff weapon, you'll want to back away from him to avoid getting hit by the sorcery attack, it has a long reach. Use your shield as well to at least lessen the damage if you don't have time to move away.
He can also use a flask to recover his health, and he can use a great amount of it. So apart from trying to be careful with fighting this knight, you will need to apply pressure by quickly attacking to stop him from healing. Now, we did discover one tactic that you can exploit. Bait and lead him towards the entrance of the doorway where the iron ball trap is. He will follow you, but not all the way. He will, however, keep walking side to side by the door and back inside, and he will wait for you to approach him. Remain at the sides of the stairs as you hug the fence to avoid getting hit by the iron ball and bombard him with ranged attacks when he's within your sight - successfully defeating this hostile NPC drops x1 Carian Knight's Shield.
From the garden where Moongrum was initially standing, straight ahead is a lift that you can ride to reach the upper level leading to the boss, while the left side of the courtyard goes down to a garden. This is guarded by a Glintstone Sorcerer and Wandering Noble. Go straight through the garden and unlock the door that serves as a shortcut back to the courtyard.

Now, you still need to clear this section and remember that the door opposite of the way portal is locked. Return to the garden and look behind the spot where the Glintstone Sorcerer once was. You'll find a corpse holding a Golden Rune (4), then look carefully past the edge to see a ledge you can jump onto, before crossing into the open window (pictured above). Enter the room, open the door, then climb up the nearby ladder.

At the top, you'll notice some enemies here, there are a couple of Glintstone Sorcerers (three to be exact) and a lesser Mad Pumpkin Head. Defeating the Mad Pumpkin Head drops a Sanctuary Stone. In this room, make sure to open the treasure chest to find x1 Glintstone Scarab. Killing the Glintstone Sorcerers in this room will also disable the metal ball trap to make for an easier runback to the boss room if you die (and to have an easier time collecting the loot on the ramp). Jump down from a balcony toward northeast direction to get Golden Rune (7) on the roof above the way portal.
Once you are ready, ride the lift to the top where you'll find doors leading to Rennala, Queen of the Full Moon.
Facing Rennala, Queen of the Full Moon

Beyond the doors is a grand library, the boss arena where you'll face Rennala, Queen of the Moon. For this boss battle, there are two phases. The first phase will take place in the library that is surrounded by stacks of books and bookshelves, while the second phase takes you to an interdimensional open area. Rennala is a boss that deals magical-elemental damage, summons spirits, and is also accompanied by her children who will also be attacking you. Rennala is immune to magic and resistant to other non-physical elemental attacks, but she is vulnerable to all physical attacks.

One of the most helpful tactics to use is to bring and use Lone Wolf Ashes to summon the three wolves that can help you in combat. The reason why you need this is to help lessen the number of her children and to easily track down the one who is sustaining the barrier that is protecting her. To identify which child is doing this, you'll see a gold aura emit around that particular child and you can also hear the child chanting a lullaby spell. Once you've found the source, you can strike the woman once and look for the next child who is sustaining the power of the barrier. Do this three times and Rennala's barrier will shatter, causing her to fall on the ground - this may look easy as you are reading this, but you will still need to watch out for the attacks coming from Rennala and her children. You'll usually see the children manipulate objects that are thrown at you, while Rennala uses magical attacks.
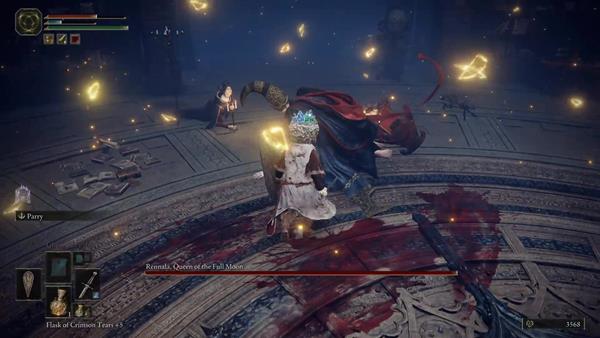
Once she falls to the ground, sprint towards her and attack with your melee weapon for a few strikes. Do not be greedy and be ready to back away since she will start to gather energy that explodes around her. You'll know when to move away once a gold aura starts to appear. Rinse and repeat until you reach phase 2. Take note that some of her children will be hiding in corners or behind bookshelves, so you'll need to check around the library.
This is why summoning the wolves is a good tactic since they'll just randomly run around attacking the children, and if you're lucky enough, if they spot one that is hiding, it can just attack it once, and you can find the next host. There is also one moment in combat that you will need to be aware of, when she speaks and says something about her children being born anew, get ready to get behind the bookshelves or stack of books since she will use them as projectiles to attack you.

The second phase happens once you've completely depleted her health in phase one. A cutscene will trigger and you'll be fighting her in an interdimensional plane, surfaced with bodies of water. As the battle begins, she will start by shooting an energy beam at you, be ready to dodge the moment it is projected. At this point, she will be more aggressive by casting more magic to attack you. If you're lucky enough and your spirit wolves are still alive, they will help in attacking and can even interrupt her attacks as she tries to channel them. Despite her using a variety of spells, they somehow project slow and are quite easy for you to track, allowing you to react at the right time to evade.
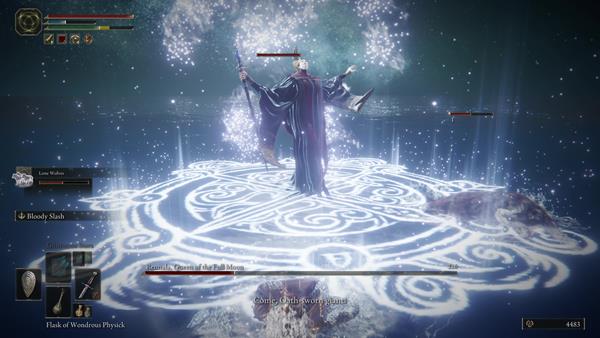
Once her health is about 70% gone, she will start to summon spirits. She will plunge her staff on the ground, emitting a blast that can damage and knock you down if you're near after she plunges her staff. Shortly after, a spirit of an enemy will appear depending on who she summons. Renalla can summon the spirit of a Troll, the Bloodhound Knight Darriwil, and a Dragon. Don't let any of those catch you off guard. They don't last until killed, but remain for a few attacks and leave the battlefield, so just focus on evading the spirit's attacks while simultaneously attacking Rennala.
Take note that every time she summons a spirit, white glyphs will appear on the ground that deals damage and can knock you down if you are caught or step on it. Defeating her yields 40000 Runes and rewards you with x1 Remembrance of the Full Moon Queen and x1 Great Rune of the Unborn.
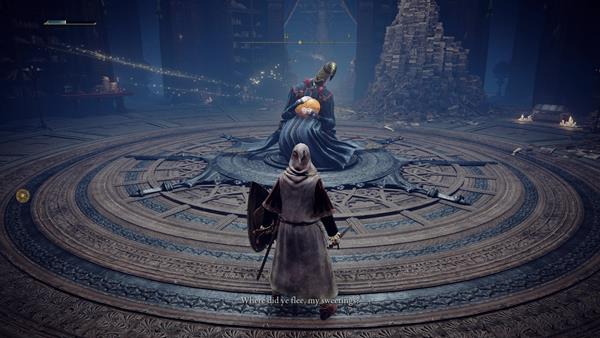
You'll return to the library and see Rennala at the center. You can speak to her, and by doing so, choosing the Cosmetics option allows you to change the physical appearance of your character, while the Rebirth option requires you to provide a Larval Tear to use this feature. There is also a chest on the right side of Rennala, but it is currently locked - also, don't forget to examine the Raya Licaria Grand Library Site of Grace here.
Where to Use the Academy Glintstone Key

One of the items you've found in the academy is the Academy Glintstone Key. This is to be given to Thops who can be found at the Church of Irith. [Map Link]. Just make sure that you were able to buy everything that you need from him before or after giving him the key. Upon giving the key, if you travel to the Schoolhouse Classroom site of grace at the academy, you'll find him dead outside the room. Go outside and turn right. You'll find him sitting in a chair. You can loot his body to find x1 Thops's Bell Bearing, x1 Thops's Barrier, and x1 Academy Glintstone Staff.
Raya Lucaria Academy Map
Raya Lucaria Academy Videos
Speed Run Walkthrough
To enter Raya Lucaria Academy, you must have an Academy Glintstone Key to pass through the barrier. To find it, grab the map that has the coordinates of the key or travel to an island that is situated on the west side from the academy. On that island, you'll find that it is guarded by a field boss, the Glintstone Dragon Smarag. Fighting this dragon is optional since you can simply sneak behind it and loot the key from a lucarian sorcerer corpse. Once you have it, return to the South Raya Lucaria Gate and you can pass through the barrier. The nearest site of grace is the Crystalline Woods site [Map Coordinates].
At the Academy Gate Town Site of Grace, check the northeast section and you can find a glowing sapling where you can pick up x1 Golden Seed [Map Coordinates Here], next, go west and you'll see a Giant Crab that you can kill, this drops x1 Crab Eggs. At the same section where the Giant Crab was, you'll find a body that can be looted to find x3 Smithing Stone (2) [Map Coordinates Here]. In the same section, look behind and you'll see a couple of Land Squirts, and above it is a Teardrop Scarab hanging on the wall. Killing the Teardrop Scarab drops Ash of War: Charge Forth.
Upon entering the academy and finding the Church of the Cuckoo Site of Grace, you'll be exploring the graveyard section that's infested with Putrid Corpses. When you cross the wooden bridge, at the other end, make a hard left and drop down to the path below. Circle around where you'll encounter two Marionette Soldiers. In front of it is a body that you can loot to find Marionette Soldier Ashes. Continue through the graveyard, but as you reach the doorway that leads into the next section, go left and you'll find a path that is lit with a torch. You'll see another Teardrop Scarab there, kill it to acquire the Ash of War: Spectral Lance.
Head through the doorway to enter the next section where you'll find a large rotating lift. By the entrance, turn right, hug the wall, and drop down to the path below. Walk along the narrow path and you'll see another group of Putrid Corpses that are worshipping a large tombstone, kill the group and pick up the glowing item near the tombstone to find the Carian Knight Set. Go back to the section where the large rotating lift is, don't ride it yet, but instead go straight where you'll see some maiden statues and a monlith at the center. Defeat the Slender Wayfarer that is guarding the monolith to acquire the Gravity Well sorcery and pick up the smithing stone on the monolith.
Next, ride the lift and head to the lower-most section where you'll encounter a Pendulum Statue enemy. Defeat it and make sure to loot the corpse here to find the Longtail Cat Talisman. Ride the lift again and head to the top section, kill the enemies along the way and enter the next section where you can find the Schoolhouse Classroom site. From the site, enter the hallway and go to the room on the left. There's a corpse that you can loot to find the Conspectus Scroll and a treasure chest containing the Glintstone Craftsman's Cookbook [5].
Don't leave the room yet, in front of the body you just looted, make sure to hit the door in front of it to reveal the illusory wall. Pillage the body on the right of the balcony to find a Smithing Stones and then jump off the balcony from the left side. Grab the materials there and follow the narrow sideway, along the way, before jumping down and returning to the Schoolhouse Classroom site, there's a body that can be looted to find the Olivinus Glintstone Crown. Now continue exploring the hallway.
Take note that the Glintstone Sorcerer has a chance to drop the Academy Glintstone Staff. At the other end of the hallway where you encountered the giant Living Jar, you'll find a chest containing x1 Ritual Pot. On the second floor that is guarded by more Glintstone Sorcerers, make sure to check the balcony to find another corpse that can be pillaged to acquire Furlcalling Finger Remedy - head up the third floor, and if you are prepared, pass through the mist to fight Red Wolf of Radagon.
Defeating Red Wolf of Radagon rewards you with 14000 Runes and x1 Memory Stone, you'll also find the Debate Parlor Site of Grace in this arena. As you exit through the doorway, you'll enter the main courtyard of the institue. From the entrance, turn right and jump over the fence. Climb up the ladder and go through the broken glass window to reach the second floor of the Debate Parlor. Go to the left, and you'll find a body that you can pillage to find x5 Crystal Bud. Head to the opposite side on the right, and you'll find a treasure chest containing x1 Radagon Icon. Head back down and start exploring the courtyard section.
On the fountain, you can find x1 Stonesword Key. Make sure to go around the courtyard to find some materials. Head west of the courtyard and you'll see a glowing sapling that is guarded by three Wandering Nobles. Kill the enemies and check the glowing sapling to find x1 Golden Seed on the ground. Also on the west, there's a Cryallized Crab hiding around the corner, by the bush, kill it to acquire x1 Karolos Glintstone Crown.
After clearing the west side of the courtyard, return to the center area where the fountain is and you'll see a slope on the right (facing the doorway leading back to the Debate Parlor). At the top, there are multiple enemies here such as more Glintstone Sorcerers and Wandering Nobles. You'll see the Wandering Nobles kneeling, a Wandering Noble standing on the steps, two Glintstone Sorcerers standing by the balcony fence at the top of the steps, while another sorcerer inside the room in front of the kneeling Wandering Nobles. Kill all the enemies and go inside the small room to find a body that is hanging on the fence of the window balcony - the body contains x1 Glintstone Whetblade.
Now traverse the rooftops section of the academy. Make sure to check every corner and some platforms that you can jump on or can drop to find some materials. There's x1 Imbued Sword Key as well that can be looted off a body located on another towering building. Eventually, you'll end up finding a broken glass window that leads to the ceiling of the Church of the Cuckoo. Loot the body that's on the narrow beam and drop down until you land on the chandelier where you can take another Academy Glintstone Key from the corpse.
Jump down to the second floor and clear the area of Lazuli Sorcerers and Glintstone Sorcerers. Check the northwest side after killing the enemies to find a corpse that is sitting against a wall, you can pillage the body to find x1 Shattering Crystal. Head east, out the balcony, and check the right side by the corner of the scaffolding to find another Crystallized Crab, kill it to acquire the Twinsage Glintstone Crown. Also, there's another doorway here that is guarded by a single soldier. Inside the room that is being guarded, you'll find the Azur's Glintstone Staff on the ground - after clearing the second floor, make sure to kick the ladder to unlock a shortcut to the Church of the Cuckoo site.
Go back to the courtyard and go east where you'll encounter the large iron ball trap. Make sure to loot the bodies on the stairs and the broken beam to find items such as x8 Crystal Dart, x1 Smithing Stone (5) and x1 Furlcalling Finger Remedy. As you enter the next section, you'll encounter a hostile enemy NPC, Moongrum, Carian Knight that's guarding the lift leading to the main boss of this legacy dungeon. Defeating Moongrum drops the Carian Knight's Shield. Before riding the lift, check the west side, by the gate, turn left and jump over the fence as you walk on the narrow beam of the wall. Climb up the ladder, defeat the Lesser Pumpkin Head and Glintstone Sorcerers. There's a treasure chest that you can open to find x1 Glintstone Scarab - climb back down, open the closed door and ride the lift.
Beyond the large door is the Grand Library where you will fight Rennala, Queen of the Moon in two phases. Defeating her yields 40000 Runes and rewards you with x1 Remembrance of the Full Moon Queen and x1 Great Rune of the Unborn. Make sure to discover the site of grace here before leaving.
One of the items you've found in the academy is the Academy Glintstone Key. This is to be given to Thops who can be found at the Church of Irith. [Map Link]. Just make sure that you were able to buy everything that you need from him before or after giving him the key. Upon giving the key, if you travel to the Schoolhouse Classroom site of grace of the academy, you'll find him dead outside the room. Go outside and turn right, you'll find him, sitting in a chair. You can loot his body to find x1 Thops's Bell Bearing, x1 Thops's Barrier, and x1 Academy Glintstone Staff.
 Anonymous
All these people with degrees contributing to global warming smh my head

 Anonymous
Honestly I feel like you should have a different set of photos showing each enemy spawn for those who are new

 Anonymous
 Anonymous
PLEASE PLEEEEAAASE PUT A SITE OF GRACE CLOSER TO THE GRAND LIBRARY

 Anonymous
Why is there a graveyard in a university
I'd be pretty worried if my uni had a ****ing graveyard ngl
 Anonymous
Look I know gor lore reasons there can't be stakes of Marika but come on. You implement a great time saving mechanic, and then go on to not use it because it conflicts with the story telling

 Anonymous
 Anonymous
So the imbued stonesword key is fairly easy to find. When you're heading to the church eaves, you will have two choices: Jump down a roof or take a ladder to the right. Take the ladder down, the corpse is in a shorter tower. It's not on the roof tops itself.

 Anonymous
Hey I just realized that the map is missing the "Ash of war: Spectral Lance" from the map: Floor 1 that is right in front of the Golden Rune (4)
Also it should make it a bit more clear that you have to jump on and over a tombstone to get to both the ashes and rune.
 Anonymous
Can we just appreciate the view of the academy while you’re charging past the zombies and how hauntedly beautiful it is?

 Anonymous
The fact that if you die you have to fight through 4 sorcerers head up to get back is asinine, especially with such a cheap boss. There is no reason for there not to be a grace sight closer to the arena.

 Anonymous
Moongrum can be easily defeated by running past him and into the elevator room, then tripping the central switch to send the elevator up. He should fall into the elevator shaft.

 Anonymous
I wish they'd mention when locations are primarily useful for a certain build. This one is pure spells. I couldn't care less about memory slots and wizard shizzle.

 Anonymous
Am i the only one who hates this place with a passion? Between the graveyard area full of stupid tanky grab spamming zombies that eat your fp and goddamn Dogs and the spell spamming Burger King look-alikes, don't forget Mr Oneshot "Mcalwaysperfectparries" Moongrum, this place can eat my whole ass, atleast the bosses aren't as cancerous as the awful mobs this place is littered with.

 Anonymous
wtf its not lettimng me cross the gap dam im using the 2 hand wep on heavy attack guard then sprint toward the gap and hit jump it only puts me on the very edge looks like i make it but my character falls to death ive done this before now it wont let me jump the gap, STOP patching the game dam

 Anonymous
Has anyone fell to the left side of the church and received that item from that very far fall?

 Anonymous
 Anonymous
Carian Knight, Moongrum can also be cheesed by luring onto the lift behind him. Block his attacks until the top, then run across the platform to activate it again, baiting him behind you while lowering it. He will fall doing massive damage. This can be repeated once or twice more until he dies and you get his loot.

 Anonymous
The recommended level is exaggerated, you can do just fine at level 35-40 as a new player

 Anonymous
I wonder what the tuition cost for this place is. Besides the glintstone key I mean. Probably a LOT of runes.

 Anonymous
Just for the record, the Abductor Virgin at the bottom of the waterfall will only teleport you to Volcano Manor if you get killed whilst inside of her. If you survive, you just get spat out as usual.

 Anonymous
I'm not sure if it has been mentioned on this page, but you can access the huge bell tower in Raya Lucaria from the Academy Crystal Cave, and find Terra Magica there

 Anonymous
I think I got lucky with Moongrum knight, he didn't manage to parry and critical hit me and I don't remember him switching to a staff and using sorcery against me. But my Lordsworn's Greatsword is +10 and I did have the talisman that boosts jump attack and the axe talisman for improved charged attacks, my physik is also set up with the spiked cracked tear to boost the charged attack and one of the crystal tears that boosts max stamina so it's not like it was a very long fight with him anyway.

 Anonymous
 Anonymous
Clicking the ground floor map image redirects to a map of stormveil

 Anonymous
Saying the high page shoots at you with a crossbow is a massive understatement, This high page isn't shooting a crossbow bolt then reloading to shoot another, he's using some sort of exploding bolts and his crossbow has full auto capability, he starts to use rapid fire as soon as he sees you, took a lot of health off me before I could get out of his firing range.

 Anonymous
Love when the giant ball does 400 one time and 1.2k another :D

 Anonymous
the link is wrong on the map of the ground floor. it is linking to a mini pic of stormveil castle

 Anonymous
Reaching the gate is rather easy; I've acquired the Site of Grace at level twenty-seven. You can go around the edge after dealing with one or two soldiers maximum, each of which you can stealth attack relatively easily.

 Anonymous
I'm not sure if anyone has mentioned it yet but when your going along the rooftops that lead to the church of the cooko there is a unique twinsage sorcerer that has a Glintstone crown that looks like a combination of the other ones and they are the only one I've seen using the spiral Glintstone spell. Any one else notice this ?

Moongrum - Carian Knight. Can be cheesed by running to the lift behind it and activating it then running off behind it. Get in a place close enough for him to take a swing at you and jump away across a corner to a safe landing and he'll fall right in.

 Anonymous
can anyone explain why some players, like in the fextralife youtube video for Raya Lucaria, can make the jump across the large gap from one rooftop to another to get to the full moon crossbow are able to make the jump just fine while others are getting nowhere near to making the distance? I can see this from all the bloodstains left by players who, just like myself, can not clear the gap. But there are plenty of messages on the other side from players who did. Am I missing something?

there is 5 moon stand around the RENNALA and 4 of them regenerate after destroy them(without reloading area).. im sure there is a riddle in here...

 Anonymous
The Gate Glyphs (on the gates to get into the Academy) remind me of Final Fantasy X

 Anonymous
The Gate Glyphs (on the gates to get into the Academy) remind me of Final Fantasy X

 Anonymous
Why did Raya Lucaria go to war against the Carian Royal family?

 Anonymous
 Anonymous
How does this pass as a wiki page? The walkthrough is high effort, but it's still just a walkthrough.

 Anonymous
 Anonymous
The bridge to the south from raya lucaria academy grace has wolves a merchant. A bloodhound knight is the end of it.

 Anonymous
This place always makes me sad. A reminder that the Lands Between we're a vibrant society where smart kids would go to school to become brilliant mages. And now that's all gone. Just enemies to fight.

How are the recommended levels calculated? 50-60 seems excessively high for Raya Lucaria. Based on matchmaking, people are closer to 35-50 in there.

 Anonymous
you can reach the boss room (rennala) if you get trapped and killed by the iron mained in the courtyard outside parlour grace. This happened to me. Has anyone else experience this, to confirm this is not a glitch or a bug?

 Anonymous
Best area in the game. I love how it looks, I love the amount of hidden stuff that you can find through exploration, the enemies are strong but fair, and the music fits the aesthetic of the area perfectly.

 Anonymous
 Anonymous
Cool place and all but why are the guys there doing Burger King cosplays?

 Anonymous
Missing from Rennala's fight info is the fact that she can also summon spirit wolves. They have low health, but there are several of them and they're fast and hit plenty hard.

 Anonymous
 Anonymous
Does anyone know how to get to the graveyard that you can see from the rooftops?
I tried dropping down, and instadied.
I thought I saw an NPC down there.
(Not the actual graveyard, but a collection of tombs like the ones where you can loot several Runes from)
 Anonymous
One thing that was missed. When you go into the secret area past the illusory empty bookshelf there's a ladder to your left. Climb up and head towards the front of the room. You'll notice there's a painting on its side directly overtop of where the large painting is below. If you jump over here there's a broken section you can fall through. You'll be in an empty corridor behind the painting. On one end there is a hole you can drop down leading you into a room that you were unable to enter from the other side. Someone else will have to run this I forget what I picked up in there but there's a big pile of crystal with something valuable and some mini jars to fight. When exiting the room you'll find yourself back in the area you'd previously cleared before going up the stairs to the half bowl statue.

 Anonymous
If you turn north from the Main Academy Gate where you would find Yura's summon sign You'll find a Golden Seed

 Anonymous
Is there a summoning statue in this dungeon? I’m playing offline but I was able to do co-op NPC for a couple other bosses and I’m curious if I can do this for this boss. Im having trouble fighting her in her second phase.

 Anonymous
The Carian Knight is easy with a faith build: spam Frenzied Burst as soon as you can make him out. You can stun lock him with the madness and he will die before he ever reaches you.

 Anonymous
The Carian Knight is easy with a faith build: spam Frenzied Burst as soon as you can make him out. You can stun lock him with the madness and he will die before he ever reaches you.

 Anonymous
Why does a wizarding school have zombies in their garden? That sounds like a health & safety hazard

 Anonymous
Why does a wizarding school have zombies in their garden? That sounds like a health & safety hazard

 Anonymous
Why does a wizarding school have zombies in their garden? That sounds like a health & safety hazard

 Anonymous
If you jump off of the balcony to the roof after defeating the lesser pumpkin head, there is a corpse with a Rune (7)! Then you can drop down by the portal door and continue to the boss.

 Anonymous
Fought Sorcy-Wolf just now. It used Magic Glintblade on me, NOT phalanx. It also used what seemed to be a gigantic glintstone shard once in one attempt but then never again in any of the fights.

 Anonymous
 Anonymous
Every time you send an npc to raya lucaria, horrible things happen to them :(

 Anonymous
"Moongrum, Carian Knight" just outside Rennala's chamber is easily beatable by using jumping attacks. His attack timing will have him start a swing just before your jump attack lands, and give a brief stumble you can use to roll away. Able to beat him without getting hit this way.

 Anonymous
If you are teleported by the iron maiden at the bottom. You do not have to kill the are boss to teleport out, you just have to rest at a grace. The grace there is not hard to find, just follow the natural path they give and don't listen to the signs telling you to jump places.

 Anonymous
After getting the Glintstone Scarab you can jump from the balcony nearby onto a roof to get a golden rune 7. Dropping from there will get you to the way portal.

 Anonymous
A golden rune (7) can be found underneath the small balcony at the end of the iron ball drop room right above the portal.

 Anonymous
"Retrace your steps to the rotating lift, jump on the platform and ride it to the top." ..
-What rotating lift? I dont remember riding one.. Are you talking about the lift I rode to Academy of Raya Lucaria? If not, I dont remember riding another lift..
 Anonymous
Why the hell does this guide not mention that the Way Portal after the giant ball trap takes you to the Church of Vows? I would think the endpoint of that Way Portal would be important to note, as it's *outside the goddamn dungeon*.

 Anonymous
There is a portal in Purified Ruins (or town I forget which) that teleports you to right in front of the main gate (and behind all the soldiers guarding it) stealth is king.

 Anonymous
I believe the sorcerers are using the giant ball trap contraption. Killing them in particular doesn’t seem to respawn them back afterwards. So the giant ball stops releasing completely. Can confirm it’s definitely not the pumpkin enemy above the ladder that needs killing, in order to stop the trap either. As he was left alive, even after I managed to stop the ball rolling completely.

 Anonymous
In the area with the longtail cat talisman there is also a blank ashes of war item (the one use to duplicate other ashes). Start by going opposite the pendulum statue. When you reach the wall, go to the right corner to find crystal outcroppings that you can climb. Climb and you will the item a few meters ahead of you.

 Anonymous
The Pendulum Statue at the bottom killer me while it captured me and teleported me to Vulcano Manor. Did not expect that. But beware, you have to kill the area boss there to teleport away.

 Anonymous
When you start hopping on roofs from the Site of Grace Debate Parlour, if you're like me and you see the item on the roof after the Fenced Bridge with a single Sorcerer and Marionette Gargoyles perched across it, after dropping down next to the rooftop with the item, look to your left and you should see a roof that feels too far to jump... you'll barely make it, but that takes you to the Bell Tower heading left to a 'Full Moon Crossbow' in a chest at the top, and a 'Smithing Stone (4)' is on that rooftop jumping off the Bell Tower below. This should rotate you back around to where you were... but you'll need to do one more rotation heading right this time, in that tower you'll find broken flooring leading you down to a Crystallized Crab holding the 'Lazuli Glintstone Crown'.

 Anonymous
This is missing the full moon crossbow:
On the rooftop section, there is a jumping puzzle that gets you to a separate section where several marionettes are lined up. After defeating them, going down to a chamber and fighting x2 more marionettes, climb a ladder to the crossbow's chest.
 Anonymous
If you're a range character, you can cheese kill the dragon by climing up the rock where it sleeps.

 Anonymous
Item list is missing graven-school talisman found through a hidden wall after the schoolhouse site of grace.

 Anonymous
anyone know what key you need to unlock the chest in the final boss room after you beat her?

 Anonymous
There is also another talisman to het here, in the hidden library if you jump from the top into a section of wall.

 Anonymous
Can't see the edit button, but the Mad Pumpkin Head drops a Sanctuary Stone

 Anonymous
Behind the secret doll before the red dog
there is a route to Grave- School tailsman
It raises the potency of soceries
 Anonymous
There is a hidden path to the right as you first enter the Church of the Cuckoo; just after you take out the two sorcerers at the front entrance.

Use Magic Glintblade versus The Carian Knight. Use it once, wait a half a second and spam the spell as much as you can. The first one will make him block and the next ones will rapid fire hit him.

 Anonymous
 Anonymous
As an FYI, it is easier to run past the enemies on the way to Red Wolf of Radagon than it is to fight them. They're pretty slow and can't catch you if you're at Med or Light load.
Take the right side when you go up the staircase before the boss. The left side has a glintstone mage who will be able to hit you but the right staircase is empty.
 Anonymous
I noticed the iron ball no longer drops from the void thing anymore. I cleared all the academy except boss and also went to the hidden area through the Iron Maiden at the bottom. Reloading does not bring the iron ball back just wondering if this is also normal or maybe my game bugged permanently? Thanks

 Anonymous
I was hoping the key puzzle would be more interesting. There are all these NPC's who should be able to help you with a clue about the key. I was keeping away from spoilers for the longest time because I thought it would be some mystery as to who has the key, be it in the Carian Study Hall, The Manor, or that a loved one of Rennala would have it or something. After running around with no leads and clearing all the other dungeons I finally caved and looked it up. Turns out the map was a on a body I looted and forgot about right at the freaking main gate. Super anti-climactic and makes me wish I had checked earlier, but still grateful for all the other dungeons though. Liurnia is my favorite zone.

 Anonymous
Parts of this area feel like a major regression to the DS2 design philosophy. Not much consideration for thoughtful enemy placement, just artificial difficulty by spamming as many annoying enemies as possible. Not even that punishing on an area, just very annoying.

 Anonymous
At the bottom of the giant waterwheel there's an Iron Maiden that if it kills you by taking you inside her, and specifically like that: by being killed *inside* that iron maiden, you will be teleported to the Volcano Manor. (warning, it will trap you and you'll likely lose the runes you have by taking this shortcut)

 Anonymous
You want to know how to defeat the knight without swinging your weapon once?
Just go to the elevator & activate it... He will fall down to death lmao.
 Anonymous
Suggested edit: Right before the "Great Hall" Section you can take the lift down to retrieve the Avionette Soldier Ashes.

 Anonymous
The guy with the crossbow guarding Azur's Glintstone staff: Does he drop any farmable weapons or gear?

 Anonymous
There is a Waygate at the Laskyar Ruins (near the start of the region) that takes you right to the Academy gates (where the note is to get the key). This lets you bypass all the enemies at the entrance ramp and takes you right to the dungeon.

 Anonymous
this place is brutal... instead of well place enemies its just as many enemies as they can cram into a section without lag... my least fav area so far...

 Anonymous
anyone got any idea how to get to the ledge on the lower right after the debate parlor bonfire? can't seem to figure out a way to.

 Anonymous
 Anonymous
The Carian Knight can be staggered and hit once or twice quite often if you do jumping attacks on him when he has his shield raised.
The pendulum at the bottom of the elevator is very easy to defeat as he cannot fit below the mechanism he is too tall. Face him under the mechanism and void going to far to his sides and just bait and wait for his grab attack and damage him significantly by hitting his exposed belly.
The bottom of the pit also has a lost ash of war for duplication. Climb up the crystals to get up a cliff and the item is at the end near a grave.
 Anonymous
You can also get off mid way down on the Big Elevator and find the Avionette Solider Ashes on the left side of the path, hidden in a zombie/gargoyle ambush.



there's a bug that sends you to grand library in front of rennala after death instead of the last visited grace
0
+11
-1