

Mad Pumpkin Head |
|
|---|---|
 |
|
| Location & Drops | |
| Waypoint Ruins: Caelem Ruins: |
|
| Strong VS |
Weaker to |
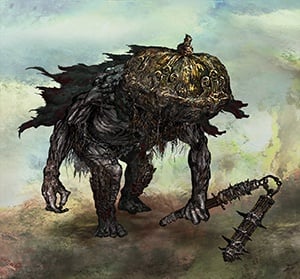
Mad Pumpkin Head is a Field Boss in Elden Ring. These towering humanoids wield massive weapons and wear distinctive pumpkin-shaped helmets. These are optional bosses as players are not required to defeat them to advance in Elden Ring.
Lesser Mad Pumpkin Head is the normal enemy form of this boss. Mad Pumpkin Heads can be summoned as spirits for aid in battle through Mad Pumpkin Head Ashes.
Though he has stifled his panic within the dark confines of his helmet, he rampages as if driven mad when agitated by bloodshed or the humming of insects. This mad soldier is all that is left of a broken gladiator.
Elden Ring Mad Pumpkin Head Location
Mad Pumpkin Head can be found in:
Mad Pumpkin Head Combat information
- Stance: 65
- Parriable: No
- Is vulnerable to a critical hit after being stance broken or parried
- While the flail variant's cant be parried, their punch attacks can be.
- The head has extra armor, and attacks that hit it will do only 20% of base damage.
Negations (or Absorptions)
The negation numbers are the % of your damage that gets blocked. For example, if a negation is 60, 40% of that damage by that type will go through and 60% will be negated. Bigger number = less damage. A negation of 100 means no damage goes through, and a negation of -100 mean the enemy takes 2x damage from that source. 0 means damage goes pretty much as is.
Elden Ring Mad Pumpkin Head Boss Guide
Mad Pumpkin Head Fight Strategy
The Best Tips for Mad Pumpkin Head:
- Summon the Lone Wolf Ashes to help stagger him, giving you an opening for free damage.
- Attack from behind to avoid hitting his head.
Melee Users
After a sequence of slow but heavy attacks, he will slowly reposition himself before attacking again. This is your chance to punish him. When dodging his attacks, try to end up behind him so you can hit his unprotected back once he's finished.
Magic and Ranged Users
Avoid shooting his head with spells or arrows. You can use Spirit Ashes to distract him so you can hit his back, or keep moving and rolling away to create enough distance to fire off spells or arrows.
Mad Pumpkin Head Attacks & Counters
| Attack | Description | Counter |
| Hand Strike | Strikes with his weaponless left hand |
Sidestep or roll backwards |
| Head Slam | Rears his pumpkin head back, then slams it down in front of him | Roll forward through the head slam, then attack his back while he recovers |
| Flail Variant | ||
|---|---|---|
| Double Swing | Swings his flail twice slowly, first counterclockwise then clockwise | Move backwards or roll to the side |
| Ground Hit | Leans back, then thrusts the flail violently into the ground | Roll to either side |
| Up-Down Combo | Swings the flail up and then immediately back down | Roll to either side |
| Big Swing | Holds or twirls the flail behind it, then swings counterclockwise | Roll to the right |
Mad Pumpkin Head (Flail) Combo Chart


Elden Ring Mad Pumpkin Head Boss (Waypoint Ruins)
- Optional boss
- Closest Site of Grace: Agheel Lake South
- Multiplayer allowed for this boss
- You can summon Spirit Ashes for this boss
Mad Pumpkin Head Location
Underneath Waypoint Ruins. Head down a staircase in the center of the ruins, south of the Giant Miranda Sprout.
Mad Pumpkin Head Boss Combat Information
- Health: 1,328 HP
- Defense: 101.3
- Damage:
 Standard,
  Strike
 - Inflicts:
 Hemorrhage
 - Drops
 1,100
1,100
Resistances
 Poison: 226 / 268 / 366 / 656
 Scarlet Rot: 226 / 268 / 366 / 656
- Hemorrhage: 169 / 197 / 239 / 337
 Frostbite: 169 / 197 / 239 / 337
The resistance numbers are the buildup amount to trigger it. For example, if a resistance is 100 you must deal 100 points of the given buildup to trigger it. Note that these go down over time, and increase each time the effect procs. The values after the "/"s indicate the increased resistances after each successive proc.
NG+ and Beyond (click to reveal)
| NG | NG+ | NG+2 | NG+3 | NG+4 | NG+5 | NG+6 | NG+7 | |
|---|---|---|---|---|---|---|---|---|
| HP | 1,328 | 4,146 | 4,560 | 4,767 | 4,975 | 5,389 | 5,597 | 5,804 |
| Defense | 101 | 117 | 120 | 123 | 129 | 134 | 140 | 152 |
| 1,100 | 5,500 | 6,050 | 6,187 | 6,600 | 6,737 | 6,875 | 7,012 | |
Resistances |
||||||||
| 226 / 268 / 366 / 656 | 122 / 164 / 262 / 552 | 123 / 165 / 263 / 553 | 125 / 167 / 265 / 555 | 127 / 169 / 267 / 557 | 129 / 171 / 269 / 559 | 131 / 173 / 271 / 561 | 132 / 174 / 272 / 562 | |
| 226 / 268 / 366 / 656 | 122 / 164 / 262 / 552 | 123 / 165 / 263 / 553 | 125 / 167 / 265 / 555 | 127 / 169 / 267 / 557 | 129 / 171 / 269 / 559 | 131 / 173 / 271 / 561 | 132 / 174 / 272 / 562 | |
| 169 / 197 / 239 / 337 | 91 / 119 / 161 / 259 | 92 / 120 / 162 / 260 | 93 / 121 / 163 / 261 | 95 / 123 / 165 / 263 | 96 / 124 / 166 / 264 | 97 / 125 / 167 / 265 | 99 / 127 / 169 / 267 | |
| 169 / 197 / 239 / 337 | 91 / 119 / 161 / 259 | 92 / 120 / 162 / 260 | 93 / 121 / 163 / 261 | 95 / 123 / 165 / 263 | 96 / 124 / 166 / 264 | 97 / 125 / 167 / 265 | 99 / 127 / 169 / 267 | |
| 310 / 408 / 698 / 1155 | 168 / 266 / 556 / 1013 | 170 / 268 / 558 / 1015 | 173 / 271 / 561 / 1018 | 175 / 273 / 563 / 1020 | 178 / 276 / 566 / 1023 | 180 / 278 / 568 / 1025 | 183 / 281 / 571 / 1028 | |
| Immune | ||||||||

Elden Ring Mad Pumpkin Heads Boss (Caelem Ruins)
- This fight features two Mad Pumpkin Heads, one with a flail and the attacks described above, and one with a hammer and a different set of moves
- Optional boss
- Closest Site of Grace: Caelem Ruins
- Multiplayer allowed for this boss
- You can summon Spirit Ashes for this boss
- Both Mad Pumpkin Heads must be defeated to win the fight
Mad Pumpkin Heads Location
Underneath Caelem Ruins. Head down a staircase in the southeast corner of the ruins, just north of a large bonfire.
Mad Pumpkin Heads Combat information
- Health: 2,800 HP each
- Defense: 109.3
- Damage: Standard (Hammer), Standard, Strike (Flail)
- Inflicts: Hemorrhage (Flail)
- If you put one Mad Pumpkin Head to Sleep and wake it up without doing a critical hit, it will beat its chest three times before briefly turning against its ally.
- Use Spirit Ashes to distract one Mad Pumpkin Head while you focus on the other.
- Focus on the Mad Pumpkin Head wielding a hammer, since it has slower attacks. If they're both attacking you at once, make them chase you around the arena until one is blocking the other's way so you only have to worry about the one in front.
- Drop 6,300
Resistances
- Poison: 237 / 279 / 377 / 667
- Scarlet Rot: 237 / 279 / 377 / 667
- Hemorrhage: 178 / 206 / 248 / 346
- Frostbite: 178 / 206 / 248 / 346
The resistance numbers are the buildup amount to trigger it. For example, if a resistance is 100 you must deal 100 points of the given buildup to trigger it. Note that these go down over time, and increase each time the effect procs. The values after the "/"s indicate the increased resistances after each successive proc.
Additional Attacks & Counters
| Attack | Description | Counter |
| Hammer Variant | ||
|---|---|---|
| Hammer Swing | Pulls back the hammer, then swings it clockwise | Dodge roll through the swing and any follow-up, get behind his back, and attack. You can even land a few strikes in between swings if your light attack is quick enough |
| Overhead Smash | Raises the hammer over his head and smashes it down onto the ground | Roll through the smash and attack |
| Uppercut | Swings the hammer up in front of it | Roll away |
| Hammer Gouge | Stabs its hammer counterclockwise in front of it | Dodge roll through the swing and any follow-up, get behind its back, and attack |
NG+ and Beyond (click to reveal)
| NG | NG+ | NG+2 | NG+3 | NG+4 | NG+5 | NG+6 | NG+7 | |
|---|---|---|---|---|---|---|---|---|
| HP | 2,800 | 4,265 | 4,691 | 4,904 | 5,118 | 5,544 | 5,757 | 5,971 |
| Defense | 109 | 117 | 120 | 123 | 129 | 135 | 141 | 153 |
| 6,300 | 18,900 | 20,790 | 21,262 | 22,680 | 23,152 | 23,625 | 24,097 | |
Resistances |
||||||||
| 237 / 279 / 377 / 667 | 258 / 300 / 398 / 688 | 261 / 303 / 401 / 691 | 265 / 307 / 405 / 695 | 269 / 311 / 409 / 699 | 273 / 315 / 413 / 703 | 277 / 319 / 417 / 707 | 281 / 323 / 421 / 711 | |
| 237 / 279 / 377 / 667 | 258 / 300 / 398 / 688 | 261 / 303 / 401 / 691 | 265 / 307 / 405 / 695 | 269 / 311 / 409 / 699 | 273 / 315 / 413 / 703 | 277 / 319 / 417 / 707 | 281 / 323 / 421 / 711 | |
| 178 / 206 / 248 / 346 | 193 / 221 / 263 / 361 | 195 / 223 / 265 / 363 | 198 / 226 / 268 / 366 | 201 / 229 / 271 / 369 | 204 / 232 / 274 / 372 | 207 / 235 / 277 / 375 | 210 / 238 / 280 / 378 | |
| 178 / 206 / 248 / 346 | 193 / 221 / 263 / 361 | 195 / 223 / 265 / 363 | 198 / 226 / 268 / 366 | 201 / 229 / 271 / 369 | 204 / 232 / 274 / 372 | 207 / 235 / 277 / 375 | 210 / 238 / 280 / 378 | |
| 326 / 424 / 714 / 1171 | 356 / 454 / 744 / 1201 | 361 / 459 / 749 / 1206 | 366 / 464 / 754 / 1211 | 372 / 470 / 760 / 1217 | 377 / 475 / 765 / 1222 | 382 / 480 / 770 / 1227 | 388 / 486 / 776 / 1233 | |
| Immune | ||||||||
Mad Pumpkin Head (Hammer) Combo Chart

Mad Pumpkin Head Image Gallery

 Anonymous
- Anonymous
Just had a bugged out entry to the waypoint pumpkin... When I entered I couldn't summon wolves until I stepped forward just slightly. Then I summoned but the pumpkin head never attacked. Just stood there while I glintstoned it down, never even aggroed the wolves. Still got the big finish, but never had the progress bar.
- Anonymous
I hate their disgusting heads and the constant banging damn thing is annoying
- Anonymous
This page has charts and data and different diagrams and key art but literally nothing about what it drops. Like what?
- Anonymous
Just realized that the St. Trina sword is found inside the ruins next to the duo boss fight... the answer was under my nose the whole time.
I'm sorry for questioning your design choices Miyazaki.
- Anonymous
- Anonymous
- Anonymous
- Anonymous
'You thought I had a watermelon instead. BUT I GOT A TEAM OF PUMPKIN HEADS!'
- Anonymous
- Anonymous
what race are these pumpkin heads? Human? Numen? Albinauric? Why are they so big if they're just human?
- Anonymous
- Anonymous
I never thought fighting this guy would be a challenge, until I played as astrologer. That was terrifying.
- Anonymous
- Anonymous
For the Duo, melee solo strat:
Run straight up to the one on the left (hammer) and get two charged attacks in which should stagger, then R1 until the other one is winding up an attack, at which point land the critical.
Run away (circling tight to the outside walls is safest) until Hammer is back up and you'll find he's a bit less aggressive than flail. You should be able to hit and run and finish him of pretty easily as long as flail is not attacking you.
Finally, if you forward roll Flail's attacks you'll have ample time to hit his back and he'll usually retaliate with the headbutt, which is easy to dodge and punish.
- Anonymous
Parriable: No
Is vulnerable to a critical hit after being stance broken or parried
is it parriable or not?
- Anonymous
Has a unique riposte when the player is knocked down, it smashes it’s head into you twice
When you fight the two at once in Caelid, throw a sleep pot at the one on the left. Just one sleep pot. It'll knock him out before he can stand up. Then you can fight one at a time. If he's still sleeping by the time you kill the first one, you can go backstab the sleeping one.
- Anonymous
- Anonymous
The lesser ones have a chance to drop their Pumpkin helm :D
Just got one from the guy resting in Morne Castle.
- Anonymous
I summoned banished knight engvall and he basically soloed these two. They didnt drop anything though. Rather anticlimactic
- Anonymous
The one standing next to a gravestone around the Bridge of Iniquity cliffside (sorry I can't remember better directions atm) planted a spear in the ground before attacking me. Do all of them do this?
- Anonymous
The roll catches on these are annoying af when they start to become regular enemies
- Anonymous
Beat the mad pumpkin head in one try today! And yeah, wolf ashes help alot with the battle.
- Anonymous
You actually can parry the flail pumpkin head's fist attacks
- Anonymous
I took the community's advice and tried using a sleep pot, and one of them became permanently hostile towards the other while dealing no damage to him
I then ran from the hostile one around the room for about two minutes hoping it would fix itself before dying to him
I guess I'm just gonna have to level up vigor and strength until I can brute force these guys?
- Anonymous
Find it kind of goofy how they arbitrarily designed a custom great hammer for these guys but didn't put it in as a drop, but the flail is available in-game. Just seems like an odd design choice. Especially with the fact that they added stuff like the lesser bubble sorceries which is almost a joke spell.
I put this on the page, but I just found out you can turn the pumpkin head bosses on each other. You can also turn the generic enemy pumpkin heads on whatever allies they have.
You need to make the pumpkin head fall asleep, then wake it WITHOUT a repost.
They will look up to the sky/ceiling and beat their chest 3 times before attacking NPCs that happen to be around them for a while. When the frenzy ends, you'll see them stare up at the sky/ceiling again and they will return to their normal state.
- Anonymous
Night maidens mist- torrent- wolves. Mind blowing how easy that was after getting jacked up over and over.
- Anonymous
Thank you for everyone who said you can ride Torrent in the dungeon. Actually makes the duo bossfight manageable at a lower level.
- Anonymous
- Anonymous
This boss fight is super easy as a sorcerer and you can beat it without leveling up. If you picked the Astrologer class, just use the glintstone arc spell, making sure you are NOT locked on. This allows for the spell to hit under his helmet and pass through his body + arms which does alot of damage. If you try and shoot his head, it will do less damage as he is armored. Just make sure to dodge his attacks and you should have easy access to a spell merchant at the beginning of the game!
- Anonymous
It helped a lot to summon the Wolfs Ashes and riding on Torrent around them to gave them some nice hits without being hit. Worked for me for every fight against them, in which Ashes and Torrent was allowed. Otherwise only Wolfes and dodging.
- Anonymous
So I’m not sure if other people have found this or thought about it, feel free to put this in the correct place but on the saintsbridge there’s a pumpkin head smacking its head with its own weapon and smashing it into the ground, the fluid that comes out is white, almost like Albinaric blood but when you strike the body the blood is read, maybe the helmet holds some kind of parasite or maybe it’s to hide a defect of some kind, just found it to be odd, maybe more knowledgeable know more about this
- Anonymous
Terrible fight. You end up fighting the room and the camera more than the bosses.
- Anonymous
For the two in the Calem ruins, the one on the left has a flag that it sets down before fighting leaving an opening to attack so focus your attacks on that one to deal as much damage as you can so that ideally you stagger it to do a critical strike and finish it off or get close to doing so.
- Anonymous
For casters who keep accidentally hitting the helmet try free-aiming
- Anonymous
For the duo, just use sleep arrow on the hammer one (5-6needed with barrage, 4normal) and kill the flail one (easy to parry his hand moves). Then finish off the halmer one on it’s own. That’s how I did it in sl1.
- Anonymous
- Anonymous
- Anonymous
The duo fight you have two choices, pray for good overlapping RNG, or cheese, same for most duo bosses aside from crucible knight duo but only bc of the simple parries and it actually seems like their AI is tweaked to make them the spear one less aggressive. Same needs to be done here. I'll take Crucible Knight duo over this duo 10x over.
- Anonymous
The one in Waypoint ruins has 1325 health (tested with sleep pot critical and bleed)
- Anonymous
you know when you see that awfull monster before you and you know you just dont got the level But you just dont give it the fear that he wanted you rise high and above and claim his ****ing runes and bring em back to the round table Thats what its all about baby
- Anonymous
Black Flame isn’t aggroing the saintsbridge pumpkin head for me
- Anonymous
- Anonymous
I just dont like that the game targets center of mass but always aims for the head
I just dont like that the game targets center of mass but always aims for the head
- Anonymous
Crystal Dart does not work for this boss, even if you get it while they don't block.
- Anonymous
Ez fight. If you somehow have trouble just use the Bloodhound's Fang
- Anonymous
Ez fight. If you somehow have trouble just use the Bloodhound's Fang
- Anonymous
Use Hoarfrost Stomp! Slows them both down and messes them up big time!
- Anonymous
Use Hoarfrost Stomp! Slows them down and messes them up! Especially the dual boss fight!
- Anonymous
Wow, amazing design. As if there wasn't enough trouble - they're perfectly capable of striking through one another and roll catching you constantly. Cancerous stuff, especially for anything melee that has vertical attack pattern due to their stupid helmets.
- Anonymous
There is one in the back of the giant room with the corpse pile right after you use the elevator up from the Castle Morne Life Grace. You will see a pack of dogs on the left and a huge corpse pile with a bunch of what I think are "misbegotten"? You can slip past the pile of homicide and just battle the dogs on the left then go for the pumpkin head. He's at the back hunched over a body, I think. Perfect way to get a devastating jump on him.
- Anonymous
I used the Land Squirt Ashes for the Caelem Ruins duo and they tanked everything and poisoned them.
- Anonymous
Wouldn't specifically follow the ranged/magic advice. Better strat was to follow the melee advice and rely on faster spells/attacks once you slip behind.
- Anonymous
So for the duel fight in Caelid ruins, don't waste time with spirit summons, buff up with grease prior and your psykick buff, traverse the mist and immediately mount up, just beat the duo this way, run clockwise (or counter if you're insane) and keep popping off hits, whittle them down and claim the flame shield.
- Anonymous
I beat a pumpkinhead on the bridge and didn't get the helmet, then waypoint ruins - also didn't get the helm.
- Anonymous
- Anonymous
For the duo in Caelem ruins I found it best to target the Flail first and only parry his fist attack kill him with ripostes and eventually kill the Hammer one solo
- Anonymous
- Anonymous
- Anonymous
For some reason, you are able to ride your horse in the Waypoint Ruins boss room...
- Anonymous
- Anonymous
- Anonymous
- Anonymous
- Anonymous
His fist attacks can be parried. I did not managed to parry his flail though.
- Anonymous
Can’t find the Cairen treasure that is supposedly dropped here :/
- Anonymous
%100 confirmed lore Siegward traded his Onion helm for Pumpkin.
- Anonymous
- Anonymous
One can be found on a bridge by the high road cave may be the same guy due to him being mentioned as a “famous tarnished”
- Anonymous
- Anonymous
- Anonymous
- Anonymous
- Anonymous
How do you get the mad pumpkin helmet? I beat him but did not get it.


I feel that these are one of the most iconic enemies in Elden Ring! So many interesting things about their nature that really makes you curious about their back story as a whole.
0
+10
-1