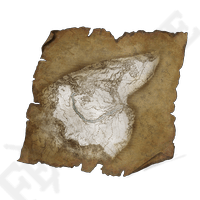
Map (Consecrated Snowfield)

map consecrated snowfiel elden ring wiki guide 200px
Type Key Item
item effects icon elden ring wiki guide 55px 18pxEffect
Map of Consecrated Snowfield and environs.

Map (Consecrated Snowfield) is a Key Item in Elden Ring. Map (Consecrated Snowfield) reveals Consecrated Snowfield and environs on your map. Key Items in Elden Ring include a wide variety of items found in specific locations or are given by a related NPCs which are used to unlock areas, quests, and to further progress the game's story.


Map of Consecrated Snowfield and environs.

The route through this land, crossed east to west by a frozen river, leads to Miquella's Haligtree. This is the path taken by those unchosen, though it is a trial all the same.


Where to find Map (Consecrated Snowfield) in Elden Ring

Map for all of Consecrated Snowfield: find it by following the road north past the snowstorm until you go down and cross a frozen river, then you will spot the map pillar ahead. [Map Link]


Elden Ring Map (Consecrated Snowfield) Use

Map (Consecrated Snowfield) can be used to reveals the Consecrated Snowfield and environs on your map.


Elden Ring Map (Consecrated Snowfield) Notes & Tips

  • Notes & Tips go here


Elden Ring Key Items
Abandoned Merchant's Bell Bearing  ♦  Academy Glintstone Key  ♦  Academy Scroll  ♦  Alexander's Innards  ♦  Amber Draught  ♦  Amber Starlight  ♦  Ancestral Infant's Head  ♦  Ancient Dragon Prayerbook  ♦  Asimi's Husk  ♦  Asimi, Silver Tear  ♦  Assassin's Prayerbook  ♦  Beast Eye  ♦  Bernahl's Bell Bearing  ♦  Black Knifeprint  ♦  Black Whetblade  ♦  Blackguard's Bell Bearing  ♦  Bone Peddler's Bell Bearing  ♦  Burial Crow's Letter  ♦  Carian Inverted Statue  ♦  Celestial Dew  ♦  Chrysalids' Memento  ♦  Conspectus Scroll  ♦  Corhyn's Bell Bearing  ♦  Cracked Pot  ♦  Crafting Kit  ♦  Cursemark of Death  ♦  D's Bell Bearing  ♦  Dancer's Castanets  ♦  Dark Moon Ring  ♦  Deathroot  ♦  Dectus Medallion (Left)  ♦  Dectus Medallion (Right)  ♦  Discarded Palace Key  ♦  Dragon Cult Prayerbook  ♦  Dragon Heart  ♦  Drawing-Room Key  ♦  Erdtree Codex  ♦  Faith-knot Crystal Tear  ♦  Fingerprint Grape  ♦  Fingerslayer Blade  ♦  Fire Monks' Prayerbook  ♦  Ghost-Glovewort Picker's Bell Bearing (1)  ♦  Ghost-Glovewort Picker's Bell Bearing (2)  ♦  Ghost-Glovewort Picker's Bell Bearing (3)  ♦  Giant's Prayerbook  ♦  Glintstone Whetblade  ♦  Glovewort Picker's Bell Bearing (1)  ♦  Glovewort Picker's Bell Bearing (2)  ♦  Glovewort Picker's Bell Bearing (3)  ♦  Godrick's Great Rune  ♦  Godskin Prayerbook  ♦  Gold Sewing Needle  ♦  Golden Order Principia  ♦  Golden Tailoring Tools  ♦  Gostoc's Bell Bearing  ♦  Gowry's Bell Bearing  ♦  Gravity Stone Peddler's Bell Bearing  ♦  Great Rune of the Unborn  ♦  Greenspill Crystal Tear  ♦  Haligtree Secret Medallion (Left)  ♦  Haligtree Secret Medallion (Right)  ♦  Hermit Merchant's Bell Bearing (1)  ♦  Hermit Merchant's Bell Bearing (2)  ♦  Hermit Merchant's Bell Bearing (3)  ♦  Holy-Shrouding Cracked Tear  ♦  Host's Trick-Mirror  ♦  Iji's Bell Bearing  ♦  Iji's Confession  ♦  Imbued Sword Key  ♦  Imprisoned Merchant's Bell Bearing  ♦  Irina's Letter  ♦  Iron Whetblade  ♦  Isolated Merchant's Bell Bearing (1)  ♦  Isolated Merchant's Bell Bearing (2)  ♦  Kale's Bell Bearing  ♦  Lantern  ♦  Larval Tear  ♦  Leaden Hardtear  ♦  Lightning-Shrouding Cracked Tear  ♦  Lord of Blood's Favor  ♦  Lost Ashes of War  ♦  Lucent Baldachin's Blessing  ♦  Magic-Shrouding Cracked Tear  ♦  Map (Ainsel River)  ♦  Map (Caelid)  ♦  Map (Deeproot Depths)  ♦  Map (Dragonbarrow)  ♦  Map (Lake of Rot)  ♦  Map (Leyndell, Royal Capital)  ♦  Map (Limgrave, East)  ♦  Map (Limgrave, West)  ♦  Map (Liurnia, East)  ♦  Map (Liurnia, North)  ♦  Map (Liurnia, West)  ♦  Map (Mohgwyn Palace)  ♦  Map (Mountaintops of The Giants, East)  ♦  Map (Mountaintops of The Giants, West)  ♦  Map (Mt. Gelmir)  ♦  Map (Siofra River)  ♦  Map (Weeping Peninsula)  ♦  Map: Liurnia, North  ♦  Meat Peddler's Bell Bearing  ♦  Medicine Peddler's Bell Bearing  ♦  Meeting Place Map  ♦  Memory of Grace  ♦  Memory Stone  ♦  Mimic's Veil  ♦  Miniature Ranni  ♦  Mirage Riddle  ♦  Miriel's Bell Bearing  ♦  Mohg's Great Rune  ♦  Nomadic Merchant's Bell Bearing (1)  ♦  Nomadic Merchant's Bell Bearing (10)  ♦  Nomadic Merchant's Bell Bearing (11)  ♦  Nomadic Merchant's Bell Bearing (2)  ♦  Nomadic Merchant's Bell Bearing (3)  ♦  Nomadic Merchant's Bell Bearing (4)  ♦  Nomadic Merchant's Bell Bearing (5)  ♦  Nomadic Merchant's Bell Bearing (6)  ♦  Nomadic Merchant's Bell Bearing (7)  ♦  Nomadic Merchant's Bell Bearing (8)  ♦  Nomadic Merchant's Bell Bearing (9)  ♦  Note (Flask of Wondrous Physick)  ♦  Note (Land Squirts)  ♦  Note (Stonedigger Trolls)  ♦  Note (Waypoint Ruins)  ♦  Patches' Bell Bearing  ♦  Perfume Bottle  ♦  Pidia's Bell Bearing  ♦  Prattling Pate Apologies  ♦  Prattling Pate Hello  ♦  Prattling Pate Thank you  ♦  Radahn's Great Rune  ♦  Red-Hot Whetblade  ♦  Ritual Pot  ♦  Rogier's Bell Bearing  ♦  Rold Medallion  ♦  Royal House Scroll  ♦  Ruptured Crystal Tear  ♦  Rusty Key  ♦  Rya's Necklace  ♦  Sanctified Whetblade  ♦  Seedbed Curse  ♦  Sellen's Bell Bearing  ♦  Sellen's Primal Glintstone  ♦  Sellian Sealbreaker  ♦  Seluvis's Bell Bearing  ♦  Seluvis's Introduction  ♦  Seluvis's Potion  ♦  Serpent's Amnion  ♦  Sewer-Gaol Key  ♦  Sewing Needle  ♦  Shabriri Grape  ♦  Smithing-Stone Miner's Bell Bearing (1)  ♦  Smithing-Stone Miner's Bell Bearing (2)  ♦  Smithing-Stone Miner's Bell Bearing (3)  ♦  Smithing-Stone Miner's Bell Bearing (4)  ♦  Somberstone Miner's Bell Bearing (1)  ♦  Somberstone Miner's Bell Bearing (2)  ♦  Somberstone Miner's Bell Bearing (3)  ♦  Somberstone Miner's Bell Bearing (4)  ♦  Somberstone Miner's Bell Bearing (5)  ♦  Spectral Steed Whistle  ♦  Spirit Calling Bell  ♦  Stonesword Key  ♦  Tailoring Tools  ♦  Talisman Pouch  ♦  Telescope  ♦  The Stormhawk King  ♦  Thops's Bell Bearing  ♦  Tonic of Forgetfulness  ♦  Torch  ♦  Twiggy Cracked Tear  ♦  Two Fingers' Prayerbook  ♦  Two Fingers Prayerbook  ♦  Unalloyed Gold Needle  ♦  Valkyrie's Prosthesis  ♦  Volcano Manor Invitation  ♦  Weathered Dagger  ♦  Whetstone Knife  ♦  Winged Crystal Tear


Tired of anon posting? Register!
    • Anonymous

      just use Bewitched Branches (x2) one for each Knight and they will turn agaisnt the Commander, when the knights gets defeated by the commander summon your mimic ash (or any other strong ash you got) and use it as a distraction while you hit it.

      • Anonymous

        If you think he’s hard, you have no idea what you’ll be fighting when you get there. Word of advice, he’s a cakewalk compared to what’s coming at the end of the snowfields.

        • Anonymous

          Is there any other way into this area?
          Commander Naill is one of the worst bosses in the game. I imagine alot of people will never get past him. There must be another way I would hope

        Load more
        ⇈ ⇈