Enir-Ilim is a Legacy Dungeon in Elden Ring. Enir-Ilim is a dungeon exclusive to the Shadow of the Erdtree DLC. You can gain access to an area containing a sealing tree by defeating Romina, Saint of the Bud in the Church of the Bud. You can then burn the sealing tree by using Messmer's Kindling, which you can obtain by defeating Messmer the Impaler. Enir-Ilim will reveal its true form after burning the sealing tree, teleporting you inside of it.

General Information
- Previous: Shadow Keep
- Recommended Levels: 150 - Above
- Bosses: Promised Consort Radahn/Radahn Consort of Miquella
- Site of Grace: Enir-Ilim: Outer Wall [Map Link]
First Rise [Map Link]
Spiral Rise [Map Link]
Cleansing Chamber Anteroom [Map Link]
Enir-Ilim Map
NPCs in the area
Bosses
- Promised Consort Radahn: Phase 1
- Radahn, Consort of Miquella: Phase 2
Video Walkthrough coming soon!
Items
Talismans
- n/a
Consumables
- x10 Fire Arrows
- x10 Golden Bolts
- x3 Whiteflesh Mushroom
- x4 Redflesh Mushroom
- x3 Furlcalling Finger Remedy
- x2 Lightningproof Pickled Liver
- x1 Messmerfire Grease
- x1 Broken Rune
- x1 Rune Arc
- x8 Thin Beast Bones
- x1 Dragonbolt Grease
- x1 Stanching Boluses
- x2 Fireproof Pickled Liver
- x1 Holyproof Pickled Liver
- x10 Lordsworn's Bolt
- x10 Golem's Great Arrow
Weapons & Shields
- Leda's Sword
- Moore's Bell Bearing
- Dane's Footwork
- Verdigris Greatshield
- Frejya's Greatsword
- Thiollier's Hidden Needle (Condition: Only if you pursue Thiollier and St. Trina's quest. And if he is summoned to help fight Radahn)
Armor
- Gravebird Helm
- Verdigris Set
- Freyja's Set
- Dane's Set
- Oathseeker Knight Set
- Leda's Armor
- Thiollier's Set (Condition: Only if you pursue Thiollier and St. Trina's quest. And if he is summoned to help fight Radahn)
Spells
Spirit Ashes
Upgrade Materials
- x4 Revered Spirit Ash
- x3 Scadutree Fragment
- x2 Somber Smithing Stone [5]
- x1 Somber Smithing Stone [6]
- x1 Somber Smithing Stone [8]
- x1 Somber Smithing Stone [9]
- x1 Somber Ancient Dragon Smithing Stone
- x2 Smithing Stone [8]
Enemy Drops
Keys & Other
- n/a
Enemies
- Gravebird Knight
- Tree Shaman
- Curseblade
- Man-Fly
- Horned Warrior
- Greater Tree Shaman
- Gravebird
Notes
- Notes go here
Full Enir-Ilim Walkthrough
Gaining Access to Enir-Ilim
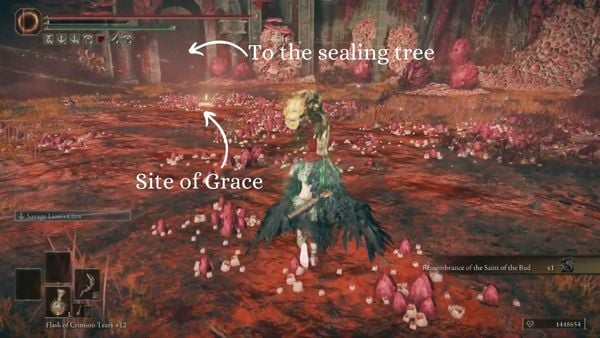
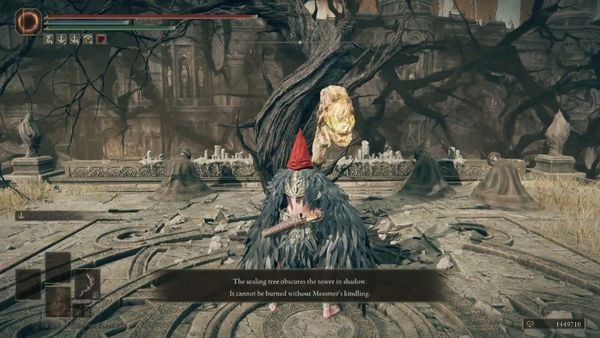
In order to gain access to Enir-Ilim, you must first defeat Romina, Saint of the Bud who is located in the Church of the Bud [See Elden Ring Map]. After defeating Romina, you will unlock the Church of the Bud Site of Grace in the Ancient Ruins of Rauh, which is a few steps away from the entrance to Enir-Ilim. Head to the archway south of the Church of Bud Site of Grace, and you will find a sealing tree. When you interact with the sealing tree, it states that it cannot be burned without Messmer's kindling. This means that you have to defeat Messmer the Impaler, located in the Specimen Storehouse [See Elden Ring Map], who will then drop Messmer's Kindling along with the Remembrance of the Impaler.
Arrival in Enir-Ilim
Once you have Messmer's Kindling, you can head to the sealing tree to burn it, triggering a cutscene wherein Enir-Ilim's true form is revealed. After the cutscene, you will then be teleported to Enir-Ilim.
Once you arrive in Enir-Ilim, look behind you to find a body containing x1 Somber Smithing Stone [9]. You will then discover the Enir-Ilim: Outer Wall Site of Grace [See Elden Ring Map], which is right next to the spot where you were teleported.

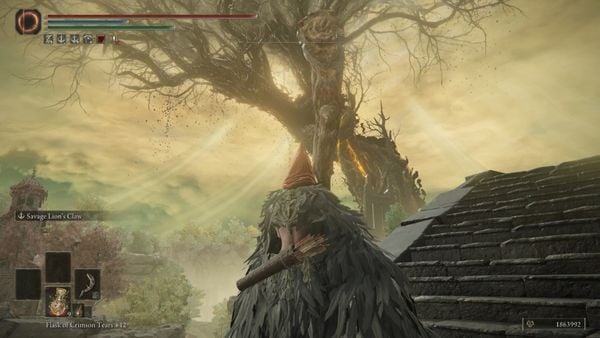
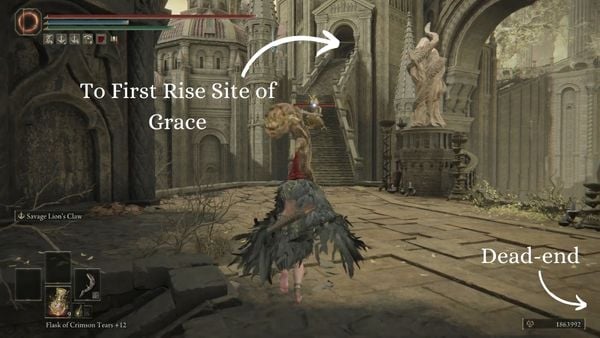
Follow the path going east, up the stairs, in which you will see the Erdtree on the northeastern side. Keep following the path, then head up the stairs. Once you head up the stairs, a hostile Gravebird Knight will be approaching you. This enemy can fly, so watch out for its attacks. The staircase on the right is destroyed, so it leads to a dead-end. After dealing with the Gravebird Knight, head up the stairs on your left which leads to the First Rise Site of Grace [See Elden Ring Map].
Exploring Around First Rise
If you go to the stairs heading up on the south side of First Rise, you will find a body that you can loot for x1 Somber Smithing Stone [5]. The staircase is destroyed, so it leads to a dead-end.

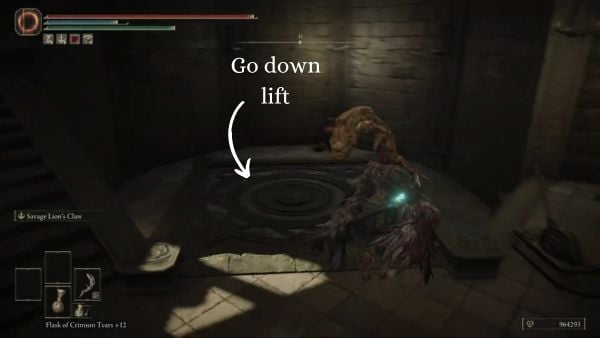
Return to the bottom of the stairs, then head to the hallway heading east-southeast of the First Rise Site of Grace. You can loot a body containing x1 Messmerfire Grease just right before the archway. Enter the room to find a lift, which you will ride going down. Go down the stairs, which then leads to Belurat, Tower Settlement [See Elden Ring Map].

Heading Deeper into Enir-Ilim
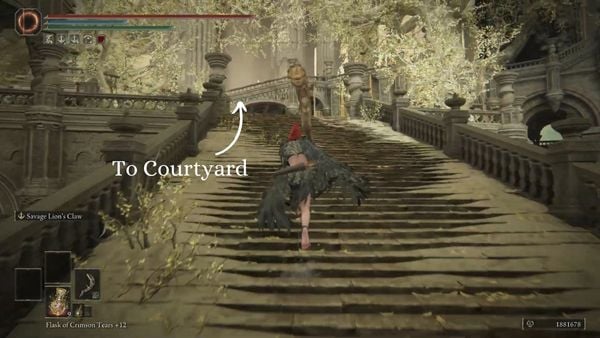
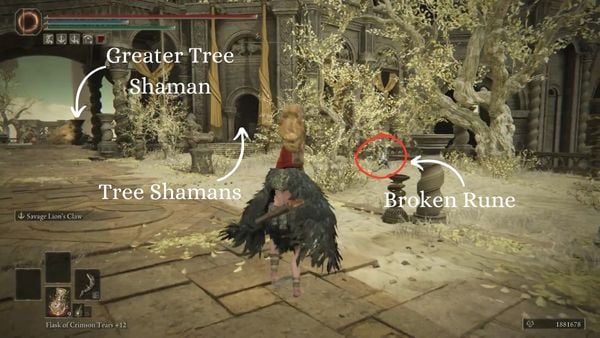
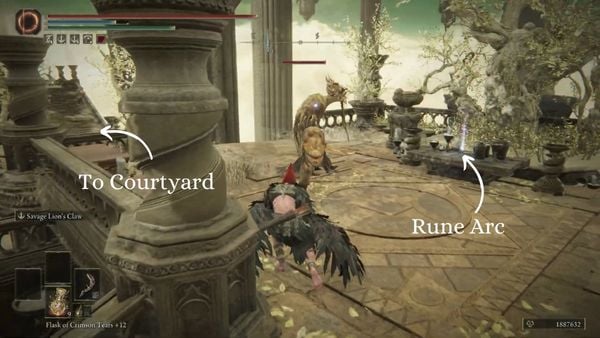
Head southwest of the First Rise Site of Grace, and you will see an archway leading to a staircase going up. Go up the stairs, and you will end up in a courtyard. There will be a body on your right that you can loot for x1 Broken Rune. There is a room on the western corner of the courtyard, which you will see two Tree Shamans, one attacking you and the other praying to a tree. In the room, you will find a doorway to a staircase on the northwestern corner of the room. Follow it, and you will see another Tree Shaman. After dealing with the shaman, you can pick up x1 Rune Arc on the ground.
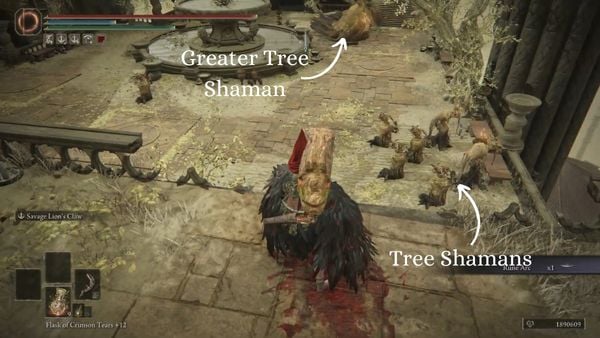
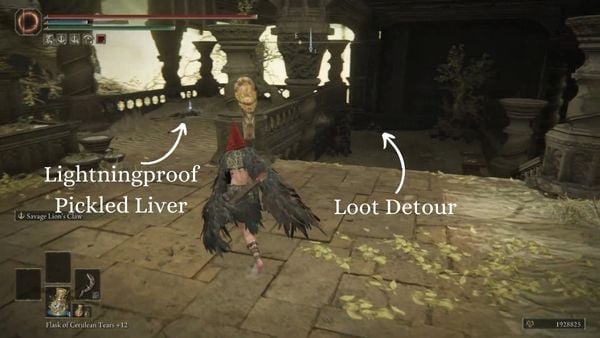
On the eastern side, you will find the continuation of the courtyard. A Greater Tree Shaman will be roaming around it, along with Tree Shamans praying in different corners of the courtyard. In the northeast side of the courtyard where you killed the Greater Tree Shaman, you can pick up x2 Lightningproof Pickled Liver from the body.
Loot Detour
Head down the stairs beside the body, leading you to the base of a tree with two hostile Humanoid Flies. Once you have killed the two enemies, you can pick up x8 Thin Beast Bones on the dead body that the two enemies were surrounding. Northeast of the tree roots is a body that you can loot for x3 Whiteflesh Mushroom. Two Humanoid Flies will land on you, which you can easily deal with.

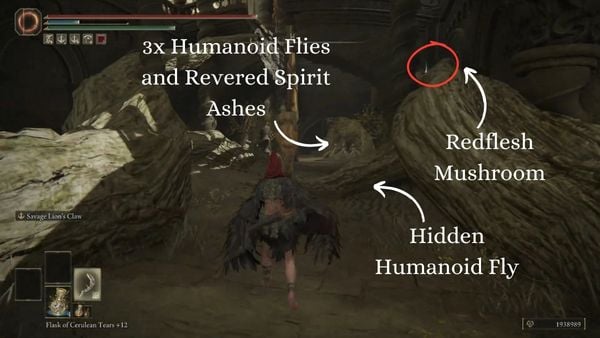
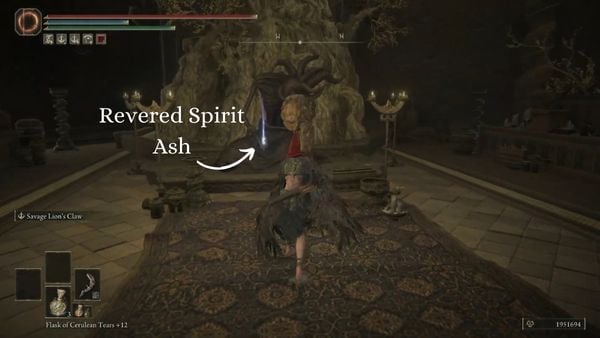
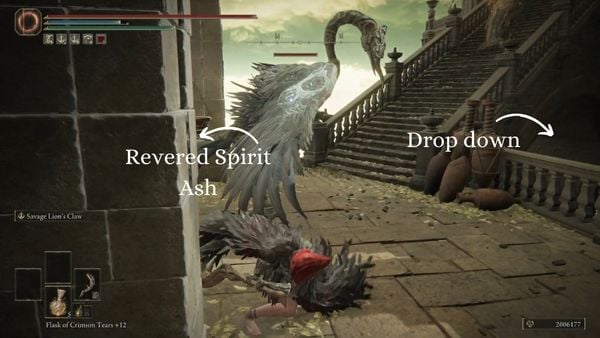
Traverse through the path on the west side of the giant tree roots. When you walk down the path, a Humanoid Fly will be hiding behind a root, waiting to attack you. You can find x4 Redflesh Mushroom on top of a root nearby. Straight ahead will be three Humanoid Flies inside a room, praying to a tree. After clearing the enemies, you can pick up x2 Revered Spirit Ash lying on the remains of a tree humanoid. Go back up the courtyard to head deeper into Enir-Ilim.
Spiral Rise Site of Grace
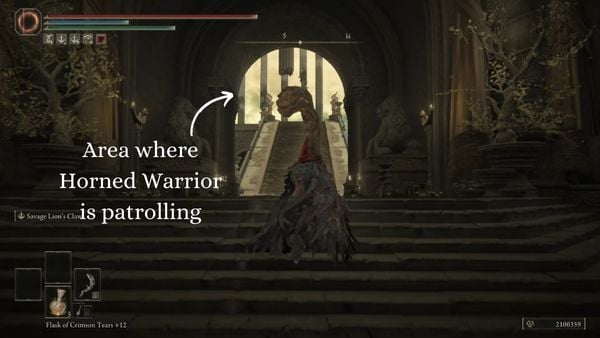
Once you have found yourself back in the courtyard, head up the stairs on the southeast. You will encounter a Tree Shaman on top of the stairs. After killing the Tree Shaman, keep following the path until you encounter a Horned Warrior.
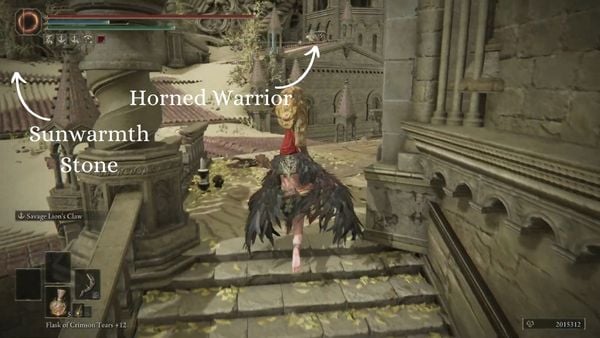
After dealing with the Horned Warrior, you will see a platform on the northern side with a tree shaman and an item. You can drop down to the tree branches below if you want to go there. Immediately after dropping down, you can loot x3 Furlcalling Finger Remedy behind you. Cross the branches going north to get to the platform. Kill the tree shaman, then you can pick up the incantation Spira on the altar. You can then return to where you came from, then continue on from there.

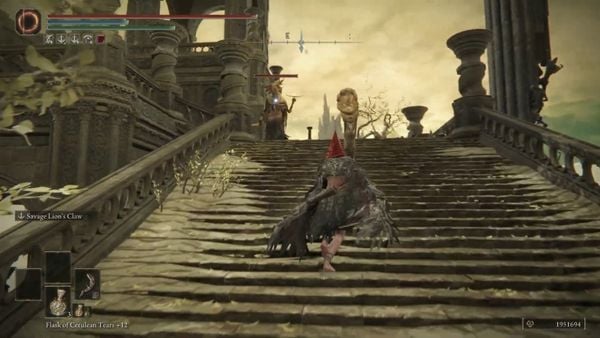
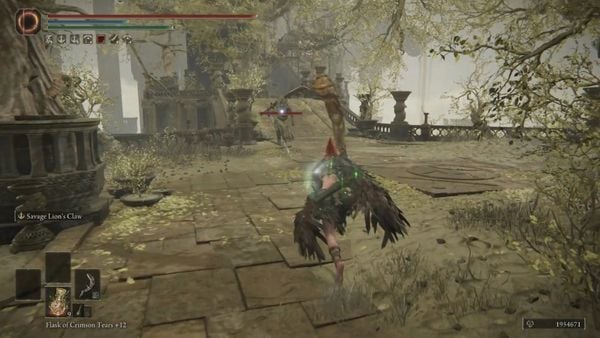
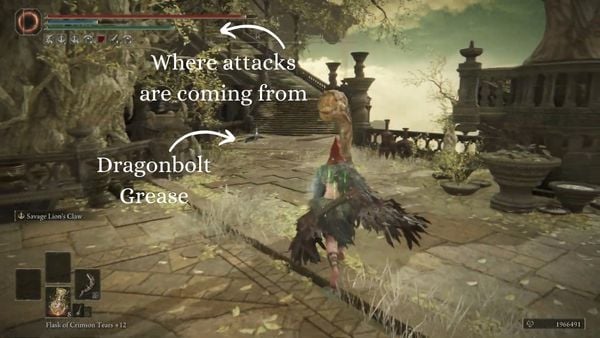
Keep following the path and stairs leading up. You can pick up x1 Dragonbolt Grease on the ground, but there will be a magic attack which seems to be coming from above. Sprint up the stairs, then kill Tree Mage responsible for the flurry of magic attacks.
After dealing with the Tree Mage, you'll notice another Tree Mage on the rooftop of the structure, which you can deal with by using ranged attacks or incantations. A Tree Shaman will also be patrolling the area at the top of the stairs. If you don't clear the Tree Mage on the rooftop, it will keep casting spells on you as you're going up the stairs. You can sprint forward if you have no way of dealing with the Tree Mage on the rooftop. After clearing the two enemies, head up the stairs. You will find bodies that you can loot for x10 Fire Arrow and x10 Golden Bolt.

Open the door at the top of the stairs to discover Spiral Rise Site of Grace [See Elden Ring Map] and x1 Scadutree Fragment.

Heading up the Spiral Rise
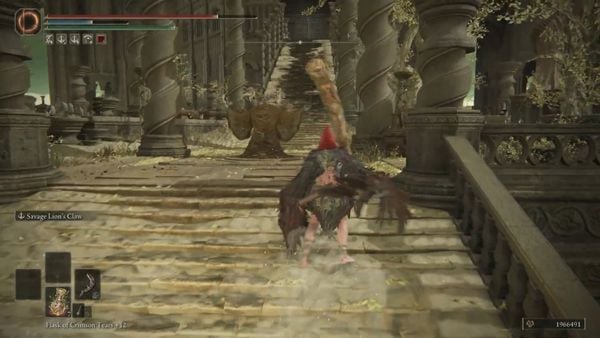
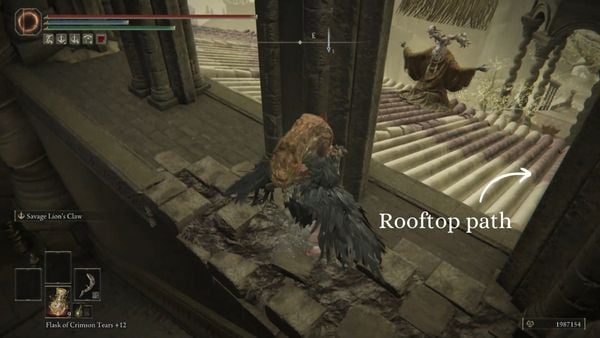
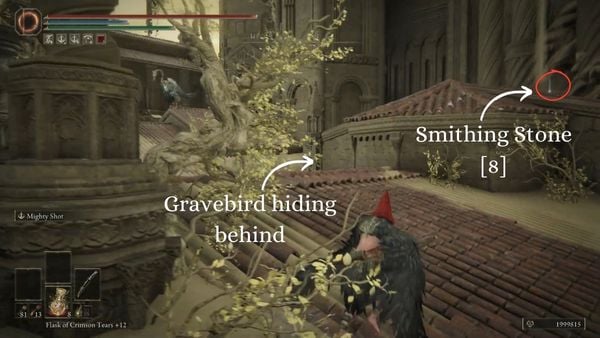
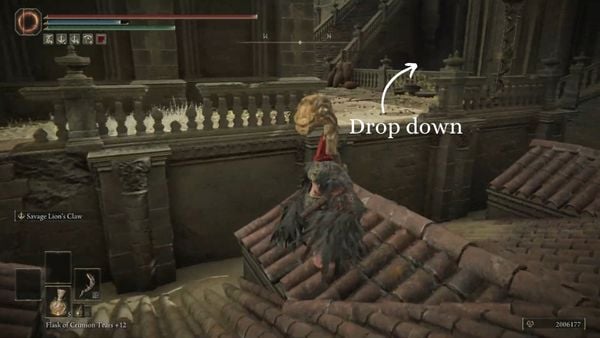
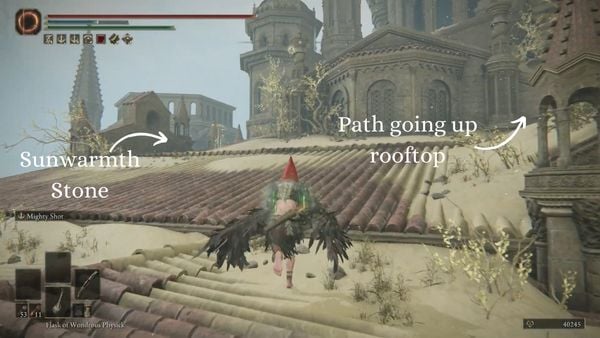
Head north of the room to climb up the stairs. There will be an opening on the left side of the stairs which lets you attack the Tree Mage earlier on the rooftop if you didn't get the chance to kill it. If you go back to the staircase, it will lead to a dead-end, so your only choice would be to traverse through the rooftop. Keep following the rooftop path by turning right as you exit through the opening. You'll encounter hostile large birds around the rooftop area, which you can easily dispose of. One of the birds will be hiding behind a corner, so be cautious of it. You can find x1 Smithing Stone [8] atop the roof near the part where the bird was hiding.
Keep going west until you get into an opening of a walkway. There will be another large bird guarding a room and a tree shaman patrolling the stairs. You can sneak up on the bird to easily dispose of it. Enter the room that the large bird was blocking to pick up x1 Revered Spirit Ash. Continue heading up, and if you didn't deal with the Tree Shaman earlier, it will be in this room along with another Tree Shaman. Deal with the shamans, then continue through the archway on the western side of the room and keep climbing the stairs.
As you get to the top of the stairs, you will find a room that contains x1 Scadutree Fragment lying on an altar. Keep exploring the rooftops, in which you will encounter a Horned Warrior. You can sneak up on it and try to do a backstab to make the fight easier. It will use frost magic along with the greatsword they are wielding, so be cautious of those attacks. On the northeast side of the rooftop, you can loot a body to pickup x2 Sunwarmth Stone.
Another Loot Detour
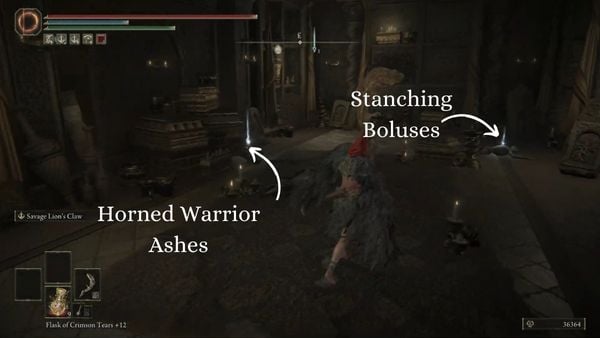
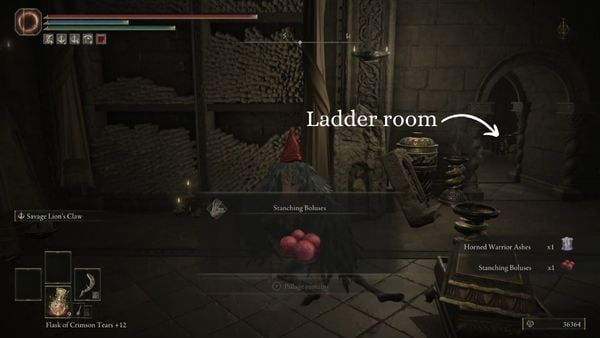
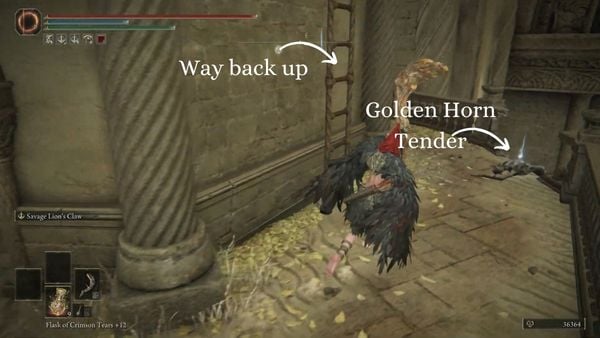
If you want to find more loot, go back to where you picked up the Revered Spirit Ash. In the middle of the stairs going up, you can drop down to a set of stairs. You can find x1 Silver Horn Tender on the edge of the staircase going down. Head up the staircase, and you will end up in a room containing x1 Horned Warrior Ashes and x1 Stanching Boluses. Backtrack your way up by climbing a ladder inside the room southwest. Head out of the ladder room, and you will find a body by the ledge containing x1 Golden Horn Tender. Climb up another ladder to get on the top floor of the structure, then jump off of it back into the rooftop where you fought a Horned Warrior using ice spells.
Keep going by jumping up on the rooftop, and you'll find your way back to the structure of the First Rise Site of Grace, bypassing the destroyed part of the staircase. If you head down the staircase, you will find x1 Somber Smithing Stone [6] lying on the ground near the part where the staircase cuts off. If you look down the destroyed part of the stairs, you will see a platform containing an item. You can go there by jumping off of the stairs. You will get to pick up x1 Gravebird Helm if you choose to go to the platform.

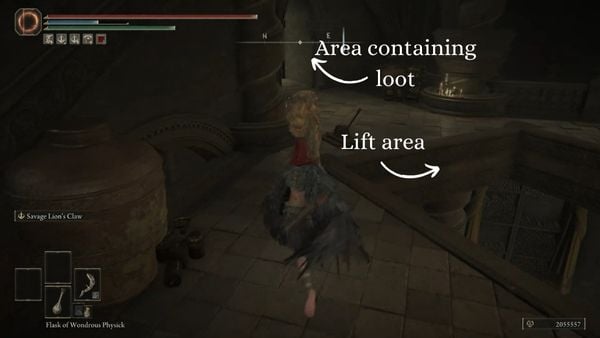
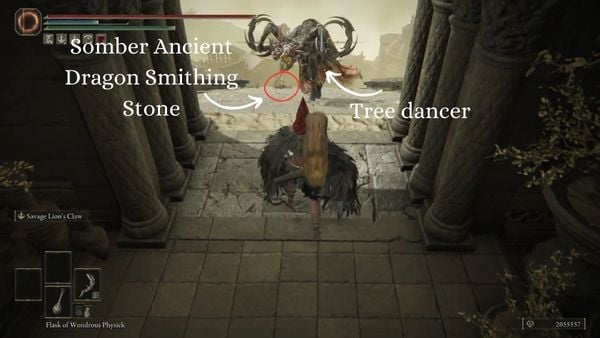
After looting the platform, you can jump on a staircase on the east side of the platform. Head down the stairs, and you will find an area with a lever that when pulled down, it will bring a lift to where you currently are. There will also be a doorway leading down to an empty room with a Tree Dancer hiding out of sight by the other doorway. The Tree Dancer will be quite nimble, so be patient while you're waiting for an opening to attack it. Once you have slain the Tree Dancer, there will be a broken staircase when you go through the archway leading outside. At the end of the staircase, you can pick up x1 Somber Ancient Dragon Smithing Stone from a dead body.
Going Up Enir-Ilim
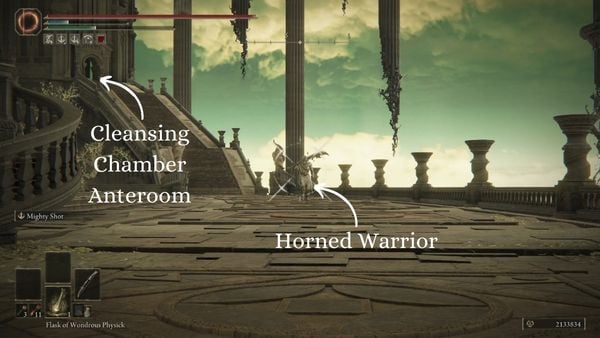
Make your way back to where you pulled the lever then ride the lift going up. You will end up in a room with two Tree Shamans that you can easily dispose of. After clearing the room, head to the archway on the south of the room leading to a stairway going up. You will encounter a Horned Warrior patrolling nearby the area, which is different from the one you encountered earlier. It uses wind attacks to complement their greatsword, and it can also swing its greatsword successively. Wait for your turn to attack it. You can even stagger it if you have enough Poise damage with your build.
Cleansing Chamber Anteroom Site of Grace
After you have slain the Horned Warrior, enter the structure to discover the Cleansing Chamber Anteroom Site of Grace [See Elden Ring Map]. Southeast of the Site of Grace, you can pick up a Scadutree Fragment.

Encounter with Needle Knight Leda
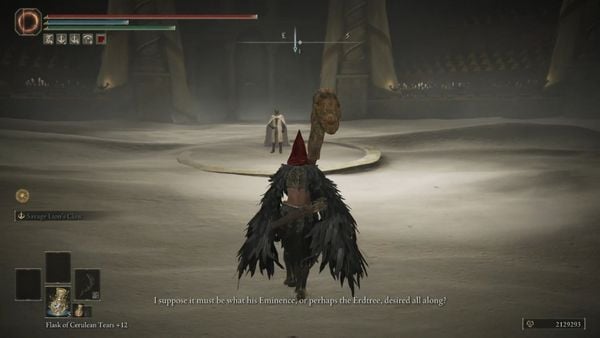
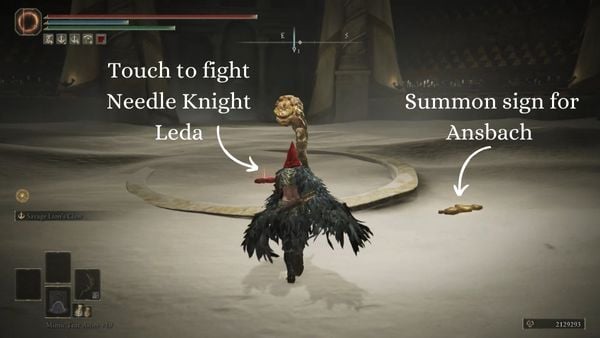
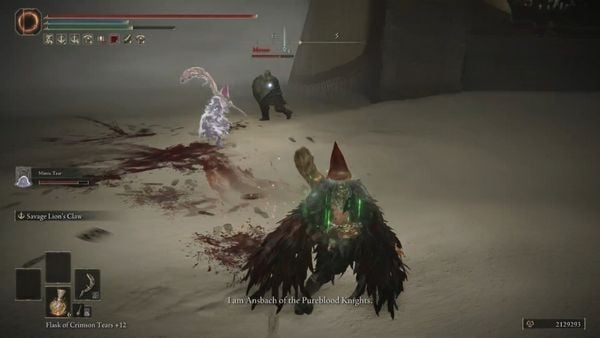
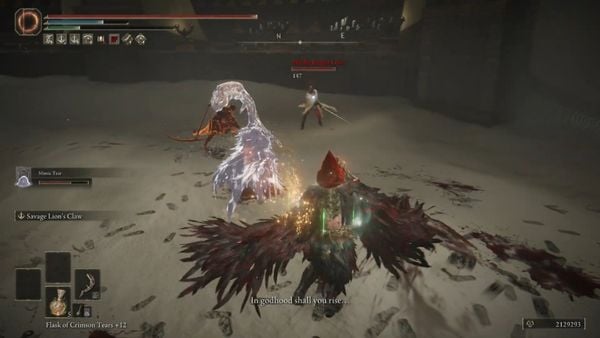
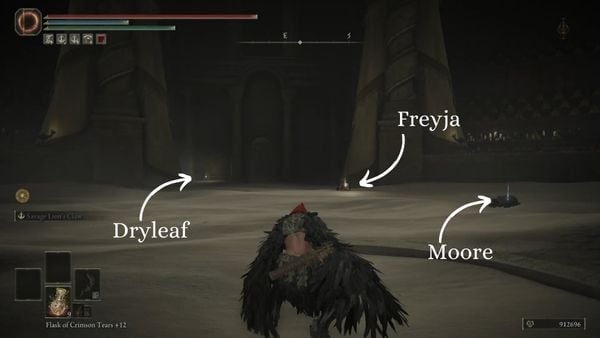
Go through the archway on the east side of the Site of Grace, going up the stairs. Keep following the path, and you will encounter Needle Knight Leda who will invite you to challenge her and her allies. You can summon Pureblood Knight Ansbach to help you in this fight just beside Leda's summon sign. Redmane Freyja will be summoned first, followed by Moore, then Dryleaf Dane. You will then fight Needle Knight Leda after all the NPC invaders have been summoned.
Once you have defeated Needle Knight Leda, you can pick up the equipment of her and her allies right after returning to your world. The bodies of her allies will be lying around the place, which you can then loot. You can pick up Moore's equipment - Moore's Bell Bearing, Verdigris Greatshield, and the Verdigris Armor Set. From Freyja, you can receive Freyja's Greatsword and Freyja's Armor Set. Lastly, you can receive the Dryleaf Armor Set and Dane's Footwork from Dryleaf.
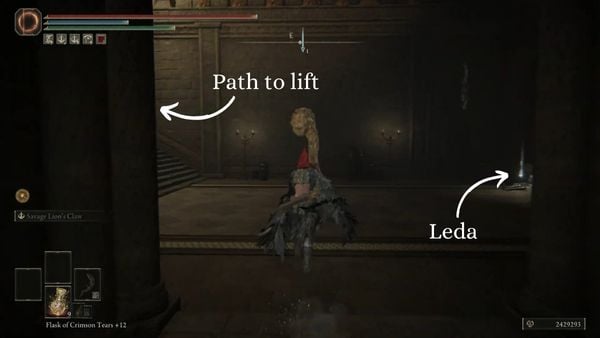
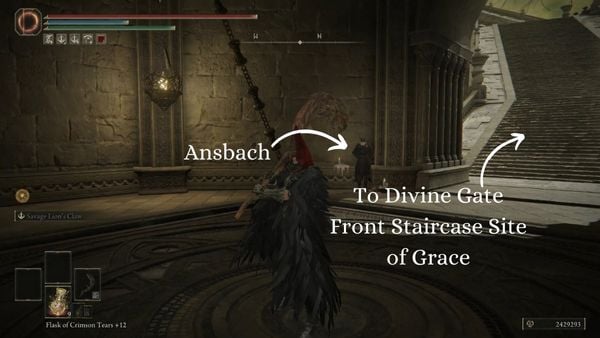
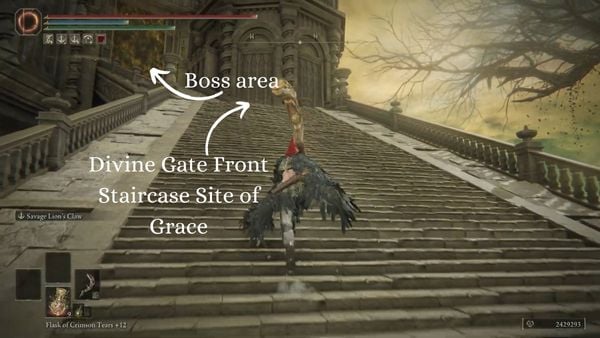
Head east through the archway, and you will find Needle Knight Leda's body containing the Oathseeker Armor Set along with Leda's Armor. After you have looted the place, head north of Needle Knight Leda's body and go up the stairs, leading you to a lift. Ride the lift going up. Once you arrive at the top of the place, you will see Ansbach right beside the lift. Go through the archway and up the stairs directly in front of you, and you will discover the Divine Gate Front Staircase [See Elden Ring Map].
Promised Consort Radahn
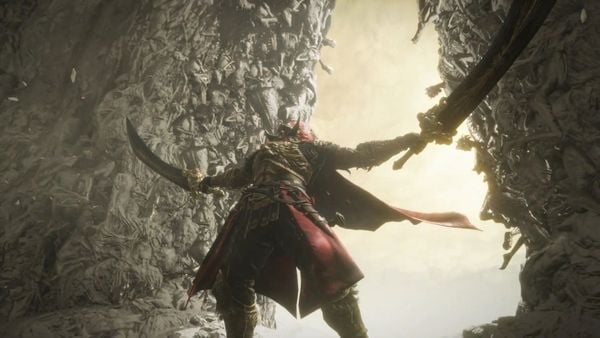
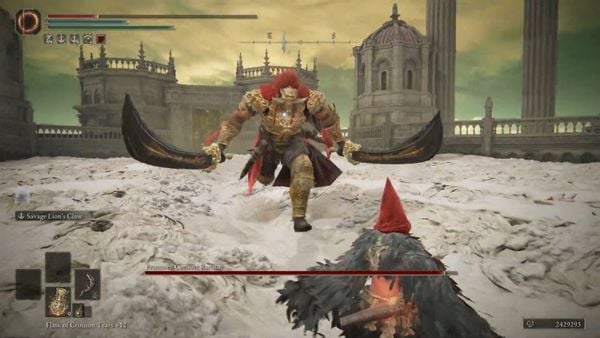
As you reach the top of the stairs, you will find a boss fog that you can pass through. If you go through it, a cutscene will trigger, showing a familiar character that you have once fought. It is then revealed that the boss that you are going to face is Promised Consort Radahn. Radahn will be using the Starscourge Greatsword once again, even using an attack similar to the Starcaller Cry. He will also be using gravity orbs from afar, guaranteeing that you won't feel safe even if you are very far from him. He can also pull you or push you away from him using gravity. For a more-detailed guide on how to defeat Promised Consort Radahn, you can go to this page.
After you have defeated Radahn, you will receive the Remembrance of a God and a Lord. The Gate of Divinity Site of Grace [See Elden Ring Map] will also be unlocked. If you look around the area, southeast of the Site of Grace, you can pick up the equipment of those who assisted you in the fight. You can pick up Thiollier's Armor Set along with his weapon, Thiollier's Hidden Needle, from his body. You can also pick up Ansbach's Set, his weapon Obsidian Lamina, and the incantation Furious Blade of Ansbach.
In the middle of the arena, you can obtain the emote Let Us Go Together. You can play a memory, triggering a cutscene. After the cutscene, you will obtain the Circlet of Light.
Obtaining Euporia
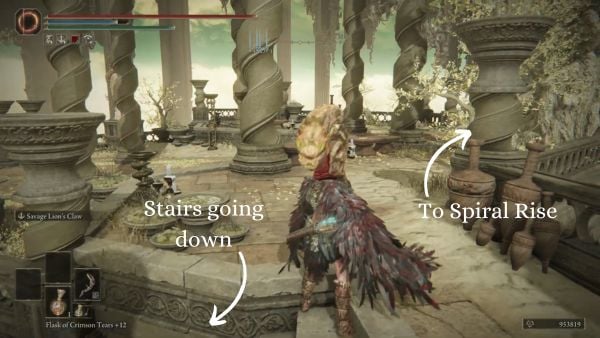
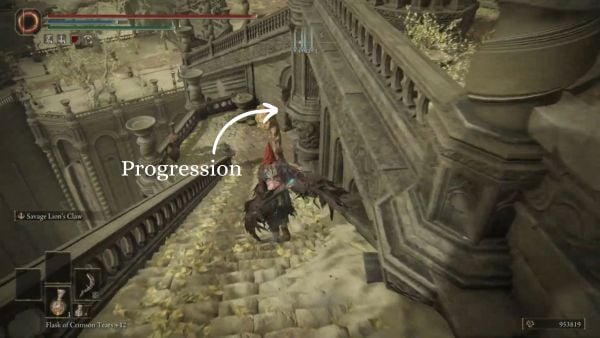
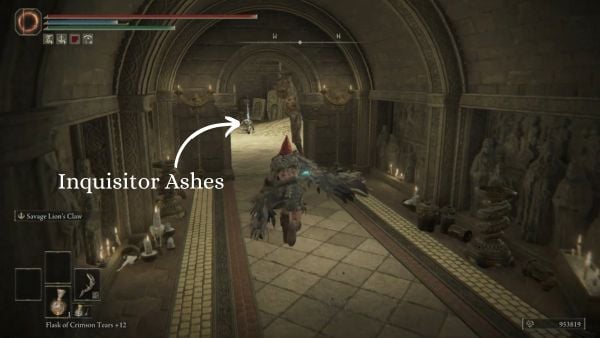
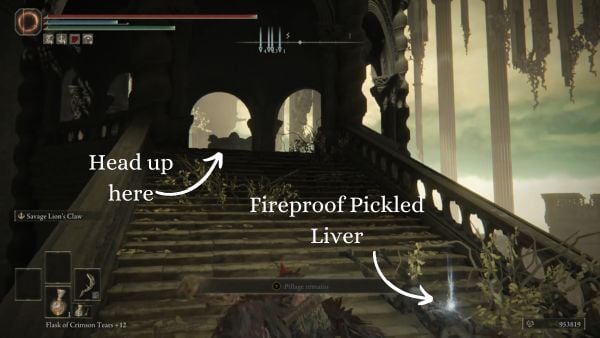
The area just before the Spiral Rise Site of Grace [See Elden Ring Map] has a lot of loot that you shouldn't miss. From the Site of Grace, backtrack your way down the stairs, then turn left to find a set of steps going down. As you go through the archway, there will be a room on your right containing x1 Inquisitor Ashes. Go to the other archway just before the room, and you will see a staircase that you can drop down to that has an item.
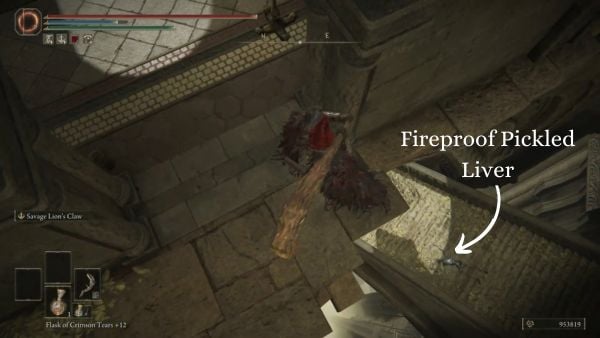
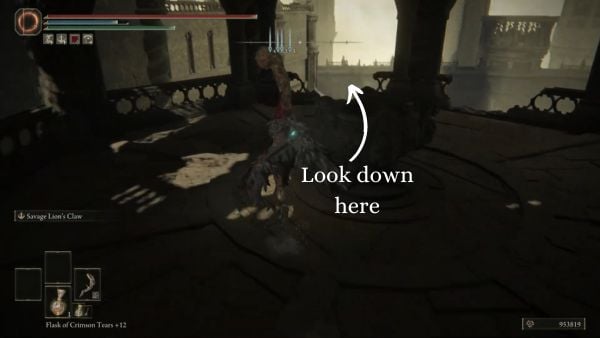
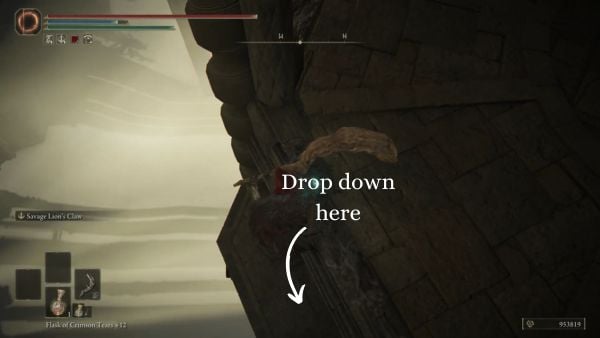
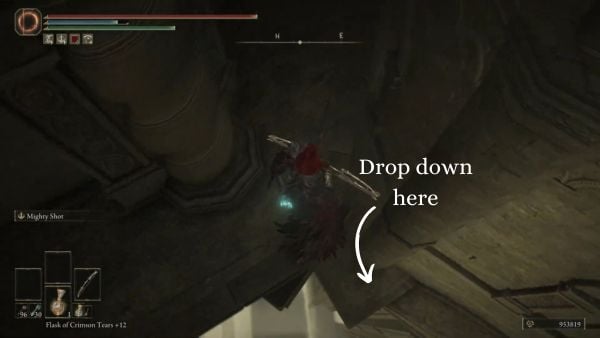
Drop down to the stairs, and you can pick up x2 Fireproof Pickled Liver from the body. Head up the stairs, then look below the broken railings to find a ledge that you can drop down to. Look down on the southeastern section of the ledge, and you will find another area that you can drop down to.
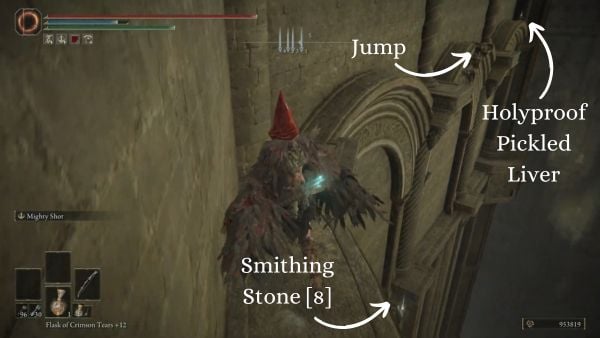
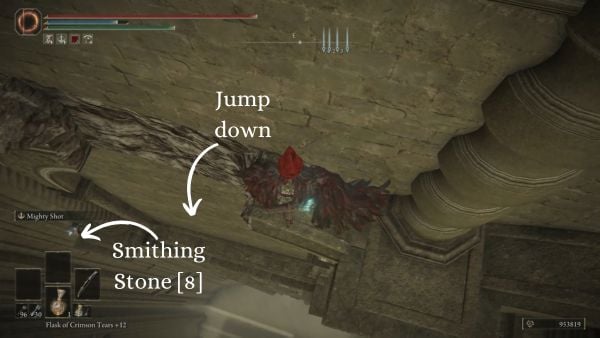
Drop down to it, then follow the ledge going south. You'll come across a broken section going to an item. Jump to get to the other side, and you can pick up x1 Holyproof Pickled Liver. After looting it, drop down from the broken section of the ledge, then pick up the nearby item, which is x2 Smithing Stone [8].
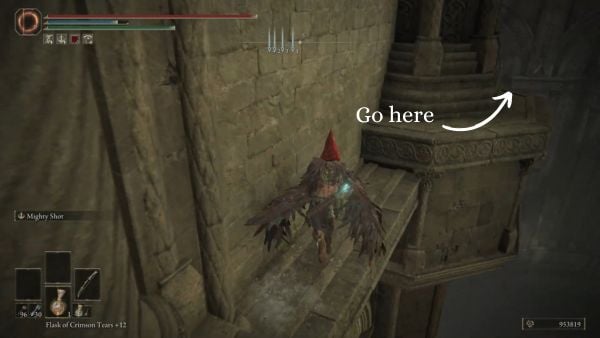
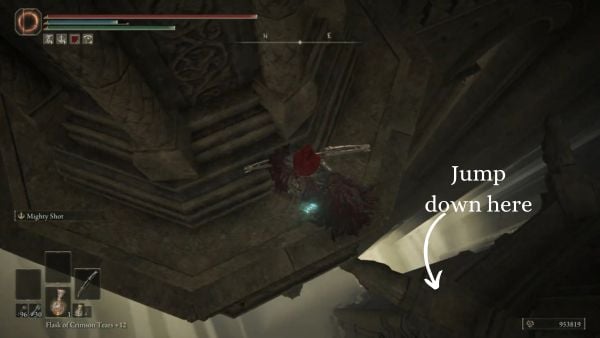
Follow the ledge going south. Be careful as there are pillars are blocking off some parts of ledge, making it tough to navigate. Keep hugging the wall just to be safe. When you go around the corner, you will find another area that you can jump down to. Jump down the area, then traverse the ledge going southwest.
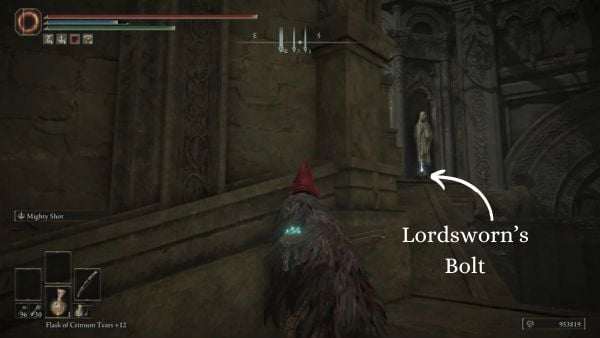
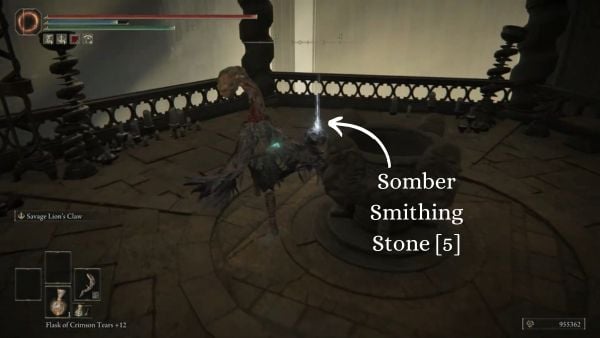
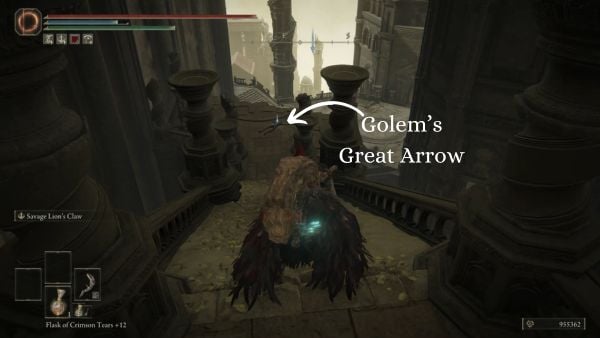
Keep following it, and you will acquire x10 Lordsworn's Bolt from a dead body at the end of it. After looting the body, follow the ledge to the other direction going down, and you'll be at a broken section of the ledge. Drop down it, and you will land near a hostile Shadow Undead. Kill it, then pick up x1 Somber Smithing Stone [5] nearby. Go down the stairs, and you'll find x10 Golem's Great Arrow from a dead body.
Belurat Tower Settlement Section
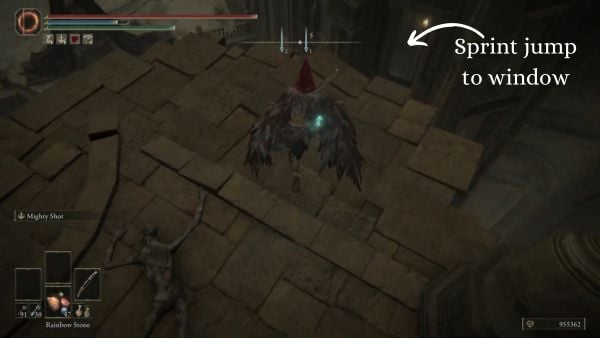
To progress further, sprint jump down the window south of the dead body containing x10 Golem's Great Arrow.
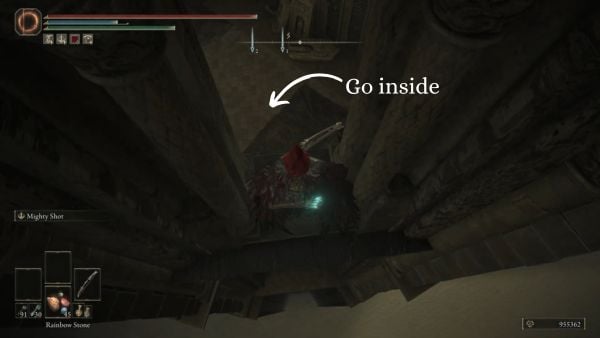
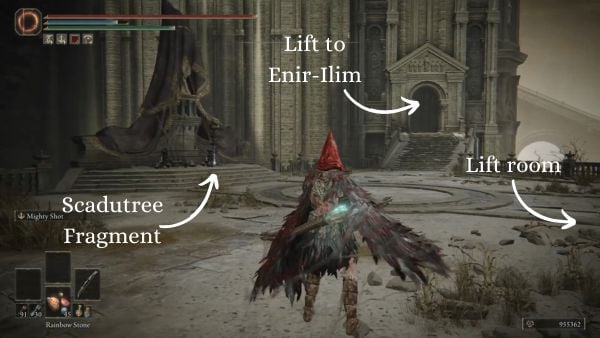
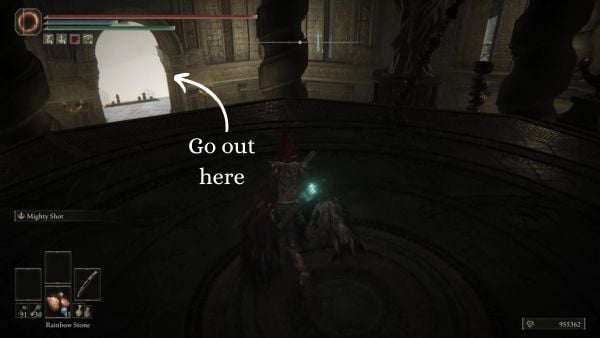
Once you have successfully jumped on the window, head inside the structure. The section you are in will be inside Belurat, Tower Settlement. Head out of the room, and you will end up in a courtyard. Pick up the x1 Scadutree Fragment by the covered statue. There are two other rooms that you can enter from the courtyard. The room on the east has a lift that you can take to return to Enir-Ilim, while the room on the south has a lift going down Belurat, Tower Settlement. Ride down the lift on the southern room.
After taking the lift, head outside by going through the archway on the southeastern side of the room. Follow the path by going down a staircase which leads you to a room containing three Tree Shamans. After clearing the room, follow the path going southwest. Head down the stairs, and you'll encounter a Horned Warrior patrolling the area. You can either fight it head-on, or you can sneak around as the Horned Warrior is patrolling in a way that you can sneak around it.
After dealing with the Horned Warrior with whichever method you choose, head inside the structure then go down the stairs on the western side. Go down the lift, and you will arrive in area with a bridge crossing to a door.
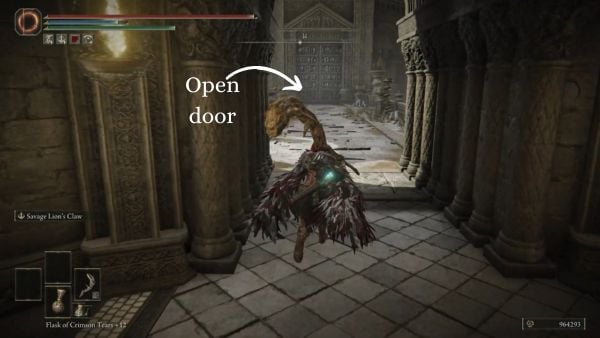
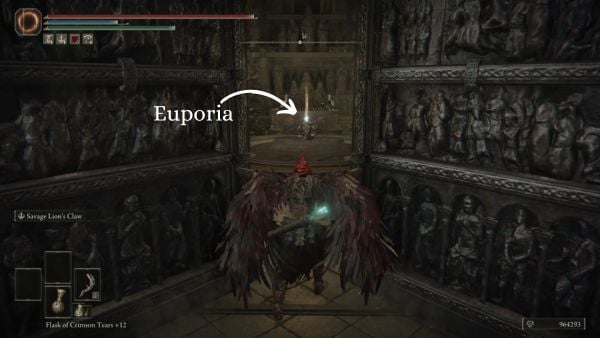
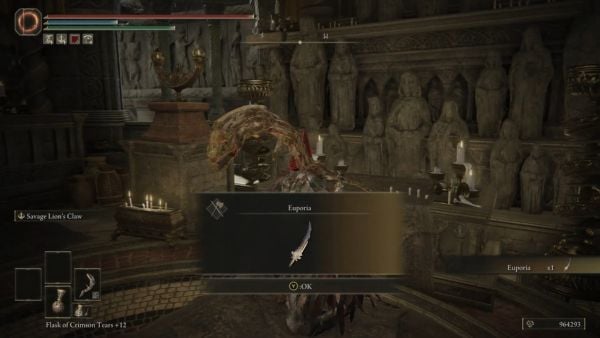
Cross the bridge, then open the door. You'll find a dead body by the altar, which you can loot for the Euporia twinblade.
Enir-Ilim Map

Enir-Ilim: Bottom Floor 
Enir-Ilim: First Floor 
Enir-Ilim: Second Floor

Enir-Ilim: Third Floor 
Enir-Ilim: Fourth Floor 
Enir-Ilim: Fifth Floor

Enir-Ilim: Sixth Floor 
Enir-Ilim: Seventh Floor 
Enir-Ilim: Top Floor
Enir-Ilim Videos
Video Walkthrough coming soon!
Speed Run Walkthrough
To gain access in Enir-Ilim, you need to defeat Messmer the Impaler to obtain Messmer's Kindling, and Romina Saint of the Bud to gain access to the area. Once you have defeated both of them, head to the sealing tree behind the Church of Bud then burn the sealing tree. You will be teleported inside of Enir-Ilim after a cutscene. After the cutscene, you can loot a body nearby for x1 Somber Smithing Stone [9]. Activate the Outer Wall Site of Grace beside you, then follow the path going through the archway. You will encounter a Gravebird Knight going down the stairs. Defeat the enemy, then go up the stairs to activate the First Rise Site of Grace.
First Rise
Go up the stairs near the Site of Grace to obtain a Somber Smithing Stone [5]. Afterwards, you can head southwest then pass through the archway to get to the courtyard filled with enemies. You can loot a dead boy for x1 Broken Rune near the trees in the courtyard. Enter the room, then fight the two Cursed Erdtree Priests inside. Head up towards the doorway with a stairs leading up, then defeat another priest. You can pick up a Rune Arc on a small shrine by the priest you just defeated.
You will then face a Cursed Erdtree Shaman roaming in the bigger courtyard, along with priests scattered around the corners of the courtyard. Defeat all the hostiles in the area, then head up the stairs. You will encounter another priest which dies in two or three hits. Keep following the path, and you'll encounter a Horned Warrior approaching the area. Defeat the Horned Warrior, then look at the platform across the one you are on. Go there by traversing through the tree branches. You can obtain x3 Furlcalling Finger Remedy right where you dropped. As you get on the platform, you'll encounter a Cursed Erdtree Priest there. After dealing with the priest, you can then pick up the Spira incantation. You can head back dropping down, then going through the path you went from originally.
Once you're back from where you dropped to the branches, follow the path going up. You can pick up a Dragonbolt Grease by the stairs, but there will be a flurry of magic attacks. The one casting the spell will be on top of the stairs, so you can sprint towards the enemy, a Cursed Erdtree Mage, to stop the attack. After that, you can deal with the mage on the rooftop near the next staircase going up by using ranged attacks. If you have no ranged attack options, you can just sprint to the top of the stairs, then defeat the priest on top of it. Along the way, you can loot dead bodies for x10 Fire Arrow and x10 Golden Bolt. Open the door to gain access to the Spiral Rise Site of Grace.
Note: Right before going up the stairs to the Site of Grace, you can find a staircase going down which will eventually lead you to a room containing the twinblade Euporia.
Spiral Rise
After activating the Spiral Rise Site of Grace, head up the stairs until you find an opening to the outside. Attack the mage, then turn right to go to the rooftop. You will encounter numerous gravebirds as you explore the rooftops. You can acquire a Smithing Stone [8] from one of the rooftops on the right side. Keep going west, and you'll find an area with broken railings that you can jump to. You will encounter a gravebird guarding a room with a chest containing x1 Revered Spirit Ash. Head up the stairs, and you'll come across Cursed Erdtree Priests that you can easily dispose of. Go through the archway, then keep climbing the stairs. You can find a room with x1 Scadutree Fragment on an altar.
You will arrive in a rooftop section with a Horned Warrior that uses frost spells. After defeating the Horned Warrior, climb up the rooftop until you find an opening to the structure containing the First Rise Site of Grace. Keep heading up the stairs until you get to the top of the structure. You'll end up in an area with a lift, and Cursed Erdtree Priests on the corners of the room. After clearing the area, you can head outside through the archway. In this area, you will encounter a Horned Warrior using wind spells. After dealing with the Horned Warrior, go up the stairs to open the door leading to the Cleansing Chamber Anteroom, then activate the area's Site of Grace. You can pick up a Scadutree Fragment southeast of the Site of Grace.
Cleansing Room Antechamber
Follow the path, then head up the stairs. You will encounter Needle Knight Leda, challenging you to a fight. In this fight, you can summon Pureblood Knight Ansbach to assist you in defeating Needle Knight Leda and her allies. After defeating Needle Knight Leda, you can loot the bodies of her allies scattered around the arena to obtain their equipment, such as Moore's Bell Bearing, Freyja's Greatsword and Dane's Footwork, among other things. Proceed to the archway, then follow the hall until you get to a lift. Use the lift to go up, and you'll arrive in a room with Ansbach near the top of Enir-Ilim. Go outside then head up the stairs, and you can activate the Divine Gate Front Staircase Site of Grace.
Promised Consort Radahn
As you go through the boss fog, you will fight Promised Consort Radahn. For a complete guide on how to defeat Promised Consort Radahn, you may visit this page. After defeating Radahn, you will receive the Remembrance of a God and a Lord. You can also pick up the equipment of those that helped you in the fight. You can get Thiollier's Set and Thiollier's Hidden Needle from Thiollier's remains, while you will get Obsidian Lamina, Ansbach's Set, and the Furious Blade of Ansbach incantation from Ansbach's Remains. In the middle of the arena, you can interact with a memory to play a cutscene. After the cutscene, you will obtain the Circlet of Light.
 Anonymous
I will never forget the sheer terror when I first encountered the lion knights.

 Anonymous
 Anonymous
For me it's canon that lion warriors can low-diff all demi-gods

 Anonymous
 Anonymous
You can still get Thiollier and Ansbach sets without summoning them for the battle. Their bodies will be in the boss chamber regardless provided you complete their quest lines.

 Anonymous
By far the worst final area in any souls game, plus enemies that are either pushovers or harder than bosses to fight. Fromsoft did a lot right, and so so much wrong in this dlc.

 Anonymous
Too short, too linear and too empty. What a huge let down for the final dungeon.

 Anonymous
 Anonymous
 Anonymous
I never thought they would make a legacy dungeon that would be better than the Haligtree, glad to be proven wrong. Absolutely beautiful.

 Anonymous
 Anonymous
 Anonymous
my favorite spot ever made. I love how advanced it is, yet still feels so primitive

 Anonymous
I love the world design, the lore, the art design, etc. even 95% of the enemies (Black Knights are brutal, but fun, same with Fire Knights, even the Curseblade are tough but give proper counterplay opportunities) but...something is off about the scaling across the DLC and it all culminates in Enir Ilim. It's entirely linear which is fine I suppose, but the scaling of the enemies makes...no sense. Man-flies get two hits by greataxe (the Death Knight one, awesome weapon), the Tree Shaman Hags die in a few hits, the big fat boy also only took a few AoW slams. But the Curseblade up above randomly is very tanky, ok fine no big deal. The Lion Warriors...it tooks everything I had to kill just one and they respawn and have an incredible amount of health. The NPC fight (while an epic idea...with the mechanics of Elden Ring it doesn't work, in Sekiro it would've been amazing) each guy as 10k+ health on NG and turns into a complete cluster instead of the epic showdown it supposed to be. And then you get to Radahn who has a comical 46k health and can one-shot with nearly any attack or combo if you make a single mistake. I think they lost their way with the whole Scadutree Fragment scaling system because it feels like the RPG mechanics of leveling and upgrading mean very little in the DLC. But the scaling problem also go the other way, as I found my way into Cerulean Coast somewhat early on with only a few Fragments and the Demi Human Queen boss there...I attacked her four times with a great club and she just...died. The St. Trina boss also similar died in only about 10-15 hits, with a only 5 fragment upgrades. Hopefully, they address whatever is happening with the scaling in a patch. I feel like the base game had a near-perfect scaling of progression and difficulty, made leveling matter and felt that progression in all aspects.

 Anonymous
Did I miss something? Got teleported to a place without consent and cannot leave it. I don't want to be here. Maybe I should have known better.

 Anonymous
 Anonymous
the people that got paid to make that one lion warrior with the ice near the end should've been fired yesterday

 Anonymous
 Anonymous
 Anonymous
Fair warning, there is a point of no return where ALL quests of the DLC end prematurely, I am not sure if it's when you enter Enir-Ilim or when you encounter Needle Knight Leda.

 Anonymous
 Anonymous
 Anonymous
i dont understand why they cant just make it somewhat easy. like obviously there can be enemies, but not 5 birds that attack allt at once one shotting you, and lions that also one shot you. this isnt just in this specific area. they do this throughout the entire game, every legacy dungeon there is just cheap enemies. but its even worse here because every enemy is scaled so much higher than the base game

 Anonymous
This area was a massive disappointment. Totally linear, one big staircase, overtuned enemies that it makes more sense to just run past.

 Anonymous
 Anonymous
what an absolute cancer of an area. infinite poise ninja paladins, wow, so cool, Miyazaki, very clever encounter design

 Anonymous
Why's there a stupid lion warrior dastard that is literally harder than any other thing in the DLC placed in an odd spot where it makes it basically impossible to run past him

 Anonymous

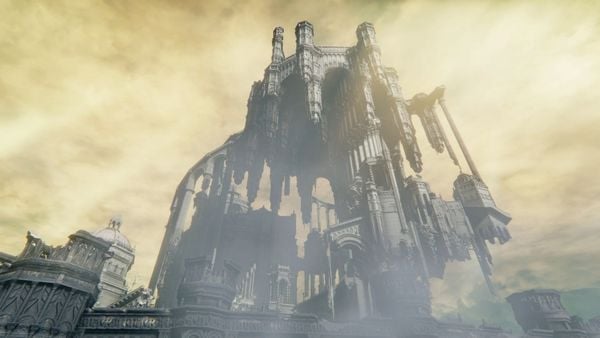
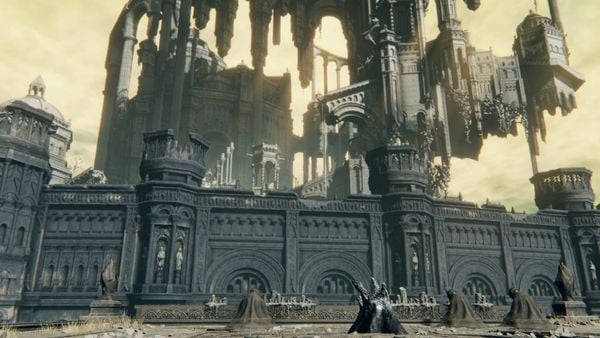

If Miquella's crosses are the "lamplight" and the "black steeple" is referred as Enir-Ilim (when it's covered the shadow) that's described Helphen's Steeple, that would IMO make sense in connections with the land of shadow, Miquella, and the Helphen "who met their death in battle" (Radahn; Mohg, St, Trina and the tarnished (in back handed ways)).
Of course, this could mean that Miquella never really transparent (except as a spirit) with anyone.
0
+10
-1