Shadow of the Erdtree Walkthrough and 100% Guide for Shadow of the Erdtree expansion covers a detailed step-by-step guide for the main story and locations of the Shadow Land. The walkthrough will include vital information about items, gear, enemies, bosses, and NPCs encountered throughout the DLC Expansion of Elden Ring. On the Shadow of the Erdtree walkthrough page, you can find important details and guides that will help you through your adventure in the Shadow Land.
- For the Elden Ring Base Game Walkthrough, please visit the Walkthrough page.
Shadow of the Erdtree Walkthrough 100% Guide
Shadow of the Erdtree All Legacy Dungeons
You can find a list of all the available Legacy Dungeons featured in Elden Ring's Shadow of the Erdtree expansion for both Main and Minor Legacy Dungeons. Each page will consist of a detailed walkthrough guide, including various entries and complete lists of the many items, equipment, NPCs, and boss encounters found within the Shadow Land.
Elden Ring Shadow of the Erdtree All Main Legacy Dungeons:
Elden Ring Shadow of the Erdtree All Minor Legacy Dungeons:
Shadow of the Erdtree Helpful Links
- Shadow of the Erdtree: Find all the information you need to learn about the expansion.
- Shadow Lands Game Progress Route: A streamlined to-do list by location for the expansion.
- Shadow of the Erdtree Map: An interactive map for checking all the different categories and assets of the expansion.
- Bosses: Boss Guides for the new Bosses in Shadow of the Erdtree.
- Sites of Grace: Check out our various guides on how the Sites of Grace works, as well as information on where to find them.
Elden Ring Shadow of the Erdtree Walkthrough - Entering Shadow Realm
Unveiling Shadow of the Erdtree
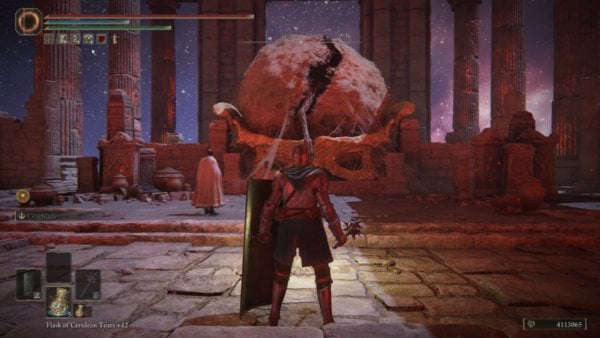
The story expansion of Elden Ring continues in a forgotten land dubbed the Shadow of the Erdtree. After defeating Mohg, Lord of Blood in the base game, you will find a new character donning a white robe next to the cocoon in the Mohgwyn Dynasty Mausoleum. Interact with her to preface your journey to the Realm of Shadow. She introduces herself as Leda and invites you to join her, and other followers of Miquella the Kind to trace his path. To start your search, approach the cocoon and touch the withered arm. You will then be transported to a familiar, yet new region.
How to Enter the Shadow Realm
- This section only applies to players who haven't finished the Elden Ring base game.
- Please see the next tab "Gravesite Plain" if you can access Realm of the Shadow immediately.

To begin your journey to the Shadow Realm, players need to defeat 2 Bosses in the base game: Starscourge Radahn and Mohg, Lord of Blood. Mohg is one of the challenging bosses that players will come across in the base game, and he can be defeated after you find your way to his palace, a location that is found beneath Caelid but the gateway access is limited to a transporter in Consecrated Snowfield.
Starscourge Radahn
There are a few ways to take down Starscourge Radahn:
- You need to gain access to the fight reaching Redmane Castle while the festival is ongoing. This festival comes alive by interacting and completing personal quests of Ranni the Witch and Blaidd the Half-Wolf (up to the part where you speak with Sorceress Sellen who will inform you that you need to defeat Starscourge Radahn to enter Nokroni).
- Speak with Witch Hunter Jerren and Blacksmith Iji after starting Ranni's questline and initiate the festival in Redmane Castle.
- Alternatively, you can explore the Altus Plateau, rest at any nearby Site of Grace, and head to Redmane Castle. You will find the festival is active and you will be able to fight Starscourge Radahn this way. This path isn't highly recommended because of the difficulty of this fight, but this can be done for players who want to take a shortcut or do a speedrun.
Mohg, Lord of Blood
To take down Mohg, Lord of Blood (not to be confused with Mohg, The Omen), players need to make their way to The Mohgwyn Palace, which can be done in two ways:
- Use the Waygate in West Consecrated Snowfield [Elden Ring Map Link]
- Follow White Mask Varre's questline until reaching the point where you will be receiving the Pureblood Knight's Medal and use it to travel to the palace.
After defeating Mohg, you will now be able to see Leda and interact with the cocoon. Doing so will let you travel to the Shadow of Realm and play the DLC expansion for Elden Ring.
Elden Ring Shadow of the Erdtree Walkthrough - Gravesite Plain
Elden Ring Shadow of the Erdtree - Navigating Gravesite Plain
- Get the Map for Gravesite Plain
- Visit Church of Consolation
- New Items for Level Scaling Mechanic: Get Scadutree Fragment and Revered Spirit Ash
- Scorched Ruins: Pick up the Larval Tear in the illuminated gravesite (night time only)
- Defeat Side Boss: Blackgaol Knight in Western Nameless Mausoleum
- Get the Sacred Tower Painting
- Defeat the Furnace Golem
- Meeting Allies in Realm of Shadow
- Optional: Discover Abandoned Ailing Village and defeat the field boss: Ghostflame Dragon
- First Path: Meet more allies and get ready to enter Belurat Tower Settlement
- Explore Belurat Gaol and Defeat the Side Boss: Demi-Human Swordmaster Onze
- Second Path: (See the next tab for Western Gravesite Plain Navigation) Then, come back here to continue exploring Gravesite Plain, the area after crossing the Greatbridge
- Third Path: Cross the Greatbridge (NOTE: Do this after Belurat Tower Settlement and Western Gravesite Plain)
- Clear the Ruined Forge Lava Intake
- Reach Pillar Path - Site of Grace
- Find Igon and Thiollier. Exhaust their dialogues. (NOTE: Speak with Moore after talking to Thiollier. You will receive Black Syrup from Moore and you will take it to Thiollier to receive Thiollier's Concoction. This item can be used to unlock an alternate ending for the Dragon Communion Priestess's quest to receive Dragonbolt of Florissax (Incantation) and Ancient Dragon Florissax (Ash Spirits).
- Unlock the Site of Grace in Dragon's Pit
- Reach Suppressing Pillar
Gravesite Plain
Upon entering the Realm of Shadow, you will see a faint light glowing before you. Walk towards this and follow the steps leading to a view of the vast land you are now in. There's a Site of Grace ahead and make sure to interact with it so you have a checkpoint here. Walk toward the northeast of the Site of Grace and look for the dirt path. Follow this path leading north and pick up the Map: Gravesite Plain in one of the stoneheads to your right, similar to the base game. This unlocks the Gravesite Plain on your map and will help you navigate more easily.

While in this area, be on the lookout for a Curseblade, this is an enemy with two blades that will attack you. After defeating it, head south and follow the dirt path. You can ride Torrent here so you can cover more distance. You can also pick up items along the way to help with crafting like Redflesh Mushroom, Whiteflesh Mushroom, and Rada Fruit on the ground. You will also encounter shadow enemies here that can attack you while riding your mount. Stay on this dirt path and continue up until you see a broken cart and dead bodies. Take a moment here to pick up some items like Glass Shard, Black Pyrefly, and Arrow. Continue going south until you reach the outside of the Church of Consolation. You can pick up Dewgem on top of the stones surrounding the church and in the area close to the nearby waterfall. There's also a Black Pyrefly behind the church.
Scadutree Fragment and Revered Spirit Ash
The church is located at the edge of the map and inside, an elite enemy is patrolling the aisle. It's up to you if you want to kill it or you can go around the church, stay crouched, and sneak behind the altar to pick up the Scadutree Fragment. However, if you opt to defeat the Black Knight Elite, you can obtain Black Steel Greatshield, Black Knight Helm, and Smithing Stone [6] as a reward. Then, you can pick up the Scadutree Fragment in front of the statue, this is an important item exclusive to Shadow of the Erdtree that boosts your damage inflicted on enemies while boosting your damage reduction. You can use this to level up your Scadutree Blessing while resting on a Site of Grace.
Outside the church, there's a small camp of Messmer Soldiers to the east. You can eliminate these soldiers for a chance to loot a piece of their armor and then pick up a Fire Coil from a corpse inside the round tent. On your way back, travel to the edge of the plain, on the side of the Site of Grace. You will find a Lump of Flesh on a corpse behind one of the stone heads.
Return to the dirt path and go towards the white tree with hanged bodies to the northeast. Continue riding Torrent and proceed to the Eastern cliff where you see the waterfall. This is the other side of a ravine separating the Church of Consolation from the plains. Walk up to the small altar and pick up the Revered Spirit Ash, this is also a new item that lets you boost Spirit Ashes beyond +10 and increase the durability and damage dealt by Torrent within the realm of shadow.
To Scorched Ruins and Defeating a Side Boss
When you're done here, continue exploring Gravesite Plain by going through the edge of the plain. You will come across a small gravesite northwest of the previous small altar. You can pick up a Spiritgrave Stone from one of the stone heads and some Rada Fruit and Knot Resin on the ground. After that, continue to the dirt path from where you picked up the map and go north. Backtrack a little and go to this area (See Larval Tear location on Map) to obtain a Larval Tear from an illuminated gravesite. You can only pick up this item at night. Then, continue north until you reach Scorched Ruins, a small area where you can fight some enemies and pick up important items.
While facing Scorched Ruins, climb the stairs to your right, and take the Hefty Cracked Pot from the corpse. This is a material that can be used for crafting cracked pot items. You can also loot other crafting items on the ground here. From here, go to your right and take the stairs to your left. Then, pick up the Greater Potentate's Cookbook [1] from a corpse on the stairs here. Next, go inside the broken building and look for the corpse hidden within jars. Destroy the jars here and pick up the Shadow Realm Rune. Go up the stairs and walk towards the enemies attacking you from the opposite building. Cross the roof to the other side and pick up Black Pyrefly behind this room. Then, go back to the front of this room and open the door to reveal a chest containing the Blade of Mercy. After that, walk directly in front of this room and drop down to the balcony below it. Jump to the next platform and pick up the Bone Dart from a corpse. The last thing to do in this area is to walk past the building towards the north and activate the Site of Grace.
If you have been following this Walkthrough, make sure to take the time to use the collected Revered Spirit Ash and Scadutree Fragment on the Site of Grace you have collected so far. The next location is an optional boss you can defeat for a reward. Head west where you will see white trees in the distance and as you get near a tall gravestone, 2 Gravebirds will swoop down to attack you. These enemies have a chance of dropping Smithing Stones so make sure to defeat them when you see one. Continue traveling west and go past the glowing worm-like creatures. These are not hostile unless you start attacking them. Continue riding Torrent until you reach the Western Nameless Mausoleum. You can go inside this building to defeat the Blackgaol Knight and earn the Greatsword of Solitude and Solitude Set as a reward.

After this area, head back to the Site of Grace and explore the east side where you will see a small gravesite. While on your way, you can see a ghost that you can interact with to learn a small bit of lore about Messmer and Marika. Continue riding past the ghost to reach the gravesite and pick up Golden Rune and Redflesh Mushroom on the grave headstones.

Continue exploring north while scaling the edge of the plain. Keep an eye out for a cave here with a glowing light. Go inside it and interact with The Sacred Tower Painting. [See the location on Elden Ring Shadow of the Erdtree Map]. As you head back outside, you will come across Inquisitor enemies who use Fire and Magic. Go toward the small altar with 4 pillars located behind this pack of enemies to pick up the Backhand Blade. Continue heading east toward the cliff and take the Grave Glovewort from the corpse on the stone. You might come across a Gravebird here once again.

Back to the dirt path along Scorched Ruins, you will see a tall flaming enemy. This is the Furnace Golem, an elite enemy that drops runes, Deflecting Hardtear, and Furnace Visage upon death. You will also see more of this enemy in other locations, but each of them has a unique tear drop. This enemy will also start throwing projectiles at you if you get too close. The Furnace Golem can be tough to beat because of the wide AoE attacks that it can do. It will take some time to get used to but the movement is slow and can be dodged by timing it with a jump before its foot hits the ground. If you're having a hard time, you can ride Torrent while fighting this boss and then focus on attacking the legs. You can take advantage of Torrent's double jump so you can have more air time.
Miquella's Followers at the Three-Path Cross
When you're done in this area, head east again where you see a faint light glowing from the ground, and some figures are gathered near it. Talk to the NPCs here, who you will come to know as followers of Miquella. Just like Needle Knight Leda said, these followers will offer help in your journey in tracing Miquella's footsteps. Interact with the NPCs here and make sure to exhaust the dialogues of Hornsent to receive the Cross Map from him. You can pick up an Empyrean-Blood Burgeon and a Scadutree Fragment on the ground next to the cross.

From the Three-Path Cross Site of Grace, navigate the wall to your left while facing north. You are headed to the area below the greatbridge here. Carefully stick to the wall and take the Ash of War: Savage Lion's Claw from a small camp here. Then, face the east direction toward the bridge to find a way to the lower area here. The Run-Down Traveler's Rest is directly below the bridge and you can pick up the Greater Potentate's Cookbook [2] inside. When you're done here, you can travel north to reach your next destination, which is the Abandoned Ailing Village.

To reach Abandoned Ailing Village, stick to the edge of the cliff here and travel north. Continue until you reach a dead-end where you will find a small altar with the Revered Spirit Ash. Eliminate the nearby giant moths so you can safely take this item. Then, head back to the ramp so you can activate the Greatbridge, North - Site of Grace.
You will see a ghost facedown on the ground ahead of you. Interact with it before you proceed to Abandoned Ailing Village. Go to the edge of the cliff behind the ghost and pick up the Human Bone Shard and Golden Rune from a corpse. Continue walking at the edge and you will find another corpse on the wooden platform where you can obtain the Ailment Talisman. Before leaving this area, go to the other side of the houses (across the ghost) and you will find a Broken Rune from a corpse.
You can now travel west toward the lake and you will see a Ghostflame Dragon in the distance. There's a summoning pool that you can activate if you want to use it. Defeating this boss will reward you with x1 Dragon Heart and x1 Somber Ancient Dragon Smithing Stone. See the Ghostflame Dragon for information and strategies to defeating this boss. You can also pick up a Great Katana from a corpse next to the dragon. After this fight, continue exploring north where you will find a small shack below the Abandoned Ailing Village. There's a corpse outside at roof level where you can pick up Fly Mold, then, you can jump inside the house through the hole in the roof to pick up the Greater Potentate's Cookbook [10].

Next, head southwest into an area in Gravebird statues. You can pick up the Gravebird Armor from the altar in the middle here. Then, follow the body of water leading to metal barricades scattered on the ground. This will lead to an entrance to Belurat Gaol where you can defeat an optional boss called Demi-Human Swordmaster Onze to earn Demi-Human Swordsman Yosh (Spirit Ash) as a reward.
The First Path: To Belurat Tower Settlement

Return to the Three-Path Cross Site of Grace and go toward the tall archway once again. This time, head up the wide steps to reach another Miquella's Cross and meet more allies. Talk to Ansbach, according to him, he once served Lord Mohg but has decided to follow Miquella the Kind. You will also find Moore, a merchant sitting on stacks of boxes behind him. Ansbach will ask you to inform him if you find more of Miquella's Cross after exhausting his dialogues. Moore on the other hand sells a collection of items, one of the notable things you can buy from him is the Note: Sealed Spiritsprings. Pick up the Scadutree Fragment next to the cross and activate the Main Gate Cross Site of Grace, too.
After this encounter, continue up the wide steps and open the door by interacting with it. A Giant Spider Scorpion will come rushing to attack you as you enter the location. There's also a Revered Spirit Ash in the center of the room. Then, go behind this altar to pick up the Poisonbone Dart from the corpse sitting on a chest. Afterward, go up the right stairs and take the Fireproof Dried Liver from the corpse. Continue exploring by going up another set of steps. You will come across another Giant Spider Scorpion here, and after eliminating this enemy, continue north to reach Belurat Tower Settlement, the first Legacy Dungeon in Shadow of the Erdtree.
Clearing Belurat Gaol
The Belurat Gaol is an optional dungeon found under the Belurat Tower Settlement. The entrance can be accessed by heading west from the Abandoned Ailing Village or the Greatbridge, North Site of Grace. You will follow the body of water here and you'll know that you are at right location when you reach the part where you see metal barricades and prison cages. As you enter the dungeon, you will find the Belurat Gaol Site of Grace and a Summoning Pool on the right side of the entrance.


This area has enemies such as Revered Spirits, large and small variations of the Living Jar, and Mutated Prisoners. This area is also a good place to farm or find Frozen Maggots, and once you get to the bottom of this dungeon, you will find the mist door where a mini-boss is waiting. Demi-Human Swordmaster Onze is a nimble creature that can execute lunge attacks, leap movements to outmaneuver you, and various deadly combos that can take you out. You can opt for a shield and summon any Spirit Ash of your choice, or have Black Knife Tiche assist you in this fight. You will receive Demi-Human Swordsman Yosh (Spirit Ash) for defeating this boss. You can also visit the page for the full Walkthrough of this dungeon.

The Third Path: Crossing the Greatbridge
After clearing Belurat Tower Settlement and the Western Gravesite Plain, return to the Three-Path Cross Site of Grace and head towards the bridge to your northeast. There are metal barricades along the bridge and as you get closer to the middle, a soldier manning the Ballista will start firing here. Eliminate the soldier first and then run back to the middle of the bridge to loot from the corpses. You can pick up Lost Ashes of War and Ballista Bolt here. There are soldier tents on the side of the bridge and you can go through them and eliminate enemies as you go. Then, return to the path in the middle where you can see an item in the middle of 2 lit lanterns. Walk toward it and pick up the Scadutree Fragment. Then, interact with the Castle Front Site of Grace behind the tent to activate it.

Clear Fog Rift Catacombs
Fog Rift Catacombs is located west of the Church of Crusade and north of Fog Rift Fort. The entrance of the catacombs leads to an elevator that goes down. You'll immediately find the Fog Rift Catacombs Site of Grace and a tunnel path straight ahead. Head through the tunnel entrance and prepare yourself for a Lion Head Goblin that will ambush you. At the upper right side of the room is a corpse holding a Grave Glovewort [1].
After retrieving that item, turn left through another tunnel entrance which leads to a large open room. Upon exiting the tunnel, immediately turn left towards a safe spot because half of the room is rigged with a spike trap that descends from above. Wait for it to come down, and once it goes up, immediately run to the other side where a Lion Head Goblin is waiting for you. Take out the Goblin and head straight to the next tunnel entrance leading to a large hallway. Turn right and head straight towards the stairs going down, but before heading down, pick up the Yellow Fulgurbloom to your left.
After collecting the plant, head down the stairs and turn right into another tunnel in the catacombs. You'll see two corpses that give you the Ancient Dragon Knight's Cookbook [1] and a Lizard Greatsword, along with a Yellow Fulgurbloom plant. Head back to where you turned right earlier, and this time, turn left down another set of stairs. This will lead you to what looks like a dead-end ledge, but wait a few seconds for the spike trap from earlier to fall down. Once it falls, hop on top of it, and it will lead you to a secret platform with a Lion Head Goblin, a corpse that gives you Knot Resin, and a Yellow Fulgurbloom plant.
After looting the platform, hop on the spike trap again, but don't go back yet. Instead, wait for the spike trap to take you back up again, and this time, look for a tunnel entrance to the left that you can drop onto. Once you enter the tunnel and the room, turn left again until you cross a bridge and a set of stairs going up. Here, you'll encounter Messmer Soldiers guarding a Great Ghost Glovewort. Loot the item, turn left, and drop down to a large open room.
Make your way back to where you first saw the spike area from a ledge. Instead of hopping back on, wait for it to drop and go up. Then immediately drop down and enter the tunnel entrance behind you. The small room here contains a Yellow Fulgurbloom. Inside the room on the left side is a ladder going up. Head up the ladder and follow the tunnel path with three Yellow Fulgurblooms.
After looting the plants, walk to the right and drop down to the area from earlier where you saw the spike trap. Drop down again and stand at the tunnel entrance behind you from earlier. Wait for the spike trap to drop, then immediately run to the other side where a set of stairs goes down. Here, you'll find a corpse that gives you Dragonbolt Grease.
Head down the stairs to find another elevator that goes further down. Upon reaching the ground, head straight towards a room with two Lion Head Goblins and loot the corpse and plant under the stairs to get Rada Fruit and a Yellow Fulgurbloom. From under the stairs, head straight towards the tunnel entrance on the other side of the room, but loot two more Yellow Fulgurblooms to the left.
Inside the small room, clear out the two enemies and loot the corpse on the upper right for a Grave Glovewort [2]. After looting the corpse, head out of the room and turn right towards another tunnel entrance with stairs going further down. This leads to an open hallway with spike traps covering half of the hallway. Just as before, run to the left towards a safe space and wait for the spike trap to drop. Once it drops, hug the wall and run straight until you see a hole to the left where you can drop down into what appears to be a sewage area. Once you land in the sewage, head straight for the tunnel entrance ahead and loot the corpse for a Ghost Glovewort [4].
On the left side of the first sewage room is an entrance to another room. Enter and turn left towards another room containing three Yellow Fulgurblooms and a corpse that drops an Electrocharge. Exit that room, turn left towards a ladder going up. Climb the ladder and drop down from the platform to find yourself near the hallway spike trap from earlier. Wait for the spike trap to drop, and once it does, run towards the other end of the hallway. Get to the second safe spot to the left, past the hole you dropped into earlier, and loot the corpse there to get a Glass Shard. Wait for the spike trap to drop again, then run towards the stairs leading to a casket above that you can loot for a Shadow Realm Rune [3].
Once you're done looting, stay on the ledge of the platform you're standing on in front. Wait for the spike trap to drop, and you'll see a small square space on the side of the spike trap that you can hop onto. Hop onto the square platform and let the spike trap raise you to a secret platform above with a chest containing the Ash of War: Blinkbolt. After looting, hop on top of the spike trap again and run to the other side until you see a small platform to the right to drop onto. You'll see an altar in front with an item, the Stone-Sheathed Sword.
To the left is a ladder going down. This ladder leads to a secret room with a corpse that gives you a Ghost Glovewort [5]. Loot it, then immediately look to the left to see another hole to drop into. This hole will drop you back to a safe spot from the hallway spike trap from earlier. Wait for the spike trap to drop, and once it does, run to the other side this time instead of the platform from earlier. Be careful in the safe area here as it connects to another spike trap area.
Wait for the spike trap on the other side to drop, then cross towards a tunnel entrance. Loot the corpse in the middle first for a Broken Rune. Head through the tunnel entrance to find another elevator that goes down. Drop here and head straight until you reach the yellow mist that leads to the Death Knight boss.
Clearing the Ruined Forge Lava Intake
After that, proceed to the riverside of Ellac Greatbridge by riding Torrent to the southern area. Eliminate the soldiers here for a chance to get Smithing Stone from them. Then, look for the corpse outside a tent to obtain a Spread Crossbow, a modified crossbow that can load multiple bolts and fire them simultaneously to create a spread of arrow bolts. From here, head east towards a gravesite where you will see Bloodfiends fighting Messmer soldiers. Continue riding ahead until you see the toppled pillars with lanterns. You will see a small entrance that will lead to Ruined Forge Lava Intake.
The Ruined Lava Forge Intake is an optional dungeon that you can explore to obtain various rewards. At the entrance, you can interact with the ghost to learn about the existence of the Altar of the Forge. Inside the dungeon, you will find Golem Smith enemies here which drop various Smithing Stones. You can also loot Smithing Stones and Somber Smithing Stones from corpses throughout the area here. There's a Fire Blob enemy reminiscent of the Silver Tear in the base game. This dungeon is a haven for upgrade materials and you can also pick up Greater Potentate's Cookbook [13] down here.
From the base level, look for a ladder going down. This will take you to a lever overlooking a magma river. You can pull the switch to let down a pillar that can be used as a bridge. Then, make sure to pick up the Glass Shard from the corpse behind the lever. Below you, there's a golem guarding a corpse. Eliminate the golem first and then pick up the Smithscript Dagger from the body. There are also some Smithing Stones nearby that can be looted.

Head toward the pillar that was lowered down and watch out for the Magma blob as you go up. After reaching the end of the pillar, look for an opening to your right. Interact with the Altar of the Forge to obtain Anvil Hammer and Ancient Dragon Smithing Stone. Then, teleport to the Castle Front so you can continue exploring the east side of Castle Ensis, leading to Pillar Path Waypoint and the Dragon's Pit.
Heading to Dragon's Pit
NOTE: This section only tells you how to get to Dragon's Pit. We recommend clearing this dungeon later on after you have cleared Cerulean Coast and you're headed to Charo's Hidden Grave.
This area can be found southeast of the path before Castle Ensis. When you're done exploring Ruined Forge Lava Intake, you will head back outside, then take the path leading south. Teleport to Castle Front - Site of Grace and follow the path. You will encounter some soldiers here on the way on a small camp. Eliminate this small group and then pick up the Swift Spear from this corpse next to the barricade.
After this area, stick to the left side and scale the cliff. There's a Site of Grace that you need to activate so you can come back to it later. This is the Pillar Path Cross that overlooks the area below you. You can also pick up a Scadutree Fragment, 2x Empyrean-Blood Burgeon here next to the cross. Then, return to the main path. Continue south until you hear a screaming man. This is Igon, a drake warrior who is screaming in pain. Make sure to talk to him until you exhaust his dialogues and you will find out that the cause of his pain is a powerful boss. NOTE: Do not kill this NPC. It is important to keep him alive because he will play an important role against a boss later on.
For now, head south and stay on the path. Players have reported that a hostile NPC version of Ancient Dragon-Man appeared here. Keep going until you see the hole to your right with a lit lantern on the ground. Go inside and activate the Site of Grace at the bottom of this section. For now, we don't recommend on exploring this dungeon yet. Instead, come back here much later after exploring Cerulean Coast, which is when you're going to Charo's Hidden Grave from the Dragon's Pit.
Suppressing Pillar
The Suppressing Pillar is a tall structure where players can find a single item at the top. It can be found in the east part of the Gravesite Plain region [See Shadow of the Erdtree Map]. Upon arriving, simply enter the pillar to find a lift, ride it to the top, and you'll spot a treasure chest that contains x1 Ancient Dragon Smithing Stone. There's nothing much else to do here but you can also find a headstone to read a message that says:
"The very center of the Lands Between.
All manners of Death wash up here, only to be suppressed."
On clear weather, the top of the Suppressing Pillar provides the best preview of all of the regions of the Realm of Shadow.
Elden Ring Shadow of the Erdtree Walkthrough - Gravesite Plain (Western)
Elden Ring Shadow of the Erdtree Belurat Tower Settlement - Navigating Western Area of Gravesite Plain
- Reaching Cliffroad Terminus: Make sure to pick up Larval Tear at the illuminated gravesite here (night time only)
- Explore Prospect Town
- Look for the Forager Brood who will give you the Forager Brood Cookbook (2). This NPC can be found next to the illuminated gravesite at night, which surrounds a Larval Tear at night. NOTE: Harming the Forager Brood will cause Moore to appear and invade your world. If Moore dies, this will also cause the Forager Brood to permanently disappear.
- Get the Incursion Painting in Artist's Shack,
- Go to the Church of Benediction
After meeting the followers of Miquella at the Three-Cross Path Site of Grace, continue exploring Gravesite Plain by going toward the tall archway that Freyja is facing in the west. You will come across shadow enemies here that you can eliminate for a chance to get Rada Fruit from them. Go to the left after exiting the archway and navigate the stone steps here. This will lead you to an area above the Western Nameless Mausoleum, the Cliffroad Terminus. You will encounter hounds and giant bats in this area. After scaling the cliff here, you can activate the Cliffroad Terminus Site of Grace.
Exploring Cliffroad Terminus

From here, follow the dirt path and head south. This will lead you to a gravesite with more Shadow enemies. Go near the edge and look for an item on the ground near the gravestone heads to obtain the following items:

There's also a Grave Glovewort that you can collect from one of the corpses here. After this area, head to the opposite side of the cliff and go toward the pond. You will encounter Hounds and Bloodfiend enemies here along the way. At the edge of the pond, you will see a small altar where you can pick up a Revered Spirit Ash. Then, head south of the pond where a hound and Bloodfiends are gathered. You can pick up a Great Arrow and a Smithing Stone from their gathering spot. Continue exploring until you reach the edge south of the pond. You will find a non-hostile servant here who will give you the Forager Brood Cookbook [2] when interacted with. There's also a nearby illuminated grave where you can pick up a Larval Tear from the center. (This area may only be spotted at night.)
Head toward the west this time and enter Prospect Town or what remains of it. This area is infested with Bloodfiends and Hounds in every corner. Inside the building to the west, you can pick up Beast Blood from the corpse next to breakable jars. Go towards the southern area of Prospect Town where you see 3 Bloodfiends gathered in the open area. Eliminate them and look around the pillars to pick up Sanguine Amaryllis from a corpse. Continue walking up two sets of wide steps and enter the building to your left. Inside, you can obtain an Outer God Heirloom from a chest.
Exit the town to continue exploring the southeast and go past the servant who gave you the cookbook. You will encounter creatures here with lightning elements, and lightning can also strike occasionally. You may also pick up Yellow Fulgurbloom and other items from slain creatures. You will see a corpse in the distance and you can go up to it to take the Greater Potentate's Cookbook [5].

Continue navigating this area and go toward the cave where you will encounter a Giant Rat and another Curseblade. You're heading toward where you interacted with the first Site of Grace in the Shadow of Realm but in the area above it. As you reach the edge of the cliff, you will see the "Incursion" Painting inside the Artist's Shack. [See the location on Elden Ring Shadow of the Erdtree Map] After going here, explore the southern area to reach the Church of Benediction. Go toward the center and pick up the Blessed Blue Dew Talisman from the altar. Then, face north and exit the tall and slim archway toward the cliff. Pick up Pata and the Oathseeker Knight Set here.
You can go down here and scale the wall while riding Torrent. This gives you access back to the Gravesite Plain without going back to the Site of Grace in Crossroad Terminus.
Elden Ring Shadow of the Erdtree Walkthrough - Belurat Tower Settlement
Elden Ring Shadow of the Erdtree Belurat Tower Settlement - Inside the Legacy Dungeon
- Meet Moore and Sir Ansbach
- Defeat the NPC Invader Fire Knight Queelign IMPORTANT: After exploring Belurat Tower Settlement, you must speak with Ansbach at the Three-Path Cross Site of Grace to progress his questline
- Take the Storeroom Key and unlock the door near the Small Private Altar Site of Grace to meet Hornsent Grandam
- Take the Well Depths Key and head to the Sewers
- Navigate the Stagefront section of Belurat Tower Settlement
- Defeat the Divine Beast Dancing Lion
- After defeating the boss, pick up the Tower of Shadow Message
- Equip the Divine Beast Head armor piece and return to Hornsent Grandam to receive Watchful Spirit (Spell)
- After exploring Belurat Tower Settlement, you must speak with Ansbach at the Three-Path Cross Site of Grace to progress his questline
Belurat Tower Settlement is a Legacy Dungeon in Elden Ring. The Belurat Tower Settlement is an exclusive legacy dungeon of the Shadow of the Erdtree DLC Expansion. The tower was said to be a place where practitioners and experts would practice the ancient form of hexing arts. It was also a place where individuals who have caught the "fly sickness" have succumbed to death or the disease that transformed them into hostile flesh-eating creatures. And since unimaginable actions and magic were practiced, those who have met their demise now roam the tower as lost Revered Spirits, waiting to kill anything or anyone who explores the area. [See Shadow of the Erdtree Map] Ground Level 1st Level 2nd Level Sewer Level Roof Level Talismans Consumables Weapons & Shields Armor Spells Ashes of War Upgrade Materials Enemy Drops Keys & Other The Belurat Tower Settlement is said to be situated within the Gravesite Plain, a somber plain that is covered in spirit graves. It is located northwest of the Gravesite Plain Site of Grace. [See Shadow of the Erdtree Map]. When you arrive at the main gate, you'll find the Main Gate Cross site of grace, and 2 NPCs near it, Moore and Sir Ansbach. Speak to Sir Ansbach and exhaust his dialogue where he talks to you about the crosses that are akin to Miquella's footprints. He will ask you to find them and speak to him upon discovering the other crosses. Behind Sir Ansback is Moore, a merchant you can interact with to buy items. Next to Miquella's Cross, where Sir Ansbach is standing, you can pick up x1 Scadutree Fragment on the ground. Once you are done speaking to the NPCs or resting at the site of grace, climb to the top of the tall stairs and open the double doors to enter the legacy dungeon. As you approach the first set of stairs, a large Spider Scorpion ahead will drop from the ceiling and start to attack you. Be ready to dodge as it will jump in the air. The large creature is easy to kill since you can block its attacks with your shield or dodge it at the right time. After killing it, climb to the top and enter the large room. Inside, you'll find a statue in the middle of the room. Tread carefully as you approach it since there are multiple Spider Scorpion enemies around the statue. Killing the enemies will have a chance to drop Scorpion Liver. Approach the statue after clearing the room to find x2 Revered Spirit Ash. Behind the statue, on the right side, there is a body sitting by the wall, you can pillage its remains to find x1 Shadow Realm Rune [1]. Head up to the second floor and you'll fight against another large Spider Scorpion, kill it, and near it, you can find another body on the ground. Loot it to find x1 Fireproof Dried Liver. Proceed to the next section and head up the stairs where you'll encounter another large Spider Scorpion. As you exit, you'll find another body by the stairs, loot it to find x5 Black Pyrefly. Exit through the door at the top of the steps to formally arrive at the Belurat Tower Settlement, you can find the Belurat Tower Settlement Site of Grace and a Summoning Pool at the top of the stone steps, near the double doors, on the left side. Next to the site of grace, there is a room you can enter (Ignore the large stone door since this is locked). Defeat the two Revered Spirit enemies and on the right side of the locked door, there is a body on the ground you can loot to find x1 Neutralizing Boluses. Go back outside, and head east towards an open section where you'll find a fountain and a waterfall. Around the fountain, there are hostile spirits that are praying to the statue sitting on the fountain. Kill them and you'll also find another body that you can loot to acquire x1 Stimulating Boluses. On the left side, you'll see a stream of water coming from above, approach it to find another body that can be looted to find x3 Knot Resin. On the right-hand side of the fountain, there is a short set of stairs that goes up. Head towards that direction and then make a right where you'll find another fountain with a group of spirits praying. You can kill the enemies easily and find x1 Somber Smithing Stone [3] on the ground. By the fountain where you got the smithing tone, if you look to the left, you'll see a ladder that goes down to the sewer or well depths. The door there is locked and you need to find the Well Depths Key to unlock it. However, you can go ahead and check the area to find x1 Messmerfire Grease on the pile of dead bodies. Climb back up the ladder and explore the east section of the area. As you walk towards the path, be ready to dodge the magical attacks from the enemies positioned above. Be ready to dash towards the slope that goes up where you'll encounter more Revered Spirits. As you run forward, go right to find an alleyway where you'll find a body. Loot it to find x1 Messmerfire Grease. Go back to the main path and head up the stairs. There are about three of these enemies that wield a melee weapon. Kill the enemies and you loot the nearby corpse to find x3 Black Pyrefly. Turn your camera facing north and you'll find an entrance to a kitchen room. There are three spirit enemies inside the kitchen room. Kill the one standing near the vases and break the objects to find x1 Silver Horn Tender on the ground. Head up the stairs and be ready to dodge the mage spirit from its magical attack. Kill it and just next to the arched doorway is the Small Private Altar site of grace. Go through the doorway after activating the site of grace and you'll find a Summoning Pool by the wall. You can explore the rooftops area through the doorway that faces the Summoning Pool to find some items there but tread carefully as there are enemies around. On the rooftops, there's a body tucked by a corner that holds x1 Somber Smithing Stone [4]. To find it, go straight until you reach the end towards the locked door of the storeroom, jump over the broken railings on the right, then immediately turn right again. At the end, drop onto the roof, walk straight, and jump onto the narrow beam on the left to reach the rooftop across. Still, on the rooftop section, you can find a body hanging by the edge of one of the roofs. Loot it to find x1 Silver Horn Tender. See the image above for reference. Return to the Small Private Altar site of grace and proceed to the doorway on the right. At the top of the stairs, be ready to fight against an elite enemy, a dual sword-wielding Horned Warrior. After killing the enemy, proceed east towards the rubble of destroyed buildings where you'll encounter more Revered Spirits, there's a body you can loot to find x2 Black Pyrefly, and another body by a corner, loot it to find x4 Thin Beast Bones. Continue going straight until you enter a large section that has an altar and a tree in the center. As you approach the altar, an NPC invader, Fire Knight Queelign, will appear and fight you. This NPC invader uses fire-based attacks. Successfully killing the NPC invader Fire Knight Queelign, drops the Crusade Insignia talisman. Investigate the altar to find a body that you can pillage to find the Ash of War: Shriek of Sorrow, as well as other bodies around the area to find items such as x10 Arrow looted off a body that's hanging by the edge of some rubble, x3 Black Pyrefly from a body sitting on a bench. Return to the entrance of the altar and navigate to the upper area of the rubble. Proceed north of your compass where you'll find an area where a stream of water is flowing, there's a body next to the steel grate that you can loot to obtain x5 Redflesh Mushroom, and x4 String you can loot by the edge of the stream of water. Proceed through the doorway on the right to find a storeroom. Climb up the ladder and you'll see a body sitting against a wall next to another arched doorway. Loot it to find the Storeroom Key. The Storeroom Key can be used to unlock the door near the Small Private Altar Site of Grace. Inside that room, you can find an NPC Hornsent Grandam. Exit through the doorway and turn left. By the steps, jump on the narrow side of the tiled roof and walk around it. But before you do that, go down the stairs until you reach a dead-end, there's a body hanging by the edge that you can loot to find x3 Throwing Dagger. Now, (refer to the image above) jump across the passageway and enter the room facing east. You should also find a body sitting against the railings, loot it to find x6 Whiteflesh Mushrooms. Enter the room ahead where you'll fight another spirit enemy, and loot the body in the room to find the Well Depths Key. This key can be used to open the locked door down at the sewers of the well. The area ahead is polluted with poison, so be ready to have Neutralizing Boluses consumable items to alleviate the build-up of poison or to cure yourself from the effect. This section of the dungeon is also swarming with another type of enemy, the Man-Fly. They can easily be killed but are deadly if they attack you in a group. To find and unlock a shortcut to the Belurat Tower Settlement site of grace, look southeast of the compass to find a tower with a tall ladder. At the top, you can unlock the door to open the shortcut leading to the Belurat Tower Settlement Site of Grace. An elite enemy, a toxic variant of the Lesser Ulcerated Tree Spirit, can also be found south of the poison-filled area. You must kill the elite enemy to continue further, and eliminating it drops a +2 variant of the Immunizing Horn Charm. Make sure that you loot the area of this Spirit Tree to find bodies you can pillage to find the following items: x1 Broken Rune, x2 Sliver of Meat, x8 Thin Beast Bones, x1 Smithing Stone [3], and x8 Poisonbone Dart. You can also find the following items at the sewer level, so make sure not to leave this section until you find the following items we've listed. These items are looted from dead bodies. x4 Whiteflesh Mushroom near the section leading to the shortcut, x5 Knot Resin on the ruins where you'll find a group of Man-Fly enemies, x3 Beast Liver on the island where you fight the dual sword-wielding Horned Warrior. x1 Poisoned Hand is located east, next to a church. x8 Serpent Arrow on top of the roof of a sunken building. x1 Neutralizing Boluses behind one of the buildings in the south section, as well as x2 Smithing Stone from a corpse hanging by the edge of a building roof. Return to the Small Private Alter Site of Grace and retrace your steps where you found the Storeroom Key, exit the doorway, and go up the steps on the right. Make a left and you should see another arched doorway that's guarded by a swarm of Spider Scorpion. Clear the path and head straight towards the arched doorway, and into a room that's a dead end. Defeat the two large Spider Scorpion enemies inside this room and pick up the Bone Bow on the ground. Facing the opposite side of the arched doorway, you will see another set of stairs that goes down, at the end of the path, you can find a lift that you can ride to reach a shortcut to the Belurat Tower Settlement Site of Grace. From where you got the Bone Bow, as you exit the doorway, make a hard left and you'll see a pile of rubble that you can jump on and you'll see there's a secret room tucked behind it. Go inside a large storeroom where you can find the following items: x5 Thin Beast Bones, x1 Scadutree Fragment, and x1 Dried Bouquet. You can click on the images above to enlarge them. After unlocking the shortcut, take the lift back up and continue exploring the rooftop area where you'll encounter some Gravebird enemies. Walk along the rooftops while fighting against the Gravebird enemies, you should find a body that you can loot to acquire x4 Flight Pinion and x3 Smithihng Stone [2] on the other body. Cross to the other side and you should see a Revered Spirit carrying a pot over its head, quickly run towards it, and kill it to acquire x1 Revered Spirit Ash and x1 Golden Horn Tender. Look to your right to find a body by a dead-end, and loot it to find x3 Black Pyrefly. Continue towards the bridge pathway and you'll encounter a heavy sword-wielding Horned Warrior. Past the bridge pathway after defeating the knight enemy, you can go east to a small sewage area infested with Man-Fly enemies, in this section you can find items to loot from dead bodies such as x1 Broken Rune. x8 Redflesh Mushroom, x1 Stanching Boluses, and x1 Glass Shard. The path you need to take is on the west side to progress. Head straight towards the stairs, before climbing up, look to the left to find a body hanging by the edge of of a broken parapet wall. Loot the body to find x4 Black Pyrefly. Next, head up the steps, and you'll find a group of Revered Spirits gathered around a large tree. Kill the enemies and on the left side of the tree, you'll find a broken statue that has an item. Loot the item to acquire x1 Revered Spirit Ash. Continue west and head inside a tower building. As you enter, go right and walk down the stairs. At the end, is a dead-end and a body hanging by the edge of the broken stairs. Loot the body to find x1 Somber Smithing Stone [1]. Go back and this time climb up the stairs where you'll encounter an elite enemy wielding two circular blades, this enemy is the Curseblade. This enemy is quite agile and hits hard, so be cautious when fighting against it as it loves to jump around and move quickly as it attacks. Defeat it and continue climbing to the top where you'll find the Stagefront site of grace. At this point, you should prepare your gear as the next room leads to the arena of a legacy dungeon boss, the Divine Beast Dancing Lion. Redmane Freyja can be summoned here to assist in battle. The main boss for this legacy dungeon is the Divine Beast Dancing Lion. Just as its name implies, the towering creature is aggressive, agile, and capable of dancing around to confuse and overwhelm its target. The beast also has a resemblance to a Chinese dragon where individuals move in harmony to perform a dragon dance. Besides its attacks that consist of leaping, jumping, and thrusting, the Divine Beast Dancing Lion will try to catch the player with an unblockable attack where it chomps its prey in the air and forcefully throws the player on the ground. This divine beast is known to be a messenger of the heavens, capable of unleashing storms as their rage sparks. For more guides on how to defeat the boss, please visit the Divine Beast Dancing Lion page. Defeating the Divine Beast Dancing Lion rewards the player with the Remembrance of the Dancing Lion and drops the head armor piece, the Divine Beast Head. Upon killing the Dancing Lion, you can activate the Theatre of the Divine Beast Site of Grace. Go east through an arched doorway to find a room that has a lift, step on it to reach an upper floor. Open the large door and you'll find a revered spirit altar on the right, approach it and pick up the x1 Revered Spirit Ash. Next, make your way to the top of the stairs on the left to find a note, the Tower of Shadow Message, near the shadow that's sealed and obscuring the path ahead. At this point, you've completed the area, but before leaving, fast travel to the Small Private Altar site of grace, and proceed to the storeroom where the old hag NPC, Hornsent Grandam, can be found. Equip the Divine Beast Head armor piece, speak to her, and exhaust her dialogue lines to obtain the Watchful Spirit spell. Leave the room and rest at the Small Private Altar site of grace, then return to the NPC and speak to her again to obtain x1 Scorpion Stew. This item is something you'll need to give to an NPC later when you complete Castle Ensis. This section of the walkthrough explains how to get the Euporia weapon. This requires to progress the DLC and reaching the endgame or the last main legacy dungeon of Shadow of the Erdtree. If you need to view the full walkthrough of the legacy dungeon, please click HERE. If you want to learn how to find the weapon, click the SHOW button below to reveal the guide. The area just before the Spiral Rise Site of Grace [See Elden Ring Map] has a lot of loot that you shouldn't miss. From the Site of Grace, backtrack your way down the stairs, then turn left to find a set of steps going down. As you go through the archway, there will be a room on your right containing x1 Inquisitor Ashes. Go to the other archway just before the room, and you will see a staircase that you can drop down to that has an item. Drop down to the stairs, and you can pick up x2 Fireproof Pickled Liver from the body. Head up the stairs, then look below the broken railings to find a ledge that you can drop down to. Look down on the southeastern section of the ledge, and you will find another area that you can drop down to. Drop down to it, then follow the ledge going south. You'll come across a broken section going to an item. Jump to get to the other side, and you can pick up x1 Holyproof Pickled Liver. After looting it, drop down from the broken section of the ledge, then pick up the nearby item, which is x2 Smithing Stone [8]. Follow the ledge going south. Be careful as there are pillars are blocking off some parts of ledge, making it tough to navigate. Keep hugging the wall just to be safe. When you go around the corner, you will find another area that you can jump down to. Jump down the area, then traverse the ledge going southwest. Keep following it, and you will acquire x10 Lordsworn's Bolt from a dead body at the end of it. After looting the body, follow the ledge to the other direction going down, and you'll be at a broken section of the ledge. Drop down it, and you will land near a hostile Shadow Undead. Kill it, then pick up x1 Somber Smithing Stone [5] nearby. Go down the stairs, and you'll find x10 Golem's Great Arrow from a dead body. To progress further, sprint jump down the window south of the dead body containing x10 Golem's Great Arrow. Once you have successfully jumped on the window, head inside the structure. The section you are in will be inside Belurat, Tower Settlement. Head out of the room, and you will end up in a courtyard. Pick up the x1 Scadutree Fragment by the covered statue. There are two other rooms that you can enter from the courtyard. The room on the east has a lift that you can take to return to Enir-Ilim, while the room on the south has a lift going down Belurat, Tower Settlement. Ride down the lift on the southern room. After taking the lift, head outside by going through the archway on the southeastern side of the room. Follow the path by going down a staircase which leads you to a room containing three Tree Shamans. After clearing the room, follow the path going southwest. Head down the stairs, and you'll encounter a Horned Warrior patrolling the area. You can either fight it head-on, or you can sneak around as the Horned Warrior is patrolling in a way that you can sneak around it. After dealing with the Horned Warrior with whichever method you choose, head inside the structure then go down the stairs on the western side. Go down the lift, and you will arrive in area with a bridge crossing to a door. Cross the bridge, then open the door. You'll find a dead body by the altar, which you can loot for the Euporia twinblade. Belurat Tower Settlement Walkthrough Video Divine Dancing Beast Dancing Lion Boss Video Guide You will formally arrive at the Belurat Tower Settlement after you go through the door at the top of the steps. You can find the Belurat Tower Settlement Site of Grace and a Summoning Pool at the top of the stone steps, near the double doors, on the left side. Next to the site of grace, there is a room you can enter (Ignore the large stone door since this is locked). Defeat the two Revered Spirit enemies and on the right side of the locked door, there is a body on the ground you can loot to find x3 Rada Fruit. Go back outside, and head east towards an open section where you'll find a fountain and a waterfall. Around the fountain, there are hostile spirits that are praying to the statue sitting on the fountain. Kill them and you'll also find another body that you can loot to acquire x1 Stimulating Boluses. On the left side, you'll see a stream of water coming from above, approach it to find another body that can be looted to find x3 Knot Resin. On the right-hand side of the fountain, there is a short set of stairs that goes up. Head towards that direction and then make a right where you'll find another fountain with a group of spirits praying. You can kill the enemies easily and find x1 Somber Smithing Stone [3] on the ground. By the fountain where you got the smithing tone, if you look to the left, you'll see a ladder that goes down to the sewer or well depths. The door there is locked and you need to find the Well Depths Key to unlock it. However, you can go ahead and check the area to find x1 Messmerfire Grease on the pile of dead bodies. Climb back up the ladder and explore the east section of the area. As you walk towards the path, be ready to dodge the magical attacks from the enemies positioned above. Be ready to dash towards the slope that goes up where you'll encounter more Revered Spirits. There are about three of these enemies that wield a melee weapon. Kill the enemies and you loot the nearby corpse to find x3 Black Pyrefly. Turn your camera facing north and you'll find an entrance to a kitchen room. There are three spirit enemies inside the kitchen room. Kill the one standing near the vases and break the objects to find x1 Silver Horn Tender on the ground. Head up the stairs and be ready to dodge the mage spirit from its magical attack. Kill it and just next to the arched doorway is the Small Private Altar site of grace. Go through the doorway after activating the site of grace and you'll find a Summoning Pool by the wall. You can explore the rooftops area through the doorway that faces the Summoning Pool to find some items there but tread carefully as there are enemies around. Whether you explore the rooftops area later or if you've finished exploring, proceed to the doorway beside the Summoning Pool and head up the steps. At the top of the stairs, be ready to fight against an elite enemy, a dual sword-wielding Horned Warrior. After killing the enemy, proceed east towards the rubble of destroyed buildings where you'll encounter more Revered Spirits. Continue going straight until you enter a large section that has an altar and a tree in the center. As you approach the altar, an NPC invader, Fire Knight Queelign, will appear and fight you. This NPC invader uses fire-based attacks. Successfully killing the NPC invader Fire Knight Queelign, drops the Crusade Insignia talisman. Investigate the altar to find a body that you can pillage to find the Ash of War: Shriek of Sorrow, as well as other bodies around the area to find items such as x10 Arrow, x3 Black Pyrefly. Return to the entrance of the altar and navigate to the upper area of the rubble. Proceed north of your compass where you'll find an area where a stream of water is flowing. Proceed through the doorway on the right to find a storeroom. Climb up the ladder and you'll see a body sitting against a wall next to another arched doorway. Loot it to find the Storeroom Key. The Storeroom Key can be used to unlock the door near the Small Private Altar Site of Grace. Inside the room, you can find an NPC Hornsent Grandam. Exit through the doorway and turn left. By the steps, jump on the narrow side of the tiled roof and walk around it. Jump across the passageway and enter the room facing east. You should also find a body hanging on the railings, loot it to find x4 Whiteflesh Mushrooms. Enter the room ahead where you'll fight two spirits, and loot the body in the room to find the Well Depths Key. This key can be used to open the locked door down at the sewers of the well. The area ahead is polluted with poison, so be ready to have Neutralizing Boluses consumable items to alleviate the build-up of poison or to cure yourself from the effect. This section of the dungeon is also swarming with another type of enemy, the Man-Fly. They can easily be killed but are deadly if they attack you in a group. To find and unlock a shortcut to the Belurat Tower Settlement site of grace, look southeast of the compass to find a tower with a tall ladder. At the top, you can unlock the door to open the shortcut leading to the Belurat Tower Settlement Site of Grace. An elite enemy, a toxic variant of the Lesser Ulcerated Tree Spirit, can also be found south of the poison-filled area. You must kill the elite enemy to continue further, and eliminating it drops a +2 variant of the Immunizing Horn Charm. Make sure that you loot the area of this Spirit Tree to find bodies you can pillage to find the following items: x2 Sliver of Meat, x8 Thin Beast Bones, x1 Neutralizing Boluses, x3 Dewgem, and x1 Broken Rune. Return to the Small Private Alter Site of Grace and retrace your steps where you found the Storeroom Key, exit the doorway, and go up the steps on the right. Make a left and you should see another arched doorway that's guarded by a swarm of Spider Scorpion. Clear the path and head straight towards the arched doorway, and into a room that's a dead end. Defeat the large Spider Scorpion inside this room and pick up the Bone Bow on the ground. Facing the opposite side of the arched doorway, you will see another set of stairs that goes down, at the end of the path, you can find a lift that you can ride to reach a shortcut to the Belurat Tower Settlement Site of Grace. From where you got the Bone Bow, as you exit the doorway, make a hard left and you'll see a pile of rubble that you can jump on and you'll see there's a secret room tucked behind it. Go inside a large storeroom where you can find the following items: x5 Thin Beast Bones, x1Scadutree Fragment, and x1 Dried Bouquet. You can click on the images above to enlarge them. After unlocking the shortcut, take the lift back up and continue exploring the rooftop area where you'll encounter some Gravebird enemies. Walk along the rooftops while fighting against the Gravebird enemies, you should find a body that you can loot to acquire x3 Smithihng Stone [2]. Cross to the other side and you should see a Revered Spirit carrying a pot over its head, quickly run towards it and kill it to acquire x1 Revered Spirit Ash. Continue towards the bridge pathway and you'll encounter a heavy sword-wielding Horned Warrior. Past the bridge pathway after defeating the knight enemy, you can go east to a small sewage area where you can find items to loot. But the path you need to take is on the west side. Head straight towards the stairs and you'll find a group of Revered Spirits gathered around a large tree. Kill the enemies and on the left side of the tree, you'll find a broken statue that has an item. Loot the item to acquire x1 Revered Spirit Ash. Continue west and head inside a tower building. As you enter, go right and walk down the stairs. At the end, is a dead-end and a body hanging by the edge of the broken stairs. Loot the body to find x3 Warming Stone. Go back and this time climb up the stairs where you'll encounter an elite enemy wielding two circular blades. This enemy is quite agile and hits hard, so be cautious when fighting against it as it loves to jump around and move quickly as it attacks. Defeat it and continue climbing to the top where you'll find the Stagefront site of grace. At this point, you should prepare your gear as the next room leads to the arena of a legacy dungeon boss, the Divine Beast Dancing Lion. Redmane Freyja can be summoned here to assist in battle. The main boss for this legacy dungeon is the Divine Beast Dancing Lion. Just as its name implies, the towering creature is aggressive, agile, and capable of dancing around to confuse and overwhelm its target. The beast also has a resemblance to a Chinese dragon where individuals move in harmony to perform a dragon dance. Besides its attacks that consist of leaping, jumping, and thrusting, the Divine Beast Dancing Lion will try to catch the player with an unblockable attack where it chomps its prey in the air and forcefully throws the player on the ground. This divine beast is known to be a messenger of the heavens, capable of unleashing storms as their rage sparks. For more guides on how to defeat the boss, please visit the Divine Beast Dancing Lion page. Defeating the Divine Beast Dancing Lion rewards the player with the Remembrance of the Dancing Lion and drops the head armor piece, the Divine Beast Head. Upon killing the Dancing Lion, you can activate the Theatre of the Divine Beast Site of Grace. Go east through an arched doorway to find a room that has a lift, and step on it to reach an upper floor. Open the large door and you'll find a revered spirit altar on the right, approach it and pick up the x1 Revered Spirit Ash. Next, make your way to the top of the stairs on the left to find a note, the Tower of Shadow Message, near the shadow that's sealed and obscuring the path ahead. At this point, you've completed the area, but before leaving, fast travel to the Small Private Altar site of grace, and proceed to the storeroom where the old hag NPC, Hornsent Grandam, can be found. Equip the Divine Beast Head armor piece, speak to her, and exhaust her dialogue lines to obtain the Watchful Spirit spell. Leave the room and rest at the Small Private Altar site of grace, then return to the NPC and speak to her again to obtain x1 Scorpion Stew. This item is something you'll need to give to an NPC later when you complete Castle Ensis. 
General Information
Belurat Tower Settlement [Map Link]
Small Private Altar [Map Link]
Stagefront [Map Link]
Theatre of the Divine Beast [Map Link]Belurat Tower Settlement Map
NPCs in the area
Bosses
Video Walkthrough
Items
Enemies
Notes
Full Belurat Tower Settlement Walkthrough
The Tower's Main Gate


Belurat Tower Settlement Site of Grace

Small Private Altar Site of Grace
The Toxic Depths

Belurat Tower Settlement: Stagefront
Boss: Divine Beast Dancing Lion
Return to Hornsent Grandam

How to Get the Euporia Weapon
Down, Down, Down
Belurat Tower Settlement Section
Belurat Tower Settlement Map
Belurat Tower Settlement Videos
Speed Run Walkthrough
Elden Ring Shadow of the Erdtree Walkthrough - Castle Ensis
Elden Ring Shadow of the Erdtree - Path to Castle Ensis
- Crossing the Greatbridge
- Clear the army camp in Castle Front
- Activate the Castle Front - Site of Grace
- Take the Spelldrake Talisman +3 from a body under the bridge
- Return to Castle Ensis
- Activate the Site of Grace
- Look for a way inside the Castle
- Defeat Moonrithyll, Carian Knight
- Pick up Rellana's Cameo from the altar inside the chapel
- Obtain Wolf Crest Shield
- Defeat Rellana, Twin Moon Knight (Optional Summons: Needle Knight Leda and Dryleaf Dane)
Castle Ensis is a Minor Legacy Dungeon in Elden Ring. Castle Ensis is a dungeon exclusive to the Shadow of the Erdtree DLC. Castle Ensis can be located north-northeast of the Three Path Cross checkpoint (site of grace). Castle Ensis is a small castle where players can encounter scholars of magic, deadly hounds, noblemen capable of using magical attacks, and soldiers of Messmer.

General Information
- Previous: Belurat, Tower Settlement
- Next: Shadow Keep
- Recommended Levels: 150 - Above
- Bosses: Rellana, Twin Moon Knight
- Site of Grace: Castle Front [Map Link]
Castle Ensis Checkpoint [Map Link]
Castle-Lord's Chamber [Map Link]
Ensis Moongazing Grounds [Map Link]
Castle Ensis Map
[map coming soon]
NPCs in the area
Located outside, past the Ensis Moongazing Grounds Site of Grace
Bosses
Video Walkthrough
Items
Talismans
Consumables
- x10 Bolt
- x10 Arrow
- x1 Black Pyrefly
- x1 Starlight Shards
- x1 Shadow Realm Rune [2]
- x1 Shadow Realm Rune [4]
- x1 Silver-Pickled Fowl Foot
- x3 Drawstring Royal Magic Grease
Weapons & Shields
Armor
- N/A
Spells
Upgrade Materials
- x3 String
- x3 Dewgem
- x7 Knot Resin
- x7 Glintslab Fly
- x2 Flight Pinion
- x1 Scadutree Fragment
- x2 Somber Smithing Stone [1]
- x1 Somber Smithing Stone [2]
- x1 Somber Smithing Stone [3]
- x1 Somber Smithing Stone [4]
- x1 Somber Smithing Stone [5]
- x2 Somber Smithing Stone [6]
Enemy Drops
- Dagger
- Page Set
- Lazuli Robe
- Flight Pinion
- Heavy Crossbow
- Smithing Stone [3]
- Smithing Stone [4]
- Smithing Stone [6]
- Smithing Stone [7]
- Royal Magic Grease
- Somber Smithing Stone [9]
Keys & Other
- x1 Imbued Sword Key
- x1 Message from Leda
- x1 Loyal Knight's Cookbook
- x1 Remembrance of the Twin Moon Knight
- x1 Ash of War: Wing Stance
Located outside, past the Ensis Moongazing Grounds Site of Grace
- x1 Monk's Missive
- May the Best Win - Gesture
Given by Hornsent who is located outside, past the Ensis Moongazing Grounds Site of Grace
- x1 Cross Map
- x1 New Cross Map
- x3 Furnace Visage (After giving him a Scorpion Stew)
Enemies
- Page
- Eagle
- Turtle
- Rotten Stray
- Troll Knight
- Messmer Soldier
- Noble Sorcerer
- Lazuli Sorcerer
- Lesser Black Knight
- Messmer Foot Soldier
- Moonrithyll, Carian Knight
Notes
- Notes go here
Full Castle Ensis Walkthrough
The Entrance to Castle Ensis
As you enter the Castle Ensis area, you will encounter a bridge. Underneath the left side of the bridge that you are on is a path to a room that has big barrells along with a body that you can loot. Get the Spelldrake Talisman +3 from the body, then head back to bridge.
Once you cross the bridge, there is a body on the left side of the bridge that contains x3 Black Pyrefly . Across the bridge, you will encounter a Troll Knight guarding the area. Be ready for combat, as this can be a tough enemy to defeat. After killing the Troll Knight, you will see an entrance to a room on the right. Once you enter it, you will encounter a Lazuli Sorcerer. Once you have dealt with the enemy, there will be a body on the immediate left corner of the room containing a Shadow Realm Rune [4]. Behind the building of the room is a ramp with a body on it that has x1 Somber Smithing Stone [3] when picked up.
Once you have cleared the building, follow the path opposite of the building leading to a stairway heading deeper into the castle. On the western side by the cliff before the walls, you can loot a dead body that has x1 Somber Smithing Stone [1]. Then, in the middle of the stairs, you can climb up a cliff with a dead body that has x1 Broken Rune on it. Keep following the stairs going up, and you will encounter an Exile Soldier along with a Rotten Stray to your right, and another of the same set of enemies on the left side. Head up the stairs that the Exile Soldier and Rotten Stray were guarding on the left side, and you'll find yourself in an area with a ladder. Climb up the ladder to find a chest containing the Milady [See Elden Ring Map], a light greatsword.
Loot Detour
Find your way back down the ladder and the stairs to a small cavern directly facing the stairs. Keep following the cavern, and you will find a body containing an item that you cannot reach yet. Once you exit the small cavern, you will see a body in front of you that contains x2 Flight Pinion. Follow the first ramp heading up, and you will see two Messmer Foot Soldiers gathering around a bonfire and a Lesser Black Knight nearby, so be prepared to engage them in combat. After dealing with the enemies, if you look down by the cliff before the bonfire area, you can drop safely into an area below. You will find remains resting right on the ledge containing x10 Bolt. Behind the remains will be the cavern that you went through earlier, and you will get to loot the body you saw earlier, containing x3 Glintslab Firefly.

Find the Castle Ensis Checkpoint Site of Grace
Backtrack your way to the ramps. On the first level of the ramps, you'll find a room to the left that has a chest containing the Loyal Knight's Cookbook [See Elden Ring Map]. Head back outside, then go up the second ramp. In the middle of the second ramp, you'll find a pathway leading to a body with an item. A Rotten Stray is hiding around the corner, so be careful as you approach to loot the body. After dealing with the Rotten Stray, loot the body to receive a Silver-Pickled Fowl Foot. Go back to the ramp and keep following it. At the top of the ramp, you will find a closed gate. Look over to the left of the gate, and you will pick up x1 Castle Cross Message. You will also find a cross, and 1x Scadutree Fragment. Near the Scadutree Fragment drop, you will find the Castle Ensis Checkpoint Site of Grace [See Elden Ring Map].

Finding A Way Inside
On the right side of the locked gate, there will be an Exile Soldier looking towards an area below. Dispose of the soldier, then jump down the area. You'll find a body immediately after the first jump which contains x3 Knot Resin. You'll notice a hole leading to a cavern in the ground. You can jump safely below, and you will deal with three Rotten Strays immediately after dropping down. You can loot a body for x10 Arrow beside where you dropped. Follow the path of the cavern. You will find yourself on a cliffside path. The path to your right leads to the rooftop of the structure that you looted near the Troll Knight. Be careful as you're traversing the path, as there is a small gap that you need to jump right before the rooftop. As you get to the rooftop, you will find an eagle in front of a body on the other end. Loot the body to find x1 Starlight Shards.
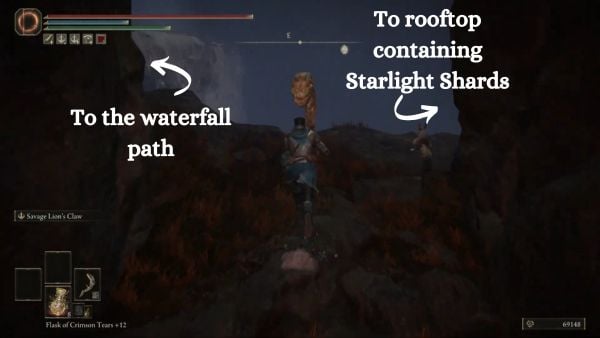
Head back to the junction of the cliffside path, then follow the left path leading to a waterfall. Jump on the rocks of the waterfall to get on top of it. You will see two turtles on the left side, and an archway leading to an area with a ladder on the left side leading to a room and a cavern behind a waterfall. There is a dead body on the left side before the cavern entrance which contains x3 Drawstring Royal Magic Grease. At the end of the cavern, you will find a dead body which you can loot for x4 Knot Resin. Head back outside the cavern, then climb up the ladder. As you enter the room, you'll encounter two soldiers. Deal with the enemies, then head to the doorway on the far-left corner of the room.

The area outside will be the locked gate you encountered earlier, which you can open by pushing the lever inside the room directly across from where you came from. Head up the stairs, and you end up in a bridge with four soldiers. The fourth soldier uses a heavy crossbow if you are not in melee-range, so be cautious of that. On the left side of the other end of the bridge, you can loot a body to receive x3 String. Follow the path leading south right after the bridge. Be careful here, as a there is a Rotten Stray hiding in the bushes on the right just as the path gets tighter. You will end up on a cliffside path.
Follow the path on the right, and you will face two Noble Sorcerers right before a staircase. There will also be a dead body on the left that you can loot for x2 Glintslab Firefly. You can easily deal with the first Noble Sorcerer as you can attack it easily. However, to deal with the second Noble Sorcerer, you can follow a path on the right of the stairs that leads to a ladder that you can climb to get on top of a fort. At the top of the fort, you will face a Page. You can pick up x1 Somber Smithing Stone [6] on a dead body just beside the Page. After dealing with the Page, you can then go to the cliff where the second Noble Sorcerer by jumping off of an opening of the fort. You can also access the area by jumping on the cliff from where the ladder is located.

Dealing with Moonrithyll, Carian Knight
After dealing with the enemies before the staircase, you can then proceed by going up the stairs. You will then end up right outside of a structure being guarded by an NPC Invader, Moonrithyll, Carian Knight. Moonrithyll uses attacks similar to the moveset of the greatsword. He can use jumping attacks, thrusts, and wide attacks when fighting. You can easily dispose of Moonrithyll by staggering him, which can be easy if you're using a build that deals a lot of Poise damage. After defeating Moonrithyll, he will drop Moonrithyll's Knight Sword, a colossal sword.

In the first room, you will find two rooms connecting to it. The room on the west side is just another way inside the structure. The room on the south side is a chapel with a Spirit NPC praying to Queen Marika. On the podium of the chapel, you can pick up the talisman Rellana's Cameo.
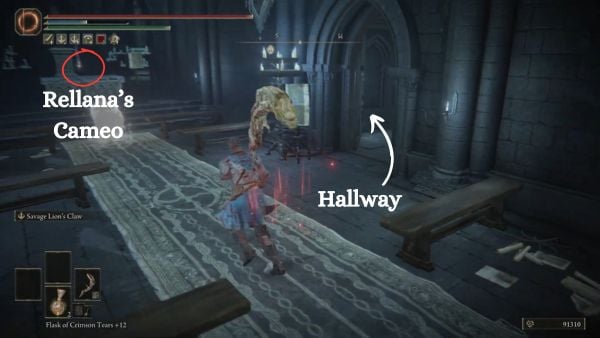
After clearing the chapel, head to the hallway near the entrance of the chapel, in which you'll encounter a Lazuli Sorcerer. You can obtain x1 Shadow Realm Rune [2] from a dead body in the hallway. Across the dead body, there is a room that another Lazuli Sorcerer is hiding in. You can deal with it now so you will not be overwhelmed with enemies as you progress through the hallway. You will encounter another Lazuli Sorcerer right around the corner of the hallway just after the dead body. If you did not clear the previous room, the enemy will come out right as you fight the other Lazuli Sorcerer in the hallway.

Finding More Loot
After killing the Lazuli Sorcerers, continue following the hallway, which leads to an area outside. There will be a dead body ahead which you can loot for x1 Glintslab Firefly. A Noble Sorcerer will be attacking you on top of a structure. If you have ranged attacks, you can easily dispose of this enemy. At the landing of the stairs, there will be a gate on the south side that you can open. On the left immediate of the gate you opened, there will be an area below that you can jump down to. You can pick up x3 Dewgem from a dead body sitting by the cliff. You will find a ladder beside the dead body that you can climb to get on the rooftop of the structure that the Noble Sorcerer was attacking you from. You can dispose of the Page along with the Noble Sorcerer here in this area. On the western side of the rooftop, you can pick up x1 Somber Smithing Stone [2] off of a dead body. There is an area that you can jump down to, before the dead body on the west to find a corpse containing the Glintblade Trio sorcery. Jump down, then enter the room to your right. You can open a chest containing the Wolf Crest Shield [See Elden Ring Map]. Head up the ladder to return to the entrance of the building.
Backtrack your way to the gate that you opened, traverse the path. You will encounter an Exile Soldier that you can get a jump on as it is facing the other way. Continue following the path, and head down the stairs to fight three Exile Soldiers along with two Rotten Strays. The other path, which is the one above the stairs leading down, also has an Exile Soldier that you can easily deal with. After dealing with the enemies, you can loot two dead bodies, one containing x1 Somber Smithing Stone [6] and x1 Somber Smithing Stone [5].

Continue following the path until you find a staircase on the side of a tower, in which you will encounter an Exile Soldier as you turn on the corner of the stairs. Once you arrive at the top of the stairs, you can find a chest in the room to your left containing the Imbued Sword Key. Across the bridge, you will encounter a Lesser Black Knight guarding the passage to a lift. After defeating the knight, ride the lift to go up the structure. After using the lift, you can follow the path on your right to discover the Castle-Lord's Chamber Site of Grace [See Elden Ring Map]. On the eastern side of the room, you can head to the balcony outside to loot a dead body containing a Somber Smithing Stone [4]. You can find an area that you can drop down to if you look by the railings of the balcony. You will find a tower near a graveyard, and on top of it, you can obtain Ash of War: Wing Stance inside a chest. Travel back to the Castle-Lord's Chamber Site of Grace. You can follow the stairs up to the west of the Site of Grace which leads to an entrance that can only be entered by going through the fog. This is a boss fight, so make sure to do the necessary preparations that you need.
Fighting Rellana, Twin Moon Knight and finishing up
The boss that you will be fighting in this area is Rellana, Twin Moon Knight. She uses dual light greatswords that she can enchant with magic and fire. Her melee attacks consist of sweeping and slashing movement, which you should be patient in dealing with. She also uses a spell similar to the Glintblade Phalanx to attack you from afar. For an in-depth guide for defeating Rellana, you can go to this page for more information.

After you have defeated Rellana, Twin Moon Knight, you will receive the Remembrance of the Twin Moon Knight and you will unlock the Ensis Moongazing Grounds Site of Grace [See Elden Ring Map]. You can exchange the Remembrance of the Twin Moon Knight with Enia at the Roundtable Hold to receive Rellana's Twinblade and the sorcery Rellana's Twin Moons.
Castle Ensis Map
Map Coming Soon
Castle Ensis Videos
Castle Ensis Walkthrough Video
Rellana, Twin Moon Knight Boss Video
Speed Run Walkthrough
A fast walkthrough of how to get to the end of the level the fastest, picking up only essential items goes here.
Elden Ring Shadow of the Erdtree Walkthrough - Scadu Altus
Elden Ring Shadow of the Erdtree - Navigating Scadu Altus
- Activate Site of Grace after eliminating Rellana, Twin Moon Knight, and exit through the newly-opened gate
- Head North and follow the dirt path to activate Highroad Cross - Site of Grace
- Exhaust dialogue of nearby NPCs: Leda and Hornsent. Accept Monk's Missive and Cross Map. (NOTE: You need to return to Three-Path Cross Site of Grace to speak with Redmane Freyja after this interaction)
- Pick up Map: Scadu Altus to reveal nearby locations
- Defeat Furnace Golem
- Head to Church of the Crusade: Defeat Fire Knight Queelign and obtain the Prayer Room Key
- Locate and explore Fog Rift Fort
- Reach Moorth Ruins and do Dryleaf Dane's quest there.
- Go to Rauh Base first (There's a secret passage from Moorth Ruins leading to Rauh Base. Ride northeast past the glowing worm creatures and travel past the tall Statue of Marika and golden flowerbloom. Follow the canyon along until you formally enter Rauh Base)
- Locate the 2 Forager Brood: The first one can be found northwest of the Ruined Forge of Starfall Past while the other one is at the northern section of Moorth Highway (the path on the way to Rauh Base)
- Return to Scadu Altus and explore Bonny Village and Bonny Gaol
- Discover the Spiritspring near Fort Reprimand and reach Scaduview Cross - Site of Grace
- Clear Fort of Reprimand
- Complete Ruined Forge of Starfall Past
- Explore southeast of Scadu Altus
- Visit Whipping Hut and Rabbath's Rise
- Get the Larval Tear west of Rabbath's Rise, you can see the illuminated gravesite (nighttime only) before you formally enter Cathedral of Manus Metyr
- Reach the Cathedral of Manus Metyr and speak to Count Ymir and Jolan
- Head north to Shadow Keep - Church District and progress NPC Questlines inside
After defeating Rellana in Castle Ensis, exit through the newly opened gate. This new area here takes you to Scadu Altus, the second region in the Realm of Shadow. You will meet Needle Knight Leda and Hornsent in this location. While in this area, make sure to activate the Site of Grace and pick up the Scadutree Fragment and an Empyrean-Blood Burgeon. Talk to both of them and exhaust their dialogues. Ask Leda about Hornsent and she will tell you about the order that Marika gave to Messmer to cleanse the townsfolk by fire. Then, interacting with Hornsent will give you a Monk's Missive and a Gesture: May the Best Win. He will also give you a New Cross Map which shows additional Miquella's Cross locations drawn.

Head north to pick up the Map: Scadu Altus to navigate easily. Eliminate the Furnace Golem that you will come across outside the Shadow Keep, which is the large building that you can see nearby. The Furnace Golem mostly roams the army campsite found in front of the Shadow Keep's main entrance. It drops x1 Crimsonburst Dried Tear and x1 Furnace Visage.
Church of the Crusade
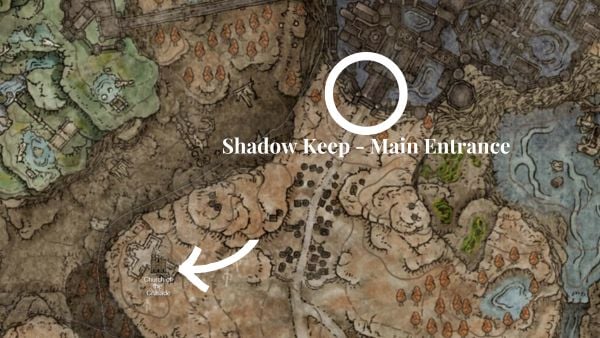
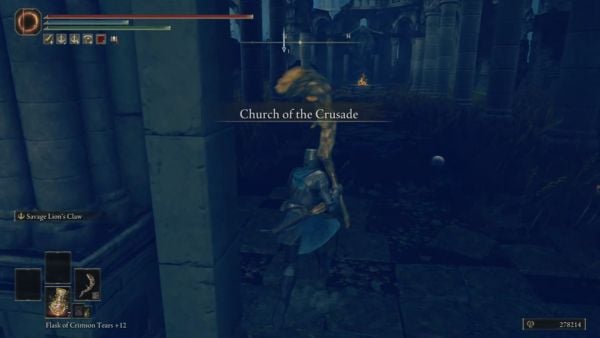
After defeating the Furnace Golem, head east to reach the Church of the Crusade. Go inside and walk down the aisle here and you will be invaded by the Fire Knight Queelign NPC. If this is your 2nd encounter with Queelign, you will receive the Ash of War: Flame Skewer and a Prayer Room Key.
You will encounter the same NPC invader in the following areas:
- Belurat Tower Settlement
- Shadow Keep
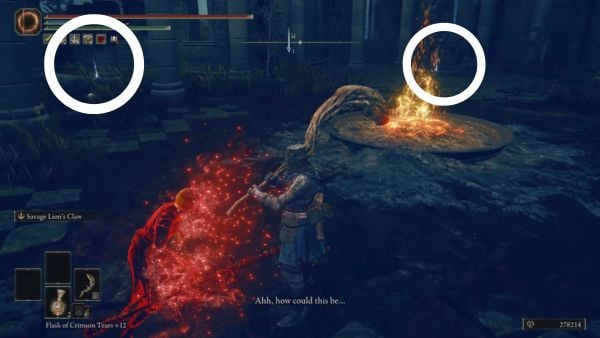
Going back to the Church of the Crusade, On the altar behind the burning pot, make sure to pick up the x2 Scadutree Fragment in front of the tall statue of Marika. On your way out, look to your right and pick up Rune Arc next to the toppled pillars.
Outside the church, head northeast and go to the very edge. You will find an injured Forager Brood here who is unable to move. To help it, drop a Warming Stone next to it then wait for it to get up. Rest at a nearby Site of Grace, come back to the location to receive Forager Brood Cookbook (4) and x3 Shadow Sunflower from it.
Fog Rift Fort
Fog Rift Fort can be accessed from the Scadu Altus, West Grace by dropping down the rocky platforms and landing on one of the fort's towers. Drop down from the tower by jumping or using the ladder, and you'll encounter Messmer Soldiers on top of the fort's walls. Once you take them out, look to your left and you'll see a corpse that you can loot, which has x10 Fire Arrow.
Afterward, follow the path until you reach the second wall tower of the fort. Here, you'll encounter a wooden bridge to your right guarded by six Messmer Soldiers. The wooden bridge leads to a rocky platform with another corpse that you can loot for the Greater Potentate's Cookbook [3].
After looting the corpse on the rocky platform, head back to the wall of the fort by crossing the bridge again and continuing on the path. Turn left to another bridge that leads to a small stone house on the other side, where you'll encounter a boss. For a complete guide on how to beat the boss, check out Black Knight Garrew. This boss drops the Black Steel Greatshield. After slaying the boss, head inside the stone house he emerged from and open the chest, which contains a Smithing Stone [3].
Next, head towards the small opening between the cliff and the left side of the stone house. Drop down on a ledge. Follow the stairs, and climb two sets of ladders to reach the top of a tower with a treasure chest containing the Arrow's Soaring Sting Talisman. Drop back down the ladder and jump on the cliff in front of it, then jump down to return to where the boss was.
Now, head to the right of the stone house and access a small part of the wall path. You'll encounter two more Messmer Soldiers and find another corpse holding x1 Somber Smithing Stone [2]. Once you've cleared out the walls of the fort, head back to the bridge that connected the wall path and the boss area, then turn left to a wooden platform with a ladder going down. This will lead you to the grounds of the fort where more Messmer Soldiers await you. The first three soldiers you'll encounter are stationed to the left of the ladder near a spike barricade. After taking them out, you'll find a corpse in the middle of the barricade that holds the Messmerfire Grease.
After looting the corpse, be careful when combatting the rest of the soldiers on the ground. Luckily, they are spread out and in the open, so you can take them out one by one using a ranged weapon. These soldiers are also stationed next to fire turrets. There are two fire turrets in front, two on the opposite side of where you are, and one on the right.
Once you've cleared out the ground, head to the opposite side of the ground where you'll find some tents. One of these tents contains a chest with the Serpent Flail.
This is your last stop before heading southeast to travel to Moorth Ruins.
To Moorth Ruins
Return to Scadu Altus Site of Grace and read the Monk's Missive. From here, head to the path leading to the southwest to Moorth Ruins. You will find Dryleaf Dane here who you will challenge to a fight. He is standing near the Site of Grace and next to Miquella's Cross. To prompt this, use the Gesture: May the Best Win while facing him. He will drop Dryleaf Arts and Dane's Hat upon his death. After this encounter, don't explore Moorth Ruins yet. You will come back here after you explore Rauh Base. There is a secret access to the next location through the lake north of Moorth Ruins. Continue reading the next part of this exploration in the next tab: See the Walkthrough for Rauh Base. Click here to return to the tab selection. Then, continue reading Scadu Altus after Rauh Base.
Continue Scadu Altus after exploring Rauh Base
Walk toward the area behind where you fought Dryleaf Dane and you will arrive at Moorth Ruins. You will be fighting phantom enemies here and this enemy type can be difficult to see at night. The Moorth Ruins are explored vertically, it will lead to an area deeper into the ground as you jump from one platform to another. Enter through the door of a collapsed building to the southeast. Then, exit towards the broken roof. You can pick up a Shattered Stone Talisman from a corpse here.
Continue navigating to the area below you by jumping near the wall. You can summon Torrent here to negate some of the fall damage. At the bottom, you will be fighting 3 Mage enemies and you can take the Golden Arcs from the chest inside the small building. Walk towards the northwest where you see a slanted piece of structure. Jump down the balcony near it and to the ground. You can pick up a Shadow Sunflower from a corpse below the balcony. Then, head to the small cave opening here with a faint ghostflame. At the end of this cave, use the ladder to reach Bonny Village.
Bonny Village
Use the Site of Grace after exiting the well. Look around and you will see multiple jars in the area. This area appears to be filled with them in every corner but they are not alive. You will be fighting shadow enemies here and encounter a Greater Potentate. You will find Redflesh Mushroom in the area or pick them up after defeating shadow enemies. Keep heading down the path in the village and look at the houses on the left side and pick up the Kukri under a small roof. When you see the broken bridge in front of you, turn around and look at the area to your right. You can pick up the Bonny Butchering Knife from a corpse here.
Make your way to the broken bridge and try to take out the ghost hounds here. You can also see the loot that they are guarding here. When it's safe, jump down the area and take Human Bone Shard and 2 Living Jar Shard from the corpses. Now, follow the path to the northwest until a figure comes into view. Don't worry, this area is safe. You can pick up the Revered Spirit Ash from this small altar. Now, teleport to the Bonny Village - Site of Grace and jump to the other side of the bridge. Head north past the orange trees here and you can see a corpse in the middle of the open ground. Pick up the O Mother Gesture here. After doing so, go to the bridge south of Bonny Village.
You will find spiked barricades and broken cages on either side of the path. Continue following this path and be careful of the 2 Giant Scorpions that will attack you from either side. Keep an eye out for an opening to the right side of the wall. When you see it, enter the cave to go to Bonny Gaol.
Bonny Gaol
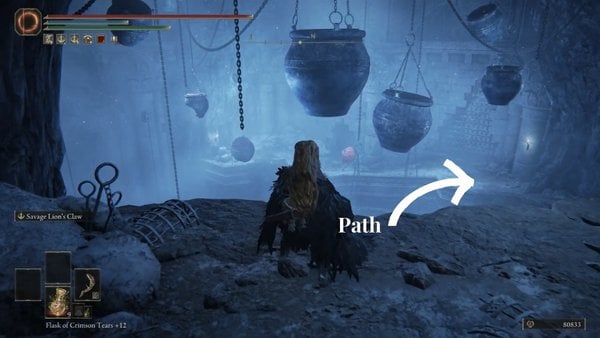
Inside the Gaol, you will find jars suspended in the air with chains holding them up. You will be fighting Living Jars and other types of enemies down here. Take the path to your right and defeat the first enemy here. Look behind you and enter the small room. Watch out for the hiding enemy to your right here. Then, pick up the Frozen Maggot from the corpse. Exit this room and then go to the area across the room you just entered. You can ignore the room to your right as you can't go to the item right now. Inside the second room, you will see an item on a corpse in the corner. Be careful as you approach this chair because 3 Shadow enemies will attack you. After defeating them, take the Bolt from the corpse.
Open the door to your right and eliminate the single enemy sitting here. Then, go down the hole next to the flaming lantern. You can pick up a Broken Rune as soon as you jump here. As you Walk towards the eastern area and enter the small cave. You will be fighting rats and giant rats in this section. After that, go past the wide area and enter through another narrow cave to your right to take the Smithing Stone from a corpse. Return to the path and use the ladder at the end of this narrow cave and as you exit, watch out for the living jar that will attack you. It can extend its innards to shoot a projectile but you can stagger this enemy with a heavy attack. Inside this room, take the Stalwart Horn Charm +2. Then, jump back to the room where you first saw this unreachable item.
Return to the sewer area where you jumped down. You will see an unreachable item in the western area because of the grills blocking the way. Look for the narrow area here and watch out for the slug-like enemies down here. They can be difficult to spot because of their color so listen closely to their sounds. This path will lead to a Broken Rune that you can pick up from a corpse. Then, look behind you to reveal another pathway where you can pick up the Invigorating Cured Meat to your left. Then, go to the right path to jump down to the lower levels of the gaol.
The river will serve as the path here, so follow the stream. To your right, you will fight a Living Jar here. There's also a Broken Rune, the one that you saw from when you first entered Broken Gaol. Fight the next cluster of enemies here near the water and pick up the Warming Stone next to the pillar behind them. Continue following the stream of water until you see an opening at the end. Watch out for hiding enemies here and make sure that you are ready for them. They will come out as soon as you step near an item. Take the Innard Meat on the ground here. Next, defeat the Living Jar next to the door, then look behind you to see a broken jar. An enemy is hiding here and will reveal a Raw Meat Dumpling under them. Go to the next room and exit through the tall archway. This will reveal just how big the Bonny Gaol is.
When you reach the area where you can see broken jails on the wall to your right, you need to watch out for an enemy that will jump at you in the next room. They can drain a chunk of your HP so you need to be ready for them or dodge early to avoid getting damaged. Then, exit through the closed door to the left corner of the room. This will take you to the jar used as a lift that will take you to the depths of the gaol. Jump on top of it and jump to the bridge. Before crossing the bridge, you need to activate the switch on the bridge and then jump on top of the jar again.
Doing this will take you to the top level of Bonny Gaol and you can pick up the Night Set from a corpse. Then, go up the stairs and defeat the Living Jar here blocking the door. Behind it, you can pick up the Shield of Night on the ledge. This time, you can now jump down the lift and cross the bridge. As you reach the other side, watch out for the 2 hiding Living Jars. Take them out as fast as you can and use heavy attacks to stagger them. Then, jump down on the left side of the bridge. Follow the path ahead and get ready for the boss fight.
You will be fighting Curseblade Labirith here, a boss that wields dual blades and can turn himself invisible. You will receive Curseblade Meera upon defeating this boss. You can visit his page for a strategy on how to beat him.
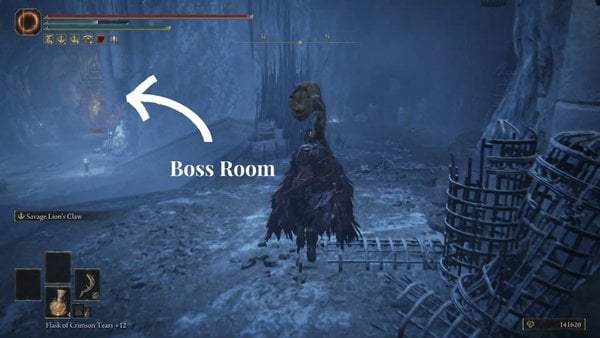
Path to Fort of Reprimand
The entrance to Fort of Reprimand will be near the Moorth Highway, South Site of Grace. [See Elden Ring Map]. From Moorth Ruins, head south using the main path. You will notice that there's an area above Fort of Reprimand and you can access this by going to the edge of the cliff to your left.
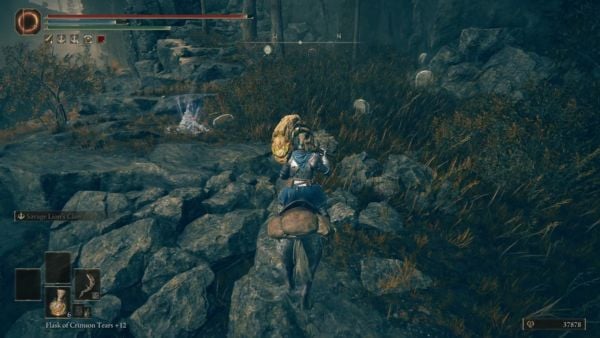
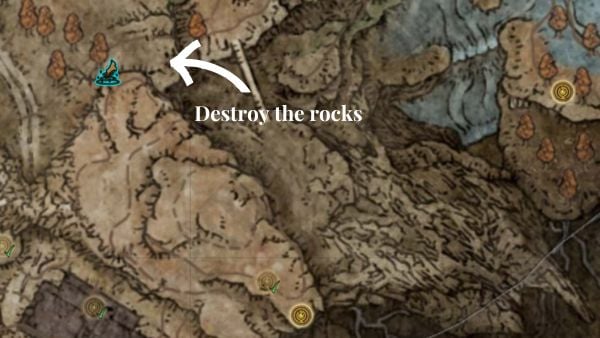
You will find a Spiritspring here but you can't use it right away. You need to look for the stack of stones by going to the edge of the cliff here. Then, summon Torrent to ride up the plain above you. From there, head southeast to reach the edge and you will find the Scaduview Cross and Site of Grace. You can pick up x1 Scadutree Fragment here next to Miquella's Cross. When you're done here, you can either jump down the Spiritspring, or teleport back to Moorth Ruins to continue exploring Fort of Reprimand.
You will first reach Fort of Reprimand's Courtyar from the entrance where the execution platform is located. There will be an Omenkiller patrolling the courtyard, so be prepared for combat. After defeating the Omenkiller, you are free to explore and loot the area. You can pick up numerous items in the courtyard, such as Throwing Dagger, Broken Rune, Grace Mimic, Furlcalling Finger Remedy, and Blessed Bone Shard. In the northeastern part of the courtyard, you will find a spot you can jump on to access its basement.


Down in the basement, you can pick up x1 Shadow Realm Rune [4], x4 Knot Resin, x1 Broken Rune, and x10 Kukri. As you head deeper into the basement, you will find an exit leading to a section behind the fort. You'll find x1 Messmer Soldier Ashes by a gravestone. You'll also find a ladder going up the fort, so use that to go back inside the fort.


After climbing the ladder, you will end up on top of the fort walls. Follow the path to the right, then head left, looting a dead body by the stairs containing x3 Dewgem. To the northwest of the body, you can activate the Fort of Reprimand Site of Grace [See Elden Ring Map]. An Omenkiller will be on top of the wall on your right, so be prepared to fight it. After defeating the Omenkiller, you can explore the western side of the Site of Grace, finding x1 Blessed Bone Shard on a dead body on a scaffolding. Go back to the staircase near the Site of Grace, then head south, where you dropped earlier.


Go back to the staircase near the Site of Grace, then head south, where you dropped earlier. You'll find a room in which you will encounter Black Knight Edreed, who uses a twinblade in combat. He can also use flying attacks to close the distance to you, so be cautious of those attacks. After you have defeated Black Knight Edreed, he will drop the Ash of War: Aspects of the Crucible: Wings.


Head up the stairs, then climb up the ladder, which leads to the outside. On the southwestern part of the area, climb up the stairs. On top of the tower, you can open a chest to acquire x1 Battlefield Priest's Cookbook [2]. Backtrack your way to the Fort of Reprimand Site of Grace.


You will find a path going down near where you dropped. Go down the stairs and keep following the path. You will encounter numerous Common Soldiers in this area, which you can easily kill in a few attacks. In the room as you enter the area, you can pick up x2 Festive Grease from a dead body right beside where two soldiers are. Head west, then southwest to explore the area, entering another room.


In this room, you will find a ladder going down right across the door you just entered. When you go down, you will find four Common Soldiers gathering at the southwestern corner of the room. You can find pick up 7x Smithing Stone [5] on a dead body at the corner where the soldiers were gathering. There will be a chest containing x1 Furnace Visage. On the southeastern part of the room, you can pick up x3 Spiritgrave Stone from a dead body.


Climb back up the stairs, then go through the doorway on the southwest. In this room, you can find x1 Fireproof Pickled Liver near the path going to the execution platform in the middle of the fort.

If you want to find the "Behind the Fort of Reprimand Site of Grace" [See Elden Ring Map], you can access it by heading west of Bonny Gaol [See Elden Ring Map]. Then, head to Ruined Forge of Starfall Past; this is an optional location but a good place to earn a number of Smithing Stones and you can also get the Ancient Meteoric Ore Greatsword from there.

Ruined Forge of Starfall Past
Return to Moorth Ruins and travel southwest to The Ruined Forge of Starfall. Before you enter the dungeon, make sure to locate the Forager Brood west of the dungeon. This one will give you the Forager Brood Cookbook [1]. Then, you can continue inside the dungeon. Its entrance is a broken-down structure with a small tunnel entrance on the west side. Enter the tunnel and follow it until you reach a ladder that descends further underground. Climb down the ladder to find an abandoned shelter, where the Ruined Forge of Starfall Site of Grace is located.

After setting up the Site of Grace, head immediately to the doorway and you'll find a Smithing Stone [6] on the ground. Additionally, on the left corner of the area, there are x5 Smithing Stone [3]. In the first area, you'll encounter two Misbegotten enemies. One is below the small bridge that connects to the other side of the room, and the other is on the far side of the bridge. Eliminate these enemies and pull the lever on the other side of the bridge, which will open an iron door below the bridge on the left side. Before heading down to the iron door, go to the opposite side of the lever to find x1 Smithing Stone [2] and a Smithscript Spear. Drop down from the bridge to take out the Misbegotten below. There's another Smithing Stone [3] opposite the iron door. Just beside the iron door on the left, you'll find another Smithing Stone [2] and Smithing Stone [3]. Enter the iron door and immediately hide in a small space to the right. You'll need to take cover here for a few seconds because a Fire Blob will shoot fire projectiles from the other side of the passage.
You can pull the lever in your hiding spot to close the iron door again. Once another projectile crosses, run toward the Fire Blob and take it out. In the next area, there are two levels and another passage to the right leading to another area. From the entrance of the iron passage, go left to grab the Smithing Stone [6] and Smithing Stone [3] on the ground. A Golem Smith is lurking behind some rubble, so be alert and take it out. To the left of the golem are x2 Smithing Stone [2].

Once you've looted the first level of the second area, go to the other passage on the right. As before, another Fire Blob will be shooting projectiles from the far side. Run to the nearest cover on the right, but be ready to fight, as another Fire Blob will be waiting to ambush you there. Take out the hiding Fire Blob and wait in cover. There's also a Smithing Stone [3] in the cover area. Wait for a projectile to cross, then run toward the Fire Blob and take it out. Through the second passage, you'll come across a ladder going up to the right. Before heading up, go straight a bit to a small dead-end area and prepare to fight a Golem Smith hiding on the left. This small room contains a Somber Smithing Stone [7] by a skeleton and a Smithing Stone [3].
Afterward, head up the ladder to reach the second level of this area. Follow the path to a room filled with three Fire Blobs and a Golem Smith. There's a Somber Smithing Stone [8] by a corpse on the ground, so pick it up. Head up the broken-down rubble to the left to reach the third level and enter the passage to the right. This will lead you back to the second area you encountered earlier, and you can drop to the second level. Before jumping to the second level, look to the left to see a small dead-end room with a corpse holding the Smithing Talisman. Enter this dead-end room, and a group of Fire Blobs will drop from the ceiling, which you need to take out.
There's a Golem Smith on the right side of the area near the bridge and a Fire Blob on a small platform once you drop down. Once you take out the golem, you can loot the second level of the second area. There's a Smithing Stone [8] by a sitting corpse on the small platform. Crossing the bridge to the other side, you can pick up a Smithing Stone [6] and a Glass Shard. Once you've looted the second level, pull the lever to open another iron door on the left side. Enter the iron door and follow the path to a mid-sized room with two Golem Smiths ready to ambush you—one to the right and one to the left. Once you clear the room, you can loot it to find a Smithing Stone [6] and a Smithscript Cirque by a corpse next to the sewage waterfall.
Do not drop down the sewage waterfall as it will kill you. Instead, head back to the passage that connects the second area and the room with the sewage waterfall. Pull the lever to the left to activate the iron door. Before the iron door rises to close, immediately jump above the iron door. Once it stops, go to the platform on the right to find an entrance to a small room. This room contains an altar that you can interact with to receive the Ancient Meteoric Ore Greatsword and an Ancient Dragon Smithing Stone.
To the Eastern Region of Scadu Altus
The eastern region of Scadu Altus can be accessed through the Bonny Village. If you have been following this walkthrough, you would have unlocked the Site of Grace in Bonny Village. Teleport there and head east by crossing the bridge. Go to the Whipping Hut at the edge and pick up the Tooth Whip from the corpse inside the hut. You can also interact with the ghost here just outside the hut.

You will notice that if you look at our Shadow of the Erdtree Map, you will see 2 locations here: Eastern Nameless Mausoleum and Darklight Catacombs. While these 2 are both part of Scadu Altus, their entrances can only be accessed after exploring an area beneath Shadow Keep. Read Part 1 of Shadow Keep to know the full details of draining the water in the Shadow Keep - Church District and how to clear both optional dungeons.
Going back to Scadu Altus Eastern Region, cross the bridge to the other side and activate the Bridge Leading to the Village - Site of Grace to the right. it was in this location past the bridge when we heard a loud audio cue followed by a notification that a great rune had broken. This significantly adds interactions you will have with NPCs. It is recommended to travel to the various sites of graces to speak with the following NPCs:
- Main Gate Cross - Site of Grace: Ansbach and Moore
- Highroad Cross - Site of Grace: Needle Knight Leda and Hornsent
- Pillar Path Cross - Site of Grace: Thiollier
Talking to Moore
Moore will ask you "Must we be sad forever?" Your answer here will affect his questline. You have 3 options:
- Put it behind you
- Remain sad forever
- I don't know
If you choose the first one, he will move on from this location and you will encounter him later as an enemy. The second one will prompt him to move to a different location as well. The third option here allows you to come back and talk to him later, however, you can also make this your final choice if you progress too far in the game. This will make him stay at the same location.
and you can continue exploring the area past here. Go to the edge of the cliff here and eliminate the Wolves for a chance to get Thin Beast Bones, then head to Rabbath's Rise and Cathedral of Manus Metyr by following the main path.
The rest of the NPCs will not have any implications, including your conversation with Needle Knight Leda. The others will tell you how they're now beginning to question their choices, and if their decisions were earnest. After talking to all of the NPCs, you can now return to the Site of Grace that you activated after crossing the bridge.
Cathedral of Manus Metyr and Rabbath's Rise
The Cathedral of Manus Metyr is located in the eastern region of Scadu Altus. You will find it along the path after exploring Bonny Village, an area where you will encounter Wolves and a Furnace Golem. Defeating the Furnace Golem here will drop Cerulean-Sapping Cracked Tear and a Furnace Visage. Continue the path ahead until you pass through Rabbath's Rise. Activate the Church of High Road - Site of Grace before continuing. Turn right to formally enter Rabbath's Rise here. This is a tower building with some of its steps destroyed. You will also see some glowing crystals on the ground floor.

Go through the door to your left and climb the spiral stairs. When you reach the study room with tall bookshelves lined on the walls, make sure to hit the wall with 2 arches. This is a secret wall hiding a stack of stones. Destroy it to reveal a nearby Spiritspring. You can't use the elevator yet, so you need to go outside the tower and look for the spirit spring. Summon Torrent and ride up the wind to reach the top of the tower. Open the chest to get Rabbath's Cannon. On your way down, you can now use the elevator that was previously stuck.
When you're done exploring Rabbath's Rise, you can now go to the Cathedral of Manus Metyr, which is just across the Rabbath's Rise. Activate the Site of Grace and enter through the closed gates. During your interaction with Count Ymir, he will give you 2 items:
Talk to Swordnight Jolan, who is leaning against a pillar. She is a servant to Count Ymir and is fiercely loyal to him. For now, there's not much that you can do to progress their quest, except to roam around the area. Head outside through the arch near Jolan which will take you to the grave area. Summon Torrent and jump over the fence to your left to explore the edges of the Cathedral. Beware of skeleton enemies here and make sure to pick up a Glinting Nail on the ground. Continue going around the cathedral and eliminate skeleton enemies as you go. These enemies also drop a piece of their armor and Cuckoo Glintstone.

In the pond area south of the cathedral, you can pick up a Greater Potentate's Cookbook [2] from a corpse. Then, head southeast where you see a broken stone chalice to pick up the Starlight Shards. As you head towards the Church District - Shadow Keep, look for the pest found west of the nearest Site of Grace on top of the tunnel road. Head to the cliff edge and seek the pest near the outer wall of the keep. Interact with it to receive the Forager Brood Cookbook [6].

Elden Ring Shadow of the Erdtree Walkthrough - Rauh Base
Elden Ring Shadow of the Erdtree Rauh Base
- Travel to Rauh Base from the lake in Moorth Ruins
- Obtain the Map: Rauh Ruins
- Go to Temple Town Ruins
- Find the way to Rivermouth Cave (This dungeon is part of Gravesite Plain but can only be accessed from Rauh Base)
- Complete Scorpion River Catacombs
- Explore Taylew's Ruined Forge
- Continue your progress by returning to Scadu Altus and teleporting to Moorth Ruins - Site of Grace.
Path to Rauh Base from Moorth Ruins
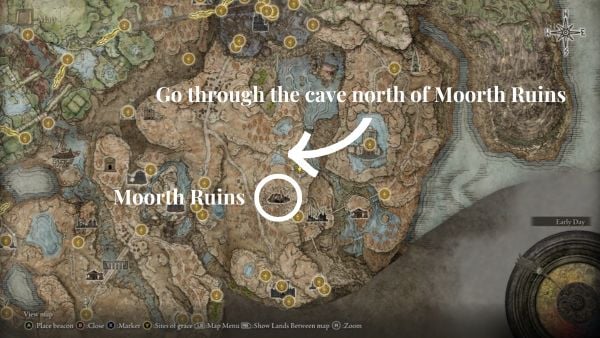
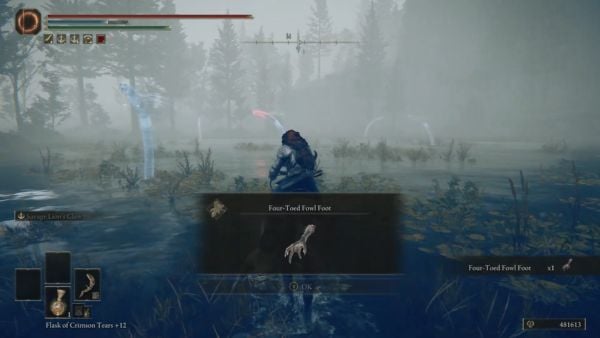
You can reach Rauh Base by traveling north from Moorth Ruins. There is a lake with glowing worm-like creatures and you need to go through it. You can also pick up Four-Toed Fowl Foot from a nearby corpse here.
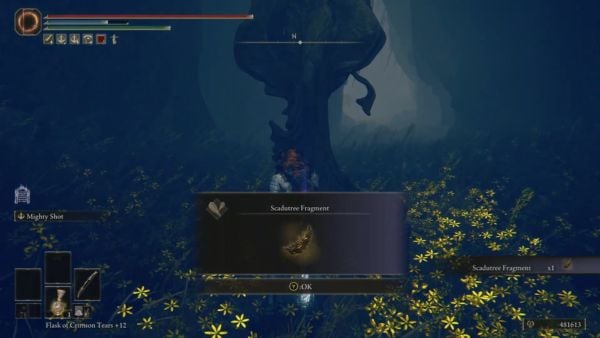
As you reach the entrance, make sure to pick up the Scadutree Fragment from the tall Statue of Marika here. There are some enemies inside, a mix of flowerbloom and white-cloaked enemies here. It's up to you if you want to fight them or just run through them.
Once you reach the poisonous swamp past the golden tree, look for the Forager Brood (pest) along the right cliff edge. You will find it near the Deathbird-infested swamp. Interact with it to receive the Forager Brood Cookbook [5]. Then, make an exit towards west until you get the Rauh Base flash on your screen.
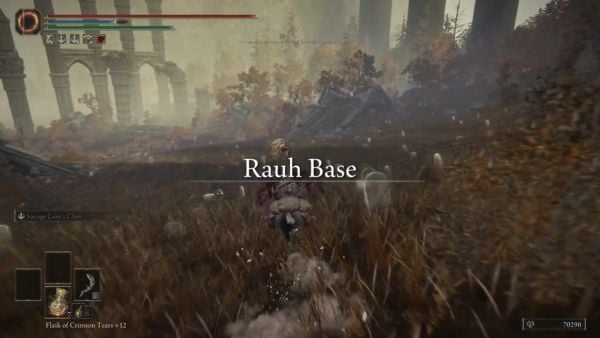
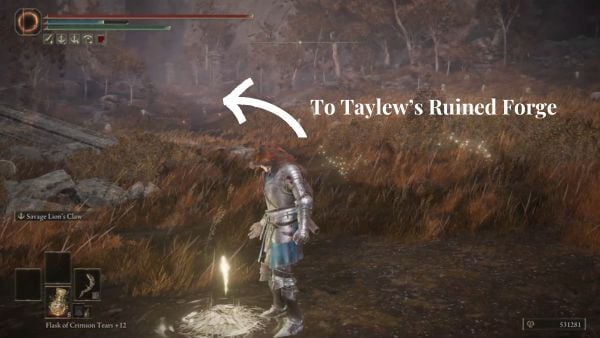
Activate the Site of Grace as you formally enter this new location. Taylew's Ruined Forge is just northeast of this Site of Grace but the first thing you need to do is to get the Map: Rauh Ruins so you can navigate easily. You can come back to this location later on.
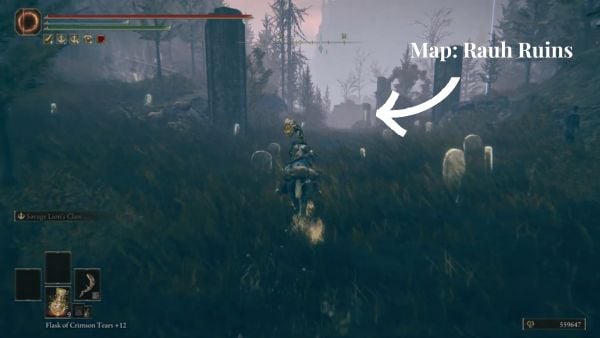
To get the map, travel southwest where you see 2 Golem Warriors ahead. One is using a bow, while the other one is using an axe. It is recommended to eliminate them before you take the map since they can still attack you from a very long distance. Get rid of the archer first as it's easier to deal with them in close combat. Then, you can take on the other golem warrior. The map is just ahead, next to stone heads past the golem warriors. After acquiring the map, head southwest to reach Temple Town Ruins.
Temple Town Ruins
The Temple Town Ruins is located near the Gravesite Plain, southeast of the Rauh Ancient Ruins, West Site of Grace [See Elden Ring Map].
After activating the Temple Town Ruins Site of Grace [See Elden Ring Map], follow the river going east. You will be by the ruins area with Shadow Pothead enemies scattered around the ruins. Explore the ruins area, and you'll find x4 Rada Fruit on a dead body on top of a collapsed roof. You can also find x1 Revered Spirit Ash on the southern part of the ruins. Afterwards, you can head west through the archway to find the graveyard section of the ruins. You can pick up x1 Grave Glovewort [8] on a dead body. A Spiritgrave Stone can also be picked up on the western side of the graveyard, by the gravestones on the corner.
To get inside the ruins' structure, you can find a small opening on the southern part of the wall of the enclosed structure. You will encounter numerous Shadow Undead, Shadow Pothead and Rotten Strays, so be prepared to face numerous enemies. On the southeastern corner of the ruins, you can find x3 Beast Blood by a collapsed roof, along with x1 Golden Rune [1]. Continue heading north, and you can pick up a Somber Smithing Stone [3] by a wall on the west side beside a Shadow Undead.
Head up the stairs on the east side, then go south to find a Shadow Pothead. Continue heading up the stairs covered by tattered cloth. Go on the northwestern edge of the collapsed roof, then drop down carefully to get to the area under the roof. Once you have successfully dropped down, you'll be in a small room with pots and a Shadow Undead. Go past the archway, and you'll encounter another Shadow Pothead. In this area, you can loot the dead body to obtain a Scadutree Fragment. Exit the structure through where you dropped earlier, then head northwest.
Traverse through the bridge on the northwestern side, picking up x2 Furlcalling Finger Remedy along the way. You will encounter a Horned Warrior going down the stairs. After defeating the Horned Warrior, go up the stairs where it was coming down from. A structure will be at the top of the stairs containing a chest. Open the chest to find the Two-Handed Sword Talisman.
Rivermouth Cave Exploration
The Rivermouth Cave is an optional dungeon that can be accessed from Temple Town Ruins. This is still part of Gravesite Plain but this can only be accessed after defeating Rellana and unlocking a gate to Scadu Altus and by making your way from Moorth Ruins to Rauh Base. To get here, you need to reach Temple Town Ruins and teleport to the Site of Grace. Then, head south and follow the river to your left. Go past the ruins until you see the waterfall and walk over to the cliff. Carefully look down and locate the platforms that you can jump down on to reach the river below.
Continue navigating southwest and stick to the wall on your right side. You will see the entrance to the Rivermouth Cave a few meters from the platform.

You will encounter Wolves and Bloodfiends inside this dungeon. You will find various consumables and crafting materials here like Sacred Bloody Flesh, Sanguine Amaryllis, and Hefty Beast Bone.
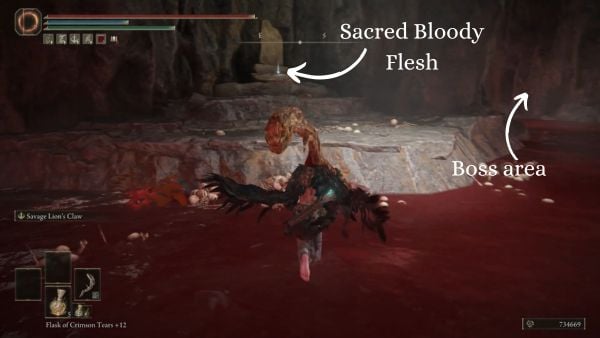
As you reach the northern corner of the cave, you will find a mist door leading to a boss fight. You will find Chief Bloodfiend here, similar to the ones that you have fought inside the cave, but the stronger version of them. This boss drops the Bloodfiend Hexer's Ashes on death. To learn more about this dungeon and all items that you can obtain, please see Rivermouth Cave.
Scorpion River Catacombs
From the Site of Grace, head straight through the catacombs. In the first room, an Imp enemy will ambush you. Afterward, head left down a short set of stairs towards a large hallway, and turn left into a small room. Inside, you'll find a corpse holding Rejuvenating Boluses and two Imps guarding it. Take them out.
Exit the small room and cross the bridge in the middle of the large hallway until you find another set of stairs going down. Follow the path until you reach another large room with two Imp enemies inside.
Eliminate them and head down the stairs of the large room. Just below the stairs is a corpse holding a Grave Glovewort [3]. Proceed through the tunnel entrance on the same level to find another room with an Imp guarding a plant on the left that gives you Yellow Fulgurbloom. At the other end of the room is another tunnel, but before proceeding, loot the corpse beside the tunnel to get x5 Redflesh Mushrooms.
Head down the tunnel and go straight through the tight path, turning right towards another short set of stairs going down. Do not immediately exit the tunnel after turning right. There's a large spike trap that launches from above. Wait for the spike to go down, then immediately run to the right to a small space that keeps you safe from the spike trap. From here, you can either run to the right to get out of the spike area or go to the corpse on the other side that has the Ghost Glovewort and then run to safety after looting it.
Once you're out of the spike trap area, turn left and drop down to another level, but be careful, as there are three Basilisks waiting to attack you. After killing the Basilisks, head through the tunnel on this level to find another corpse on the left, giving you the Shadow Realm Runes [4]. Exit the tunnel, and just to the left, you'll see another Yellow Fulgurbloom.
To the right, you'll find a ladder going up. Head up the ladder and take out an Imp enemy on the edge of the tunnel enjoying the view of the next room. Drop down into the room and loot the corpse on the right for another Ghost Glovewort [5].
Then, head to the left side of the room and up a short set of stairs. Turn left to find yourself back at the spike trap area. Cross the spike trap area again, but instead of dropping down to the Basilisk area, turn right. This leads to an open hallway with Messmer Soldiers inside. Before proceeding toward the Messmer Soldiers, run to a safe space on the right as the first half of the hallway is another spike trap. Once you cross the hallway, take out the two Messmer Soldiers and then the Black Knight with its back turned. After clearing the hallway, loot the corpse on the right near where you fought the Messmer Soldiers to get a Smithing Stone [5]. In the middle of the hallway, where the Black Knight stood, loot the altar to receive the Black Knight Captain Huw.
Afterward, head back to the safe area of the second spike trap and climb the ladder going up. Once you reach the top, wait for the spike trap to go down. Before it goes back up, hop on top of it to reach a secret platform above. Loot the corpse there to get the Imp Head (lion). Hop on the spike trap again to go back to the level above the ladder.
Cross the bridge to the right, and before heading straight through the other tunnel, turn left and cross the ledge. Hop on the spike trap that goes down on the left to reach another secret platform and loot a corpse for the Imp Head (lion).
Return to the ledge, but before going back, turn left first to the tunnel here and enter the small room at the end. Kill two Imps guarding a corpse that gives you the Knight's Lightning Spear. Afterward, head back through the tunnel. Before exiting to the ledge area, turn left and go up the stairs to a small area with two Imps. Loot the corpse on the left to get x6 Yellow Fulgurbloom.
Once done looting, drop down near the corpse to find yourself back at the crossing point of the ledge where you crossed the bridge earlier. Go through the tunnel now and take the elevator down.Once you reach the bottom, head straight through the catacomb tunnels until you reach an intersection. Turn right and wait a few seconds for a shadow fireball trap to cross. When the shadow fireball passes and goes back, tail it down a set of stairs. There's climbable rubble up ahead, but first, check if the shadow fireball has crossed. If it has, climb up the rubble and turn right to the first path.
Follow the path until you reach a giant Imp guarding a short set of stairs. Loot the corpse to the right for a Grave Glovewort [4] before taking out the giant Imp. Head down the stairs after defeating the giant Imp and you'll find yourself in another large room. Head straight and loot the corpse and plant for a Yellow Fulgurbloom and Ghost Glovewort. Then, go down the ladder to the right of the plant and corpse. Once you reach the bottom, loot the corpse to the left for a Great Ghost Glovewort.
Head back up the ladder and turn left through another tunnel, and head up the stairs. At the top, peek first because there are two Shadow Fireballs that will cross. Wait for them to pass above you and then run across the bridge. You can stop in the middle of the bridge and drop down to the left onto a small area to get a Yellow Fulgurbloom plant.
At the other end of this place, where you dropped down, is a ladder going up. Climb up to find a small room with some Imps and a chest containing the Ancient Dragon Knight's Cookbook [2]. Afterward, from the ladder, turn left through a tight tunnel that leads to the second level of a previous area. Loot the corpse on the right for Rejuvenating Boluses.
Turn left towards another tunnel with a Yellow Fulgurbloom plant on the right. To the left of the tunnel is a drop-down path back to where the Shadow Fireball trap of the bridge you dropped down from earlier was. Cross the bridge completely and turn right at the end. There's another elevator here that goes down. At the bottom, walk straight to find a yellow mist that leads to the Death Knight boss battle. This boss drops the Death Knight's Longhaft Axe and Cerulean Amber Medallion +3.
Taylew's Ruined Forge
Taylew's Ruined Forge is crawling with interesting items to collect. Players can progress in the dungeon by heading through the inner section of it.
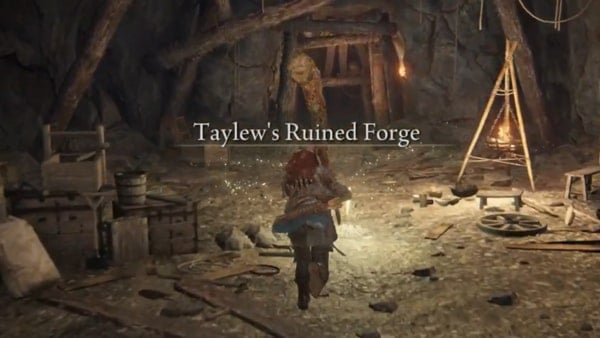
Inside this dungeon, you will be fighting Lava Slime, Stone Golem, and a variation of it. This is a good place to farm Smithing Stone, Somber Smithing Stone, and other upgrade materials. If you want to see the full walkthrough, you can go to Taylew's Ruined Forge. Other notable items that you can pick up are various Smithscript weapons like:
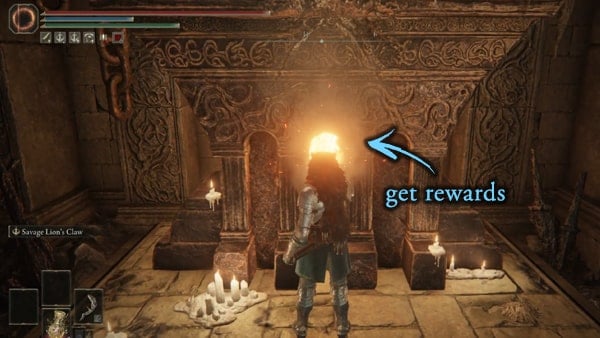
Completing this dungeon will require you to reach the Altar of the Forge and interact with this Altar to receive the following, x1 Taylew the Golem Smith and x1 Ancient Dragon Smithing Stone. This is the end of the dungeon and you can access the teleporter so you can exit the dungeon.
This walkthrough is a work in progress.
Elden Ring Shadow of the Erdtree Walkthrough - Shadow Keep (Part 1)
Elden Ring Shadow of the Erdtree Part 1 of Shadow Keep - Church District (To progress NPC Questlines). This section covers the Church District including draining the water in the Shadow Keep to unlock the path to Eastern Nameless Mausoleum and Darklight Catacombs in Scadu Altus.
- Reach the Cathedral of Manus Metyr
- Look for the Forager Brood just outside the entrance of the Church District
- Enter Shadow Keep through the Church District Entrance
- Reach Specimen Storehouse, Shadow Keep
- Progress NPC Questlines of Sir Ansbach and Redmane Freyja
- Use the Prayer Room Key (from Church of the Crusade) to speak with Fire Knight Queelign:Give him Iris of Grace or Iris of Occultation.
- Optional: Fight Scadutree Avatar
- Obtain Domain of Dragons Painting
- Find a way to the eastern Scadu Altus to reach Eastern Nameless Mausoleum and Darklight Catacombs
- You will be traveling next to Southern Shore to progress NPC Questlines again.
Shadow Keep, Church District
The main entrance of the Church District of the Shadow Keep is located on the east side of the Shadow Keep. The direct path to finding it is to travel from the Church District High Road Site of Grace [See Shadow of the Erdtree Map]. You'll know you'll arrive when you enter a large doorway and pass through a long hallway. At the end of the hallway is where you'll formally arrive at the church district and discover the Church District Entrance checkpoint [See Shadow of the Erdtree Map].
The Church District is a flooded area, and the goal is to traverse the area by using high ground and finding a mechanism that drains the water. Please take note that falling into the water will result in death. Ignore the path on the left since you won't be able to use the lift until you drain the flood. Instead, jump across (using a running jump) to land on the roof of a building, then check the right side to find a small Crab and a body next to it that can be looted to acquire x2 Crab Eggs. Continue walking around the roof to find another body that's being eaten by a Crab. Loot the body to obtain x4 Thin Beast Bones. Continue south and you'll find another body being eaten by a Crab, check the body to find x2 Strip of White Flesh.
Next, jump on the floating tree trunk to reach a large broken-up circular platform. The path here is fairly straightforward, try to reach the opposite end by using the floating tree trunks and wooden platforms, and make sure to loot the body on the circular platform to find x1 Great Grave Glovewort. Retrace your steps to the rooftop of the building where you looted bodies and killed the small Crabs, and this time, head west where you can jump across to progress (see the second image above for reference).
Once you're across, walk around the sides to reach the platform and loot the body that is guarded by Ignited Putrid Corpse enemies to obtain x1 Fireproof Pickled Liver. Jump back onto the sides of this building so you can walk to the top and proceed west where you'll have to do a running jump to safely land on top of another roof of a building. On the roof of the building, you should encounter a Fire Knight enemy walking around. Kill it and then loot the body that's near the spot where the Fire Knight enemy was walking to obtain x3 Ember of Messmer. Keep going straight until you reach a wall, then turn around to find a body sitting against one of the roof's structures. Loot it to acquire x1 Slumbering Egg [See Shadow of the Erdtree Map].
The Prayer Room: Fire Knight Queelign
Next, face the east side of the compass and you should see a narrow ramp structure of one of the churches. Do a running jump to land on it safely, then walk to the top where you'll find two large openings or holes on the big roof. Slowly drop down onto the narrow structure that's on the right side, then you can walk down so you can safely run onto the other structure that is on the left so you can loot the body that holds x3 Stormhawk Feathers [See Shadow of the Erdtree Map]. Go back and then drop down onto the opening of a ceiling (see the third image above for reference).
Below, you should immediately see yet another corpse next to a small Crab. Loot the body to find x1 Lightningproof Pickled Liver. Go around, northeast, and you'll locate a locked door, this is the Prayer Room that requires the Prayer Room Key, a key that drops upon defeating the NPC Invader Fire Knight Queelign, encountered for the second time at the Church of the Crusade [See Shadow of the Erdtree Map]. If you have the key, you can unlock the door and find Fire Knight Queelign (NPC) in the flesh. Now, if you have an item called the Iris of Occultation, you can give it to the NPC, and after Queelign's dialogue, the NPC will drop a weapon you can loot. This weapon is Queelign's Greatsword. NOTE: If you give the Iris of Grace to Queelign, you'll receive the Spirit Ash "Fire Knight Queelign". The Iris of Occultation can be acquired in many ways, one way is by obtaining it as an item drop from defeating a Lesser Ulcerated Tree Spirit located in this area after you drain the flood.
The Flooded Church District: Draining the Flood

Exit the prayer room and proceed to the northwest doorway, but before proceeding further, be sure to enter the armory room on the left to find a body sitting against the wall. Loot the body to find x1 Rune of an Unsung Hero
. Enter the hallway and kill the first Fire Knight enemy that you see, on the left side of the hallway, loot the body resting against the wall to find x2 Furlcalling Finger Remedy, and continue straight down the hallway where you'll encounter another Fire Knight. The room ahead is not accessible at the moment and the doorway to the right where you'll notice Marika's statue that has a glowing item in its hand is unreachable, so exit through the first doorway on the left side of the hallway.
NOTE: In the same hallway, there are two doorways on the left, the far most or second doorway will lead you to a lift that takes you to the Specimen Storehouse section of the Shadow Keep. You're free to roam here, but we highly recommend returning to the Specimen Storehouse after clearing the Main Plaza and Church District of the Shadow Keep. What you can do is enter the Specimen Storehouse, and activate the nearby Site of Grace (Storehouse, Back Section) so you can just fast travel here after exploring the Church District.
Cross the pathway where you'll encounter two Giant Bat enemies, then walk up to the short steps where you'll encounter another Giant Bat ahead. Jump over the gap, and kill the creature. Now before going straight, walk up a bit and you'll find a corner on the right. It's a dead end but there's a body that you can loot that's being protected by another Giant Bat hanging from the ceiling. Kill the enemy and loot the body to acquire x3 Hefty Beast Bone [See Shadow of the Erdtree Map]. Next, climb the ladder next to a doorway to find the mechanism that drains the water.
You can also return to the hallway to get the item sitting on the hand of Marika's statue. You can get the item by jumping on the hand, it may require a few tries as the platform that you need to stand on is quite narrow. Loot the item to acquire x1 Scadutree Fragment, then prepare to fight a group of Ignited Putrid Corpse as you jump down. Behind the same statue, you can find the Fire Knight's Seal weapon [See Shadow of the Erdtree Map]
Exploring the Sunken Chapel
Kill the Lesser Ulcerated Tree Spirit by the Large Tree

For some clarity, we recommend that you start by fast-traveling to the Church District Entrance checkpoint [See Shadow of the Erdtree Map] since you can now use the lift near the Site of Grace. From the checkpoint, go left, use the lever to call the lift, then step on the center to ride it down. You'll now be able to explore the open area of the Sunken Chapel. At the center, you will see a large tree, only approach the tree if you're prepared to fight because a Lesser Ulcerated Tree Spirit will emerge beneath the ground. Killing it will drop the Mantle of Thorns, and resting against the tree is a corpse holding x1 Somber Smithing Stone [5].
Defeat the Second Lesser Ulcerated Tree Spirit
The second Lesser Ulcerated Tree Spirit is located around the east area of the sunken chapel (see the images above for reference). Defeating it will drop x1 Iris of Occultation which (if you don't have it yet) you can give to Fire Knight Queelign in the Prayer Room to obtain Queelign's Greatsword. Also in the east area, you can find open buildings. One building houses two bodies that you can loot to find x4 Rada Fruit and x6 Kukri [See Shadow of the Erdtree Map].
There is also building another where you'll find a pack of Crabs and Giant Crab enemies, one roaming around, and the other next to another body that you can loot to find x1 Shadow Realm Rune [5]. [See Shadow of the Erdtree Map]. If you continue to go around this area, you'll reach the west side where you'll find the Sunken Chapel Site of Grace [See Shadow of the Erdtree Map]
Find the Tree-Worship Site of Grace
Head north towards the entrance of the main church then immediately turn left to find a corpse by a corner. Loot the body to find x3 Shadow Sunflower. Clear out the enemies then approach the small room that has Marika's statue (the same statue where you got the Scadutree Fragment and the Fire Knight's Seal weapon. Make a right and you'll enter a large room. Straight ahead, you'll see some stairs on both ends, walk up to the upper platform and investigate the railings to discover a body hanging on top of it.
Loot the body to obtain the Battlefield Priest's Cookbook [1], [See Shadow of the Erdtree Map]. Walk back down the stairs and check under the upper platform to find a door. Open that door and you'll find another lift that takes you underground. Ride it to find and activate the Tree-Worship Site of Grace — from here, (if you followed the tip earlier by activating the Storehouse, Back Section checkpoint in the Specimen Storehouse) you can fast travel to the Site of Grace to start exploring the Specimen Storehouse.
Shadow Keep: Specimen Storehouse
Storehouse, First Floor
Northeast of the Site of Grace, you can loot a dead body for x1 Fireproof Pickled Liver. There will be a Vulgar Militiaman tucked in the column behind you which will easily die in one hit. A Vulgar Militia will be hiding behind the table, so you can get a jump on it as its back will be exposed to you. Head straight, and you will find a room on the western side near the Site of Grace. In this room, you will encounter Vulgar Militiamen scattered around the room. You can loot x1 Rune Arc on a dead body near the entrance. Go past the archway on the western side, then ride the lift going down.

Finding the West Rampart Site of Grace (Detour)
After arriving in the basement, explore the area. You'll find a dead body that you can loot for x1 Gold-Pickled Fowl Foot on the room at the end of the hallway. Be cautious as you are entering the room, as there is a Living Jar waiting for you to enter. After clearing the room, go past the doorway on the northern side of the room, just beside the lift area. You'll be in a hallway connecting two other rooms. The room on your left is a balcony that has another Living Jar waiting for you, and a dead body. Loot the dead body after killing the Living Jar for x1 Ash of War: Wall of Sparks. Exit the room, then head north to progress.
In the next room, there will be a Living Jar running up the stairs to approach you. At the end of the wall parallel to the stairs, you can hit it to reveal a hidden room. Loot the dead body in the hidden room for x1 Battlefield Priest's Cookbook [4]. After looting the hidden room, head down the stairs. You will be in an area filled with Living Jars. You can find x1 Innard Meat northwest hidden behind the jar that a Living Jar crawled out of.
In the next room, you'll find hostile Living Jars of various sizes. On the eastern side of the room, you can pick up x1 Iris of Grace behind a Living Jar. A dead body lying on a bed will give you x1 Hefty Cracked Pot. Exit the room by the west doorway to progress. You will encounter another Living Jar right as you enter the room. After defeating the Living Jar, head down either stairs, which leads to the West Rampart Site of Grace [See Elden Ring Map]. Go back to the Storehouse, First Floor Site of Grace.
Exploring Storehouse, First Floor
As you head north of the area, you will encounter numerous Vulgar Militiamen in the area which you can easily dispose of as they usually die in one hit. As you progress through the area, you will have to deal with Vulgar Militiamen while also picking up loot such as x1 Fire Coil. Go down the stairs on the northern side of the area, picking up x3 Hefty Beast Bone. In this room, Ansbach will be in the corner northeast of the room, reading scriptures. Head back out of the room, then keep going west. You'll encounter three Vulgar Militiamen shortly. Head west past the Militiamen, and you will encounter a Fire Knight patrolling the area. By the southern wall, you'll find a dead body sitting with x1 Smithing Stone [6]. Go back to the stairs, then head up after clearing the area.
When you arrive at the top of the stairs, go to the right and keep following the path until you see a Vulgar Militia looking over the railing on the east side. Behind the militiaman, you can pickup x1 Smithing Stone [5] on the railing opposite of it. Jump over the railing that the militiaman is looking over, and you can loot x1 Boltdrake Talisman +3 from a dead body in the area. On the north side of the room, pull the lever to reveal a path behind the bookcase. Go through the path, and you can pick up x2 Ember of Messmer from the body along the way. This path will lead you back to the central library.
Head back to the stairs that you went up to, then go left instead. You will encounter three Vulgar Militiamen. You can loot x4 Black Pyrefly on the western part of the room. After getting the loot, you can head up the stairs on the north. There will be a Fire Knight under it, but you won't attract its aggro if you go up the stairs. You can pick up x4 Beast Horn on the area under the stairs where the Fire Knight is at. Once you head up the stairs, you can find another Fire Knight by the ledge, southwest of you. You can ignore it first and clear the area. At the southern section of the area, you can deal with the four Vulgar Militiamen by the shelves, then pick up x1 Blessed Bone Shard. You can then take the Fire Knight in combat.
Once you have dealt with the Fire Knight, go the western section of the ledge to find x1 Pearldrake Talisman +3. Then, follow the southern ledge. Along the way, you can pick up x1 Furlcalling Finger Remedy. There will be Vulgar Militiamen in the area, so be prepared to face them in combat. After defeating the Vulgar Militiamen, you can climb on to the foot of a hanging statue. You can drop on top of another statue with x1 Revered Spirit Ash that you can pick up.
Make your way back to the statue, then look southeast. You'll find an area than you can cross to with a beam by jumping on the railing. You will find x1 Dueling Shield on a dead body sitting by the southern wall. Go back to the statue, then explore the area by following the path southwest of it. You'll encounter numerous enemies in this area, such as militiamen. Inside the small archway room, you can find x2 Lump of Flesh on a dead body. Go inside the room, and you'll come across a Fire Knight. After dealing with the Fire Knight, you can loot the dead body by the railing to get x4 Beast Horn. Go back to the statue crossing this time, and you'll find yourself in a new area. You can loot x1 Scadutree Fragment here and x1 Storehouse Cross Message. You can activate the Storehouse, Fourth Floor Site of Grace [See Elden Ring Map] in this area.
Storehouse, Fourth Floor
After activating the Storehouse Fourth Floor Site of Grace, there will be a body containing x3 Stormhawk Feather on the right as you head out through the arches. To continue, turn left, following the path going south. Keep following the path until you encounter a Fire Knight patrolling by the stairs. Right before the stairs leading up to the Fire Knight, you can loot x4 Black Pyrefly on the right side of it.
After defeating the Fire Knight, continue traversing the path until you see two giant bats. Deal with the giant bats, picking up x3 Ember of Messmer where the giant bats were, then go down the stairs just before the bats. Pick up a Shadow Realm Rune [5] on the ledge by the stairs, then enter the room. You can find x1 Secret Rite Scroll lying on a desk in the northeastern side behind the bookcases and x1 Holyproof Pickled Liver on a dead by the wall south of the room. Head back up the stairs again, then enter the room on the left near where you fought the giant bats.

In the room, if you go left, defeat the Vulgar Militiamen in the area. After that, you can loot a body on the western side sitting on the wall, which will contain x2 Smithing Stone [6]. If you turn right, you will be in the library again, although at a different level. Clear the area of enemies, mostly consisting of Vulgar Militiamen. You will come across a body by a lectern, which contains x2 Fire Coil when you loot it. Eventually, you will be facing a Fire Knight. After defeating the Fire Knight, you can loot a nearby body with x3 Smithing Stone [7]. Keep following the path, clearing hostiles as you come across them.
Repositioning Specimens
Climb up the stairs heading west. You can pick up x1 Silver-Pickled Fowl Foot on a body near the top of the stairs. On this level, you will be fighting Vulgar Militiamen and Fire Knights. On the southwestern-most part of the level, there will be a body containing x1 Spirit Calculus, nearby a Fire Knight that you fought. If you want to clear the whole floor, you can head east past the set of stairs going up. There will be a passageway to an area on the eastern side containing Vulgar Militiamen and loot. You can pick up x5 Ember of Messmer and x1 Shadow Realm Rune [5]. There will also be a lever at the southern wall. When you pull the lever, the structure in the middle will start to go up, bringing along the specimens that are hanging onto it.
After clearing the current floor, you can head up the highest level of Storehouse. You can loot a body on the left side of the top of the stairs containing x2 Sliver of Meat. In this floor, you will activate the Storehouse, Seventh Floor Site of Grace [See Elden Ring Map]. Redmane Freyja will be present near the Site of Grace, who is at the southwest side of the room by a stone tablet. Exhaust all dialogue options with Redmane Freyja.

Storehouse, Seventh Floor (and Backtracking)
After activating the Storehouse, Seventh Floor Site of Grace, head to the eastern section of the area. Jump up the ledge, then onto the hanging statue, and you can loot x1 Revered Spirit Ash. Backtrack your way outside, then take the stairs down to go to an area that has Vulgar Militiamen. Earlier, you talked to Redmane Freyja at the Storehouse, Seventh Floor Site of Grace. Talk to Ansbach, who will then give you x1 Letter for Freyja. If you give the letter to Redmane Freyja, she will reward you with the Golden Lion Shield.

To progress, you need to go to a beam that has moved up because you pulled the lever earlier. If you look over the railing on the bridge outside the Site of Grace, you can see which beam you have to jump on. Head there by going down one level, then going to the room across the stairs. Clear the Shadow Undead you encounter along the way, then jump on the beam.
Head up the structure and its statues until you see a balcony by the head of the highest statue. The room will have three Shadow Undead and x1 Ember of Messmer that you can pick up below the southwest shelf.
Obtain Domain of Dragons Painting

From the Main Gate Plaza - Site of Grace, exit through the door while facing Southeast. This will take you to an area with Satyr enemies. Outside, go up the ramp and make a right to the burning boats. Then, use the ladder on the left side to go down near a waterfall to the left.


Walk towards the waterfall to reveal a room here. Take the ladder going down and go through the door to your left. You will see the Domain of Dragons Painting here. Interact with it, then pay attention to the wall behind you.


Path to Eastern Scadu Altus Dungeons
This blank wall is a secret passage and you can attack it to reveal a new area. This will lead you to an area beneath Eastern Scadu Altus region and allows you to reach Eastern Nameless Mausoleum and Darklight Catacombs. To continue, go through the secret room and follow the stream of water.


Go down the steps and turn left. You will see a coffin at the edge here. Rest in the coffin to travel to a new location.

After the short cutscene plays you will arrive at a new location. Go through the door then activate the Castle Watering Hole - Site of Grace left of the doorway. Then, summon Torrent and ride southeast here. You will come across a Furnace Golem here and it's up to you if you want to defeat it. From here, you will stick to the mountain side on your left. Make sure to pay attention to the gaps on the platform here. Once the path to the left side ends, jump over to the other side. This time, you will stick to the mountainside to the right.
From here, you can activate the Ellac River Downstream - Site of Grace. This is important because you will be returning to this location to reach the Southern Shore. Next, you will go down some platforms near this Site of Grace. When you reach the river level, head north and turn right until you reach the end where you'll find the mausoleum and the Darklight Catacombs.
By the entrance, there is a Summoning Pool or effigy for players to use for co-op. There is also a Stake of Marika that you can use to respawn by the entrance of the mausoleum in case you die. As mentioned, the location is where you'll fight against a mini-boss, so make preparations before you pass through the mist. For guides and strategies on how to defeat the boss, please visit the Rakshasa boss page. Defeating this mini-boss rewards the player with the following items:
Darklight Catacombs
The Darklight Catacombs is located south of the Scadu Altus region, directly south of the Eastern Nameless Mausoleum. To get there, go to the Recluses' River Downstream Site of Grace [See Elden Ring Map], then go traverse the cliffs going south. As you get to the bottom, keep going south. By going in this direction, you will stumble upon the door leading to the Darklight Catacombs. Open the door to gain access inside the catacombs.
Once you are inside the Darklight Catacombs, follow the path leading to a lift. After arriving at the bottom, you can activate the Darklight Catacombs Site of Grace [See Elden Ring Map]. After activating the Site of Grace, head north to pick up x1 Grave Glovewort [5]. A lionhead Imp will jump on you as you approach the item, so take caution. Once you have picked up the Grave Glovewort, go to the eastern hall right before picking up the loot. Grab x1 Yellow Fulgurbloom right as you head down the path. Turn left, and you'll find another path going down, with x1 Yellow Fulgurbloom in the middle of the stairs.

You will arrive on a ledge area with two Fanged Imps. Defeat the enemies, then drop down the ledge or walk down the ramp. Immediately on the west of where you dropped is a passageway leading to a lever that will turn on the lights when pulled. Go back to where you dropped, then head southeast, passing through the archway. As you turn the corner to the archway, a bigmouth Imp will attack you.
In the room overlooking the lit area, you can drop from the railings onto a ledge, then drop from the broken section of the ledge to a room with a chest containing the Viridian Amber Medallion +3. Afterwards, drop down to a bridge. The room on the south connecting to the bridge contains x1 Grave Glotwort [1] on the east side, and x2 Yellow Fulgurbloom right by the western wall. After clearing the area, follow the path going north leading to another lift. Use the lift to go down.

Follow the path north, going through the ramp on the right side to progress. A Fanged Imp will be waiting for you at the bottom of the ramp. Keep heading north, and you'll find x1 Yellow Fulgurbloom along with a bigmouth Imp opposite of it. After dealing with the imp, go back a few steps and you'll see a ladder going up. Climb the ladder, then turn right through the tight passageway, dropping to a room with a lever. Pull the lever, and you will activate the lights in another area. By the lever, you can drop down safely into a staircase below containing x4 Thin Beast Bones. Follow the path going up the stairs.
Once you have arrived at the top of the second set of stairs, look down by the opening, then drop down to the ledge. Follow the ledge going west, then climb up the ladder in the corner. In front of you, you can pick up x1 Shadow Realm Rune [5] from a corpse, and you will encounter an Inquisitor. You can safely drop to the room below with a body that has x1 Ghost Glovewort [2]. A Fanged Imp will attack you from behind after dropping. You can exit through the archway to the east. You'll be back in the area where you climbed up a ladder to the lever room.

You'll find a broken section of the railings. Drop down to the ledge bellow it, and you'll find a hallway with an Inquisitor on the southeastern corner. In this hallway, you can obtain the Death Knight Set from a dead body by the ledge on the north. South of the hallway, you can find an opening with a ladder going down. Climb down the ladder then head east through the archway. On your left, you'll find x1 Ghost Glovewort [9]. On your right, a Inquisitor will be attacking you. Defeat the Inquisitor, then drop down the ledge.
After dropping down, you can pick up x1 Yellow Fulgurbloom just where you dropped. Go east, then go through the archway going down, leading you to another lift. After arriving at the bottom of the lift, keep heading east. You will encounter a giant Bigmouth Imp which shoots fireballs towards you. Run through it, then turn left to head north. There will be a section here that has a pillar that can serve as a safe spot for you. As you are in the safe spot, a Fanged Imp will approach you. After dealing with the Fanged Imp, sprint to the area where it came from, then pull the lever in the room. Afterwards, kill the giant Bigmouth Imp, then defeat the Fanged Imp that spawns after it.

Go back to where you dropped, and you can pick up x2 Yellow Fulgurbloom and x1 Ghost Glovewort [8]. Afterwards, head to the pathway that the giant Bigmouth imp was blocking, then enter the room to loot a chest containing x1 Bigmouth Imp Ashes. Head up the stairs on the eastern wall, then keep heading east through the hall. You will encounter a Fanged Imp at the end of the hallway. You can safely drop, then head north. In the northernmost wall, you can pick up x1 Ghost Glovewort [4] from a dead body. Head back south going down the ramps, and you'll find another lift which leads you to a boss fog.
Once you head inside the boss fog, you will encounter Jori, Elder Inquisitor. For a more detailed guide on how to defeat Jori, Elder Inquisitor, you can visit this page. After defeating Jori, Elder Inquisitor, you will obtain the Barbed Staff-Spear and the Forsaken Graveyard Site of Grace [See Elden Ring Map] will be unlocked.

NOTE: The Abyssal Guides can be accessed after defeating the boss of the Darklight Catacombs. After you have defeated Jori, you can follow the path going south to get to the Abyssal Woods region. You can't use your mount in the area, so you will get kicked off of your mount as you approach the region. Keep going south, and you can activate the Woodland Trail Site of Grace [See Elden Ring Map]. To unlock the map for the Abyssal Woods region, you can keep following the path going south, and you will come across a glowing column with an item. Pick it up to get the Map: Abyss. Nearby, you can activate the Abandoned Church Site of Grace [See Elden Ring Map].
Elden Ring Shadow of the Erdtree Walkthrough - Southern Shore
Elden Ring Shadow of the Erdtree - Southern Shore (First Entrance)
- Travel from Ellac River Downstream - Site of Grace in Gravesite Plain and navigate the path to Cerulean Coast
- Look for the Forager Brood to receive an item. This one is located Northeast of the Cerulean Coast - Site of Grace
- Reach Cerulean Coast
- Fight Ghostflame Dragon
- Reach Southern Shore
- Pick up Map: Southern Shore
- Explore Stone Coffin Fissure
- Summon Thiollier to fight the Putrescent Knight
- Defeat Putrescent Knight
- Reach Garden of Deep Purple
- Progress Thiollier and St. Trina's Questline
- Reach Southern Nameless Mausoleum and defeat Dancer of Ranah
- Make your way to Finger Ruins of Rhia by following the path in Eastern Coast
- Progress Count Ymir and Jolan's Questline (Please see the Finger Ruins Walkthrough Tab)
Exploring Cerulean Coast
From the Ellac River Downstream - Site of Grace, jump down the rocks while facing south. Be careful on your way down here because you can fall off and result in an instant death. Follow the stream of the waterfall here and take your time jumping down between the stone pillars. Once you reach the river level, continue heading south until blue flowers come into view.
After a short while, you can activate the Cerulean Coast - Site of Grace near the river. Then, you can backtrack to the area where you saw the Furnace Golem. Locate the Forager Brood near the forest of lightning rams here. You will receive the Forager Brood Cookbook [3] from it.
Your first stop is obtaining the Map: Southern Shore. From the Site of Grace, head south and go past the 3 small patches of land. A Ghostflame Dragon will come swooping down here but you can just outrun it if you don't want to fight it. Head south and go past the glowing worm creatures. You will spot the map to your right just as you reach the top of the ramp.
After obtaining the map, continue up the ramp then make a left to travel southeast. You will reach Miquella's Cross here next to a Site of Grace. Pick up the Scadutree Fragment and interact with the Cerulean Coast - Site of Grace. This time, travel west and stick to the cliff on your left. Go past the glowing worm-like creatures and at the very end, a giant will throw boulders at you here. Ignore it and continue traveling south until you see a large hole in the ground. Carefully navigate to the bottom by jumping down.
You can minimize fall damage by riding Torrent as you go down and at the bottom, you will reach The Fissure - Site of Grace.
Exploring Stone Coffin Fissure
From the Site of Grace, head south and jump between the platforms until you see an enemy slime on the ground. Go past it and climb the ramp behind it and pick up the Congealed Putrescence at the edge.
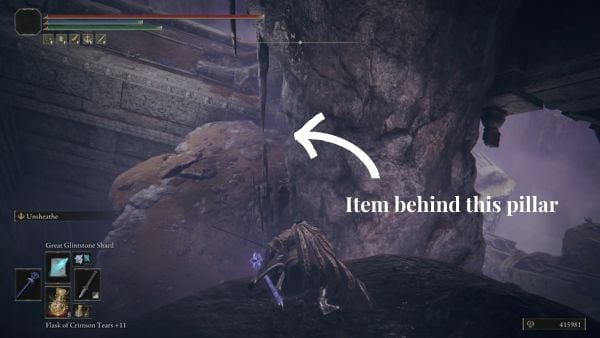
Then, face the north direction and jump down in this thick pillar ahead of you. Make a right and take the Trina's Arrow from the corpse on the ground. Make a U-turn and watch out for a Cursed Bloodfiend here as you go down. It will come from the edge of the pillar. You can eliminate this enemy or just run away from it.
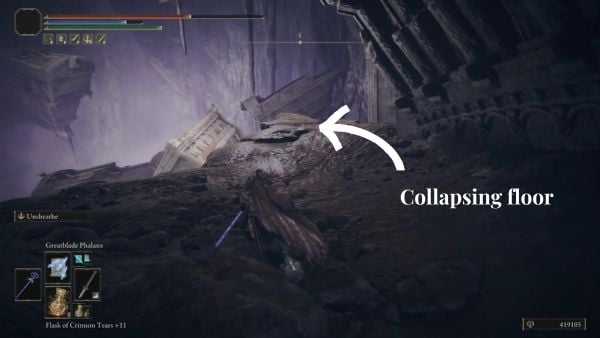
On the edge of this area, you will see this floor at the cliff. This is a collapsing ground and you can stand on it so you can reach the lower level. There are multiple bloodfiends here and you can eliminate them for a chance to get their items like Bloodfiend's Fork, String, or Runes. Head north towards the cliff where you see a corpse on the ground. Pick up the Deep-Purple Lily from this corpse. Then, face the southeast and find the way to the center of the dungeon. You will see 2 more Cursed Bloodfiends here sitting on the upper deck. Go towards them and defeat them. You can pick up the Shadow Realm Rune [3] behind them.
Fissure Cross - Site of Grace
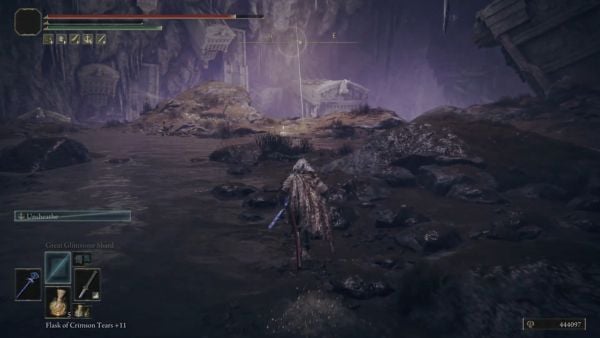
Face the east direction where you see Miquella's Cross and a Site of Grace. Walk over it and take the Scadutree Fragment on the ground and make sure to activate the Fissure Cross - Site of Grace. From here, face northwest where you see a large chunk of collapsed stone. There is a platform that lets you jump down to the lower section.
When you reach the bottom, face east and head to the lower level. Beware of the slimes that will fall from the ceiling. To the left, you can pick up the Velvet Sword of St. Trina tucked at the end of this short cave. Go to the other path where a Gravebird is resting on the edge. Do a sneak attack and then pick up the Nectarblood Burgeon from where it was sitting. Jump down the edge and then pick up the Grave Glovewort [3] right where you will land.
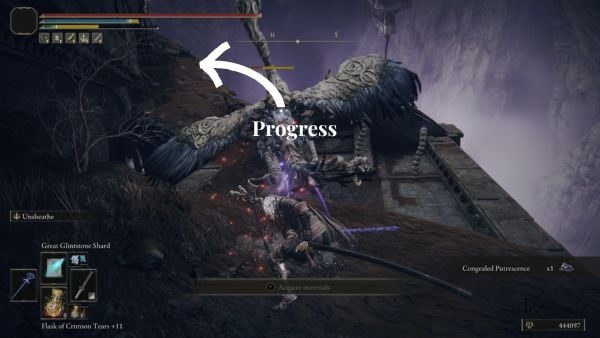
Face north and go up the ramp. There's another Gravebird here with purple markings on its wings. When you reach the slanted area, you will fight another Gravebird. Going to the top, you can pick up a Grave Glovewort [2] from a corpse. Then, head down through the broken bridge here. There are caterpillar-like enemies here on your path and they can shoot out laser-like projectiles. You can try to run from them or just take them out so it's safer to navigate later on.
Once you make it to the toppled building on the other side, go to the left side by facing west where you see these stone clusters. You can trigger the explosions by getting near them and then back off as they explode. You can pick up a Grave Glovewort [8] at the end here. Then, go to the right side by facing east and go to the top of the building. Jump down on the left side to pick up Nectarblood Burgeon and a Smithing Stone [6] here.
To continue your progress, face northeast where you see another caterpillar-like enemy. Ideally, you want to get rid of this so it will not bother you later. Then, jump down behind the caterpillar, and jump past another stone cluster of enemies. When you see this Site of Grace come into view, go to the right side first. Pick up the Grave Glovewort [7] from this corpse on the edge. Activate the next Site of Grace. While facing northeast, jump to the other platform and then jump down to the lower level.
Cross the bridge and pick up the Mass of Putrescence on the other side. To continue your progress, face northeast and go up the ramp. Watch out for the fire-throwing enemies. When you get to the upper area, you can pick up Nectarblood Burgeon and Congealed Putrescence. You can just ignore these enemies after getting the item and continue going up the ramp. At the top, you will find an archway next to a Skeleton Archer.
Fight the Spirit Form of Misbegotten Crusader
Jump down the archway but watch out for the giant slime here. Take the path to your left and you will be fighting the spirit of the Misbegotten Crusader. It will drop the Multilayered Ring of Light upon defeating it. Then, jump on the platform to the southeast and cross the bridge to your left. You can pick up 3 Nectarblood Burgeon here. Then, face southeast and follow the faint glimmer of the Site of Grace. Activate it and walk up the ramp.
Go towards the horned statue and jump down. At the bottom, you will reach a boss arena. You will be fighting the Putrescent Knight here, a skeleton riding a horse. It wields a massive weapon that behaves like a boomerang and can be thrown in an arc projectile. This boss can deal a good amount of damage and you can check out our Putrescent Knight page to see more info on how to defeat this boss. This boss will drop Remembrance of Putrescence upon defeating it.
A new Site of Grace will be revealed after the fight and it will also unlock the entrance to the Garden of Deep Purple. Go inside the cave and pick up the items inside. There are Nectarblood Burgeons on the ground and a St. Trina Disciple's Cookbook [3] here. Talk to St. Trina by interacting with the bright purple flower here. This marks the beginning of Thiollier's quest which requires you to return to Pillar Path Cross - Site of Grace and speak with him there. You can also view Thiollier's page to know more about his questline.
Southern Nameless Mausoleum
The Southern Nameless Mausoleum is located within the Cerulean Coast region, the southern section of the map. The location is an arena where you can fight against a mini-boss, the Dancer of Ranah. As indicated in the image below, head to the location that's marked in the Cerulean Coast, which is towards the edge of a cliff and near a withered tree. From there, check the left to find a narrow path (below the tree) that leads to a hole that you can drop to enter a cave.

When you reach the bottom, face the compass towards the west and go straight until you exit the cave. You can ride your mount here and avoid fighting the Giant Crab inside the cave. As you exit, you should find yourself on the small island if you open the map. Make a right towards the shore, then up the hill on the left where you'll find a field of blue glowing flowers and the mausoleum. By the entrance, there is a Summoning Pool or effigy for players to use for co-op. There is also a Stake of Marika that you can use to respawn by the entrance of the mausoleum in case you die. As mentioned, the location is where you'll fight against a mini-boss, so make preparations before you pass through the mist. For guides and strategies on how to defeat the boss, please visit the Dancer of Ranah page or view the video guide above.
Defeating this mini-boss rewards the player with the following items:
Elden Ring Shadow of the Erdtree Walkthrough - Dragon's Pit Path to Charo's Hidden Grave
Elden Ring Shadow of the Erdtree - Reaching Charo's Hidden Grave
- Explore Dragon's Pit
- Reach the Grand Altar of Dragon Communion
- Reach Charo's Hidden Grave
- Fight Death Rite Bird
- Defeat Furnace Golem
- Clear Lamenter's Gaol
The Entrance from Dragon's Pit (The other side of Southern Shore)
Dragon's Pit is located north of the Church of Consolation and northeast of Lamenter's Gaol. Its entrance is a tight cave marked by torches outside. Once you enter the cave, you will eventually encounter the Dragon's Pit Site of Grace. Continuing through the cave, you will enter a more spacious part that resembles a ritual room. There are skeleton enemies here that you need to take out. Afterward, loot the corpse at the back of the ritual area inside a mini cave to obtain a Smithing Stone [1].
Exit the mini cave and turn left, following another tight path until you reach a cliff with a ledge path to the left. Follow the ledge and drop onto the platform below where a skeleton enemy is waiting. After defeating the enemy, go to the altar on the left and loot the corpse to find the Shadow Realm Rune [2].
Turn left from the altar and navigate another tight part of the cave until you enter a room with multiple skeleton enemies and a staircase leading up. Clear the area, then head up the staircase to find a corpse on the left holding Knot Resin. On the right, you will encounter a Lesser Magma Wyrm. After slaying the dragon, loot the corpse near a hole to obtain a Smithing Stone [5].
Return to the staircase and head downstairs until you see another tight part of the cave. After passing through, you will enter a larger section with small structures and torches. Proceed straight ahead and drop down the cliff. Though it’s a long fall, it won't kill you. Upon landing, you will immediately see a yellow mist indicating a boss ahead. Before proceeding through the mist, look back to find a corpse holding a Smithing Stone [4]. The boss in this area is the Ancient Dragon-Man. For a detailed guide on how to defeat this boss, refer to the Ancient Dragon-Man page. This boss drops the Dragon-Hunter's Great Katana.
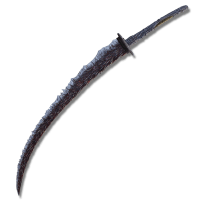
After defeating the Ancient Dragon-Man, look to the other side where you'll find a large double door. Loot the boss and proceed through this door to reach the Dragon's Pit Terminus Site of Grace, which is also the path leading to the Jagged Peak Region where all the dragons reside. This indicates that defeating the Ancient Dragon-Man unlocks the path to the Jagged Peak Region.
Into the Dragon Area
From the Dragon's Pit Terminus - Site of Grace, head towards the east where you will encounter Jagged Peak Drake, this is a dragon resting in the middle of the open ground. It's up to you if you want to fight this dragon but you can just skip it and head west so you can avoid it. If you decide to fight it, the Jagged Peak Drake can breathe fire and stomp you with its massive legs and wings. When defeated, it drops a Dragon Heart and Dragonscale Flesh. Then, head towards the south where the path narrows. You will encounter skeletons and some fire-breathing enemies here. After a while, you will find a new location called Grant Altar of Dragon Communion.
Speak to the NPC named Dragon Communion Priestess to receive Ancient Dragon's Blessing. There's also a nearby Site of Grace that you can activate here. This is your last stop before heading to Charo's Hidden Grave.
Charo's Hidden Grave


Head up the dragon's body by facing southwest. Climb it to the top then face south until the red flowers come into view. Then,turn right to formally enter Charo's Hidden Grave. Head southwest until you make it to Charo's Hidden Grave. This area is filled with various gravesite locations and are guarded by mostly skeleton enemies. This is a location filled with red flowers on the ground and is the area above Cerulean Coast.


Jump down into the water and then pick up the Grave Keeper's Cookbook [2] Continue riding northwest and you will see a Tibia Mariner here on the water. Defeat this enemy to obtain Tibia's Cookbook. Then, continue riding south to activate the Site of Grace before a small archway and near the cliff edge. From here, you can even see the Cerulean Coast at the lower area.

Beyond this area, you will fight a Death Rite Bird. This is an optional boss found in the middle of the body of the lake here.Head west and go past the glowing worm-like creatures. You will start to see metal barricades and broken prison cages. Stick to the wall on your right and you will find the entrance to Lamenter's Gaol with red flowers leading to it.
Lamenter's Gaol
Inside the dungeon, you will encounter shadow and jar enemies, but instead of the jar like in the base game, the meaty creature screams and breaks out of the jar as you attack it. Some enemies are also walking around without their jars. To go deeper into the gaol, players need to look for the Gaol Lower Level Key. This can be retrieved from a chest near piles of bones.

At the bottom of this dungeon, players will fight the Lamenter. This is an optional boss who can turn invisible and create clones of himself. When defeated, it drops the Lamenter's Mask. To view the full walkthrough, please see Lamenter's Gaol page.
Elden Ring Shadow of the Erdtree Walkthrough - Finger Ruins
Elden Ring Shadow of the Erdtree Finger Ruins of Rhia: This location spans across multiple 3 Different Finger Ruins: Rhia, Dheo, and Miyr.
- Make your way to the Finger Ruins of Rhia from Cerulean Coast
- Travel to Cathedral of Manus Metyr to speak with Count Ymir and Jolan
- Progress their questline
- Reach Finger Ruins of Dheo through the entrance in Shadow Keep
- Make your way to Finger Ruins of Miyr
- Fight the boss
- Return to Cathedral of Manus Metyr to speak with Jolan
- Speak with Jolan: Giver her Iris of Grace or Iris of Occultation
- If you gave her the Iris of Grace: Travel to Shaman Village and obtain Swordhand of Night Anna
NOTE: This section follows your encounter with Count Ymir and after exploring the Church District of Shadow Keep, traveling to Cerulean Coast, and Charo's Hidden Grave. By now, you would have acquired the O Mother (Gesture near a cliff in Bonny Village), Ruins Map, and Hole-Laden Necklace from your first meeting with Count Ymir.
Finger Ruins of Rhia
You can reach the Finger Ruins of Rhia by traveling southeast from the Cerulean Coast - Site of Grace. Go past the toppled pillar and stick to the wall on your left side. Continue following it as you go up the ramp and past the glowing worm creatures. You will come around and find the entrance past the shoreline and behind the dragon. Go up the ramp and you will see a small-altar-like structure at the very end. You can pick up the Grave Glovewort (9) here. On the right side, you can climb down to activate the Ruins of Rhia Site of Grace.
With the first map, fast travel to the Finger Ruins of Rhia Site of Grace and make your way down, be careful of the Fingercreepers and the Man-Serpents there. Once you reach the bell, interact with it and you will be granted the Crimson Seed Talisman +1. Return to the Cathedral of Manus Metyr and speak with Count Ymir again and he will grant you the Ruins Map (2nd) and Beloved Stardust.
Finger Ruins of Dheo
With the second map, fast travel to the Shadow Keep, Back Gate Site of Grace, facing the entrance of the structure, go left and you will find a Summoning Pool that you can activate and a room you can go into. Head into the room, on the left is a message that reads "Have mercy, For the spirited-away shamans." and straight ahead you can pick up the Scadutree Fragment at the altar. At the altar, you will need to perform the O Mother Gesture in front of the altar to trigger it to move.
Go through the hidden tunnel and you will find yourself at the Hinterlands. You can activate the Site of Grace as soon as you exit the tunnel and go down the steps. From here, head east to make your way to the Hinterland Bridge. You will follow the path here and you can activate the next Site of Grace on the other side of the bridge. Continue traveling in the eastern direction and the Finger Ruins of Dheo will come into view.
You will encounter a lot of smaller enemies that could potentially kill you so you will need to be careful in this area. You can activate the Fingerstone Hill - Site of Grace before you travel further. This area is covered with thick fog and can become difficult to navigate at night. You can pass the time to make navigating easier.
Head south until you reach the end. You can interact with the bell and you will be granted the Cerulean Seed Talisman +1. When you're done here, you will return to the Cathedral of Manus Metyr and speak to Count Ymir and he will give you the Ruins Map (3rd).
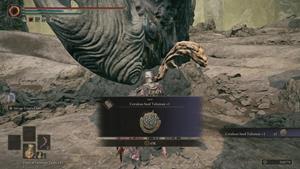
With the third map, make sure to rest at a grace somewhere else and then fast-travel to the Cathedral of Manus Metyr so Count Ymir will not be there. Make your way over to the throne you once met Count Ymir on, this time you can examine the throne. Interact with it to see it slide back and reveal a rope ladder, take the ladder down to reach the Finger Ruins of Miyr.
Finger Ruins of Miyr
Once you head down, NPC invader Swordhand of Night Anna will appear, defeat her and you will be granted the Claws of Night. You will be able to find a few Finger Mimics scattered around the area, other than that, you can find the Finger-Weaver's Cookbook (2) on a body on the lower left walkway of the path. Nearing the bell, you can interact with the Summoning Pool to activate it and then interact with the hanging bell to teleport you to the Metyr, Mother of Fingers arena.
Once you Defeat Metyr, Mother of Fingers you will be granted 420,000 Runes, and the Remembrance of the Mother of Fingers. You can then fast-travel back to the Cathedral of Manus Metyr and head back to the throne and interact with it once more to encounter another NPC invader named Swordhand of Night Jolan, defeat her and you will have to face Count Ymir, Mother of Fingers. This is when Count Ymir borrows the powers of Metyr to fight you. Defeat her and you will be granted the High Priest Armor Set that comes with the High Priest Hat, High Priest Robe, High Priest Gloves, and High Priest Undergarments, as well as Ymir's Bell Bearing and the Maternal Staff.
Elden Ring Shadow of the Erdtree Walkthrough - Hinterlands
Elden Ring Shadow of the Erdtree - Hinterlands
- Make your way to Hinterlands through the Statue of Marika in Shadow Keep, Back Gate (This is part of the Finger Ruins Questline that includes Count Ymir and Jolan)
- Reach Albinauric's Shack
- Complete Scadutree Chalice
- Explore Shaman Village
Finger Ruins of Dheo: Count Ymir and Jolan's Questline
With the second map, fast travel to the Shadow Keep, Back Gate Site of Grace, facing the entrance of the structure, go left and you will find a Summoning Pool that you can activate and a room you can go into. Head into the room, on the left is a message that reads "Have mercy, For the spirited-away shamans." and straight ahead you can pick up the Scadutree Fragment at the altar. At the altar, you will need to perform the O Mother Gesture in front of the altar to trigger it to move.
Go through the hidden tunnel and you will find yourself at the Hinterlands. You can activate the Site of Grace as soon as you exit the tunnel and go down the steps. From here, head east to make your way to the Hinterland Bridge. You will follow the path here and you can activate the next Site of Grace on the other side of the bridge. Continue traveling in the eastern direction and the Finger Ruins of Dheo will come into view.
You will encounter a lot of smaller enemies that could potentially kill you so you will need to be careful in this area. You can activate the Fingerstone Hill - Site of Grace before you travel further. This area is covered with thick fog and can become difficult to navigate at night. You can pass the time to make navigating easier.
Head south until you reach the end. You can interact with the bell and you will be granted the Cerulean Seed Talisman +1. When you're done here, you will return to the Cathedral of Manus Metyr and speak to Count Ymir and he will give you the Ruins Map (3rd).


With the third map, make sure to rest at a grace somewhere else and then fast-travel to the Cathedral of Manus Metyr so Count Ymir will not be there. Make your way over to the throne you once met Count Ymir on, this time you can examine the throne. Interact with it to see it slide back and reveal a rope ladder, take the ladder down to reach the Finger Ruins of Miyr.
Scadutree Chalice
To gain access to this area, you must first defeat Commander Gaius who is located near the Shadow Gate, Back Gate Site of Grace [See Elden Ring Map]. To get there, you must first explore the Shadow Keep Church District by entering from the east side. Afterwards, you can get access to the Back Section from the Church District side, which will then lead you to the Storehouse, Loft Site of Grace [See Elden Ring Map]. From the loft section, you can find your way to the Shadow Keep, Back Gate Site of Grace [See Elden Ring Map] by walking through the beams above the Specimen Storehouse. You'll find a room heading outside to a lift area and a locked door. Take the lift, and you will arrive at the Back Gate section once you get to the bottom of the lift. If you go through the archway going outside, you will be able to fight Commander Gaius. For a more detailed guide on how to defeat Commander Gaius, you can go to this page.
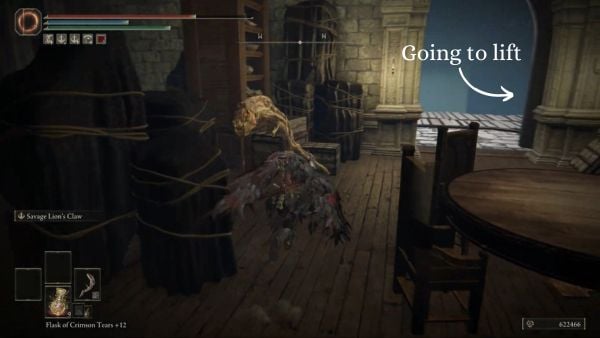
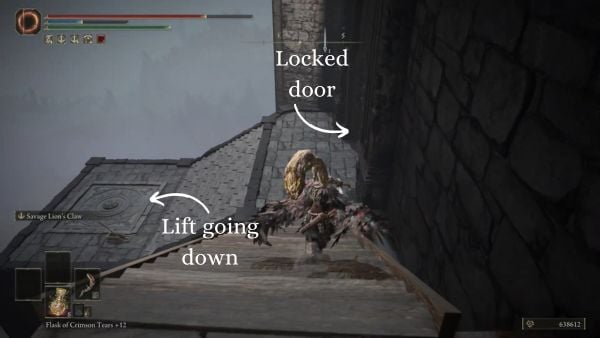
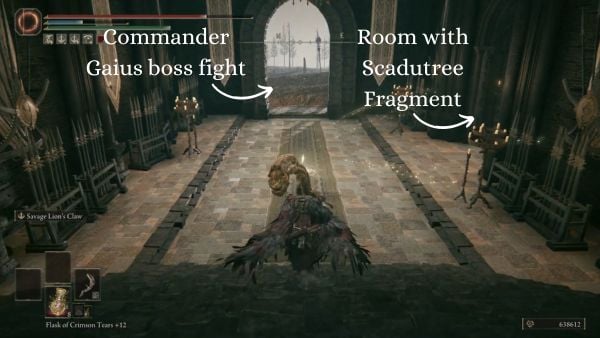
After defeating Commander Gaius, you will gain access to the area behind the Shadow Keep. Head straight through the archway north of Scaduview Site of Grace [See Elden Ring Map]. Follow the path going north, and you will see a big wall structure with an archway in the middle. Go through the archway in the middle, and you will be in Scadutree Chalice.
In Scadutree Chalice, there will be 6 items on the ground that you can pick up. There are x5 Scadutree Fragments and a Blessed Bone Shard by the giant chalice.
Albinauric's Shack
To get to the Albinauric's Shack, you must first defeat Commander Gaius to gain access to the area behind the Shadow Keep. You can get to Commander Gaius by first going to the Church District section of the Shadow Keep. Progress through the Shadow Keep from that side to get to the Storehouse, Back Section, and then eventually the Storehouse, Loft section, where you need to traverse through the beams above the Specimen Storehouse. Progressing through the Storehouse, Loft section will lead you to the lift going to the Shadow Keep, Back Gate Site of Grace [See Elden Ring Map]. Once you are at the Shadow Keep, Back Gate, you can walk through the archway going outside to fight Commander Gaius. You can view this page to read a comprehensive guide on how to defeat Commander Gaius. After defeating Commander Gaius, the Scaduview Site of Grace [See Elden Ring Map] will be unlocked, and you are free to explore the area behind the Shadow Keep.


From the Scaduview Site of Grace, head through the archway on the north. Keep following the path north until you see a broken-down house on the west of the path. Approach it, and you will be at the Albinauric's Shack.
An Albinauric Wolfback Archer will be stationed in the Albinauric Shack. Once you have defeated the Albinauric Wolfback Archer, you can loot it to receive Gaius's Greaves.
Head inside the shack to obtain the only item there, a Sharpshot Talisman.

Shaman Village
Shaman Village is located east of Shadow Keep in the Scaduview region. It is a beautiful garden area with leaves falling around. To access this area, you first need the "O Mother" gesture. To acquire the gesture, head to Bonny Village, which is southeast of the Moorth Ruins Site of Grace. Ride through the ruins until you see a building with a small door entrance. Inside, you'll find a deep pit that you need to drop down into by navigating the rocky structures. Once you reach the bottom, follow the tunnel until you reach a ladder going up. This ladder will lead you out of a well and into Bonny Village. Upon arriving at Bonny Village, turn left and head northeast. Continue until you reach a point where you need to jump across a small ravine. Keep heading north, and you'll eventually find a headless corpse with the "O Mother" gesture.
From here, head back to Bonny Village and go through it. Cross the wooden bridge to the east and follow the path until you reach a Furnace Golem. After dealing with the golem, head up the hill going north until you spot a large tunnel leading to the back of Shadow Keep. At the end of the tunnel, you'll find the entrance to the Church District of Shadow Keep. If this is your first time in the Church District, you will need to filter out the water to explore further. Jump on the rooftops until you reach one with a hole in the middle. Drop down and continue on the side path to the left, climb the ladder, and eventually, you'll find the lever that filters out the water.
Return to the main path and continue on the separate side path, leading you to an elevator going up. This will bring you to the back of the specimen storehouse. From the Storehouse, Back Section Site of Grace, you'll see a ladder that goes up. Once up, climb a nearby set of stairs and turn right around the bookshelves. You'll find a large hole in the wall with a good view of Shaman Village. From this Site of Grace, take a smaller elevator up to the upper areas of Shadow Keep. Follow the path until you reach another elevator. Look around for a balcony where you can drop down. This balcony has an opening on the wall, leading to another elevator that takes you down to a side path, which in turn leads to another elevator taking you to the back entrance of Shadow Keep. Here, take a right turn to find a statue of Marika and a message on the ground saying, "Have mercy. For the spirited-away shamans." Use the "O Mother" gesture in this message to have the statue move aside, granting you access to Shaman Village. You'll find 2 Tree Sentinels that you can fight separately. Afterward, take the right path and cross the bridge. Once you cross the bridge entering the village, head straight through the garden of flowers, and you'll find a Minor Erdtree plant in the middle of the garden, specifically illuminated by sunlight.
After looting the Minor Erdtree, head up the hill to the left where there are abandoned structures, and turn right towards the cliff overlooking an abandoned house below. By the edge of the cliff, you'll find Marika's Rune.
Afterward, continue up the hill to see more abandoned structures. On the right side of the area, you'll find a large tree with an open trunk. Inside this tree trunk, you can loot a corpse to obtain the Golden Braid.
Elden Ring Shadow of the Erdtree Walkthrough - Jagged Peak
Elden Ring Shadow of the Erdtree - Navigating Jagged Peak
- From the Dragon's Pit Terminus - Site of Grace, travel to Foot of Jagged Peak - Site of Grace and defeat the 2 Jagged Peak Drake
- Talk to Igon and receive Igon's Furled Finger
- Fight Ancient Dragon's Senessax
- Summon Igon to defeat Bayle The Dread
- Return to Igon's location near Foot of the Jagged Peak where you fought the 2 Dragons
- Return to Dragon Communion Priestess
Head out to the Foot of the Jagged Peak by returning to where you fought the first dragon, but this time, you will head north and pass through the pillars. This will take you to the cliff of the mountain.
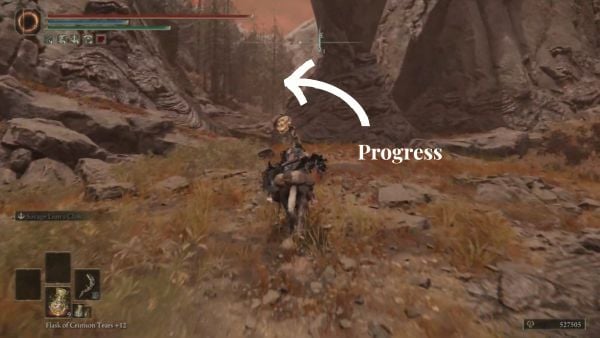
Use the Spiritspring at the end of this path, then veer right and cross the bridge. Activate the Foot of the Jagged Peak site of grace here before proceeding. This is very important because you will be fighting a boss in the next area. This is where you will respawn if you die during the fight.
Next, continue up ahead until you reach the boss arena. You will be fighting another Jagged Peak Drake, but this time, there will be two of them. After this fight, you will hear the voice of Igon nearby. Locate him towards the east and head towards the area where the red smoke is thick. Talk to him there and exhaust his dialogues. He will ask you to summon him and let him join you in the fight against Bayle the Dread. You will receive Igon's Furled Finger.
From here, take the Spiritspring behind him, and another one at the next level. On the third level, you will see the entrance to the cave of the next dragon. Go inside the cave and watch out for the rolling boulders here. You can avoid it by going to the right area of the cave, and then crossing right after the boulder rolls down. Once you make it to the left side of the room, you will reach the arena of another boss.
You will be fighting Ancient Dragon Senessax. After defeating this boss, go up the north exit where you will see the remains of other dragons on the ground. This serves as your guide that you are headed to the right place.
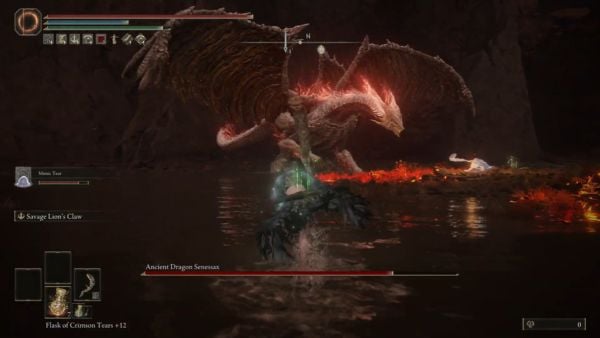
Outside this area, activate the Jagged Peak Mountainside - Site of Grace. Then, head to the top of the mountain by heading southwest. You will see the dragon remains here and keep following it. There are also lightning effects that will occasionally strike. Then, use the Spiritspring and continue going to the south.
Stick to the wall here to your left and use another Spiritspring. You will find yourself at a level with multiple dragon remains and a small cave entrance in front of you. Go inside and pick up the Ancient Dragon Smithing Stone on the right side, then walk over to your left and use another Spiritspring at the end.
Use the Site of Grace at the top and this is the one that you will be using in case you die during the boss fight. (Beware: You probably will). Go towards the small opening here and once you enter the arena, Bayle the Dread will land once you are inside. Now, the key to completing Igon is to summon him here. He can't be summoned from the outside but you need to locate his summon sign inside the arena after this boss fight is triggered.
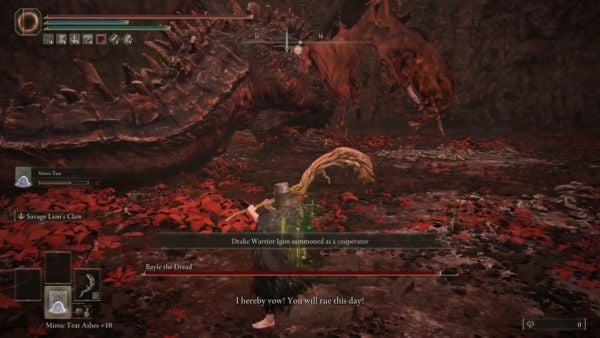
After defeating this boss, return to Igon's last location where you fought the two Jagged Peak Drake. [See the SOTE Elden Ring DLC Map] He will drop his items that you can loot:
Once you have collected these items, go to the Grand Altar of Dragon Communion. Teleport to the site of grace that you previously used. The Dragon Communion Priestess has vanished and will leave the following items behind:
Elden Ring Shadow of the Erdtree Walkthrough - Abyss
Elden Ring Shadow of the Erdtree - Navigating Abyssal Woods
- Points of Interest can be added here. This is a work in progress.
Elden Ring Shadow of the Erdtree Walkthrough - Shadow Keep (Part 2)
Elden Ring Shadow of the Erdtree Shadow Keep - A Legacy Dungeon
- Fight the Golden Hippopotamus (Optional NPCs: Redmane Freyja and Hornsent)
- Needle Knight Leda and Hornsent fight: Choose between who you will assist. (The outcome will be reflected later before the final boss)
- Find a way to the Abyssal Woods (through the Illusory Wall)
- Progress NPC Questlines of Ansbach and Redmane Freyja
- Obtain Secret Rite Scroll and give it to Sir Ansbach, then, pass his message to Freyja
- Receive the Golden Lion Shield
- Fight Messmer the Impaler (It's important to summon Hornsent during the fight for his questline)
- Return to Hornsent Grandam in Belurat Tower Settlement (You will receive one final item from her)
- Look for Needle Knight Leda at Highroad Cross - Site of Grace (This will trigger another fight between her and Sir Ansbach)
Shadow Keep is a Legacy Dungeon in Elden Ring. The Shadow Keep is a legacy dungeon exclusive to the Shadow of the Erdtree DLC, it accommodates the main army of Messmer the Impaler. The Shadow Keep is located at the center or the heart of the Scadu Altus region and has multiple entrances and exits, considering it to be a non-linear dungeon where adventurers will encounter many enemies such as Messmer Soldiers, Fire Knights, Giant Crabs, Giant Bats, Vulgar Militia, Black Knights, and devastating creatures. [See Shadow of the Erdtree Map]
The Shadow Keep location is divided into three sections, the Main Plaza, the Church District, and the Specimen Storehouse. Please click the links to jump to a specific section of the walkthrough.

General Information
- Previous: Castle Ensis
- Next: Enir-Ilim
- Recommended Levels: 150 - Above
- Bosses: Golden Hippopotamus, Messmer the Impaler
Shadow Keep Sites of Grace
Shadow Keep, West Sites of Grace
- West Rampart [Map Link]
Church District Sites of Grace
Specimen Storehouse Sites of Grace
- Storehouse, Back Section [Map Link]
- Storehouse, Loft [Map Link]
- Storehouse, First Floor [Map Link]
- Storehouse, Fourth Floor [Map Link]
- Storehouse, Seventh Floor [Map Link]
- Dark Chamber Entrance [Map Link]
Video Walkthrough
Shadow Keep Map
Main Gate

Main Entrance - Main Gate Plaza
Church District

Church District - Scadutree Base

Church District - "Underwater" Level

Church District - Surface Lower Level

Church District - Surface Upper Level
West Rampart
Specimen Storehouse

Specimen Storehouse - First Floor

Specimen Storehouse - Second Floor

Specimen Storehouse - Third Floor

Specimen Storehouse - Fourth Floor

Specimen Storehouse - Fifth Floor

Specimen Storehouse - Sixth Floor

Specimen Storehouse - Seventh Floor

Specimen Storehouse - Dark Chamber
Back Gate

Specimen Storehouse - Lower Back Section

Specimen Storehouse - Upper Back Section

Specimen Storehouse - East Balcony

Specimen Storehouse - Back Gate Ground Level

Specimen Storehouse - Back Gate Upper Level

Specimen Storehouse - North Balcony

Specimen Storehouse - Beams, Lower Level

Specimen Storehouse - Beams, Upper Level
NPCs in the area
Bosses
Main Plaza
Specimen Storehouse
Video Walkthrough coming soon!
Items
Talismans
Consumables
- x6 Kukri
- x6 Fire Coil
- x1 Rune Arc
- x8 Bone Dart
- x4 Golden Vow
- x1 Festive Grease
- x2 Fireproof Pickled Liver
- x1 Gold-Pickled Fowl Foot
- x2 Holyproof Pickled Liver
- x3 Shadow Realm Rune [5]
- x1 Shadow Realm Rune [6]
- x2 Rune of an Unsung Hero
- x1 Well-Pickled Turtle Neck
- x2 Silver-Pickled Fowl Foot
- x3 Furlcalling Finger Remedy
- x1 Lightningproof Pickled Liver
- x1 Leda's Rune
Weapons & Shields
- Main-gauche
- Falx
- Dueling Shield
- Fire Knight's Seal
- Golden Lion Shield
- Queelign's Greatsword
- Carian Thrusting Shield
Armor
Spirit Ashes
Ashes of War
Spells
- x2 Crab Eggs
- x8 Beast Horn
- x13 Rada Fruit
- x8 Black Pyrefly
- x2 Lump of Flesh
- x1 Spirit Calculus
- x1 Furnace Visage
- x3 Glintslab Firefly
- x1 Slumbering Egg
- x2 Revered Spirit Ash
- x6 Hefty Beast Bone
- x7 Thin Beast Bones
- x9 Shadow Sunflower
- x13 Ember of Messmer
- x6 Stormhawk Feather
- x6 Scadutree Fragment
- x1 Messmerfire Grease
- x2 Strip of White Flesh
- x1 Blessed Bone Shard
- x10 Smithing Stone [1]
- x8 Smithing Stone [2]
- x1 Smithing Stone [5]
- x3 Smithing Stone [6]
- x7 Smithing Stone [7]
- x8 Smithing Stone [8]
- x1 Great Grave Glovewort
- x1 Somber Smithing Stone [5]
- x1 Somber Smithing Stone [8]
- x1 Somber Smithing Stone [9]
- x1 Drawstring Golden Grease
Enemy Drops
- Crab Eggs
- Beast Horn
- Innard Meat
- Living Jar Shard
- Death Mask Helm
- Smithing Stone [2]
- Smithing Stone [3]
- Smithing Stone [4]
- Smithing Stone [5]
- Smithing Stone [7]
- Ember of Messmer
- Vulgar Militia Saw
- Strip of White Flesh
- Raw Meat Dumpling
- Vulgar Militia Armor
- Fire Knight Gauntlets
- Messmer Soldier Helm
- Messmer Soldier Armor
- Shadow Realm Rune [1]
- Fire Knight's Shortsword
Keys & Other
- x1 Iris of Grace
- x1 Letter for Freyja
- x1 Secret Rite Scroll
- x1 Iris of Occultation
- x1 Hefty Cracked Pot
- x1 Messmer's Kindling
- x1 Furnace Keeper's Note
- x1 Storehouse Cross Message
- x1 Domain of Dragons Painting
- x1 Remembrance of the Impaler
- x1 Battlefield Priest's Cookbook [1]
- x1 Battlefield Priest's Cookbook [4]
Enemies
- Crab
- Giant Bat
- Living Jar
- Giant Crab
- Fire Knight
- Black Knight
- Vulgar Militia
- Messmer Soldier
- Ignited Putrid Corpse
- Messmer Foot Soldier
- Fire Knight Captain Kood
- Lesser Ulcerated Tree Spirit
- Hornsent
Notes
- Notes go here
Full Shadow Keep Walkthrough
Shadow Keep: Main Plaza Entrance
The Main Entrance of Shadow Keep
The main entrance of the Shadow Keep dungeon is the linear path to take when traveling to the location. When you clear Castle Ensis after defeating Rellana, travel north until you reach the main entrance. Along the high road, you should find a monolith where you can grab the Scadu Altus Map Fragment, Map: Scadu Atlas [See Elden Ring Map]. Tread carefully as you approach the main gate as you'll encounter campsites of Messmer Soldiers. Before heading inside, check the east section of the fort's outer walls to find a fallen Furnace Golem where you can loot x1 Furnace Visage [See Elden Ring Map]. Next to it, you can find a tent, inside is a corpse that you can pillage to find x1 Furnace Keeper's Note [See Elden Ring Map].
Approach the main entrance and step on the lift's mechanism to ride it to the top. When you arrive, you'll find the Shadow Keep Main Gate site of grace, interact with it, and make preparations before entering the plaza where you'll fight a Great Enemy Boss, the Golden Hippopotamus. As soon as you enter the plaza, the battle against the boss will begin. For more guides and strategies on how to defeat the boss, please click here. Defeating the Golden Hippopotamus drops x2 Scadutree Fragment and the incantation spell, Aspects of the Crucible: Thorns. Defeating this boss will also allow you to continue exploring the Shadow Keep and the Main Gate Plaza lost site of grace manifests at the center of the large room.
Past the Main Plaza
Proceed to the next section by passing through an armory room that's on the left side of the Main Gate Plaza checkpoint. Inside the room, there is a Spirit NPC you can talk to. Exit the room and walk up the stairs to enter the next room where you'll encounter two Messmer Soldier enemies on the left and another soldier patrolling the narrow stairs on the right. Defeat the enemies, and before going up the narrow stairs, loot the body near the foot of the stairs, next to some objects to loot x1 Festive Grease. Slowly walk up to the first set of stairs and you'll find a doorway on the right leading to another armory room. Inside the room, there are two Messmer Soldier enemies and a body that can be pillaged to obtain x6 Smithing Stone [1].
In the same room, there is another doorway on the right, tread carefully since there are two more Messmer Soldier enemies and one Black Knight wielding a double-headed spear. One of the soldiers near the doorway is sleeping, and you can gain the upper hand by using a long-range weapon like a bow to shoot it from afar, thinning out their numbers. Clear out the enemies and approach the table beside the rack of weapons, you'll find a body next to it. Pillage the body to find a dagger weapon, the Main-gauche.
Next, go back to the previous room and jump through the window to enter a courtyard area that has a golden tree in the middle. Facing the golden tree, turn left, and you'll see a Black Knight enemy facing a corpse holding an item. You can sneak behind the enemy to attack with a critical backstab. Kill the enemy and loot the corpse to find x3 Golden Vow. Now walk up to the golden tree to find the Talisman of Lord's Bestowal. Before you progress, check the south section to find a doorway, inside is a scaffolding of wooden platforms where you can find a corpse that can be looted to find x2 Smithing Stone [8]. Now go back to the courtyard, head north to enter the doorway that was near the Black Knight enemy you killed earlier.
You'll enter another armory room where you'll encounter an axe-wielding Messmer Soldier and another Black Knight wielding a double-headed spear. After killing the enemies, before you exit the doorway on the right side of this room, check behind the rack of weapons to find a body you can loot to acquire x4 Smithing Stone [1]. Exit through the doorway to find a ladder that you can climb, this leads to a door that can be opened to find a refectory or a dining room.
East Wing of the Keep
Tread carefully in this room since there are enemies inside, a Black Knight wielding a hammer and a shield, and another Black Knight with a large bow. You can pick up x1 Golden Vow on a dead body by the opening on the wall on right side. A Shadow Realm Rune [6] can be found just by the doorway heading outside. Exit through the doorway that's on the east side of the room to exit a battlements area where you'll find lined-up boats and stacks of weaponry. On the left side just as you exit, you can pick up x1 Holyproof Pickled Liver. Be careful as you explore this section since there are multiple Vulgar Militia enemies guarding and surrounding the boats. There is one body nearby that is sitting against a boat, you can loot it to find x1 Rada Fruit. Check the east side of the battlement area. You'll find a dead body with x1 Silver-Pickled Fowl Foot and another body sitting against the eastern wall. Loot the body to obtain x3 Smithing Stone [8].
Find the Domain of Dragons Painting
You'll find a ladder beside a body that has a Silver-Pickled Fowl Foot. Climb down the ladder and investigate behind the waterfall where you'll find another ladder. Climb the ladder to find a storeroom that has the Domain of Dragons Painting. [See Shadow of the Erdtree Map]. Head out of the storeroom, then back to the waterfall area. Keep following the path going west, and you will find a dead body with x1 Somber Smithing Stone [8].

As you approach a ramp in the middle, head down to kill the Vulgar Militia enemies and loot a corpse at the bottom of the ramp to acquire x1 Drawstring Golden Grease. Also at the bottom of the ramp, you can find double doors that can be opened which leads to a shortcut to the Main Gate Plaza Site of Grace. Go back up the ramp. As you go back up the ramp, you can find summon signs. For the red summon sign, you will be summoned by Needle Knight Leda to to assist her in defeating Hornsent. After defeating Hornsent, you will be sent back to your original location. You will also acquire the curved sword Falx along with the Hornsent Set armor. For the yellow sign, you will be assisting Hornsent in defeating Needle Knight Leda. Once you have defeated Leda, you will receive the Ash of War: Swift Slash and Leda's Rune. You can choose to do both, so you won't have to make a choice in which one you want to assist. By the stairs leading to the Fire Knight, you can loot a dead body for x1 Messmerfire Grease. Kill the patrolling Fire Knight and make sure to also loot the nearby bodies to acquire x8 Smithing Stone [2] and x8 Bone Dart. Proceed north and ride the lift to enter the Specimen Storehouse of the Shadow Keep.
Shadow Keep, Church District
The main entrance of the Church District of the Shadow Keep is located on the east side of the Shadow Keep. The direct path to finding it is to travel from the Church District High Road Site of Grace [See Shadow of the Erdtree Map]. You'll know you'll arrive when you enter a large doorway and pass through a long hallway. At the end of the hallway is where you'll formally arrive at the church district and discover the Church District Entrance checkpoint [See Shadow of the Erdtree Map].
The Church District is a flooded area, and the goal is to traverse the area by using high ground and finding a mechanism that drains the water. Please take note that falling into the water will result in death. Ignore the path on the left since you won't be able to use the lift until you drain the flood. Instead, jump across (using a running jump) to land on the roof of a building, then check the right side to find a small Crab and a body next to it that can be looted to acquire x2 Crab Eggs. Continue walking around the roof to find another body that's being eaten by a Crab. Loot the body to obtain x4 Thin Beast Bones. Continue south and you'll find another body being eaten by a Crab, check the body to find x2 Strip of White Flesh.
Next, jump on the floating tree trunk to reach a large broken-up circular platform. The path here is fairly straightforward, try to reach the opposite end by using the floating tree trunks and wooden platforms, and make sure to loot the body on the circular platform to find x1 Great Grave Glovewort. Retrace your steps to the rooftop of the building where you looted bodies and killed the small Crabs, and this time, head west where you can jump across to progress (see the second image above for reference).
Once you're across, walk around the sides to reach the platform and loot the body that is guarded by Ignited Putrid Corpse enemies to obtain x1 Fireproof Pickled Liver. Jump back onto the sides of this building so you can walk to the top and proceed west where you'll have to do a running jump to safely land on top of another roof of a building. On the roof of the building, you should encounter a Fire Knight enemy walking around. Kill it and then loot the body that's near the spot where the Fire Knight enemy was walking to obtain x3 Ember of Messmer. Keep going straight until you reach a wall, then turn around to find a body sitting against one of the roof's structures. Loot it to acquire x1 Slumbering Egg [See Shadow of the Erdtree Map].
The Prayer Room: Fire Knight Queelign
Next, face the east side of the compass and you should see a narrow ramp structure of one of the churches. Do a running jump to land on it safely, then walk to the top where you'll find two large openings or holes on the big roof. Slowly drop down onto the narrow structure that's on the right side, then you can walk down so you can safely run onto the other structure that is on the left so you can loot the body that holds x3 Stormhawk Feathers [See Shadow of the Erdtree Map]. Go back and then drop down onto the opening of a ceiling (see the third image above for reference).
Below, you should immediately see yet another corpse next to a small Crab. Loot the body to find x1 Lightningproof Pickled Liver. Go around, northeast, and you'll locate a locked door, this is the Prayer Room that requires the Prayer Room Key, a key that drops upon defeating the NPC Invader Fire Knight Queelign, encountered for the second time at the Church of the Crusade [See Shadow of the Erdtree Map]. If you have the key, you can unlock the door and find Fire Knight Queelign (NPC) in the flesh. Now, if you have an item called the Iris of Occultation, you can give it to the NPC, and after Queelign's dialogue, the NPC will drop a weapon you can loot. This weapon is Queelign's Greatsword. NOTE: If you give the Iris of Grace to Queelign, you'll receive the Spirit Ash "Fire Knight Queelign". The Iris of Occultation can be acquired in many ways, one way is by obtaining it as an item drop from defeating a Lesser Ulcerated Tree Spirit located in this area after you drain the flood.
The Flooded Church District: Draining the Flood

Exit the prayer room and proceed to the northwest doorway, but before proceeding further, be sure to enter the armory room on the left to find a body sitting against the wall. Loot the body to find x1 Rune of an Unsung Hero
. Enter the hallway and kill the first Fire Knight enemy that you see, on the left side of the hallway, loot the body resting against the wall to find x2 Furlcalling Finger Remedy, and continue straight down the hallway where you'll encounter another Fire Knight. The room ahead is not accessible at the moment and the doorway to the right where you'll notice Marika's statue that has a glowing item in its hand is unreachable, so exit through the first doorway on the left side of the hallway.
NOTE: In the same hallway, there are two doorways on the left, the far most or second doorway will lead you to a lift that takes you to the Specimen Storehouse section of the Shadow Keep. You're free to roam here, but we highly recommend returning to the Specimen Storehouse after clearing the Main Plaza and Church District of the Shadow Keep. What you can do is enter the Specimen Storehouse, and activate the nearby Site of Grace (Storehouse, Back Section) so you can just fast travel here after exploring the Church District.
Cross the pathway where you'll encounter two Giant Bat enemies, then walk up to the short steps where you'll encounter another Giant Bat ahead. Jump over the gap, and kill the creature. Now before going straight, walk up a bit and you'll find a corner on the right. It's a dead end but there's a body that you can loot that's being protected by another Giant Bat hanging from the ceiling. Kill the enemy and loot the body to acquire x3 Hefty Beast Bone [See Shadow of the Erdtree Map]. Next, climb the ladder next to a doorway to find the mechanism that drains the water.
You can also return to the hallway to get the item sitting on the hand of Marika's statue. You can get the item by jumping on the hand, it may require a few tries as the platform that you need to stand on is quite narrow. Loot the item to acquire x1 Scadutree Fragment, then prepare to fight a group of Ignited Putrid Corpse as you jump down. Behind the same statue, you can find the Fire Knight's Seal weapon [See Shadow of the Erdtree Map]
Exploring the Sunken Chapel
Kill the Lesser Ulcerated Tree Spirit by the Large Tree

For some clarity, we recommend that you start by fast-traveling to the Church District Entrance checkpoint [See Shadow of the Erdtree Map] since you can now use the lift near the Site of Grace. From the checkpoint, go left, use the lever to call the lift, then step on the center to ride it down. You'll now be able to explore the open area of the Sunken Chapel. At the center, you will see a large tree, only approach the tree if you're prepared to fight because a Lesser Ulcerated Tree Spirit will emerge beneath the ground. Killing it will drop the Mantle of Thorns, and resting against the tree is a corpse holding x1 Somber Smithing Stone [5].
Defeat the Second Lesser Ulcerated Tree Spirit
The second Lesser Ulcerated Tree Spirit is located around the east area of the sunken chapel (see the images above for reference). Defeating it will drop x1 Iris of Occultation which (if you don't have it yet) you can give to Fire Knight Queelign in the Prayer Room to obtain Queelign's Greatsword. Also in the east area, you can find open buildings. One building houses two bodies that you can loot to find x4 Rada Fruit and x6 Kukri [See Shadow of the Erdtree Map].
There is also building another where you'll find a pack of Crabs and Giant Crab enemies, one roaming around, and the other next to another body that you can loot to find x1 Shadow Realm Rune [5]. [See Shadow of the Erdtree Map]. If you continue to go around this area, you'll reach the west side where you'll find the Sunken Chapel Site of Grace [See Shadow of the Erdtree Map]
Find the Tree-Worship Site of Grace
Head north towards the entrance of the main church then immediately turn left to find a corpse by a corner. Loot the body to find x3 Shadow Sunflower. Clear out the enemies then approach the small room that has Marika's statue (the same statue where you got the Scadutree Fragment and the Fire Knight's Seal weapon. Make a right and you'll enter a large room. Straight ahead, you'll see some stairs on both ends, walk up to the upper platform and investigate the railings to discover a body hanging on top of it.
Loot the body to obtain the Battlefield Priest's Cookbook [1], [See Shadow of the Erdtree Map]. Walk back down the stairs and check under the upper platform to find a door. Open that door and you'll find another lift that takes you underground. Ride it to find and activate the Tree-Worship Site of Grace — from here, (if you followed the tip earlier by activating the Storehouse, Back Section checkpoint in the Specimen Storehouse) you can fast travel to the Site of Grace to start exploring the Specimen Storehouse.
Shadow Keep: Specimen Storehouse
Storehouse, First Floor
Northeast of the Site of Grace, you can loot a dead body for x1 Fireproof Pickled Liver. There will be a Shadow Undead tucked in the column behind you which will easily die in one hit. A Shadow Undead will be hiding behind the table, so you can get a jump on it as its back will be exposed to you. Head straight, and you will find a room on the western side near the Site of Grace. In this room, you will encounter Shadow Undead scattered around the room. You can loot x1 Rune Arc on a dead body near the entrance. Go past the archway on the western side, then ride the lift going down.

Finding the West Rampart Site of Grace (Detour)
After arriving in the basement, explore the area. You'll find a dead body that you can loot for x1 Gold-Pickled Fowl Foot on the room at the end of the hallway. Be cautious as you are entering the room, as there is a Living Jar waiting for you to enter. After clearing the room, go past the doorway on the northern side of the room, just beside the lift area. You'll be in a hallway connecting two other rooms. The room on your left is a balcony that has another Living Jar waiting for you, and a dead body. Loot the dead body after killing the Living Jar for x1 Ash of War: Wall of Sparks. Exit the room, then head north to progress.
In the next room, there will be a Living Jar running up the stairs to approach you. At the end of the wall parallel to the stairs, you can hit it to reveal a hidden room. Loot the dead body in the hidden room for x1 Battlefield Priest's Cookbook [4]. After looting the hidden room, head down the stairs. You will be in an area filled with Living Jars. You can find x1 Innard Meat northwest hidden behind the jar that a Living Jar crawled out of.
In the next room, you'll find hostile Living Jars of various sizes. On the eastern side of the room, you can pick up x1 Iris of Grace behind a Living Jar. A dead body lying on a bed will give you x1 Hefty Cracked Pot. Exit the room by the west doorway to progress. You will encounter another Living Jar right as you enter the room. After defeating the Living Jar, head down either stairs, which leads to the West Rampart Site of Grace [See Elden Ring Map]. Go back to the Storehouse, First Floor Site of Grace.
Exploring Storehouse, First Floor
As you head north of the area, you will encounter numerous Shadow Undead in the area which you can easily dispose of as they usually die in one hit. As you progress through the area, you will have to deal with Shadow Undead while also picking up loot such as x1 Fire Coil. Go down the stairs on the northern side of the area, picking up x3 Hefty Beast Bone. In this room, Ansbach will be in the corner northeast of the room, reading scriptures. Head back out of the room, then keep going west. You'll encounter three Shadow Undead shortly. Head west past the Shadow Undead, and you will encounter a Fire Knight patrolling the area. By the southern wall, you'll find a dead body sitting with x1 Smithing Stone [6]. Go back to the stairs, then head up after clearing the area.
When you arrive at the top of the stairs, go to the right and keep following the path until you see a Shadow Undead looking over the railing on the east side. Behind the militiaman, you can pickup x1 Smithing Stone [5] on the railing opposite of it. Jump over the railing that the militiaman is looking over, and you can loot x1 Boltdrake Talisman +3 from a dead body in the area. On the north side of the room, pull the lever to reveal a path behind the bookcase. Go through the path, and you can pick up x2 Ember of Messmer from the body along the way. This path will lead you back to the central library.
Head back to the stairs that you went up to, then go left instead. You will encounter three Shadow Undead. You can loot x4 Black Pyrefly on the western part of the room. After getting the loot, you can head up the stairs on the north. There will be a Fire Knight under it, but you won't attract its aggro if you go up the stairs. You can pick up x4 Beast Horn on the area under the stairs where the Fire Knight is at. Once you head up the stairs, you can find another Fire Knight by the ledge, southwest of you. You can ignore it first and clear the area. At the southern section of the area, you can deal with the four Shadow Undead by the shelves, then pick up x1 Blessed Bone Shard. You can then take the Fire Knight in combat.
Once you have dealt with the Fire Knight, follow the southern ledge. Along the way, you can pick up x1 Furlcalling Finger Remedy. There will be Shadow Undead in the area, so be prepared to face them in combat. After defeating the Shadow Undead, you can climb on to the foot of a hanging statue. You can drop on top of another statue with x1 Revered Spirit Ash that you can pick up.
Make your way back to the statue, then look southeast. You'll find an area than you can cross to with a beam by jumping on the railing. You will find x1 Dueling Shield on a dead body sitting by the southern wall. Go back to the statue, then explore the area by following the path southwest of it. You'll encounter numerous enemies in this area, such as militiamen. Inside the small archway room, you can find x2 Lump of Flesh on a dead body. Go inside the room, and you'll come across a Fire Knight. After dealing with the Fire Knight, you can loot the dead body by the railing to get x4 Beast Horn. Go back to the statue crossing this time, and you'll find yourself in a new area. You can loot x1 Scadutree Fragment here and x1 Storehouse Cross Message. You can activate the Storehouse, Fourth Floor Site of Grace [See Elden Ring Map] in this area.
Storehouse, Fourth Floor
After activating the Storehouse Fourth Floor Site of Grace, there will be a body containing x3 Stormhawk Feather on the right as you head out through the arches. To continue, turn left, following the path going south. Keep following the path until you encounter a Fire Knight patrolling by the stairs. Right before the stairs leading up to the Fire Knight, you can loot x4 Black Pyrefly on the right side of it.
After defeating the Fire Knight, continue traversing the path until you see two giant bats. Deal with the giant bats, picking up x3 Ember of Messmer where the giant bats were, then enter the room on the left.

In the room, if you go left, defeat the Shadow Undead in the area. After that, you can loot a body on the western side sitting on the wall, which will contain x2 Smithing Stone [6]. If you turn right, you will be in the library again, although at a different level. Clear the area of enemies, mostly consisting of Shadow Undead. You will come across a body by a lectern, which contains x2 Fire Coil when you loot it. Eventually, you will be facing a Fire Knight. After defeating the Fire Knight, you can loot a nearby body with x3 Smithing Stone [7]. Keep following the path, clearing hostiles as you come across them.
Repositioning Specimens
Climb up the stairs heading west. You can pick up x1 Silver-Pickled Fowl Foot on a body near the top of the stairs. On this level, you will be fighting Shadow Undead and Fire Knights. On the southwestern-most part of the level, there will be a body containing x1 Spirit Calculus, nearby a Fire Knight that you fought. If you want to clear the whole floor, you can head east past the set of stairs going up. There will be a passageway to an area on the eastern side containing Shadow Undead and loot. You can pick up x5 Ember of Messmer and x1 Shadow Realm Rune [5]. There will also be a lever at the southern wall. When you pull the lever, the structure in the middle will start to go up, bringing along the specimens that are hanging onto it.
After clearing the current floor, you can head up the highest level of Storehouse. You can loot a body on the left side of the top of the stairs containing x2 Sliver of Meat. In this floor, you will activate the Storehouse, Seventh Floor Site of Grace [See Elden Ring Map]. Redmane Freyja will be present near the Site of Grace, who is at the southwest side of the room by a stone tablet. Exhaust all dialogue options with Redmane Freyja.

Storehouse, Seventh Floor (and Backtracking)
After activating the Storehouse, Seventh Floor Site of Grace, head to the eastern section of the area. Jump up the ledge, then onto the hanging statue, and you can loot x1 Revered Spirit Ash. Backtrack your way outside, then take the stairs down to go to an area that has Shadow Undead. In this room, you can get loot such as a Secret Rite Scroll lying on a desk (NOTE: only pick it up after talking to Freyja at the Seventh Floor Site of Grace) and a Smithing Stone [6]. Earlier, you talked to Redmane Freyja at the Storehouse, Seventh Floor Site of Grace. Talk to Ansbach, give him the Secret Rite Scroll, then teleport to the First Floor Site of Grace. Return to Ansbach, then he will then give you x1 Letter for Freyja. If you give the letter to Redmane Freyja, she will reward you with the Golden Lion Shield. You can also return to the ledge on the fourth floor where you found a Fire Knight. Go to the western section of it, and you can find the Pearldrake Talisman +3.

To progress, you need to go to a beam that has moved up because you pulled the lever earlier. If you look over the railing on the bridge outside the Site of Grace, you can see which beam you have to jump on. Head there by going down one level, then going to the room across the stairs. Clear the Shadow Undead you encounter along the way, then jump on the beam.
Head up the structure and its statues until you see a balcony by the head of the highest statue. The room will have three Shadow Undead and x1 Ember of Messmer that you can pick up below the southwest shelf.
After clearing the room, head outside. Follow the path on the right side (going north), going up the set of stairs. Three Shadow Undead will be in the room on your right, along with a body that you can loot for x3 Ember of Messmer. At the end of the bridge across the room, Fire Knight Captain Kood will be guarding a door. This enemy will be a bit different from the ones you encountered earlier, as its move set will be more aggressive than the normal Fire Knight.
After defeating the Fire Knight captain, x1 Winged Serpent Helm and x1 Ash of War: Flame Spear will be dropped. Open the door to proceed further. Head up the stairs and you will discover the Dark Chamber Entrance Site of Grace [See Elden Ring Map].
Storehouse, Back Section
Upon entering, look to the right immediately to see a noble corpse against the wall. Loot it to obtain x1 Somber Smithing Stone [9]. Proceed to the left side, through the doorway, where you'll find the Storehouse, Back Section checkpoint. Continue moving straight until you walk past a ladder. Do not climb the ladder first, instead, keep going straight to find some items. First, look to your left to see, another noble corpse sitting against a desk, loot it to obtain x3 Glintslab Firefly. Then at the end, you'll see a Fire Knight and three Shadow Undead standing next to another corpse, kill the enemies then loot the body to acquire x1 Carian Thrusting Shield.
Go back and climb the ladder to the top where you'll encounter another Fire Knight and two Shadow Undead reading a book. You can sneak behind the enemies to backstab them. Continue to the right side and walk carefully up the stairs to avoid aggravating the Fire Knight, roaming the floor above. At the top of the stairs, turn to the corner on the right to find a corpse to loot x3 Fire Coil. Kill the enemies on this floor, then continue moving straight. You'll discover another noble corpse sitting against a small table, loot it to obtain x4 Rada Fruit, and go straight towards the balcony to find another noble corpse that holds the Fire Serpent incantation. Go back, and look behind the bookcase to find an opening on the wall.
Through the opening, turn right and you'll find another noble corpse sitting by the edge of the narrow scaffolding. Loot the body to acquire x6 Shadow Sunflower. Continue going up, and by the ramp, you should find another noble corpse that you can loot to obtain x1 Blessed Bone Shard. Continue going up and you'll arrive at the loft section of the storehouse. Activate the Storehouse, Loft Site of Grace before you proceed to explore.
Storehouse, Loft
Once you have activated the Storehouse, Loft Site of Grace, proceed to the lift north of the Site of Grace to go up. You will end up on beams above the Specimen Storehouse. This level will be filled with Giant Bats roaming the area. The only path you can follow will be the one going west, so keep following it. There will be a lot of ways you can walk on the beams, but the only way you can progress through this area is through the ladder. Pick up x7 Thin Beast Bones from a body at the edge of a beam, then go up the ladder that you walk past through just before picking up the loot.

After climbing the ladder, you will arrive in a new level. If you go to the southeast section of the level, you can find x4 Smithing Stone [7] from a dead body. Following the path from the south side will lead you to a pillar blocking your way. If you look down, you can find a platform that you can jump off of, and it will contain the Wrath from Afar incantation. Next, jump on the beam to the north, then climb up the nearby ladder to the west of where you landed. You will end up on the beam that a pillar was blocking earlier. You can aggro the bats here, so be careful when attacking as you might fall off of the beams.
You can find a lift in the middle of the beam going west with an item above it, along with a Fire Knight on a nearby beam which will be hostile if you approach the lift.

If you use the lift to go down, you will end up in an area with a Fire Knight facing the other way around. You can easily dispose of the Fire Knight by backstabbing it and staggering it continuously. After dealing with the Fire Knight, you can pick up x1 Rune of an Unsung Hero on the southwestern corner of the area. The area will be clear, and you can head back up the beams using the lift. If you want to get the item above, you can ride the lift, then exit it before going down. A second lift will arrive just beside it, then do it again. Jump on the roof of the first lift just as it is arriving, and you will be able to reach the item, which is a Fire Knight Hilde summon.
If you walk across the beam going west, you can climb down a ladder. On your left, just around the corner, you can loot a body for x4 Rada Fruit. Directly northeast of the ladder you descended on, you will find another ladder you can use to descend. You will reach an area similar to the Site of Grace.
If you head outside the archway on the northwestern side of the area, you will find a lift directly on your right. Take the lift going down, then keep following the scaffolding until you reach an area with a door and a lift. You cannot open the door yet, so use the lift nearby to go down. The lift will then lead you to the Shadow Keep, Back Gate Site of Grace [See Elden Ring Map].
This area leads you into two areas. There is a room on the east, just beside the Site of Grace. In this room, you can pick up x1 Scadutree Fragment. After that, you will see an archway heading outside on the north-northeast side of the room. This is a boss area in which you will be fighting Commander Gaius.

The Dark Chamber
Near the Dark Chamber Entrance Site of Grace will be a door. Opening it will lead you to the boss, who is then revealed to be Messmer the Impaler. Messmer the Impaler uses a spear as a weapon, so be careful of the range of his attacks. His spear and attacks will be imbued with fire, so having fire resistance would be a good idea for this boss fight. For a more in-depth guide on how to defeat Messmer the Impaler, you can go to this page for more information.
When you defeat Messmer the Impaler, you will receive Messmer's Kindling along with the Remembrance of the Impaler. Messmer's Kindling will be used to gain access to a legacy dungeon, Enir-Ilim [See Elden Ring Map].
Shadow Keep Map
Main Gate Plaza
![shadow_keep_main_entrance2_main_gate_plaza_map_elden_ring_sote_wiki_guide_300px shadow keep main entrance2a main gate plaza map elden ring sote wiki guide 300px[1]](/file/Elden-Ring/shadow_keep_main_entrance2a_main_gate_plaza_map_elden_ring_sote_wiki_guide_300px[1].jpg)
Main Entrance - Main Gate Plaza 
Main Entrance - Yard 
Main Entrance - Bridge
Church District

Church District - Scadutree Base 
Church District - "Underwater" Level 
Church District - Surface Lower Level

Church District - Surface Upper Level 
Church District - Roof
West Rampart

West Ramprt - Lower Floor 
West Rampart - Upper Floor
Specimen Storehouse

Specimen Storehouse - First Floor 
Specimen Storehouse - Second Floor 
Specimen Storehouse - Third Floor 
Specimen Storehouse - Fourth Floor

Specimen Storehouse - Fifth Floor 
Specimen Storehouse - Sixth Floor 
Specimen Storehouse - Seventh Floor 
Specimen Storehouse - Dark Chamber
Back Gate

Lower Back Section 
Upper Back Section 
Loft 
East Balcony

Back Gate Ground Level 
Back Gate Upper Level 
North Balcony

Beams, Lower Level 
Beams, Upper Level
Shadow Keep Videos
Shadow Keep Walkthrough Video Guide
Speed Run Walkthrough
Shadow Keep Main Entrance
When you enter the main entrance of the Shadow Keep, ride the lift going up. Activate the Shadow Keep Main Gate Site of Grace, then make preparations for a boss fight. As soon as you enter the main plaza, you will be fighting the Golden Hippopotamus. After defeating the Golden Hippopotamus, you will obtain the Aspects of the Crucible: Thorns incantation, along with x2 Scadutree Fragment. Activate the Main Gate Plaza Site of Grace in this room.
Main Plaza to Specimen Storehouse
Proceed to the next section by going to the passageway left of the Main Gate Plaza Site of Grace, following the path going up. You will encounter Messmer Soldiers while traversing this path. Pick up loot that you can obtain along the way, such as x1 Festive Grease, and x6 Smithing Stone. As you go up a set of stairs, you will see a Black Knight wielding a twinblade. Enter the room, then clear it so that you can explore it. In this room, you can find the dagger Main-gauche from a dead body. In the room, you can find a window that you can drop down to so you can get to the courtyard. By the golden tree in the courtyard, you can pick up the Talisman of Lord's Bestowal just beside it. You can also loot x2 Smithing Stone [8] from a nearby room on the corner that has a scaffolding. Backtrack your way to the stairs going up, then keep following it. You can loot another room for x4 Smithing Stone [1] while progressing. You will then end up in a dining room filled with Messmer Soldiers and Black Knights.
Clear the room of the enemies, then loot the area for x1 Golden Vow and x1 Shadow Realm Rune [6]. Head out the room, and you will be on top of a rampart. On the left side, you can pick up x1 Holyproof Pickled Liver from a dead body by the dead-end. Follow the path on the right, killing the Vulgar Militiamen and any enemies that you encounter. You will see a ramp going down, which contains a door that you can open as a shortcut from the main plaza. Climb up the ramp, then explore the area filled with boats to your right. You can pick up x1 Rada Fruit, x1 Silver Pickled Fowl Foot, and x3 Smithing Stone [8] in this area. By the remains that you obtained the Silver Pickled Fowl Foot from, you can climb down a ladder leading you to a waterfall area. Follow the path, which will lead you to a dead body containing x1 Somber Smithing Stone [8]. Go back to the waterfall, then head inside the room hidden by the waterfall. At the end of the passageway, you'll obtain the Domain of Dragons Painting. Head back out, backtrack your way to the ramparts, then head up the stairs. By the ramp going down to the Main Gate Plaza Site of Grace, you can find summon signs to fight Needle Knight Leda (yellow) or Hornsent (red). When you defeat Hornsent, you will receive the Falx and Hornsent Set. Defeating Needle Knight Leda will give you the Ash of War: Swift Slash and Leda's Rune. After defeating Hornsent and Needle Knight Leda, head up the stairs. You will encounter a Fire Knight patrolling and blocking a passageway. After defeating the Fire Knight (or running from it), go inside the room then ride the lift going up.
To West Rampart
After riding the lift, you will then end up in the Specimen Storehouse. The Storehouse, First Floor Site of Grace can be activated in this area. As you explore the first floor, you can find a room on the left near the Site of Grace which leads to another lift going down.
This section of the map is filled with Living Jar enemies, so be careful in exploring this area. As you arrive at the bottom, you will immediately find loot in the other room. Grab the loot, which will be x1 Gold-Pickled Fowl Foot. Defeat the Living Jar in the room, then head back until you find another hallway on the left side. In this hallway, you can pick up the Ash of War: Wall Sparks from a dead body hanging on the railings of the balcony.
Continue heading down the path, and you'll find a Living Jar sprinting towards you from the stairs. After defeating the Living Jar, you can find a room hidden by a section parallel to the stairs, which contains the Battlefield Priest's Cookbook [4].
After looting the hidden room, go down the stairs the Living Jar was sprinting from, and you will end up in an area filled with Living Jars.You can loot the Iris of Grace in this area, which is an item needed for later. Head down the room directly opposite of the Iris of Grace, then head down the stairs to find the West Rampart Site of Grace, which is one of many entrances to the Shadow Keep. You may then return to the Storehouse, First Floor Site of Grace.
Storehouse, First Floor
Keep following the path going north until you find a room with x3 Hefty Beast Bone. Ansbach will be in the northeastern corner of the room. Talk to him and exhaust all his dialogues for later. Head out of the room, then keep going west until you see a staircase going up. There will be multiple Shadow Undead and a Fire Knight near the area. You can loot x1 Smithing Stone [6] from the section that the Fire Knight is patrolling in. Head up the stairs then go right until you see a Shadow Undead looking over a railing on the east side. Before jumping to the room, pick up a Smithing Stone [5] on the railing opposite to the Shadow Undead. Jump down to the room to get the Boltdrake Talisman +3. In this room, you can pull the lever to open a hidden path leading you back to the central library. Once the path opens, you can pick up x2 Ember of Messmer right by the opened path. Backtrack your way to the second level, then go left this time. Pick up the x4 Black Pyrefly on the western part of the room, then go up the stairs nearby.
You will encounter numerous Shadow Undead in this area and a couple of Fire Knights. After getting the talisman, follow the ledge going south. You can pick up a Furlcalling Finger Remedy along the way. Numerous Shadow Undead will be in the area. When you get to a specimen that you can jump on its foot, look on the other side of the railing to find an area that contains the Dueling Shield south of it. Return to the area with the hanging specimen, then follow the path going to another room. In this room, there will be a Fire Knight alongside Shadow Undead enemies. After clearing the room of enemies, you can get x2 Lump of Flesh and x4 Beast Horn here. Go back to the hanging specimen, then jump on its feet. You can drop down to a structure to obtain a Revered Spirit Ash.
Storehouse, Fourth Floor
Climb back up to the specimen, then cross it to an area in which you can activate the Fourth Floor Site of Grace. In the Site of Grace area, you can pick up a Scadutree Fragment and a Storehouse Cross Message. Head outside, and you can loot x3 Stormhawk Feather immediately on your right after heading out. Follow the path going left until you encounter a Fire Knight. Before the stairs where the Fire Knight is at, there's x4 Black Pyrefly on the right side of the stairs. After defeating the Fire Knight, keep following the path until you encounter two giant bats. Afterwards, you can progress by entering the room near where you fought the giant bats.
In this room, you'll encounter numerous Shadow Undead and a couple of Fire Knights. Climb up a staircase heading west, in which you'll find x1 Silver-Pickled Fowl Foot on a dead body at the top of the stairs. In this level, you'll find a room that has a lever that you can pull to move the structure inside the specimen storehouse up, giving you access to its final level. Pull it, then in the same room that you pullled it, you can jump onto a beam that leads to progression. Do not go there first, as you can explore the area to find the Storehouse, Seventh Floor Site of Grace, which is found after you go up another set of stairs near where you went up.
Storehouse, Seventh Floor
After discovering the Storehouse, Seventh Floor Site of Grace, you can find Redmane Freyja nearby. Talk to her, then backtrack your way to a staircase going down. In this room, you can pick up the Secret Rite Scroll (make sure to talk to Freyja first before picking this up) along with a Smithing Stone [6]. Give the Secret Rite Scroll to Ansbach back on the first floor, then teleport to the first floor Site of Grace. Return to Ansbach, and he will give you the Letter for Freyja. Go back to Redmane Freyja, then give her the letter. You will receive the Golden Lion Shield.
After giving the letter to Redmane Freyja, you can head down the stairs near the Site of Grace, then head straight to go to the lever room. Jump on the beam to traverse the structure, going up until you find a balcony that you can jump off to. After jumping to the balcony, clear the Shadow Undead as you go forward. Follow the stairs going up, and you'll end up in a bridge with a Fire Knight guarding a door, and a room opposite of it. If you choose to clear the room, you can find x3 Ember of Messmer here. The only way to progress is to fight the Fire Knight captain blocking the door. Defeat the Fire Knight Captain, and you will receive x1 Winged Serpent Helm and the Ash of War: Flame Spear.
Open the door to progress. Immediately after opening it, you'll find a Scadutree Fragment. Head up the stairs, then you can discover the Dark Chamber Entrance Site of Grace. If you open the door near the Site of Grace, it will lead to the fight with the final boss of this area, Messmer the Impaler.
After defeating Messmer the Impaler, you will receive the Remembrance of the Impaler along with the Messmer's Kindling, a key item to enter the next legacy dungeon, Enir-Ilim.
Church District
You can access the Church District by approaching the Shadow Keep from the east side. The Church District High Road Site of Grace's path directly leads you to the entrance of the Church District. Enter through the access on the eastern side, and you'll find the Church District Entrance Site of Grace. Traverse through the rooftops, in which you can find items such as Crab Eggs, Thin Beast Bones, and Strips of White Flesh. From the dead body that you looted the Strips of White Flesh, head west then make a jump to progress. Once you are across, you will encounter enemies such as an Ignited Putrid Corpse and a Fire Knight. Keep heading deeper to where the rooftops lead you, and you will find a Slumbrering Egg.
Next, head east and you will see a ramp-like structure in one of the run-down churches. Do a running jump to get to it, and you'll find two openings. Drop down the structure on the right side, then loot the body containing x3 Stormhawk Feathers. Afterwards, drop down to the opening of the ceiling. As you explore the area, you will find a locked door that needs the Prayer Room Key to enter. This can be obtained by defeating Fire Knight Queelign at the Church of the Crusade. If you unlock the door, you can find Fire Knight Queelign (NPC). If you talk to her if you have the item Iris of Occulation or Iris of Grace, you can receive items from her. The Iris of Occulation can be obtained as a drop from a Lesser Ulcerated Tree Spirit later on.
Proceed northwest of the doorway to progress through the Church District. You can find an armory that has x1 Rune of an Unsung Hero along the way. Keep heading down the hall, and you'll encounter a Fire Knight. You'll also find a room that is inaccessible for now, and you'll see a statue of Marika that has an item which you can't reach (for now). In this hallway, the second doorway on the left side will lead you to the Specimen Storehouse through a lift. You'll find the Storehouse, Back Section Site of Grace if you go far enough that path. To progress, exit through the first doorway on the left side of the hallway.
Keep following the path, while also killing the Giant Bats you encounter. You'll come across an archway with a ladder beside it. Climb up the ladder, and you will find the mechanism that will drain the water from the flooded section of the Church District. Use the mechanism to clear the flooded section of the Church District to gain access to sections that were once submerged in water. After the water has been drained, you can go back to the statue of Marika to acquire a Scadutree Fragment. Be careful when jumping off of the statue, as there are Ignited Putrid Corpses. Behind the statue, you can find the Fire Knight's Seal.
Exploring the Sunken Chapel
Go back to the Church District Entrance Site of Grace to immediately access the once-submerged area. From the Site of Grace, go left, then use the lift to go down. In this area, you can explore the grounds for loot. You'll see a large tree at the center of the church ground. If you approach the tree, you will encounter a Lesser Ulcerated Spirit Tree. After defeating the tree spirit, it will drop the Mantle of Thorns sorcery. You'll also find a dead body by the tree containing x1 Somber Smithing Stone [5].
East of the chapel grounds, you can fight another Lesser Ulcerated Tree Spirit, which drops the Iris of Occulation. You can give this to Fire Knight Queelign in the prayer room once you have it unlocked. If you give it to Queelign, she will give you Queelign's Greatsword. You can freely explore the area to find x4 Rada Fruit, x6 Kukri, and x1 Shadow Realm Rune [5]. If you head north towards the main entrance of the main church, you can find various items lying around. You can pick up x3 Shadow Sunflower and Battlefield Priest's Cookbook [1] around the area. In a room inside the church, head down the stairs and check the upper platform to find a door. This room contains a lift that you can ride down to an underground section of the area. You will find the Tree-Worship Site of Grace in this area. Afterwards, you can teleport to the Storehouse, Back Section Site of Grace if you activated the Site of Grace earlier.
Storehouse, Back Section
Once you have arrived at the Storehouse, Back Section Site of Grace, follow the path until you come across a ladder. Keep going straight, not going up the ladder, to find loot such as x1 Glintslab Firefly and the Carian Thrusting Shield. Backtrack your way to the ladder, then climb up. You'll encounter a Fire Knight and two Shadow Undead. Continue walking down the path and onto the stairs, being cautious of the Fire Knight roaming on the floor above. Kill all the enemies that you'll encounter, while also looting items such as x3 Fire Coil, x4 Rada Fruit. On the balcony, you can loot a corpse for the Fire Serpent incantation. Go back, and you'll find an opening behind the bookcase. Go through the path, then keep going up the ramp. You'll find x6 Shadow Sunflower and a Blessed Bone Shard as you are traversing through the scaffolding. You will eventually arrive at the Storehouse, Loft Site of Grace. Activate it, then you'll be ready to explore this section.
Storehouse, Loft
Use the lift north of the Site of Grace, and you'll be at the beams at the top of the Specimen Storehouse. As you explore the beams, you'll see a ladder across the beam where you first arrived. Go to the ladder, making sure to loot the body nearby it for x7 Thin Beast Bones, then go up the ladder. In the level you are currently at, you can find a Smithing Stone [7] at the southeastern section. You can also find a giant gear that you can jump off to to obtain the Wrath from Afar incantation. Jump to another beam from the giant gear, and you'll find a lift with the Fire Knight Hilde summon on top of it. You'll encounter Fire Knights in this area, so be cautious. The lift going down will lead you to an area with x1 Rune of an Unsung Hero, and a Fire Knight that you can get a jump on. Return to the level above, then keep exploring the area. Across the beam connecting to the lift, you can find a ladder. Climb down using the ladder, and you'll find a dead body with x4 Rada Fruit. Near the ladder, you can find another ladder that you can climb down of to get to a platform.
If you head out of the archway northwest of the platform, you can ride a lift going down. Follow the path, take the stairs going down, and you will end up in an area with a lift and a locked door. Since you can't open the door from this side, you can use the lift to go down. Once you have arrived at the bottom of the lift, you'll end up in a room with the Shadow Keep, Back Gate Site of Grace. If you go outside, you can fight Commander Gaius. The other room will contain a Scadutree Fragment.
Elden Ring Shadow of the Erdtree Walkthrough - Ancient Ruins of Rauh
Elden Ring Shadow of the Erdtree - Path to Ancient Ruins of Rauh
- Activate Viaduct Minor Tower - Site of Grace
- You will encounter Hornsent on your way to the Church of the Bud
- Fight Devonia, Crucible Knight
- Eliminate Furnace Golem
- Fight Romina, Saint of the Bud
- Points of interest will be added soon.
Crossing the Bridge from Shadow Keep
If you have been following this walkthrough, teleport to the West Rampart - Site of Grace in Shadow Keep. If you haven't unlocked this section, please see Shadow Keep or the Shadow Keep Tab on this page for the full walkthrough on how to reach the area.
From the Site of Grace, enter through the small archway on the right side of the bridge. It is recommended to ride Torrent here as you cross the bridge so you can move faster and loot as you travel. There will be giant bats on this bridge but you will move fast enough and they shouldn't be able to reach you. You will find bootable corpses here, the first one to the left which is a Smithing Stone [3]. Up ahead, you can loot more 3x Beast Liver, 3x Beast Blood, Smithing Stone [4], 5x Redflesh Mushroom, 8x Thin Beast Bones, and a Somber Smithing Stone [2].

At the other end of this bridge, you will encounter a Fire Knight wearing a red cloak. It wields dual daggers and can cast fire magic and will drop Salza's Hood and Rain of Fire upon defeating it.
Go inside the building behind the enemy you just defeated and take the Somber Smithing Stone [9] from the corpse on the corner. Take the spiral stairs next to it and you will reach an elevator at the top. This will take you to a new gate and then, interact with the Viaduct Minor Tower - Site of Grace here.
Exploring the Southern Area
- The southern area of the Ancient Ruins of Rauh covers exploring the parts near the Site of Grace. This includes the area below you that is accessible via the elevator in the small pond.
Go through the archway and go to the right side. Stick to the wall and go ride past the thick greenery here. You will go around this building and at the back, you can pick up the Golden Horn Tender. Go back the same way you came from, return to the entrance side, and head southeast past the small pond. You can see some boar creatures hanging out here and go behind this tree. Look for the corpse lying on top of a stone slab and pick up the Spirit Calculus. Then, use the elevator to go down to the lower level.
As you go down, face the southwest direction so you are ready for the Bloodfiend waiting here. Then, follow the path behind it where a group of Bloodfiends is gathered. This can be difficult since you are outnumbered, but if you have a magic build, you can use Adula's Moonblade to effectively take out the group. After fighting them, you can pick up Somber Smithing Stone [8] from the corpse behind the group. From here, face the southwest direction and exit through the small hole. Go to the right side and go past the bloodfiend. There's a corpse near the edge and you can pick up 8x Thin Beast Bones from it.
Now look behind you; you should be facing southeast here and go towards the edge and jump down on the steps below you. Look to your right and fight the lesser Golden Hippopotamus. This looks just like the boss at the Main Entrance of Shadow Keep but this one has a smaller health pool. It can also pull off the same moves just like the boss version. Upon defeating it, it will drop a Scadutree Fragment. You are now done with this section. Return to the Site of Grace and continue exploring the eastern area through the felled tree.
Eastern Section

Upon exiting the archway, face the western direction and go through the collapsed tree. Follow the path ahead where you will see small creatures and make a right to to enter the building marked by these 2 standing lanterns. This area is filled with shadowy enemies and there are variations of them. Others are hunched on the ground, while there are some walking around carrying a jar. Take note that some of these enemies carry an important item. If you see them glimmering in the dark, eliminate them to take their item.
As you enter, go to your immediate right and climb up the overgrown roots. Head towards the northeast and turn left behind the pillar to pick up the Somber Smithing Stone [9] from the edge of this root. Go around this area and return to the entrance side and eliminate the shadow enemy carrying a jar here. This one is carrying a Revered Spirit Ash and a Silver Horn Tender. Pick it up later after you fight the lesser Curseblade Labirith. This behaves similarly to the boss but has a lesser health pool. After defeating these enemies, face the northeast where you see this tall door.
Don't enter through the door yet, instead turn left and you will see this burning cauldron. You can pick up the Fire Spiritstone on the right side of this cauldron. Then, return to the door but make sure to defeat the nearby enemies here so they can't interrupt you. Open up the door and head down the steps. You will be fighting a Giant Scorpion here, then turn left where you will fight more of these Giant Scorpions. You can pick up the Shadow Realm Rune [5] just past this lit stone.
After picking up this item, look behind you and attack this illusory wall. Go inside and pick up the Bondstone and Antiquity Scholar's Cookbook (2). Leave this area and turn right to progress. Go down the steps where a group of shadow enemies are gathered. Pay attention to the glimmering one carrying a jar and make sure to eliminate them to get 3x Spirit Calculus from them. You can also pick up a Broken Rune in front of this square hole to the southeast. (Take note of this location because you will be coming back here later)
Go through this square hole and once you reach the other side, you will be fighting more Giant Scorpions. Watch out for the ones hiding and sleeping on the ceiling. They will attack you as you approach this loot on the corner. Go up the stones and take the Somber Smithing Stone (6) from the corpse here. Exit this area and turn right. Look for this glimmering enemy carrying a jar and defeat it. It will drop a Scadutree Fragment and Golden Horn Tender.
Then, look behind you and face the northeast direction. You will be able to see this lesser Curseblade Labirith on the second pillar. This one refuses to go down unless you go near it so you can just use range attacks to defeat it without getting damaged. After killing it, walk in front of you and pick up the 5x Throwing Dagger on the next alcove.

From the last alcove, turn right, then left. You will be facing a group of shadow enemies and a giant scorpion here. Make sure to take them out before you continue exploring here. Loot the corpse here to get Glass Shard. Continue up ahead and turn right to this room where you see a scorpion suspended in the air. You can see multiple corpses on the ground with loot on them but you need to eliminate this enemy first. Try not to the aggro of the Giant Scorpion on the other by doing ranged attacks. After doing so, pick up the x2 Sliver of Meat, x3 Scorpion Liver, and Spider Scorpion Ashes.

Head to the next area filled with white flowers and defeat the Giant Scorpions here. You can also pick up 2x Dewgem from the corpse here. Then, return to the other side of the square hole that you entered earlier. Trace your steps and return to the area where the shadow enemies are gathered. Open the door here facing southwest, then, take the 5x Rauh Burrow from the corpse to your right.

Follow this path until you reach this Spiritspring with surrounding nails. You can jump down here while riding Torrent and you will not be damaged. Face the southeast direction and go to the very end of this path. Pick up the Shadow Realm Rune (6) behind the Spiritspring. Don't go up the spiritspring and head back towards the area where you came from.
Turn right behind the 3rd pillar, and then go up the thick roots to pick up the Fine Crucible Feather Talisman. Then, head southwest and exit through the small archway at the end. Turn left and you will see an item on the top of the first archway to your left. Behind it, you can use the overgrown branch to climb this arch and then pickup the Shadow Realm Rune (7) from the corpse. Continue riding southeast and you will reach the outdoor area.
When this enemy comes into view, don't try to take its aggro right away. You want to be able to reach the nearby Site of Grace here by walking only on the right side. Stick to the edge on your right and you will see Miquella's Cross here near the edge. The Rauh Ancient Ruins, East - Site of Grace is on your right and you can pick up an Ancient Ruins Cross Message and Scadutree Fragment on the ground near the cross.
From the Site of Grace, face northeast and go towards the pillar here. Walk over the edge to find an item near the waterfall. Pick up the Ash of War: Dryleaf Whirlwind here. Then, return to the enemy that you saw earlier. This Lesser Crucible Knight will drop Devonia's Hammer and Crucible Hammer-Helm upon defeating it.
After defeating this enemy, cross the bridge facing southwest. There's a Furnace Golem at the other end of this bridge and it will start attacking you as you jump down. There are also shadow enemies along the way and you can pick up 4x Dewgem and 2x Flight Pinion. Then, jump down to the right side here. Ride up ahead but make sure to sprint so you can safely reach the covered area here. Then, go past the Furnace Golem, and don't fight it for now. The Rauh Ancient Ruins, West - Site of Grace is in the area behind it so you want to get the checkpoint first.
The Western Section Part 1
From the Rauh Ancient Ruins, West - Site of Grace, go down the ramp and fight the Furnace Golem. It will drop the Crimson-Sapping Cracked Tear and a Furnace Visage upon defeating it.

After fighting the Furnace Golem, teleport to the Site that you had just activated. Face the southwest direction and go toward the double archway. There are different shadow enemies here, like shadow mage and shadow hound. Eliminate them as you go and go up the stairs to the right. You can pick up a 6x Kukri on the steps and Whiteflesh Mushroom from the enemies.
Go up the steps, then, go to the right side and eliminate the glimmering shadow enemy carrying a jar here. It will drop x3 Spirit Calculus and a Rauh Burrow. Then, defeat the 2 Shadow Mages here. At the center of this map, there's a Lesser Curseblade Labirith. This one uses death spells and is just as dangerous as the boss version. On the northwest side, there's an altar where shadow enemies are worshipping. Go towards it and pick up the Scadutree Fragment.
Then, explore towards south and then turn right. Make sure to pick up the Rauh Burrow and 2x Spiritgrave Stone along the way. Then, use the elevator at the end of this path that will take you to the stone pillar section. Go to the left then jump down on the stone pillar below you. Try to land on the widest portion here and follow the steps 1 to 3. When you get to the 3rd jump, look to the pillar behind you and pick up the Four-Toed Fowl Foot from the corpse.

Keep following the steps here and then face southeast and jump towards the building on the far end to the left. Eliminate the 2 enemies holding a candlestick standing in front of the steps here. Face the building and go towards the square hole to the left, then turn left again to reach the chest. You can get the Talisman of All Crucibles inside.
The Grand Stairway Section

While facing the chest, exit through the square hole to your right. Use the elevator to go up, and you can already see the Ancient Ruins, Grand Stairway - Site of Grace from the top. Walk towards it and activate it.
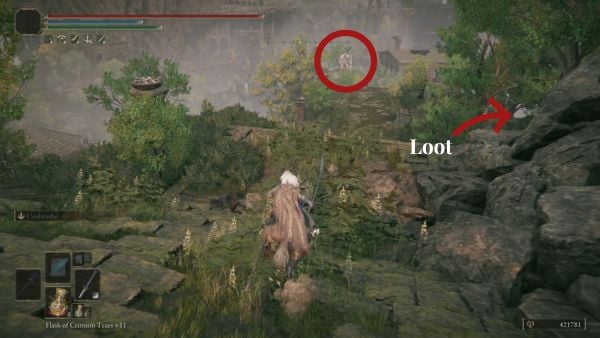
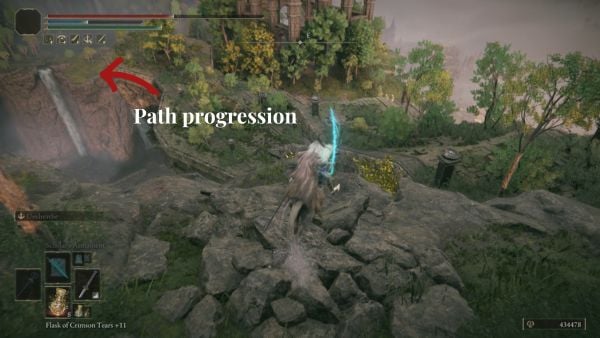
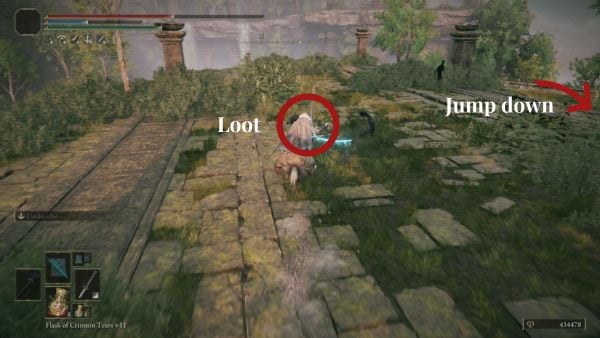
Face the northwest direction, jump down the stairs, and then turn right to get loot. Stick to the wall to your right and then go to the very edge here to pick up a Spirit Calculus from a corpse. Then, return to the grand stairway where you see the archer version of the Golem Warrior. You can go up the ramp behind it and take it out. This enemy is weak to heavy attacks so make sure to take full advantage of its weakness.

Go down the broken bridge here and cross towards the northeast. Near the end of this bridge, you will find a corpse in the middle and you can take a Shadow Realm Rune (7) from it. Then, jump down on the right side. There's a Divine Beast Dancing Lion field boss here, and it's up to you if you want to fight it but you can run away from it by jumping down on the northeastern platform. This disables the fight and the boss will not chase you.

There's an elite enemy in the middle of the pool. This one wields a dual curved sword and will drop the Divine Bird Warrior Gauntlets upon defeating it. Go up the ramp on the left side to pick up 2x Beast Bones. Then, go to the area behind the boss to pick up Verdigris Discus. Continue exploring the southern area here to pick up a Redflesh Mushroom from a corpse next to a pillar. This is your last stop in the Grand Stairway section and you will now return to the Rauh Ancient Ruins, West - Site of Grace.
The Western Section Part 2
- This covers the rest of the exploration of the western section where you will be invaded by an NPC.
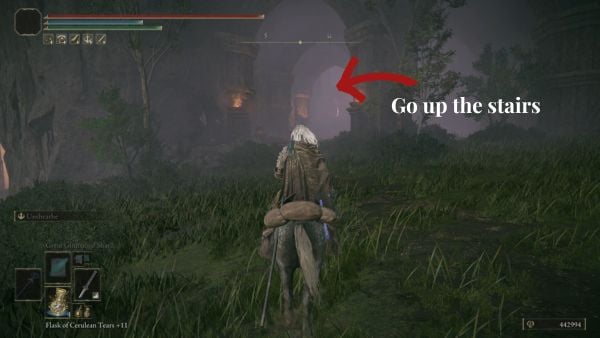
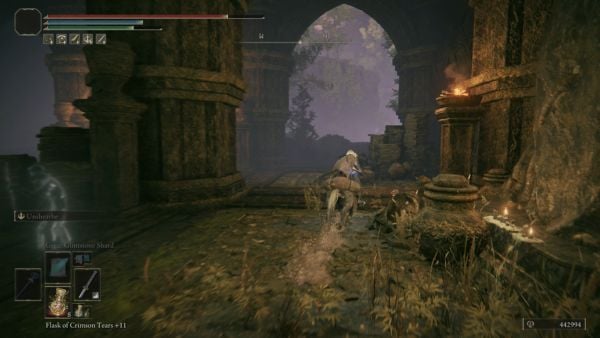
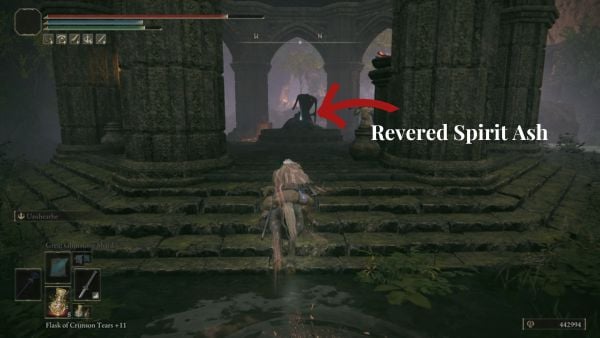
From the Rauh Ancient Ruins, West - Site of Grace, face the southwest section and climb up the stairs to the left. This is the same area that you explore earlier but instead of going to the left section, you will head northwest towards the outdoor area. Head straight into the gazebo in front of you and you can pick up the Revered Spirit Ash on this altar. Watch out for the enemy nearby but since you are riding Torrent, you can just outrun them.
Continue exploring the path behind this gazebo and make sure to pick up this Rauh Burrow on the wall. Take note of the location on your left because you will be returning here later. For now, continue ahead and jump down on the platform behind this stone.

Go to the bottom of the steps and head northeast. You will find hounds inflicted with Scarlet rot here and you can pick up Golden Horn Tender from this corpse in the middle. There's a Bloodfiend here in the middle of this section but it's up to you if you want to fight it. You can get 5x Sacred Bloody Flesh if you want to fight it. Continue traveling north where you will encounter another Bloodfiend, then turn left where more enemies are waiting. Take out the hounds and bloodfiends here for a chance to get Beast Blood and a piece of the bloodfiend's gear, like Bloodfiend's Fork.
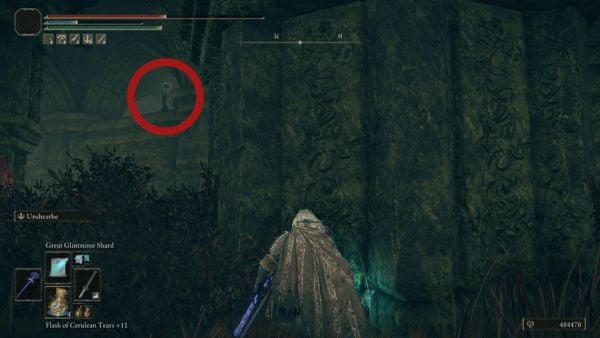
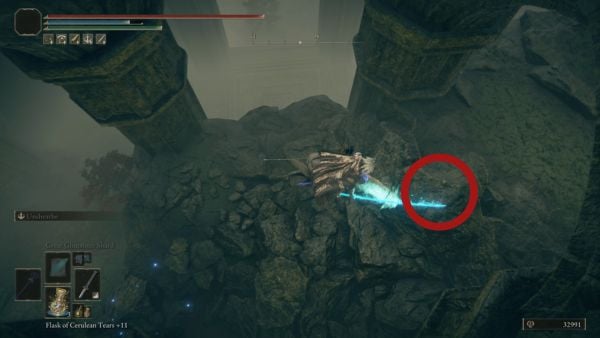
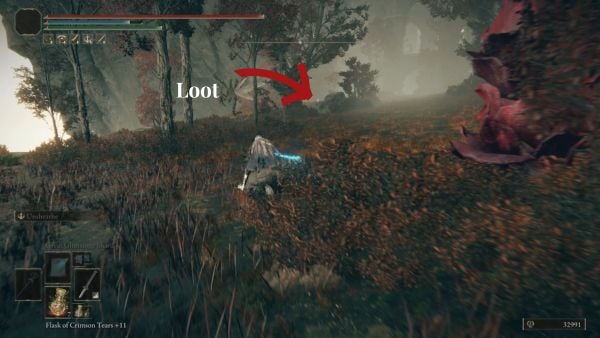
On the upper area, while facing northwest, you will see this glimmering shadow enemy holding a jar on its head. To go there, you need to head to jump down on the area below it. Summon Torrent and try to land on the highest part here to minimize your fall damage. The elevator is right here when you go down, but before that,m make sure to head to the area on the northeast. This area is protected by giant flies so you need to eliminate them first.
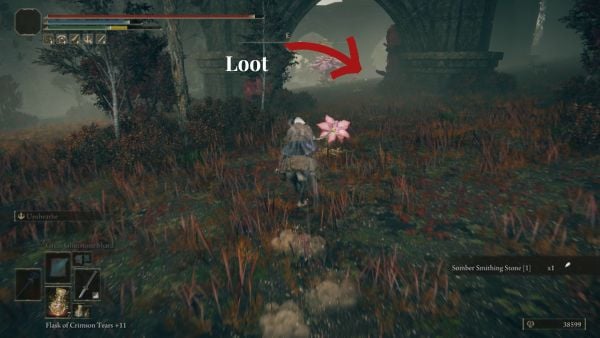
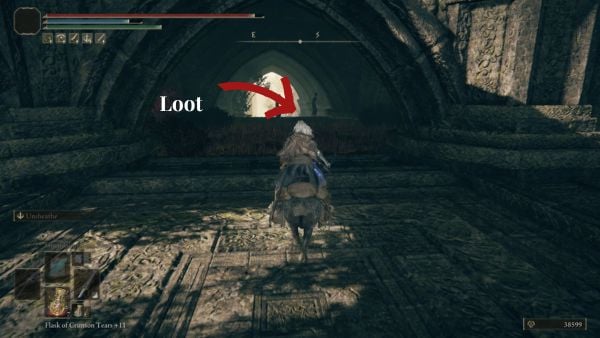
Take the Somber Smithing Stone (1) from the corpse lying on the stone. After doing so, head east where you see the Pink Flwoerbloom. Go towards it and then pick up the Aspects of the Crucible: Bloom. Now, return to where you jumped down and take the elevator to go up. On the top level, you will reach the shadow jar enemy. This one drops a Revered Spirit Ash and you can eliminate the nearby enemies to get a Redflesh Muishroom and Silver Horn Tender.

This is your last stop in this area and you will now be returning to the area that we mentioned that you will be coming back to. Jump down on the same ledge that you are facing as you approached the loot, then look behind this pillar and you will see a corpse here. Take the 3x Knot Resin from it then go up the stairs.

Turn right where you will be facing scarlet rot-inflicted enemies. There's a scarlet version of Lesser Kindred of Rot (Pests) here, be careful of them because they can deal a high amount of damage when you get struck by them.

Go to the northwest arch and pick up the Dappled White Cured Meat. To your right, there are more pest enemies here. There's a large group of them in the next section and try to cheese them as much as you can. If you have any ranged or magic attacks, make use of them to eliminate them before they get near you. You can obtain these items from the ground here: x3 Immunizing Cured Meat, x4 Fly Mold, and Smithing Stone (2). After fighting them, exit through the archway on the left side. Look on the stack of stones to your right and you will see a corpse here. You can pick up the Greater Potentate's Cookbook (9) from it.
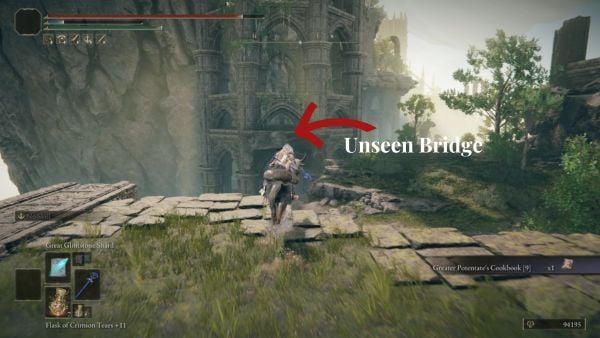
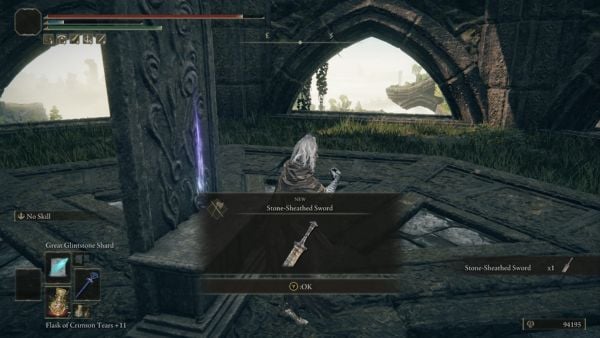
Face the tower to the northeast and walk straight towards it. This is the Unseen Bridge that connects the main building to this tower. Cross to the other side and pick up the Stone-Sheathed Sword.
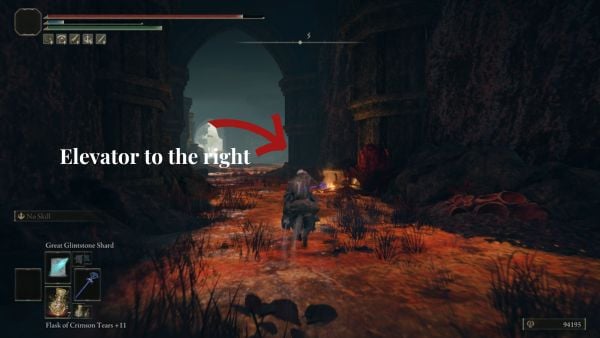
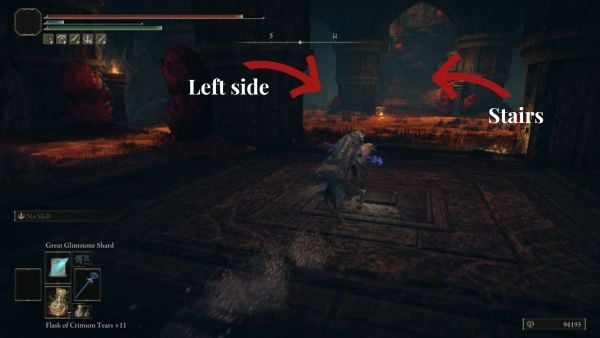
Go back to the main building the same way you got here and then continue exploring by going to the left past the room. Then, turn right to use the elevator that will take you to the upper level. There are more pest enemies here at the top and you will see the stairs in the middle. Just take note of these areas for now because you will be returning here later.

First, turn your attention to the nearest enemy standing next to the archway then go out to the area outside. Go past the gazebo and look at the corpse in the middle of the water. Go towards it and then pick up the Divine Bird Feathers.
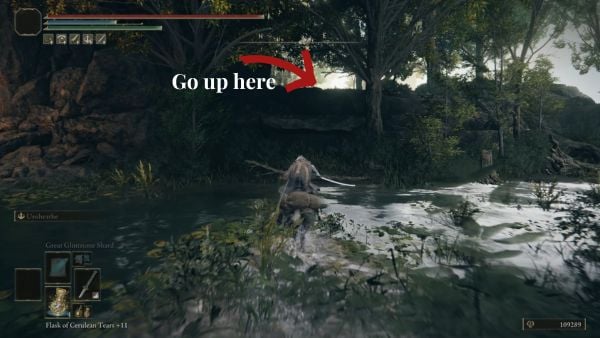
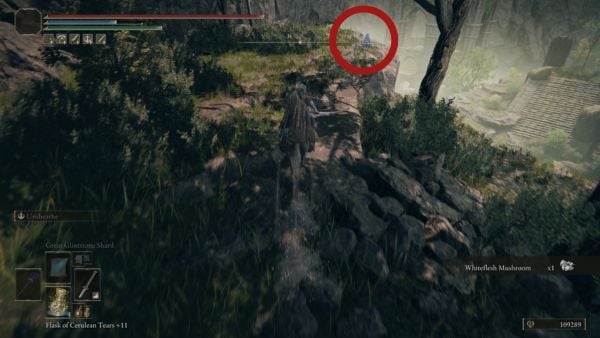
The elite enemy here will be aggro-ed upon picking up the item. Take your time as you deal with it and use the pillars of the gazebo to defend yourself against some of its attacks. After fighting it, go up the ramp and go to the edge. You will see the clusters of stones that unlock a Spiritspring after destroying it.

Jump towards the Spiritspring, then use it again to reach the area on the other side. Go to the right side and walk to the area behind the thick pillar and go around it to pick up x2 Beast Horn from the corpse. Then, go up the stairs that you saw earlier and open the chest at the top to get Mottled Necklace +2. Use the Spiritspring again to return to the other side. Head back inside where you used the elevator and then turn left.

Fight the pests that you will come across here and then turn right at the end. You can pick up the Pest-Thread Spears next to the wall on your right side. Go around this area and get ready for a fight before you head up the stairs. As you approach the top section, Hornsent will invade you. This is potentially a long walk back if you didn't activate the Spiritspring beforehand, but if you have been following this walkthrough, you will have a faster way of reaching this area in case you die.
The Spiritspring is located just northwest of the Site of Grace, in the pool area. Defeating Hornsent here will reward you with the following items:
Fight Romina in the Church of the Bud
Romina, Saint of the Bud, is a mid-sized boss with a body resembling a centipede, a scorpion, the wings of a butterfly, and a human. She wields a spear, centipede fangs, and a scorpion stinger, making her a unique foe. To defeat Romina, you'll need a balanced approach, mixing both offense and defense. When facing her as a melee character, focus not only on her central human body but also observe her centipede fangs and scorpion stinger, which act as her arms.
Defeating Romina Saint of the Bud will reward you 280,000 Runes and Remembrance of the Saint of the Bud. This fight will also let you access the Sealing Tree behind the arena. You will need Messmer's Kindling to burn the Sealing Tree to gain access to the final legacy dungeon. After the short cutscene, the real Enir-Ilim will be revealed and you will be transported to the base of Enir-Ilim.
Elden Ring Shadow of the Erdtree Walkthrough - Enir-Ilim
Elden Ring Shadow of the Erdtree Enir-Ilim - A Legacy Dungeon
- Fight Needle Knight Leda and her allies.
- Defeat the final boss.
All NPC Encounters and Fight: When you reach Needle Knight Leda's location in Enir-Ilim, you will be fighting some of Miquella's followers here. Depending on the choices that you have made so far, those who will be siding with Leda will vary. See the progression below:
- Needle Knight Leda attacks you no matter what your choices have been.
- Redmane Freyja: She will attack you if you hand the letter from Sir Ansbach in Shadow Keep. Defeating her here will drop her items. Otherwise, she will stay in the Storehouse and will disappear to leave behind her items (Need further checking on which items she will drop and where)
- Hornsent: Hornsent will go after you if you didn't summon him during the fight against Messmer.
- Moore: The merchant will attack you in this arena if you choose the dialogue to "Put it behind you"
- Thiollier: If you progress his quest and pass the message of St. Trina, he can be summoned as a cooperator.
- Dryleaf Dane: Just like Leda, he will attack you, no matter what your choices have been.
- Final Boss Fight: If you helped Ansbach and Thiollier with their quests, both of them can be summoned as cooperators.
Enir-Ilim is a Legacy Dungeon in Elden Ring. Enir-Ilim is a dungeon exclusive to the Shadow of the Erdtree DLC. You can gain access to an area containing a sealing tree by defeating Romina, Saint of the Bud in the Church of the Bud. You can then burn the sealing tree by using Messmer's Kindling, which you can obtain by defeating Messmer the Impaler. Enir-Ilim will reveal its true form after burning the sealing tree, teleporting you inside of it. [map coming soon] Video Walkthrough coming soon! Talismans Consumables Weapons & Shields Armor Spells Spirit Ashes Upgrade Materials Enemy Drops Keys & Other In order to gain access to Enir-Ilim, you must first defeat Romina, Saint of the Bud who is located in the Church of the Bud [See Elden Ring Map]. After defeating Romina, you will unlock the Church of the Bud Site of Grace in the Ancient Ruins of Rauh, which is a few steps away from the entrance to Enir-Ilim. Head to the archway south of the Church of Bud Site of Grace, and you will find a sealing tree. When you interact with the sealing tree, it states that it cannot be burned without Messmer's kindling. This means that you have to defeat Messmer the Impaler, located in the Specimen Storehouse [See Elden Ring Map], who will then drop Messmer's Kindling along with the Remembrance of the Impaler. Once you have Messmer's Kindling, you can head to the sealing tree to burn it, triggering a cutscene wherein Enir-Ilim's true form is revealed. After the cutscene, you will then be teleported to Enir-Ilim. Once you arrive in Enir-Ilim, look behind you to find a body containing x1 Somber Smithing Stone [9]. You will then discover the Enir-Ilim: Outer Wall Site of Grace [See Elden Ring Map], which is right next to the spot where you were teleported. Follow the path going east, up the stairs, in which you will see the Erdtree on the northeastern side. Keep following the path, then head up the stairs. Once you head up the stairs, a hostile Gravebird Knight will be approaching you. This enemy can fly, so watch out for its attacks. The staircase on the right is destroyed, so it leads to a dead-end. After dealing with the Gravebird Knight, head up the stairs on your left which leads to the First Rise Site of Grace [See Elden Ring Map]. If you go to the stairs heading up on the south side of First Rise, you will find a body that you can loot for x1 Somber Smithing Stone [5]. The staircase is destroyed, so it leads to a dead-end. Return to the bottom of the stairs, then head to the hallway heading east-southeast of the First Rise Site of Grace. You can loot a body containing x1 Messmerfire Grease just right before the archway. Enter the room to find a lift, which you will ride going down. Go down the stairs, which then leads to Belurat, Tower Settlement [See Elden Ring Map]. Head southwest of the First Rise Site of Grace, and you will see an archway leading to a staircase going up. Go up the stairs, and you will end up in a courtyard. There will be a body on your right that you can loot for x1 Broken Rune. There is a room on the western corner of the courtyard, which you will see two Tree Shamans, one attacking you and the other praying to a tree. In the room, you will find a doorway to a staircase on the northwestern corner of the room. Follow it, and you will see another Tree Shaman. After dealing with the shaman, you can pick up x1 Rune Arc on the ground. On the eastern side, you will find the continuation of the courtyard. A Greater Tree Shaman will be roaming around it, along with Tree Shamans praying in different corners of the courtyard. In the northeast side of the courtyard where you killed the Greater Tree Shaman, you can pick up x2 Lightningproof Pickled Liver from the body. Head down the stairs beside the body, leading you to the base of a tree with two hostile Humanoid Flies. Once you have killed the two enemies, you can pick up x8 Thin Beast Bones on the dead body that the two enemies were surrounding. Northeast of the tree roots is a body that you can loot for x3 Whiteflesh Mushroom. Two Humanoid Flies will land on you, which you can easily deal with. Traverse through the path on the west side of the giant tree roots. When you walk down the path, a Humanoid Fly will be hiding behind a root, waiting to attack you. You can find x4 Redflesh Mushroom on top of a root nearby. Straight ahead will be three Humanoid Flies inside a room, praying to a tree. After clearing the enemies, you can pick up x2 Revered Spirit Ash lying on the remains of a tree humanoid. Go back up the courtyard to head deeper into Enir-Ilim. Once you have found yourself back in the courtyard, head up the stairs on the southeast. You will encounter a Tree Shaman on top of the stairs. After killing the Tree Shaman, keep following the path until you encounter a Horned Warrior. After dealing with the Horned Warrior, you will see a platform on the northern side with a tree shaman and an item. You can drop down to the tree branches below if you want to go there. Immediately after dropping down, you can loot x3 Furlcalling Finger Remedy behind you. Cross the branches going north to get to the platform. Kill the tree shaman, then you can pick up the incantation Spira on the altar. You can then return to where you came from, then continue on from there. Keep following the path and stairs leading up. You can pick up x1 Dragonbolt Grease on the ground, but there will be a magic attack which seems to be coming from above. Sprint up the stairs, then kill Tree Mage responsible for the flurry of magic attacks. After dealing with the Tree Mage, you'll notice another Tree Mage on the rooftop of the structure, which you can deal with by using ranged attacks or incantations. A Tree Shaman will also be patrolling the area at the top of the stairs. If you don't clear the Tree Mage on the rooftop, it will keep casting spells on you as you're going up the stairs. You can sprint forward if you have no way of dealing with the Tree Mage on the rooftop. After clearing the two enemies, head up the stairs. You will find bodies that you can loot for x10 Fire Arrow and x10 Golden Bolt. Open the door at the top of the stairs to discover Spiral Rise Site of Grace [See Elden Ring Map] and x1 Scadutree Fragment. Head north of the room to climb up the stairs. There will be an opening on the left side of the stairs which lets you attack the Tree Mage earlier on the rooftop if you didn't get the chance to kill it. If you go back to the staircase, it will lead to a dead-end, so your only choice would be to traverse through the rooftop. Keep following the rooftop path by turning right as you exit through the opening. You'll encounter hostile large birds around the rooftop area, which you can easily dispose of. One of the birds will be hiding behind a corner, so be cautious of it. You can find x1 Smithing Stone [8] atop the roof near the part where the bird was hiding. Keep going west until you get into an opening of a walkway. There will be another large bird guarding a room and a tree shaman patrolling the stairs. You can sneak up on the bird to easily dispose of it. Enter the room that the large bird was blocking to pick up x1 Revered Spirit Ash. Continue heading up, and if you didn't deal with the Tree Shaman earlier, it will be in this room along with another Tree Shaman. Deal with the shamans, then continue through the archway on the western side of the room and keep climbing the stairs. As you get to the top of the stairs, you will find a room that contains x1 Scadutree Fragment lying on an altar. Keep exploring the rooftops, in which you will encounter a Horned Warrior. You can sneak up on it and try to do a backstab to make the fight easier. It will use frost magic along with the greatsword they are wielding, so be cautious of those attacks. On the northeast side of the rooftop, you can loot a body to pickup x2 Sunwarmth Stone. If you want to find more loot, go back to where you picked up the Revered Spirit Ash. In the middle of the stairs going up, you can drop down to a set of stairs. You can find x1 Silver Horn Tender on the edge of the staircase going down. Head up the staircase, and you will end up in a room containing x1 Horned Warrior Ashes and x1 Stanching Boluses. Backtrack your way up by climbing a ladder inside the room southwest. Head out of the ladder room, and you will find a body by the ledge containing x1 Golden Horn Tender. Climb up another ladder to get on the top floor of the structure, then jump off of it back into the rooftop where you fought a Horned Warrior using ice spells. Keep going by jumping up on the rooftop, and you'll find your way back to the structure of the First Rise Site of Grace, bypassing the destroyed part of the staircase. If you head down the staircase, you will find x1 Somber Smithing Stone [6] lying on the ground near the part where the staircase cuts off. If you look down the destroyed part of the stairs, you will see a platform containing an item. You can go there by jumping off of the stairs. You will get to pick up x1 Gravebird Helm if you choose to go to the platform. After looting the platform, you can jump on a staircase on the east side of the platform. Head down the stairs, and you will find an area with a lever that when pulled down, it will bring a lift to where you currently are. There will also be a doorway leading down to an empty room with a Tree Dancer hiding out of sight by the other doorway. The Tree Dancer will be quite nimble, so be patient while you're waiting for an opening to attack it. Once you have slain the Tree Dancer, there will be a broken staircase when you go through the archway leading outside. At the end of the staircase, you can pick up x1 Somber Ancient Dragon Smithing Stone from a dead body. Make your way back to where you pulled the lever then ride the lift going up. You will end up in a room with two Tree Shamans that you can easily dispose of. After clearing the room, head to the archway on the south of the room leading to a stairway going up. You will encounter a Horned Warrior patrolling nearby the area, which is different from the one you encountered earlier. It uses wind attacks to complement their greatsword, and it can also swing its greatsword successively. Wait for your turn to attack it. You can even stagger it if you have enough Poise damage with your build. After you have slain the Horned Warrior, enter the structure to discover the Cleansing Chamber Anteroom Site of Grace [See Elden Ring Map]. Southeast of the Site of Grace, you can pick up a Scadutree Fragment. Go through the archway on the east side of the Site of Grace, going up the stairs. Keep following the path, and you will encounter Needle Knight Leda who will invite you to challenge her and her allies. You can summon Pureblood Knight Ansbach to help you in this fight just beside Leda's summon sign. Redmane Freyja will be summoned first, followed by Moore, then Dryleaf Dane. You will then fight Needle Knight Leda after all the NPC invaders have been summoned. Once you have defeated Needle Knight Leda, you can pick up the equipment of her and her allies right after returning to your world. The bodies of her allies will be lying around the place, which you can then loot. You can pick up Moore's equipment - Moore's Bell Bearing, Verdigris Greatshield, and the Verdigris Armor Set. From Freyja, you can receive Freyja's Greatsword and Freyja's Armor Set. Lastly, you can receive the Dryleaf Armor Set and Dane's Footwork from Dryleaf. Head east through the archway, and you will find Needle Knight Leda's body containing the Oathseeker Armor Set along with Leda's Armor. After you have looted the place, head north of Needle Knight Leda's body and go up the stairs, leading you to a lift. Ride the lift going up. Once you arrive at the top of the place, you will see Ansbach right beside the lift. Go through the archway and up the stairs directly in front of you, and you will discover the Divine Gate Front Staircase [See Elden Ring Map]. As you reach the top of the stairs, you will find a boss fog that you can pass through. If you go through it, a cutscene will trigger, showing a familiar character that you have once fought. It is then revealed that the boss that you are going to face is Promised Consort Radahn. Radahn will be using the Starscourge Greatsword once again, even using an attack similar to the Starcaller Cry. He will also be using gravity orbs from afar, guaranteeing that you won't feel safe even if you are very far from him. He can also pull you or push you away from him using gravity. For a more-detailed guide on how to defeat Promised Consort Radahn, you can go to this page. After you have defeated Radahn, you will receive the Remembrance of a God and a Lord. The Gate of Divinity Site of Grace [See Elden Ring Map] will also be unlocked. If you look around the area, southeast of the Site of Grace, you can pick up the equipment of those who assisted you in the fight. You can pick up Thiollier's Armor Set along with his weapon, Thiollier's Hidden Needle, from his body. You can also pick up Ansbach's Set, his weapon Obsidian Lamina, and the incantation Furious Blade of Ansbach. In the middle of the arena, you can obtain the emote Let Us Go Together. You can play a memory, triggering a cutscene. After the cutscene, you will obtain the Circlet of Light. The area just before the Spiral Rise Site of Grace [See Elden Ring Map] has a lot of loot that you shouldn't miss. From the Site of Grace, backtrack your way down the stairs, then turn left to find a set of steps going down. As you go through the archway, there will be a room on your right containing x1 Inquisitor Ashes. Go to the other archway just before the room, and you will see a staircase that you can drop down to that has an item. Drop down to the stairs, and you can pick up x2 Fireproof Pickled Liver from the body. Head up the stairs, then look below the broken railings to find a ledge that you can drop down to. Look down on the southeastern section of the ledge, and you will find another area that you can drop down to. Drop down to it, then follow the ledge going south. You'll come across a broken section going to an item. Jump to get to the other side, and you can pick up x1 Holyproof Pickled Liver. After looting it, drop down from the broken section of the ledge, then pick up the nearby item, which is x2 Smithing Stone [8]. Follow the ledge going south. Be careful as there are pillars are blocking off some parts of ledge, making it tough to navigate. Keep hugging the wall just to be safe. When you go around the corner, you will find another area that you can jump down to. Jump down the area, then traverse the ledge going southwest. Keep following it, and you will acquire x10 Lordsworn's Bolt from a dead body at the end of it. After looting the body, follow the ledge to the other direction going down, and you'll be at a broken section of the ledge. Drop down it, and you will land near a hostile Shadow Undead. Kill it, then pick up x1 Somber Smithing Stone [5] nearby. Go down the stairs, and you'll find x10 Golem's Great Arrow from a dead body. To progress further, sprint jump down the window south of the dead body containing x10 Golem's Great Arrow. Once you have successfully jumped on the window, head inside the structure. The section you are in will be inside Belurat, Tower Settlement. Head out of the room, and you will end up in a courtyard. Pick up the x1 Scadutree Fragment by the covered statue. There are two other rooms that you can enter from the courtyard. The room on the east has a lift that you can take to return to Enir-Ilim, while the room on the south has a lift going down Belurat, Tower Settlement. Ride down the lift on the southern room. After taking the lift, head outside by going through the archway on the southeastern side of the room. Follow the path by going down a staircase which leads you to a room containing three Tree Shamans. After clearing the room, follow the path going southwest. Head down the stairs, and you'll encounter a Horned Warrior patrolling the area. You can either fight it head-on, or you can sneak around as the Horned Warrior is patrolling in a way that you can sneak around it. After dealing with the Horned Warrior with whichever method you choose, head inside the structure then go down the stairs on the western side. Go down the lift, and you will arrive in area with a bridge crossing to a door. Cross the bridge, then open the door. You'll find a dead body by the altar, which you can loot for the Euporia twinblade. Map Coming Soon Video Walkthrough coming soon! To gain access in Enir-Ilim, you need to defeat Messmer the Impaler to obtain Messmer's Kindling, and Romina Saint of the Bud to gain access to the area. Once you have defeated both of them, head to the sealing tree behind the Church of Bud then burn the sealing tree. You will be teleported inside of Enir-Ilim after a cutscene. After the cutscene, you can loot a body nearby for x1 Somber Smithing Stone [9]. Activate the Outer Wall Site of Grace beside you, then follow the path going through the archway. You will encounter a Gravebird Knight going down the stairs. Defeat the enemy, then go up the stairs to activate the First Rise Site of Grace. Go up the stairs near the Site of Grace to obtain a Somber Smithing Stone [5]. Afterwards, you can head southwest then pass through the archway to get to the courtyard filled with enemies. You can loot a dead boy for x1 Broken Rune near the trees in the courtyard. Enter the room, then fight the two Cursed Erdtree Priests inside. Head up towards the doorway with a stairs leading up, then defeat another priest. You can pick up a Rune Arc on a small shrine by the priest you just defeated. You will then face a Cursed Erdtree Shaman roaming in the bigger courtyard, along with priests scattered around the corners of the courtyard. Defeat all the hostiles in the area, then head up the stairs. You will encounter another priest which dies in two or three hits. Keep following the path, and you'll encounter a Horned Warrior approaching the area. Defeat the Horned Warrior, then look at the platform across the one you are on. Go there by traversing through the tree branches. You can obtain x3 Furlcalling Finger Remedy right where you dropped. As you get on the platform, you'll encounter a Cursed Erdtree Priest there. After dealing with the priest, you can then pick up the Spira incantation. You can head back dropping down, then going through the path you went from originally. Once you're back from where you dropped to the branches, follow the path going up. You can pick up a Dragonbolt Grease by the stairs, but there will be a flurry of magic attacks. The one casting the spell will be on top of the stairs, so you can sprint towards the enemy, a Cursed Erdtree Mage, to stop the attack. After that, you can deal with the mage on the rooftop near the next staircase going up by using ranged attacks. If you have no ranged attack options, you can just sprint to the top of the stairs, then defeat the priest on top of it. Along the way, you can loot dead bodies for x10 Fire Arrow and x10 Golden Bolt. Open the door to gain access to the Spiral Rise Site of Grace. Note: Right before going up the stairs to the Site of Grace, you can find a staircase going down which will eventually lead you to a room containing the twinblade Euporia. After activating the Spiral Rise Site of Grace, head up the stairs until you find an opening to the outside. Attack the mage, then turn right to go to the rooftop. You will encounter numerous gravebirds as you explore the rooftops. You can acquire a Smithing Stone [8] from one of the rooftops on the right side. Keep going west, and you'll find an area with broken railings that you can jump to. You will encounter a gravebird guarding a room with a chest containing x1 Revered Spirit Ash. Head up the stairs, and you'll come across Cursed Erdtree Priests that you can easily dispose of. Go through the archway, then keep climbing the stairs. You can find a room with x1 Scadutree Fragment on an altar. You will arrive in a rooftop section with a Horned Warrior that uses frost spells. After defeating the Horned Warrior, climb up the rooftop until you find an opening to the structure containing the First Rise Site of Grace. Keep heading up the stairs until you get to the top of the structure. You'll end up in an area with a lift, and Cursed Erdtree Priests on the corners of the room. After clearing the area, you can head outside through the archway. In this area, you will encounter a Horned Warrior using wind spells. After dealing with the Horned Warrior, go up the stairs to open the door leading to the Cleansing Chamber Anteroom, then activate the area's Site of Grace. You can pick up a Scadutree Fragment southeast of the Site of Grace. Follow the path, then head up the stairs. You will encounter Needle Knight Leda, challenging you to a fight. In this fight, you can summon Pureblood Knight Ansbach to assist you in defeating Needle Knight Leda and her allies. After defeating Needle Knight Leda, you can loot the bodies of her allies scattered around the arena to obtain their equipment, such as Moore's Bell Bearing, Freyja's Greatsword and Dane's Footwork, among other things. Proceed to the archway, then follow the hall until you get to a lift. Use the lift to go up, and you'll arrive in a room with Ansbach near the top of Enir-Ilim. Go outside then head up the stairs, and you can activate the Divine Gate Front Staircase Site of Grace. As you go through the boss fog, you will fight Promised Consort Radahn. For a complete guide on how to defeat Promised Consort Radahn, you may visit this page. After defeating Radahn, you will receive the Remembrance of a God and a Lord. You can also pick up the equipment of those that helped you in the fight. You can get Thiollier's Set and Thiollier's Hidden Needle from Thiollier's remains, while you will get Obsidian Lamina, Ansbach's Set, and the Furious Blade of Ansbach incantation from Ansbach's Remains. In the middle of the arena, you can interact with a memory to play a cutscene. After the cutscene, you will obtain the Circlet of Light.

General Information
First Rise [Map Link]
Spiral Rise [Map Link]
Cleansing Chamber Anteroom [Map Link]Enir-Ilim Map
NPCs in the area
Bosses
Items
Enemies
Notes
Full Enir-Ilim Walkthrough
Gaining Access to Enir-Ilim
Arrival in Enir-Ilim

Exploring Around First Rise


Heading Deeper into Enir-Ilim
Loot Detour

Spiral Rise Site of Grace


Heading up the Spiral Rise
Another Loot Detour

Going Up Enir-Ilim
Cleansing Chamber Anteroom Site of Grace

Encounter with Needle Knight Leda
Promised Consort Radahn
Obtaining Euporia
Belurat Tower Settlement Section
Enir-Ilim Map
Enir-Ilim Videos
Speed Run Walkthrough
First Rise
Spiral Rise
Cleansing Room Antechamber
Promised Consort Radahn
 Anonymous
Church with the Fire Knight is to the WEST. Cardinal directions (N, W, S, E) aren't subjective. Much love for the guides but that's really important.

 Anonymous
insane how much the authors struggle with basic cardinal directions

 Anonymous
The people who write these guides need to learn urgently where is east and where is west, so much time wasted with wrong indications.

 Anonymous
Bloodfiend's Sacred Spear is found in small pond directly west of the main section of the Shadow Keep, on the same plateau as the entrance to Taylew's Ruined Forge.

 Anonymous
scorpion river catacombs is in rauh base south of rugalea the great red bear in the river at the edge

 Anonymous
So I didn´t talk to the new NPC and just entered the shadowlands. Now my Charachter with 400 ish hours broke. Fun

 Anonymous
How to finish the dlc
Go belurat and kill boss
Go castle ensis and kill boss
Go Shadow Keep and kill boss
Go to the Church of the bud
Burn the sealing using kindling
Go enir ilim and kill the final boss
 Anonymous
The Castle Enis section skips over the area you get Wing Stance. You jump off the left side of the balcony where you get the Somber Smithing Stone 4, right near the Castle-Lord's Chamber SoG.

 Anonymous
The Castle Enis section skips over the area you get Wing Stance. You jump off the left side of the balcony where you get the Somber Smithing Stone 4, right near the Castle-Lord's Chamber SoG.

 Anonymous
Can anyone give farming location for smithing stone 7 and 8 in the dlc

 Anonymous
You can skip Rellana entirely. Just head down towords the Ruined Forge Lava Intake, but go left down to the poison swamp area with the Miranda flowers. Follow the swamp area and turn right towards Elder's Hovel. In the area after the swamp is a sealed Spirit Spring, the Stone Cairn is just a path ahead. By taking the jump, you reach the Fort of Reprimand.

 Anonymous
Logur, the Beast Claw is missing from this walkthrough! Drops Beast Claw, a new weapon type, when defeated. Can be found in the southern woods on the path to the Church of Consolation.

 Anonymous
Think the enemy at Church of Consolation actually dropped the great hammer instead of the shield.

 Anonymous
 Anonymous
Should I start NG or just pick up a game I already finished?

 Anonymous
Should I start NG or just pick up a game I already finished?

 Anonymous
 Anonymous
ive killed both on PC and still no NPC at cocooon map...wtf going on?




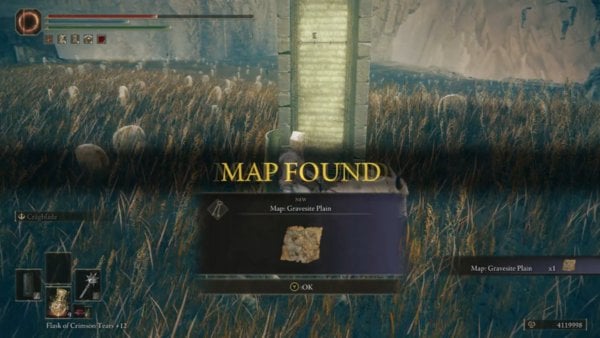
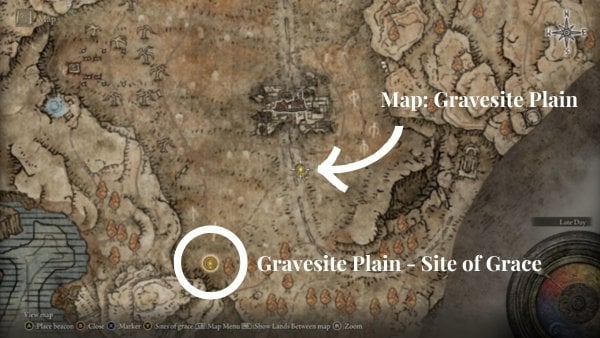
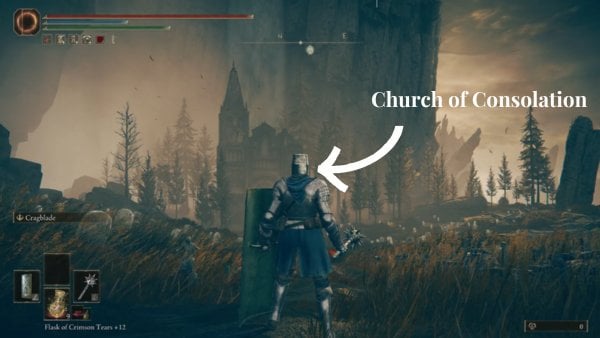
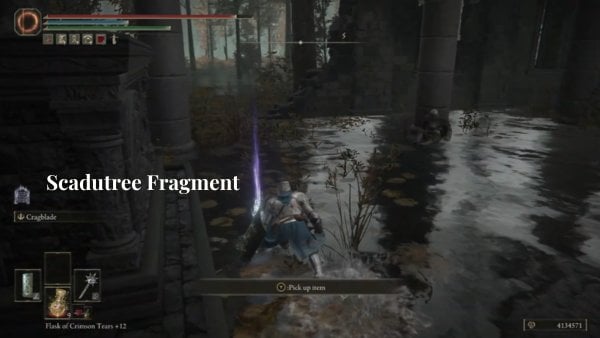
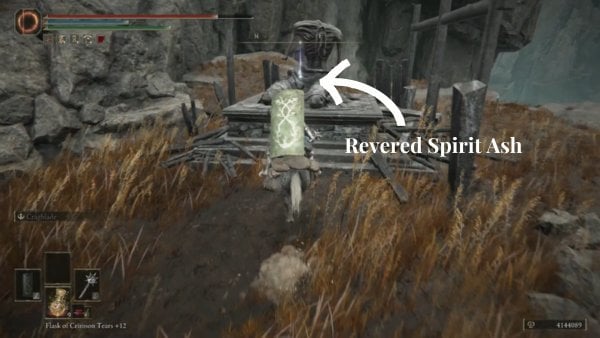
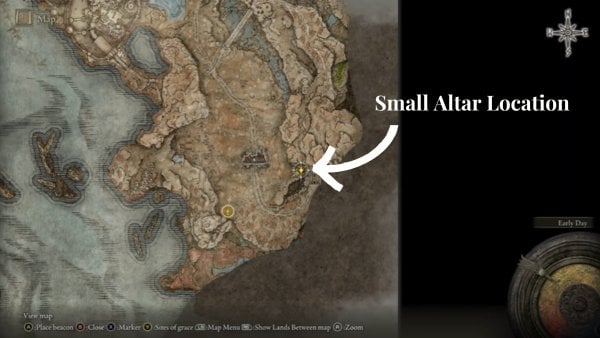
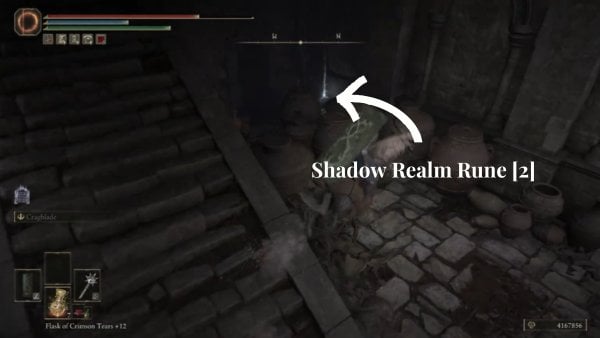
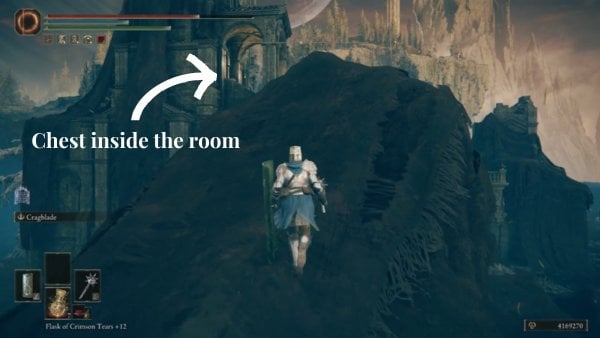
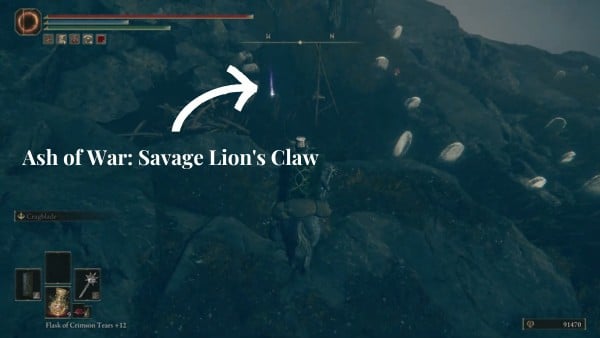
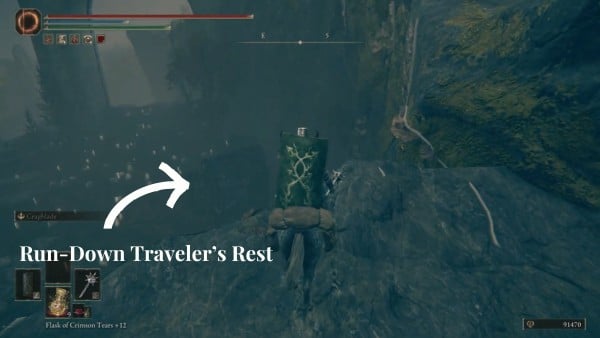


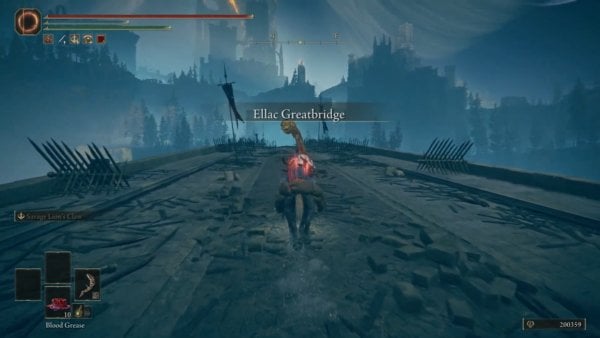
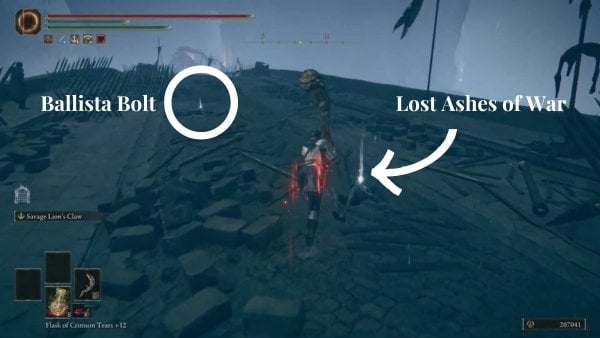
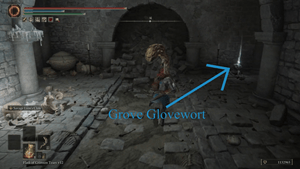
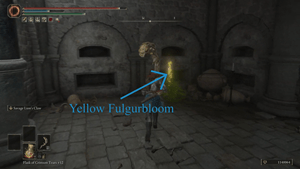
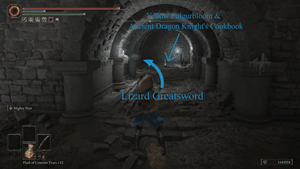
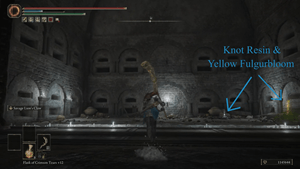
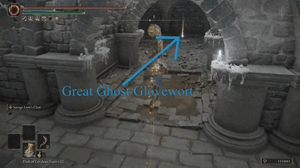
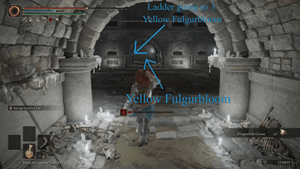
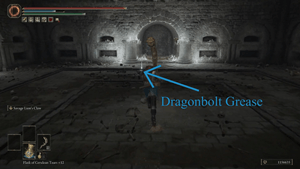
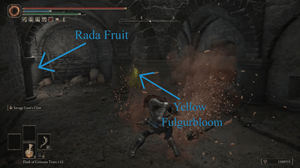
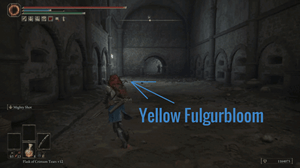
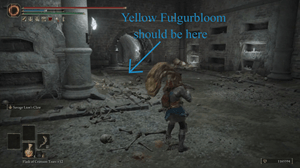
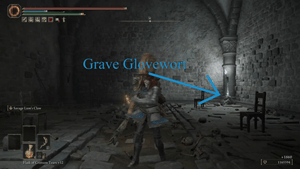
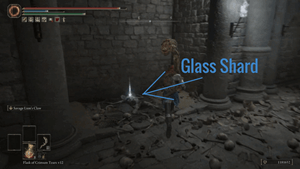
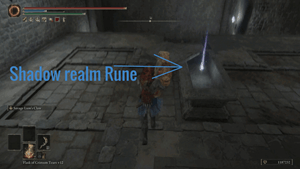
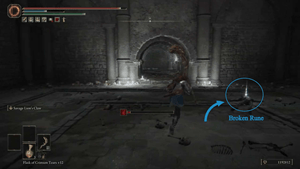
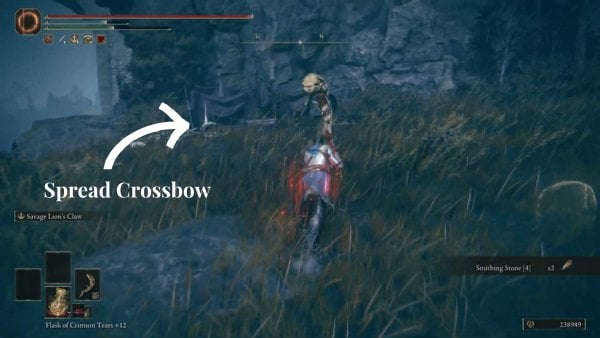
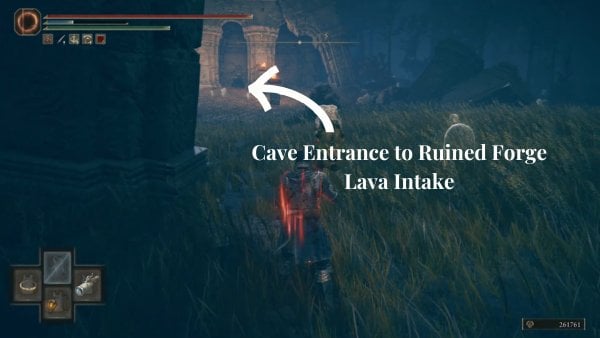
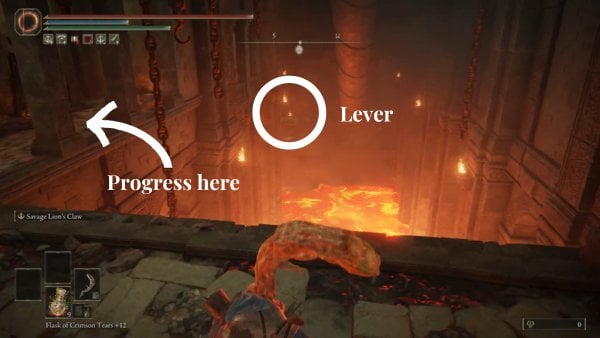
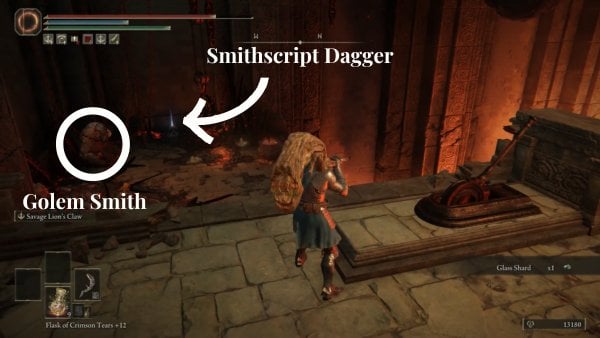
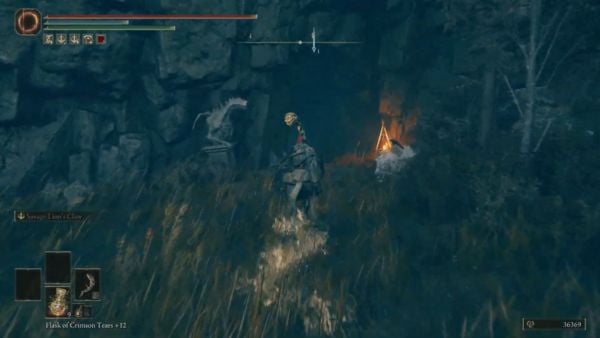
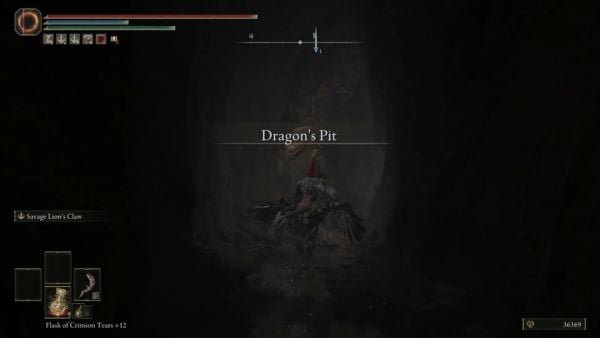
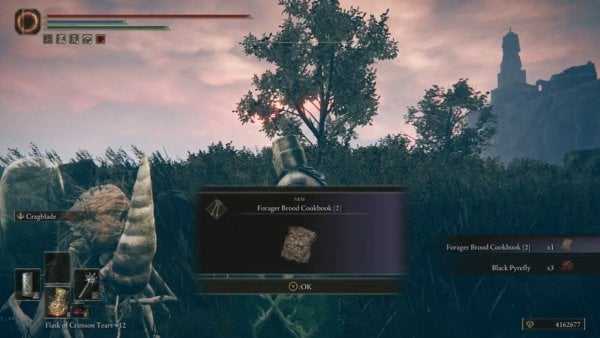
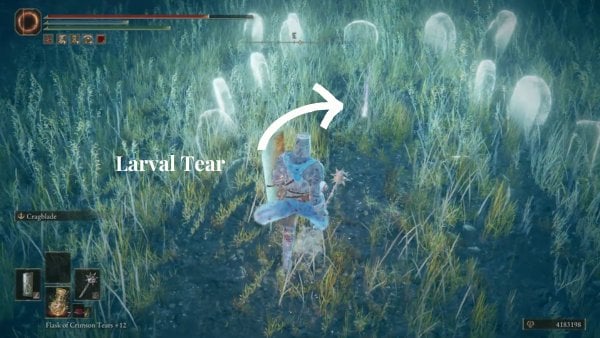
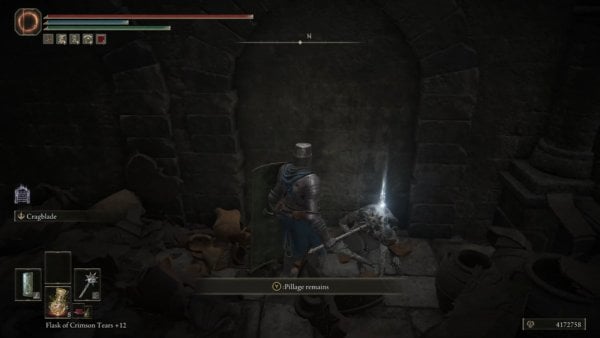
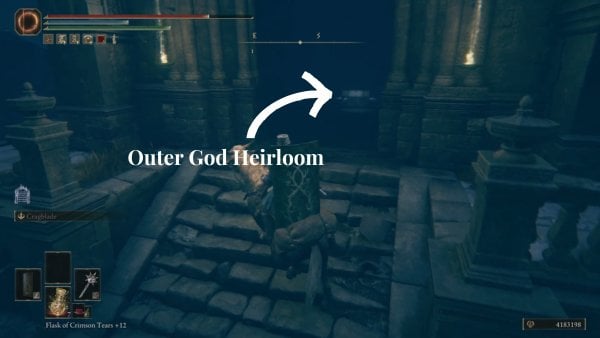
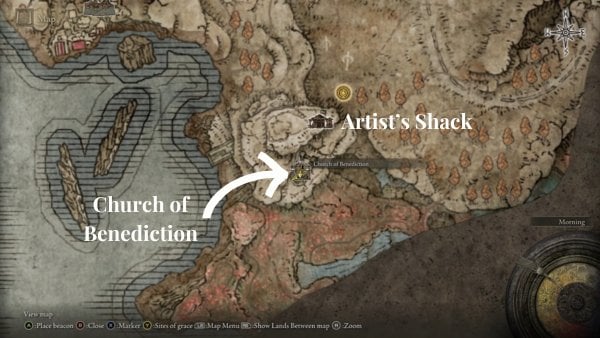
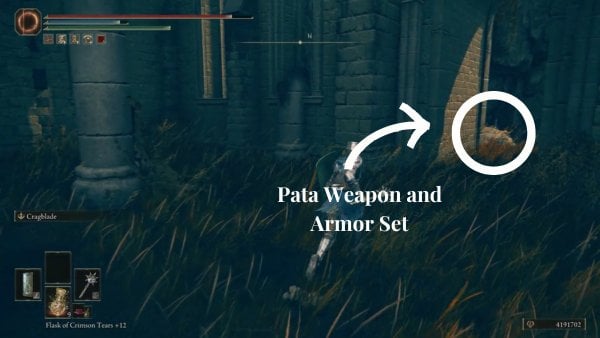


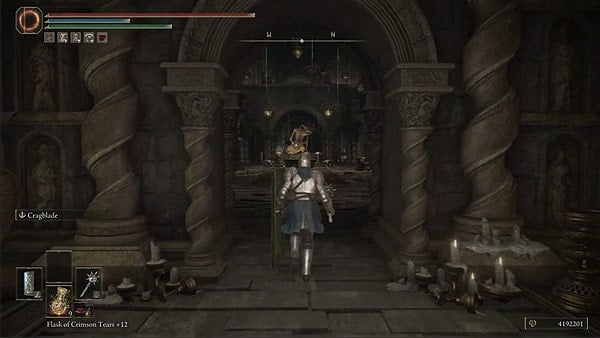
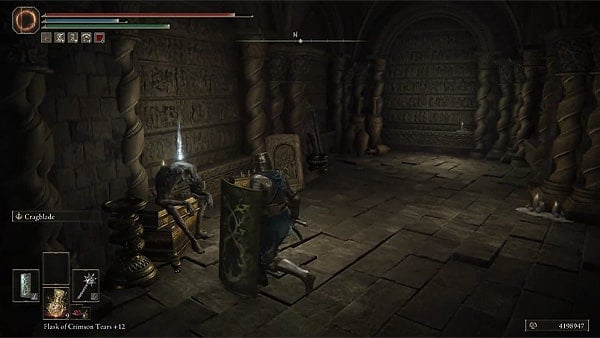
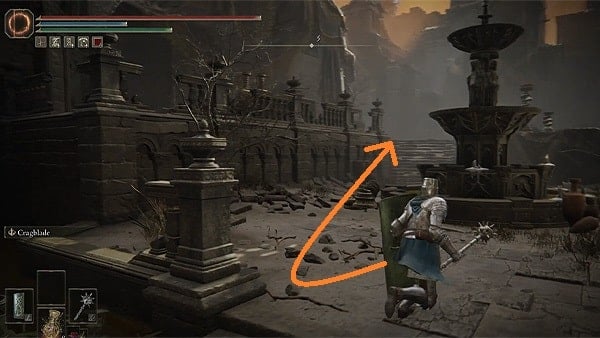
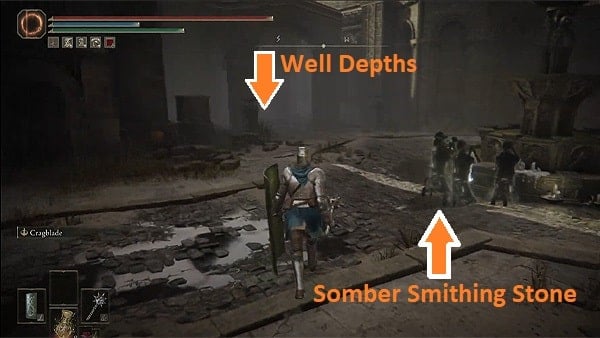
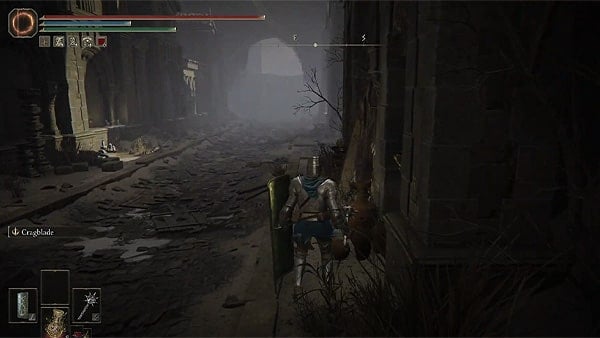
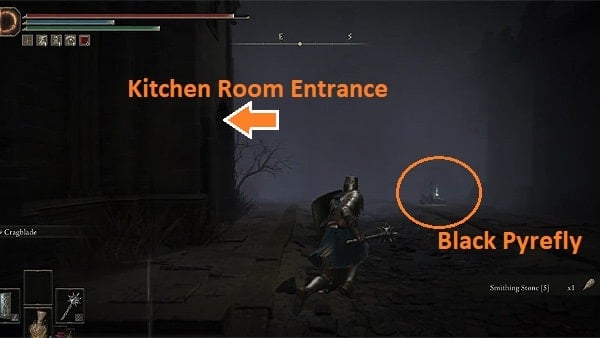
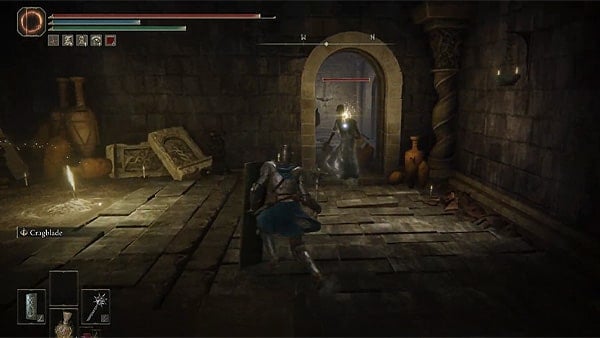
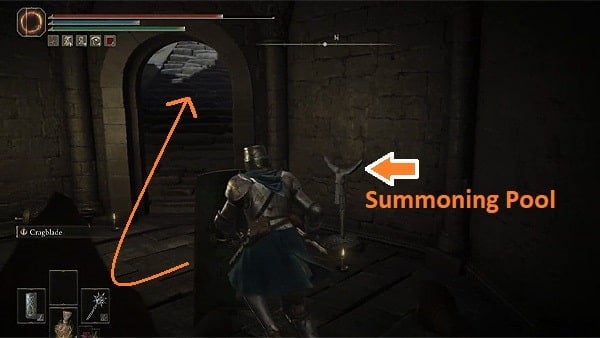
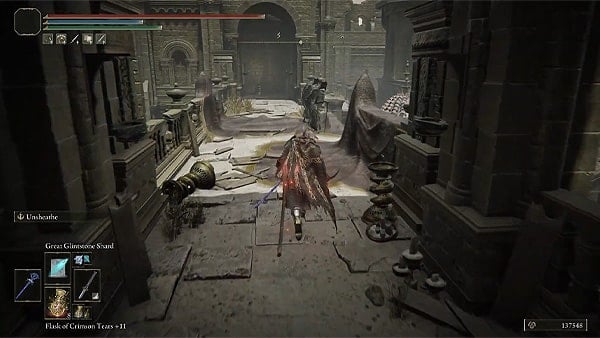
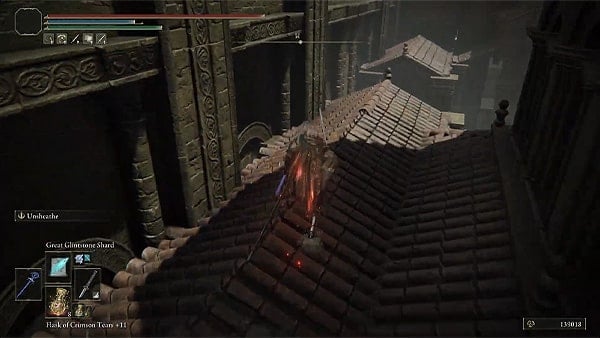
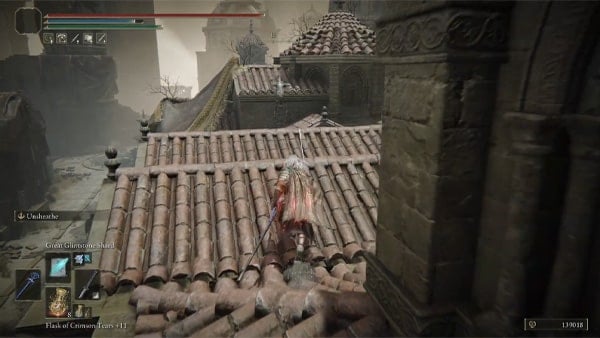
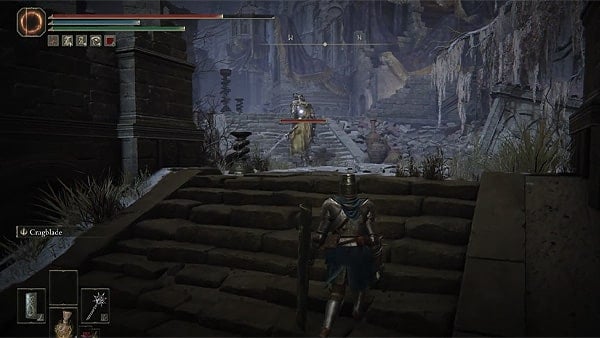
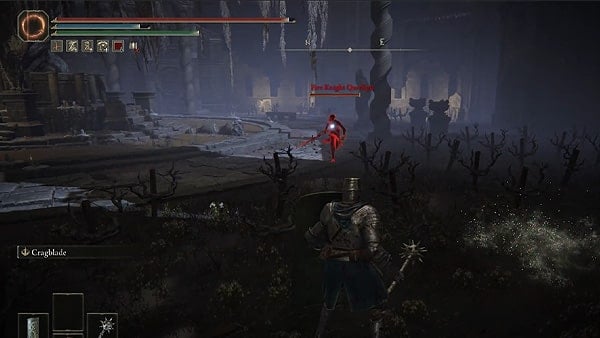
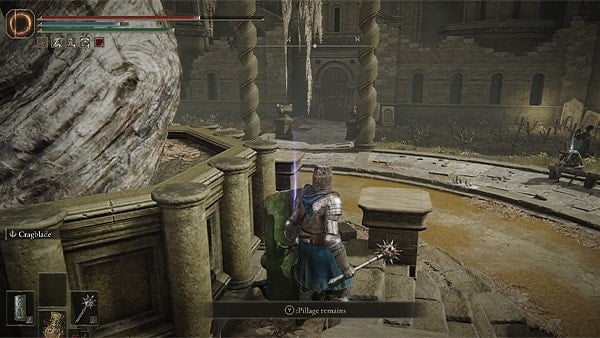
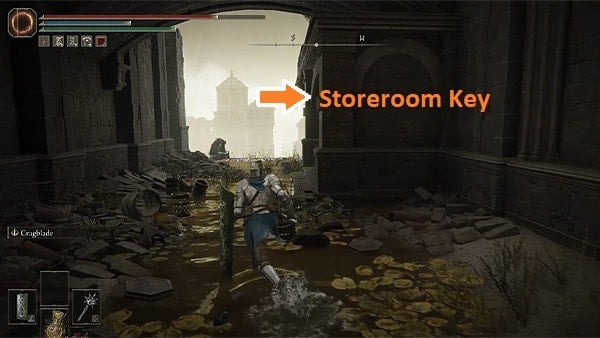
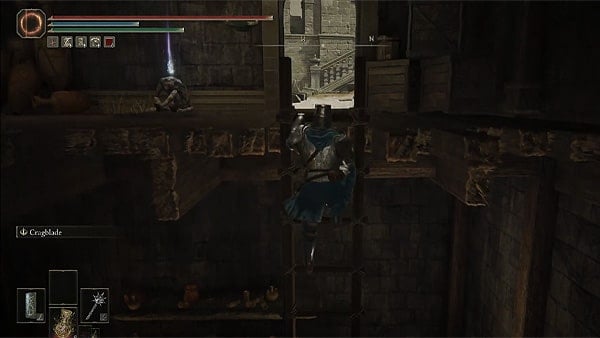
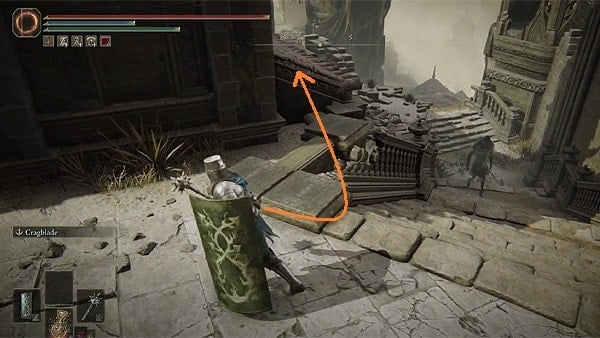
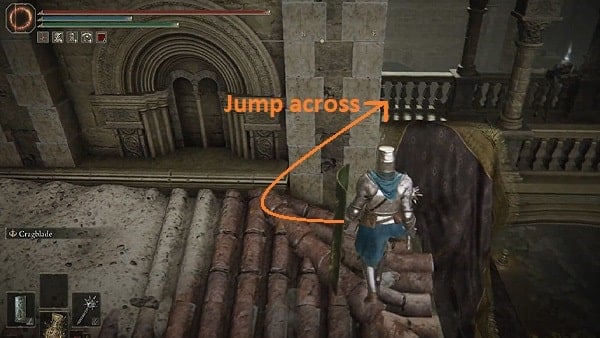
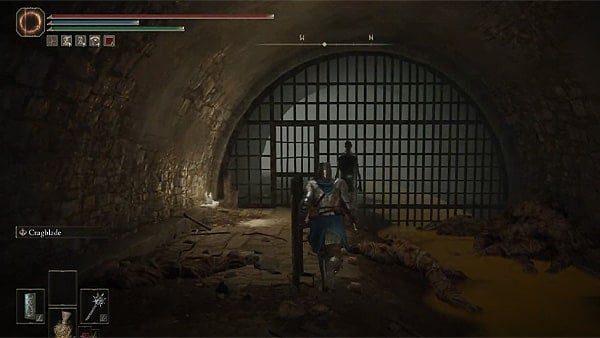
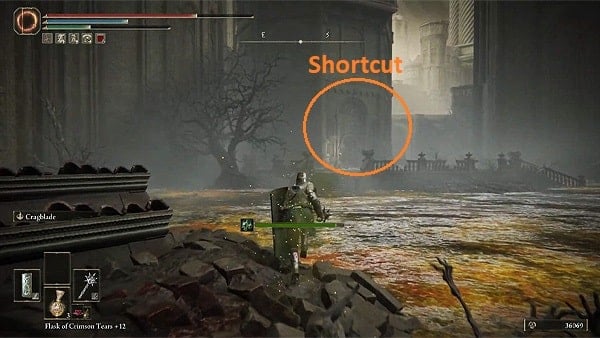
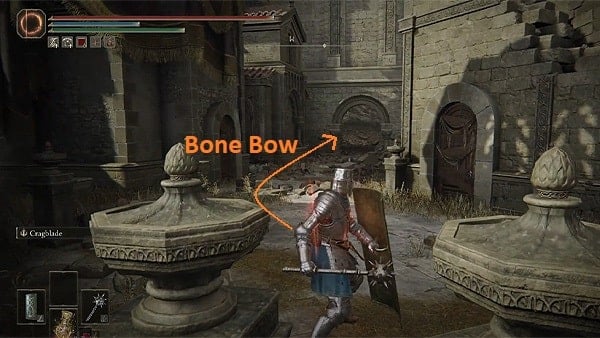
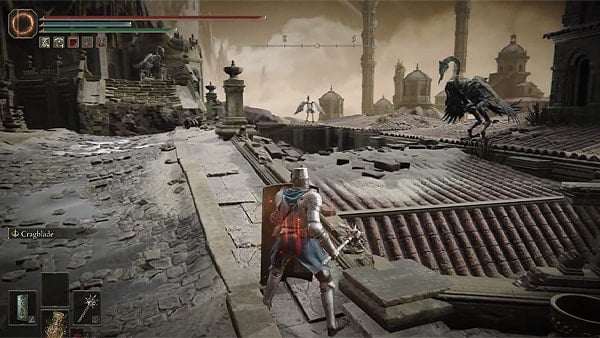
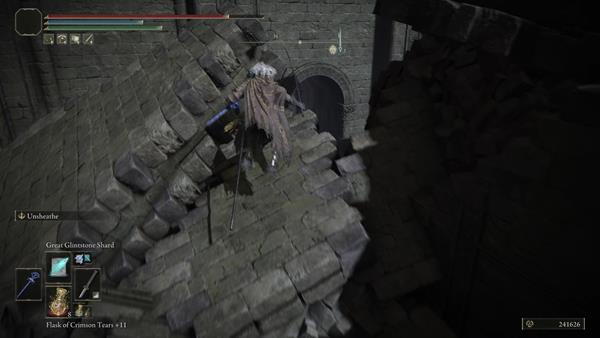
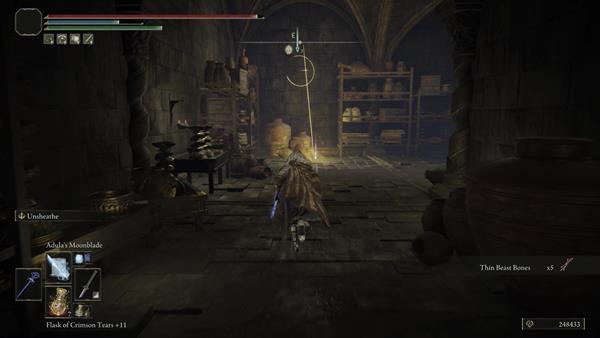
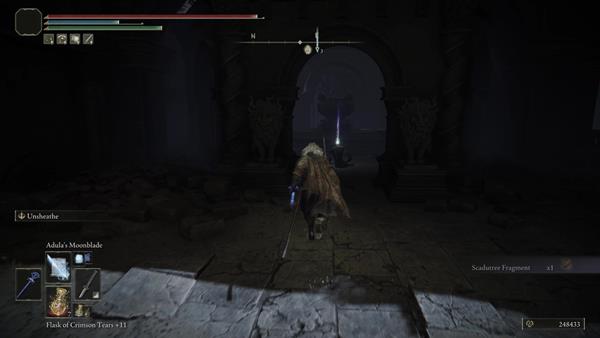
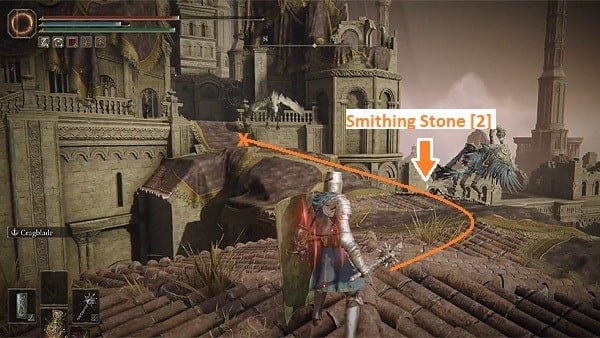
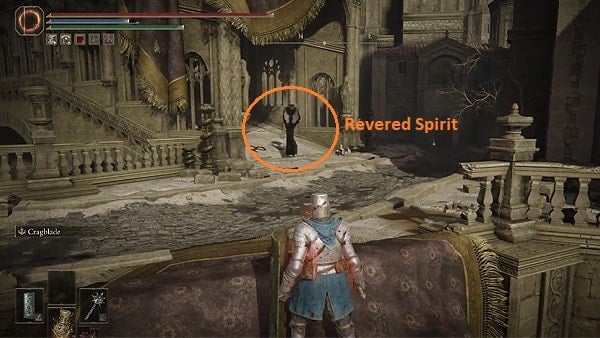
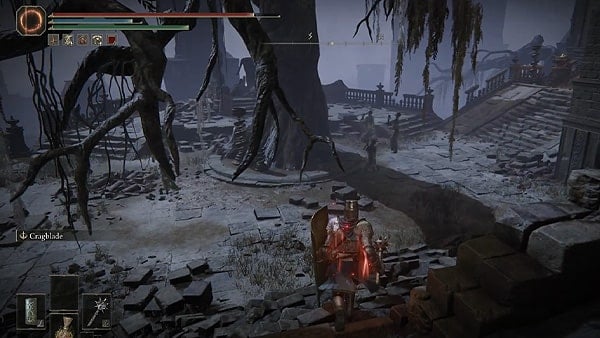
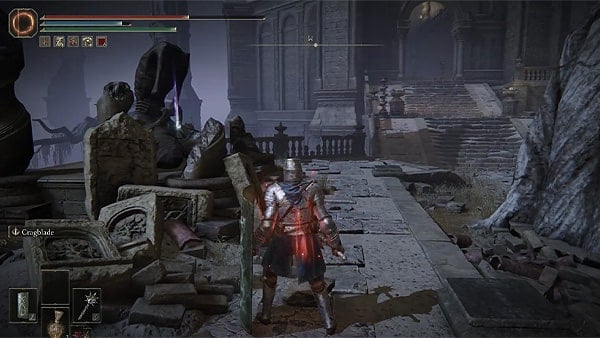
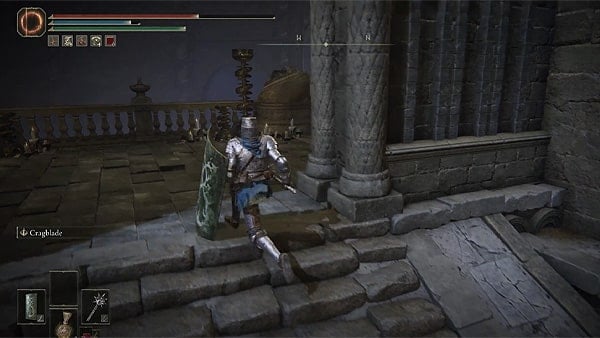
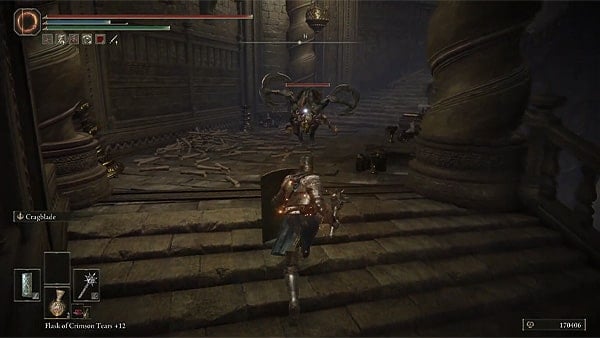

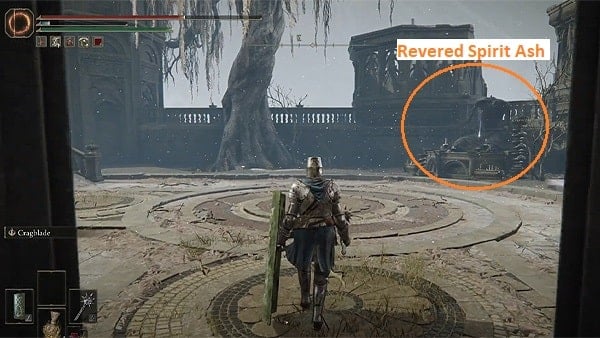
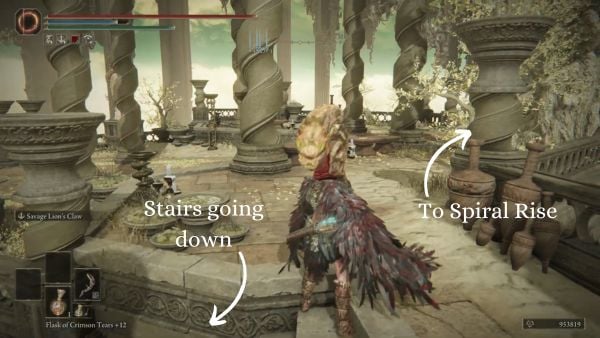
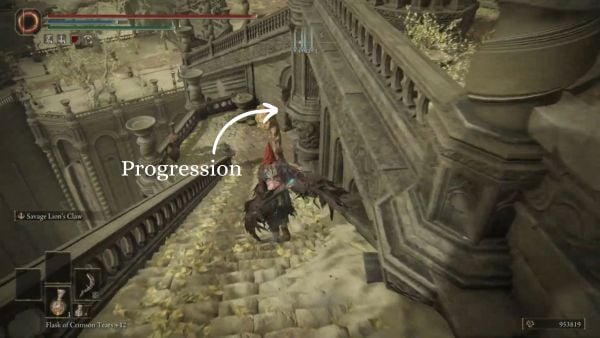
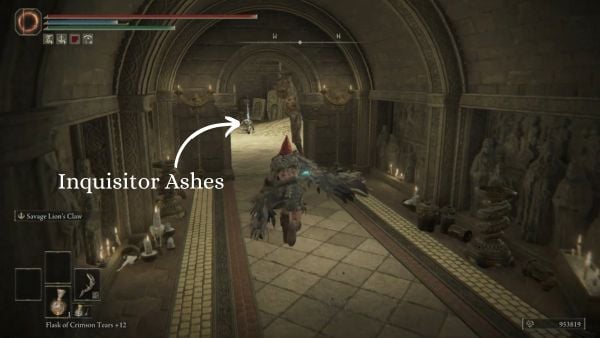
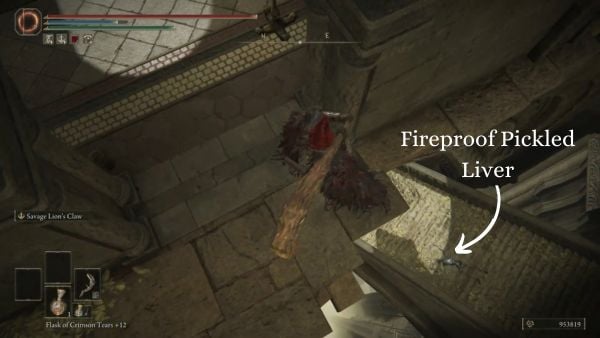
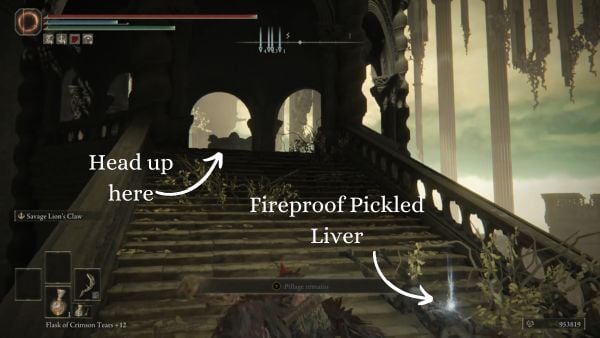
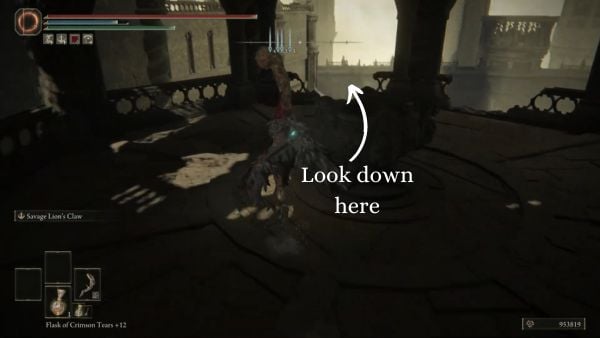
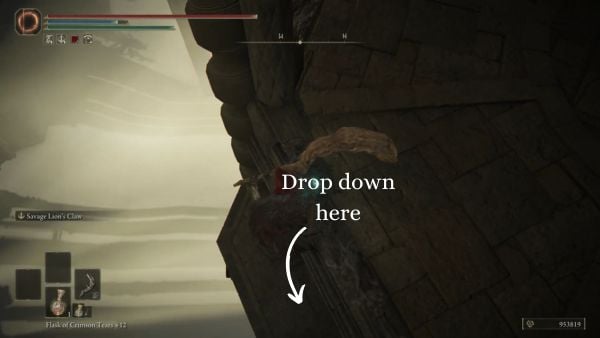
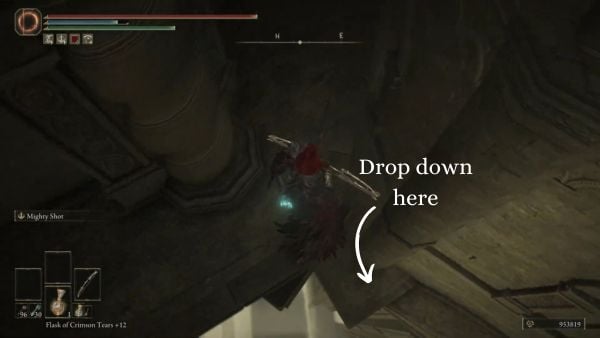
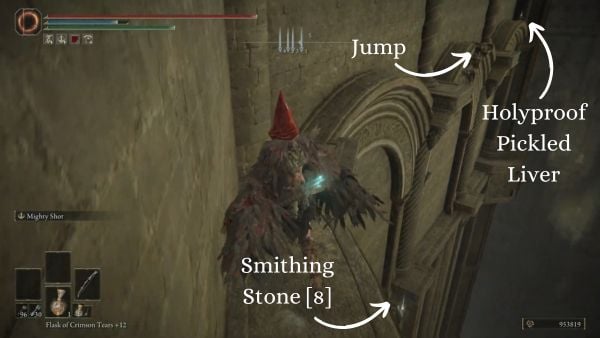
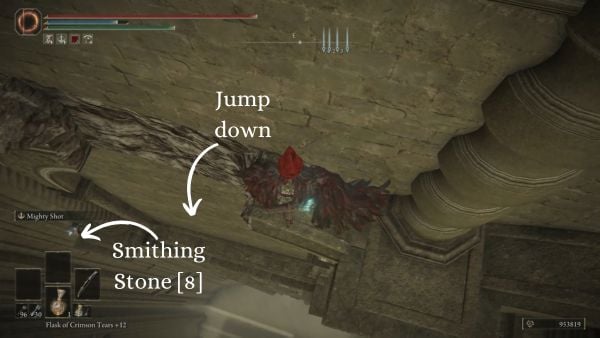
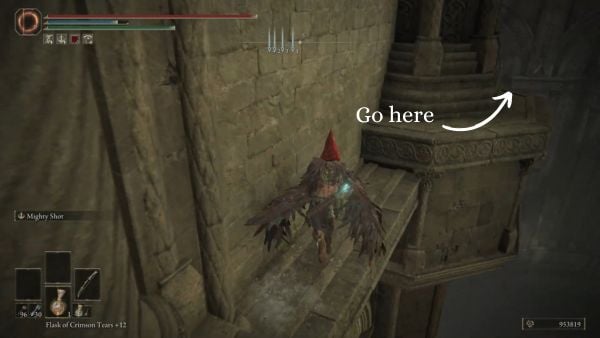
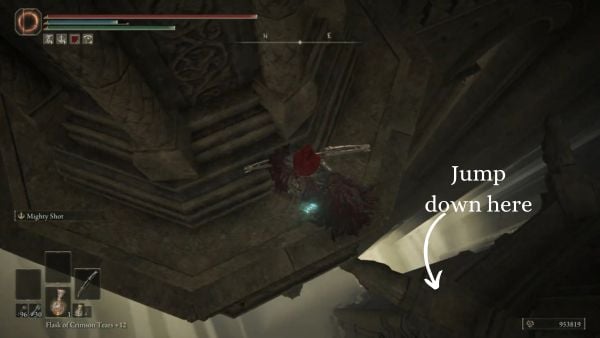
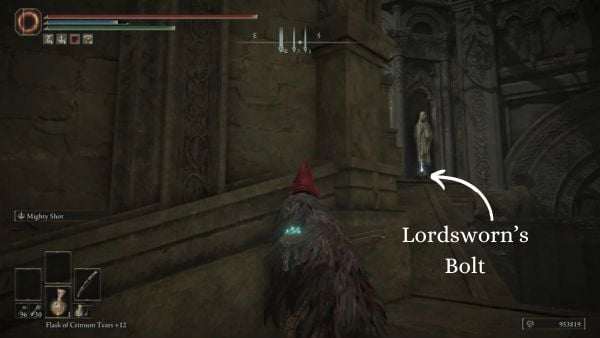
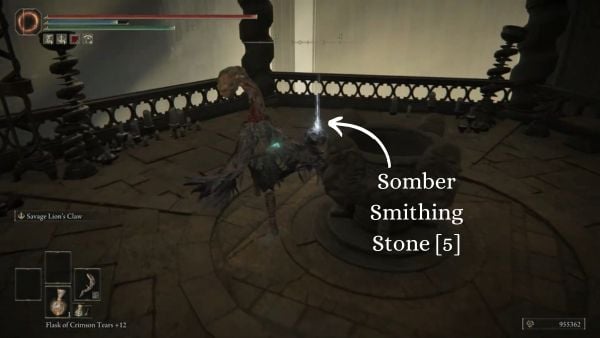
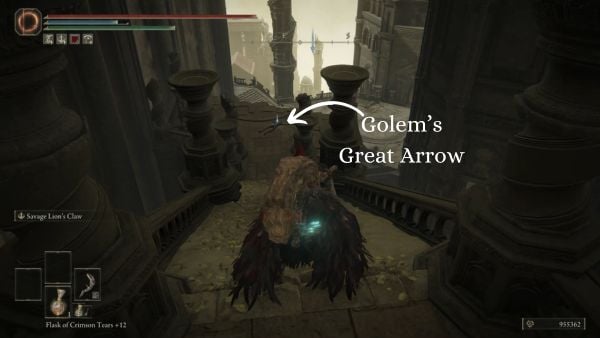
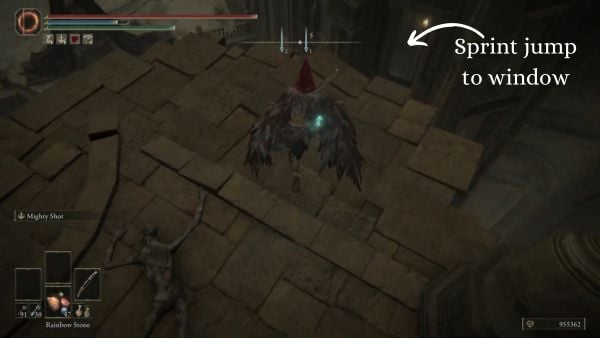
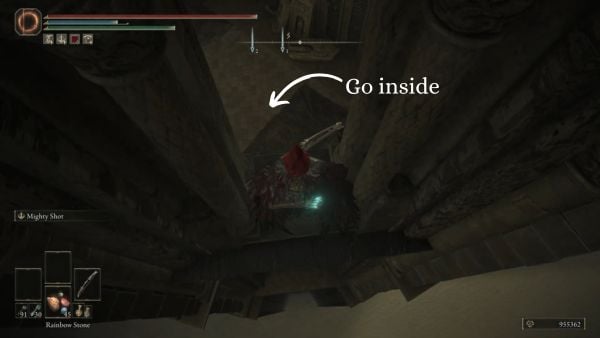
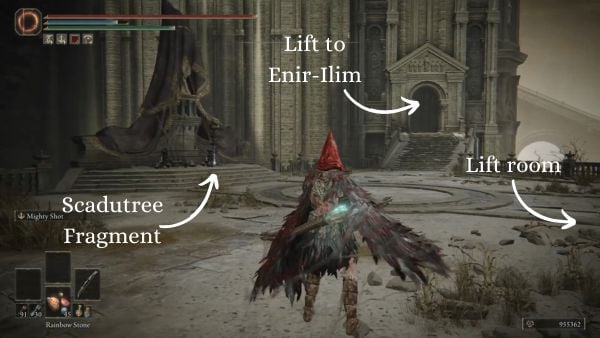
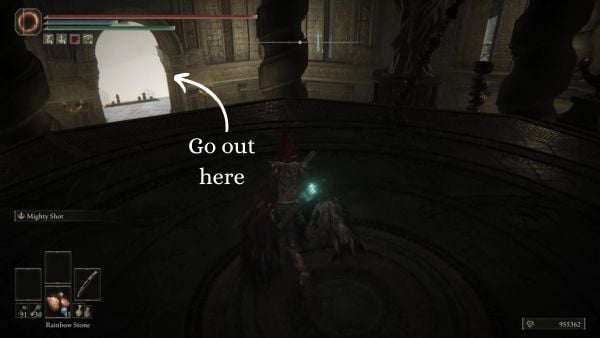
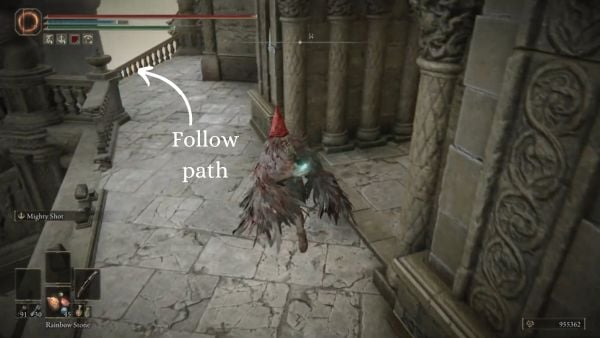
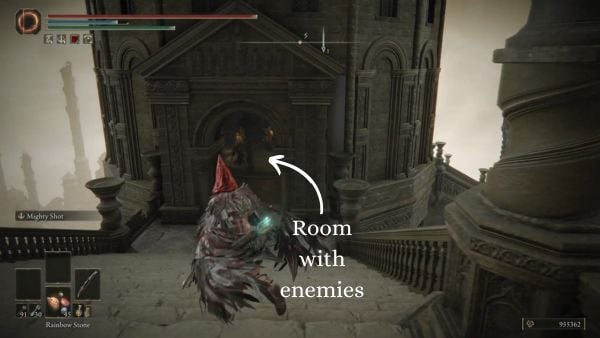
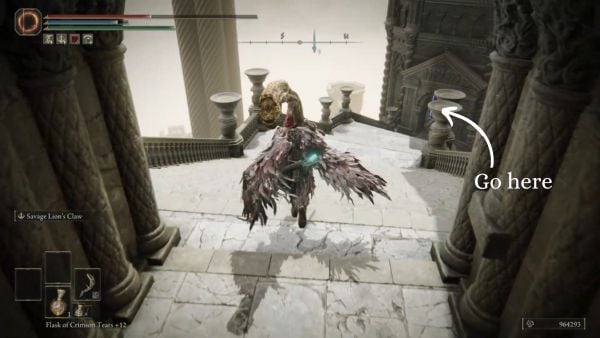
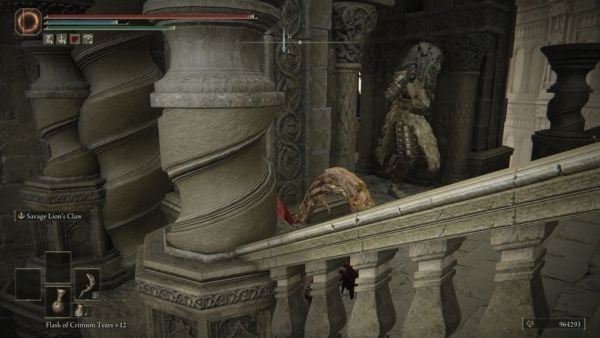
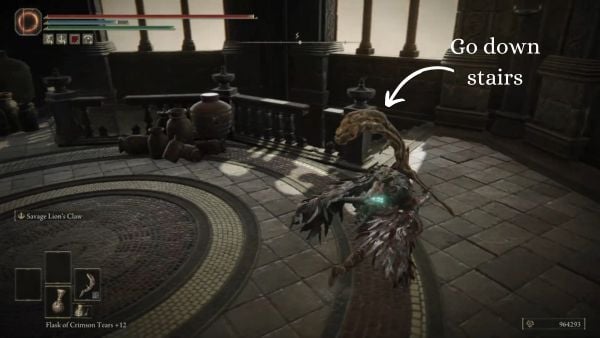
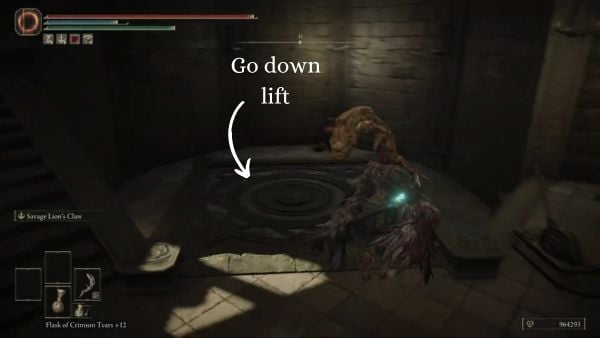
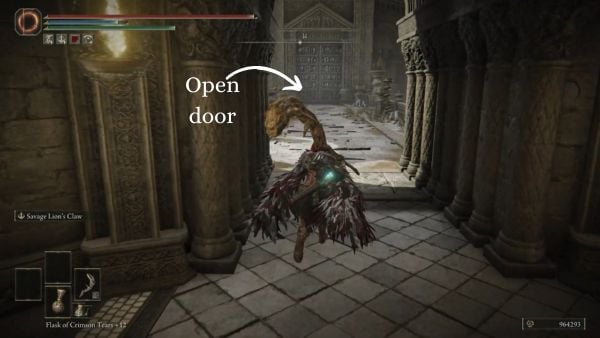
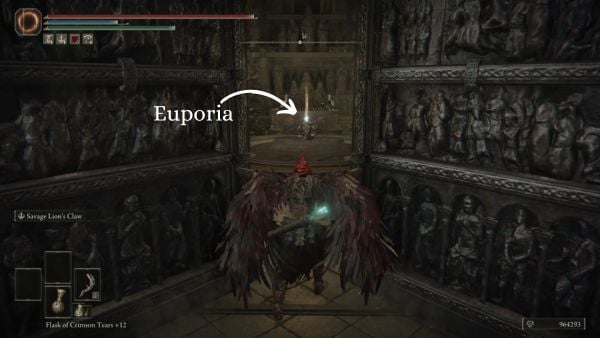
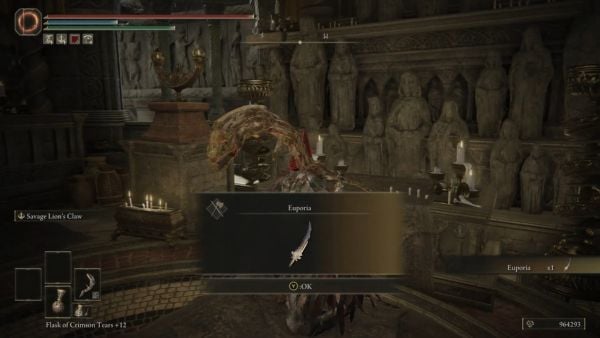


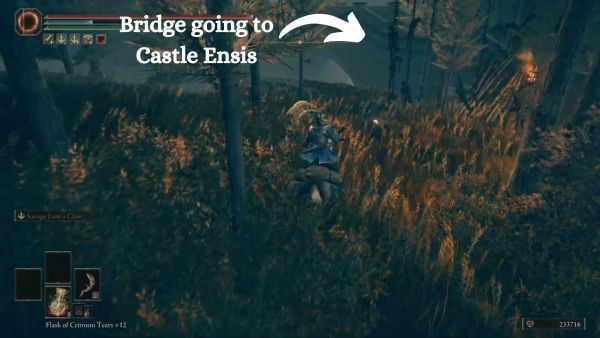
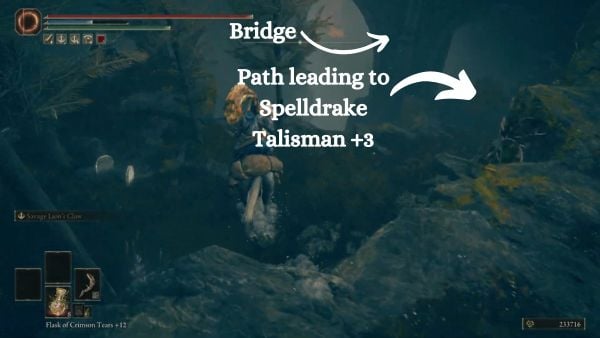
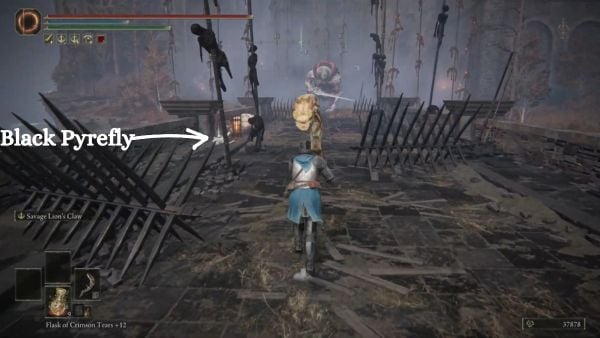
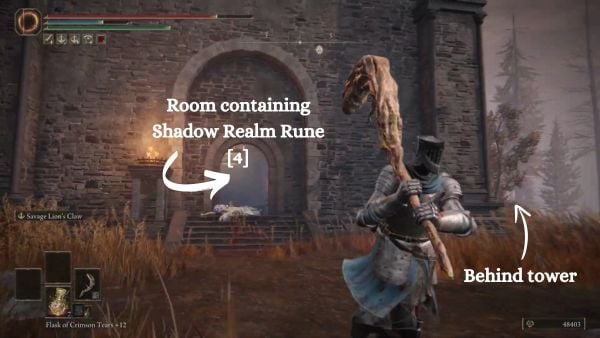
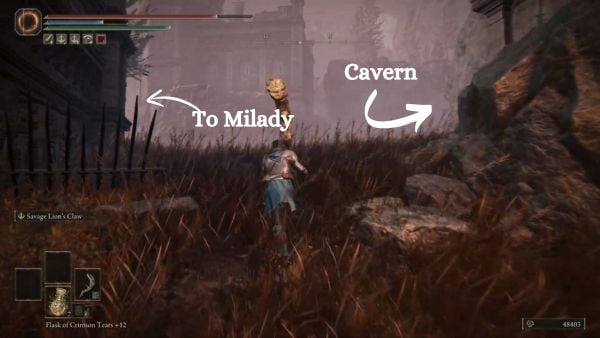
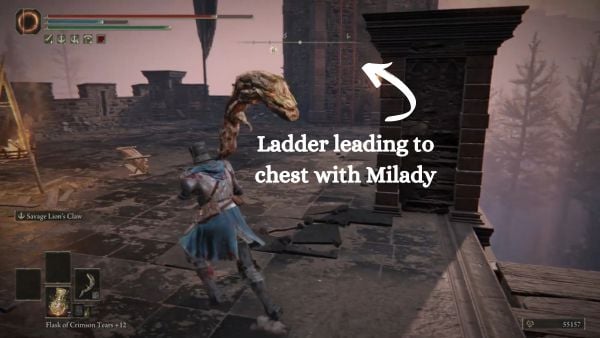
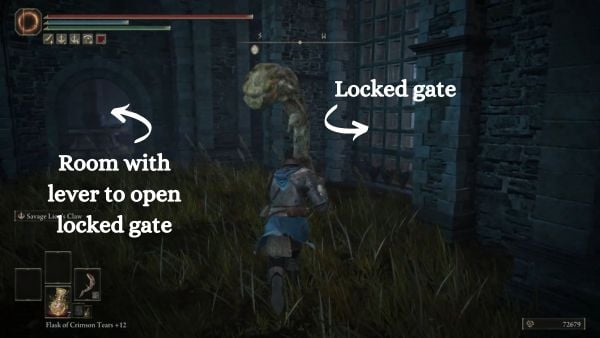
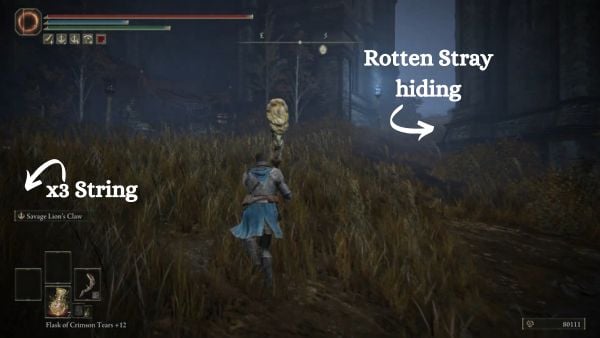
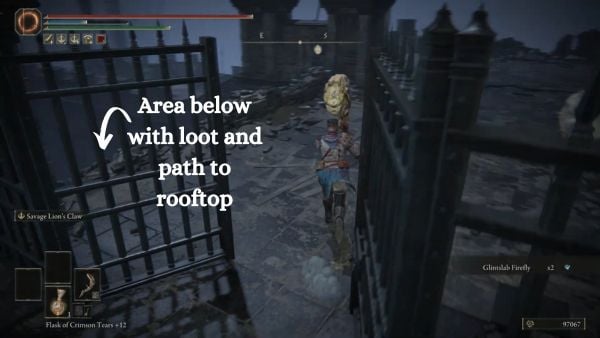
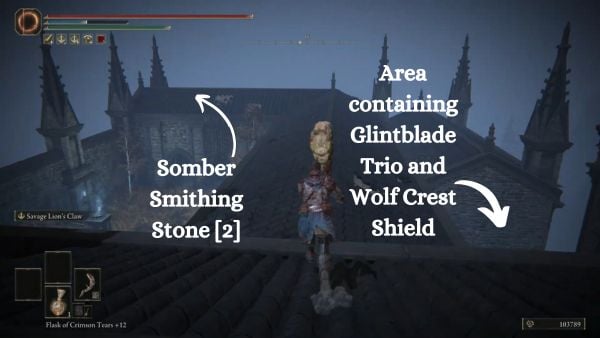
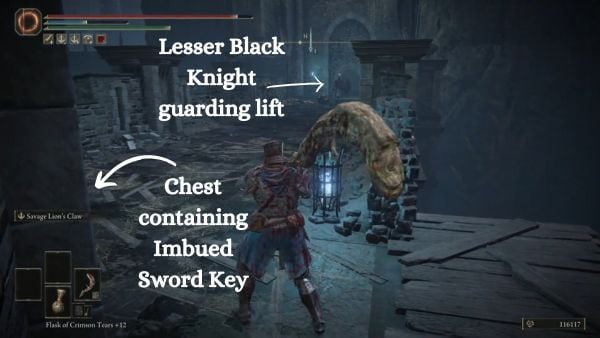
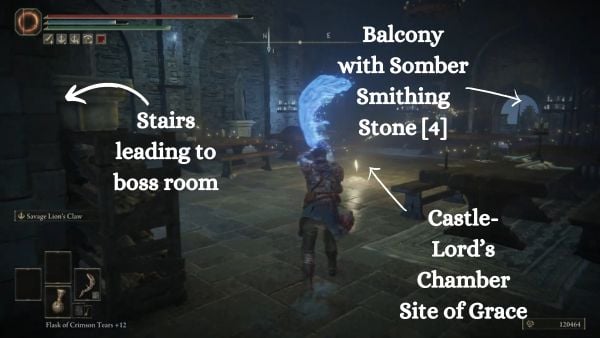


-min.png)


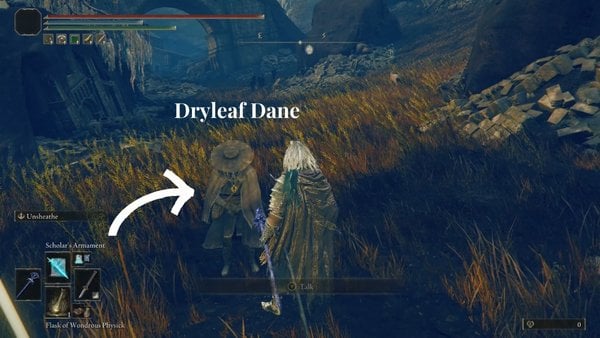
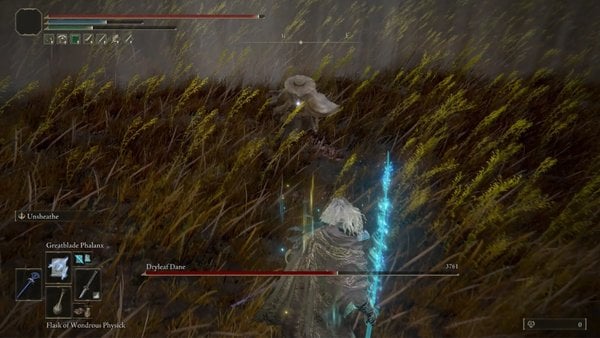
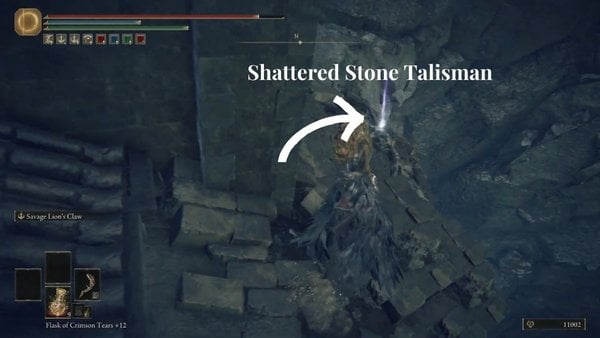
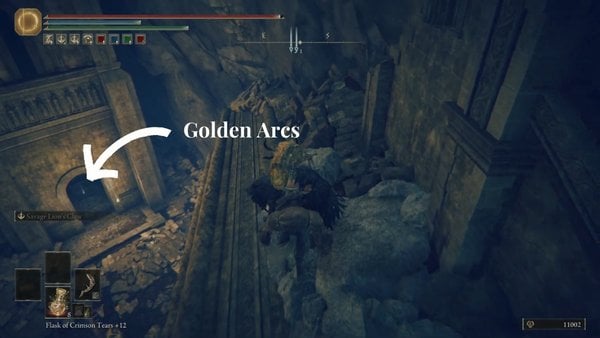
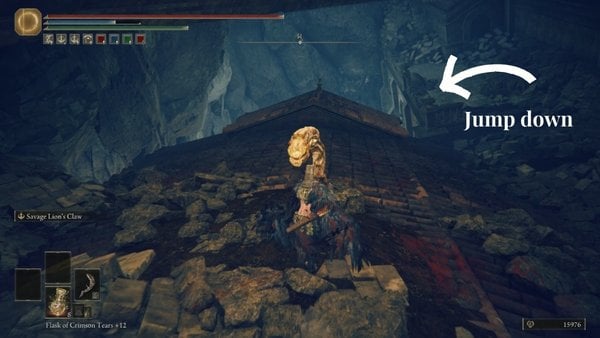
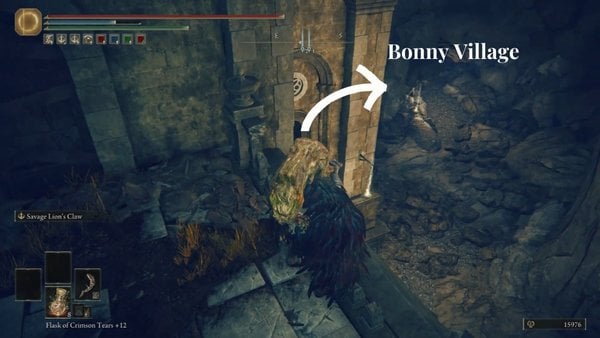
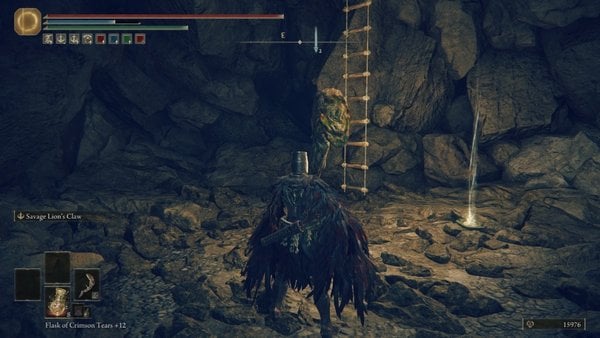
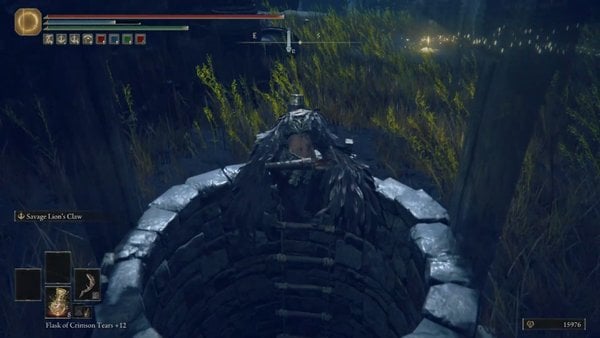
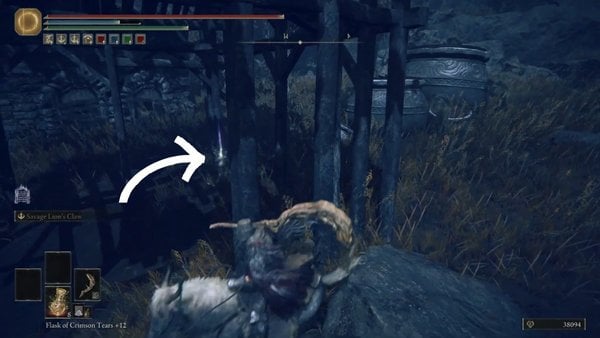
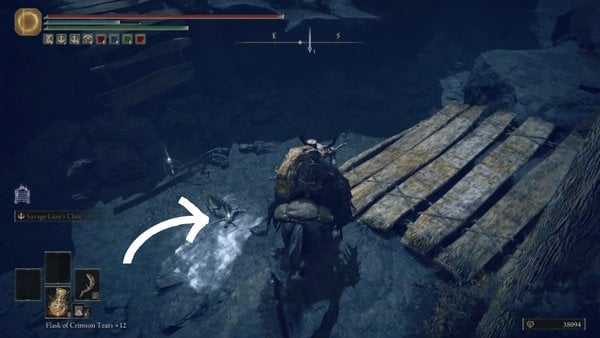
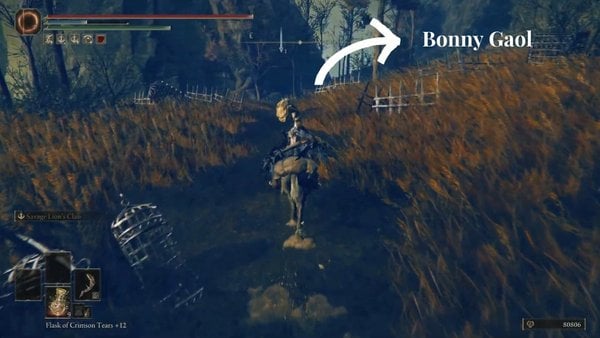
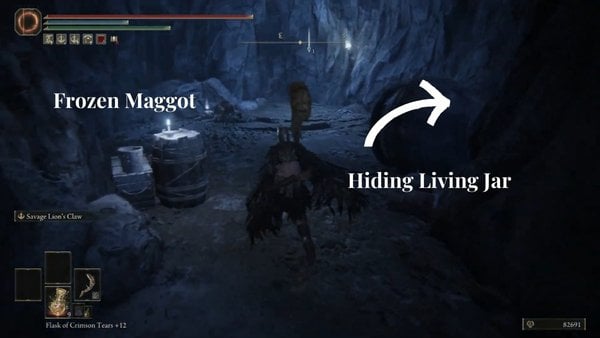
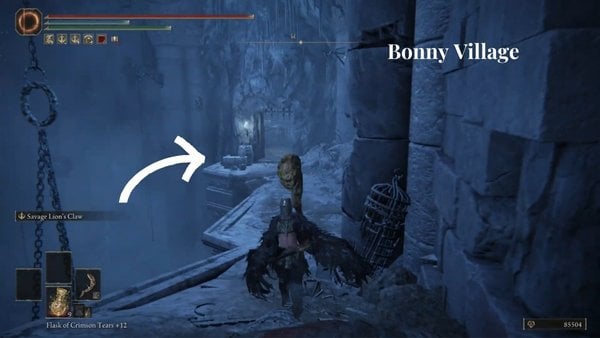
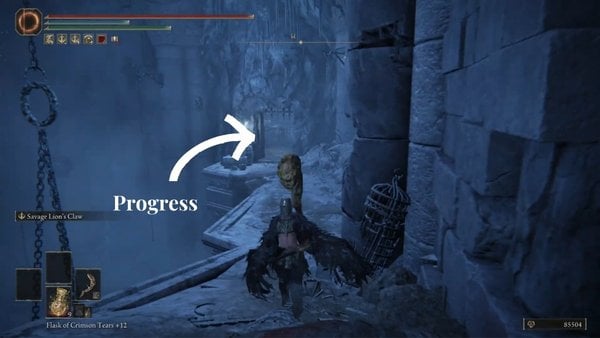
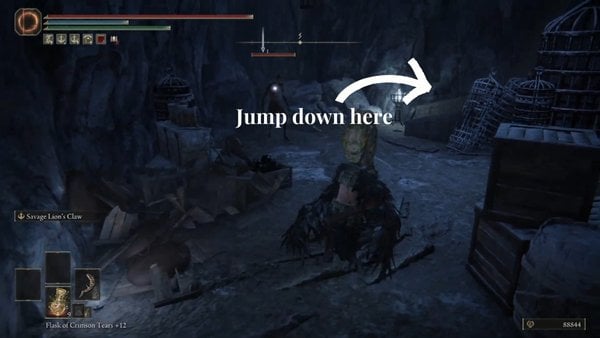
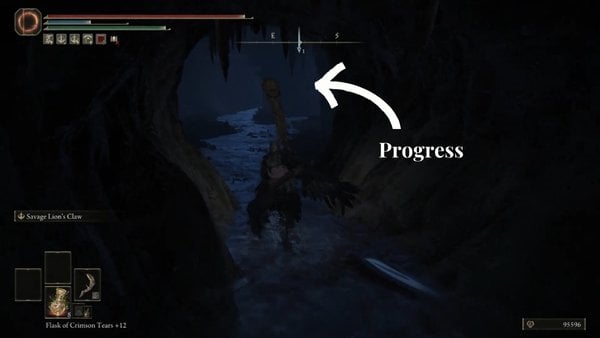
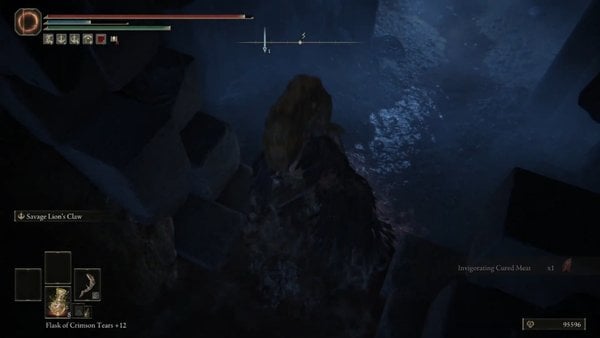
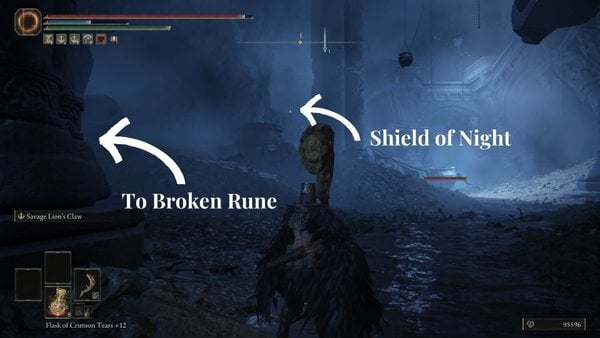
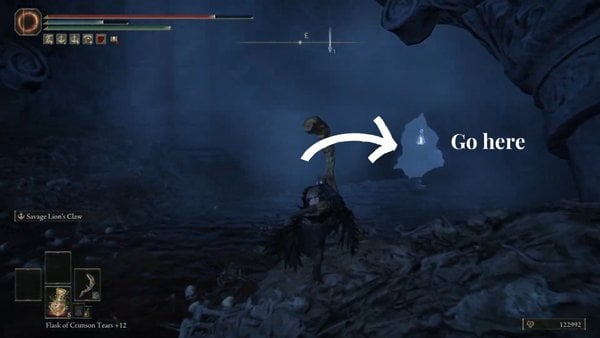
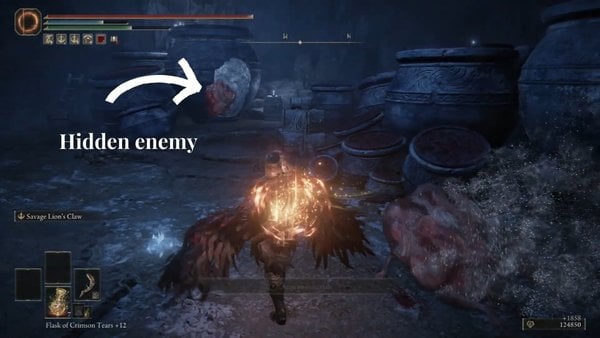
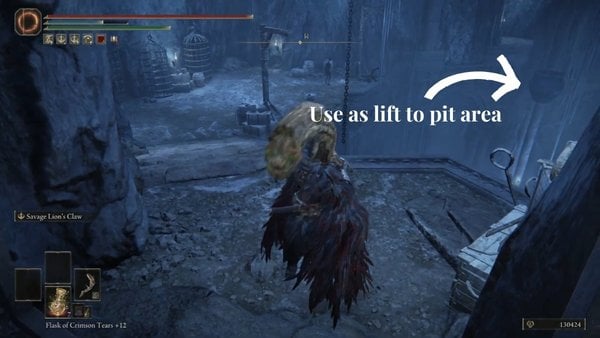
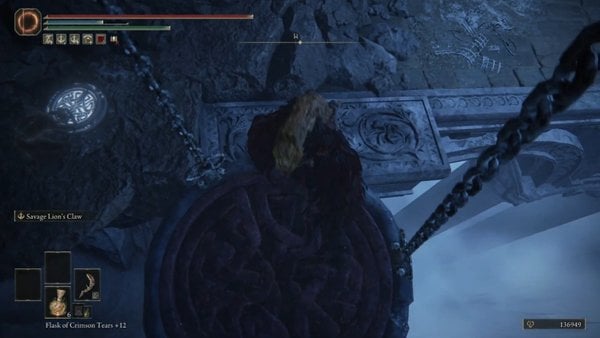
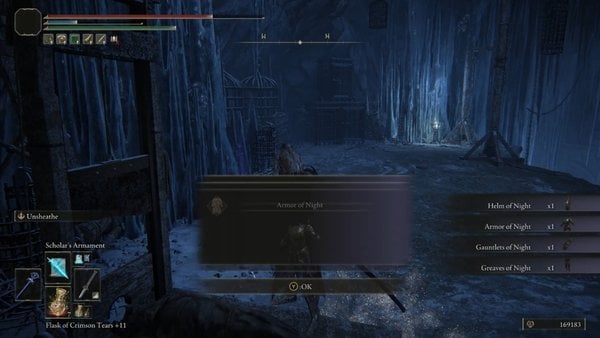
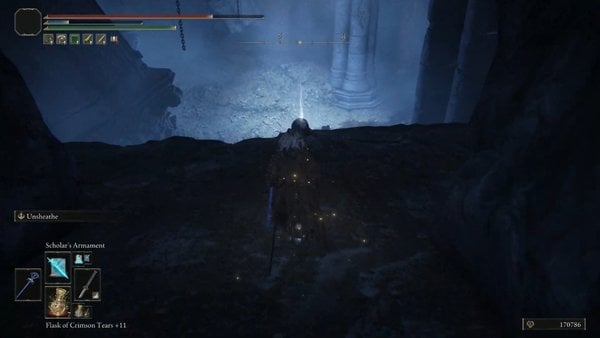
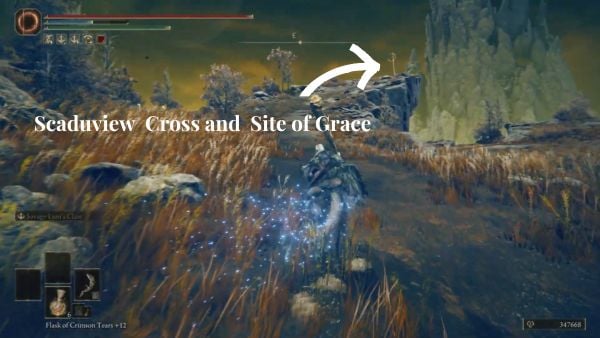


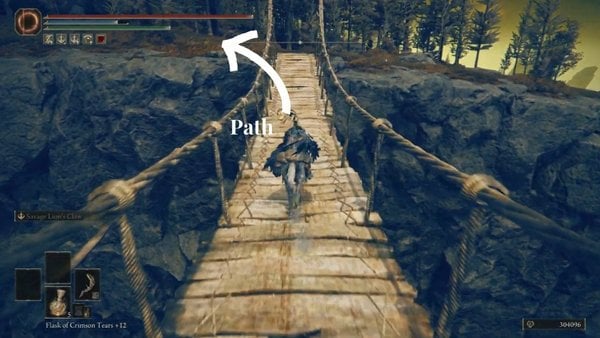
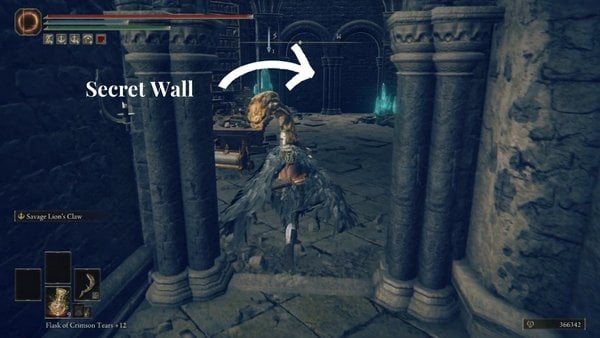
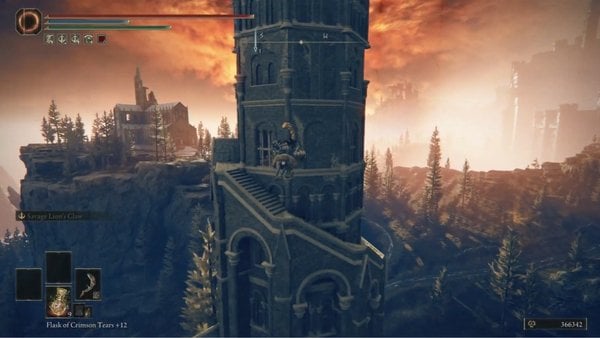
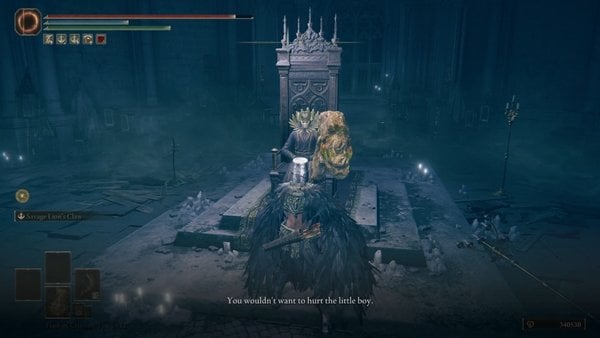
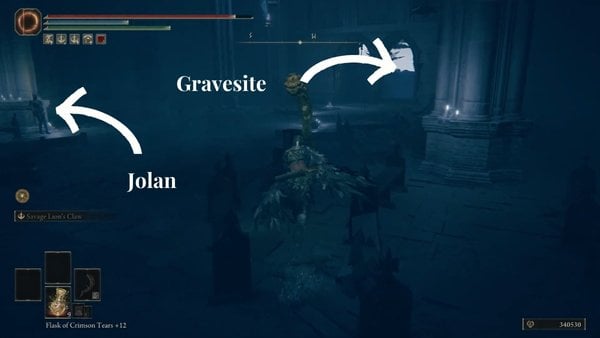
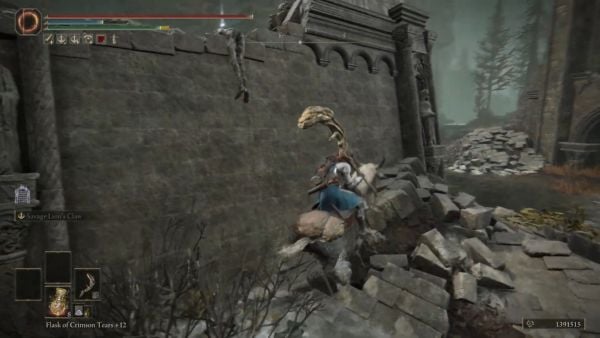
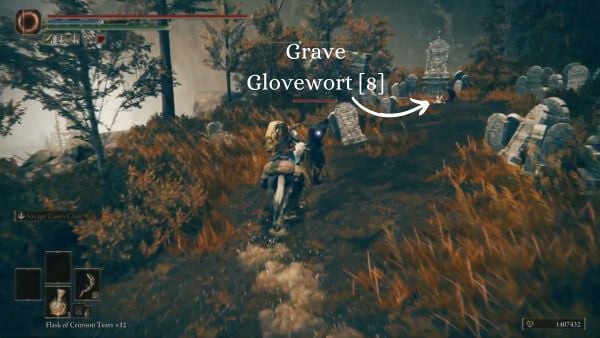
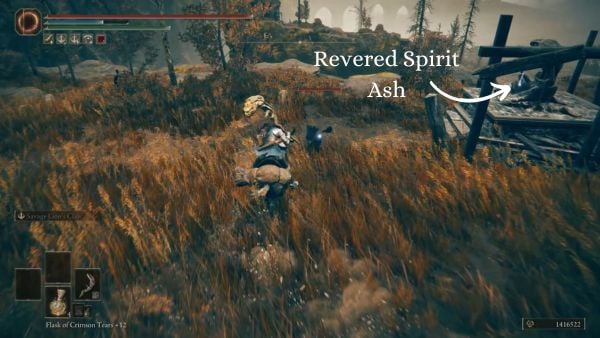
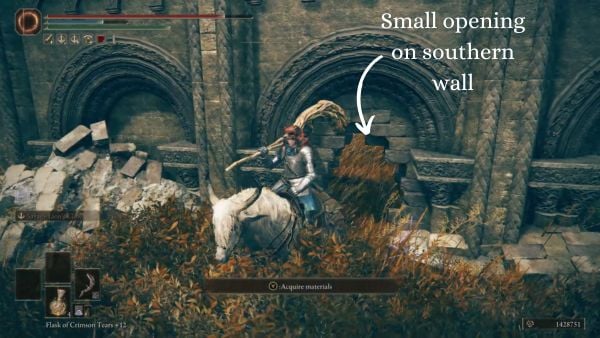

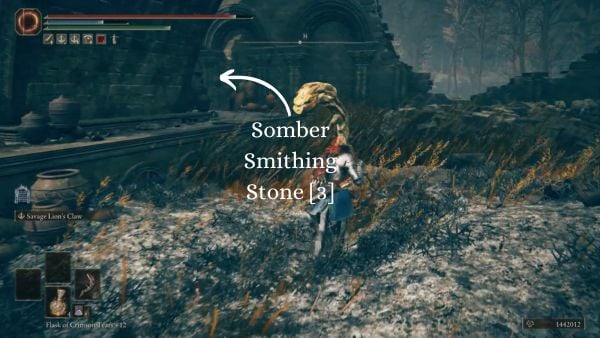
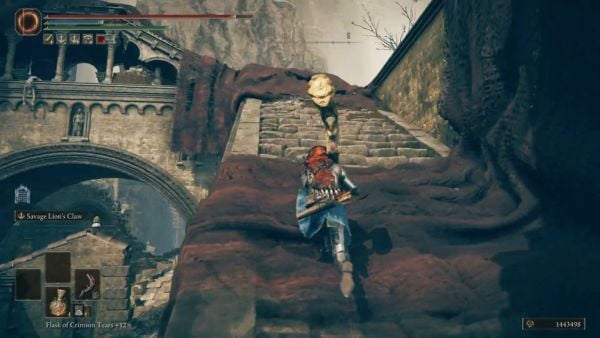
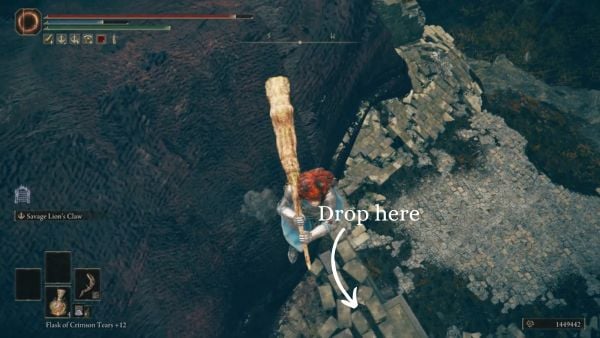
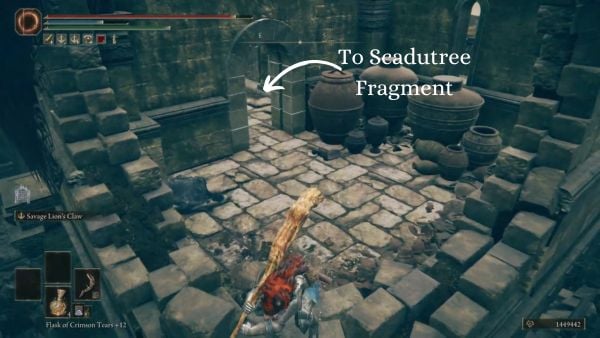
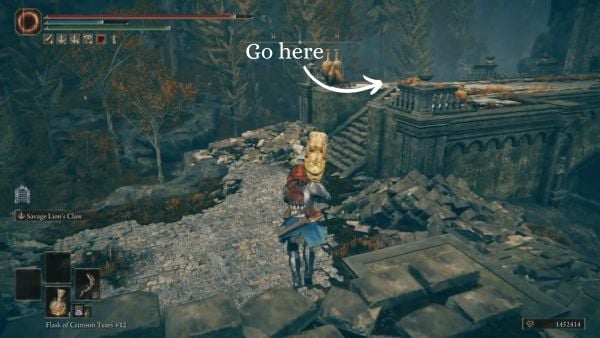
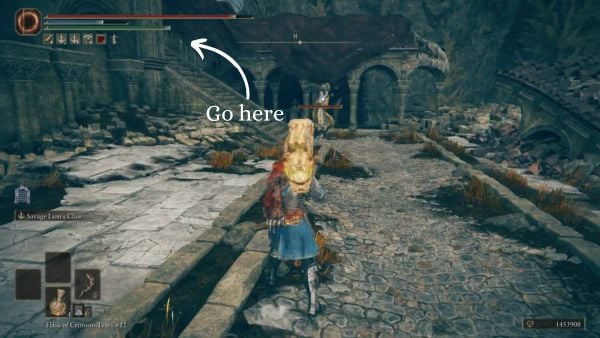
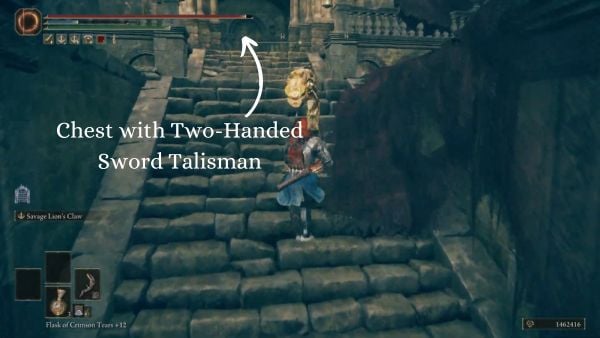
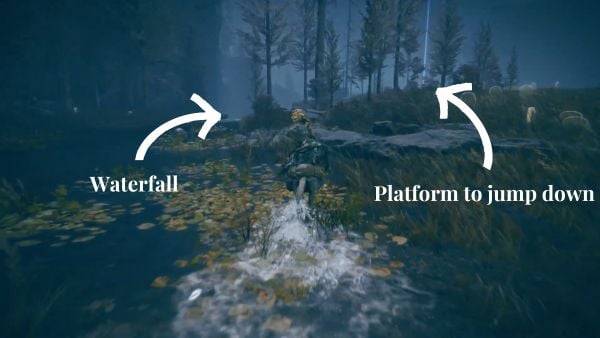
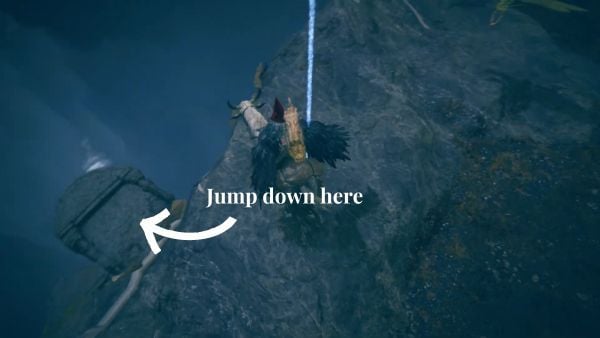
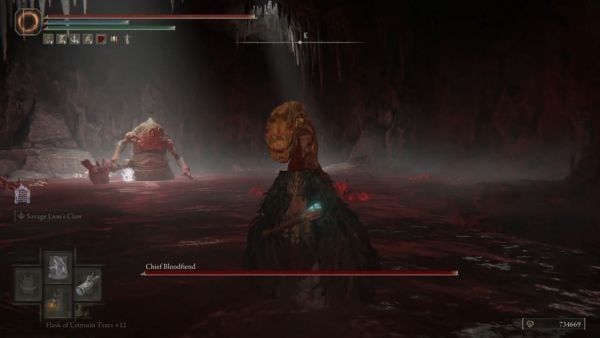
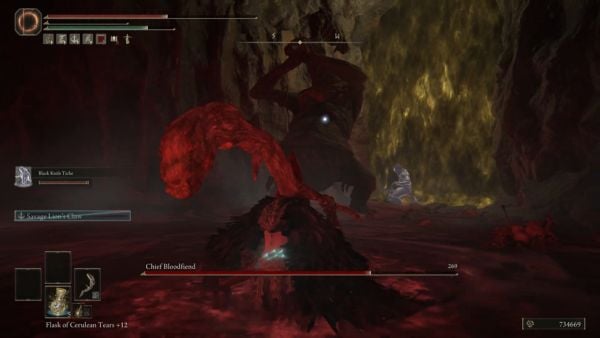
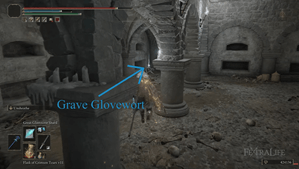
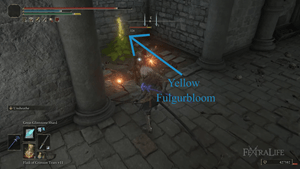
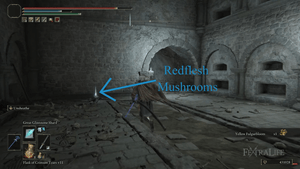
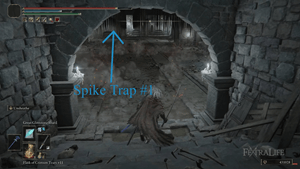
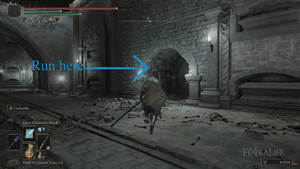
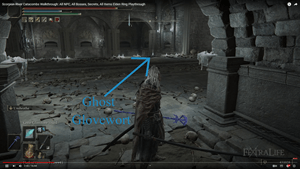
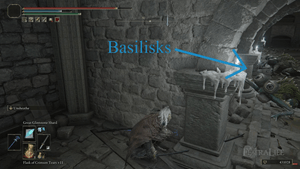
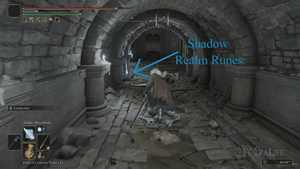
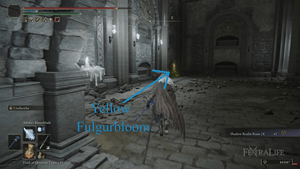
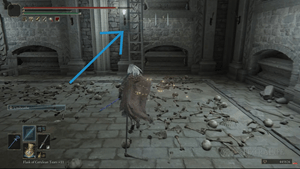
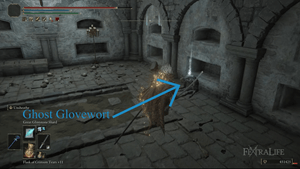
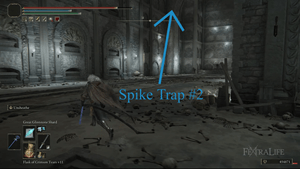
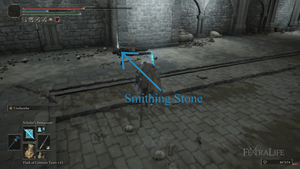
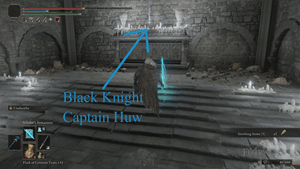
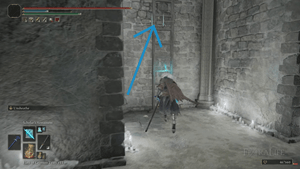
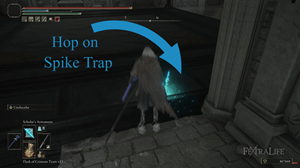
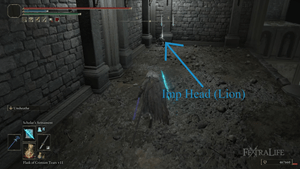
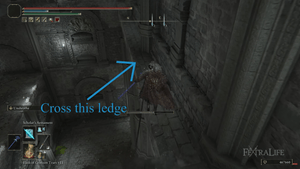
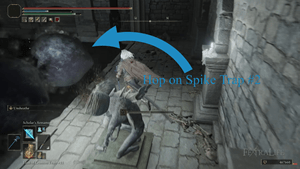
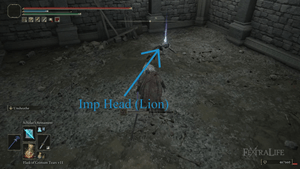
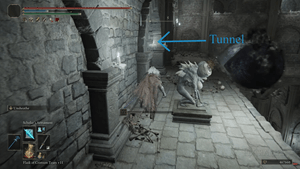
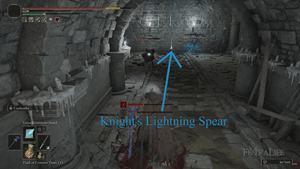
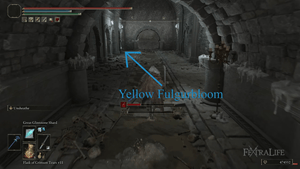
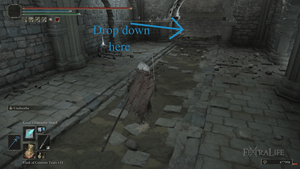
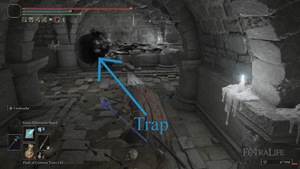
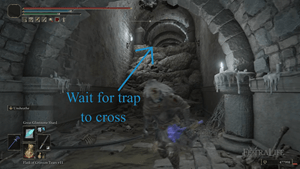
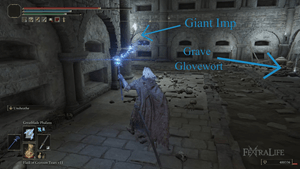
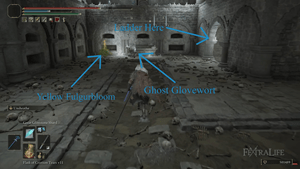
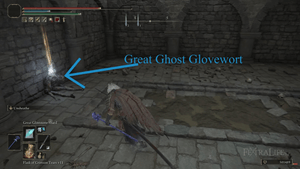
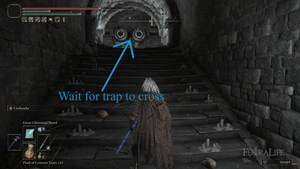
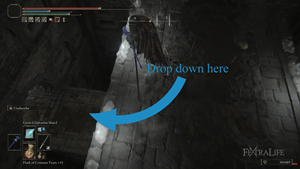
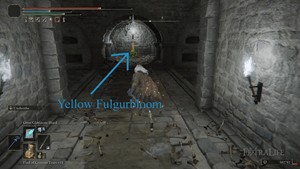
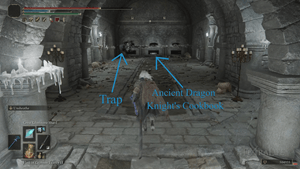
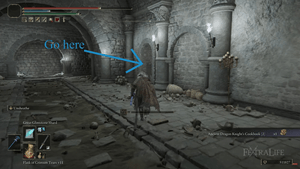
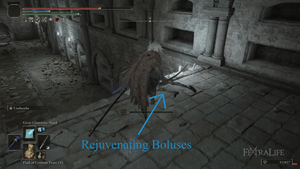
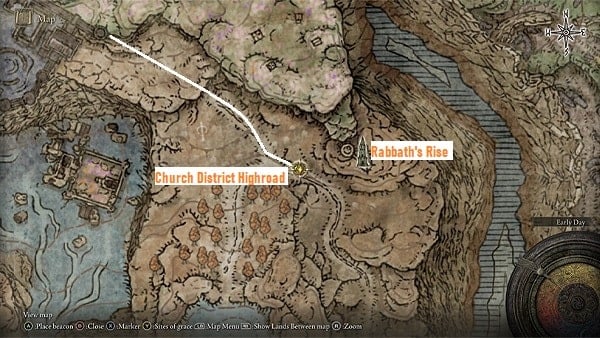
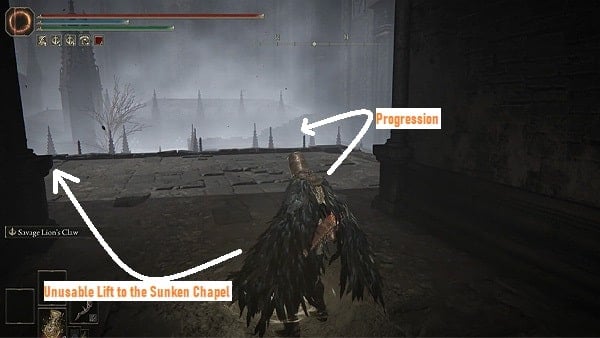
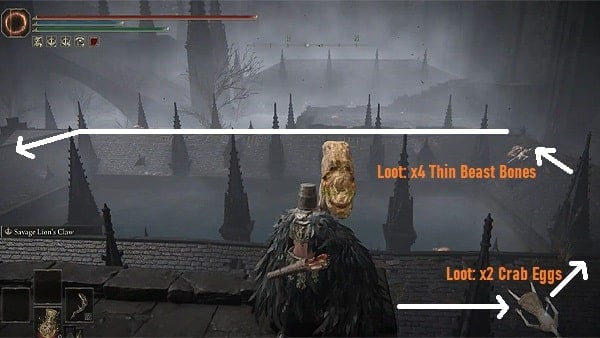
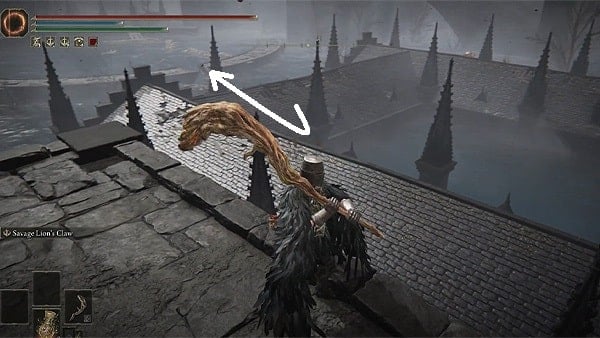
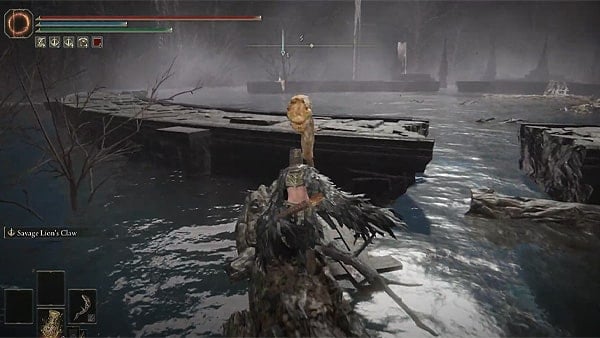
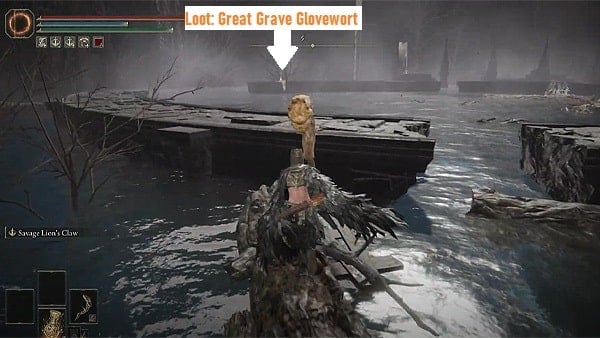
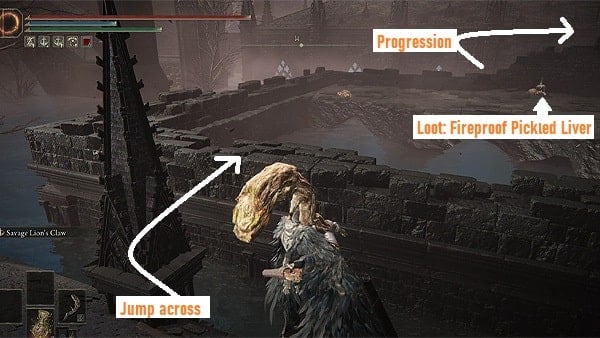
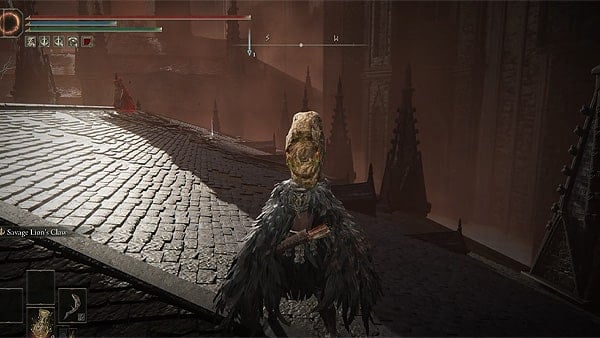
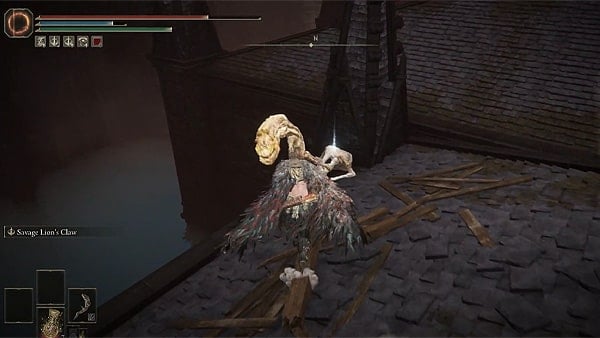
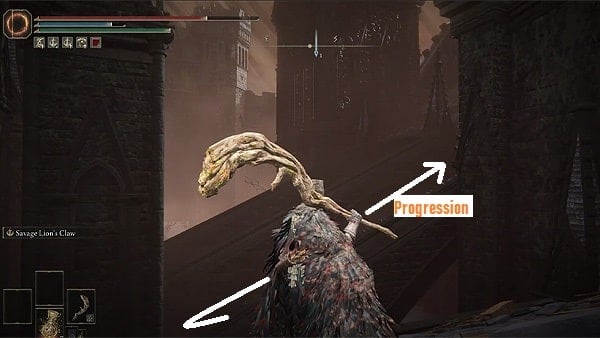
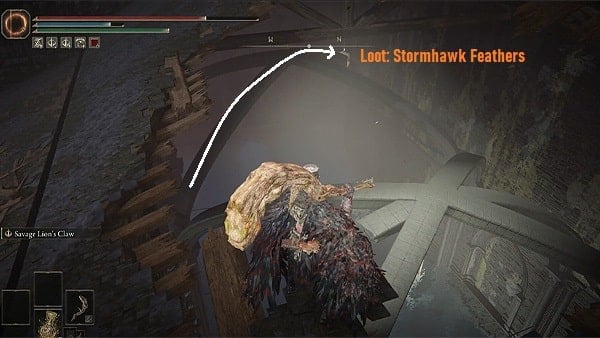
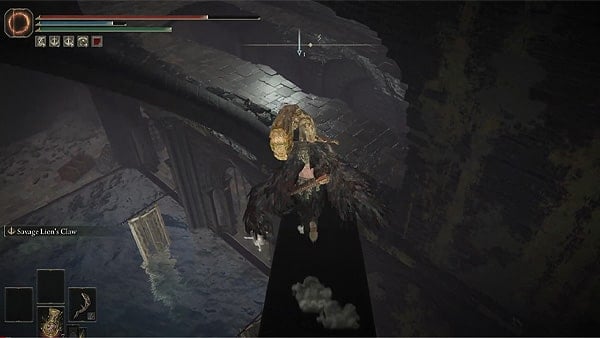
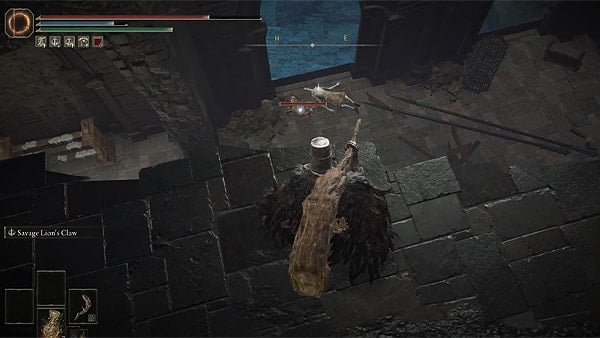
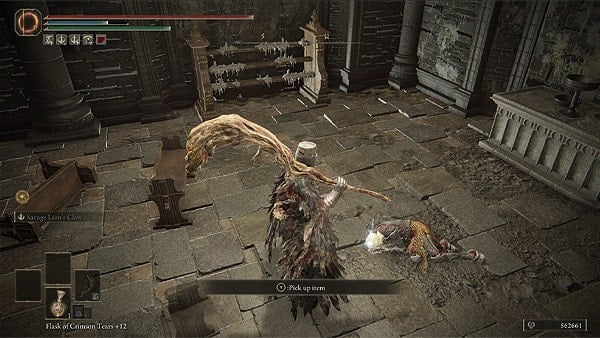
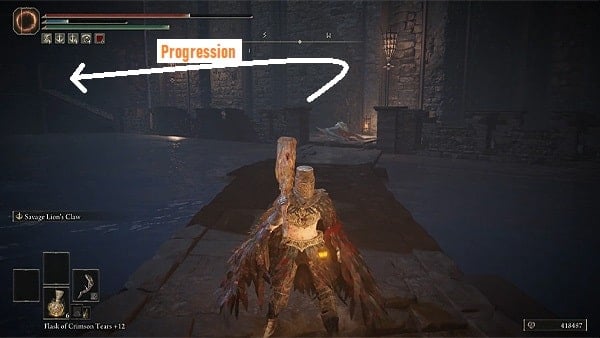
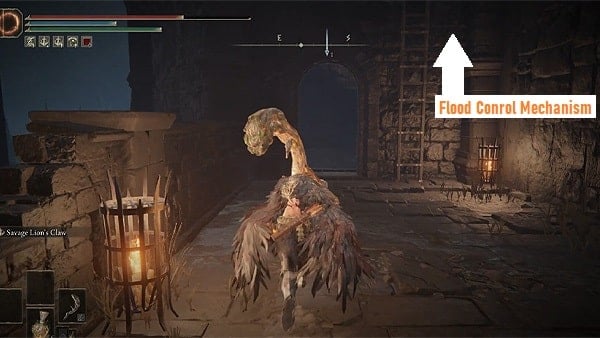
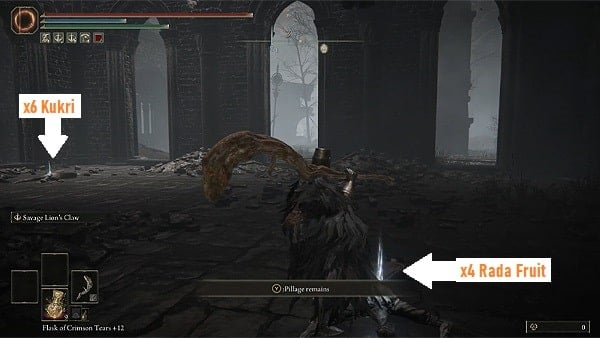
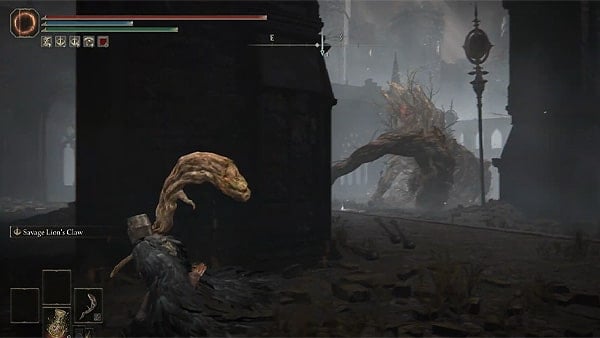
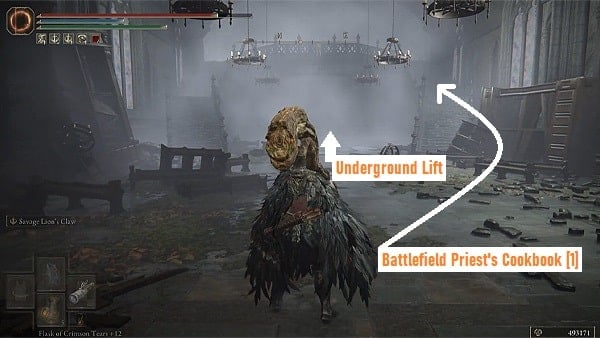
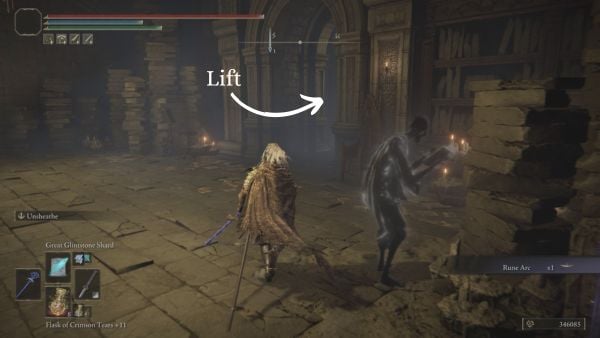
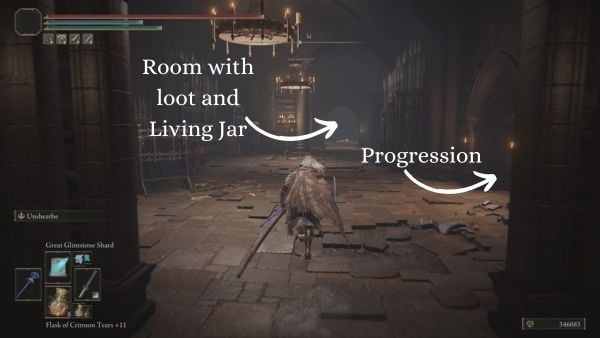
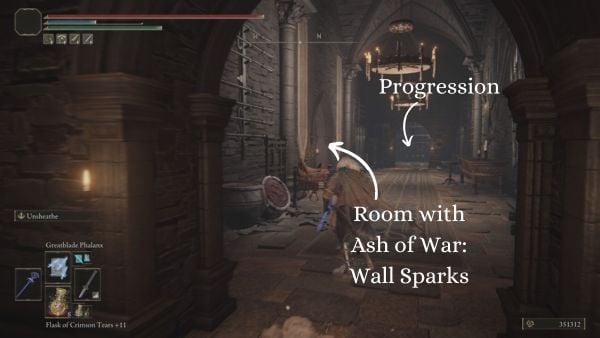
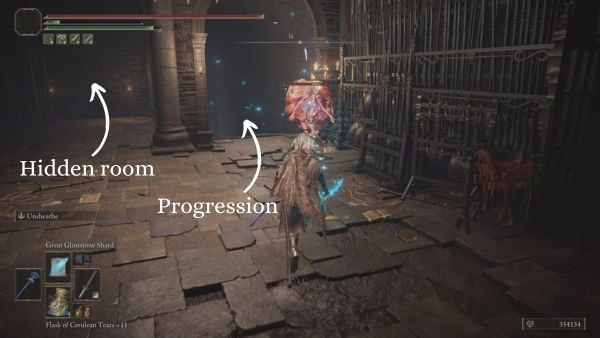
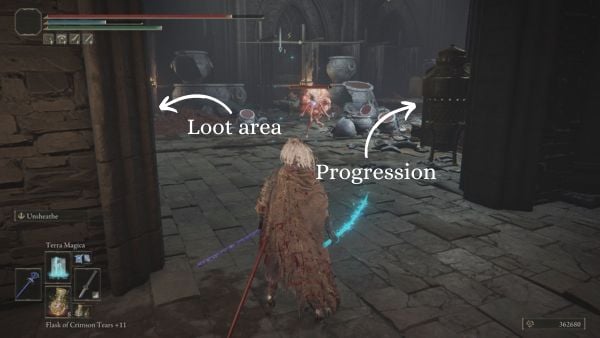
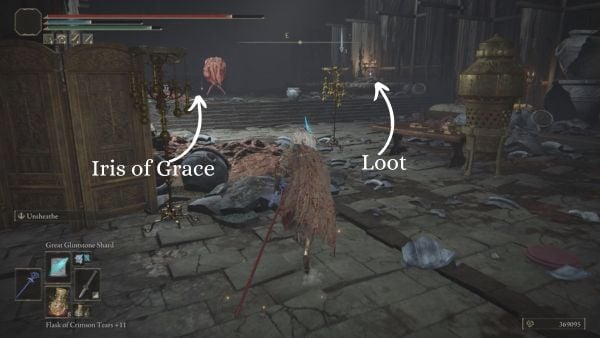
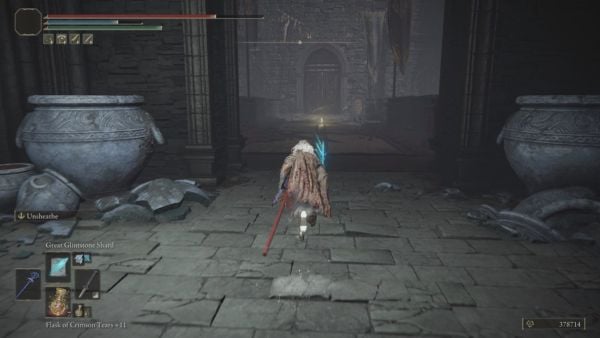
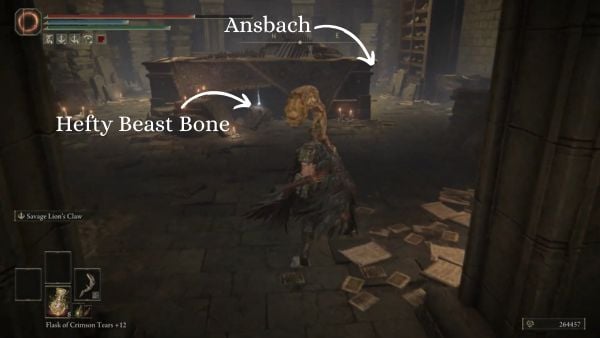
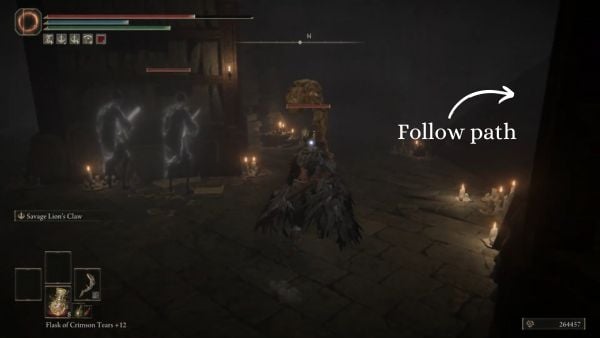
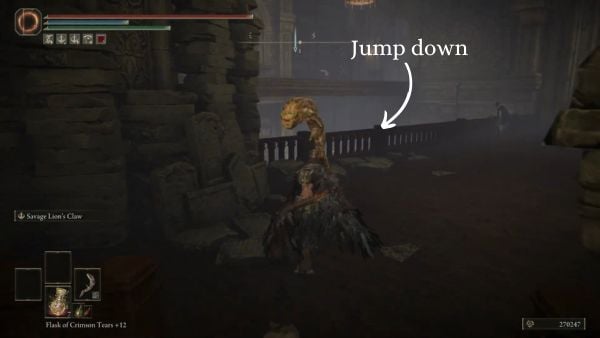
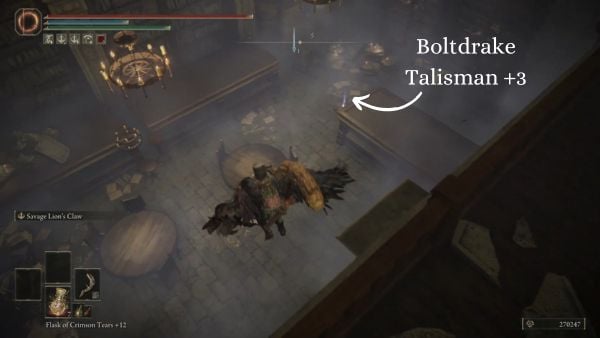
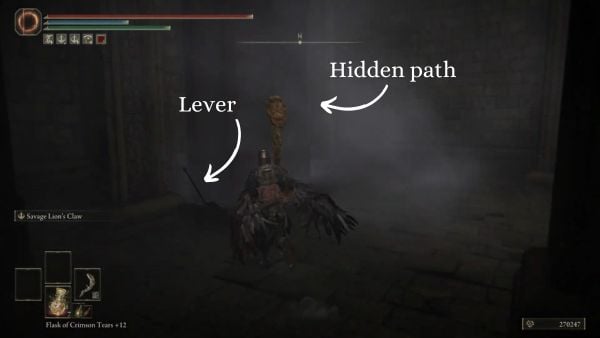
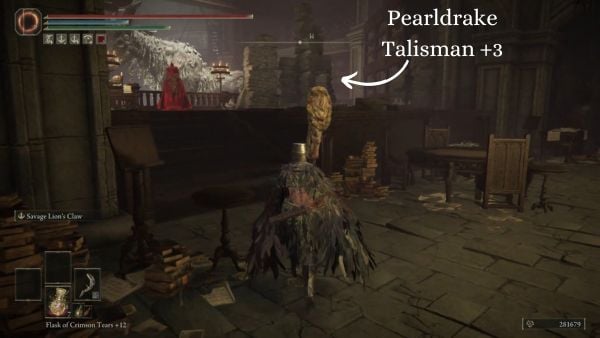
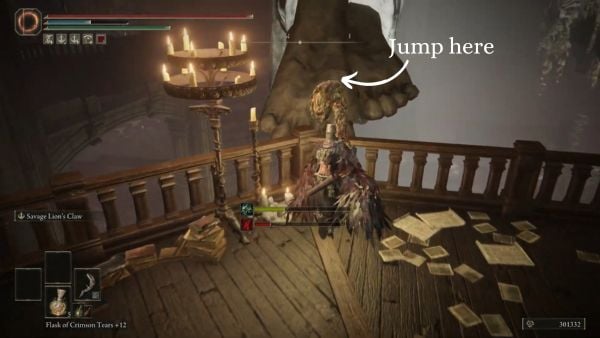
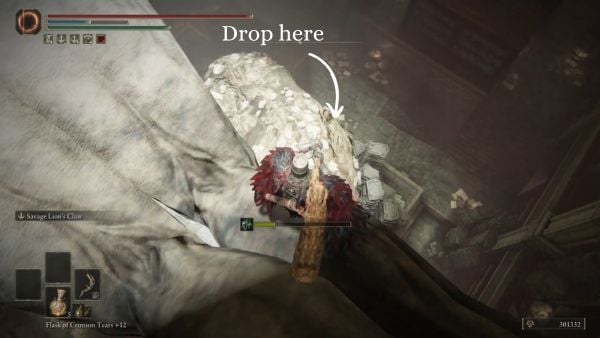
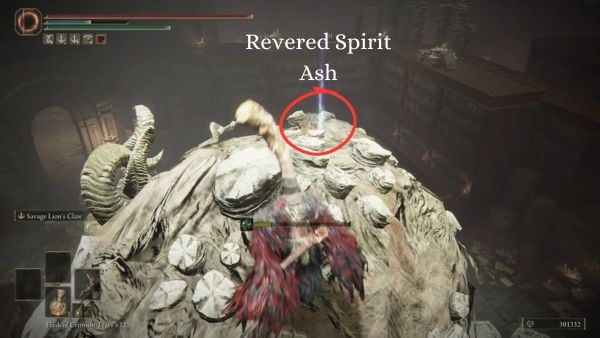
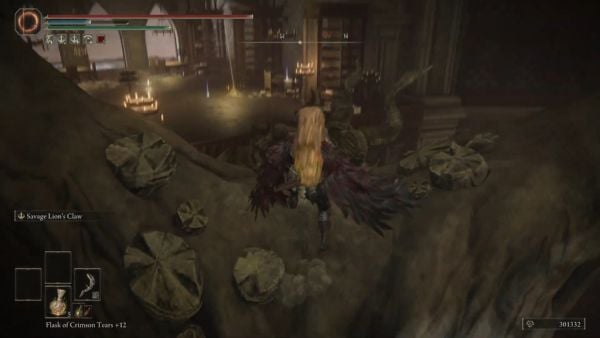
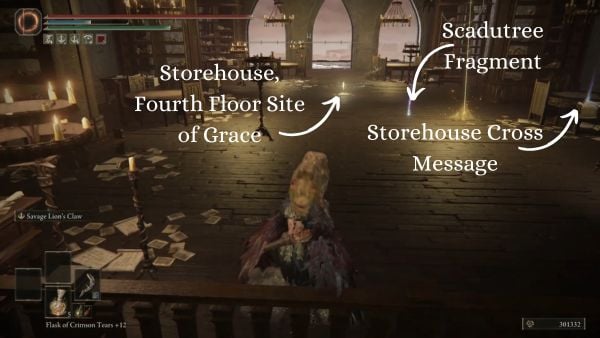
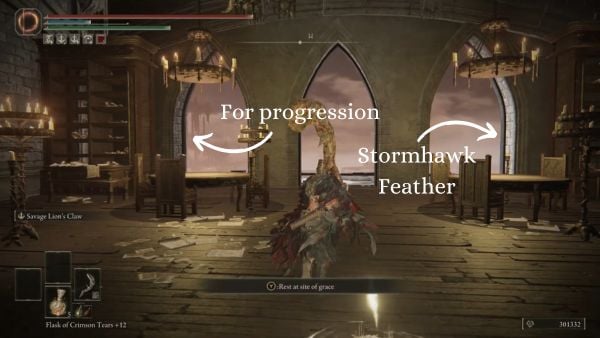
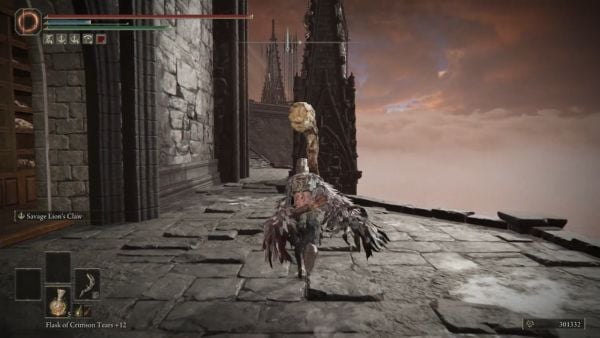
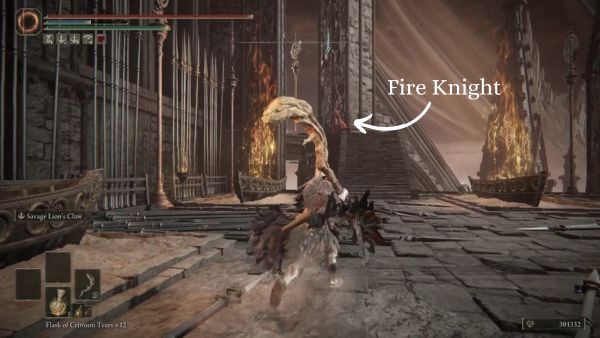
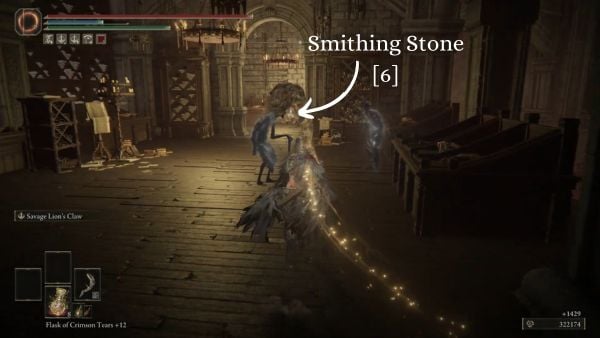
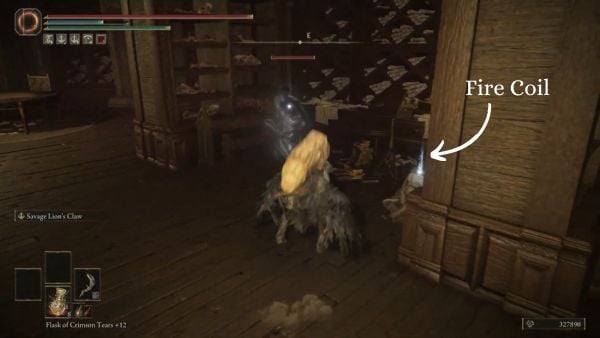
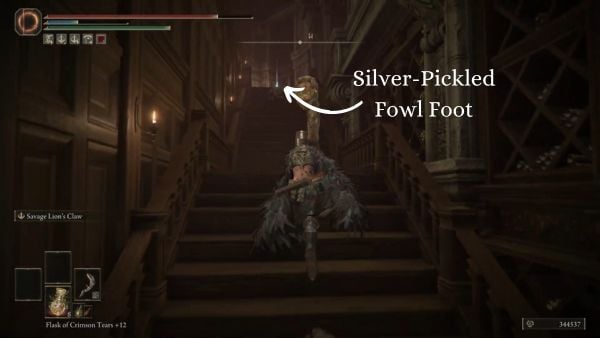
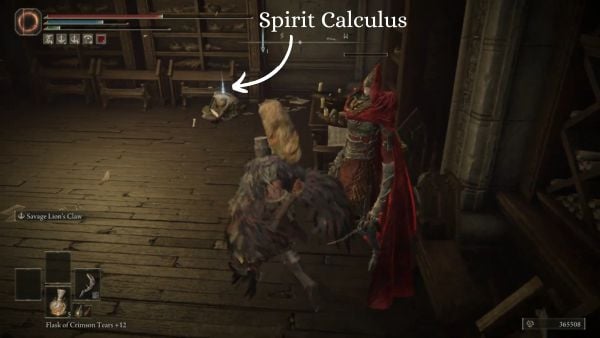
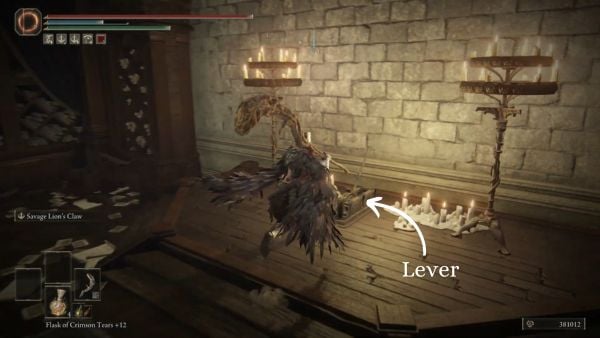
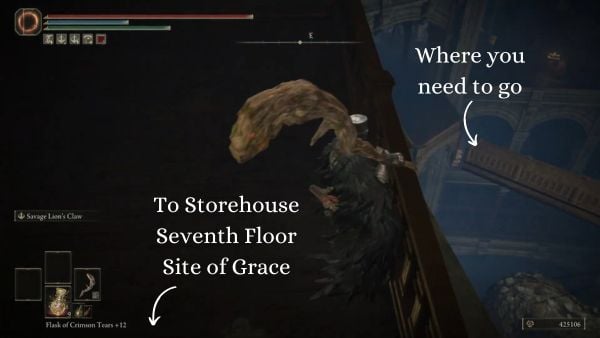
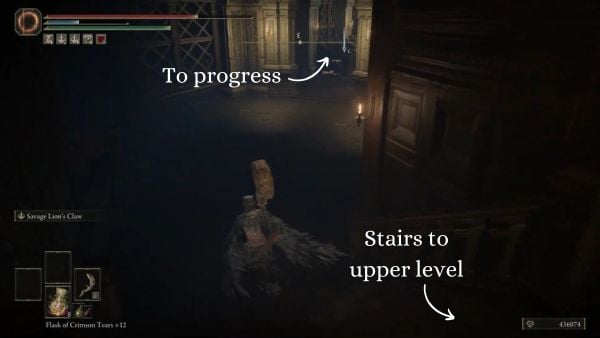
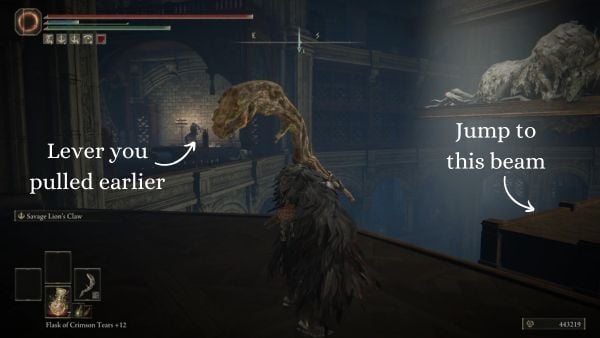

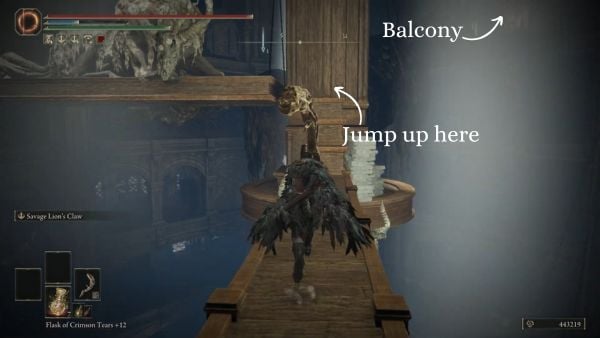
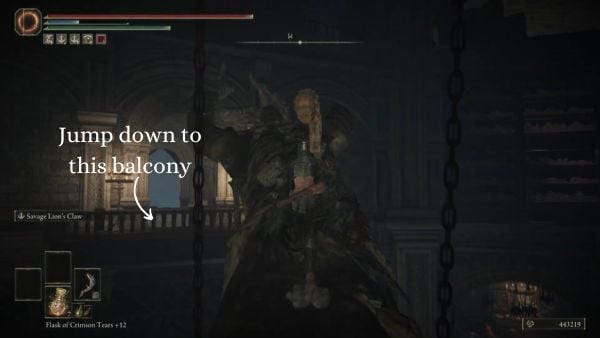
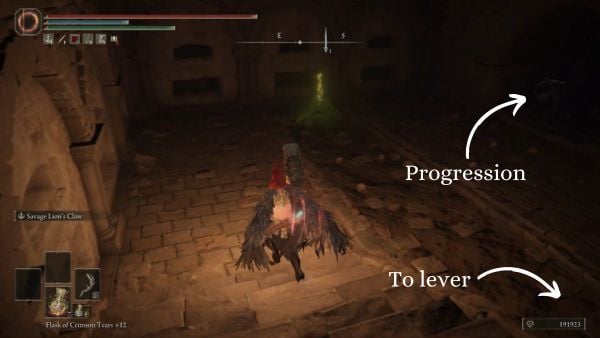
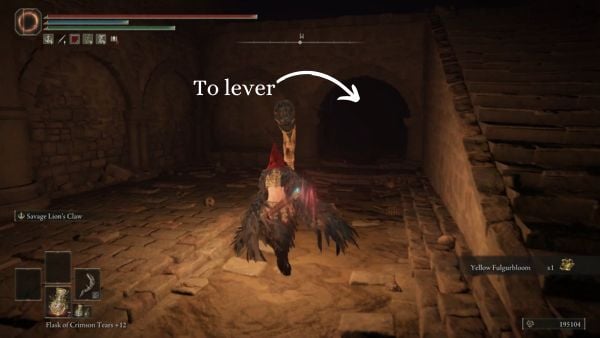
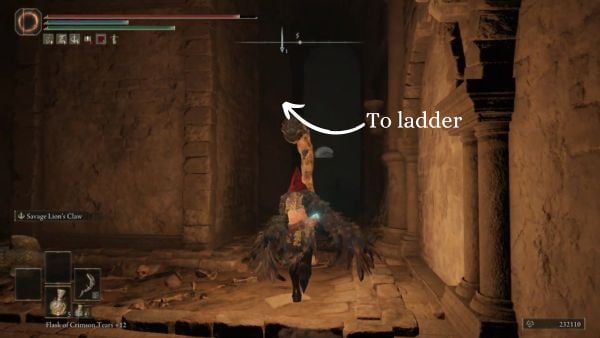
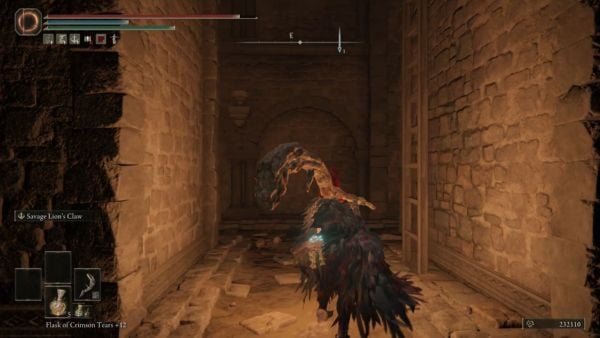
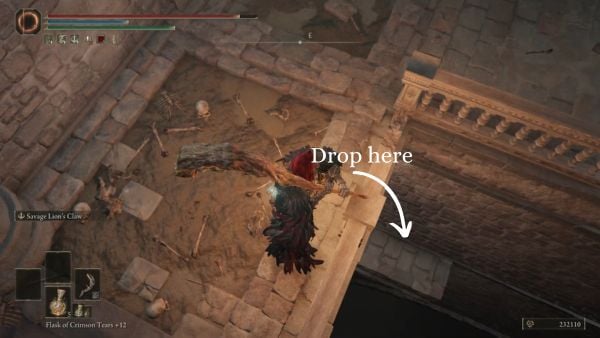
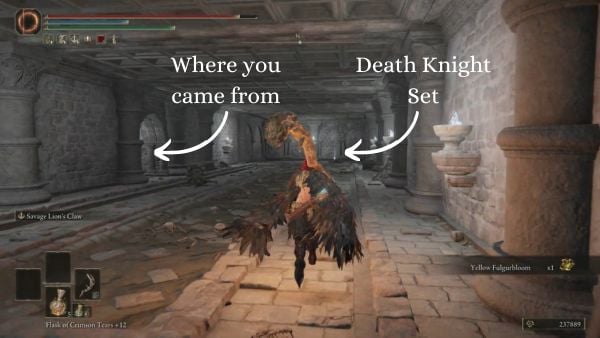
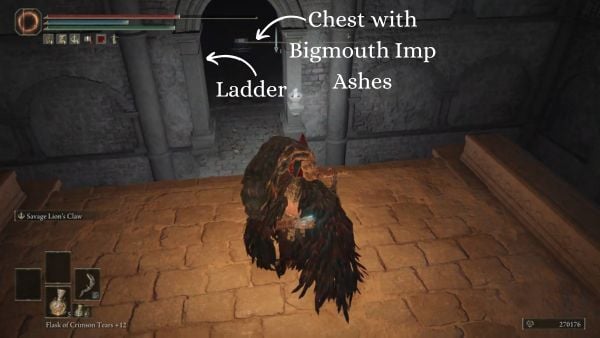
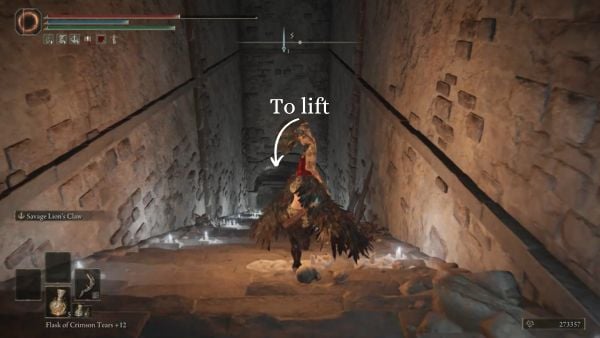
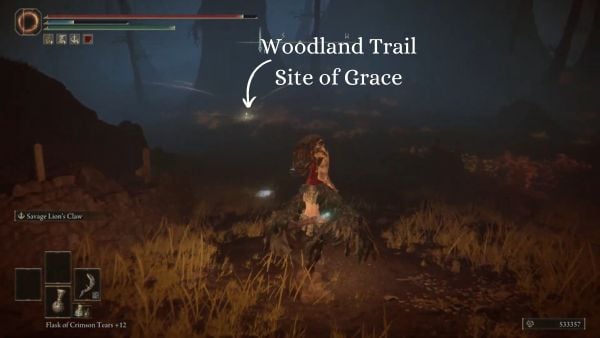
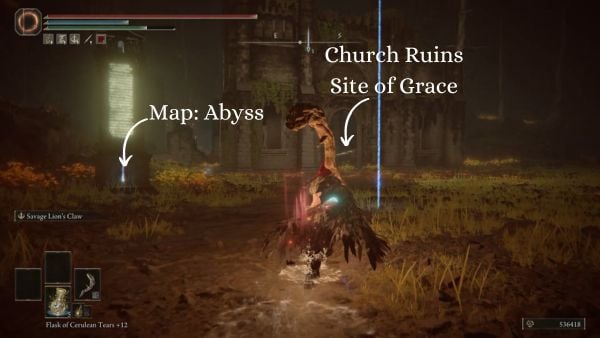
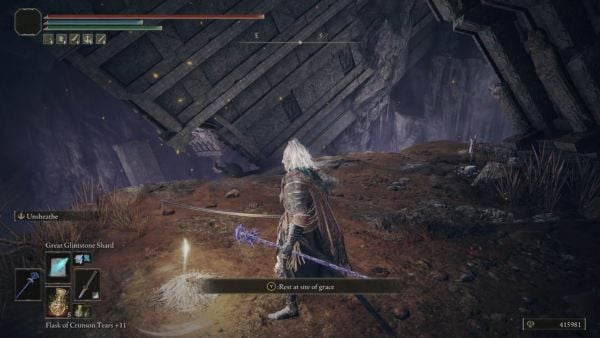
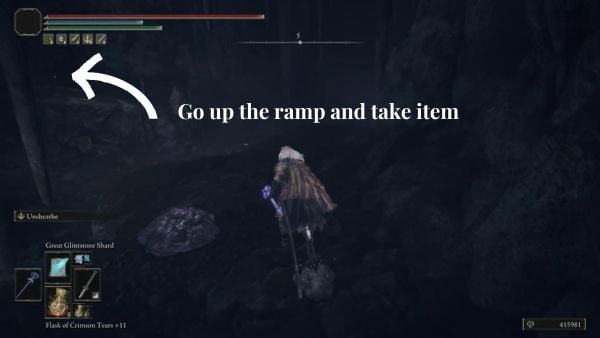
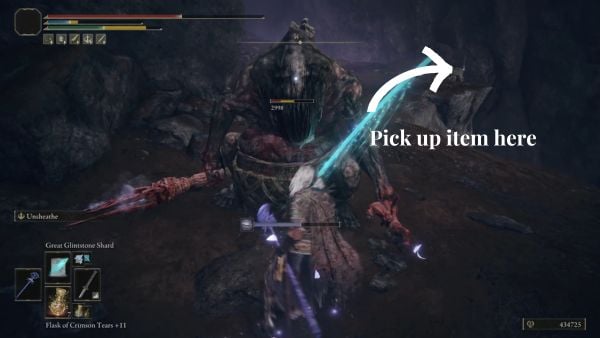
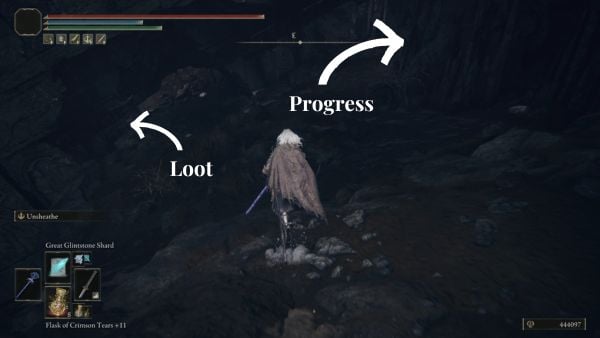
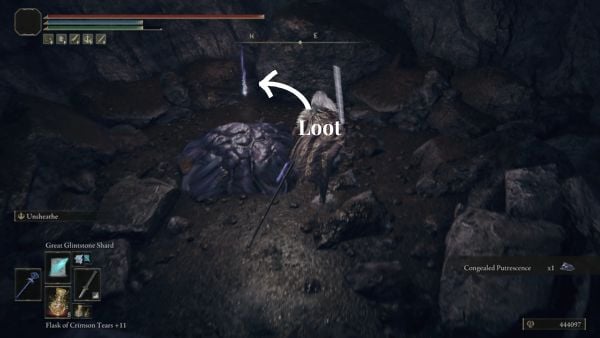
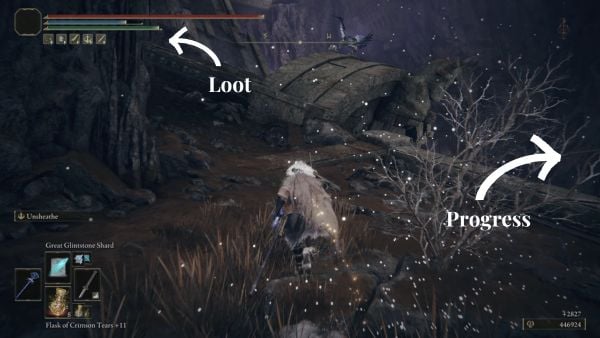
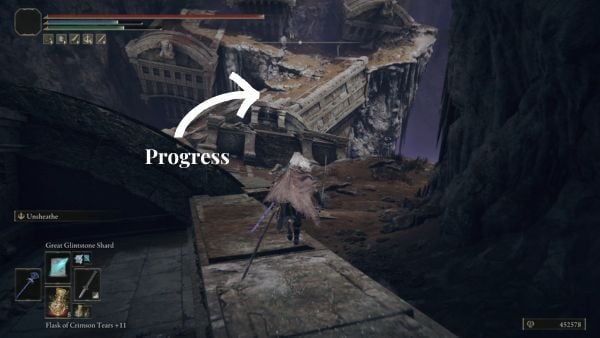
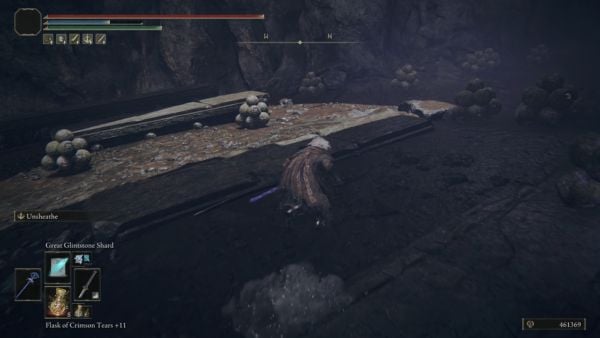
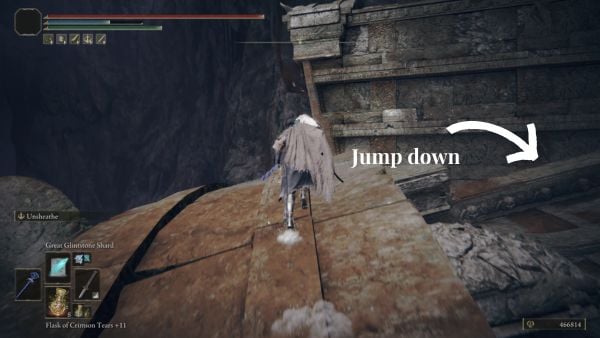
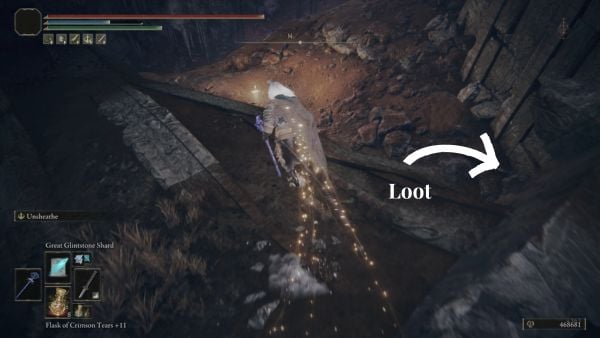
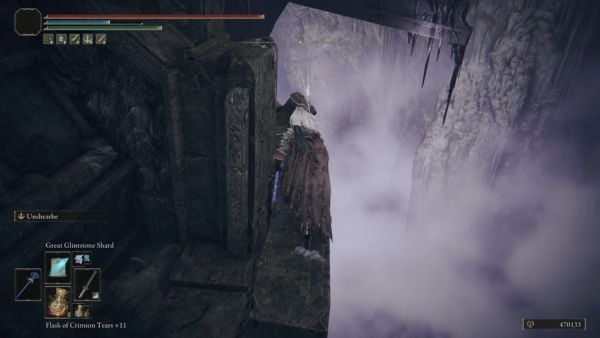
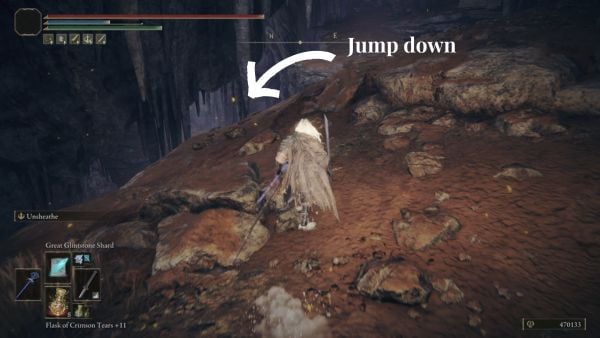
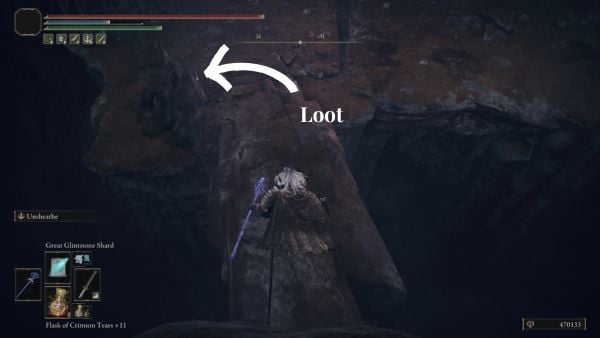
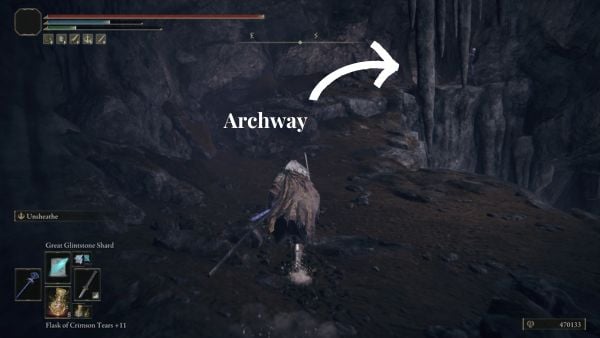
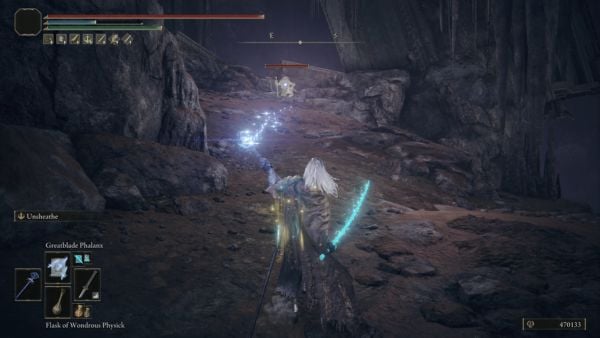
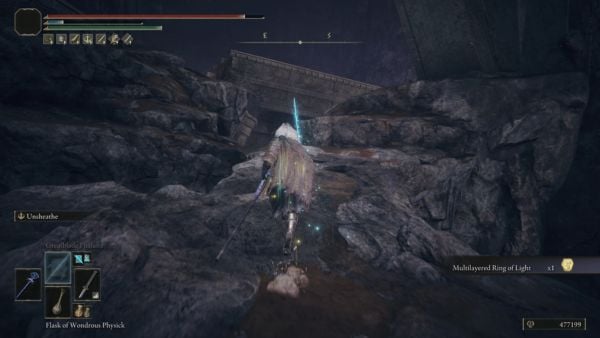
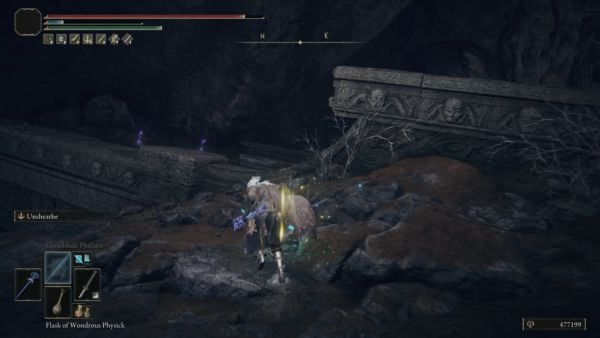
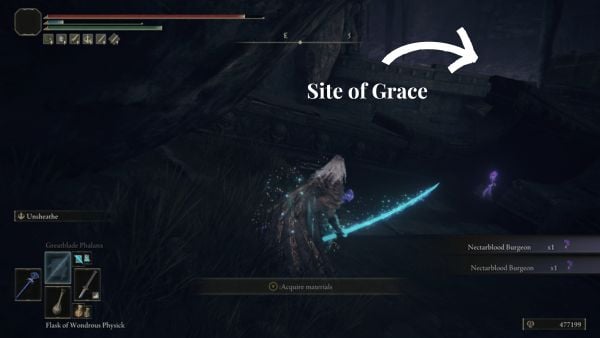
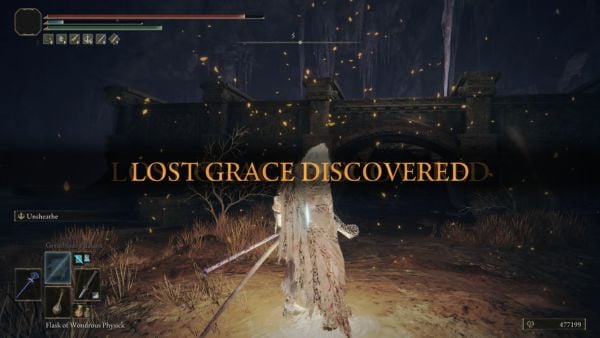
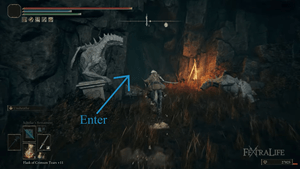
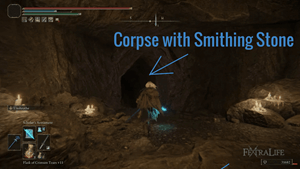
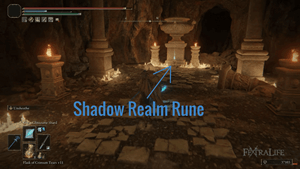
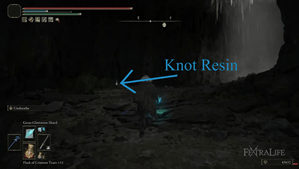
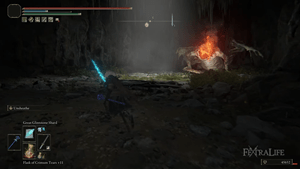
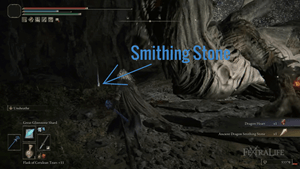
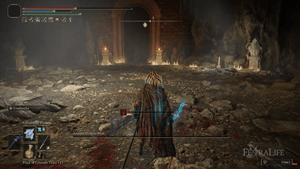
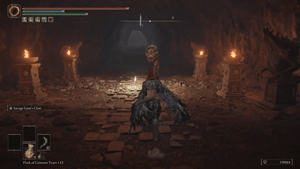
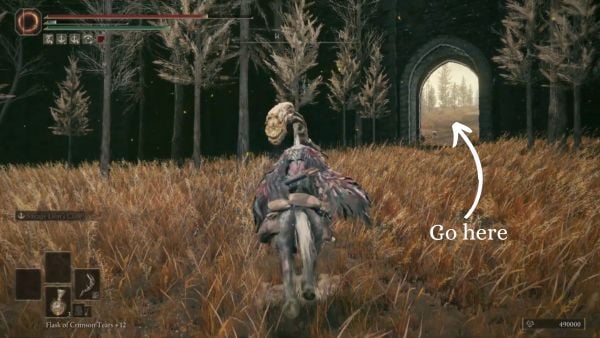
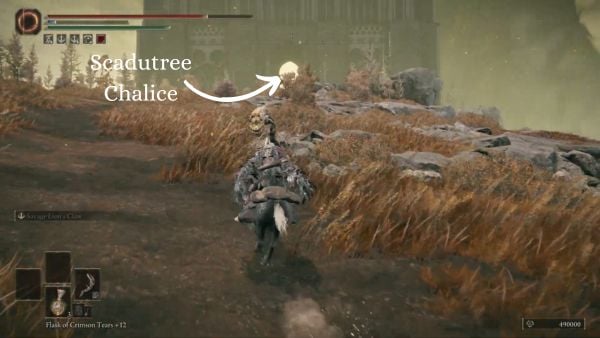

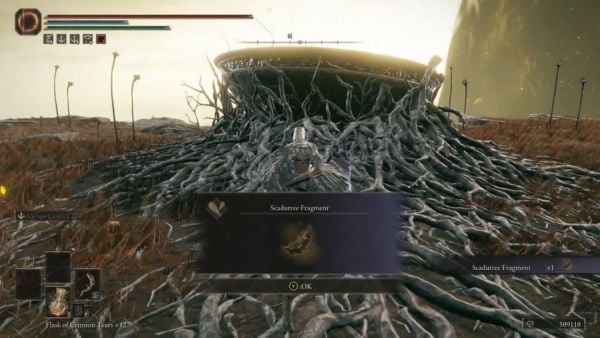
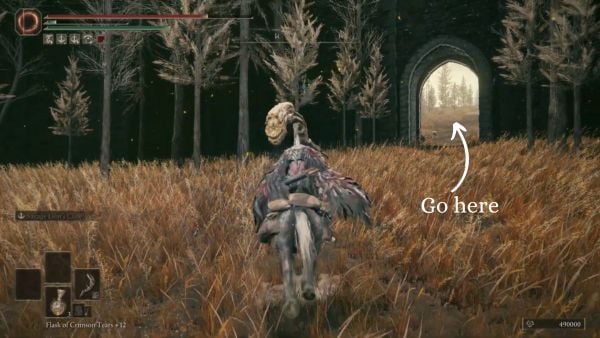
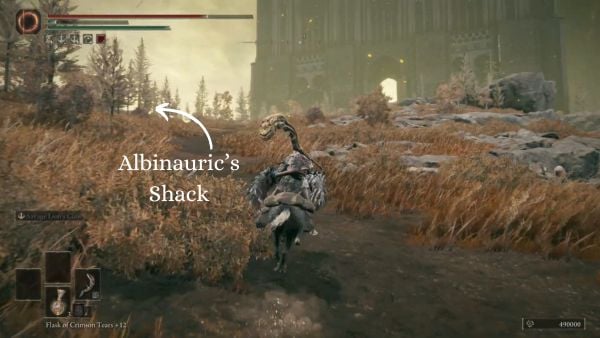
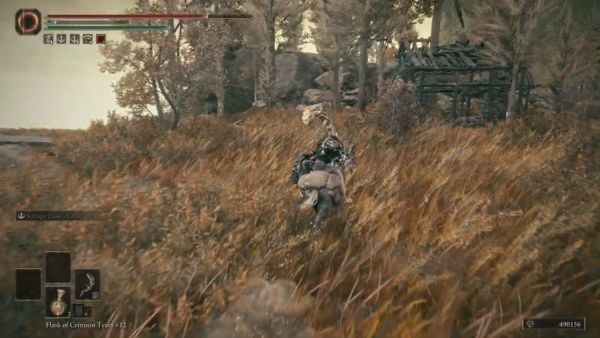
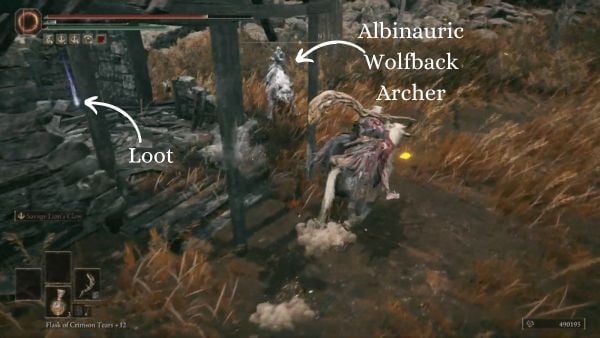
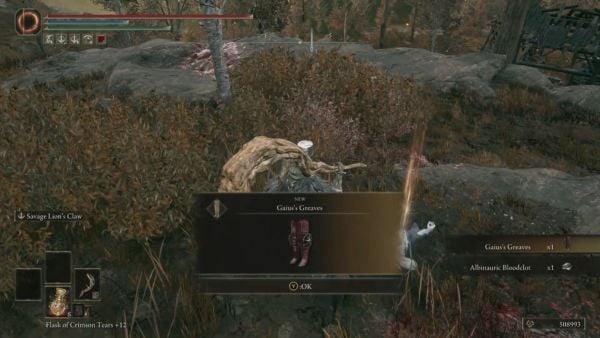
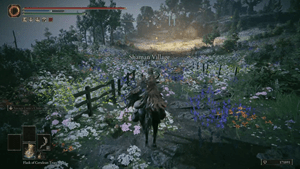
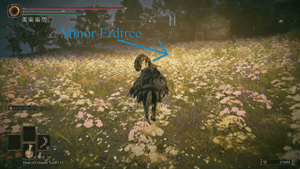
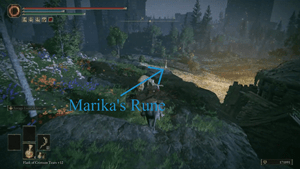
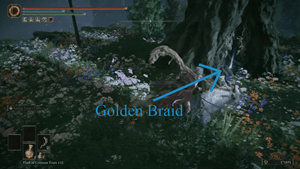
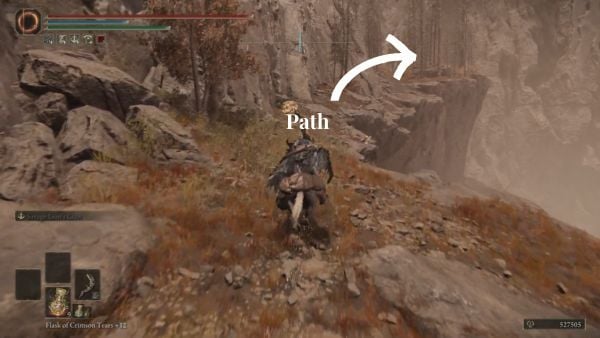
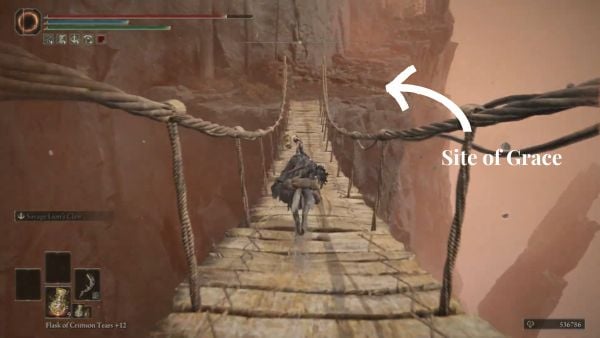
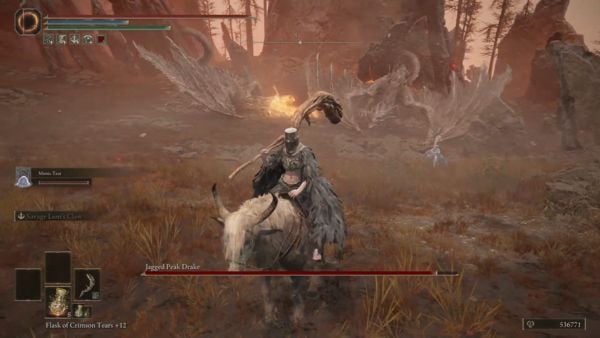
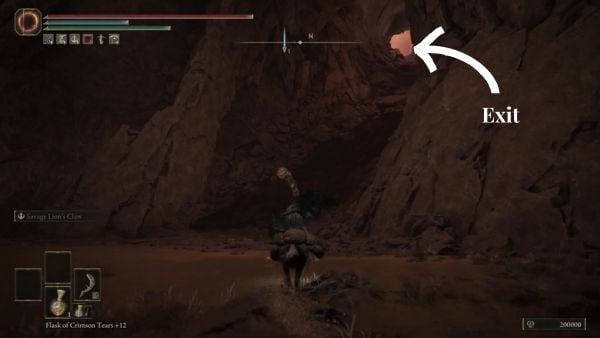
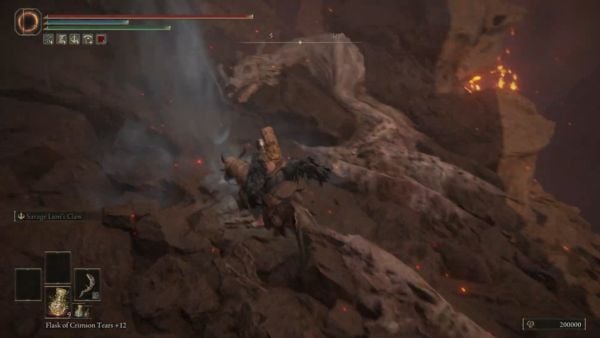
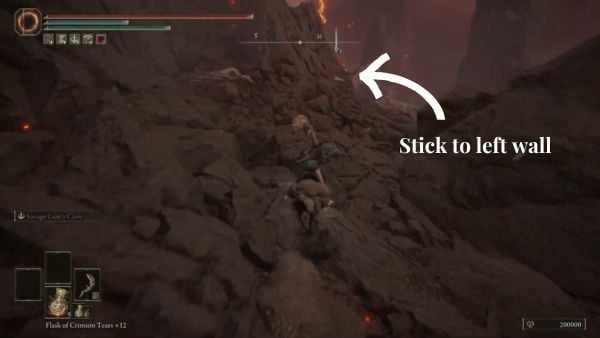
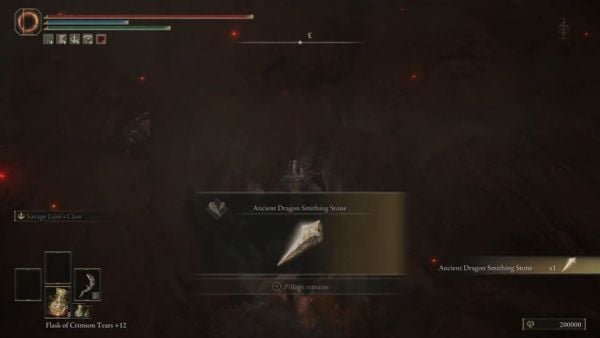
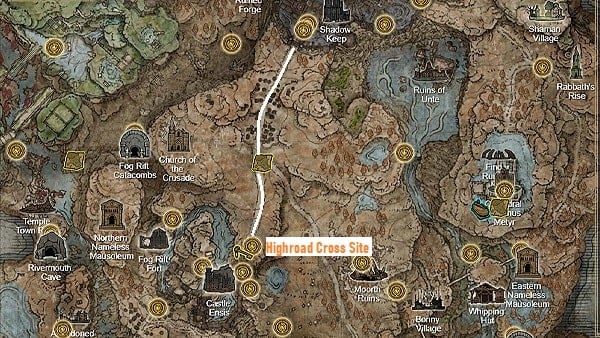
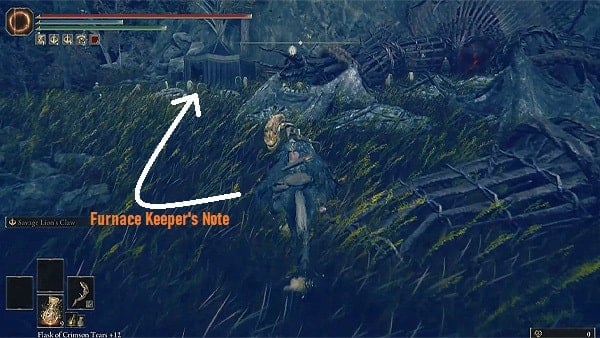
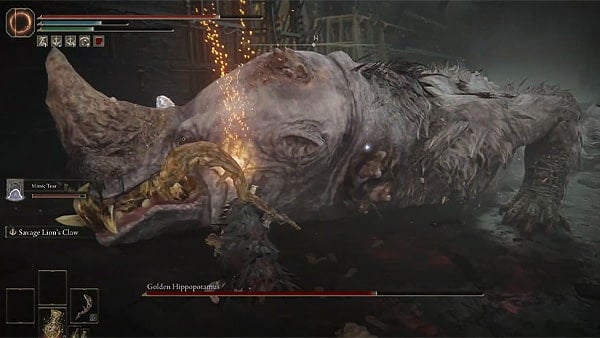
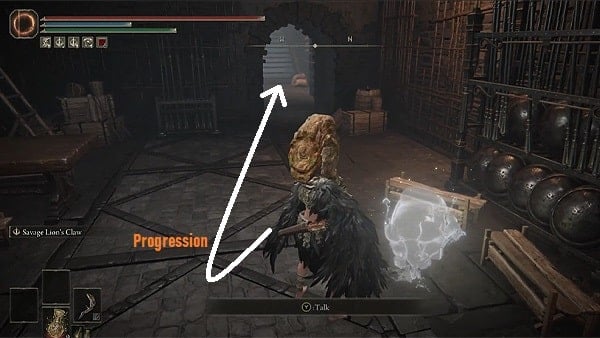
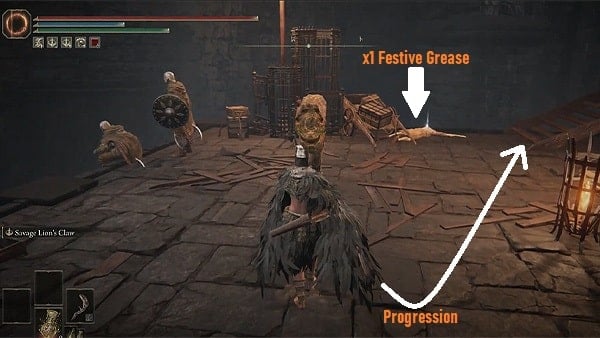
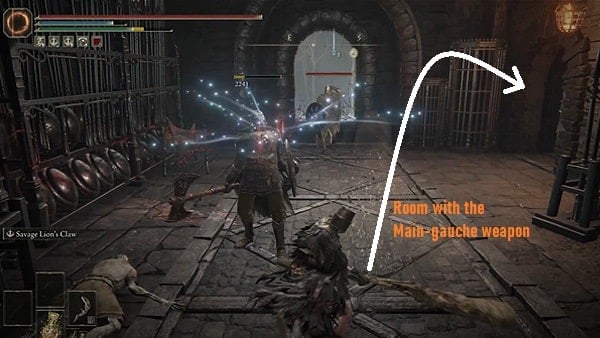
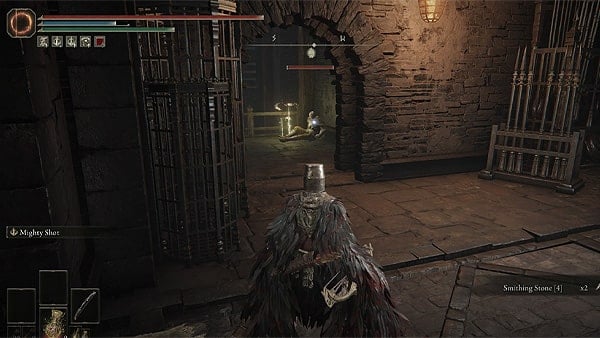
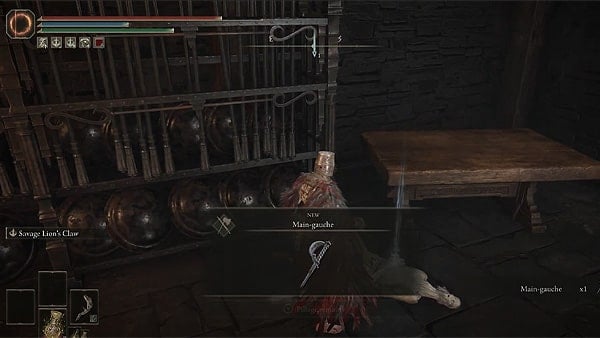
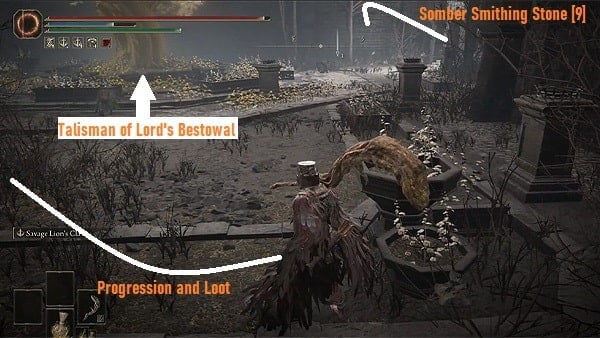
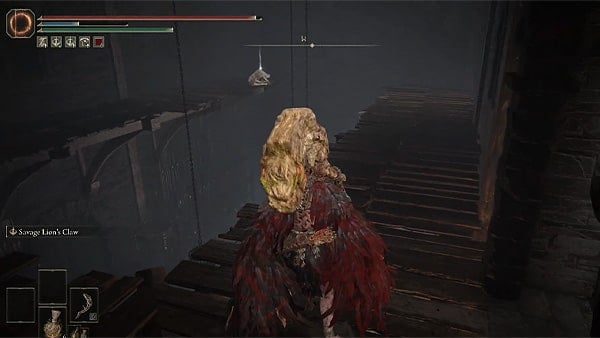
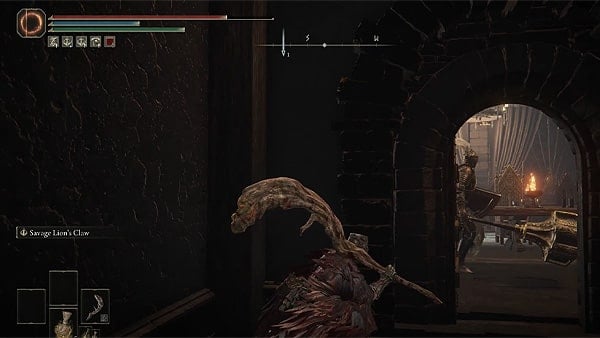
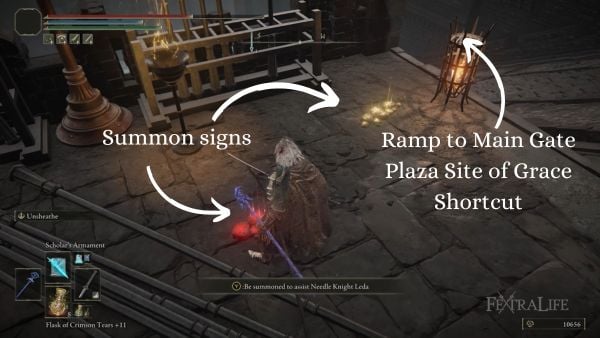
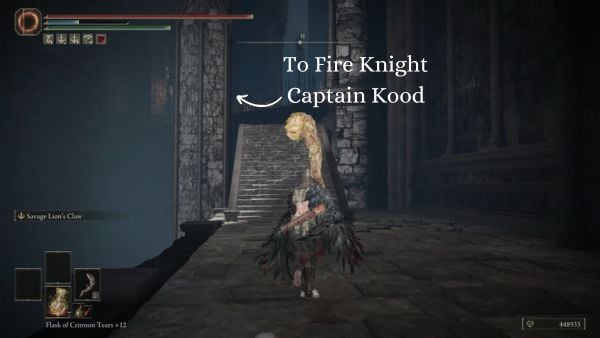
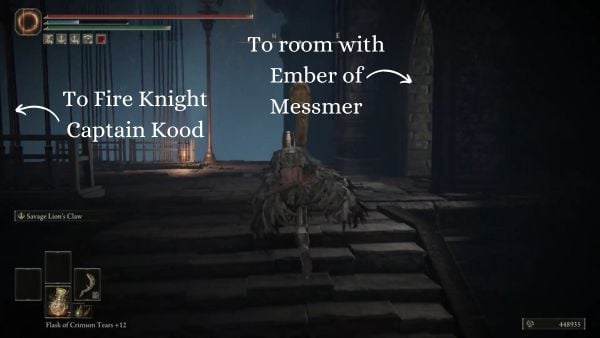
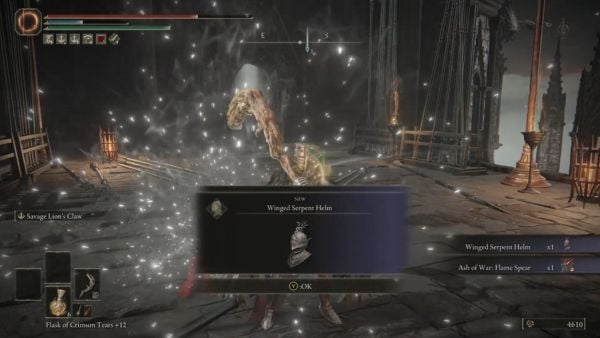
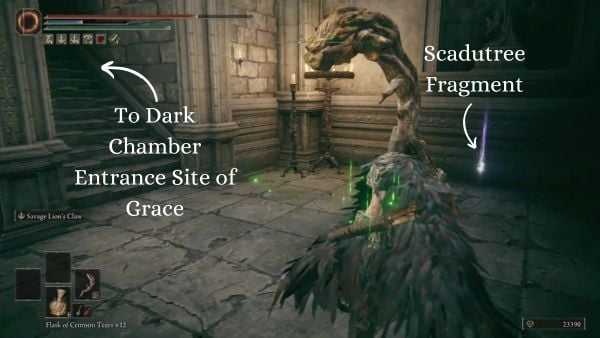
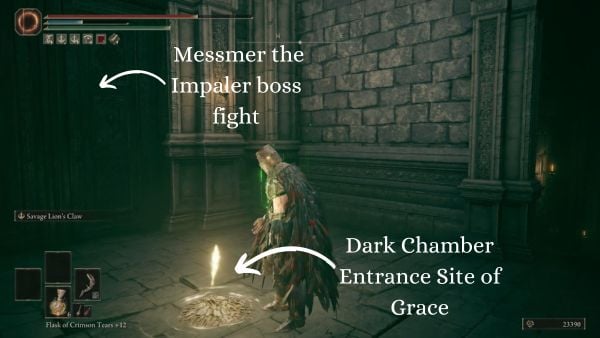
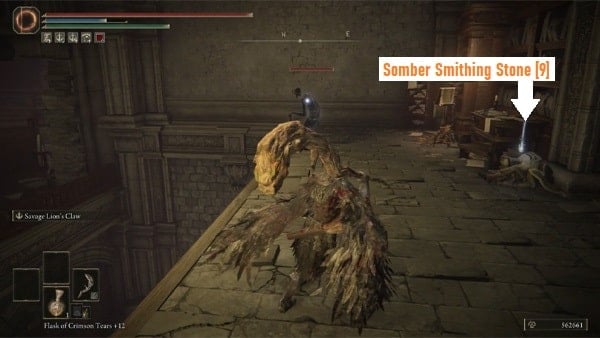
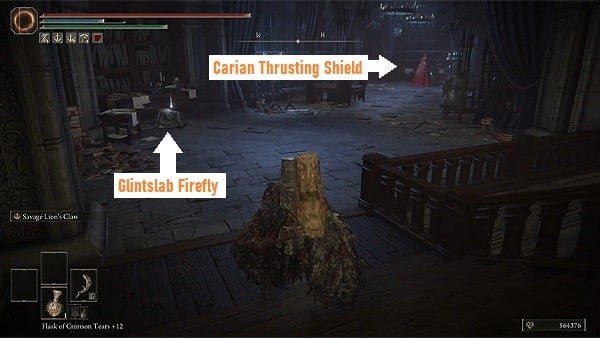
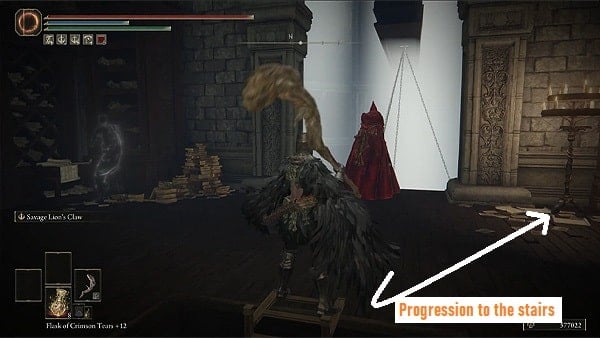
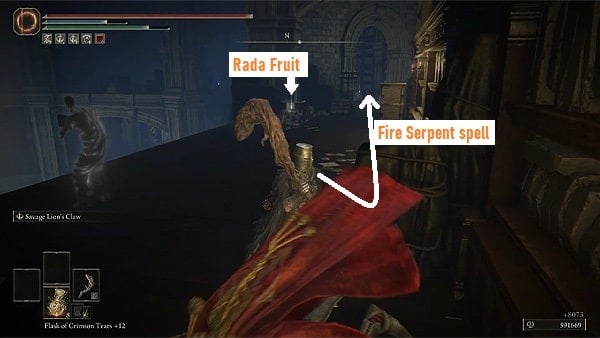
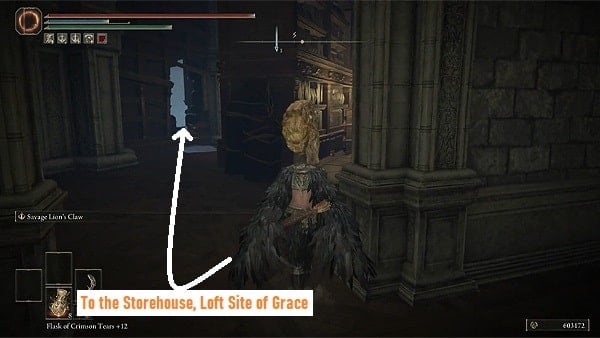
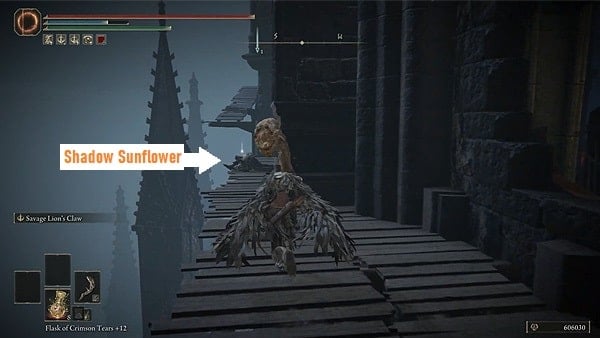
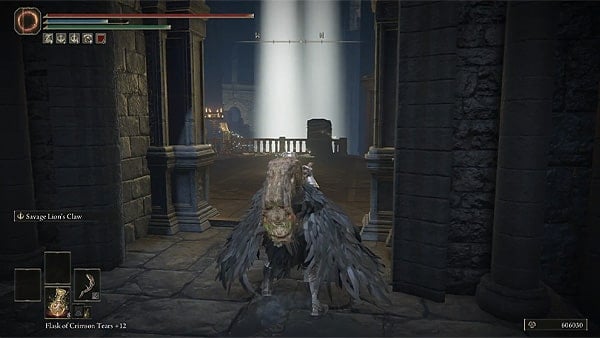
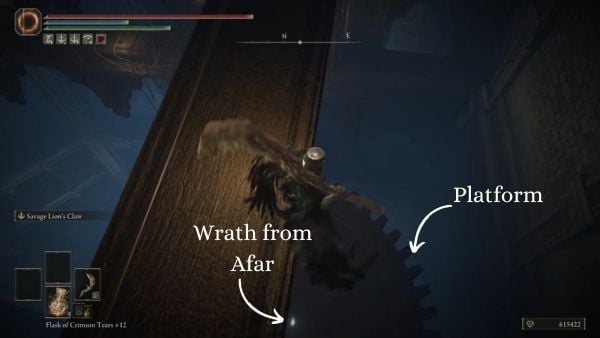
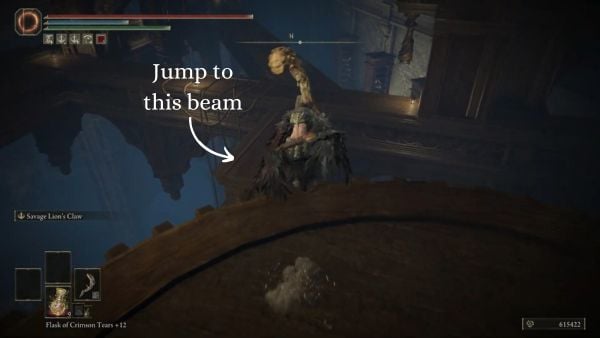
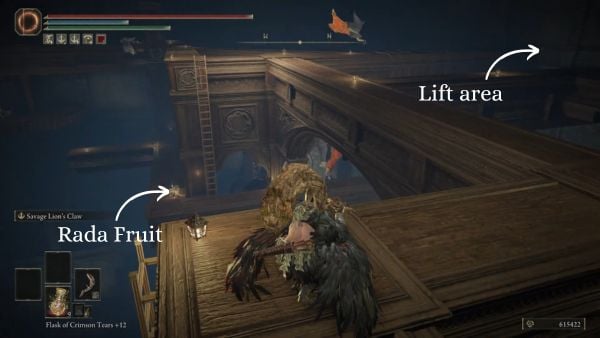
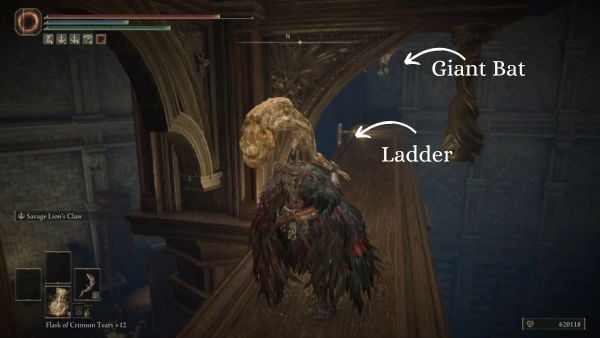
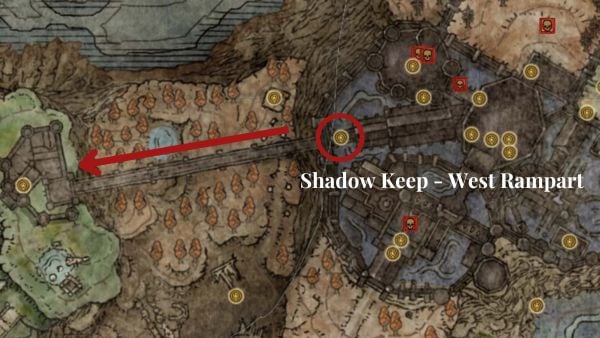
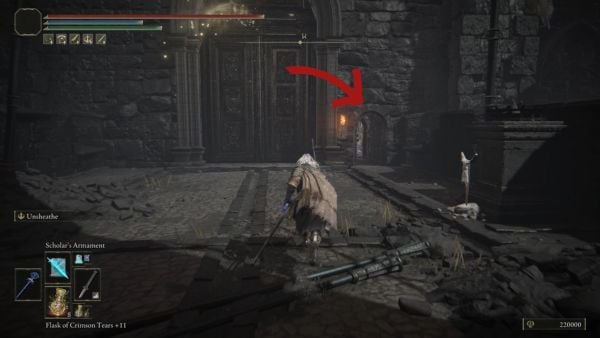
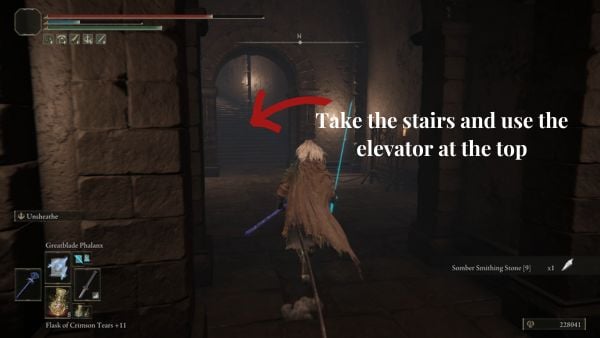
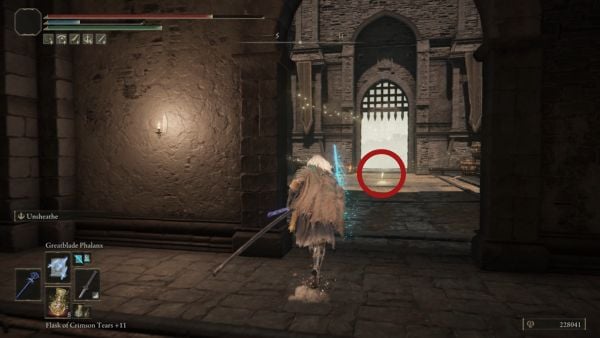
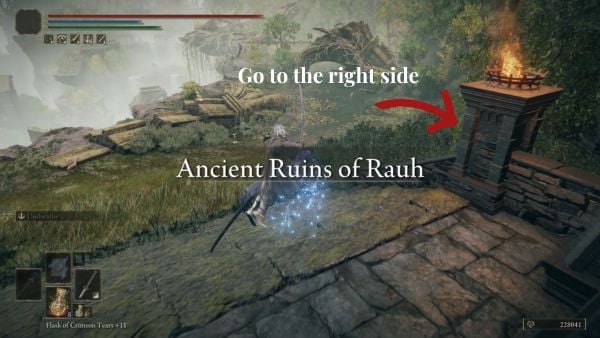
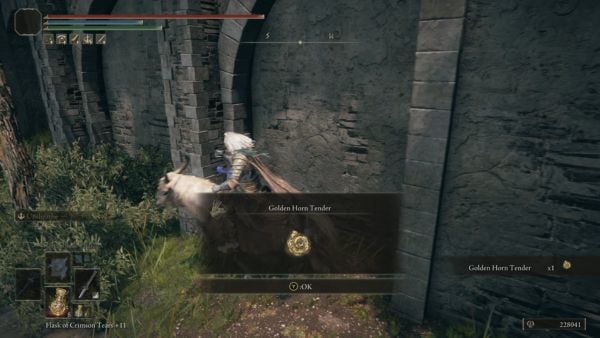
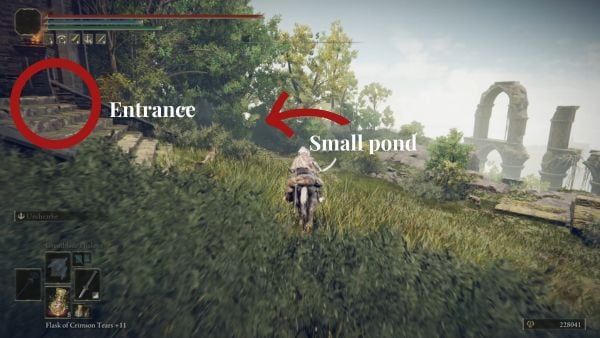
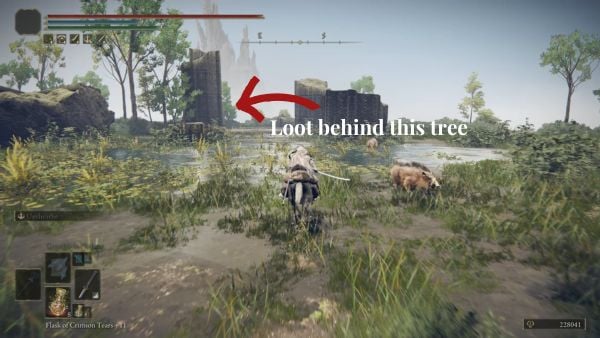
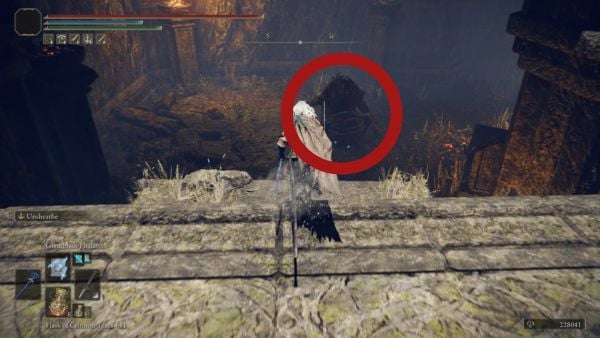
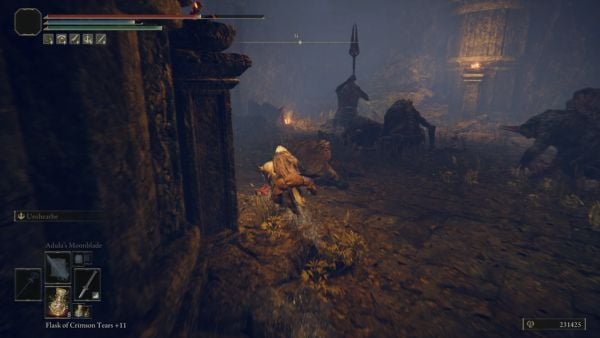
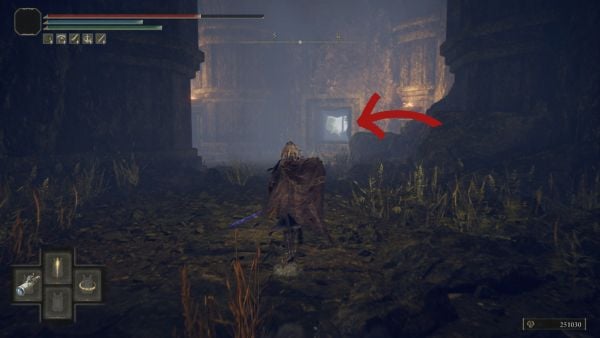
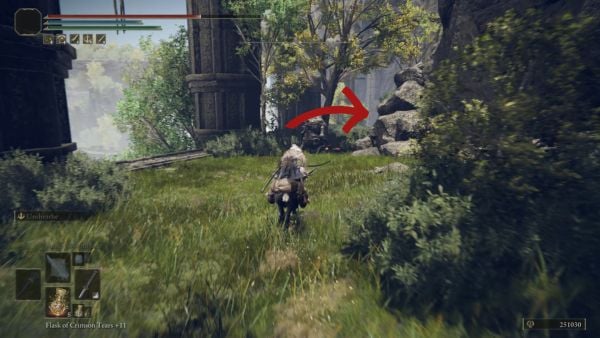
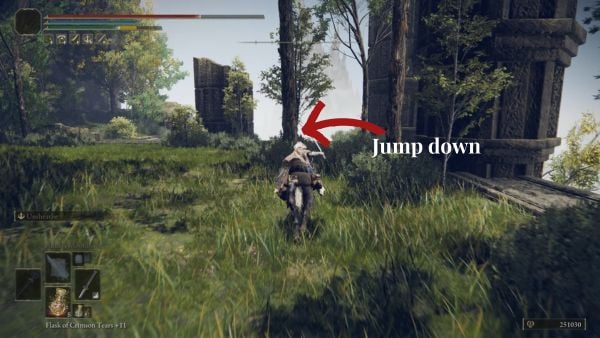
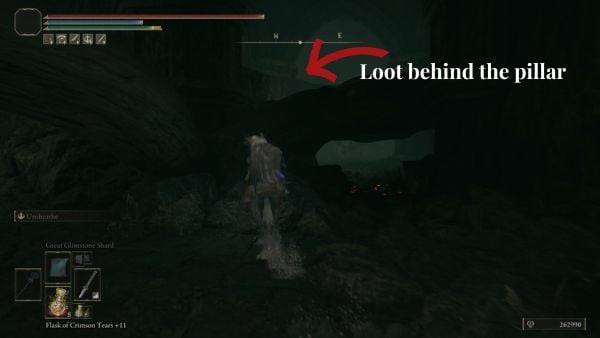
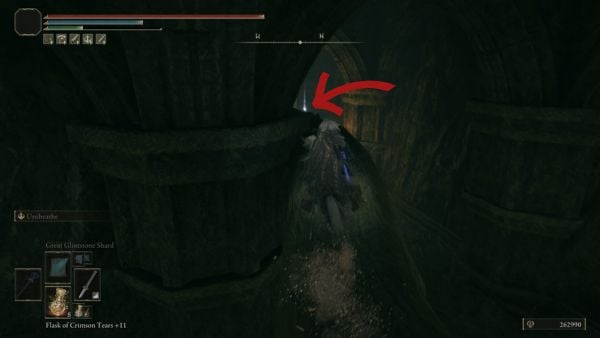
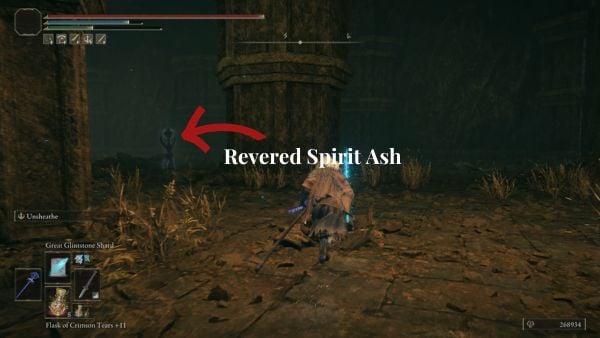
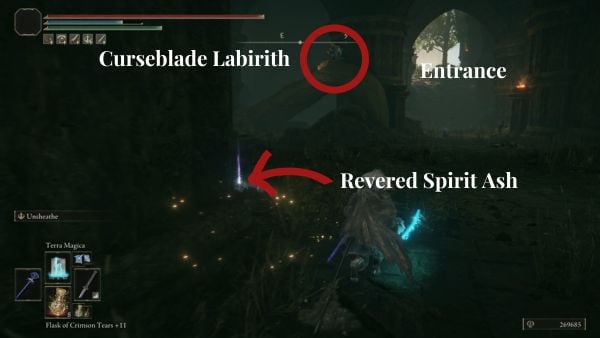
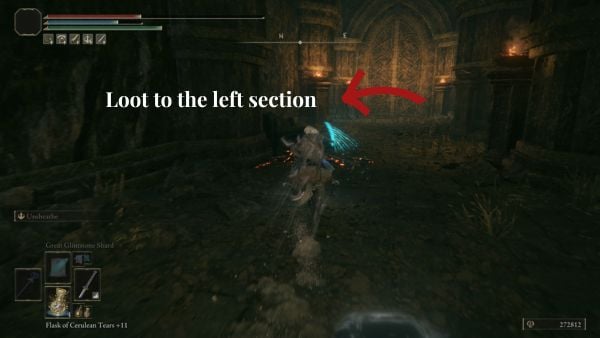
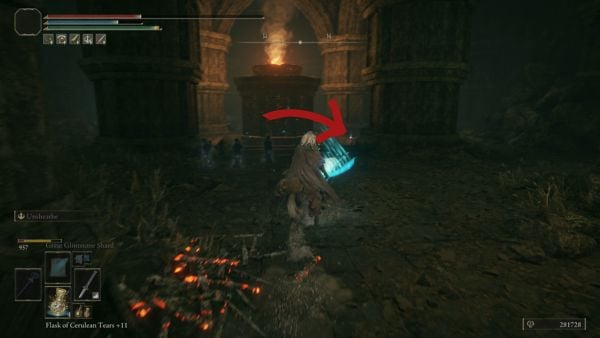
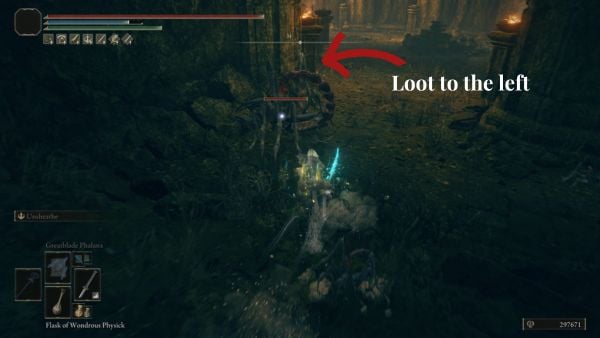
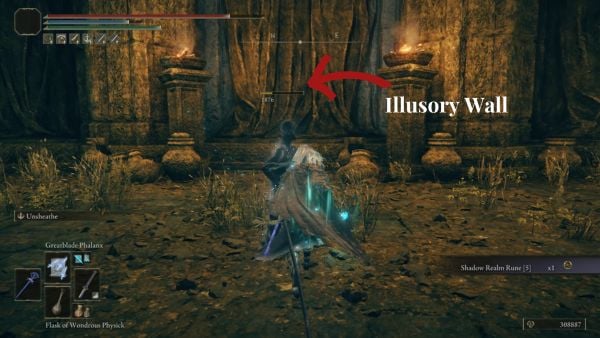
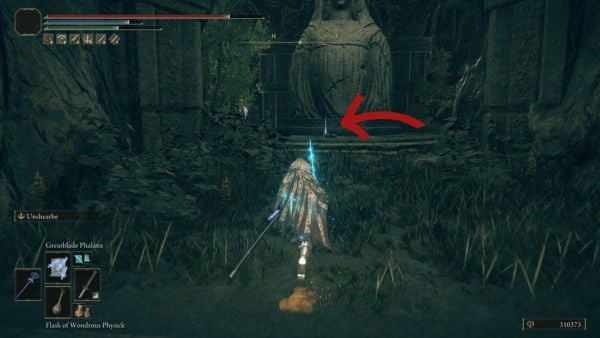
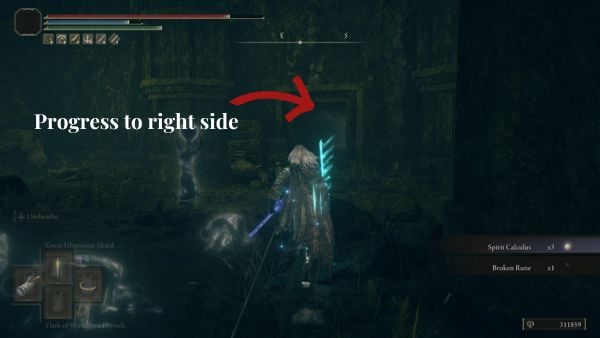
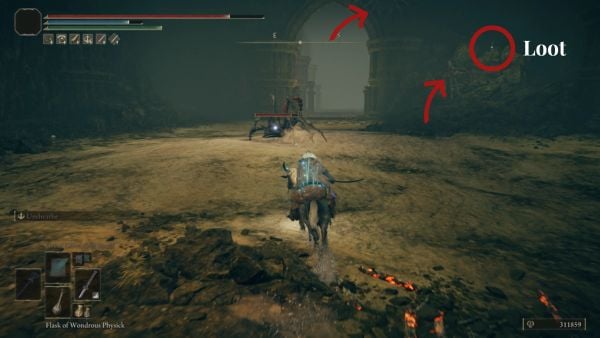
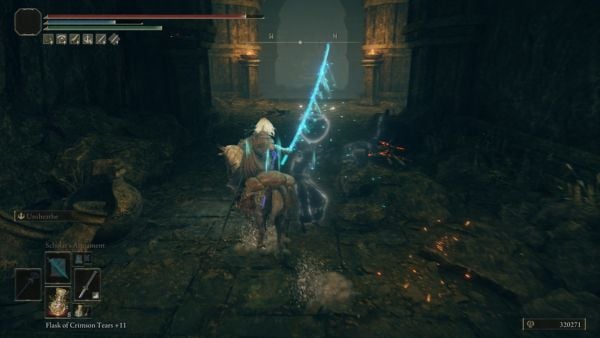
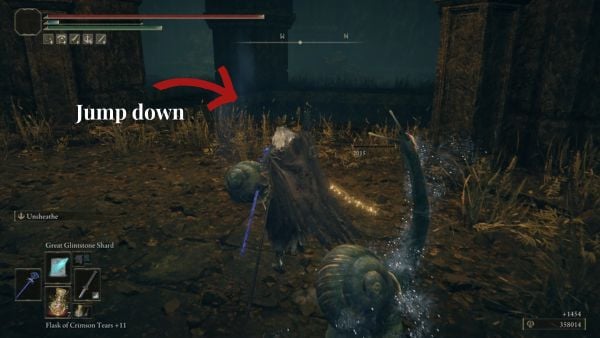
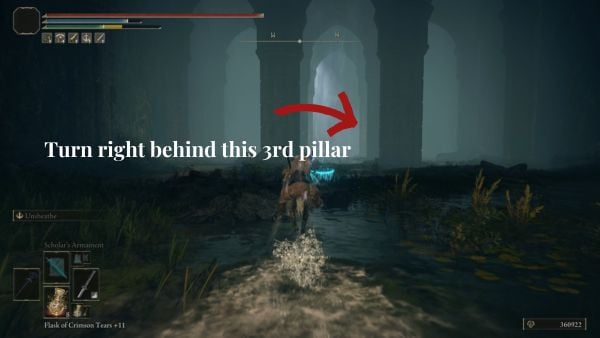
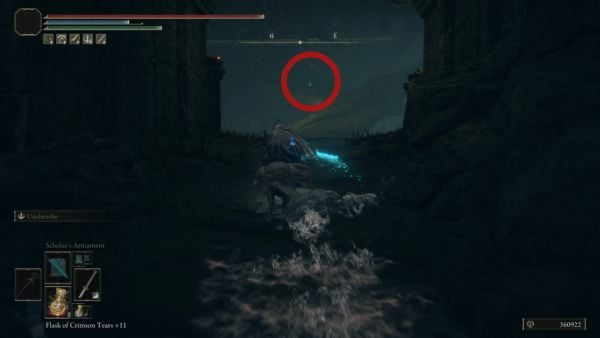
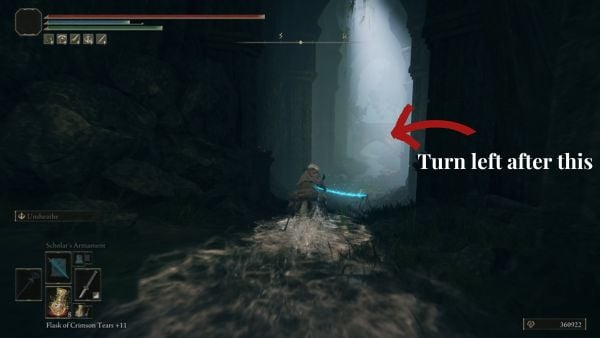
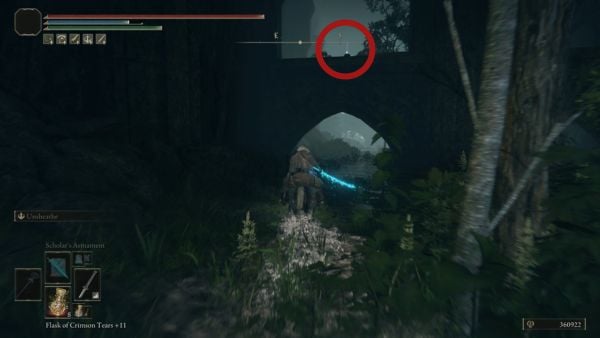
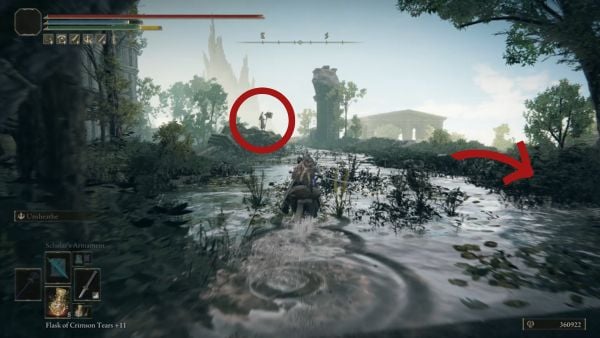
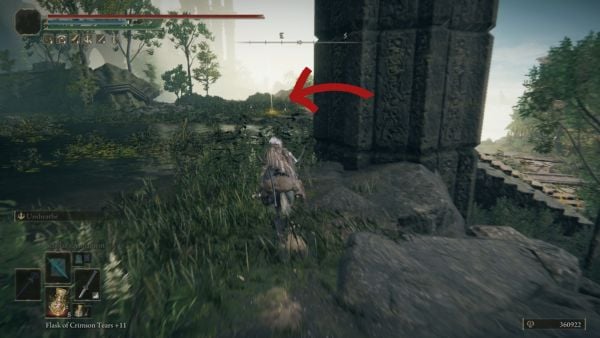
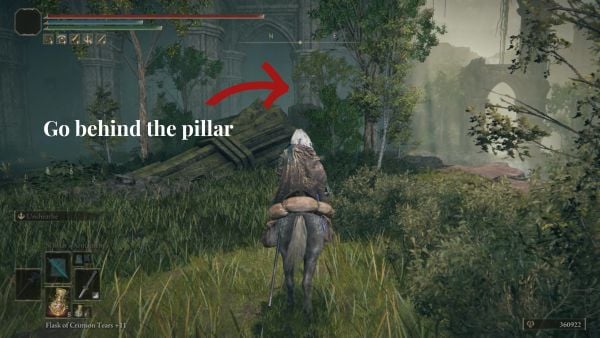
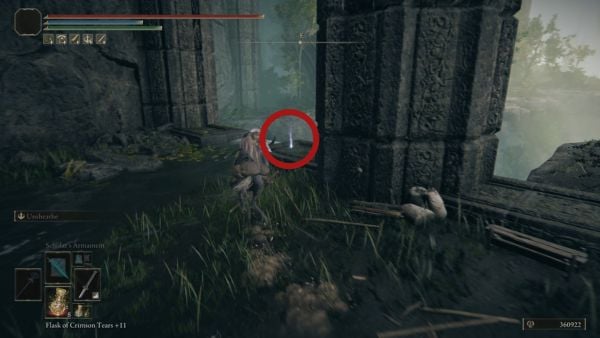
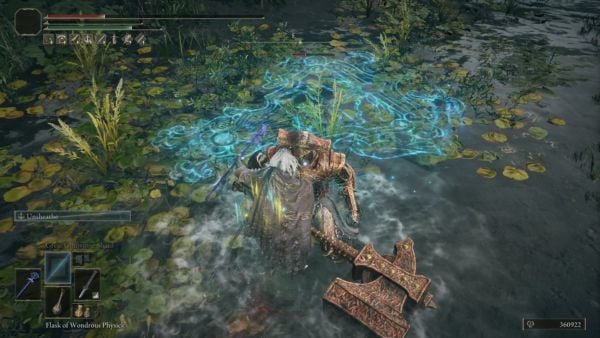
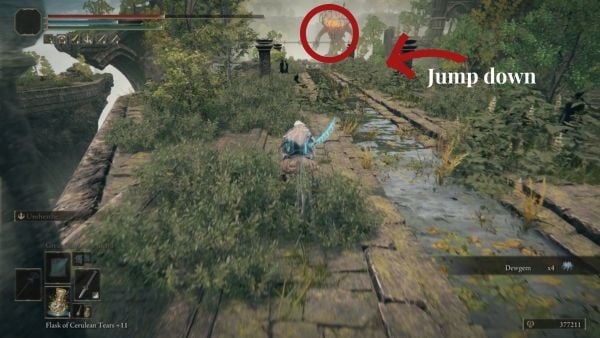
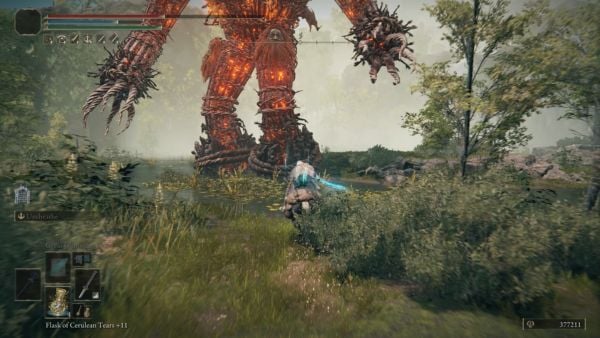
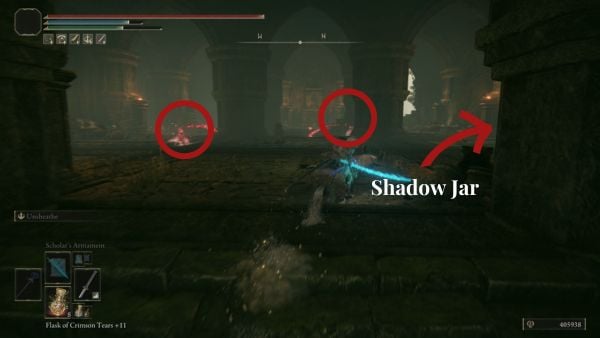
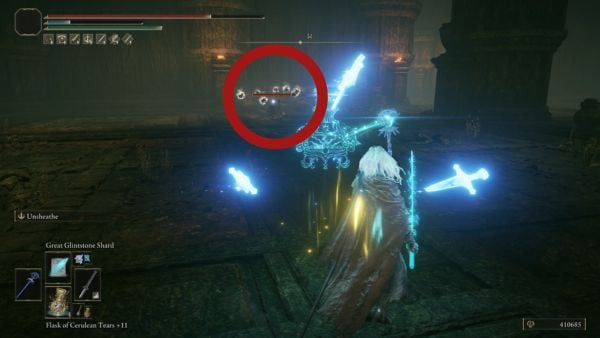
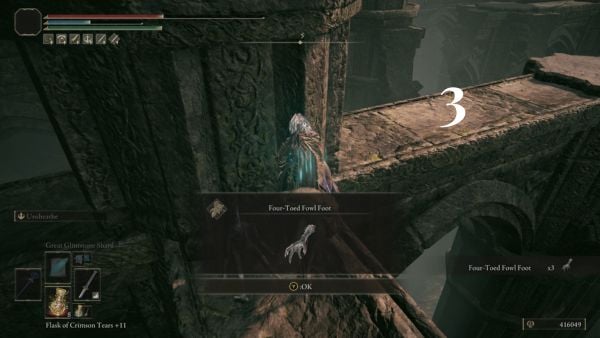
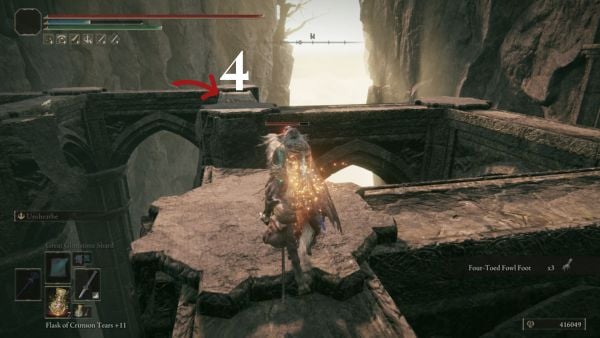
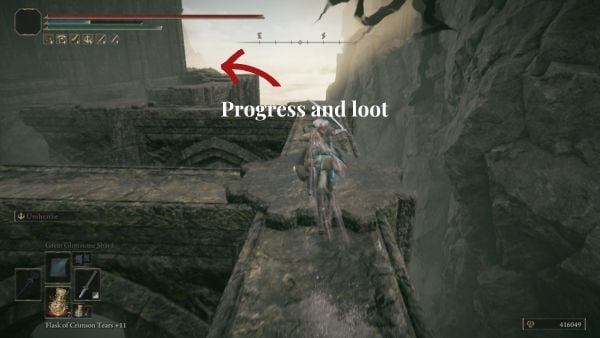

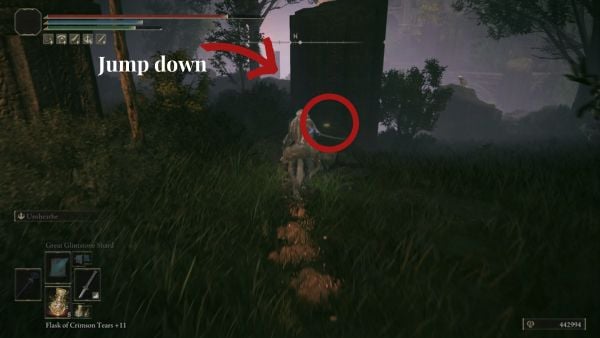
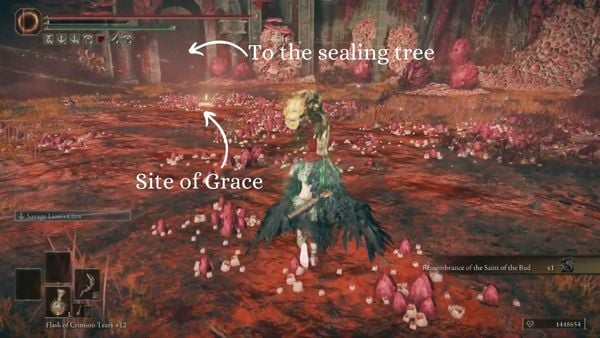
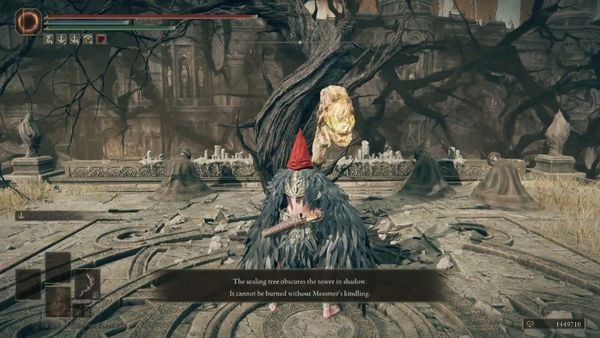
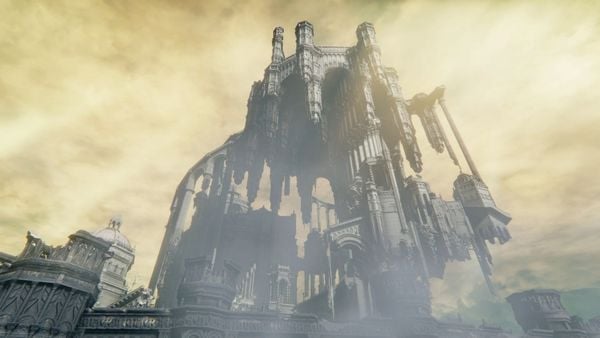
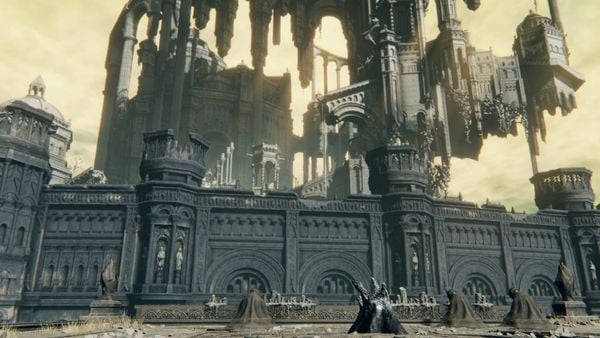
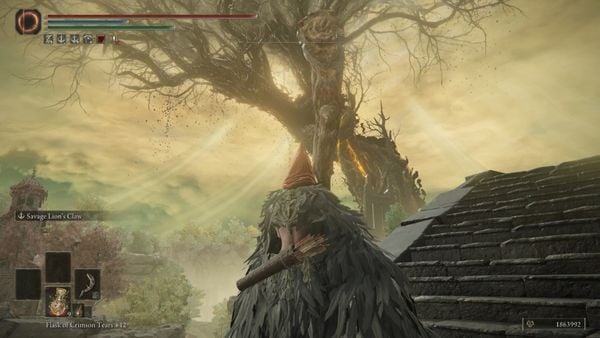
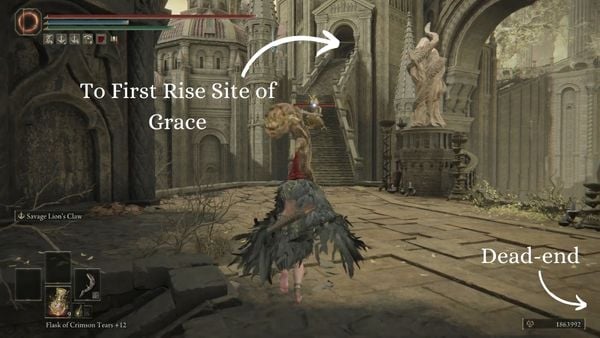
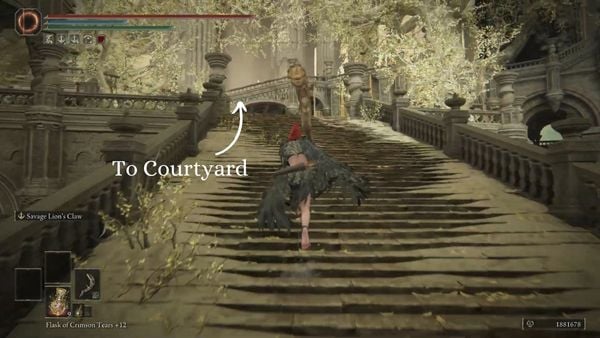
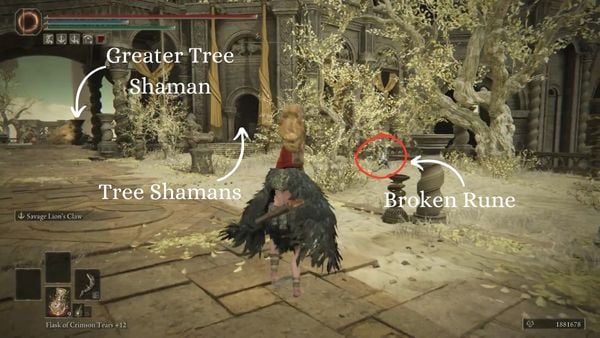
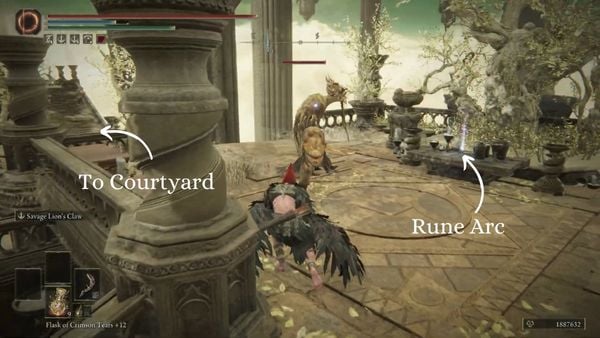
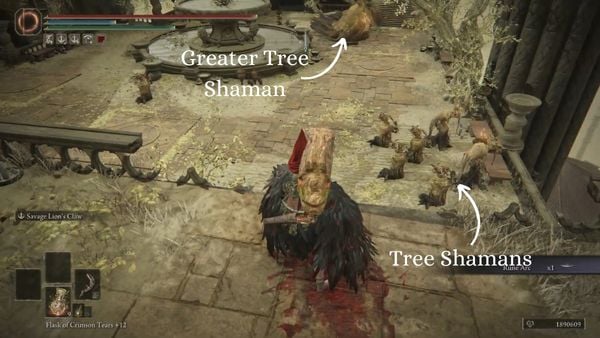
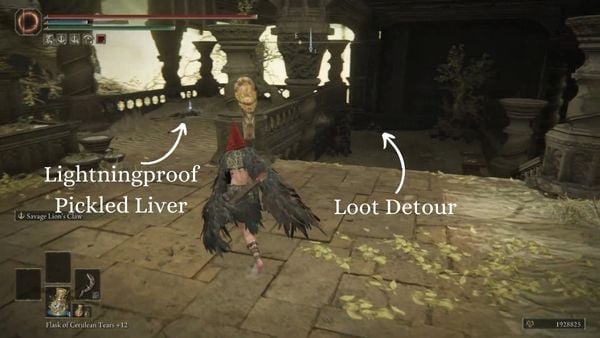
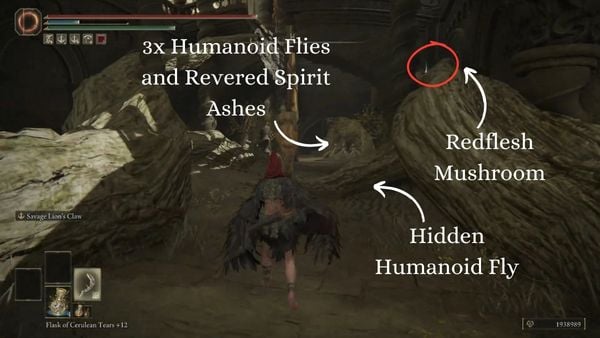
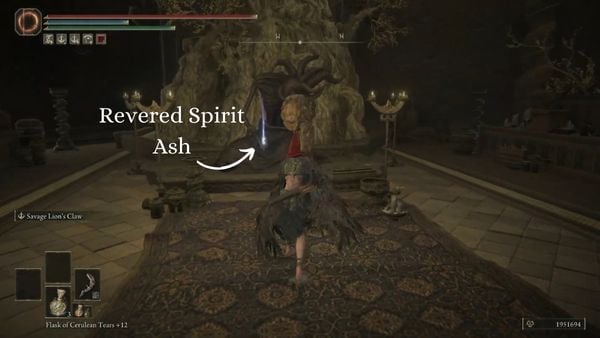
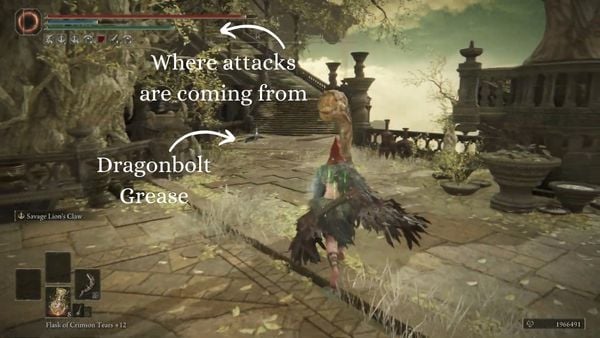
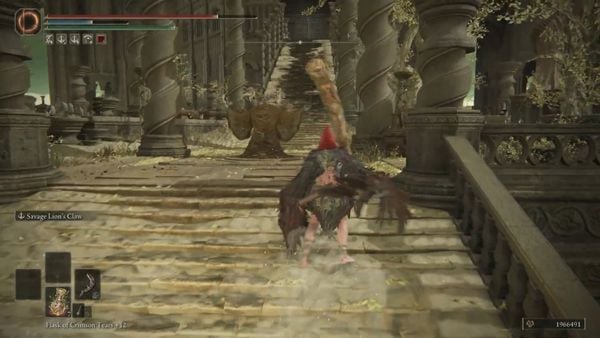
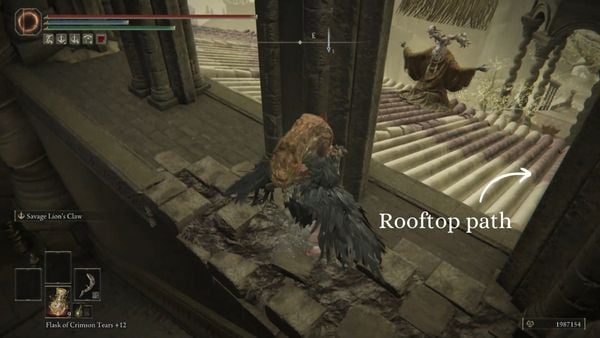
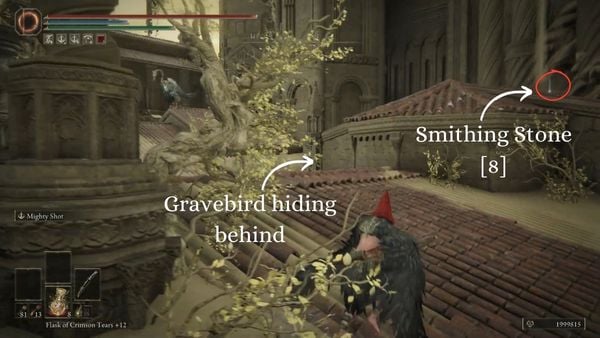
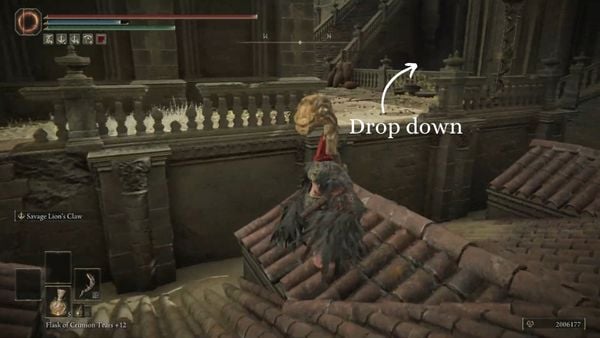
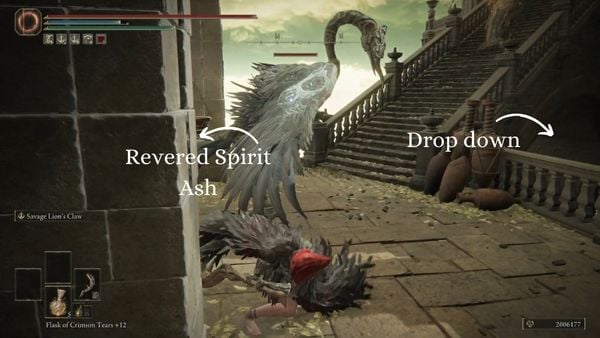
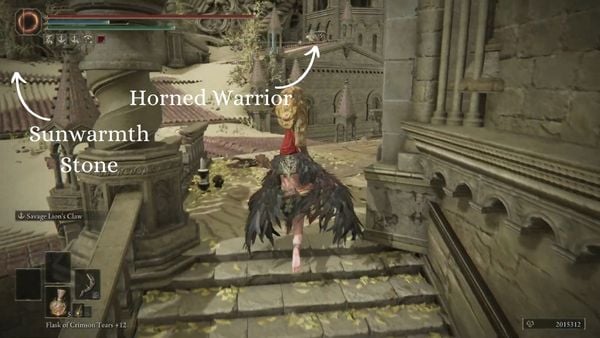
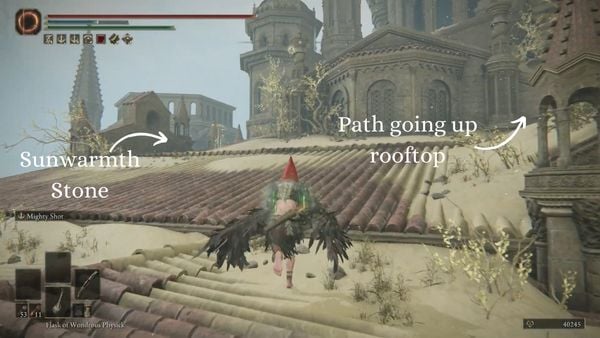
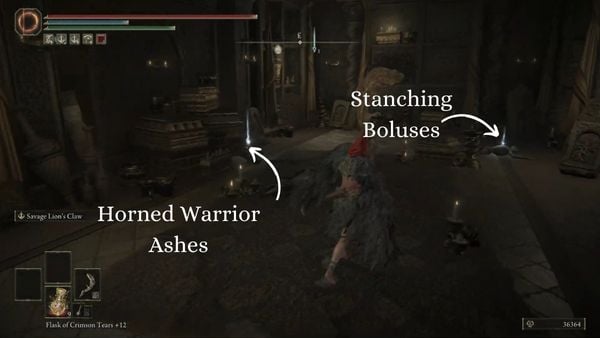
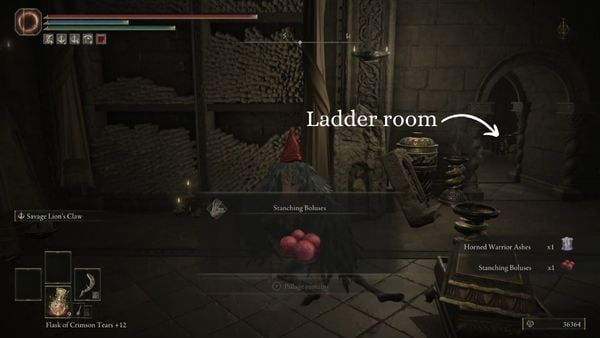
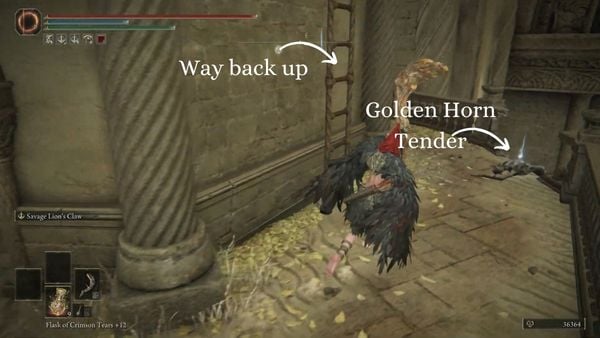
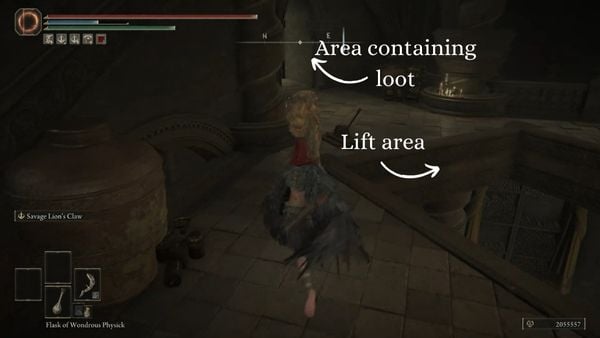
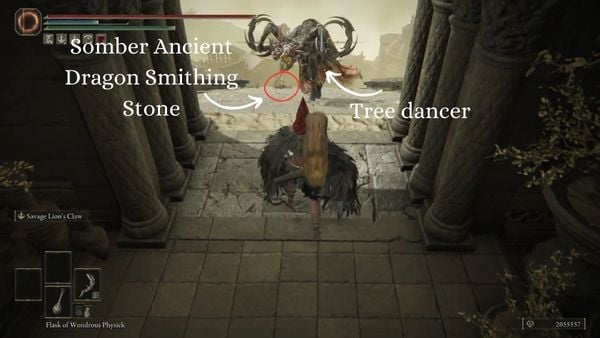
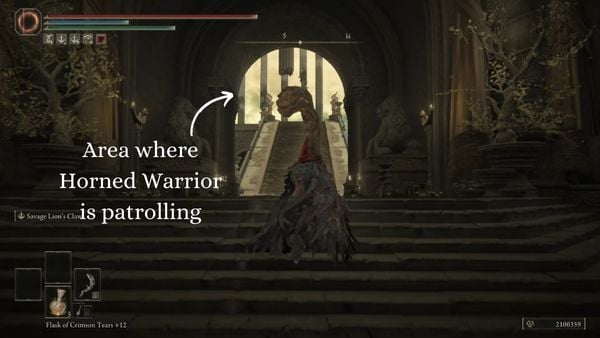
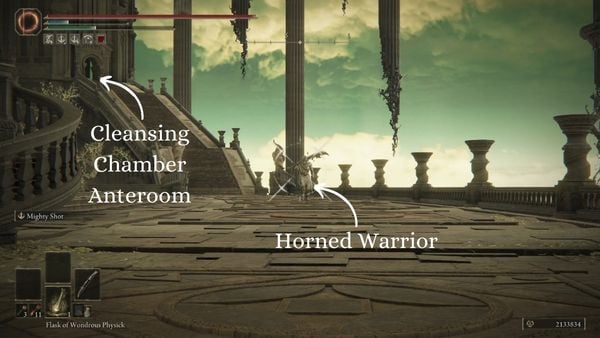
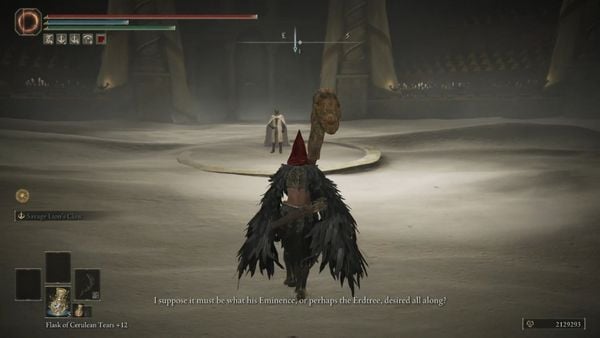
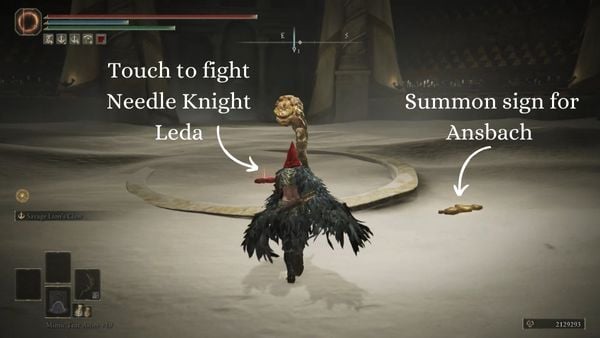
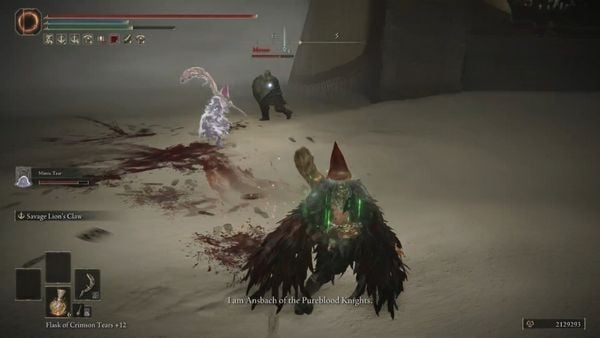
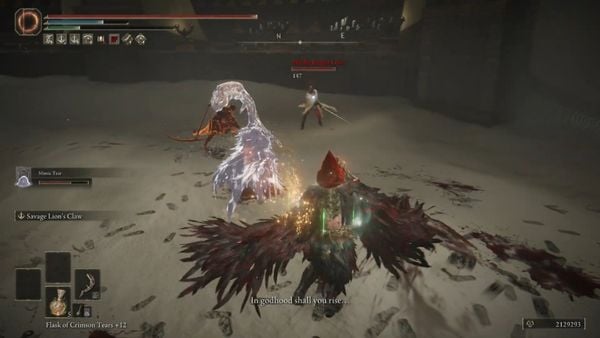
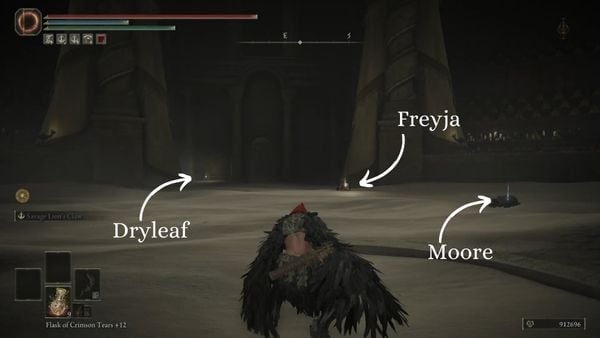
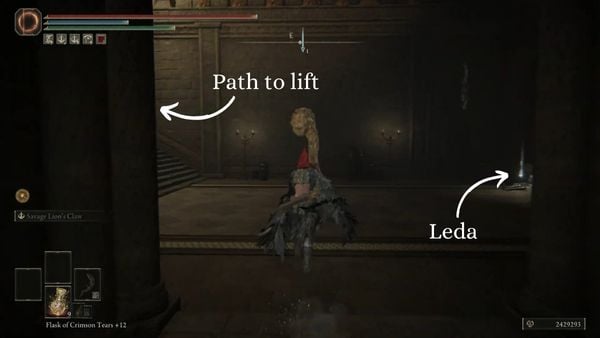
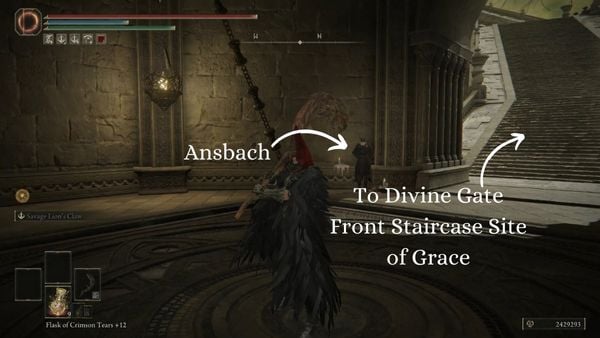
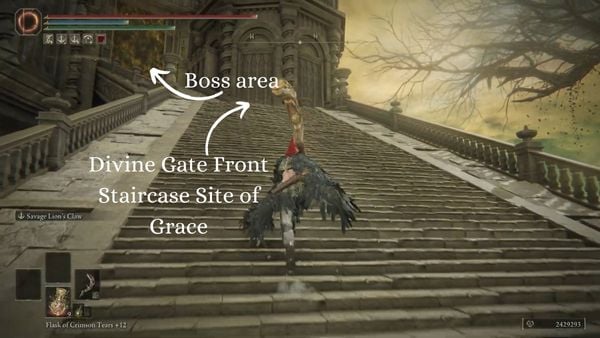

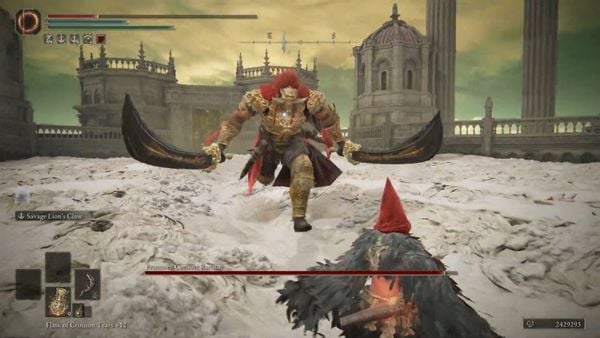
Definitely needs some refining. For example in the shadow keep it says to collect the pearldrake talisman +3 but doesn't even mention the lever you need to use to reach it. It also says to go to a certain painting from the main gate Plaza but the door is closed and oh ya can't forget the giant monstrosity in your way. Unless I completely skipped over sections accidently, it's very possible.
1
+10
-1