Belurat Tower Settlement is a Legacy Dungeon in Elden Ring. The Belurat Tower Settlement is an exclusive legacy dungeon of the Shadow of the Erdtree DLC Expansion. The tower was said to be a place where practitioners and experts would practice the ancient form of hexing arts. It was also a place where individuals who have caught the "fly sickness" have succumbed to death or the disease that transformed them into hostile flesh-eating creatures. And since unimaginable actions and magic were practiced, those who have met their demise now roam the tower as lost Revered Spirits, waiting to kill anything or anyone who explores the area. [See Shadow of the Erdtree Map]

General Information
- Previous: n/a
- Next: Castle Ensis
- Recommended Levels: 150 - Above
- Bosses: Divine Beast Dancing Lion
- Site of Grace: Main Gate Cross [Map Link]
Belurat Tower Settlement [Map Link]
Small Private Altar [Map Link]
Stagefront [Map Link]
Theatre of the Divine Beast [Map Link]
Belurat Tower Settlement Map
Ground Level
1st Level
2nd Level
Sewer Level
Roof Level
NPCs in the area
Bosses
Video Walkthrough
Items
Talismans
Consumables
- x1 Glass Shard
- x2 Broken Rune
- x1 Stanching Boluses
- x2 Silver Horn Tender
- x1 Stimulating Boluse
- x2 Messmerfire Grease
- x1 Golden Horn Tender
- x2 Neutralizing Boluses
- x1 Fireproof Dried Liver
- x1 Shadow Realm Rune [1]
Weapons & Shields
- x10 Arrow
- x1 Bone Bow
- x8 Serpent Arrow
- x1 Poisoned Hand
- x8 Poisonbone Dart
- x3 Throwing Dagger
- x1 Euporia (Late Game Acquisition)
Armor
Spells
Ashes of War
Upgrade Materials
- x4 String
- x8 Knot Resin
- x3 Beast Liver
- x4 Flight Pinion
- x2 Sliver of Meat
- x20 Black Pyrefly
- x17 Thin Beast Bones
- x3 Smithing Stone [2]
- x1 Smithing Stone [3]
- x4 Revered Spirit Ash
- x2 Scadutree Fragment
- x13 Redflesh Mushroom
- x10 Whiteflesh Mushroom
- x1 Somber Smithing Stone [1]
- x1 Somber Smithing Stone [3]
- x1 Somber Smithing Stone [4]
Enemy Drops
- Dewgem
- Fly Mold
- Flight Pinion
- Black Pyrefly
- Scorpion Liver
- Silver Horn Tender
- Horned Warrior Set
- Smithing Stone [4]
- Smithing Stone [5]
- Smithing Stone [6]
- Horned Warrior's Sword
- Somber Smithing Stone [1]
Keys & Other
- Storeroom Key
- Well Depths Key
- x1 Scorpion Stew
- Tower of Shadow Message
- Remembrance of the Dancing Lion
Enemies
- Man-Fly
- Gravebird
- Curseblade
- Spider Scorpion
- Revered Spirit
- Horned Warrior
- Fire Knight Queelign
- Lesser Ulcerated Tree Spirit
Notes
- Notes go here
Full Belurat Tower Settlement Walkthrough
The Tower's Main Gate

The Belurat Tower Settlement is said to be situated within the Gravesite Plain, a somber plain that is covered in spirit graves. It is located northwest of the Gravesite Plain Site of Grace. [See Shadow of the Erdtree Map]. When you arrive at the main gate, you'll find the Main Gate Cross site of grace, and 2 NPCs near it, Moore and Sir Ansbach. Speak to Sir Ansbach and exhaust his dialogue where he talks to you about the crosses that are akin to Miquella's footprints. He will ask you to find them and speak to him upon discovering the other crosses. Behind Sir Ansback is Moore, a merchant you can interact with to buy items. Next to Miquella's Cross, where Sir Ansbach is standing, you can pick up x1 Scadutree Fragment on the ground.

Once you are done speaking to the NPCs or resting at the site of grace, climb to the top of the tall stairs and open the double doors to enter the legacy dungeon. As you approach the first set of stairs, a large Spider Scorpion ahead will drop from the ceiling and start to attack you. Be ready to dodge as it will jump in the air. The large creature is easy to kill since you can block its attacks with your shield or dodge it at the right time. After killing it, climb to the top and enter the large room.
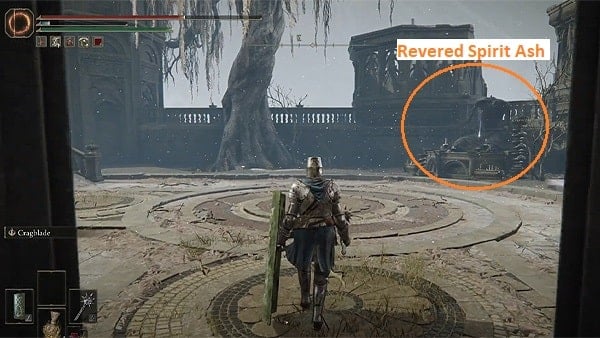
Inside, you'll find a statue in the middle of the room. Tread carefully as you approach it since there are multiple Spider Scorpion enemies around the statue. Killing the enemies will have a chance to drop Scorpion Liver. Approach the statue after clearing the room to find x2 Revered Spirit Ash. Behind the statue, on the right side, there is a body sitting by the wall, you can pillage its remains to find x1 Shadow Realm Rune [1].

Head up to the second floor and you'll fight against another large Spider Scorpion, kill it, and near it, you can find another body on the ground. Loot it to find x1 Fireproof Dried Liver. Proceed to the next section and head up the stairs where you'll encounter another large Spider Scorpion. As you exit, you'll find another body by the stairs, loot it to find x5 Black Pyrefly. Exit through the door at the top of the steps to formally arrive at the Belurat Tower Settlement, you can find the Belurat Tower Settlement Site of Grace and a Summoning Pool at the top of the stone steps, near the double doors, on the left side.
Belurat Tower Settlement Site of Grace

Next to the site of grace, there is a room you can enter (Ignore the large stone door since this is locked). Defeat the two Revered Spirit enemies and on the right side of the locked door, there is a body on the ground you can loot to find x1 Neutralizing Boluses. Go back outside, and head east towards an open section where you'll find a fountain and a waterfall. Around the fountain, there are hostile spirits that are praying to the statue sitting on the fountain. Kill them and you'll also find another body that you can loot to acquire x1 Stimulating Boluses. On the left side, you'll see a stream of water coming from above, approach it to find another body that can be looted to find x3 Knot Resin.
On the right-hand side of the fountain, there is a short set of stairs that goes up. Head towards that direction and then make a right where you'll find another fountain with a group of spirits praying. You can kill the enemies easily and find x1 Somber Smithing Stone [3] on the ground. By the fountain where you got the smithing tone, if you look to the left, you'll see a ladder that goes down to the sewer or well depths. The door there is locked and you need to find the Well Depths Key to unlock it. However, you can go ahead and check the area to find x1 Messmerfire Grease on the pile of dead bodies. Climb back up the ladder and explore the east section of the area.
Small Private Altar Site of Grace
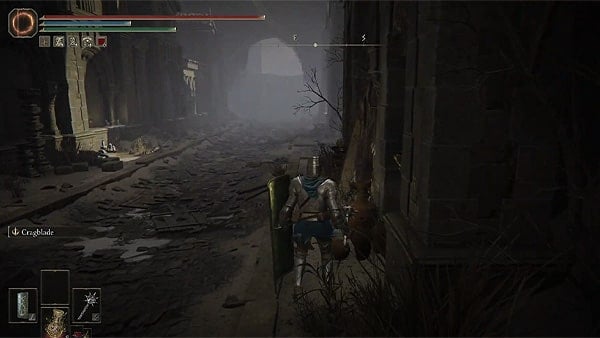
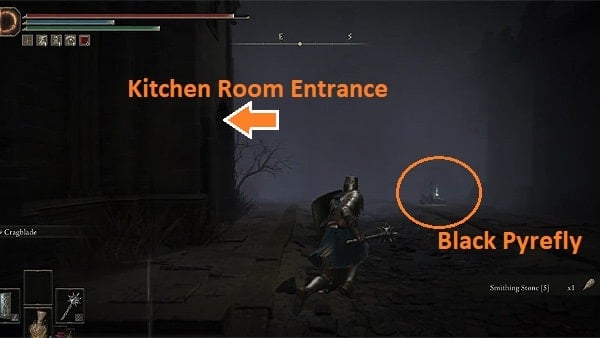
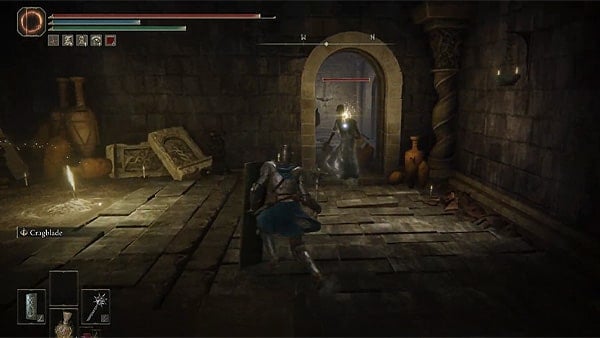
As you walk towards the path, be ready to dodge the magical attacks from the enemies positioned above. Be ready to dash towards the slope that goes up where you'll encounter more Revered Spirits. As you run forward, go right to find an alleyway where you'll find a body. Loot it to find x1 Messmerfire Grease. Go back to the main path and head up the stairs. There are about three of these enemies that wield a melee weapon. Kill the enemies and you loot the nearby corpse to find x3 Black Pyrefly. Turn your camera facing north and you'll find an entrance to a kitchen room. There are three spirit enemies inside the kitchen room. Kill the one standing near the vases and break the objects to find x1 Silver Horn Tender on the ground.
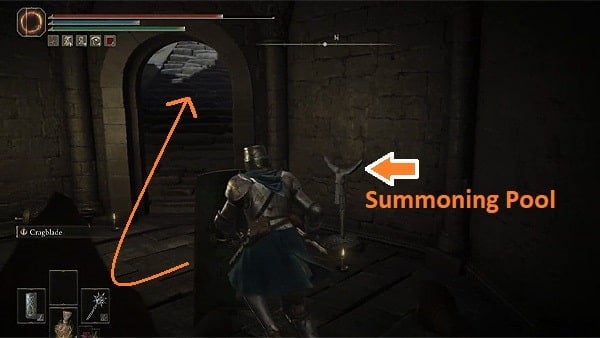
Head up the stairs and be ready to dodge the mage spirit from its magical attack. Kill it and just next to the arched doorway is the Small Private Altar site of grace. Go through the doorway after activating the site of grace and you'll find a Summoning Pool by the wall. You can explore the rooftops area through the doorway that faces the Summoning Pool to find some items there but tread carefully as there are enemies around.
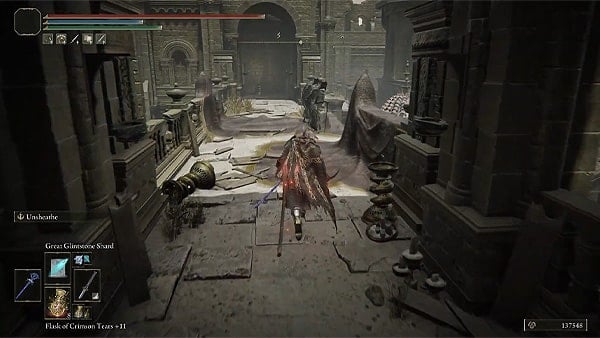
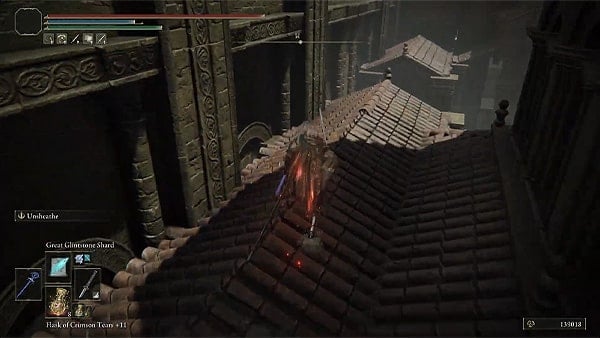
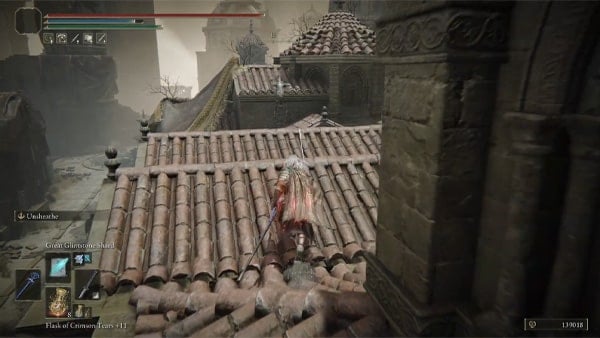
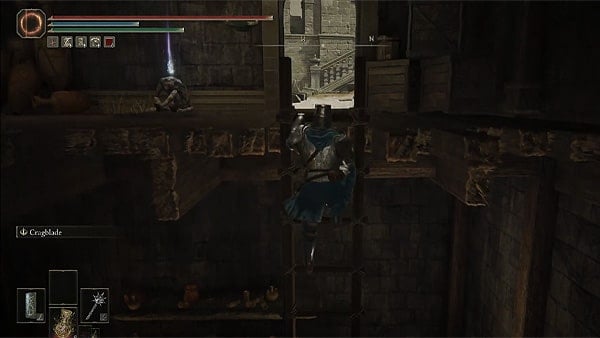
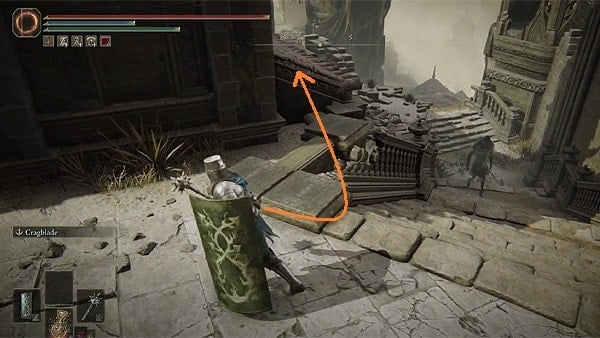
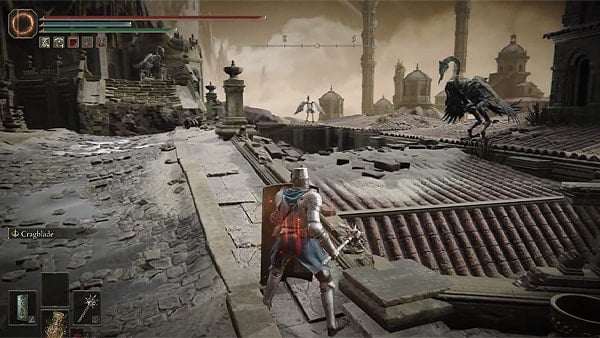
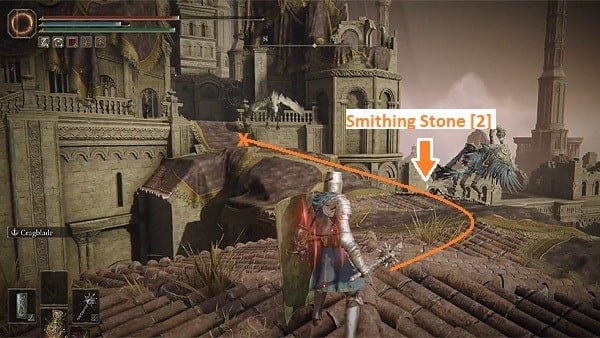
On the rooftops, there's a body tucked by a corner that holds x1 Somber Smithing Stone [4]. To find it, go straight until you reach the end towards the locked door of the storeroom, jump over the broken railings on the right, then immediately turn right again. At the end, drop onto the roof, walk straight, and jump onto the narrow beam on the left to reach the rooftop across. Still, on the rooftop section, you can find a body hanging by the edge of one of the roofs. Loot it to find x1 Silver Horn Tender. See the image above for reference.
Return to the Small Private Altar site of grace and proceed to the doorway on the right. At the top of the stairs, be ready to fight against an elite enemy, a dual sword-wielding Horned Warrior. After killing the enemy, proceed east towards the rubble of destroyed buildings where you'll encounter more Revered Spirits, there's a body you can loot to find x2 Black Pyrefly, and another body by a corner, loot it to find x4 Thin Beast Bones. Continue going straight until you enter a large section that has an altar and a tree in the center. As you approach the altar, an NPC invader, Fire Knight Queelign, will appear and fight you. This NPC invader uses fire-based attacks. Successfully killing the NPC invader Fire Knight Queelign, drops the Crusade Insignia talisman.
Investigate the altar to find a body that you can pillage to find the Ash of War: Shriek of Sorrow, as well as other bodies around the area to find items such as x10 Arrow looted off a body that's hanging by the edge of some rubble, x3 Black Pyrefly from a body sitting on a bench. Return to the entrance of the altar and navigate to the upper area of the rubble. Proceed north of your compass where you'll find an area where a stream of water is flowing, there's a body next to the steel grate that you can loot to obtain x5 Redflesh Mushroom, and x4 String you can loot by the edge of the stream of water.
Proceed through the doorway on the right to find a storeroom. Climb up the ladder and you'll see a body sitting against a wall next to another arched doorway. Loot it to find the Storeroom Key. The Storeroom Key can be used to unlock the door near the Small Private Altar Site of Grace. Inside that room, you can find an NPC Hornsent Grandam.
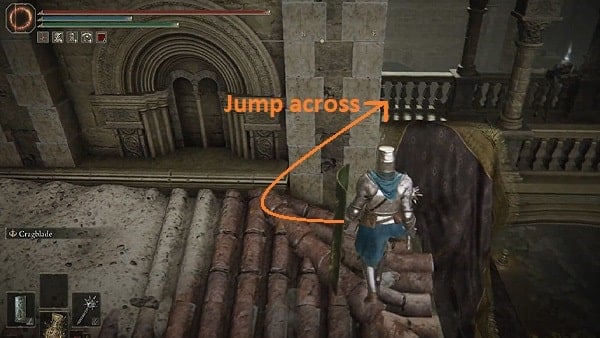
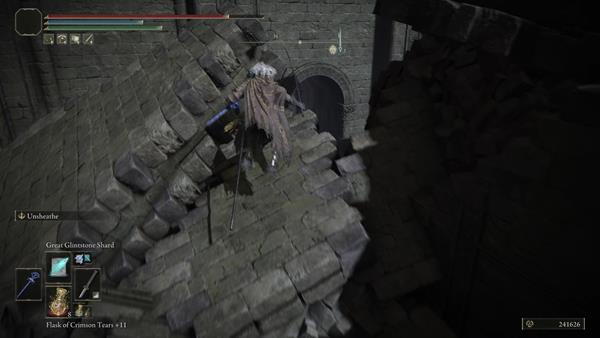
Exit through the doorway and turn left. By the steps, jump on the narrow side of the tiled roof and walk around it. But before you do that, go down the stairs until you reach a dead-end, there's a body hanging by the edge that you can loot to find x3 Throwing Dagger. Now, (refer to the image above) jump across the passageway and enter the room facing east. You should also find a body sitting against the railings, loot it to find x6 Whiteflesh Mushrooms. Enter the room ahead where you'll fight another spirit enemy, and loot the body in the room to find the Well Depths Key. This key can be used to open the locked door down at the sewers of the well.
The Toxic Depths
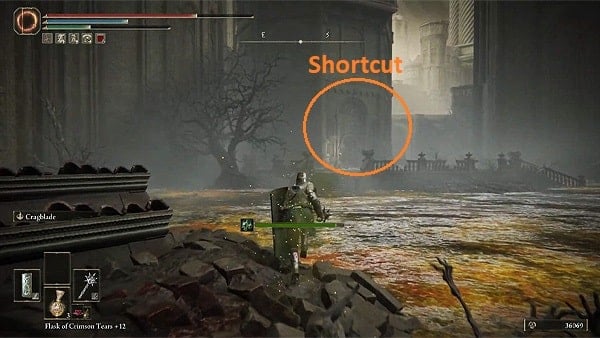
The area ahead is polluted with poison, so be ready to have Neutralizing Boluses consumable items to alleviate the build-up of poison or to cure yourself from the effect. This section of the dungeon is also swarming with another type of enemy, the Man-Fly. They can easily be killed but are deadly if they attack you in a group. To find and unlock a shortcut to the Belurat Tower Settlement site of grace, look southeast of the compass to find a tower with a tall ladder. At the top, you can unlock the door to open the shortcut leading to the Belurat Tower Settlement Site of Grace.

An elite enemy, a toxic variant of the Lesser Ulcerated Tree Spirit, can also be found south of the poison-filled area. You must kill the elite enemy to continue further, and eliminating it drops a +2 variant of the Immunizing Horn Charm. Make sure that you loot the area of this Spirit Tree to find bodies you can pillage to find the following items: x1 Broken Rune, x2 Sliver of Meat, x8 Thin Beast Bones, x1 Smithing Stone [3], and x8 Poisonbone Dart.
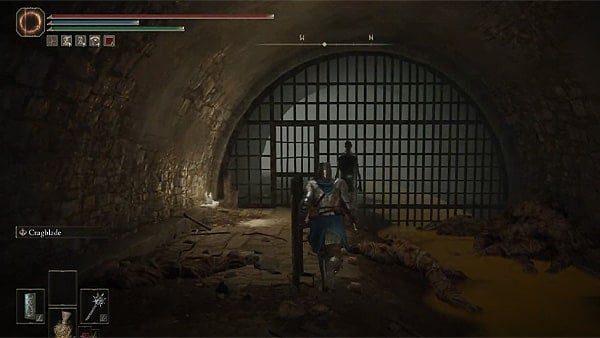
You can also find the following items at the sewer level, so make sure not to leave this section until you find the following items we've listed. These items are looted from dead bodies. x4 Whiteflesh Mushroom near the section leading to the shortcut, x5 Knot Resin on the ruins where you'll find a group of Man-Fly enemies, x3 Beast Liver on the island where you fight the dual sword-wielding Horned Warrior. x1 Poisoned Hand is located east, next to a church. x8 Serpent Arrow on top of the roof of a sunken building. x1 Neutralizing Boluses behind one of the buildings in the south section, as well as x2 Smithing Stone from a corpse hanging by the edge of a building roof.
Belurat Tower Settlement: Stagefront
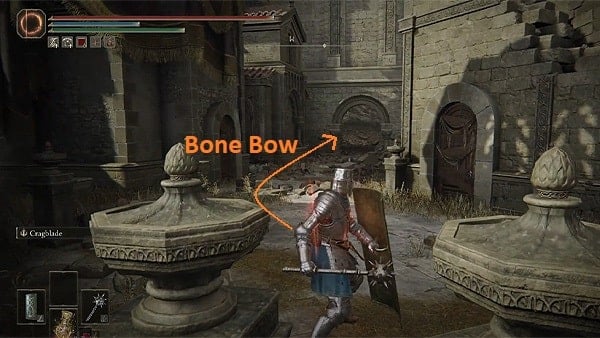
Return to the Small Private Alter Site of Grace and retrace your steps where you found the Storeroom Key, exit the doorway, and go up the steps on the right. Make a left and you should see another arched doorway that's guarded by a swarm of Spider Scorpion. Clear the path and head straight towards the arched doorway, and into a room that's a dead end. Defeat the two large Spider Scorpion enemies inside this room and pick up the Bone Bow on the ground. Facing the opposite side of the arched doorway, you will see another set of stairs that goes down, at the end of the path, you can find a lift that you can ride to reach a shortcut to the Belurat Tower Settlement Site of Grace.
From where you got the Bone Bow, as you exit the doorway, make a hard left and you'll see a pile of rubble that you can jump on and you'll see there's a secret room tucked behind it. Go inside a large storeroom where you can find the following items: x5 Thin Beast Bones, x1 Scadutree Fragment, and x1 Dried Bouquet. You can click on the images above to enlarge them.
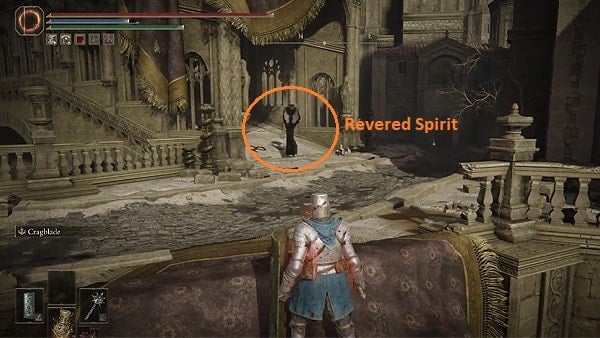
After unlocking the shortcut, take the lift back up and continue exploring the rooftop area where you'll encounter some Gravebird enemies. Walk along the rooftops while fighting against the Gravebird enemies, you should find a body that you can loot to acquire x4 Flight Pinion and x3 Smithihng Stone [2] on the other body. Cross to the other side and you should see a Revered Spirit carrying a pot over its head, quickly run towards it, and kill it to acquire x1 Revered Spirit Ash and x1 Golden Horn Tender. Look to your right to find a body by a dead-end, and loot it to find x3 Black Pyrefly. Continue towards the bridge pathway and you'll encounter a heavy sword-wielding Horned Warrior.
Past the bridge pathway after defeating the knight enemy, you can go east to a small sewage area infested with Man-Fly enemies, in this section you can find items to loot from dead bodies such as x1 Broken Rune. x8 Redflesh Mushroom, x1 Stanching Boluses, and x1 Glass Shard. The path you need to take is on the west side to progress. Head straight towards the stairs, before climbing up, look to the left to find a body hanging by the edge of of a broken parapet wall. Loot the body to find x4 Black Pyrefly.
Next, head up the steps, and you'll find a group of Revered Spirits gathered around a large tree. Kill the enemies and on the left side of the tree, you'll find a broken statue that has an item. Loot the item to acquire x1 Revered Spirit Ash. Continue west and head inside a tower building.
As you enter, go right and walk down the stairs. At the end, is a dead-end and a body hanging by the edge of the broken stairs. Loot the body to find x1 Somber Smithing Stone [1]. Go back and this time climb up the stairs where you'll encounter an elite enemy wielding two circular blades, this enemy is the Curseblade. This enemy is quite agile and hits hard, so be cautious when fighting against it as it loves to jump around and move quickly as it attacks. Defeat it and continue climbing to the top where you'll find the Stagefront site of grace. At this point, you should prepare your gear as the next room leads to the arena of a legacy dungeon boss, the Divine Beast Dancing Lion. Redmane Freyja can be summoned here to assist in battle.
Boss: Divine Beast Dancing Lion
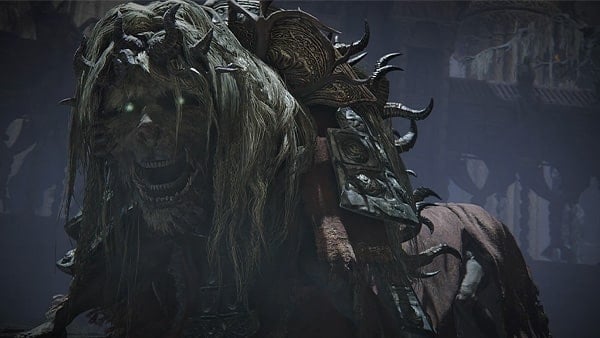
The main boss for this legacy dungeon is the Divine Beast Dancing Lion. Just as its name implies, the towering creature is aggressive, agile, and capable of dancing around to confuse and overwhelm its target. The beast also has a resemblance to a Chinese dragon where individuals move in harmony to perform a dragon dance. Besides its attacks that consist of leaping, jumping, and thrusting, the Divine Beast Dancing Lion will try to catch the player with an unblockable attack where it chomps its prey in the air and forcefully throws the player on the ground. This divine beast is known to be a messenger of the heavens, capable of unleashing storms as their rage sparks. For more guides on how to defeat the boss, please visit the Divine Beast Dancing Lion page.
Defeating the Divine Beast Dancing Lion rewards the player with the Remembrance of the Dancing Lion and drops the head armor piece, the Divine Beast Head. Upon killing the Dancing Lion, you can activate the Theatre of the Divine Beast Site of Grace. Go east through an arched doorway to find a room that has a lift, step on it to reach an upper floor. Open the large door and you'll find a revered spirit altar on the right, approach it and pick up the x1 Revered Spirit Ash. Next, make your way to the top of the stairs on the left to find a note, the Tower of Shadow Message, near the shadow that's sealed and obscuring the path ahead.
Return to Hornsent Grandam

At this point, you've completed the area, but before leaving, fast travel to the Small Private Altar site of grace, and proceed to the storeroom where the old hag NPC, Hornsent Grandam, can be found. Equip the Divine Beast Head armor piece, speak to her, and exhaust her dialogue lines to obtain the Watchful Spirit spell. Leave the room and rest at the Small Private Altar site of grace, then return to the NPC and speak to her again to obtain x1 Scorpion Stew. This item is something you'll need to give to an NPC later when you complete Castle Ensis.
How to Get the Euporia Weapon
This section of the walkthrough explains how to get the Euporia weapon. This requires to progress the DLC and reaching the endgame or the last main legacy dungeon of Shadow of the Erdtree. If you need to view the full walkthrough of the legacy dungeon, please click HERE. If you want to learn how to find the weapon, click the SHOW button below to reveal the guide.
Down, Down, Down
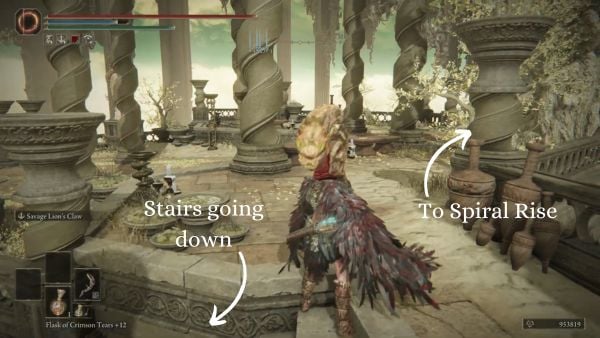
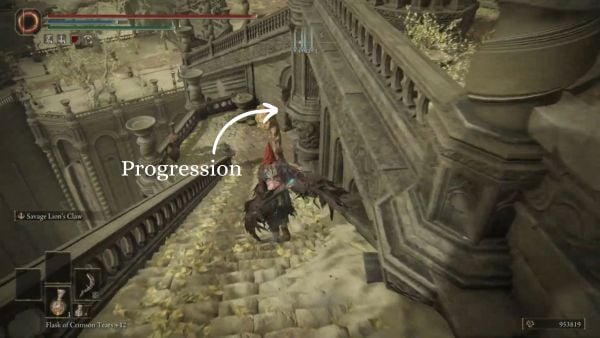
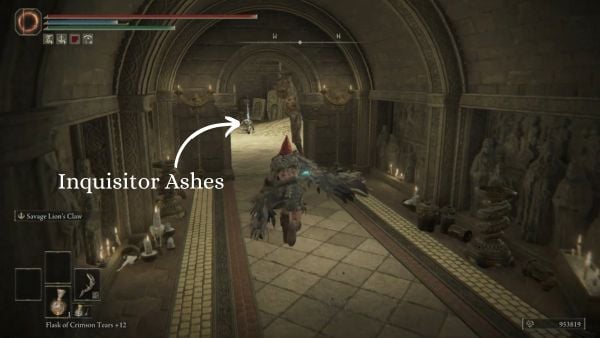
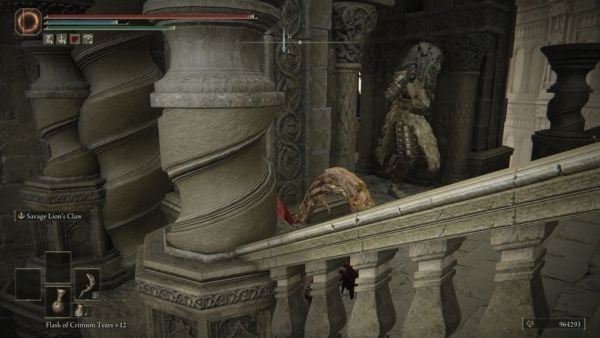
The area just before the Spiral Rise Site of Grace [See Elden Ring Map] has a lot of loot that you shouldn't miss. From the Site of Grace, backtrack your way down the stairs, then turn left to find a set of steps going down. As you go through the archway, there will be a room on your right containing x1 Inquisitor Ashes. Go to the other archway just before the room, and you will see a staircase that you can drop down to that has an item.
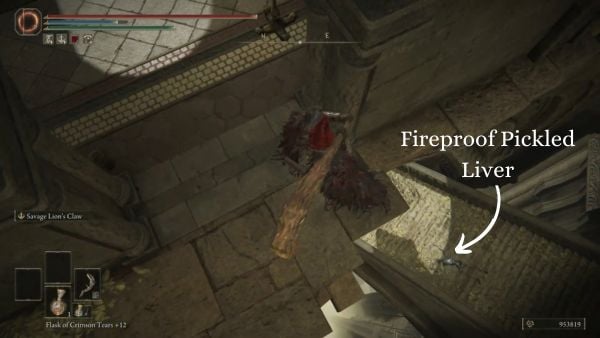
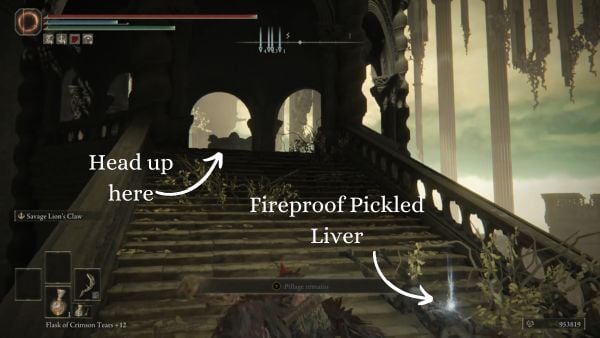
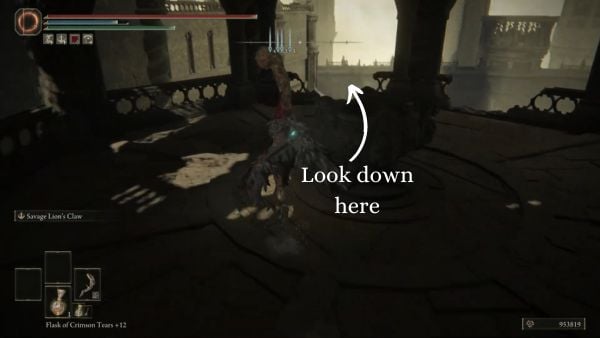
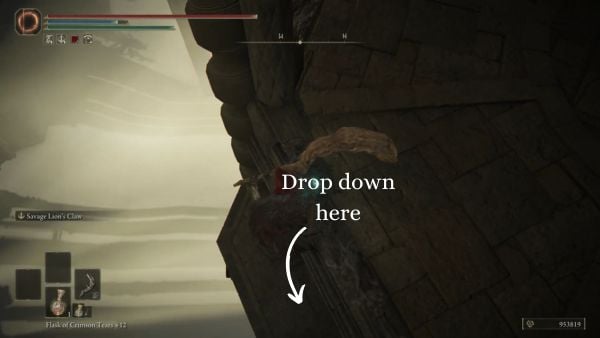
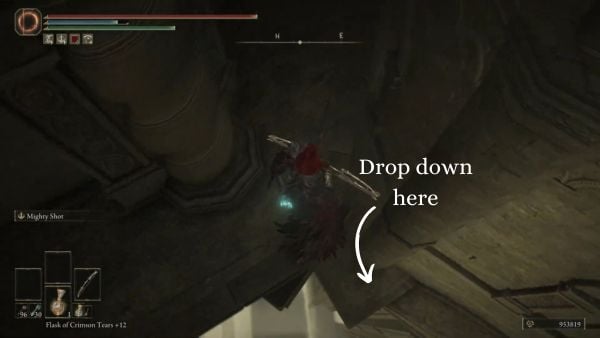
Drop down to the stairs, and you can pick up x2 Fireproof Pickled Liver from the body. Head up the stairs, then look below the broken railings to find a ledge that you can drop down to. Look down on the southeastern section of the ledge, and you will find another area that you can drop down to.
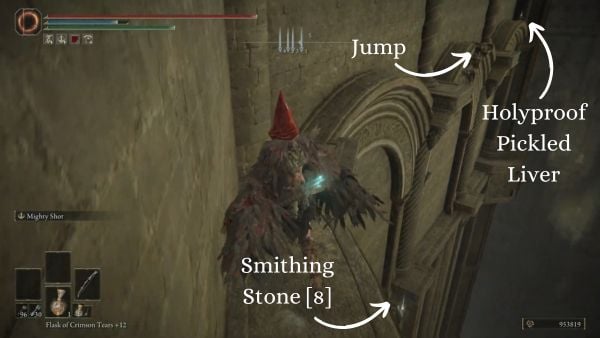
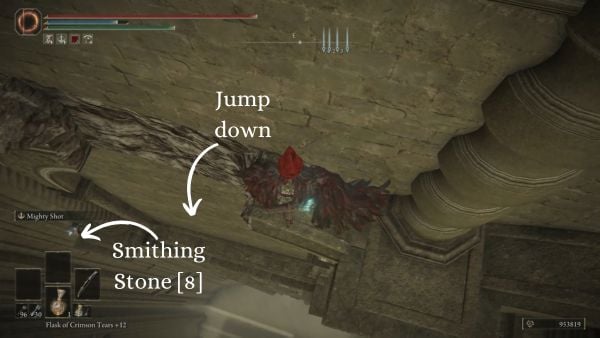
Drop down to it, then follow the ledge going south. You'll come across a broken section going to an item. Jump to get to the other side, and you can pick up x1 Holyproof Pickled Liver. After looting it, drop down from the broken section of the ledge, then pick up the nearby item, which is x2 Smithing Stone [8].
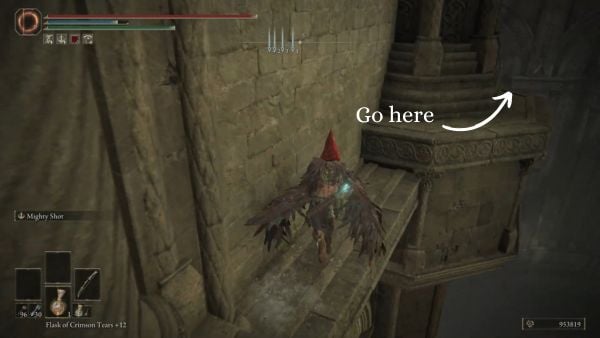
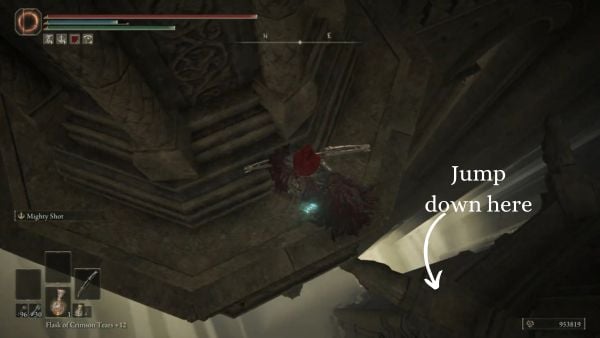
Follow the ledge going south. Be careful as there are pillars are blocking off some parts of ledge, making it tough to navigate. Keep hugging the wall just to be safe. When you go around the corner, you will find another area that you can jump down to. Jump down the area, then traverse the ledge going southwest.
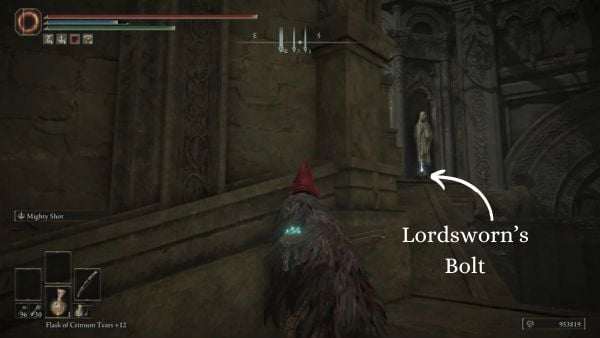
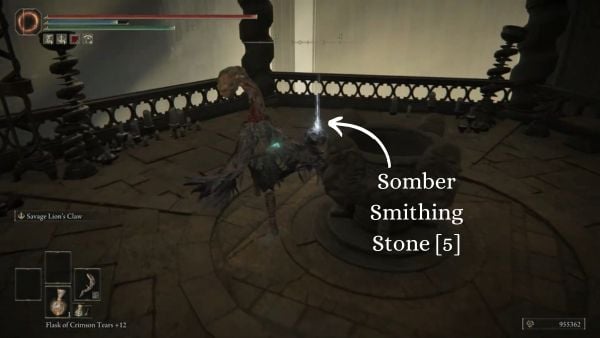
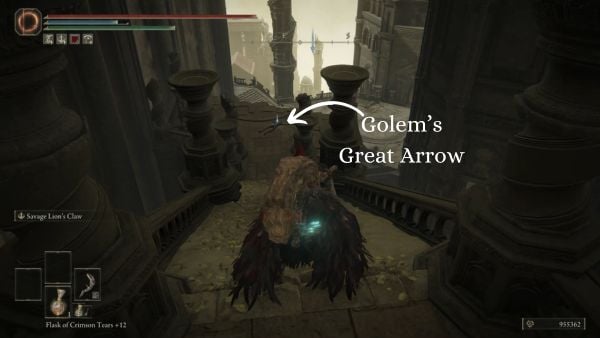
Keep following it, and you will acquire x10 Lordsworn's Bolt from a dead body at the end of it. After looting the body, follow the ledge to the other direction going down, and you'll be at a broken section of the ledge. Drop down it, and you will land near a hostile Shadow Undead. Kill it, then pick up x1 Somber Smithing Stone [5] nearby. Go down the stairs, and you'll find x10 Golem's Great Arrow from a dead body.
Belurat Tower Settlement Section
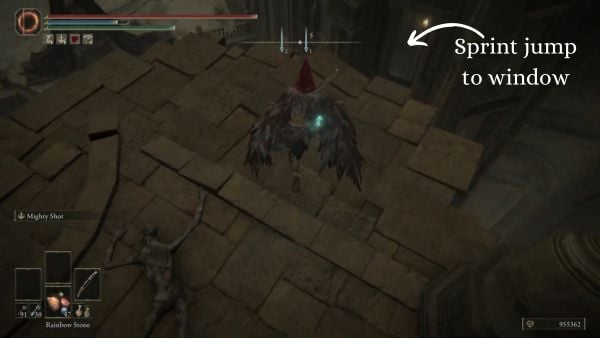
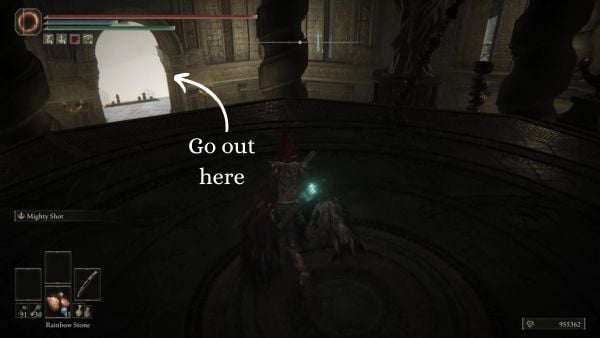
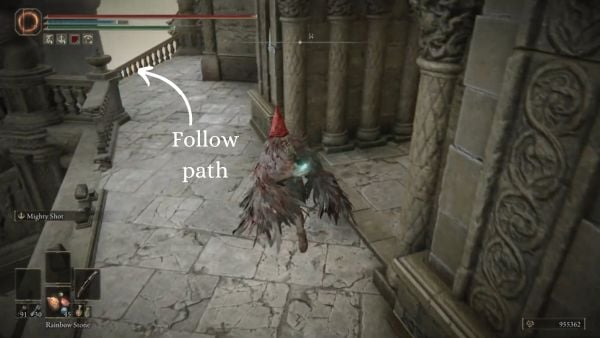
To progress further, sprint jump down the window south of the dead body containing x10 Golem's Great Arrow.
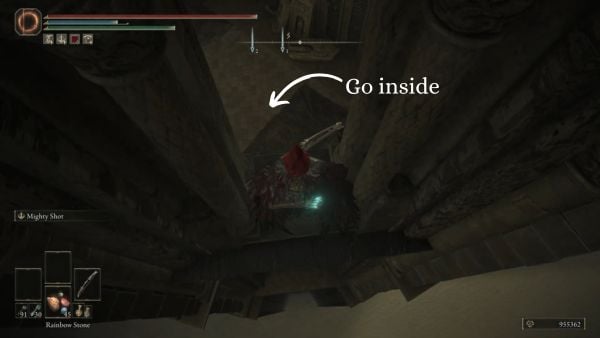
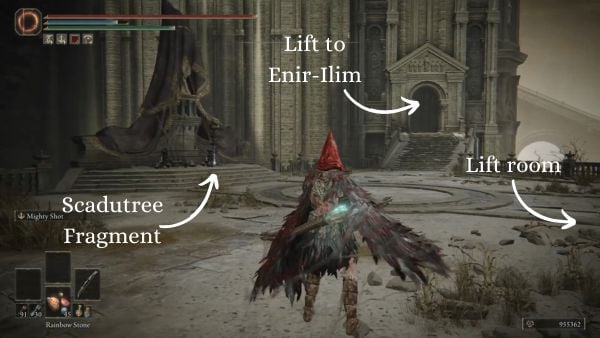
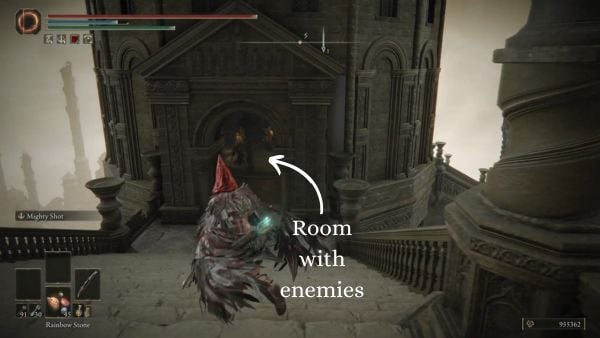
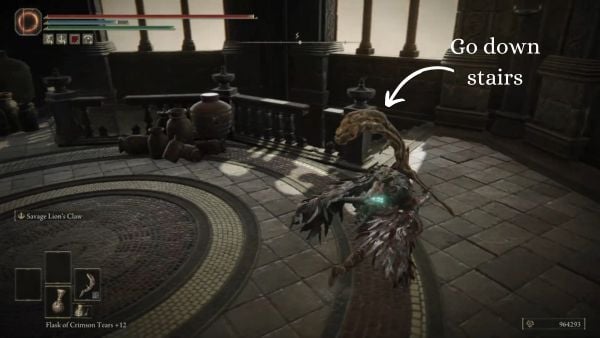
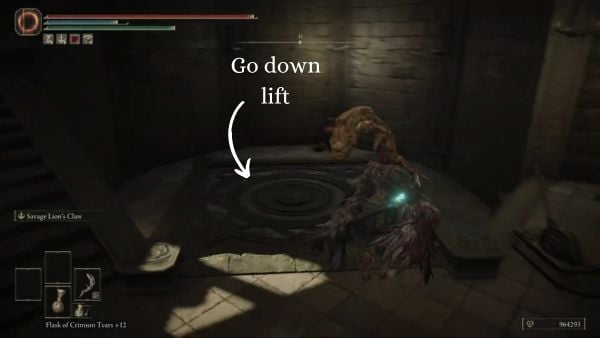
Once you have successfully jumped on the window, head inside the structure. The section you are in will be inside Belurat, Tower Settlement. Head out of the room, and you will end up in a courtyard. Pick up the x1 Scadutree Fragment by the covered statue. There are two other rooms that you can enter from the courtyard. The room on the east has a lift that you can take to return to Enir-Ilim, while the room on the south has a lift going down Belurat, Tower Settlement. Ride down the lift on the southern room.
After taking the lift, head outside by going through the archway on the southeastern side of the room. Follow the path by going down a staircase which leads you to a room containing three Tree Shamans. After clearing the room, follow the path going southwest. Head down the stairs, and you'll encounter a Horned Warrior patrolling the area. You can either fight it head-on, or you can sneak around as the Horned Warrior is patrolling in a way that you can sneak around it.
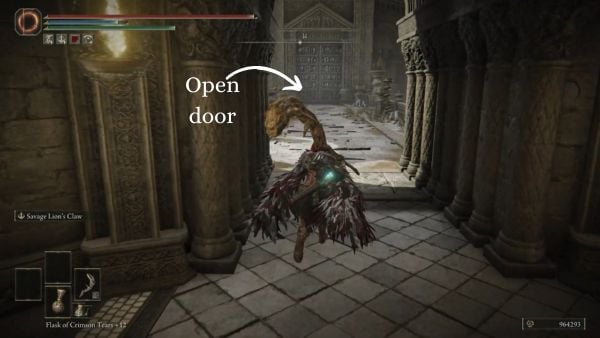
After dealing with the Horned Warrior with whichever method you choose, head inside the structure then go down the stairs on the western side. Go down the lift, and you will arrive in area with a bridge crossing to a door.
Cross the bridge, then open the door. You'll find a dead body by the altar, which you can loot for the Euporia twinblade.
Belurat Tower Settlement Map
Belurat Tower Settlement Videos
Belurat Tower Settlement Walkthrough Video
Divine Dancing Beast Dancing Lion Boss Video Guide
Speed Run Walkthrough
You will formally arrive at the Belurat Tower Settlement after you go through the door at the top of the steps. You can find the Belurat Tower Settlement Site of Grace and a Summoning Pool at the top of the stone steps, near the double doors, on the left side.
Next to the site of grace, there is a room you can enter (Ignore the large stone door since this is locked). Defeat the two Revered Spirit enemies and on the right side of the locked door, there is a body on the ground you can loot to find x3 Rada Fruit. Go back outside, and head east towards an open section where you'll find a fountain and a waterfall. Around the fountain, there are hostile spirits that are praying to the statue sitting on the fountain. Kill them and you'll also find another body that you can loot to acquire x1 Stimulating Boluses. On the left side, you'll see a stream of water coming from above, approach it to find another body that can be looted to find x3 Knot Resin.
On the right-hand side of the fountain, there is a short set of stairs that goes up. Head towards that direction and then make a right where you'll find another fountain with a group of spirits praying. You can kill the enemies easily and find x1 Somber Smithing Stone [3] on the ground. By the fountain where you got the smithing tone, if you look to the left, you'll see a ladder that goes down to the sewer or well depths. The door there is locked and you need to find the Well Depths Key to unlock it. However, you can go ahead and check the area to find x1 Messmerfire Grease on the pile of dead bodies. Climb back up the ladder and explore the east section of the area.
As you walk towards the path, be ready to dodge the magical attacks from the enemies positioned above. Be ready to dash towards the slope that goes up where you'll encounter more Revered Spirits. There are about three of these enemies that wield a melee weapon. Kill the enemies and you loot the nearby corpse to find x3 Black Pyrefly. Turn your camera facing north and you'll find an entrance to a kitchen room. There are three spirit enemies inside the kitchen room. Kill the one standing near the vases and break the objects to find x1 Silver Horn Tender on the ground.
Head up the stairs and be ready to dodge the mage spirit from its magical attack. Kill it and just next to the arched doorway is the Small Private Altar site of grace. Go through the doorway after activating the site of grace and you'll find a Summoning Pool by the wall. You can explore the rooftops area through the doorway that faces the Summoning Pool to find some items there but tread carefully as there are enemies around. Whether you explore the rooftops area later or if you've finished exploring, proceed to the doorway beside the Summoning Pool and head up the steps.
At the top of the stairs, be ready to fight against an elite enemy, a dual sword-wielding Horned Warrior. After killing the enemy, proceed east towards the rubble of destroyed buildings where you'll encounter more Revered Spirits. Continue going straight until you enter a large section that has an altar and a tree in the center. As you approach the altar, an NPC invader, Fire Knight Queelign, will appear and fight you. This NPC invader uses fire-based attacks. Successfully killing the NPC invader Fire Knight Queelign, drops the Crusade Insignia talisman.
Investigate the altar to find a body that you can pillage to find the Ash of War: Shriek of Sorrow, as well as other bodies around the area to find items such as x10 Arrow, x3 Black Pyrefly. Return to the entrance of the altar and navigate to the upper area of the rubble. Proceed north of your compass where you'll find an area where a stream of water is flowing. Proceed through the doorway on the right to find a storeroom. Climb up the ladder and you'll see a body sitting against a wall next to another arched doorway. Loot it to find the Storeroom Key. The Storeroom Key can be used to unlock the door near the Small Private Altar Site of Grace. Inside the room, you can find an NPC Hornsent Grandam.
Exit through the doorway and turn left. By the steps, jump on the narrow side of the tiled roof and walk around it. Jump across the passageway and enter the room facing east. You should also find a body hanging on the railings, loot it to find x4 Whiteflesh Mushrooms. Enter the room ahead where you'll fight two spirits, and loot the body in the room to find the Well Depths Key. This key can be used to open the locked door down at the sewers of the well.
The area ahead is polluted with poison, so be ready to have Neutralizing Boluses consumable items to alleviate the build-up of poison or to cure yourself from the effect. This section of the dungeon is also swarming with another type of enemy, the Man-Fly. They can easily be killed but are deadly if they attack you in a group. To find and unlock a shortcut to the Belurat Tower Settlement site of grace, look southeast of the compass to find a tower with a tall ladder. At the top, you can unlock the door to open the shortcut leading to the Belurat Tower Settlement Site of Grace.
An elite enemy, a toxic variant of the Lesser Ulcerated Tree Spirit, can also be found south of the poison-filled area. You must kill the elite enemy to continue further, and eliminating it drops a +2 variant of the Immunizing Horn Charm. Make sure that you loot the area of this Spirit Tree to find bodies you can pillage to find the following items: x2 Sliver of Meat, x8 Thin Beast Bones, x1 Neutralizing Boluses, x3 Dewgem, and x1 Broken Rune.
Return to the Small Private Alter Site of Grace and retrace your steps where you found the Storeroom Key, exit the doorway, and go up the steps on the right. Make a left and you should see another arched doorway that's guarded by a swarm of Spider Scorpion. Clear the path and head straight towards the arched doorway, and into a room that's a dead end. Defeat the large Spider Scorpion inside this room and pick up the Bone Bow on the ground. Facing the opposite side of the arched doorway, you will see another set of stairs that goes down, at the end of the path, you can find a lift that you can ride to reach a shortcut to the Belurat Tower Settlement Site of Grace.
From where you got the Bone Bow, as you exit the doorway, make a hard left and you'll see a pile of rubble that you can jump on and you'll see there's a secret room tucked behind it. Go inside a large storeroom where you can find the following items: x5 Thin Beast Bones, x1Scadutree Fragment, and x1 Dried Bouquet. You can click on the images above to enlarge them.
After unlocking the shortcut, take the lift back up and continue exploring the rooftop area where you'll encounter some Gravebird enemies. Walk along the rooftops while fighting against the Gravebird enemies, you should find a body that you can loot to acquire x3 Smithihng Stone [2]. Cross to the other side and you should see a Revered Spirit carrying a pot over its head, quickly run towards it and kill it to acquire x1 Revered Spirit Ash. Continue towards the bridge pathway and you'll encounter a heavy sword-wielding Horned Warrior.
Past the bridge pathway after defeating the knight enemy, you can go east to a small sewage area where you can find items to loot. But the path you need to take is on the west side. Head straight towards the stairs and you'll find a group of Revered Spirits gathered around a large tree. Kill the enemies and on the left side of the tree, you'll find a broken statue that has an item. Loot the item to acquire x1 Revered Spirit Ash. Continue west and head inside a tower building.
As you enter, go right and walk down the stairs. At the end, is a dead-end and a body hanging by the edge of the broken stairs. Loot the body to find x3 Warming Stone. Go back and this time climb up the stairs where you'll encounter an elite enemy wielding two circular blades. This enemy is quite agile and hits hard, so be cautious when fighting against it as it loves to jump around and move quickly as it attacks. Defeat it and continue climbing to the top where you'll find the Stagefront site of grace. At this point, you should prepare your gear as the next room leads to the arena of a legacy dungeon boss, the Divine Beast Dancing Lion. Redmane Freyja can be summoned here to assist in battle.
The main boss for this legacy dungeon is the Divine Beast Dancing Lion. Just as its name implies, the towering creature is aggressive, agile, and capable of dancing around to confuse and overwhelm its target. The beast also has a resemblance to a Chinese dragon where individuals move in harmony to perform a dragon dance. Besides its attacks that consist of leaping, jumping, and thrusting, the Divine Beast Dancing Lion will try to catch the player with an unblockable attack where it chomps its prey in the air and forcefully throws the player on the ground. This divine beast is known to be a messenger of the heavens, capable of unleashing storms as their rage sparks. For more guides on how to defeat the boss, please visit the Divine Beast Dancing Lion page.
Defeating the Divine Beast Dancing Lion rewards the player with the Remembrance of the Dancing Lion and drops the head armor piece, the Divine Beast Head. Upon killing the Dancing Lion, you can activate the Theatre of the Divine Beast Site of Grace. Go east through an arched doorway to find a room that has a lift, and step on it to reach an upper floor. Open the large door and you'll find a revered spirit altar on the right, approach it and pick up the x1 Revered Spirit Ash. Next, make your way to the top of the stairs on the left to find a note, the Tower of Shadow Message, near the shadow that's sealed and obscuring the path ahead.
At this point, you've completed the area, but before leaving, fast travel to the Small Private Altar site of grace, and proceed to the storeroom where the old hag NPC, Hornsent Grandam, can be found. Equip the Divine Beast Head armor piece, speak to her, and exhaust her dialogue lines to obtain the Watchful Spirit spell. Leave the room and rest at the Small Private Altar site of grace, then return to the NPC and speak to her again to obtain x1 Scorpion Stew. This item is something you'll need to give to an NPC later when you complete Castle Ensis.
 Anonymous
Goddamnit, of course there's an ulcerated tree spirit in status effect soup, my man just couldn't resist the temptation. Still a really cool dungeon though.

 Anonymous
Perhaps this area is a reference to the Tower of Babel? It has a great blend of cultures

 Anonymous
Words cannot describe how cool this area looks, It reeks of atmosphere...

 Anonymous
>Exit through the doorway and turn left.
there are two. neither look anything like what you describe,
 Anonymous
 Anonymous
I actively avoided Dark Souls 2 because of the spiders just to get jumpscared by spider scorpions, can you tell that I’m having fun with this DLC?

 Anonymous
You guys missed the prayer room key and the prayer room in the church district. I came here bcs I couldn’t find smh.

 Anonymous
 Anonymous
 Anonymous
There are two large scorpions in the Bone Bow room for those unaware

 Anonymous
Is there a way onto the bridge that spans the two lone towers in the poison area (the one with some fly men hanging from it)? The door to one of them looks like the carved doors elsewhere and I can see they decorated the room with furniture and candles and some kind of giant bed or possibly a boat (hard to tell through the windows from where you can see in). Neither tower is connected to anything else that would make logical sense, though, and I didn't see anytbing that might have opened a spirit spring nearby...

 Anonymous
 Anonymous
 Anonymous


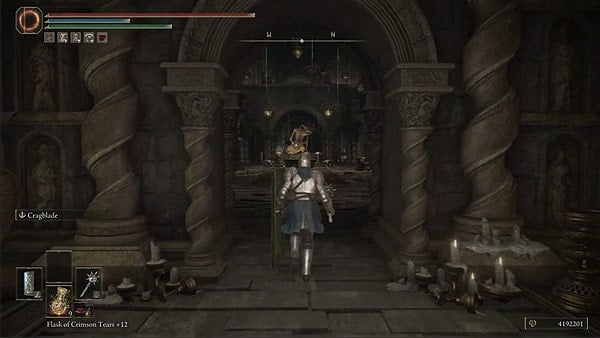
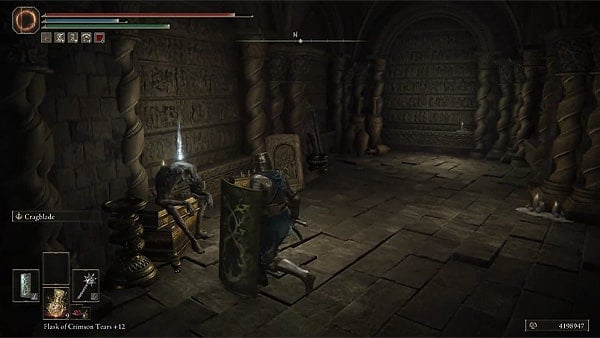
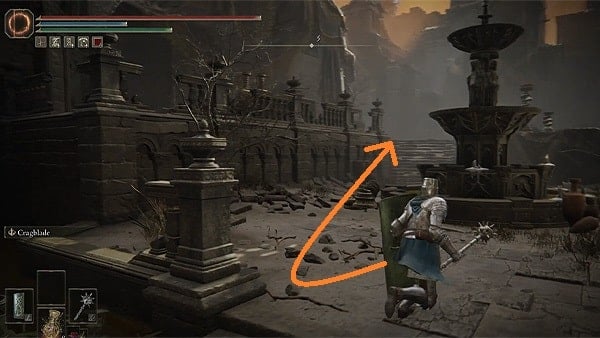
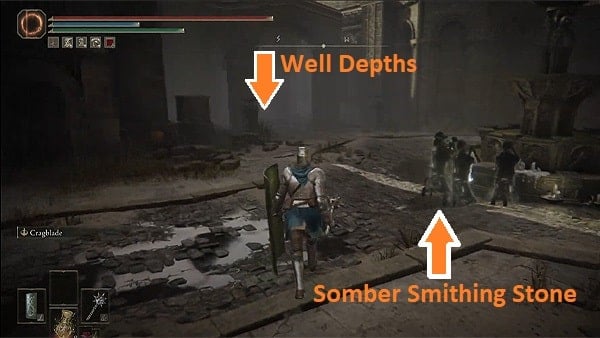
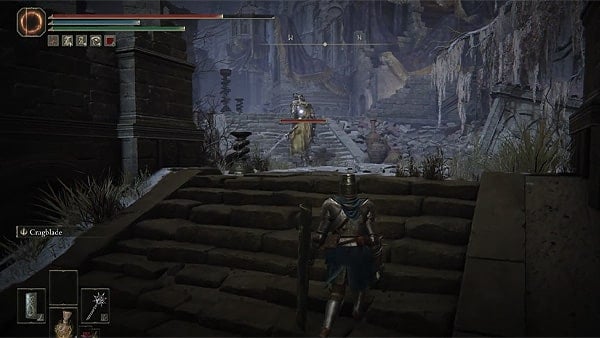
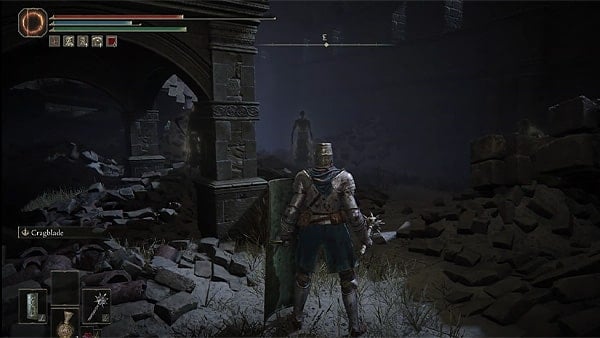
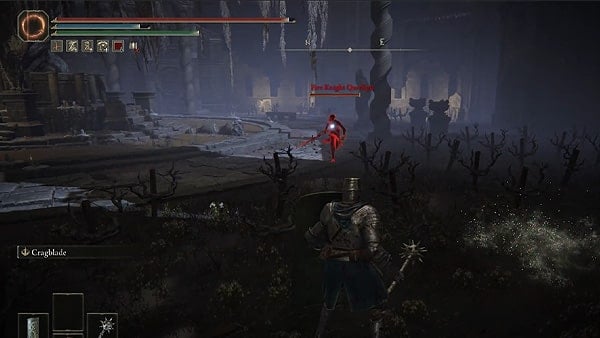
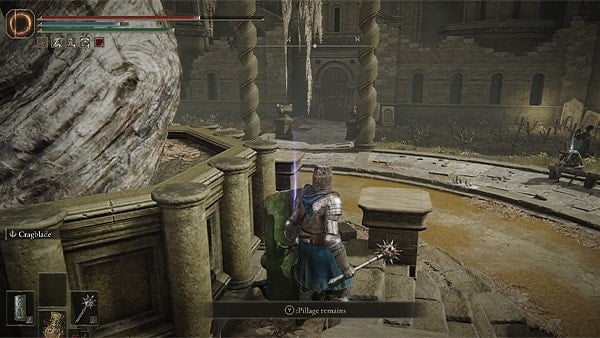
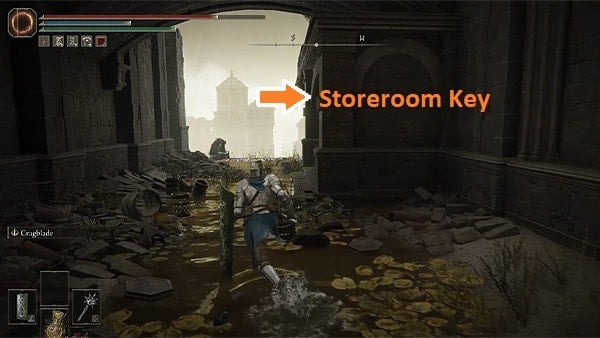
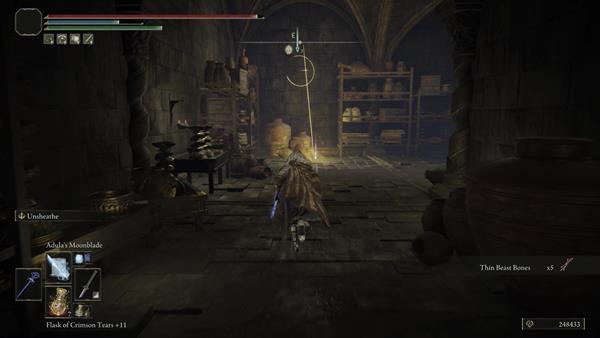
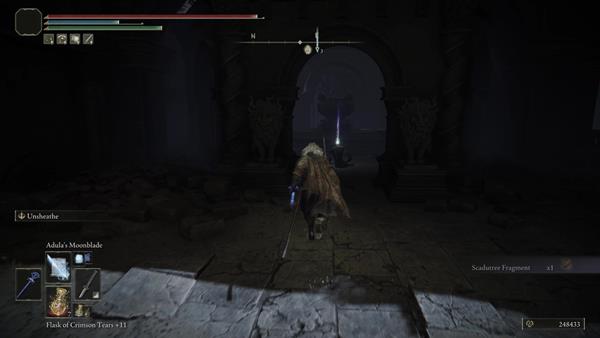
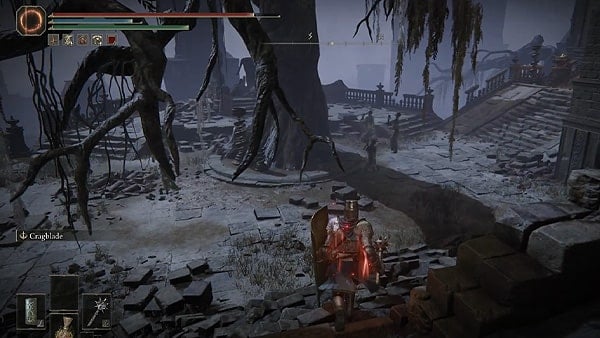
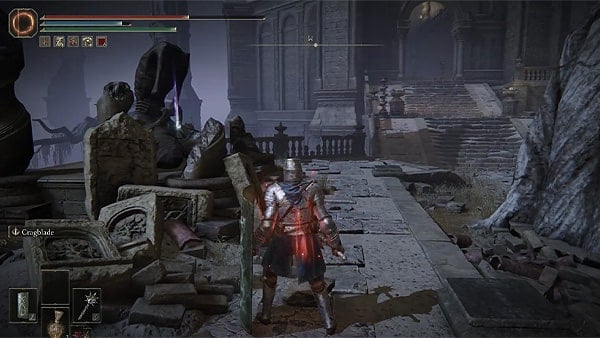
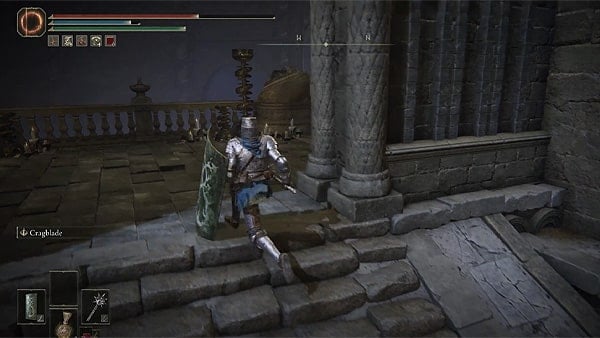
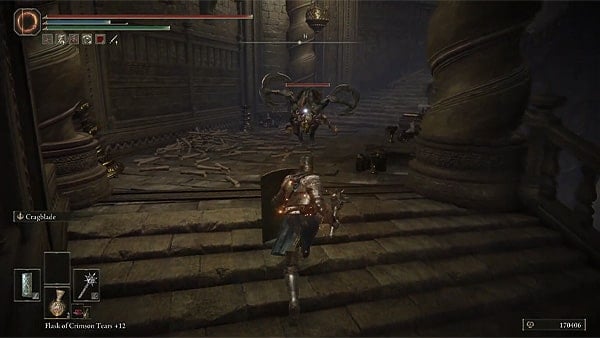
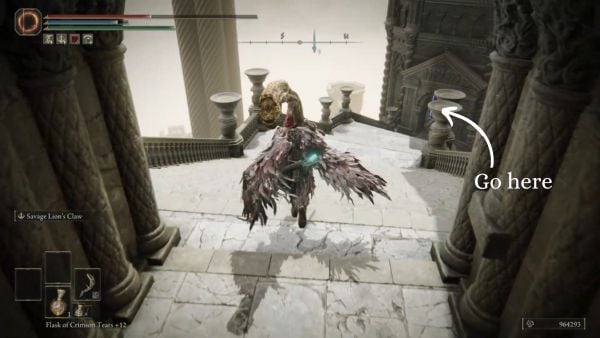
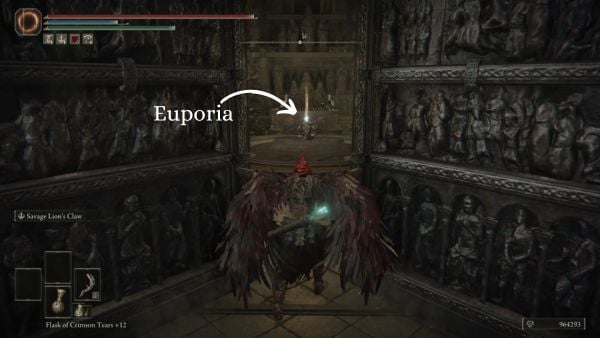
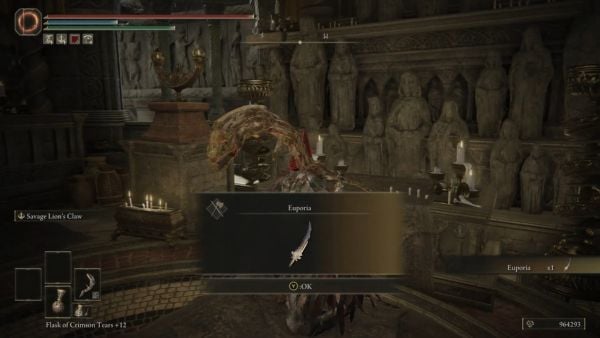


PSA: You CANNOT get the golden item you see shining up a tower from the Swamp. You will have to progress most of the DLC then come back here from the area that is blocked off after the boss of this area. You can find info on the item if you look at the Legacy Dungeons and pick the last one.
20
+13
-1