Crumbling Farum Azula is a Legacy Dungeon in Elden Ring. Crumbling Farum Azula may also be considered a very small region, which can be reached through the Site of Grace at the Forge of the Giants in Mountaintops of the Giants, either by talking to Melina or listening to the flame, depending on your prior decisions in the game.
A smaller portion of the area can be reached through one of the waygates in The Four Belfries. In this part, you can find the Pearldrake Talisman on a corpse after dropping down a few ledges.

General Information
- Previous: Leyndell, Royal Capital
- Next: Miquella's Haligtree
- Recommended Levels: 100+
- Bosses: Dragonlord Placidusax, Godskin Duo, Maliketh, the Black Blade
- Sites of Grace:
- Beside the Great Bridge [Map Link]
- Crumbling Beast Grave Depths [Map Link]
- Crumbling Beast Grave [Map Link]
- Dragon Temple [Map Link]
- Dragon Temple Altar [Map Link]
- Dragon Temple Lift [Map Link]
- Dragon Temple Rooftop [Map Link]
- Dragon Temple Transept [Map Link]
- Dragonlord Placidusax [Map Link]
- Maliketh, the Black Blade [Map Link]
- Tempest-Facing Balcony [Map Link]
Crumbling Farum Azula Walkthrough Video
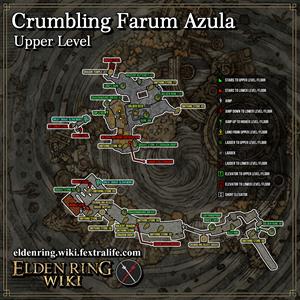
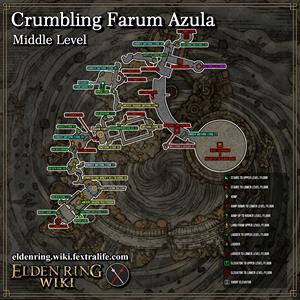
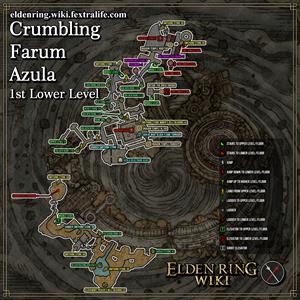
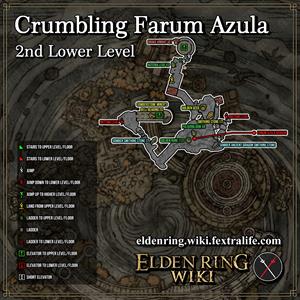
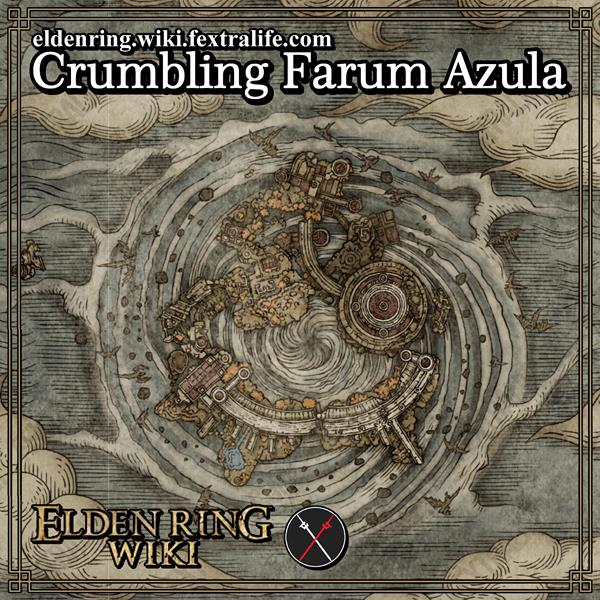
Crumbling Farum Azula Maps
Top Level
Upper Level
Middle Level
1st Lower Level
2nd Lower Level
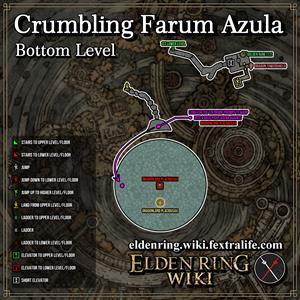
Bottom Level
NPCs in the area
- Iron Fist Alexander (final part of his questline)
Bosses
Items
Talismans
Consumables
- Golden Arrow
- Golden Rune (9)
- Golden Rune (10)
- Golden Rune (11)
- Golden Rune (12)
- Lightningproof Dried Liver
- Lightning Greatbolt
- Lightning Grease
- Dragonwound Grease
- Hero's Rune (2)
- Rejuvenating Boluses
- Rune Arc
- Hero's Rune (5)
Weapons & Shields
Armor
Spells
Upgrade Materials
- Somber Ancient Dragon Smithing Stone
- Ancient Dragon Smithing Stone
- Somber Smithing Stone (9)
- Somber Smithing Stone (8)
- Somber Smithing Stone (7)
- Smithing Stone (8)
- Smithing Stone (7)
- Smithing Stone (6)
- Gravel Stone
- Golden Seed
- Great Grave Glovewort x2
Enemy Drops
- Beast Champion Set (Recusant Bernahl)
- Blasphemous Claw (Recusant Bernahl)
- Devourer's Scepter (Recusant Bernahl)
- Malformed Dragon Set (Draconic Tree Sentinel)
- Remembrance of the Black Blade (Maliketh, the Black Blade)
- Remembrance of the Dragonlord (Dragonlord Placidusax)
Keys & Other
- Ancient Dragon Apostle's Cookbook (4)
- Ash of War: Black Flame Tornado
- Azula Beastman Ashes
- Fulgurbloom
- Glovewort Picker's Bell Bearing (3)
- Nascent Butterfly
- Old Fang
- Smithing-Stone Miner's Bell Bearing (4)
- Somberstone Miner's Bell Bearing (4)
- Somberstone Miner's Bell Bearing (5)
- Stonesword Key
Enemies
- Azula Beastman
- Banished Knight
- Crucible Knight
- Draconic Tree Sentinel
- Farum Azula Dragon
- Lesser Crucible Knight
- Lesser Wormface
- Recusant Bernahl
- Rotten Stray
- Skeleton
- Warhawk
Notes
- Notes go here
Full Crumbling Farum Azula Walkthrough
Getting to Crumbling Farum Azula
Once you commit to "the cardinal sin" by talking to Melina from the Site of Grace found at the Forge of the Giants, your character falls asleep during a cinematic and then wakes up in Crumbling Farum Azula. Alternatively, if you've interacted with the Three Fingers, Melina does not help you get there. Instead, while resting at the Forge of the Giants Site of Grace, select the 'Listen to the sound of the flames' option and a different cutscene will play, but take to you to the same spot in Crumbling Farum Azula.
Crumbling Beast Grave
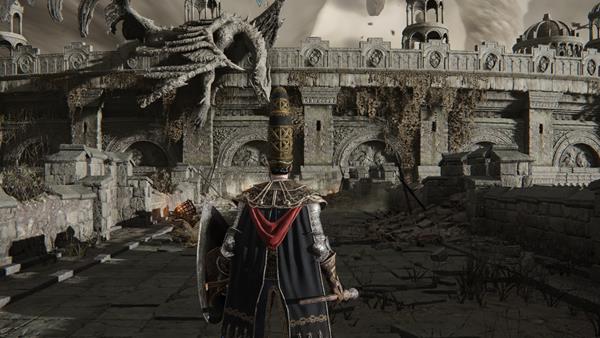
Crumbling Farum Azula is mazelike, consisting of multiple branching paths, each with different loot. Following the introductory cutscene, the player will wake up at the south bridge of Crumbling Farum Azula. The path to follow is linear for now. At the end of the bridge, you'll find a Smithing Stone (8). Continue down the ruins to your right and pick up the Golden Rune (9) on the way. Keep following the path and you'll get to a platform overlooking several Azula Beastmen. Engage them one at a time from stealth, or lure them with ranged attacks to avoid being overwhelmed by their high-damage attacks. Defeat the Azula Beastmen in this area to pick up three Old Fangs from the corpse here. Head inside the building, where you'll find more Azula Beastmen and a Lightningproof Dried Liver. Before continuing, enter the first doorway to the left and activate the Crumbling Beast Grave Site of Grace, which then enables quick-travel to the rest of the map.
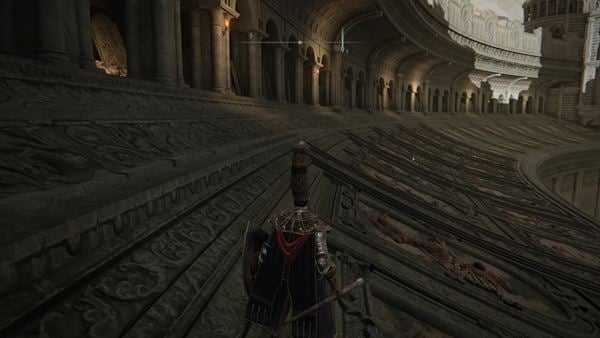
Head back through the hallway and you'll emerge back outside. You will encounter the first Farum Azula Dragon at the large curved bridge right in front of you. The dragon takes some time to land and perform its first attack, leaving enough time to run past it and collect the Smithing Stone (6), Smithing Stone (8), and Dragonwound Grease if you'd rather not fight it. Defeating the dragon awards an Ancient Dragon Smithing Stone, and Spirit Ashes are available for this fight. Head up through the archways to your left at the end of the bridge, making sure to pick up the Smithing Stone (8), then continue forward to reach the Crumbling Beast Grave Depths Site of Grace.
In the room ahead are two Azula Beastmen and a Smithing Stone (7). Head through the northwestern hallway, and you'll find a three-way split. To the left is a dead-end and straight ahead is a large hall. The right path takes you to an upper ledge that has two Azula Beastmen on the way, but eventually circles back to the hall ahead. Laying on the stairs right ahead of you is a corpse with fourteen Lightning Greatbolts. Continue straight and out the doorway you see ahead of you to get to an outdoor balcony with a Golden Rune (12) on a corpse dangling off of the left side.
Backtrack to the room that had two Beastmen right after the site of grace, and go onto the balcony of this room. On the right side of the balcony, you can hop onto the roof and enter back into the building on a higher level. On the left side of the room are three Gravel Stones on an altar. You can find a Smithing Stone (6) on a corpse in the middle of the room, and in the far end you'll find a Great Grave Glovewort on an altar guarded by an Azula Beastman Mage flanked by two melee Beastmen. Head back into the hall and down the main stairs, where you'll find more Azula Beastmen and the Ancient Dragon Prayerbook. Immediately out the door to the northeast is the Temple-Facing Balcony Site of Grace and the Somberstone Miner's Bell Bearing (4).
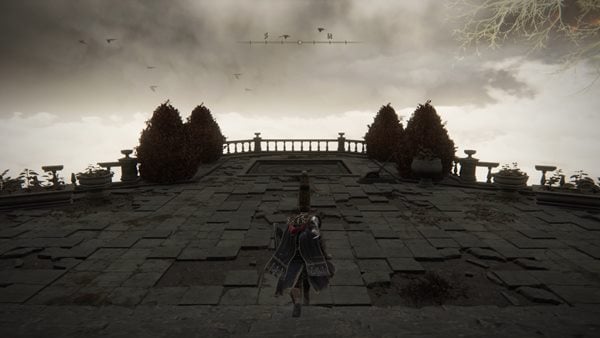
Before continuing forward, head back into the building and out the southwestern door. To the right of the stairs going down is a corpse hidden by pots holding a Hero's Rune (2). Hop onto the elevator by the base of the stairs and you'll be taken down to lower exterior levels of Crumbling Farum Azula. Immediately down the slope a Lesser Wormface will ambush you from the left. You can lure it out or avoid the ambush entirely by dropping from the ledge above behind it. then continue down the left-most path going upwards when the path splits. Here you'll find a corpse with four Fulgurbloom guarded by another Lesser Wormface.
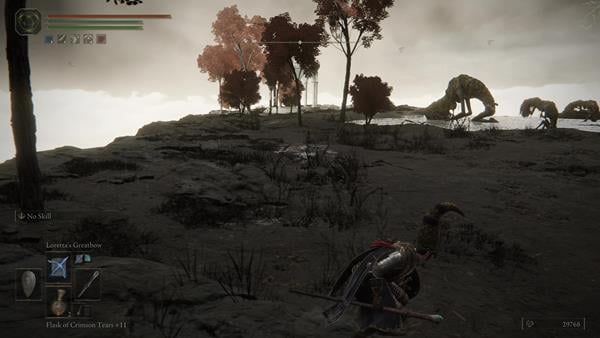
Continue forward and you'll emerge at a lake with three Lesser Wormface. Take care as one of them is much larger and more dangerous than the others. Ranged combat is viable from the stair-like cliffs as the enemy will easily get stuck on trees and will have a more difficult time spitting blight upwards. If you head down the slope to the east of the lake, you'll find five Gravel Stones on a corpse hidden in a corner of the outside of the ruins here. Back at the lake, you'll find the Glovewort Picker's Bell Bearing (3) in the gazebo at the far end of the lake. The Lesser Wormface here are distracted and you can easily sneak past them while grabbing the Smithing Stone (8) and Rejuvenating Boluses from the corpses beside them.
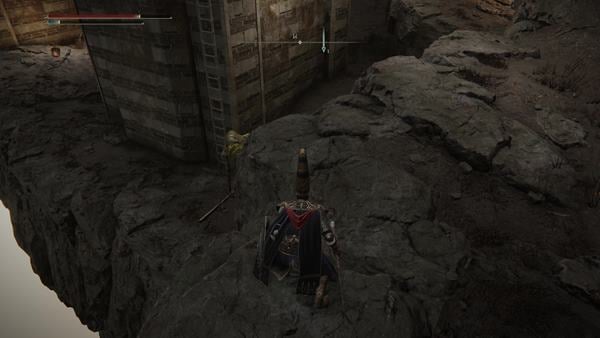
Head back up the slope you came from at the side of the mountain, and you'll find a ladder at the side of the arch ruins guarded by another Lesser Wormface. Head up the ladder to find a Lesser Wormface keeping watch over a corpse with a Smithing Stone (8). Head back down the ladder and turn left, going through the arches. On your way back up, you'll find several more Lesser Wormface and a Somber Smithing Stone (9). Continue from here to circle back to the lift from the balcony.
Facing the lift now, look to the left and a side path leading to a large circular platform with an item is visible. Jump from rock to rock avoiding the sloped rock on the right to get to the larger platform, but be aware that a Farum Azula Dragon will engage you after a brief delay. The corpse on the far edge holds a Smithing Stone (8), which can be grabbed quickly before the dragon attacks. Defeating the dragon only awards runes, so you may choose to fight it here or attempt to disengage. Follow the same path back, again avoiding the sloped rock that is now on the left, then take the lift back up and return to the Tempest-Facing Balcony Site of Grace through the doorway to the northeast.
Dragon Temple
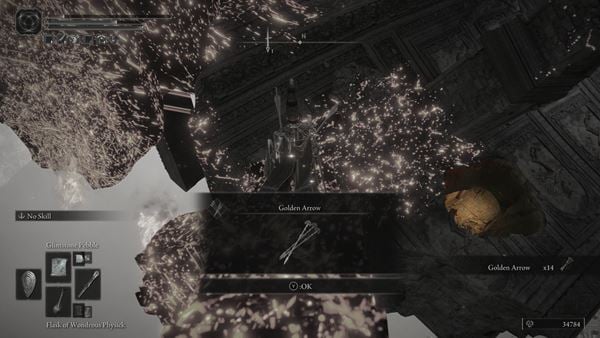
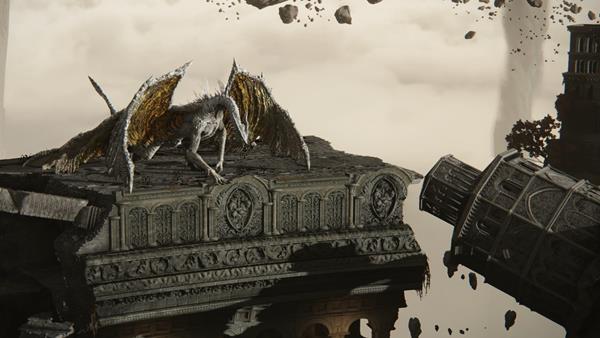
From the Site of Grace, you will be able to see a Farum Azula Dragon in the far distance. Though you may not be able to reach it at this time, it will breathe fire towards you while you jump to the platform under it. However, if you've advanced Iron Fist Alexander's questline to its final step, he will be standing on the building instead of the Dragon.
Head down the floating rocks and ruins west, where you'll get to a makeshift bridge occupied by Skeletons. The skeletons here in Crumbling Farum Azula look to have similar features and wield the same weapons as Azula Beastmen but have the same respawn mechanic as regular in-game skeletons. At the top of this first large chunk of ruin, you'll find a Golden Rune (9) on a corpse behind one of the pillars. Continue jumping across the floating ruins north, being sure to pick up the Somber Smithing Stone (7) and fourteen Golden Arrows, and jump into the hole in the corner of the next large chunk of ruin, right beside where you land.
Down the hole, to the southwest is a corpse with a Golden Rune (10). Head forwards to the northeast and before going through the first doorway to your left, go through the second one for an item protected by a Skeleton. At the end of the hallway through the first doorway, you'll emerge out onto a balcony. Turn left, scale the ruins up, and then head up the ladder you find at the end. On the altar up ahead is another Great Grave Glovewort. Three skeletal beastmen spawn after you pick it up. When you're done dealing with them, head out of the room and look down to your left to find a safe path back down to the large chunk of ruin with the hole you went down earlier. Following the path, pick up three Gravel Stones and a Somber Smithing Stone (9) on the way, and you'll eventually find the Dragon Temple Site of Grace.
From this Site of Grace, turn around back towards the ruins you came from and look down. There are floating stair ruins that you can jump down. At the base of these stairs, turn back around again and jump down to the lowest platform here. On the left is a corpse with a Rune Arc on it. If you head into the building and turn right at the corner, you'll find the Azula Beastman Ashes right ahead on an altar, guarded by several Banished Knights. Look to the right of the altar with the ashes and pass through the doorway to find a corpse with a Somber Smithing Stone (9). Head back into the building and jump off onto the lower ruin to the east. Here, you'll find the Dragon Temple Transept Site of Grace. Don't head into the room to your left yet - that's a boss fight we'll come back to. After you're done with all that, teleport back to the Dragon Temple Site of Grace.
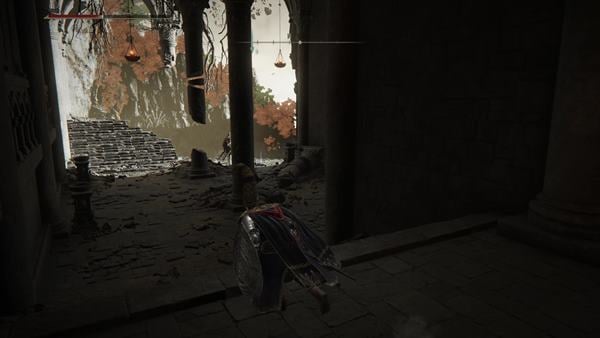
This next area is the Dragon Temple. After heading into the building, turn left and head to the edge of the ruin to find a Golden Rune (11). Head back the other way to find a Smithing Stone (6). Continue down the stairs and further into the temple. When you get to the hallway, turn right, and before going down the stairs, head left to another hallway. Following this path takes you outside, where you'll find a Stonesword Key by the edge of a cliff. Head up the stairs here, being careful of the enemy right by the doorway, and head into the temple ruin to find two Dragonwound Grease at the far end. From the ledge this corpse is on, you can safely jump down to the stone steps. Head to the top to find a Golden Rune (12), then head back down to enter the main hall of the temple.
Miniboss: Godskin Duo
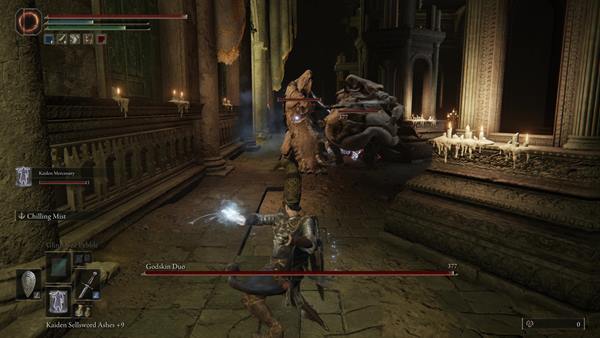
The main hall is an arena to fight the Godskin Duo and you must defeat them to be able to advance in Crumbling Farum Azula. If you had taken the stairs down in the first hallway earlier, you would've also ended up in this room. Being one of many duo bosses, this boss can be difficult to track and defeat solo. Make sure to use the pillars of the arena to your advantage and try to focus fire on one of them. As of Patch 1.03, Bernahl can be summoned to aid you, making this fight less frustrating. His summon sign can be found in front of either of the boss room entrances.
After defeating them, you will be rewarded with 170,000 Runes, the Smithing-Stone Miner's Bell Bearing (4), and the Ash of War: Black Flame Tornado. Interact with the Dragon Temple Altar Site of Site of Grace that spawns after their defeat and now we can move forward.
Completing the dungeon
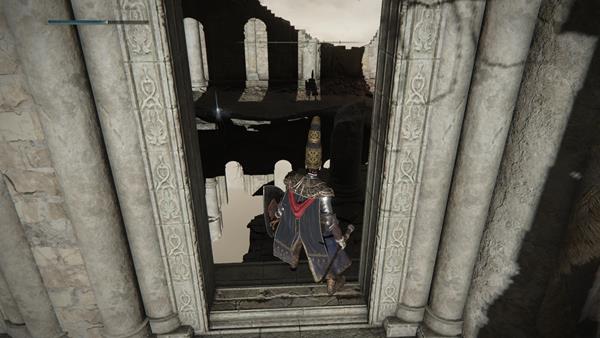
Head out the northeastern door and jump down to the lower platform. Take the way to the left, heading down the stairs westward, and you'll find a Golden Rune (11) guarded by a Rotten Stray. To your left are some ruined windows. Before jumping through them, you should defeat the enemies if you have a ranged build as they can swarm and overwhelm you easily. On the corpse here are five Old Fangs, and if you check behind the ruin walls, you'll also find a Hero's Runes (5).
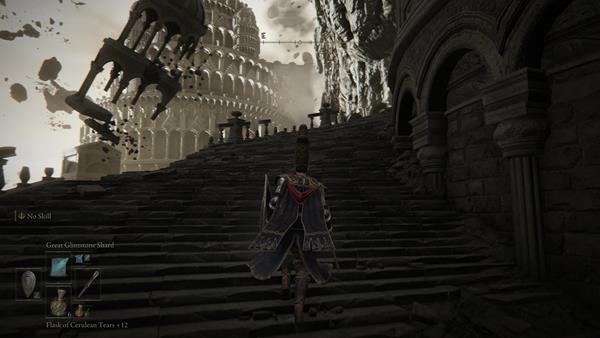
Continue heading north through the ruins and at the very end, ignore the doorway to your right for now and emerge back outside, noting a staircase to your right. Head forward to find a Smithing Stone (7) behind a fallen pillar, then turn left and follow the outer wall of the ruin to find five Lightning Grease. Backtrack back to the staircase and head up them. There's not much besides a Azula Beastman down the right hallway, however, if you head straight ahead, you'll find a Somber Smithing Stone (9) and an imp statue. You can use a Stonesword Key to gain access to an elevator that takes you to the Dragon Temple Lift Site of Grace. The area up here is quite large and completely optional, but you'll find some interesting loot.
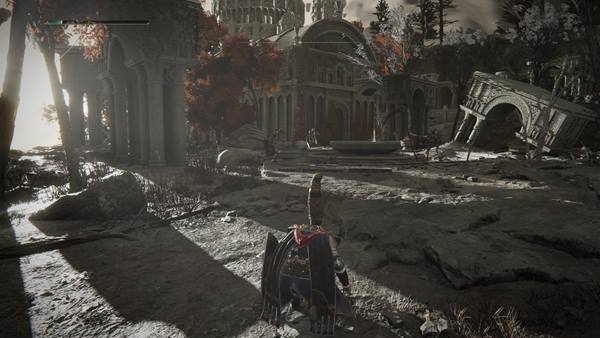
At the top of the lift, turn left to get to a courtyard full of Skeletons. In the middle of the courtyard is a fountain with a Lord's Rune in it. Head down the stairs going east by the side of the cliff on the left side of the courtyard. The corpse at the base of the tree here has two Nascent Butterflies. Continue forward, hopping up rocks positioned like stairs, and you'll get to another Skeleton-infested area. Be careful while moving/fighting near the nearby tree as the skeletons hanging off of it will drop down and attack you. If you've got ranged abilities, you can target and hit them while they are still hung up on the tree.
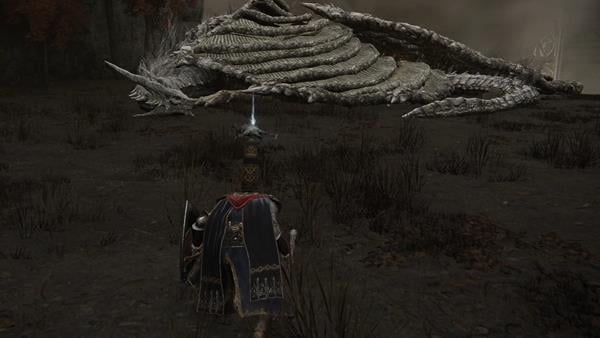
Move forwards towards the south, and head up the stairs to the elevated platform. On the east side of the platform is a corpse by the edge of the cliff that has a Smithing Stone (8). Head westward next to find a Rune Arc and a Golden Seed close to each other. Continue southwest, down the slope, and you'll find a Teardrop Scarab that drops the Golden Lightning Fortification Incantation. On the same cliff, you'll find a sleeping Farum Azula Dragon, which you can sneak towards to grab a Smithing Stone (8). If awaken, the dragon will breath fire and flies off. It is, however, possible to kill this dragon (12682 HP) to get about 21600 runes and 3 Gravel Stones after resetting the area by visiting a grace site.
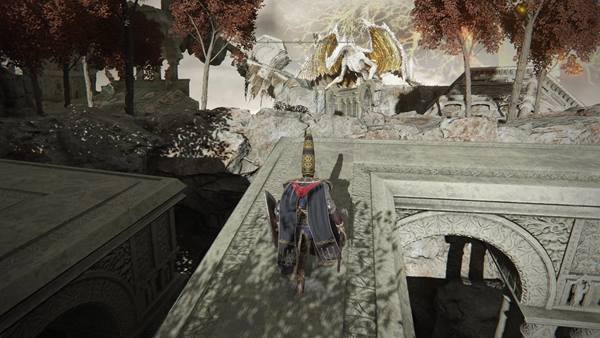
Backtrack back up the slope towards where you found the Golden Seed & Rune Arc and at the top, turn hard left. There is a series of collapsed archways and crumbled tower pieces stretching to the west to traverse. Platform over the tower pieces and you'll reach a large open area. If you've reached the end of his questline this is where you face Iron Fist Alexander in his final duel. Defeating Alexander here gets you Shard of Alexander and Alexander's Innards. Otherwise, this is where you can kill the fire-breathing Farum Azula Dragon from earlier.
Continue ascending the floating rubble, and pick up the Ancient Dragon Apostle's Cookbook (4) inside an enclosed area at the end. Two large undead beastmen are hiding here - one in the shadows around the outside of the tower, and one in pieces on the ground behind a block of rubble. They will attack you when you pick up the cookbook, so it is better to take out the one behind the tower first, then goad the second one into attacking before defeating it in single combat.
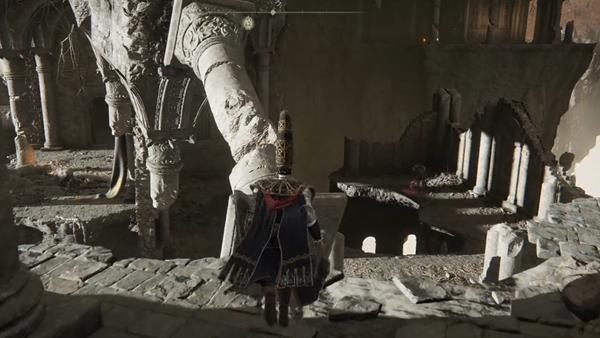
Once you've got the cookbook, look north of the collapsed building it was in for another platform you can jump down to, containing a corpse with a Somber Smithing Stone (8). From there, you can drop down to another floating platform just below it for a Smithing Stone (8). From there, fast travel back to the Dragon Temple Lift Site of Grace and head down the elevator. Turn right towards the east, walk through the archway, then turn right again towards the south. You will be able to see a column that is floating diagonally, close enough for you to jump on and climb up. Up here, you'll find an Ancient Dragon Smithing Stone guarded by a Farum Azula Beastman and Rotten Stray. From here, there's a way back to the Godskin Duo boss arena if you look down towards the northeast and jump down to the floating platform below you. There's nothing of value on the way, however, so simply backtrack down the stairs and we'll go back to the doorway we ignored earlier.
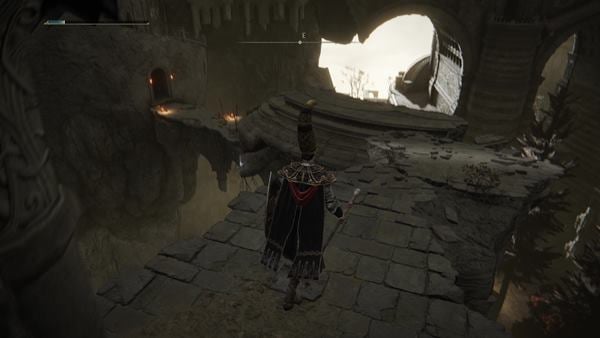
At the bottom of the stairs, turn left to enter back into the ruins and left again to go through the doorway. Continue forward, jumping down the ruins here, where you'll be able to pick up the Dragoncrest Shield Talisman (+2) hidden behind and a Golden Rune (12). Keep following the path and you'll get to an open area where you will meet a Crucible Knight, like the one you can find in Limgrave.
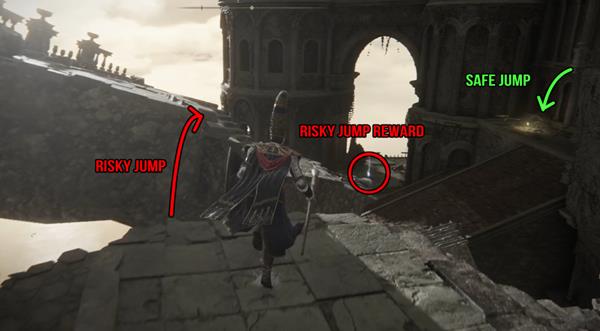
After you've defeated it, the Crucible Knight won't respawn. Your next course of action is to head southeast. There are two choices to take - you can simply jump over the banister of the balcony overlooking the Dragon Temple Rooftop Site of Grace ahead, or you can jump to the floating rock on the right, which requires a very tight jump, where you'll be rewarded with a Smithing Stone (8). If you can't take on the Crucible Knight in a straight fight, you can make the save jump straight to the Site of Grace and then pick it off from afar.
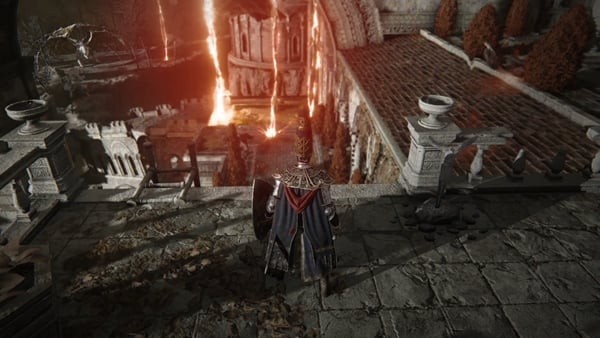
Once you go down, you will encounter a seemingly harmless Eagle laying on the floor near an open elevator shaft. Beware, however, of another eagle waiting to ambush you inside the round tower at your left. The corpse here has a Smithing Stone (6) on it.
(Optional side path to Drake Knight Set): Go down the ladder to the south and immediately turn left to find a floating platform behind the corner, hop on it and then jump down to a circular lift area. Run around it to the other end to find Drake Knight Set in a chest. Then take the elevator up to encounter an Azula Beastman across the small bridge. Loot the Lightning Greatbolt here and safely drop back down to grace.
After going back to the ladder where you encountered two eagles, looking to the south, you'll see a hostile pale Dragon casting red lightning bolts all over the rooftops. Keep in mind that before hitting the ground, bright red flames mark the areas the lightning is about to strike. By staying away from these flames, you can avoid being hit by these attacks.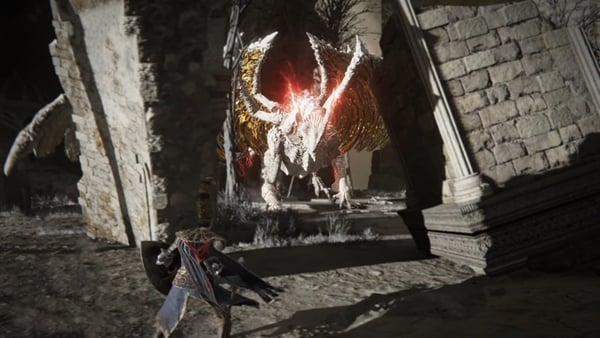
Descend by using the ladder in front of you, or by jumping down from the roof on your right, and keep moving ahead in direction of the Dragon. On the way, you'll come across another couple of large Eagles. Using long-range attacks, like magic or archery, is a good strategy here, as there seem to be certain spots where the lightning won't land. As you approach the Dragon, you'll notice it is in quite low health. You can defeat the Dragon the normal way or cause it to flee by landing a few good hits or by backtracking a short distance. In its place eight Fulgurblooms and a Golden Rune (12) at his position, and the gazebo behind it holds a Somber Ancient Dragon Smithing Stone.
(Optional side path to Boltdrake Talisman +2 & Dragon Towershield): Left of the gazebo, in the eastward direction, if you look down, you'll see platforms down below. Keep dropping down and then drop down to another platform by the right side, next to the building. Drop below, left again to find a doorway. Enter it and to your left, you'll fight through a Banished Knight. Continue to find an Eagle and a ladder. Be careful as you ascend the ladder as there is another knight with a spear patrolling above and another soldier with two swords standing on the left. The Dragon Towershield can be found in the chest directly left from the ladder. Right across the ladder, there is an elevator. Take it up to find a path going west which takes you into the building right below the birds that you fought earlier on your way to the Dragon. Enter this set of ruins and you should encounter a Crucible Knight fighting Beastmen. If you are quick enough, you can run past them and take the ladder up at the end, otherwise, you can choose to defeat the Crucible Knight. After ascending the ladder, to your right, you can finally pick up Boltdrake Talisman +2 from the corpse. Drop down to find yourself back at the area with Eagles where the Dragon was using his lightning and make your way back to the Dragon's location where this side path started.
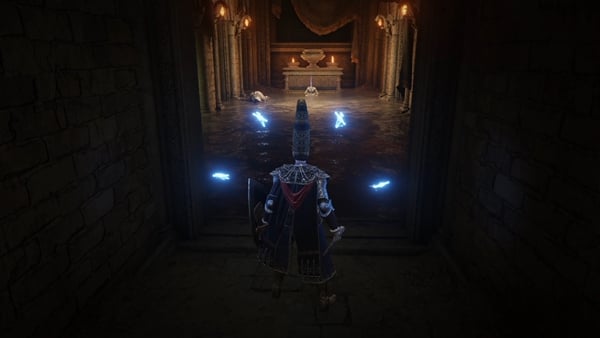
Next, head southwest and fight through a total of five Beastmen. Cross north to the other side by using the fallen structure as a bridge (mind the Beastman with thrown axes on the other side), and focus on the next building to your right. You can see a Beastman that's standing over a corpse with the Somberstone Miner's Bell Bearing [5]. Take care when you approach, as on your right there is a Beastman with a greataxe and on the left is a Beastman that can cast lightning. Take out the Beastman you can see from range, step in and lure out the greataxe Beastman, but bear in mind that the caster Beastman can call down lightning from behind the walls.
Once you've dealt with or escaped from the foes, move forward through the stairs located to the right of the chapel's altar. The path will take you to an elevator, after which, you'll reach the Beside the Great Bridge Site of Grace. Moving further up the stairs you will then reach the Great Bridge. You'll be situated now at the middle of the bridge, and facing the choice to either go right (South) or left (North). The Bossfight takes place at the coliseum-like structure located upwards, so if you want to enter the last stage of your journey at Crumbling Farum Azula you can head this way. Please note that there is also another optional boss fight (Dragonlord Placidusax) that can be accessed by going back down the elevator from Beside the Great Bridge Site of Grace. If you'd like to fight the boss now, click here. However, this section of the guide will first cover what lies at your left, that is, heading north.
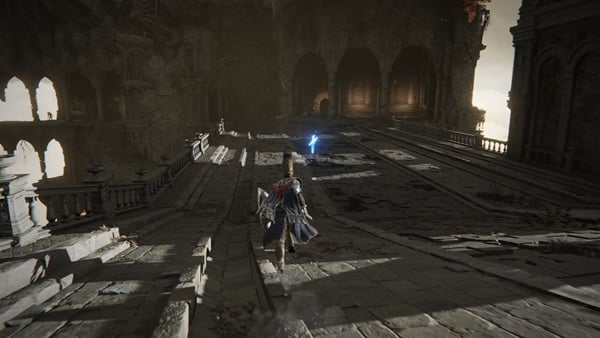
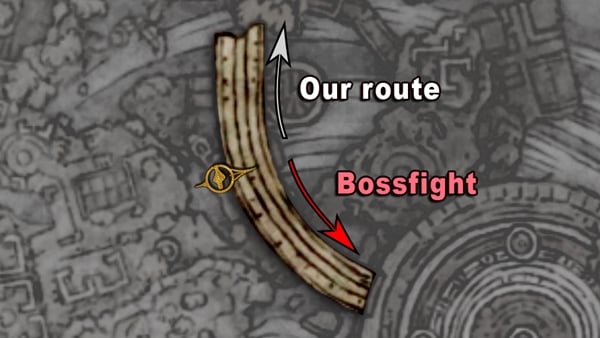
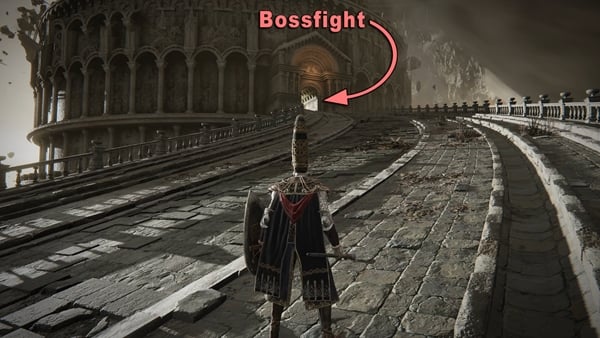
This route takes you directly to the Dragon Temple, and the path is as straightforward as it gets. After descending through a set of stairs and heading through the door you'll reach a terrace. You'll find the ladder to move forward located on your right. But first turn left, as you'll find a corpse holding a Somber Smithing Stone [8]. There are numerous Beastman corpses here, but a few are merely resting. They will not attack you unless damaged first. If you still wish to kill them, use lock-on to identify the living from the dead. Once that's taken care of, you may resume the previous route and head south for the ladder you encountered when arriving at this terrace.
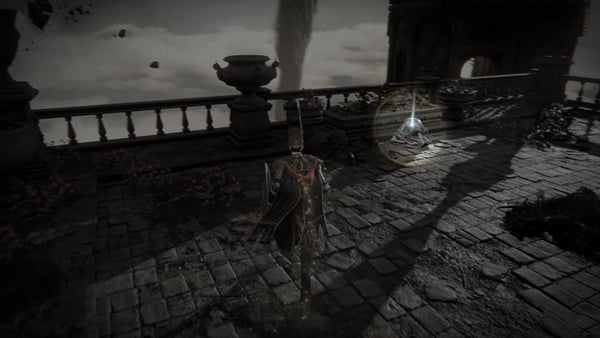
Now, the next area after going down the ladder is a bridge leading you to one of the towers. Inside, you will find a coffer guarded by three Beastmen, but upon reaching the tower you are invaded by Recusant Bernahl, previously known as Knight Bernahl. You don't want to take them all at once, so your best bet is to defeat the invader first.
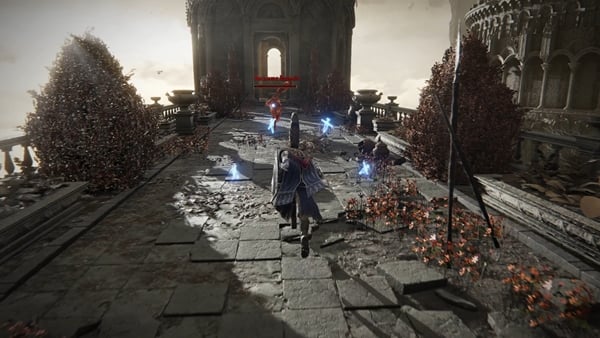
Recusant Bernahl wields a Devourer's Scepter Warhammer and his fight style consists mostly of melee attacks. However, the skill on his weapon, Devourer of Worlds, allows him to charge it with magic and strike it against the ground to steal your HPs. Once defeated, Recusant Bernahl drops the entire Beast Champion Set as well as the Devourer's Scepter Warhammer and x1 Blasphemous Claw.
Once the area is cleared, you may loot the coffer inside the rounded tower. This chest contains the Old Lord's Talisman, which extends the duration of effects caused by sorceries and incantations. Now that this area has been exhausted, return to the Beside the Great Bridge Site of Grace to refill your health and flasks, and go back onto the Great Bridge and head for the boss fight.
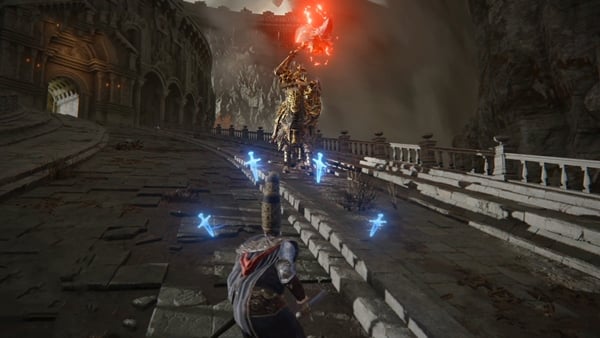
Before you take on the boss of this area, there is a Draconic Tree Sentinel that will intercept you when attempting to reach the gates. Be aware of his devastating downward Mace attack, and try to avoid it by sticking close on his left side. Upon losing 50% of his life bar, he enters phase 2 and calls down powerful red lightning to course through his Mace. His attacks become more violent and gain the ability to summon a small controlled storm around him, similar to the dragon you came across earlier. It is recommended once he starts sparkling to fall back until the lightning has cleared away.
Fighting this Sentinel is duly compensated as it rewards you with the Malformed Dragon Set. Head up towards the fog door, grabbing the Somber Smithing Stone (7) on the way.
NOTE: Upon defeating the following boss, much of Leyndell, Royal Capital will become unavailable, as will many of the weapons, items, spells, and armor located there. Plan to collect any items you want from Leyndell before completing the fight, in particular the legendary armament the Bolt of Gransax.
Beast Clergyman/Maliketh, the Black Blade
Once you've reached the coliseum-shaped structure, you'll begin fighting Beast Clergyman. His attacks mainly consist of close-range swipes and various rock throws. Since his quicker and more deadly attacks are done in melee range, magic and ranged users will have an easier time dealing with him as they can fight back while keeping their distance. Melee users should look for opportunities where the Beast Clergyman is vulnerable before committing to any attacks. One such attack that is safer to punish is one of the rock throws where he plunges his knife into the ground. You can find more details and strategies on his boss page.
After taking the Beast Clergyman's HP to about half, it will reveal itself to be Maliketh, The Black Blade. Maliketh has a different skill set than the Beast Clergyman but has the same 'quick and hard to punish' characteristic. If you've finished Bernahl's questline and have defeated Recusant Bernahl, be sure to make use of the Blasphemous Claw that he drops. You can use the item to counter Maliketh's attacks that make his weapon briefly glow yellow. You can find more details and strategies on his boss page and the Blasphemous Claw page.
After you have defeated Maliketh, you will be teleported to the Leyndell, Capital of Ash Site of Grace. After activating that grace you can teleport back to Beside the Great Bridge Site of Grace and return to the boss fight arena to touch Maliketh, the Black Blade Site of Grace if you wish to do so. However, the main point of focus here is to go to the optional boss fight.
Dragonlord Placidusax
To find Dragonlord Placidusax, head back down the lift from the Beside the Great Bridge Site of Grace. Leave the temple down the curbed stairwell and through the shallow water room with red lightning enemies. When you exit the building, head straight ahead towards the cliff's edge and slightly to the left. If you look down, you'll find some floating platforms you can jump down to. Follow the path down to get to a large empty chunk of ruin. Find the arch on the ground without bones, and you'll get prompted to lie down. When you do so, a cutscene will play and you'll get teleported to the boss arena. Dragonlord Placidusax is not a very nimble boss, but many of his attacks have large areas of effect that can be difficult to dodge out of if you've animation locked yourself. At about 50% health, it gains access to a divebomb-like attack. It's relatively easy to track, but do be careful of its large hitbox.
Upon defeat, this boss drops 280,000 Runes and the Remembrance of the Dragonlord. Interact with the Dragonlord Placidusax Site of Grace that spawns here, and you're done with the area.
If you have Miquella's Needle and have come into contact with the Three Fingers, you can use the Needle while in the arena to cure yourself of the Fingers' influence. You do not need to defeat Placidusax; you just need to be in its arena to do this.
Crumbling Farum Azula Maps
Crumbling Farum Azula Videos
Speed Run Walkthrough
Interact with Melina at the Forge of the Giants Site of Grace to teleport to Crumbling Farum Azula. If you've interacted with the Three Fingers, you have to select the 'Listen to the sound of the flames' option at the Site of Grace instead to teleport here. Cross the bridge, and at the end, you'll find a Smithing Stone (8). Turn right and follow the path down. When you get inside the building, head into the first doorway to your left to interact with the Crumbling Beast Grave Site of Grace.
At the end of the hallway, you'll be back outside and will see a makeshift bridge in front of you. When you get to about halfway through, a Farum Azula Dragon swoops down to try to attack you. It takes a while for it to attack you, however, and you can easily run past it to get to the Crumbling Beast Grave Depths Site of Grace on the other side. On your way here, you can pick up a Smithing Stone (6) and Smithing Stone (8).
In the next room, you'll find a Smithing Stone (7) on one of the altars. Head through the northwestern hallway, ignoring the left and right splits, and go straight ahead to reach a large hall. Turn right and head down the main stairway to find the Ancient Dragon Prayerbook on the floor. Immediately out the door to the northeast is the Temple-Facing Balcony Site of Grace and the Somberstone Miner's Bell Bearing (4). If you want some extra loot, including the Glovewort Picker's Bell Bearing (3), two Smithing Stone (8), and a Somber Smithing Stone (9), head back into the building and out the southwestern door. You'll find a lift taking you down to an area infested with Lesser Wormface. The path here circles 'round back to the lift, so there are no worries about getting lost just yet. Once you're done, head back to the Temple-Facing Balcony Site of Grace.
Head down the floating rocks and ruins west, where you'll get to a large floating ruin chunk occupied by skeletal Azula Beastmen. Grab the Somber Smithing Stone (7) here, then jump down north to the next large ruin chunk. Jump down into the hole in the corner of this chunk (should be to your right when you land on it) and go through the first doorway to your left. Follow the path, head up the ladder when you get to it, then you'll find a Great Grave Glovewort on the altar ahead. Head out of the room and look down to your left to find a safe path back down to the large chunk of ruin with the hole you went down earlier. Continue north, picking up a Somber Smithing Stone (9) on the way, and you'll eventually find the Dragon Temple Site of Grace.
From this Site of Grace, if you turn back around from where you came from, you'll see a set of stairs you can jump down to. At the base of these stairs, turn around again and head into the building to grab the Azula Beastman Ashes. Turn left from this altar and jump down the ledge to activate the Dragon Temple Transept Site of Grace. When that's done, teleport back to the Dragon Temple Site of Grace.
Head through the temple's doorway, then turn right. You'll find a Smithing Stone (6) at the end. Turn left and head down the stairs, then take a right again when you get to the hallway. Before going down the steps, turn left into another hallway to find a Stonesword Key. Backtrack back to the stairs and head down to get to the main hall, or go to the Dragon Temple Transept Grace and ascend the stairs to the same hall. Regardless of your entry route, you'll fight the Godskin Duo in this large room, and upon their defeat will receive the Smithing-Stone Miner's Bell Bearing (4) and the Ash of War: Black Flame Tornado. The Dragon Temple Altar Site of Grace spawns here too.
The way forward is out the northeastern door. Jump down to the lower platform in front of you, then head left down the stairs. When you emerge back outside, head through the ruined windows to your left. Jump down the ruins to the north and take note of the doorway on your right at the end of the hallway. Back outside, check behind the pillar in front of you for a Smithing Stone (7) then head up the stairs to your right.
At the top of the stairs, turn left and you'll find a column that is floating diagonally, close enough for you to jump on and climb up. Up here, you'll find an Ancient Dragon Smithing Stone guarded by a Rotten Stray. Back track back to the top of the stairs and head west, where there will be a Somber Smithing Stone (9) and imp statue in the area. The imp statue here locks off a large, but completely optional area. If you unlock it, you can take the lift behind it to the Dragon Temple Lift Site of Grace. Explore the area and you'll be able to find valuable loot such as a Rune Arc, Golden Seed, the Golden Lightning Fortification incantation, Ancient Dragon Apostle's Cookbook (4), and various Smithing Stones.
When you're done with that area, head back down the stairs and back to the doorway, you took a note of earlier. Continue forward, jumping down the ruins here, where you'll be able to pick up the Dragoncrest Shield Talisman (+2) hidden within the ruins. Keep following the path and you'll get to an open area where you will meet a Crucible Knight. Once you defeat it, it will not respawn again.
You'll want to head southwest next. There are two viable ways to get to the Site of Grace you see ahead. One is by simply jumping over the banister of the balcony, and the other is by doing a tricky jump onto the floating ruins where you'll find an item. Once you've interacted with the Dragon Temple Rooftop Site of Grace, jump down the roofs and you'll find a Smithing Stone (6). Go down the ladder in front of you and if you look to the left, you'll find a floating platform behind the corner that you can jump to. Follow the path here to get the Drake Knight Set and you'll be able to circle back to the Dragon Temple Rooftop Site of Grace.
Head back down the ladder and head south towards the Farum Azula Dragon. You'll find a Somber Ancient Dragon Smithing Stone in the gazebo behind it. To the left of the gazebo, you'll see platforms down and to the east. If you follow this path, you'll be able to find the Boltdrake Talisman (+2) & Dragon Towershield and from here, you will eventually circle back to the rooftops. Head back to where the dragon was sitting and head southwest.
Go up the slope then turn right, crossing the ruins here going north. You'll find a temple to your right with the Somberstone Miner's Bell Bearing (5). Be careful in this temple as you will get ambushed by two strong Azula Beastmen. On the south side of the temple, you'll find a path and an elevator taking you to the Beside the Great Bridge Site of Grace.
From here there are multiple options to take. To go and fight Dragonlord Placidusax, head back down the elevator and exit the temple. Head straight ahead towards the edge of the cliff, and if you look down, you'll find some floating platforms you can jump down to. Follow the path down and in the arch on the ground without bones, you'll get prompted to lie down. A cutscene will play, after which you'll find yourself in the boss' arena. Defeat it for the Remembrance of the Dragonlord and interact with the Site of Grace hereafter it spawns.
Teleport back to the Beside the Great Bridge Site of Grace. Follow the stairs up and you'll get to a large crumbling bridge. For even more loot, head north down the bridge. Head into the building and when you emerge back out, turn left to find a Somber Smithing Stone (8). On the right of the doorway is a ladder you can descend. If you've completed Bernahl's questline and defeated Rykard, Recusant Bernahl will invade you when you reach about halfway across the bridge here. Defeat him for a Blasphemous Claw, the Devourer's Scepter, and the Beast Champion Set. In the building ahead, you'll find a chest with the Old Lord's Talisman guarded by multiple Azula Beastmen.
After you're done with that area, teleport back to the Beside the Great Bridge Site of Grace and back to the bridge. Head south, going up the bridge this time and you'll encounter a Draconic Tree Sentinel. You can choose to run past this enemy, however defeating it nets you the Malformed Dragon Set. Continue up the bridge, collecting the Somber Smithing Stone (7), and head through the fog door.
You'll start by fighting the Beast Clergyman. Once you get him down to 50% health, a cutscene will play and he'll transform into Maliketh, the Black Blade. On his defeat, you'll be given the Remembrance of the Black Blade and get teleported back to Leyndell, now in a different state. If you head back to Maliketh's boss area, you can interact with the Maliketh, the Black Blade Site of Grace.
Gallery
 Anonymous
Are we not going to talk about the ten (10) stormhawks I'm expected to fight while dodging lightning attacks from the 4th dragon? I get most of you just blow through them with ranged attacks but trying to land a melee hit on these with the abysmal camera controls feels like From ran out of ways to make their dungeons 'difficult' without making them suck.

 Anonymous
Most games would have put an area this visually stunning as close to the beginning as possible, to try and hook as many players as they can early on.
But the artists at FromSoft maintain such a high standard of quality that even this late in what is a very large game, you still come across areas that take your breath away.
It feels increasingly rare in today's games industry. We are lucky to have them.
 Anonymous
 Anonymous
They put ds3's greyish palette colors in this place and i doubt it was an accident.

 Anonymous
The end game of elden ring is so bad lmao. Snowfields, fire giant, farum, godskin duo, maliketh, and then finally for a final boss you get the worst of it all, elden beast. Cancerous.

 Anonymous
after finishing Mohg's palace and the Haligtree, Farum Azula feels like a relief, honestly.

The Godskin Duo boss wasn’t as bad as I thought it would be, but dang it, GETTING BACK to them after each death was a pain in the butt because you have to dodge past at least 2-3 knights - aggro’ing at least 1-2 of them into following you downstairs. Without summons, this duo boss might’ve been worse than the O&S duo in DS1.

 Anonymous
I'm with the naysayers. In level design, you need a central focus point to see progression, and to use a Valve term, Vista points. The best levels in FromSoft games give you a mental model of where you are in the world. You hit all these vista points, that have real interesting lore, are visually gorgous, or set the stage for some epic showdowns. Stormveil Castle, you are navigating through the outer towers, trying to get to the keep. You mentally know where you are in this massive dungeon. The inner courtyard is forbidden (for now), and when you finally get there, it's a wealth of visual lore, with defenders behind spikes. It's so well build, most players can probably play Stormveil Castle in their heads.
Crumbling Farum Azura fails. That big tornado with dragons flying around is a neat feature, but not a strong visual guide to where you are on the map. There's multiple tornados. You don't really know where you are - You just keep moving in a direction until you can't. There's some interesting showdowns for sure, but which teleporter do you take? And I bet most people cannot run this level in their heads. So yeah, it's not very good.
 Anonymous
A vast, crumbling mausoleum surrounded by tornados and flying dragons.
And some have the audacity to call this level “uninspired.”
 Anonymous
 Anonymous
This is one of those levels that kills all interest. Just like all snow levels in the souls series. Also kind of reminds me of dragon aerie from dark souls 2 for obvious reasons. Unfortunately nothing will ever be as good as dark souls 2.

 Anonymous
Can be found by googling "Elden Ring Crumb". I have also tried "crumbs", "breadcrumbs", and "cookie that is crumbling" and the last one got me to a bunch of Farum Azula-related videos but only "Elden Ring Crumb" found me this page.

 Anonymous
I love the Level Design in this Game but towards the end it was somehow rushed and you can see it. For example, Some of the hanging grey corpses on the edge of the floating Stones/islands in Crumbling Farum Azula would normally contain loot but sadly there is none. Despite this, its still a 10/10 Game but i will always wonder how it would be if they had more Time for the developement. I also cant understand why they didnt patch some of the well known glitches or optimize the lag on some areas or even make some QoL changes for convinience after the Game came out. FromSoftware is really a mystery that i will never understand...

 Anonymous
hit or miss. The Dragon Temple Lift Site of Grace has a Stake yet no boss.. yet. It shall be here were you fight the Godskin quintett to enter the Lands behind the Haligtree. Miyazaki told me, my uncle works for the EUw server of Eldenring.

 Anonymous
Nothing bugs me more than looking to the west from the Dragon Temple Site of Grace and seeing that super suspicious floating building just looking like it's waiting for me to somehow teleport over to it.

 Anonymous
This whole place is so bland and uninspired. Nothing but recycled enemies in convoluted and boring layouts. The only thing about it that's even mechanically kind of interesting is the Maliketh fight, but that fight's not even fun. This one area nearly soured me on the whole of Elden Ring's late game. At least you get to hit up Ashen Capital immediately and get a buffet of rad boss fights.

 Anonymous
Color palette in this area is like playing a depression simulator. 10/10 goty

 Anonymous
The way I woke up there without even knowing how I got in reminded me of all the times I wole up home after binge drinking and blacking out

 Anonymous
 Anonymous
Farum Azula, a magical place full of dragons and...zombified werewolves? I guess the devs didn't have another place to put them.

 Anonymous
 Anonymous
I really love the visual design of this area, truly worthy for the last legacy dungeon in the game. Also the size and many optional routes the player can take, the bosses and of course the end to the quest line of one of the most likeable characters. What I dislike though is the section with the warhawks and the dragon at the end. The warhawks just really suck if you use short range weapons like claws. I could not hit them at all, but rushing past them also proved deadly.

 Anonymous
i have fallen off and died way too many times in this god damn area

 Anonymous
I can't believe people defend this place. This is place is ****ing awful.

 Anonymous
Not the best area by far. Filled with normal mobs that just do too much damage. It’s like they want you to ignore the scenery and just run through. The bosses that don’t have a name tag here are just normal enemies with their health and damage dialed up to 11 with no trade off. The average player doesn’t make a big enough stat jump to offset the sheer damage of everything here. If they halved the enemies and got rid of the wandering boss enemies (crucible knight and tree sentinel) people would be able to appreciate the amazing level design. You can see everything from every point. It’s really great but it’s like from soft doesn’t want me to take it in

 Anonymous
This page is a damn mess! Don't dedicate a majority of the wiki page to various walkthroughs; I came here because I wanted a quick overview of the enemies found in the region so I can check their resistances. All these walkthroughs should be moved to another and dedicated page for them, but don't merge them with the main page of the area. The main page should quickly describe:
a) what the area is including general lore tidbits,
b) where it is found and accessed,
c) what general loot and bosses are in the area and
d) what enemies you are bound to encounter.
Not this nonsense with so much space dedicated to various walkthroughs.
 Anonymous
 Anonymous
I love how this dungeon uses the dull coloration and ubiquity of the debris to disorient you.

 Anonymous
probably my favourite area - despite it being bullshit with the crucible knight's difficulty and the dumb sentinel, as well.

 Anonymous
The Crucible Knight in this area is a bunch of BS. He can be parried but the critical strike you follow up with after breaking his stance does no more damage than if you would have just hit him with a normal swing. He is heavily armored with a heavy weapon, but after breaking his stance, he stands back up so fast, you have barely enough time to down a heal potion before he combo hits you. If it were a player character, we would be getting stomped while trying to get back up in that heavy gear. The other BS is when he stomps his foot, and stun locks you until you are dead. By scrolling down to other comments, I can see there is much more BS similar to this ahead here.

I'm surprised people like this area so much. By far one of the worse in the game. Dozens of beastmen with consecutive, non telegraphed, super fast attacks that kill stamina, worm faces with incredibly high health that you can't chip away at because they spew death blight which fills up in milliseconds, dragons with more health and attack than Melinda, arenas where you can fall off easily dodging hard to dodge attacks. The only area of the game where I think fromsoft went too far.

 Anonymous
 Anonymous
worst location in elden ring, its like they piled every single annoying enemy into one location and made it compulsory

 Anonymous
"After exploring the area, head back down the imp statue elevator by the Dragon Temple Lift Site of Grace. Turn right towards the east, walk through the archway, then turn right again towards the south. You will be able to see a column that is floating diagonally, close enough for you to jump on and climb up. Up here, you'll find an Ancient Dragon Smithing Stone guarded by a Farum Azula Beastman and Rotten Stray. From here, there's a way back to the Godskin Duo boss arena if you look down towards the northeast and jump down to the floating platform below you. There's nothing of value on the way, however, so simply backtrack down the stairs and we'll go back to the doorway we ignored earlier."
Did you mean go back UP the elevator?? If you go DOWN, turning right makes you point WEST not EAST.
 Anonymous
If you have it, the stats to make it hurt and can afford the FP cost of casting it two or three times in succession, Giantsflame take thee will one shot ALL of the regular beastmen and two shot the big buggers wielding the cleavers, full charged casts will ragdoll even the big ones off the edge of fatal drops or flying into walls. Strong contender to be the most entertaining, funny and effective incantation for anything that doesn't have stupid high fire damage negation.

 Anonymous
The first dragon is wildly over powered for a "lesser" dragon. It hits harder than Lansseax with 60 VIG every attack it landed took over three quarters of my HP. I started with five crimson and nine cerulean flasks but I had to resort to dropping warming stones every time I went anywhere near it. I had ninety something HP left when Latenna killed it just before it could get me. The dragon stone it drops was nice but it isn't fun to fight that thing.

 Anonymous
 Anonymous
I cheesed the stupid Draconic Tree Sentinel before Maliketh by hitting him with Rotten Breath or Ancient Lighting Spear (AoW from Bolt of Gransax) then running away. Repeat until he's dead.

 Anonymous
Other companies would make Crumbling Farum Azula and Miquella's Halligtree a DLC. For From Software those two are just 2 regions of many.

 Anonymous
I can't believe how many amazing and unique locations are in this game. Countless times I never thought I could be blown away numerous times after discovering a new location. From the first time when I took the lift in Mistwood down to the underground river, discovering the eternal city, Leyndell, and countless other placed. I know From Software are great and I love all their games. Still I ask myself: "how did they make something like this?" from a basic vision to making it a reality with a team of people.

 Anonymous
 Anonymous
You can cheese the first dragon you face in the Farum pretty easily with Rotten Breath and then just hide after reaching the safe space near the site of grace. Hit with a second blast if necessary.

 Anonymous
Interesting observations (ready for the wiki to destroy my nicely formatted work);
1. You cannot see Farum Azula from anywhere on the map EXCEPT for the Isolated Divine Tower.
2. From Farum Azula, you cannot see any minor Erdtrees, Liurnia and Raya Lucaria, Limgrave and Stormveil Castle, Weeping Peninsula and Castle Morne.
3. From Farum Azula, you can see all Divine Towers, Bestial Sanctum, the Erdtree, Leyndell, Mountaintops of the Giants, and the Forge.
4. The buildings of Farum Azula and the Bestial Sanctum share the same domed roofs, statues and architecture.
5. The structure under the Bestial Sanctum has these roof domes, and the floor/roof part is a perfect match for the lower floating segment of Farum Azula (where we lay down to fight Placcy).
6. Farum Greatbridge leads to the Bestial Sanctum, meaning Farum Azula was situated North, East, or perhaps more interestingly.. South in the location that is now the Wailing Dunes. The ruins that are strewn across the dudes all appear to be supports for a bridge, and the remaining standing parts all aim north east, extending past Fort Faroth aiming towards Farum Greatbridge from the direction of the Impassable Greatbridge. These pillars and the Farum Greatbridge differ in the shape (Octagonal vs Rectangular) but share a very similar archway, whereas the Impassable Greatbridge shares no similarities to either.
9. The Golems spread around the world are said to have fallen from above, with some as far as Limgrave having taken substantial damage on landing. There is one Golem on the ledge of the Wailing Dunes in the ruins. This Golem is unique in that it can shoot blue lasers, making it likely to have been a more elite version, being situated close to somewhere of importance, meaning it may not have fallen very far at all, perhaps directly from the bridge that ran through here in the past.
10. The same style of ruins is found in the Highroad Cave, which extends out under the sea in Limgrave. The boss is.. a golem, which has either fallen through the roof (which is technically underwater), or was stationed in here.
11. The same style of ruins makes up the Ruin-Strewn Precipice, and the Seaside Ruins in Limgrave, which also appear to be destroyed bridges. There are some pillars on the beach west of the 3rd Church of Marika, facing towards the Moonlight Plateau; and to the south east/ north east of the Tower of Return, arcing around the Minor Erdtree before heading through the gorge north towards Limgrave where they follow the water and converge with the ruins from the other side, heading towards the Bridge of Sacrifice where they stop, and also to the Church of Dragon Communion where they stop. A line can be drawn from Farum Greatbridge, down through the wailing dunes, past the Cathedral of Dragon Communion, to the Bridge of Sacrifrice, where it splits into two paths; Parallels with the southern coast of Limgrave until the Sainted Hero's Grave near the Dragon Church, South cutting through Weeping curving around the Minor Erdtree towards the Tower of Return, then back up towards the Dragon Church (slightly south). IT appears to be high roads linking the two locations of the churches without having to travel overland.
 Anonymous
Why the person who wrote this use compass directions and normal directions?

 Anonymous
If you are having trouble finding Bernahl's spawn it may be because there us more then one entrance for the Duo fight. The entrance with Bernhal's spawn is by Dragon Temple Transept and up the stairs in front.

 Anonymous
I've been on the Farum Azula dragon wiki and it says there the dragons can be fought but I think the dragons after the first one on the curved bridge are buggy. It says on that page the dragon past the rooftop grace continually casting red lightning as soon as you get near the ladder can be fought and drops an ancient dragon stone. But for me it was disappearing after taking damage every time, I got close enough to it one time to use melee against it but it flies upward then vanishes and it was the same trying to kill it from longer range.
All the stationary dragons were doing the exact same thing as well. I wouldn't care except the ancient dragon stones for +10 and +25 are limited resources. Is anyone else here seeing the same thing happen when trying to kill the dragons after the first one?
 Anonymous
theres so many cool flat arenas to duel here. too bad nobody does because people crutch so hard on liurnia's rain for their lightning builds.

 Anonymous
"Turn left, scale the ruins up, and then head up the ladder you find at the end. On the altar up ahead is another Great Grave Glovewort. Three skeletal beastmen spawn after you pick it up."
The skeletal beastmen don't "spawn"; they are already there, suspended from the ceiling like the marionettes in Raya Lucaria. Picking up the Great Grave Glovewort just prompts them to fall into the room behind you and attack. You can hit them with magic or ranged attacks before going in to make them fall and take them out one-by-one. Then casually stroll in and pick up the Glovewort when they're done.
 Anonymous
Is there an issue with Bernahl not spawning? I killed the sentinel but no bosses. He isn't invading where he is supposed to I got the talisman but no sign of him.

 Anonymous
I don't see it mentioned here but if you plan to snipe the draconic sentinel from long distance thinking you are safe and it wont be able to get at you, think again. He has a red LTN attack that can either pass through walls and the floor as it hones in on you or the LTN automatically hits you wherever you are. Also, that malformed dragon set is one of the stupidest looking armour in the game, and that's really saying something.

 Anonymous
The weapon art on a +10 bolt of gransax with ritual sword talisman, lightning scorpion charm and golden vow cast kills the mob wormface enemies in one fully charged and one quick hit from the lightning spear it throws. For the big wormface and both smaller ones in the shallow pool I highly recommend climbing the ladder up to the top of the remains of the wrecked bridge and killing all three from range its safe enough to drop down the to the first or even second floating stone platform if you need target lock for spells or incantations after drawing their aggro with a bow their deathblight vomit wont reach up that far but don't get impatient and drop down to the third until at least the big wormface and one of the smaller are dead, getting hit by deathblight from two or three or even just the big one will kill you quickly regardless of how high your vitality is, having the prince of death's cyst equipped or having boluses ready.

 Anonymous
Recommending this or that weapon or spirit ash to anyone else is full of pitfalls but the first dragon you run into here has a similar move-set to Lansseax, a red lightning glaive, the red lightning AoE, a fire breath attack and a claw swipe attack at close range that generates a burst of red lighting similar to Mohg's bloodflame talons, I've never seen a dragon do that before, this one might not be a boss but it has a plenty big health pool anyway. I can see how it's tempting to summon dung or mimic for everything but if you have been upgrading her Latenna is much better suited for this, for every named dragon up to this point really, dung will spend most of this fight getting knocked flat onto then up off his arse.
She can't be summoned in the ideal spots here, either in the doorway before you drop down after the grace or the small room overlooking the area on the left, but she can be summoned at the first alcove next to that room. If you sprint to where the dragon lands after summoning her she wont be in any danger for most of the fight and her arrows will consistently hit the dragon. As it's health gets low it flies into the air to reposition or dive bomb you and it did get close and aggro on Latenna then but it isn't too hard to get it to focus on you before any risk of her dying to it, this is how I just killed it as well as Ekzykes and Borealis.
 Anonymous
Shame how while this place has two of the coolest bosses in the game, it also unfortunately has one of the worst and most poorly designed fights in the game that you have to get past, i highly recommend bringing as many sleep pots as you can muster, you're gonna need it if you're not using dual bleed/cold weapons .etc to melt the Foreskin *******s.

 Anonymous
These ancient dragon civilization ruins had their place in DS2, but here they feel as tacked on as they did in DS3.

 Anonymous
The coolest area in the game imo, awesome visuals, great music and although the enemies are deadly and can mess you up very quickly if you get cocky, I'm glad it doesn't do the same bullshit that awful Haligtree does where it just recycles a bunch of non-unique enemies and makes them damage sponges with disgustingly huge damage to the point that normally easy as all hell trash mobs can instakill you, or leave you barely alive if you screw up even once.

The walkthrough or loot descriptions don't mention the Golden Seed? It is mentioned on the map page though.

 Anonymous
What is so hard about the two or three only slightly broken platforming parts? None of them are particularly dangerous or difficult. I see more complaints about the parkouring here than taking the secret jumping route down to the three fingers proscription. It, the jumps down from the dragonbarrow minor Erdtree to the ridge overlooking radahns area, and to a lesser extent the descent down the caelid divine tower, are the only three tedious platforming parts in the whole game. The hardest things in Azula are the eagles between the dragon knight and the lightning spamming dragon.

 Anonymous
Really effin sick of this place crashing at every lightning spam dragon. EVERY lightning spam dragon.

 Anonymous
 Anonymous
"If awaken, the dragon will breath fire and flies off"
BS, this dragon fights your ass and doesn't fly off, got killed coz i was expecting it to fly off
 Anonymous
Should be renamed to Continuous Falling Azula. My most common mode of death is falling.

 Anonymous
this place actually feels well balanced for an end game area, unlike elphael

 Anonymous
My favorite Legacy Dungeon so far. I just didn't do Elphael an Miquella' yet.

 Anonymous
 Anonymous
I really dislike this bloody place. It is nothing more than annoying enemies fannying about, waiting to catch you off-guard. I always rush through the area quickly, the only items I care to pick up are the bell-bearing and the golden seed.

 Anonymous
 Anonymous
Oddly not visible from anywhere but the Isolated Divine Tower. You’d think you would see it at Bestial Sanctum or the Forge of the Giants but nope, nothing but clouds. Clear as day from Malenia’s Tower though!

 Anonymous
Use these walkthrough guides as a reference for when you get stuck and you will not find them confusing. Skim through the guides then explore the dungeons on your own. Try to not follow the guides word by word or else you cannot enjoy the game, you are busy reading the words instead.

 Anonymous
My favorite area in the game visually, just forget about keeping any runes you might be carrying, even with 2k HP and 30+ phys dmg negation pretty much every enemy here has an instadeath stunlock combo if you mistime your moves

This guide is kind of terrible, the wording is so confusing I have no idea what routes or bosses you're referring to because you mention MULTIPLE at once.

 Anonymous
 Anonymous
There's a chunk of text starting with the sentence "On the right side of the balcony, you can hop onto the roof and enter back into the building on a higher level." which is out of sequence. The balcony giving access to the upper level is on the first balcony after the Crumbling Beast Grace Depths, and NOT the one where the Golden Rune (12) is.

 Anonymous
I thought Melina teleports you here. Isn't this a giant plot hole if you accept the Flame of Frenzy before she burns the Erdtree?

 Anonymous
 Anonymous
 Anonymous
So the ruins scattered around the Lands Between are fallen pieces of Crumbling Farum Azula?

 Anonymous
I'm a little bit overwhelmed by the size and layout of this place. So many paths and splits and whatever to explore. Tons of scattered loot and stuff you see in the distance and you gotta backtrack a lot to explore everything. So yeah, like I said I'm kinda overwhelmed atm but I enjoy the challenge of the last dungeon, great game.

 Anonymous
After Godskin duo “Head out the northeastern door and jump down to the lower platform.” Northeastern did not make sense looking at the compass on the map. Maybe rephrase?

 Anonymous
Average crumbling azula fan vs average miquella's haligtree enjoyer

 Anonymous
There are so many complaints in the comments, but I really enjoyed Farum Azula. All the intricate twists and turns and hidden pathways are fun to discover, and it rewards you with the final 3 smithing stone bell bearings (one normal, two somber) plus a somber and a regular ancient dragon stone. Plus you get three whole armor sets (Drake Knight, Beast Champion and Malformed Dragon), or four if you count buying Maliketh's set after beating him. I'm also a weirdo who likes the Godskin Duo fight, so maybe I'm just the odd one out.

 Anonymous
I can't believe they added California weather in Elden Ring

 Anonymous
 Anonymous
 Anonymous
is there a normal farum azula too? this naming is just so super odd, it really bothers me

 Anonymous
Godskin Duo is a "miniboss?!" I wouldn't call a non-optional (unless you cheat) fight a miniboss, especially considering their difficutly. Can we all agree that anything with a named healthbar is a boss?

 Anonymous
"so simply backtrack down the stairs and we'll go back to the doorway we ignored earlier."
WHAT FUXKINF STAIRS? THERE ARE NO FUXKINF STAIRS HERE!
 Anonymous
on my ng+ got up to lurnia beat the boss renela
just messing around with friends pvp etc all of a sudden i can use a bf located in crumbling farm azula straight to the dragon plasx boss fight?? iv not even got into altus yet or caria manor sht not even done radagon ??
when i get dropped into the boss i can either keep fightng and respawnng or i can teleport out mid fight during a boss fight? anyone else experiance this
 Anonymous
Which should be done first, Haligtree, or crumbling Azula? I’m at a point where I could do either next.

 Anonymous
My first reaction was the "Age of Ancients!" when I first got here... Just a thought.

 Anonymous
Needs to be mentioned that it takes 2 stone keys for the lift, not one.

 Anonymous
Mimic tear is bugged on first dragon fight you encounter. Summoned the mimic and he just started walking into a wall and wouldn't move or do anything.

 Anonymous
Garbage level layout and terrible enemy difficulty to reward ratio. I’ll simp for a lot of From’s most egregious sins but I won’t stoop to such low depths to make excuses for this catastrophe of a level.

 Anonymous
"If awaken, the dragon will breath fire and flies off."
Um, no it doesn't. It will straight up attack you until one of you dies. Not sure if a patch changed this, but this is no longer accurate.
Lore question: Please share discoveries or correct me if I'm wrong.
I just came to this specific site to confirm my suspicion. Not even one golem in Farum Azula? If they come from there, at least one should be present or their weapons or something. I mean Golem descriptions say, that they come from the sky temple and Farum is the only Temple we see in the sky.
Hear me out: 1. I think there were two sky cities. Elden ring map looks like a ring. It has a hole in the middle. There could have been a city there and the divine towers, were the bridges (as they kind of extend into the water for seemingly no reason). We know from opening cinematic that the shattering war, led to the ''abandonment by the greater will'' (greater will took it's city and went away) and we see dead two fingers on each tower(Possibly they are inactive, because greater will decided they are not useful anymore). 2.Golems were constructs, made for guarding the sky temple of (possibly) greater will. After greater will abandonded the lands between, more golems cannot be created (probably because they need flame magic to work, evidence:critical hits to the core of flame+some golems use fire attack). But Lyndell still likes the stone soldiers, so they make inferior versions - Gargoyles. 3. From description of Astel and Ruins Greatsword we know that ''ruin it came from crumbled when struck by a meteorite'' and astel came to The Lands Between as a ''falling star''(meteorite). But there is a second Astel, he could have struck the other city also, as a meteore. One big meteore crater candidate it of course the hole in the middle of the map, but curiously, there is a second crater. just north of the shaded castle in Atlus in the water, there is a hole and clearly someone has drawn a big rock in the middle that looks like a meteore and not like an island, and curiosly-er right undert hat that crater is the nameless eternal city, whose people are known for worshipping stars.(I did not test it in game though, I used interactive fextralife map, so it's possible that the map is off).
Anyway, if you have something to add or evidence that contradicts, my insane ramblings, please share them with me.
 Anonymous
My PC keeps crashing on the first Dragon. AMD Ryzen 9 5900, 64 GB RAM, RX580 8 GB. Been stable so far. Three repeatable screen freeze on the first dragon.

There are no Great Ghost Gloveworts in this zone, only 2 Great Grave Gloveworts. Unsure if intended, but confirmed. Edited the wiki

 Anonymous
I'm still lost after using the guide. I've circled the same portion of the map like 5 times. This place sucks.


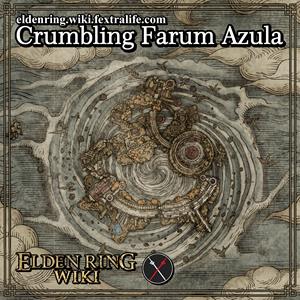
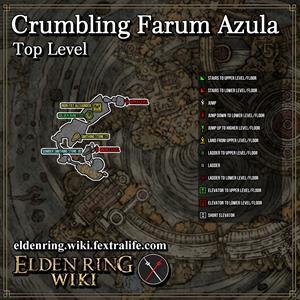

probably my favorite area in any video game
3
+11
-1