

Scadutree Avatar |
|
|---|---|
 |
|
| Location | Scadutree Base |
| Drops | 260,000 Remembrance of the Shadow Sunflower Miquella's Great Rune |
| HP | ??? |
| Strong VS
A
B |
Weak to
Fire
Magic |
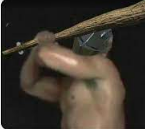
Scadutree Avatar is a Legend Boss in Elden Ring. Scadutree Avatar is the Scadutree equivalent of the Erdtree Avatar, but in design, it resembles an Ulcerated Tree Spirit, and is found in Scadutree Base. This is an optional boss as players don't need to defeat it in order to advance in Shadow of the Erdtree. This boss is exclusive to the DLC, and is not present in the main game.
Elden Ring Scadutree Avatar Boss
Scadutree Avatar is a Legend Boss found in Scadutree Base.
- This is an optional boss
- What kind of Foe is it
- Closest Site of Grace: Scadutree Base
- Multiplayer is allowed for this boss
- You can summon Spirit Ashes for this boss
Elden Ring Scadutree Avatar Location
Scadutree Avatar can be found in Scadutree Base. Scadutree Base is located East of Albinauric's Shack and Northeast of Shadow Keep. Scadutree Avatar can be found at ground level in the Scadutree Base area. See the Scadutree Avatar on the [Elden Ring Shadow of the Erdtree Map]
Scadutree Avatar Combat Information
- Health: NG (??), NG+ (??), NG++ (??), NG+3 (??), NG+4 (??), NG+5 (??), NG+6 (??), NG+7 (318500)
- Absorptions: ??
- Has 3 phases. Health restores to 75% in Phases 2 and 3.
- Damage:
 Standard,
  Strike,
  Holy
Holy - Parriable: No
- Poise cannot be broken.
- Weak to Fire Damage and Magic Damage.
- Resistant to ??
- Immune to Scarlet Rot
- Drops Remembrance of the Shadow Sunflower, Miquella's Great Rune,
 260,000.
Elden Ring Scadutree Avatar Boss Guide
Scadutree Avatar Boss Video Guide
Scadutree Avatar Fight Strategy
- Its head is prone to absorb more damage, compared to its body
The Best Tips for Scadutree Avatar:
- Use the Black Knife Tiche Ash Summons
- Use the Fire Serpent Spell
- Bring ?? Item
Melee Users
The Scadutree Avatar is a formidable, tree-inspired boss in Elden Ring, resembling the Erdtree Avatar but significantly larger and more powerful. This challenging encounter is divided into three phases, each increasing in speed and difficulty as its health depletes. As a melee character, your main objective is to get close and target its sunflower-shaped head, which is its weakest point.
Phase 1
In Phase 1, the Scadutree Avatar is easy to handle. The battle begins with its triple tree root ranged attack, where it sends out three spiked roots towards you upon entering the Scadutree Base. Dodge these roots and close the distance to deliver heavy attacks to its head. Throughout this phase, the Avatar will occasionally raise its head and swing at you multiple times. Be ready to back up and evade these swings. Even at a distance, remain vigilant for its ranged holy attack, which releases four tracking beams. The first phase is slow-paced, allowing you to predict and learn its attack patterns. Once you deplete its health, the Scadutree Avatar will collapse, only to resurrect a few seconds later with 75% health, marking the start of Phase 2.
Phase 2
Phase 2 introduces a more aggressive and faster Scadutree Avatar. It retains all previous attacks and adds a powerful thrust move. Upon resurrection, it will immediately thrust towards you, regardless of distance. Time your rolls precisely to avoid this attack. Adapt to its increased speed by counter-attacking after each move it makes. The key is to stay close, dodge its attacks, and strike its head when it is down. During this phase, the Avatar will often leave its head exposed after an attack, giving you opportunities to land heavy blows. Maintain your agility and continue the pattern of dodging and counter-attacking until its health is once again depleted. This triggers the final and most challenging phase.
Phase 3
Phase 3 is the most difficult stage of the fight. The Scadutree Avatar retains all attacks from the previous phases and introduces the devastating Charged Light Explosion. This attack is its most powerful, capable of either one-shotting you or draining 80% of your health upon impact. Its overall movements are now very fast, requiring heightened focus and quick reflexes. Watch for the telltale sign of this attack: when its chest becomes stationary and glows yellow. When this happens, run as far as possible and lock onto the foe to predict the explosion beams. Keep dodging this attack while looking for opportunities to land heavy blows on its head.
Magic and Ranged Users
Strategy Writeup for Magic Users
Scadutree Avatar Attacks & Counters
| Attack | Description | Counter |
| Triple Tree Root | From a distance, the Scadutree Avatar will summon 3 tree roots heading straight towards you in mid-speed. | You can counter this by rolling to the left or right. you can also counter this by getting behind a tree branch in the Scadutree Base. |
| Double Root Swing | When your character gets close, the Scadutree Avatar Spins its root arms twice to hit you. | This can be evaded by observing its movements and backing up with a roll once the Scadutree Avatar is about to swing. If you are close enough to the Avatar when it does this attack, both hits will miss without you needing to dodge. |
| Head Stomp | When your character gets super close or when your character hits the Scadutree's head, the foe will cock its head back and stomp its head toward you. | This can be evaded by rolling back when you see the Scadutree Avatar lift its head after you hit it. |
| Root Swing | At close range, the boss will swing it's arm either to the left or right. | This is a very predictable attack, so rolling back just before it swings will most likely guarantee you dodge it. |
| Root Pound | Similar to the Root Swing, but instead of the boss swinging sideways, it smashes its arms downward towards you. | Rolling to the right or left just before it swings downward will make you dodge it. |
| 4 Root Pound | The Scadutree Avatar in close range will pound its root arms towards you 4 times. The last pound will be a charged attack and will cause thorns to spread in a small circle upon hitting the ground. | The first three pounds of this attack are easy to evade by simply rolling just before it pounds the ground, dodging as soon as possible after the second to avoid the third. The last pound though, you'll need to roll back twice or thrice since the impact of the last pound will result in thorns spreading in a small circle in the ground. |
| Thrust | At mid or long-range, the Scadutree Avatar will thrust itself toward you in high speed. | At the perfect moment, depending on its distance from you, roll to either left or right. |
| Land of Shadow | At a distance, the Scadutree Avatar will raise its head and charge a blast. Upon launching the blast, 4 beams will come towards you. The Avatar can cast this up to 3 times in a row, with it spawning additional projectiles with each consecutive cast. | Once the 4 blasts have been launched and headed towards you, wait for the 4 to get closer to you and dodge to either left or right. |
| Ground Smash | This smash will be a charged attack and will cause thorns to spread in a small circle upon hitting the ground. | You'll need to roll back twice or thrice since the impact of the last pound will result in thorns spreading in a small circle in the ground. |
| Head Thrust | At close range, the foe will thrust its head towards you. | Rolling to the left or right just before it thrusts its head can help you evade the attack. |
| Petal Grab | At close range, the Scadutree Avatar rears its head upward, glowing before smashing it back down. If it directly hits you, it will go into a grab animation to pummel you thrice, with the final hit pushing you a distance away. If the attack misses, after a very small delay, the smash will produce an additional small blast of gold energy. | Pay close attention to the Avatar's head as it charges this attack, and roll the moment its head begins to move downward. Make sure to make distance with your dodge, or the smash's delayed blast may catch you after your roll. |
| Area of Thorns | At mid-range, the foe will summon a lot of spiked tree branches in a wide area. Glowing circles will spread to the ground indicating where the spiked tree branches will spawn from. | Once the glowing circles on the ground appear, immediately roll back multiple times until you're out of range from the glowing circles. |
| Charged Light Explosion | At Phase 3 of the battle, once the Scadutree Avatar resurrects again, it will immediately charge up a bright attack hitting everything surrounding it. Dealing with heavy damage. This move also has a variation where it explodes three times, possibly happening when the boss is at low health. | This is tough to evade, but the best way to evade this attack is to run as far away from the foe as possible once it starts charging from its chest. While running away, keep yourself locked on the foe to see where the beams of explosions are headed. With the distance made, you can predict where the beams are headed giving you a short time to dodge if one is headed towards you. |
Scadutree Avatar Lore, Notes & Other Trivia
- Voice Actor: ??
- Other Notes and Trivia Go Here
Dialogue
Introduction:
Add dialogue here
During Fight:
Defeating player: Add dialogue here
After Fight:
Add dialogue here
Scadutree Avatar Image Gallery
[screenshots and artwork go here]
 Anonymous
They way it takes the shape of the Scadutree when doing the nuke attack is absolute peak cinema
- Anonymous
Messmer's assault to the face took out 1/3 of this sunflower's health it's insane.
- Anonymous
Flame Art Greatsword with Flame Spear aow. Golden Vow and Flame Granth me Strenght. Flower goes down HARRRRD
- Anonymous
A single frenzied burst to the face with 80 faith took out something like 90% of this things hp, might want to give it a try if you're struggling with it
- Anonymous
I had a few problems because I was rather defensive and attacked from a distance.
What helped me though: Omen Cleaver + Flame/Fire infusion + wild strikes -> stay mega aggressive on him, hit his head when the time comes and it becomes very easy.
- Anonymous
I swear half of these bosses were designed to be fought on horseback, and then at the last minute they just went "NAAAAAAHHHHHHH!!!!"
- Anonymous
On NG+2 I just tanked his big 3rd phase attack and then hit his head which is lump on the ground. Even if you can't dodge it due to bad timing you still get at least 2 hits out. 2 rounds and he is a goner.
- Anonymous
If you're running a dexterity build, I recommend getting Messmer's spear. Its Ash of War shreds this thing to pieces with just a few casts.
- Anonymous
not a hard boss, but a fun one. very cool too! if you have problems with the phase 3 nuke, go find the hair braid in shaman village.
- Anonymous
This guy is deceptively easy, but that 3 hit explosion is absolute bullshit the first time you see it
- Anonymous
Fire coils are really effective against this boss, i personally used them during THAT part of the fight. You will need this cookbook to craft them. https://eldenring.wiki.fextralife.com/Fire+Knight's+Cookbook+(2)
Rellana's Twin Blades theoretically does very good here.
Haven't reached the boss yet tho.
- Anonymous
Fellow strength bros, I'm sorry, but after seeing some of you complain about this boss, it's just a skill issue. It has a weak point the size of a studio apartment that it dangles in front of your face after every attack. There could not be a more free bonk.
- Anonymous
This thing is definitely extremely weak to fire. I took out half its healthbar with one Lion's Claw on a 25+ Flame Art Greatsword at 50/50 STR(FTH. If you only target the head, you can take out all 3 healthbars in 5-6 hits.
- Anonymous
After struggling, I tried the Mohg's spear suggestions below (+10 spear and only 28 Arcane + Shard of Alexander) and killed it in one try.
- Anonymous
if you hit it's head with fire damage this is probably one of the squishier DLC bosses, especially in the first and second phases
- Anonymous
- Anonymous
did this guy get hit with the apparent nerfs theyve been mentioning adding to the game? i just gunned him down in 5 mins.
Flame Spear AoW has a projectile, perfect for melee because you can hit his head mid range
- Anonymous
Kinda wish the third phase went full on sif with how it seems to limp around and look really weak and exhausted, feels like it wouldve made for an effective moment, still manages to do the super fast forward rushes though so guess it's not fully out of steam yet at that point.
- Anonymous
Prelate's crozier's special underneath him makes it a quick fight. If you survive long enough to launch the fireballs.
- Anonymous
oil and hefty furnace pots make quick work of this, only took about 3 per phase
- Anonymous
Mohgs Sacred Spear w 60 arcane and Alexander shard and fire damage tear absolutely rekked this guy. Get under him when he finishes a big attack and triple blast his head. Rinse and repeat.
- Anonymous
- Anonymous
In order to get the lower hp bar in 2nd and 3rd phase, you MUST perform a critical hit in between phases.
- Anonymous
You can tank the massive holy explosion with Crimsonwhorl Bubbletear
- Anonymous
The fact that the camera issues of it pulling the camera to look at the Skybox mid attack whilst locked on to its head made it through playtesting is embarrassing
- Anonymous
God they're not even trying with this wiki anymore.
"Closest site of grace is Scadutree base" yeah no **** that's the site of grace you unlock AFTER you beat the boss.
- Anonymous
The 2nd DLC boss (first is Renalla) where my Int Caster only build wasn't getting wrecked so hard
- Anonymous
As someone who loved this fight and was using a melee weapon, I think people's problems are stemming from them trying to not hit the head. Stay in front of its face, and the camera works just fine. You deal better damage and see the boss properly. Genuinely one of my favorite bosses from the DLC if you fight it like that.
- Anonymous
- Anonymous
GOD! For all the bosses in the DLC that I expected a phase 3 of, how could I not be ready for it to be a giant sunflower?
- Anonymous
Mohg spear aow is very effective. If you position yourself and time it so that the trident fork goes directly into the head, 3 L2 can do basically its entire health bar.
- Anonymous
the key win these 3 pahse ez is ash of war flame skewer + Great sword katana and put flame art or any thing close to ur build that make better attribute scaling.
mimic tear ash make a copy of ur build and even if u dont use pot equip that for ur mimic (this is only for ur offense)
for def focus on light dmg neg there is blood loss aswell but phase 3 comeout almost just heavy light dmg.
by this path i had 5 flast after finishing boss.
dont try fighting his head cuz u will get more dmg and less attack but if fighting his head u may put more dmg by window time just 1 attack and its not big deal as u can attack his leg 4 or 5 times;)
- Anonymous
- Anonymous
Now I know they the game has mixed reviews when this 3 phase infestation exist
- Anonymous
trivial with ranged weapons or spells, boring with melee since, again, almost same issue of elden beast, can't see it right, run away constantly and so forth. A bad boss through and through.
- Anonymous
2 shot/phase this boss with sword of night and flame + flame grant me strength
- Anonymous
I had a really hard time with this guy using the Anvil Hammer +10 on a STR/FTH build. If I could hit his face I did half his health in one shot but he usually only lets you land the one. He has good options to hit you at any range, the thorn attack does a ton of bleed damage and getting hit once means you're likely off time and going to get hit again. Just learn the fight a phase at a time, once you can get through phase one learn his new moves in 2 and then 3. The dash attack is especially annoying at first but it has a really obvious windup. He (almost?) always opens phase 3 with a body explosion that could one shot me at 60 vigor if I was too close. Don't forget you need to visceral attack between phases!
- Anonymous
Charged Black Flame DELETES this boss if you lock onto the head, half HP on each hit. (I used Godfrey,Radagon,fire scorpion, flame tear, golden vow, flame grant me strength)
- Anonymous
Its pretty cool it has 3 hp bar, unfortunately the fight is another r1ing under its feet until stamina runs out, a little disappointed
- Anonymous
These bosses are so disgraceful that they wont let you summon the mimic in piece when you enter the arena
- Anonymous
They went to far with these bosses lmao this easilly could have a cool gimmick boss like rykard, but no
- Anonymous
poise can be broken, and if you don't do viscral attack at end phases and before next phase, health is restored to 100%
- Anonymous
Fire weapons go hard here, I used Blasphemous Blade to melt him but any will work well. Messmer's Great Spear will probably destroy it
- Anonymous
I use the big pots here and the deflecting hardtear. I parry it and take no damage and throw pot at the head when theres an opening.
- Anonymous
- Anonymous
This fight is absolutely great, the arena and buildup is phenomenal, the 3 phase surprise caught me off guard, the fight itself is really fun with alot of cool attacks that are easy to dodge, It doesn't deal alot of damage, and the music is such a cool remix of the Erdtree avatar theme.
9.5/10
- Anonymous
Surprisingly a really fun fight, and no the "camera" is absolotely not an issue in this fight, his head is so far off his body that it's very easy to focus on it.
- Anonymous
I'll share my strategy how to fight this flower that might work for fellow tarnish who struggle with this boss
gear and equip
- Bolt of Gransax
- Fingerprint Stone Shield (or any great shield that can withstand a lot of hit)
- Mimic for summon as tank phase 2 or 3
strategy:
- try to use lightning bolt at weak spot (flower part) can either fully charge or tap, it can do serious damage to it
- guard up all the time, but try to dodge throne/projectile if possible
- boss usually have some delay after each attack, u can punish him at that moment
- try to don't fight in close combat, it easliy to fight at mid-far range just lighting bolt only (easily to aim weak spot at this range)
- don't rush
- Anonymous
Cagney Carnation from Cuphead spent a lot of time in the gym lately
Flowey just hasn't been the same ever since he started doing bath-salts
- Anonymous
The boss isn't the fight. Its the camera that you actually gotta win against
- Anonymous
This boss is such a pain in an ass to the point it’s not even fun anymore if you’re running a pure STR build or melee build ffs
- Anonymous
Can be poise broken, only noticed it in 2nd/3rd phase.
Vow of the indomitable useful for golden nuke on 3rd phase.
Gorgeous fight
- Anonymous
mesmer spear WA absolutely MELT him like can legit deal 80% of his First phase in one swoop (with fire scorpion talisman, shard of alexander, flame grant me strenght, and a flask with the fire buff tear)
- Anonymous
Shard Spiral makes this boss trivial. Especially if you use Ranni's Dark Moon to make him even more susceptible to magic damage.
- Anonymous
Burn O Flame does stupid damage to him. Just spam it and melt each phase.
- Anonymous
- Anonymous
I know it has multiple healthbars so it's not ACTUALLY that much damage in the long run, but it's immensely satisfying to smack this thing on the forehead with a dagger and watch a MASSIVE chunk of hp evaporate
- Anonymous
Playing mushroom/rot theme so I didn't have fire going in, but Pest Threads in the face hurts it a lot. Time it well, after a sequence, and you'll be okay. Probably.
- Anonymous
Its not even the endurance which is bad, its:
A. The janky hitbox of its slam attacks
B. The inconsistent timing windows on the massive AOE barbs which is even worse than the winter lantern parry timing
C. Has even more mobility than the Elden Beast
- Anonymous
The constant spamming of thorns makes me wanna just strangle someone, like wtf
- Anonymous
Use crimson dagger or prayerful strike in between phases when its down
- Anonymous
Very fair boss, weak to fire as expected, magma blades jump attack or ash of war melts him
- Anonymous
Playing ps4 version on ps5 for better framerate, but this things thirn attack would destroy my fps for a split sec.
- Anonymous
- Anonymous
If you're having trouble, try using the Dragon Hunter's Great Katana with a 100% physical shield. You can block a LOT of what this boss does (not the thorns, lasers or the charge). The boss is basically a dragon, so lock on to the head, and let loose with the L2 as often as you can. When you "kill" it make sure to do a crit on the head going into the next life. At the start of phase 2, lock on and prepare to roll INTO the bumrush three times. At the start of phase 3, get as far away as possible to dodge the firecracker. Other than that, Get your hits in hard on the head, try to dodge or roll the endless thorns, and scream at your computer as loud as you can.
- Anonymous
Immune to bleed and poise cannot be broken? Why did they make a boss that I actually need to fight? They ruined my Elden Ring smh my head
- Anonymous
- Anonymous
Fire serpent incantation rips this guy apart, it locks on to his head too so each phase took around 10 casts so maybe 30 seconds each phase.
- Anonymous
small tip, phase two always starts with the slingshot, so you can position yourself so that it charges into the wall and get a nice opening pretty consistently
- Anonymous
Ground slam will randomly ignore block.
Triple Tree Root will also randomly curve back towards the boss, or come from both left and right.
- Anonymous
Health only restores to 75% (and not to 100%) if you give it the repost in the end of the phase
- Anonymous
tbh i liked this boss, but i cant tell if thats cuz the boss was actually good or if cuz every other dlc boss so far has been disappointing
Fool me once, shame on you. Fool me twice, Firespark Perfume Bottle with Wall of Sparks. Actually turns the fight into a joke
- Anonymous
- Anonymous
use the big candle, literally oneshot all of the phases lmao
- Anonymous
I thought the Dancing Lion boss was the worst camera for the dlc until I fought against this boss. I am locked to his head and yet his head is barely in view of my screen. I'm literally standing back and can see his whole body yet the camera still doesn't go to the locked-on part. Not to mention phase 2 where you have to run a 200m sprint to reach him after the start of the phase, but I'd take that over the terrible camera fromsoft has failed to ever fix with these large bosses
- Anonymous
At first the 3 phases annoyed me, but all in all a very fun fight. Use flame art on a long range weapon like zweihander, heavy damage and the range makes hitting its head much easier.
- Anonymous
i would give anything for higher FOV/further away camera. even if you dodge his first bleed vine attack as you're running at him theres so many vines in my face i cant see the second one coming
- Anonymous
The fire perfume bottle weapon kinda melts this boss, especially the r2's. This is a good opportunity to use this new weapon type, so give it a try.
- Anonymous
Sword Lance and jumping attacks perforated it pretty handily. But holy crap if that wasn't one of the most gorgeous fights I've experienced across Souls. I legit felt like I had done something innately *wrong* by killing this for how theatrical everything was.
- Anonymous
Don't lock on, you'll never hit the head as melee. Just run straight to the stem and carve it up.
- Anonymous
I love this fight. If you think about him more like Midir(so you will try to stand whole time in front of him and hit her) it's quite easy.
- Anonymous
- Anonymous
You can cheese him pretty easily with smithscript shield spam to the face, one hit does about 1/10 health on +24, made the fight incredible easy
- Anonymous
- Anonymous
- Anonymous
After dying each time you can riposte the head to remove some HP from the next phase before its corpse vanishes and spawns a new one
- Anonymous
Corpse Piler. Dragonxrest Greatshield, Pearldrake, Golden Braid, and a fourth talisman of your choosing (I did Rotten Wing Sword Insignia). Target the head only. Dodge forward through the thorns. Easy peasy once you learn the moves.
- Anonymous
For everybody struggling.
Here is the setup that I used to absolutely burn through all through phases in no time and little effort.
Right hand:
- mohgwyn's spear (+9) for fire damage and blood loss
Left hand:
- jellyfish shield (+9) for its skill that buffs
- any seal + golden vow
Talisman:
- fire scorpion charm (buff fire damage by 12% at expense of taking more damage)
- ritual sword talisman (buff attack power by 10% when at full health)
- lord of blood's exultation (raises attack power by 20% when blood loss occurs (which will happen quickly with this setup)
- shard of alexander (boosts attack power of skills by 15%)
items
- boiled crab to reduce physical damage by 20% for 60 seconds
- flask of wondrous physique (flame-shrouding cracked tear for boost to fire attacks + opaline bubbletear for 90% damage negation until first hit)
- health flasks
- FP flask
Spirit ashes
- Mimic tear
- Anonymous
Blocking that bulshit ass exploding attack in 3rd phase with a greatshield did all the difference
- Anonymous
- Anonymous
Pretty fun fight. Summons are quite useless cause if they draw aggro its hard to hit it in the face and also harder to dodge the attacks. I had a much better time, just to light roll solo and learn his attacks, they are pretty telegraphed and leave big windows.
- Anonymous
After he does his explosion attack in 3rd phase he goes to sleep for like 10 secs,so if you roll the light explosion right in his face you can basically finish the fight almost immediately
- Anonymous
What a horrible boss. You spend half the fight running around chasing the thing. I ended up using the Prelate's Charge AOW, which did a decent amount of damage at the start and end of the move and helped me keep up with the stupid thing when it would backstep. Mimic tear too. On the last phase, I just kept away and let it beat up my tear while I waited for the big explosion, which I then blocked and then ran up and beat up the head while it was recovering.

Running level 150 pure faith lightning with no summon absolutely nukes him due to the arena being mostly water. I'm sure someone could optimize this even more for one shots.
Equipment
-Light load
-Erdtree seal in left hand
-Uchikatana with Seppuku in the right
-Blood Gods Exultation
-Godfreys Icon
-Beloved Stardust
-Lightning Scorpion Charm
Spells
-Knights Lightning Spear
-Ancient Dragons Lightning Strike
-Golden Vow
-Howl of Shabriri
Physik
-Faith Knot
-Lightning Shrouded Cracked Tear
Pre buff and seppuku, enter the arena, dodge the first 2 thorn swipes, start charging the first knights lightning spear while he goes for the spin attack, dodge backwards and hit him with the second and it should kill. Execute, seppuku, and immediately start a full charge of Dragon lighting, this will half his health when he emerges. Repeat the process, keeping distance after dodging the charges. Use the trees to dodge the projectiles. For third phase, seppuku and lightning strike again, the Light Beam charge up lasts 4 seconds. 2-3 lightning spears will end the fight.
0
+11
-1