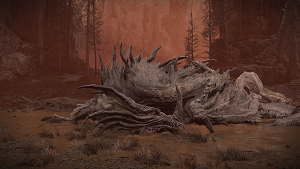
Jagged Peak Drake |
|
|---|---|
 |
|
| Location | In between the Suppressing Pillar and Finger Ruins of Rhia |
| Drops | 90000 x1 Dragon Heart x1 Dragonscale Flesh |
| HP | 39377 (Great Enemy) |
| Strong VS
A
B |
Weak to
A
B |
Jagged Peak Drake is a Boss in Elden Ring. Jagged Peak Drake is a dragon that deals fire and lightning damage and is found in between the Suppressing Pillar and the Finger Ruins of Rhia. This is an optional boss as players don't need to defeat it to advance in Elden Ring.
Elden Ring Jagged Peak Drake Boss
Jagged Peak Drake is a Field Boss found in between the Suppressing Pillar and Finger Ruins of Rhia
- This is an optional boss
- This boss is a Field type.
- Closest Site of Grace: Dragon's Pit Terminus
- Is multiplayer allowed for this boss?
- You can summon Spirit Ashes for this boss.
Elden Ring Jagged Peak Drake Location
Jagged Peak Drake can be found in between the Suppressing Pillar and Finger Ruins of Rhia. From the Dragon's Pit Terminus Site of Grace, head out of the tunnel and up the path and carefully make your way down the cliff to find an open field with the Jagged Peak Drake lying in the middle of it. See the Jagged Peak Drake on the [Elden Ring Shadow of the Erdtree Map]
Jagged Peak Drake Combat Information
- Health: NG (39377), NG+ (40611), NG++ (44672), NG+3 (46702), NG+4 (48733), NG+5 (52794), NG+6 (54824), NG+7 (56855)
- Absorptions: ??
- Defenses do not change between phases - a firebomb will do the same damage in phase 1 as in phase 2.
- Deals
 Standard,
  Fire,
Fire,  Lightning
 - Parriable: Yes / No
- The poise can be broken by repeatedly hitting the boss and then striking with a heavy attack.
- Weak to: Lighting, Frost
- Resistant to: Fire
- Immune to ??
Elden Ring Jagged Peak Drake Boss Guide
Jagged Peak Drake Boss Video Guide
Jagged Peak Drake Fight Strategy
The Best Tips for Jagged Peak Drake:
- Use the ?? Ash Summons
- Use the ?? Spell
- Bring ?? Item
Melee Users
The Jagged Peak Drake can be found sleeping in between the Suppressing Pillar and the Finger Ruins of Rhia in the open field. This boss is optional so you can choose to take it on now or when you are much stronger. This boss deals fire damage and lightning damage, with only 1 melee attack and mostly ranged elemental attacks. It will use up the large area by flying and leaping around sometimes while performing an attack as well.
The 1 melee attack that the Jagged Peak Drake does is its tail sweep. While facing you, it might start to turn around, when it does, it performs a sweep attack with its tail to deal damage to you. This can be easily indicated as it takes a while for the Drake to turn around, so you will need to time your dodge roll right to avoid receiving damage. You can dodge forward to also get closer to it so that you can perform close-range melee attacks on its legs to break its stance to further deal heavy damage to it.
It also has a few attacks where it will be stationed in one location in the area. One of which is when it plants itself on the ground and breathes fire in front of it, this attack can be easily indicated when it has fire in its mouth and starts to swing its head slowly from side to side. When you see this, that is your signal to run to the sides to avoid the flames and to catch up to it to deal damage to its sides as it will only direct the flames in front of it. Another attack is when it lets out a loud roar with lightning bolts coming down in front of it, this can be indicated when you see streaks of orange connecting to the ground as it roars. Just like with the fire-breathing attack, dodge or run toward the sides and gain up to it so you can attack its back legs.
The Jagged Peak Drake has a few leaping attacks that it performs. One of them is its heavy stomps which it will leap into the air, hover a moment, and stomp down heavily onto you. This attack can be indicated when it hovers momentarily in the air. You will need to time your dodge towards its back legs right when it stomps onto the ground, this will avoid the damage and get you closer to attacking it. The next leaping attack is its leaping fire-breathing attack, It will leap up and then breathe out fire when it hovers down backward. This leaves a large AoE on fire so you will need to run or dodge roll out of the indicated orange glow on the ground. It will land a distance away from you so you can either catch up to attack it or wait until its next attack.
Once you defeat the Jagged Peak Drake, it will drop 9000 Runes, 1 Dragon Heart, and 1 Dragonscale Flesh.
Magic and Ranged Users
Strategy Writeup for Magic Users
Jagged Peak Drake Attacks & Counters
| Attack | Description | Counter |
| Tail Sweep | While the Jagged Peak Drake turns to face you, it will swipe its tail at you and deal damage upon contact. | When it swipes its tail, you can perform a dodge roll forward to avoid getting hit by its tail and to lessen the distance to attack it. |
| Heavy Stomps | The Jagged Peak Drake will leap into the air and hover a little before stomping down heavily at you. | It will hover quite a bit before stomping down so you can time when to dodge and roll forward to avoid the damage and to gain closer to attack it. |
| Fire Breaths | While the Jagged Peak Drake is planted on the ground, it will swing its head and prepare to breathe out fire from its mouth in the direction in front of it. | When it starts to swing its head and have fire in its mouth, you will need to run away towards the sides. You can gain up to it and attack its legs to break its stance. |
| Leaping Fire Breath | The Jagged Peak Drake will leap and breathe fire downward while leaping backward which will cause a large AoE of fire. | When you see the Jagged Peak Drake leap backward, you should start to dodge roll, or run away to avoid the AoE. |
| Lightning Roar | The Jagged Peak Drake will plant itself and raise its head to perform a loud road, lightning bolts will come down in a line in front of it. | If you're standing in front of the Jagged Peak Drake while you see it raising its head, that is a sign to run towards the sides and gain up to it to attack it. |
Jagged Peak Drake Lore, Notes & Other Trivia
- Voice Actor: ??
- Other Notes and Trivia Go Here
Dialogue
Introduction:
Add dialogue here
During Fight:
Defeating player: Add dialogue here
After Fight:
Add dialogue here
Jagged Peak DrakeFoot of the Jagged Peak, South East |
|
|---|---|
 |
|
| Drops | 120000 x1 Dragon Heart x1 Dragonscale Flesh |
| HP | ??? (Secondary Boss) |
Elden Ring Jagged Peak Drake (Foot of the Jagged Peak)
- This is an optional boss
- Closest Site of Grace: Foot of the Jagged Peak
- Multiplayer is allowed for this boss.
- You can summon Spirit Ashes for this boss
Elden Ring Death Knight Location
The Jagged Peak Drake can be found just near the Foot of the Jagged Peak Site of Grace. From the Site of Grace, head southeast through the rocky path and you'll find the dragon fighting another dragon. See the Jagged Peak Drake on the [Elden Ring Shadow of the Erdtree Map]
Additional Fight Strategy
- Strategy for this boss fight goes here.
Jagged Peak Drake Image Gallery
[screenshots and artwork go here]
 Anonymous
Dude kept backing away, eventually it fell off the cliff by the big archway and died on my playthrough... wtf?

 Anonymous
 Anonymous
Do NOT get summoned as a co-op after defeating the main drake. The other one will despawn forever (seemingly) if you are removed from the game in such a way.

 Anonymous
Why the Bayle have the weakest fire breath out of every goddamn dragon on this peak

 Anonymous
 Anonymous
Looks like it is resistant to poison, but not scarlet rot. Just like the ghostflame dragons. I don't know why From decided this.

 Anonymous
Ah yes I love waiting half an hour for two enemies to finish fighting before I do the boss. What very excellent design.

 Anonymous
I used crimson bubbletear and opaline bubbletear then went into him with Scarlet Aeonia. Though Crimson Tear is worthless because he will one shot you no matter your fire resistance. Waited for him to kill off second drake then used Pest Threads to finish him off. They deal more damage the bigger the enemy is. You can use Incantation while riding Torrent though to escape his Hellish Breath

 Anonymous
Poor guy got to be the test dummy for the new dragon-killing katana everyone picked up before they came here

 Anonymous
Poor guy got to be the test dummy for the new dragon-killing katana everyone picked up before they came here

 Anonymous
This fight is fairly easy if you stay on Torrent and use bows. I used a crossbow with rot bolts and bleed bolts. Bleed the dragon while its rotting, continuously circle it (I went clockwise), and stay just outside of its wingspan.

 Anonymous
Why the **** does the fire oneshot you? Especially annyoing with the double dragon fight since you need to wait for the other dragon to die

 Anonymous
 Anonymous
this guy just randomly flew onto the hill next to the arena and bugged out

 Anonymous
This boss just offed itself out of nowhere. I just rode past it while it was fighting (and winning, by a wide margin) against the regular drake since I figured I'd get my ass handed to me if I tried fighting it right now, but after I went up the second spirits print "GREAT ENEMY FELLED" suddenly popped up in the middle of the screen along with the drops, followed by Igon spawning on the way to the spiritspring, telling me what a great drake hunter I was or some such nonsense as well as asking me to summon him later to fight Bayle.

 Anonymous
another boring copy pasted dragon eh it could have been worse atleast its not an ancient dragon

 Anonymous
dont bother equipping any fire res, youll get oneshot anyways

 Anonymous
It says: "This is not an optional boss as players don't need to defeat it [...]". It should be: "This is an optional boss"

 Anonymous
This is not an optional boss as players don't need to defeat it to advance in Elden Ring

 Anonymous

Cool spectacle, only problem is that the dragon you're supposed to help ends up killing you 90% of the time.
0
+10
-1