Miquella's Haligtree is a Legacy Dungeon in Elden Ring. Miquella's Haligtree is found far to the north of the Consecrated Snowfield and the entire Lands Between. You'll find yourself on the canopy of a great branching tree, fighting against deadly foes. If you're looking for the castle area situated within Miquella's Haligtree, visit Elphael, Brace of the Haligtree. [Elden Ring Map here]

General Information
- Previous: Crumbling Farum Azula
- Next: Elphael, Brace of the Haligtree
- Recommended Levels: 110+
- Bosses: Loretta, Knight of the Haligtree
- Site of Grace:
Haligtree Canopy [Elden Ring Map Link]
Haligtree Promenade [Elden Ring Map Link]
Haligtree Town [Elden Ring Map Link]
Haligtree Town Plaza [Elden Ring Map Link]
Video Walkthrough
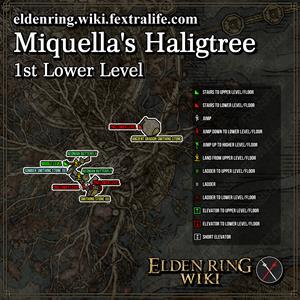
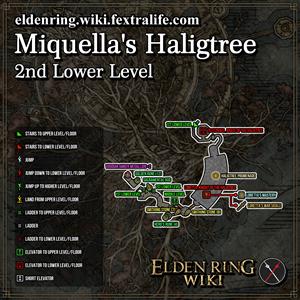
Miquella's Haligtree Map
NPCs in the area
- No NPCs in the area
Bosses
Items
Talismans
Consumables
- 1x Dappled Cured Meat
- 8x Fire Grease
- 10x Flaming Bolt
- 3x Golden Rune (10)
- 1x Golden Rune (12)
- 1x Golden Rune (13)
- 1x Hero's Rune (4)
- 1x Numen's Rune
- 1x Preserving Boluses
- 2x Rot Grease
- 4x Warming Stones
Weapons & Shields
Armor
Spells
Upgrade Materials
- 6x Aeonian Butterfly
- 2x Ancient Dragon Smithing Stone
- 1x Lost Ashes of War
- 4x Sacramental Bud
- 2x Smithing Stone (6)
- 1x Smithing Stone (7)
- 2x Smithing Stone (8)
- 1x Somber Smithing Stone (8)
- 1x Somber Smithing Stone (9)
Enemy Drops
- Iron Cleaver (Misbegotten)
- Iron Greatsword (Leonine Misbegotten)
- Grave Glovewort (1) (Lesser Spirit-Calling Snail)
- Somber Smithing Stone (7) (Battlemage)
- Loretta's Mastery (Loretta, Knight of the Haligtree)
- Loretta's War Sickle (Loretta, Knight of the Haligtree)
- Envoy's Greathorn (Giant Oracle Envoy)
Keys & Other
Enemies
- Battlemage
- Giant Ant
- Giant Miranda Sprout
- Lesser Spirit-Caller Snail
- Misbegotten
- Oracle Envoy
- Large Oracle Envoy
- Giant Oracle Envoy
- Miranda Sprout
- Putrid Corpse
- Teardrop Scarab
Notes
Important Discoveries
- Do the puzzle at Ordina, Liturgical Town to reach the Haligtree
- Be careful of the Oracle Envoys up in the canopy
- There are two Stonesword Keys here to collect if you fancy
- Defeat the Giant Oracle Envoy
- Grab the Lost Ashes of War and the Oracle Envoy Ashes
- Reach Miquella's Haligtree Town
- Collect the Pearldrake Talisman +2 and Viridian Amber Medallion +2
- Grab the Ancient Dragon Smithing Stone from under a large Misbegotten
- Defeat Loretta, Knight of the Haligtree
Full Miquella's Haligtree Walkthrough
How to get to Miquella's Haligtree
Miquella's Haligtree is accessed by completing the evergaol candle puzzle located at the Ordina Liturgical Town to be able to go through the Waygate that leads to the Haligtree. Map Link. You can find the solution to the puzzle on the town's page.
Miquella's Haligtree Canopy
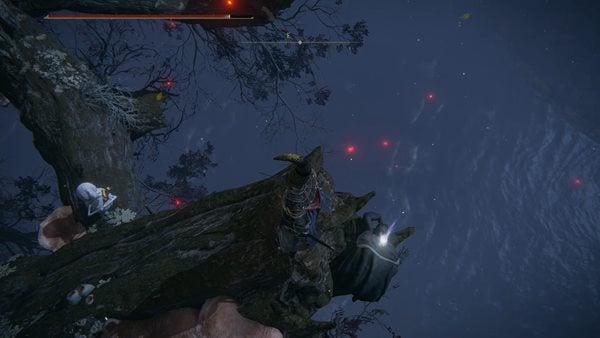
You have to be incredibly careful when traversing Miquella’s Haligtree. The enemies here have good range and any misstep, poor jump, or even a simple knockback from an enemy can send you falling off the tree and to your doom. Having ranged attacks and skills helps immensely for this area, and holy damage negation is great for weathering the projectiles. After arriving at Miquella’s Haligtree, immediately turn around. You’ll find a corpse sitting at the branch’s tip that has a Stonesword Key on them. Turn back around and move forward to get to a Site of Grace.
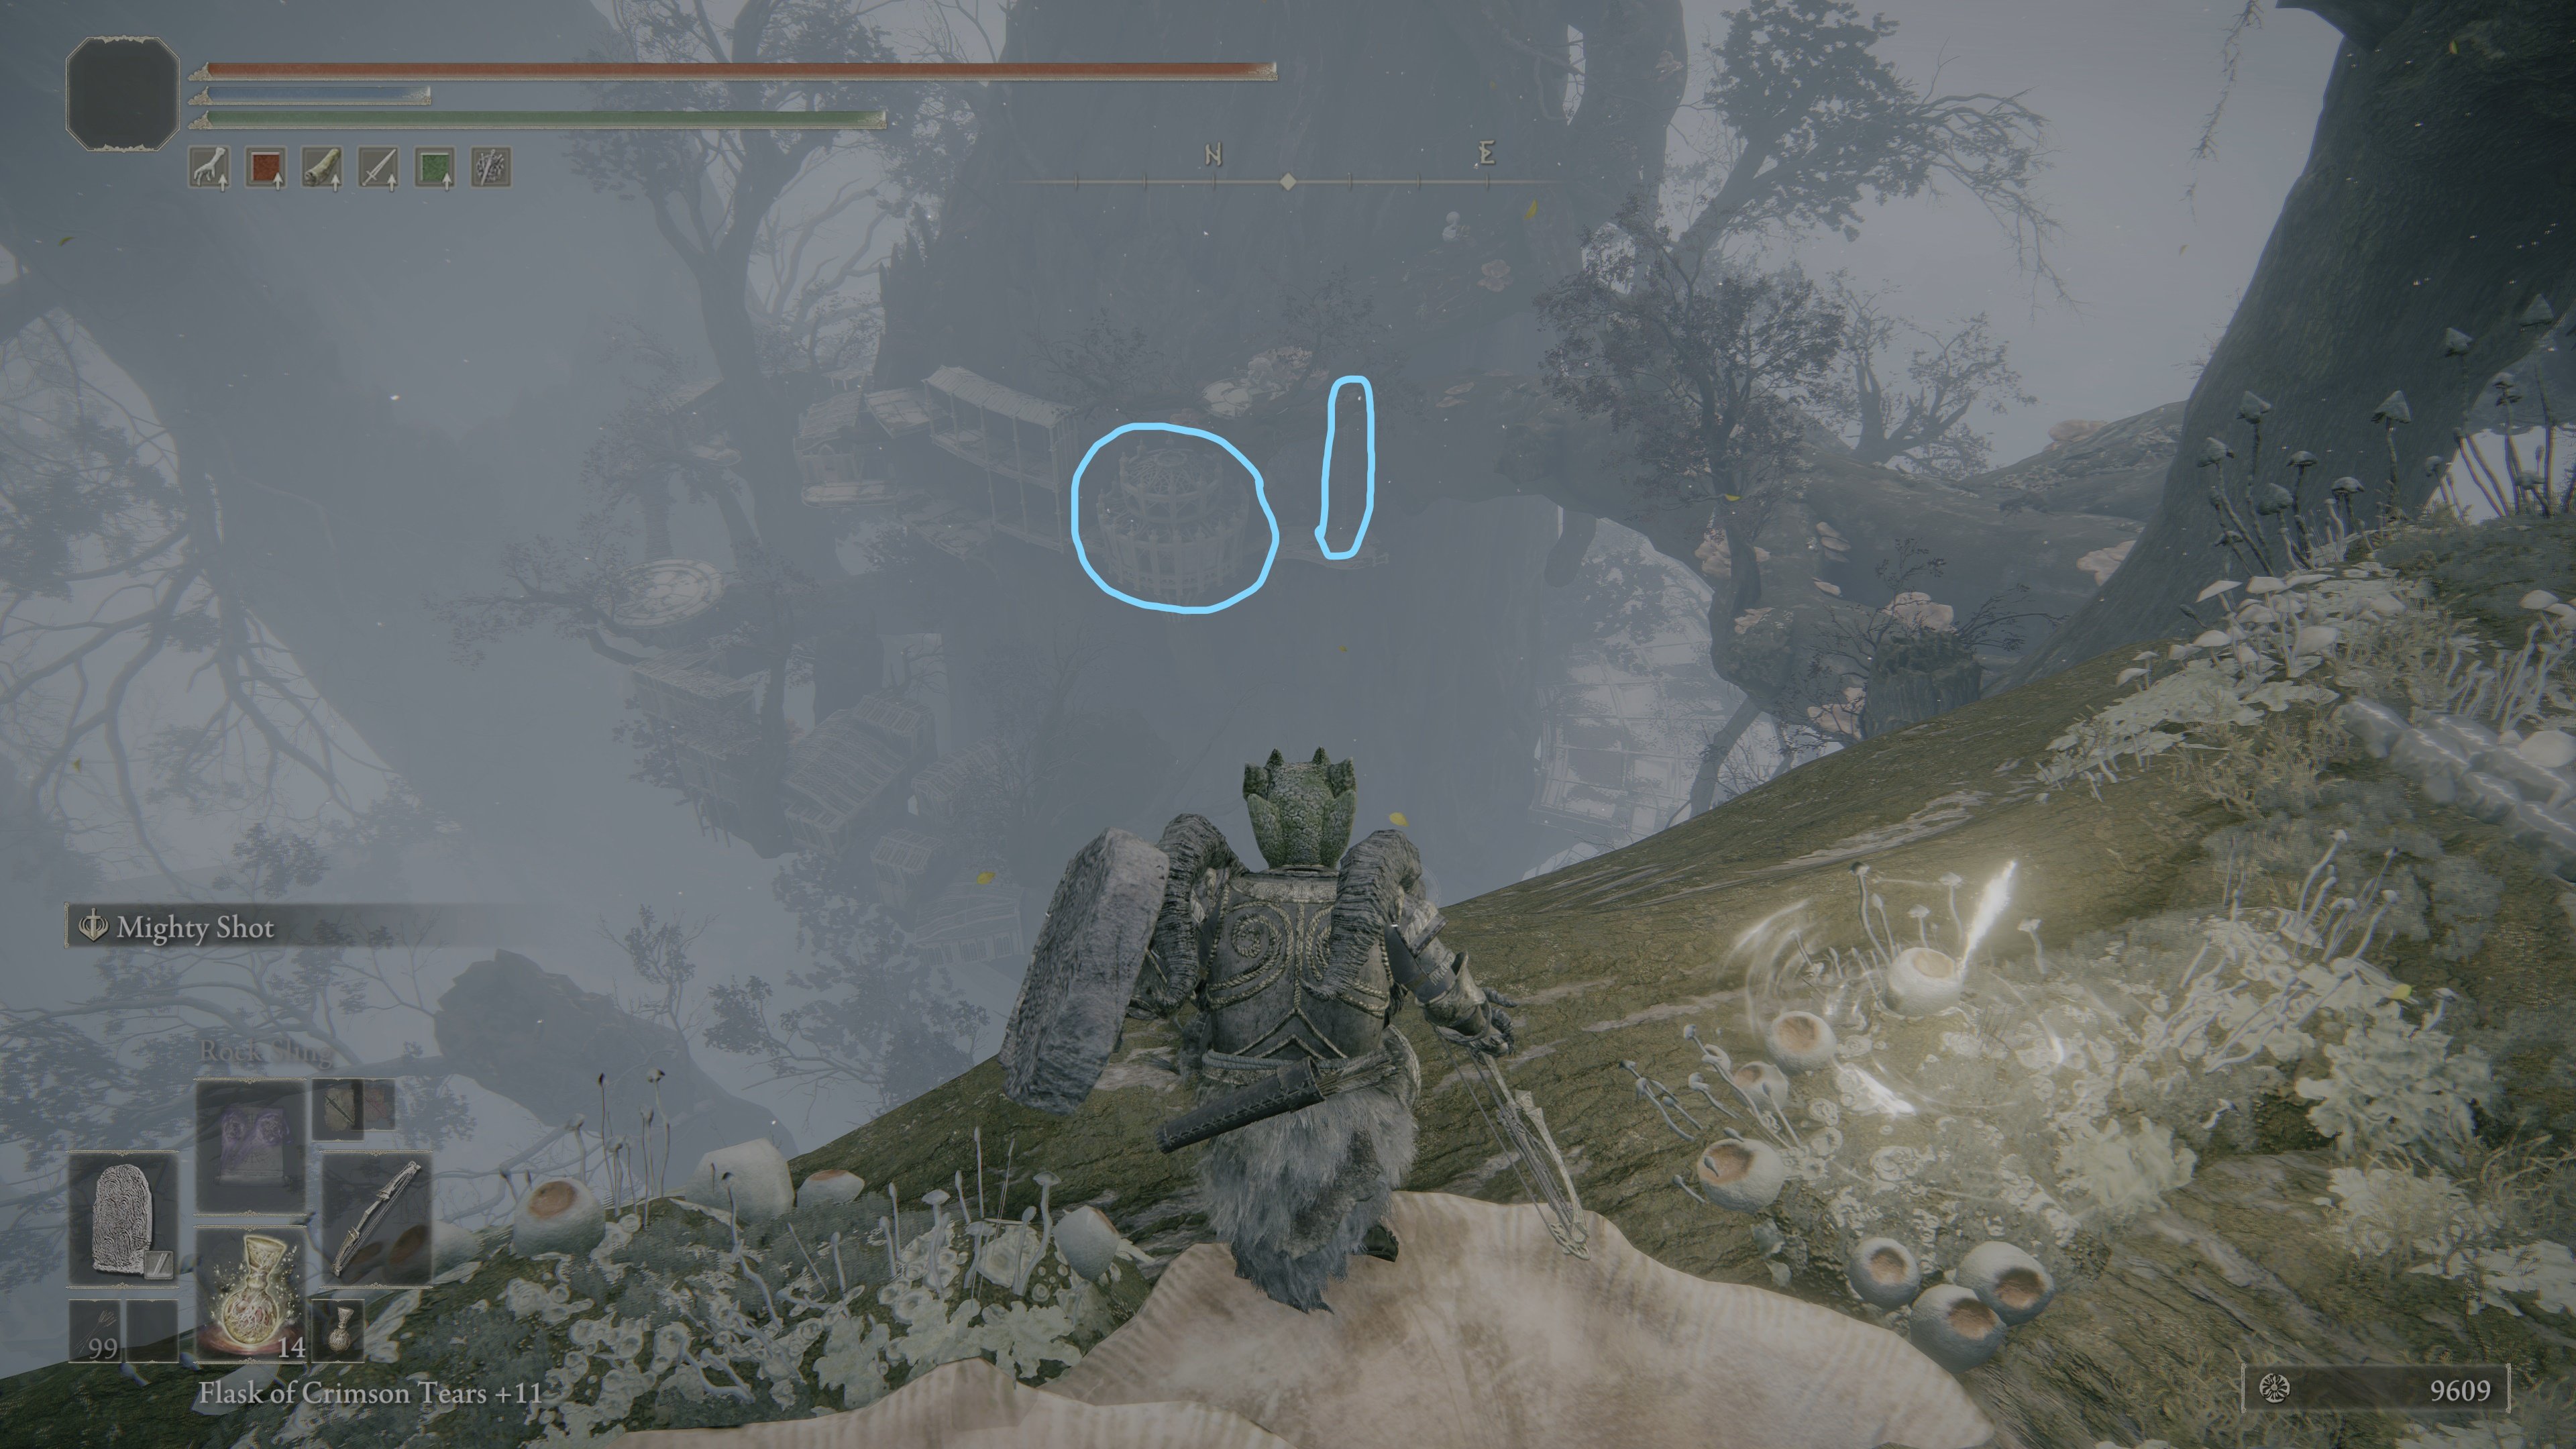
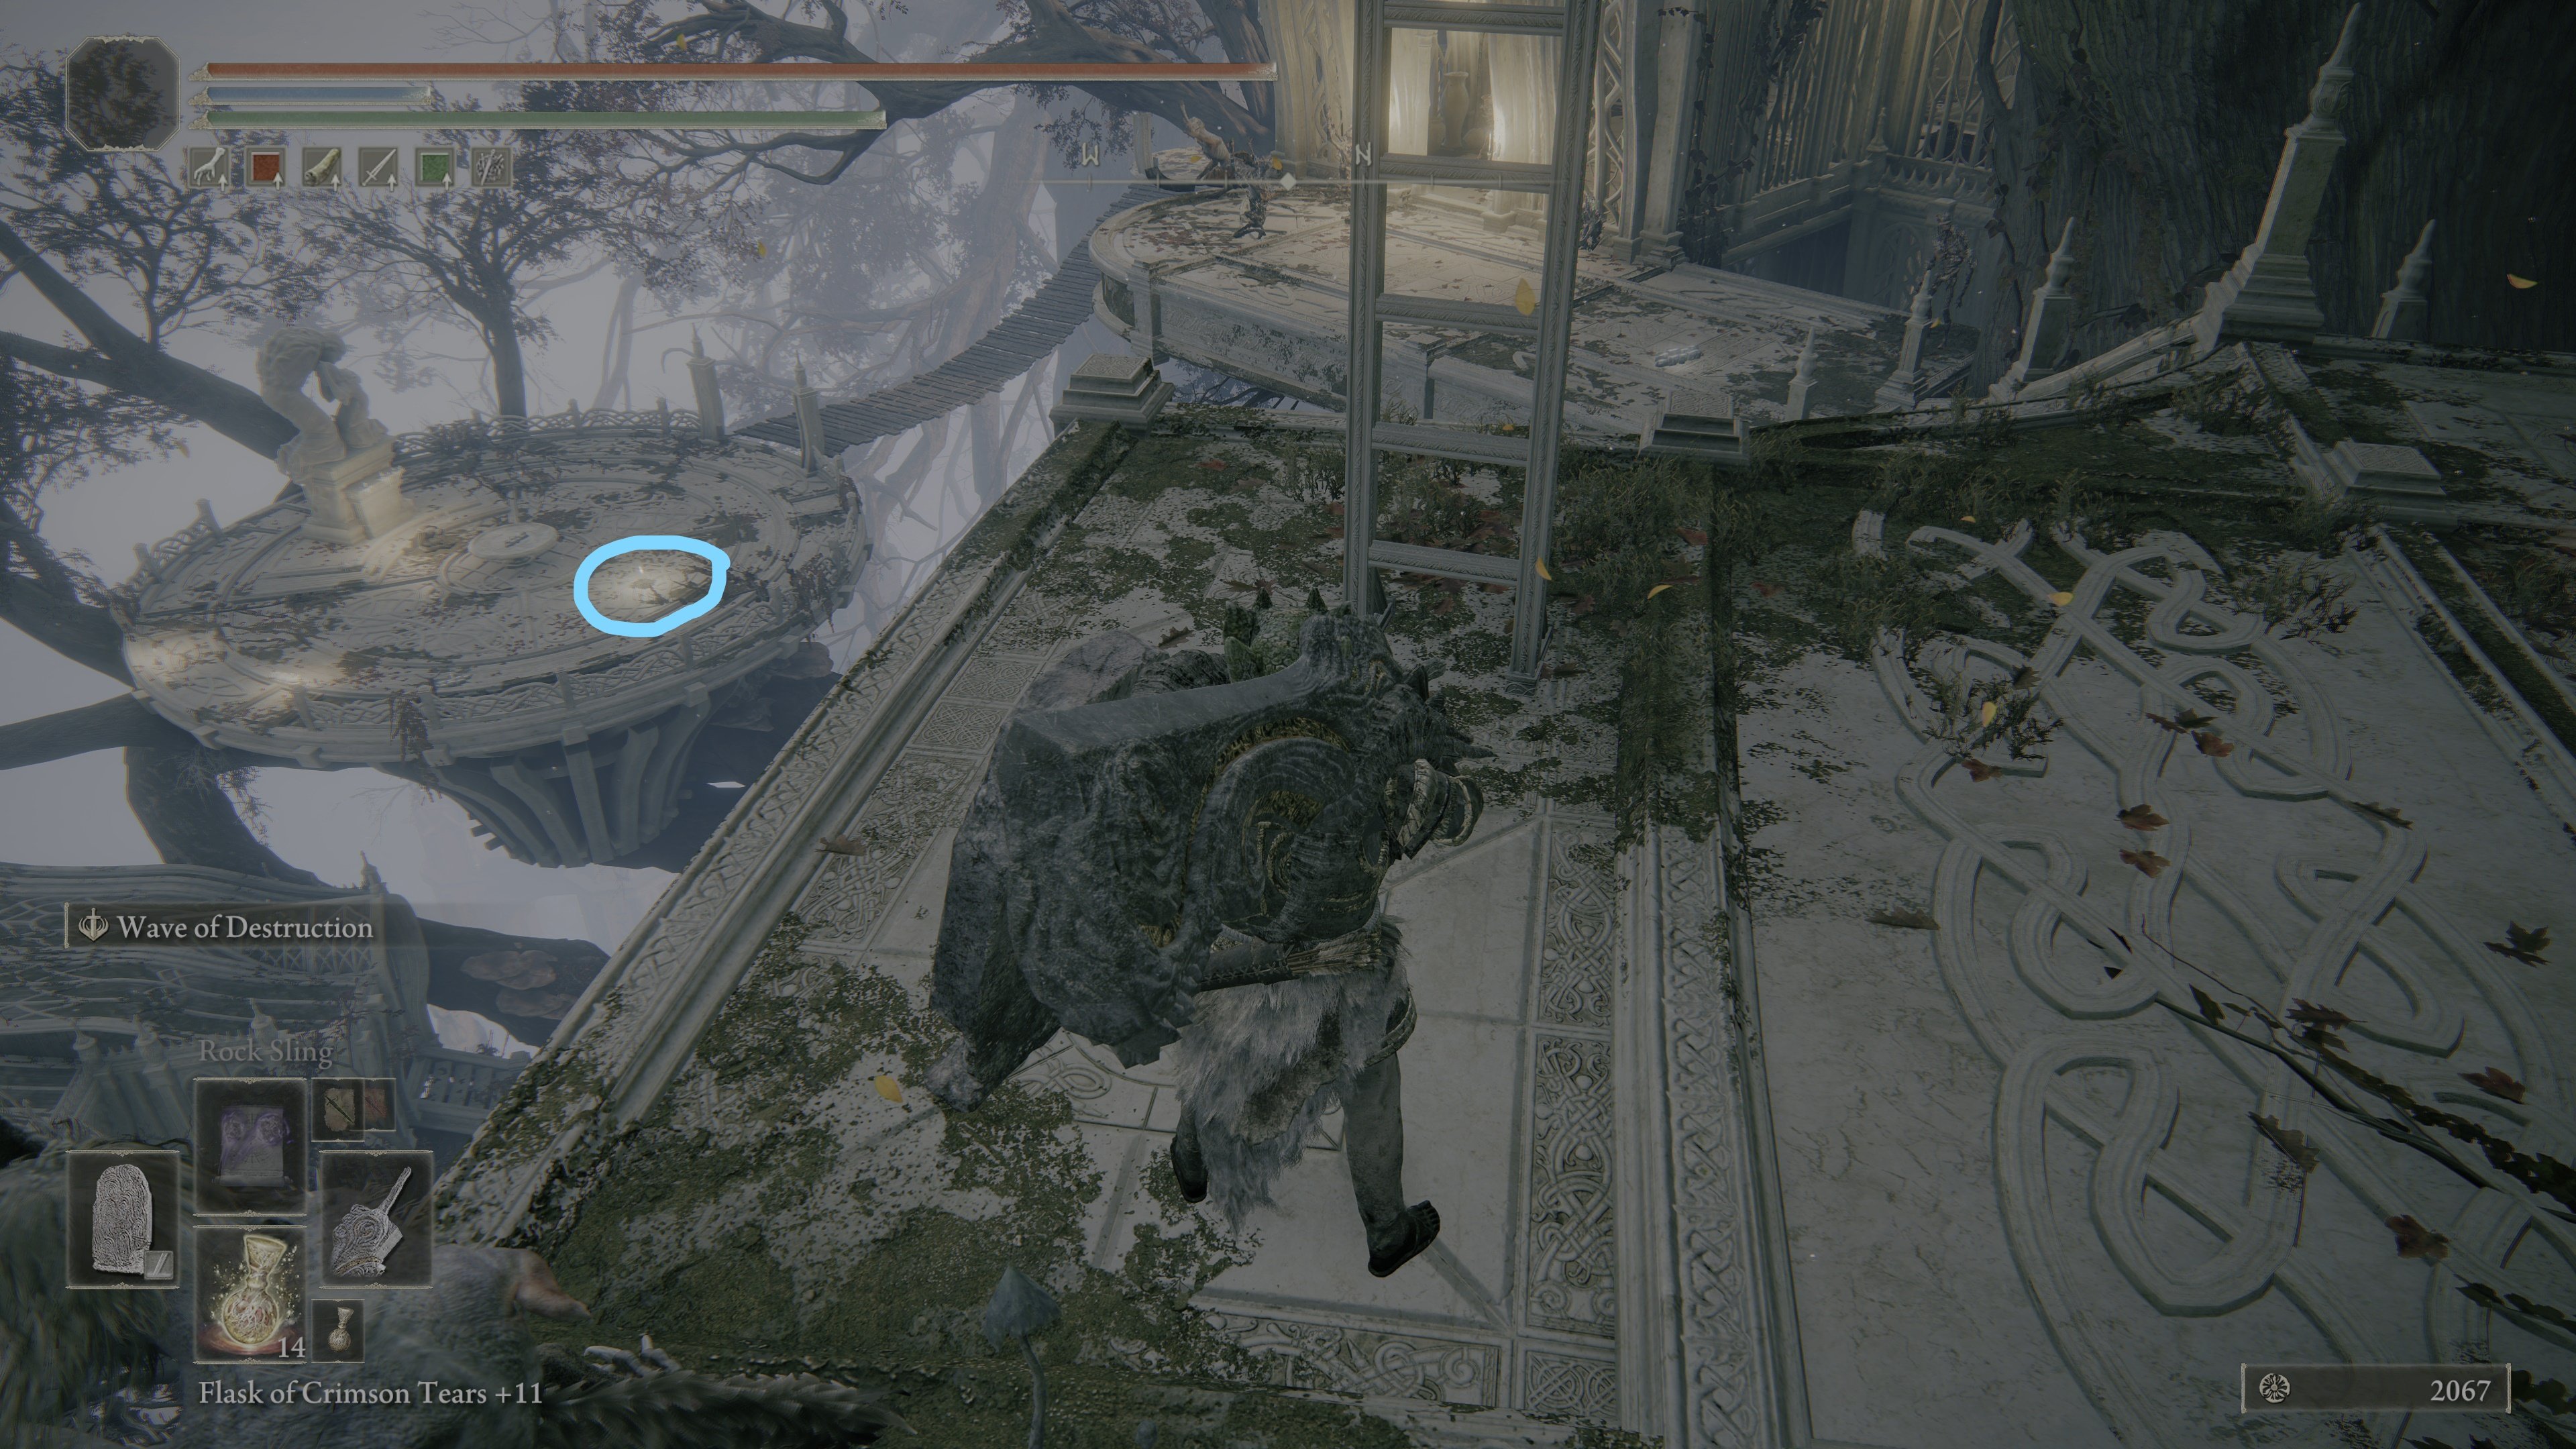
Starting at the site of grace, face North. On the right, you'll see a ladder with a enclosed gazebo on the left of it. The next site of grace is in that gazebo, so your goal is to proceed through the treetops until you reach the ladder and climb down. (See first image below)
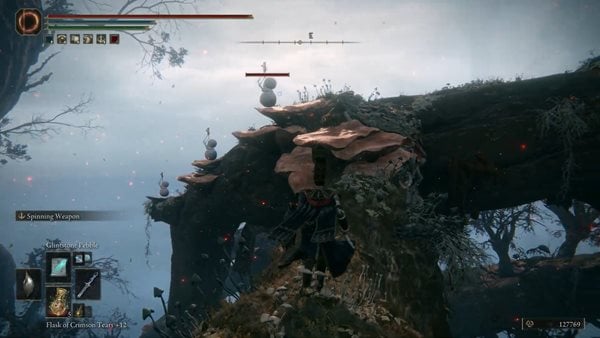
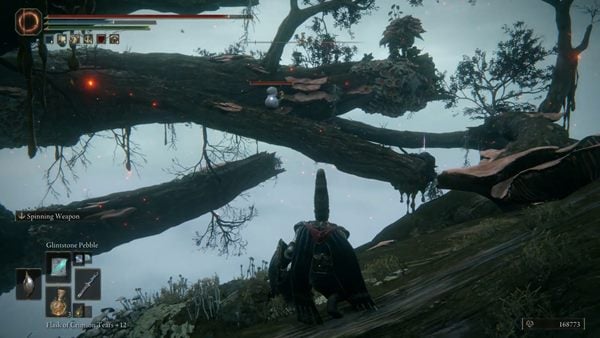
Look east and you'll find three Oracle Envoys at different levels of the branch's edge that you can sneak up to and knock off the tree. At the first Oracle Envoy, you can turn right and follow the branch to get to a corpse that has three Sacramental Buds. After knocking off the third Oracle Envoy, look eastward and jump down to the branch close to you. Ahead, is a Large Oracle Envoy. He will knock you off, so quickly close the distance and prevent him from attacking by staggering him out of his attacks. You'll find a corpse with a Golden Rune (10) right where he was standing.

Turn left and follow the branch northeast. You'll see three Oracle Envoys on the branch above and one patrolling the one you are currently on. If you can snipe them from far away, for example with Loretta's Greatbow, it will help you navigate this area. Otherwise, sneak forward and jump down to the wide tree branch to your southeast that's patrolled by Giant Ants. If you get spotted at this point, the Oracle Envoys will spit bubbles that can 2-hit you. Facing south, looking towards where this wide branch splits, head up the left side to get out of their range. There's a Large Oracle Envoy here that, as long as you don't attack, will not notice you. You can safely deal with any Giant Ants you've alerted here and pick up a Golden Rune (10) on a corpse. You'll be able to spot an item in the east, but we'll grab that when it's safer.

Once that's all dealt with, you can go back to where this branch splits and instead go up the right side where you'll find a corpse with a Dappled Cured Meat. Head back down the branch facing north, and take the first right. This branch leads up to where those three Oracle Envoys were sniping you from. You can now close the gap and defeat these enemies, making navigating this part of the haligtree safer.
Backtrack to the left split of the branch where you found the Golden Rune (10) and when facing south, take the left detour branch towards where the item we saw earlier is. If you have any ranged attacks, it's worth taking care of the Oracle Envoy and the Giant Poison Flower here as their attacks can knock you off of this thin branch. Follow this branch and when you get to the end, turn north-east and jump down to the closest branch. Follow this branch around and you'll reach that corpse you saw at the tip of the branch containing a Stonesword Key. Other items you can find on your way include two Aeonian Butterflies, a Preserving Boluses, and three Fire Grease.
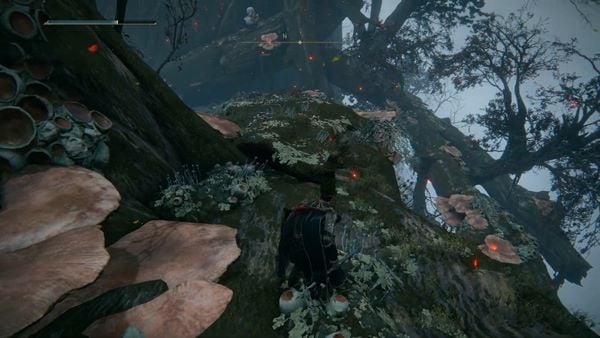
Navigate your way back to the thick branch where the Giant Ants were found. Facing north, continue making your way down the branch finding four Warming Stones on a corpse lying on some mushrooms. If you turn around and go up the thinner branch to the right, you'll find the Prattling Pate "My Beloved". From the corpse with the Warming Stones, you should be able to see a Giant Oracle Envoy in the far distance. Get ready to make a break for him because he will spot you from a mile away, and he will shoot 5 homing bubbles at a time to destroy you. From the corpse, you can sneak towards the first set of large pink mushrooms you see on your right. If you look down you'll be able to see a thin branch you can jump down to.
After jumping down, sneaking will no longer help you as the Oracle Envoy should have spotted you. Turn left at the juncture and follow the path of the branch, rolling past the Poison Flowers and dodging the incoming bubbles, until you get to the Oracle Envoy. Because of how the branches are formed and sloped, you can angle yourself to where he shoots his bubbles at the floor and attack him during his downtime. If you're walking up at him to deal melee attacks, be particularly careful of when he jumps up and slams the ground as this move can potentially knock you off of the tree.
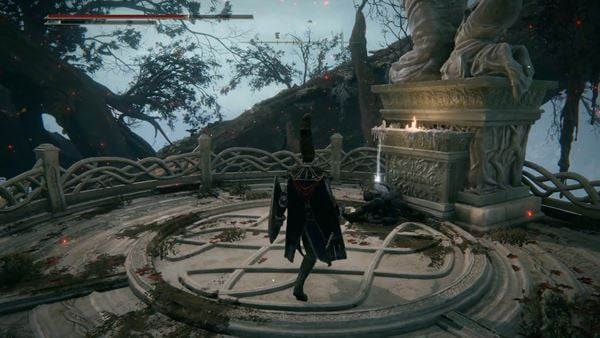
After you've defeated him, turn around and look for a branch going upwards. You'll see two Oracle Envoys, a Large Envoy, and a Giant one all with their backs turned. Carefully pick them off, then at the top of this branch, you can collect the Oracle Envoy Ashes. Turn back, follow the branch southwest where you'll find a corpse on the platform that has a Lost Ashes of War. You can now backtrack to the thick branch where there are two corpses with items under the branch he was standing on, one of which contains ten Flaming Bolts and another with a Numen's Rune. Continue facing north and making your way down the branch and you'll get to a platform with a ladder going down. After heading down the ladder, you'll find a non-functioning lever to the right. This will be used for a shortcut that links to the end of this area. Continue forward and you'll find the Haligtree Town Site of Grace.
Miquella's Haligtree Town

From this point on, navigating the tree is less dangerous, but do note that falling off the platforms and buildings into the void is still fatal. As you make your way down the steps ahead, a Misbegotten will come rushing at you. Another two can be found distracted on the next platform. Note that failing to backstab the closest distracted Misbegotten will attract the attention of a more powerful one on the platform above you, and they will jump down and attack. From here there are two ways forward - up the ladder or further down the steps.
Note that from the ladder, if you look off to the West, you can see the next site of grace.
Head up the ladder first, where you'll find a Misbegotten ravaging a corpse. To the right, you'll see three scarlet rot zombies peering over the edge. It doesn't seem that any of these enemies will notice you until you attack them, so dispose of them however you please. The body here has two Rot Grease on it and if you turn to face where the zombies were facing earlier, you'll see another platform with an item guarded by a Leonine Misbegotten (provided you didn't aggro it from below). The item here is a Pearldrake Talisman (+2) and once you've grabbed it, head back down the ladder.

Continue down the stairs where you'll see some Misbegotten seemingly praying to the skies. Beware of the zombie ambush when you reach the base of the stairs though. Head through the building to the right, again being careful of a zombie ambush as you approach the building, and you'll see an item on a corpse right ahead. Before picking it up, take care of the axe-wielding Misbegotten around the corner, or it'll charge you while you're trying to loot. Once you've looted the corpse for a Smithing Stone [8], continue heading down the steps where you'll find another two Misbegotten and a corpse with six Hefty Beast Bones on it. You can also choose to jump down from where the zombie waiting to ambush you were to the lower floor of the building, skipping the zombie group and the axe-wielding Misbegotten on the top floor. Before you leave through the gaping hole in the building, head out the southern door, where you'll get to a ledge with a Golden Rune [13] on a corpse.
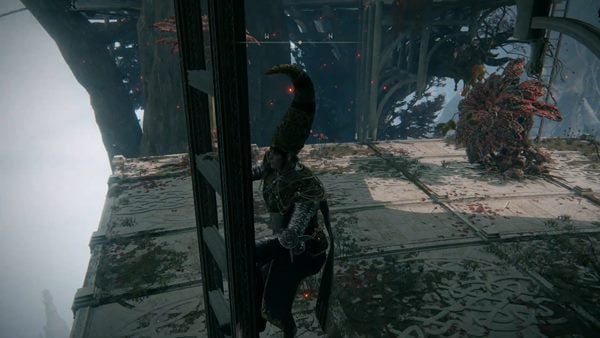
Back through the destroyed wall, there's a ladder going down. If you have any ranged attacks, you might want to get rid of the Giant Poison Flower you can see from the top of the ladder because once you descend it, you'll find that there are two Giant Poison Flowers here sitting next to each other. Alternatively, you can jump across to the platform with a ladder going up to the right and a wooden bridge to the left. If you decided to go down and kill the flowers, head up the ladder that used to be behind the rightmost flower, and head in the building to your left through the open window. If you turn to face the southeast, you'll see the aforementioned bridge, with a corpse holding five Fire Grease, connecting this building to a platform with the ladder going up. There isn't much at the top besides a hoard of zombies that you can farm, so once you've taken the item off of the corpse, turn around and head back to where you came from.
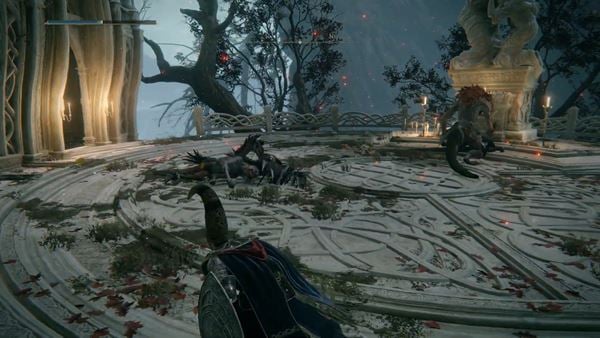
After emerging from the building, you'll see a large Misbegotten standing guard in front of a statue. Be careful as you exit the building, because two other misbegottens will ambush you, alerting the large enemy. You can back up in the building to manage the fight better. Defeat the group of enemies and grab the Ancient Dragon Smithing Stone in front of the statue.
- If you're finding this to be difficult and far away from a site of grace; while dodging enemies, you can run out the building, into the next building to the west/southwest, run straight out of this building, turn south to find a wooden bridge, run across the bridge to the Haligtree Town Plaza Site site of grace. Backtrack to gather the following items.
Enter the doorway into the building in the west/southwest. In this building, you can go either straight ahead or to the left. To the left, you'll find a corpse (guarded by enemies) hanging off the ledge with a Somber Smithing Stone [8] on it, be mindful of the ambushing zombies and a misbegotten enemy. Straight ahead, you'll cross a bridge that takes you to the Haligtree Town Plaza Site of Grace and a Golden Rune [12].
![Roof with a Smithing Stone [6] miquellas haligtree walkthrough 12 elden ring wiki guide 600px](/file/Elden-Ring/miquellas-haligtree-walkthrough-12-elden-ring-wiki-guide-600px.jpg)
Facing south, jump down to the roof of the building and collect the Smithing Stone [6] from the corpse, then turn around to go to the branch with the Giant Ants protecting a corpse with four Aeonian Butterflies on it. Turn back toward the building on the roof you jumped off, and head inside. There'll be three scarlet rot zombies and a corpse holding a Somber Smithing Stone [9].

When you emerge from the building, turn hard right and defeat the Lesser Spirit-Caller Snail here. There's another snail straight ahead from the building and another to the right of that snail, hiding in the corner of the roof. You'll want to have them defeated before doing this next part. After looting the Golden Rune [10] off of the corpse here, face southeast and head to the tip of the roof. The jump onto the other roof is difficult but manageable. If you, however, can't make the jump, you will still survive by simply landing on the platform the building is standing on.

If you jumped onto the platform, head up the ladder, be careful of the zombie that may ambush you as you approach it, and take the zombies up here out to grab the Smithing Stone [6]. Taking a ladder behind (north), you will reach a roof you intended to jump onto. Now jump to the roof to southwest direction. Facing north, you will see a room slightly below the roof you are standing. This will net you Viridian Amber Medallion+2, found in a chest.
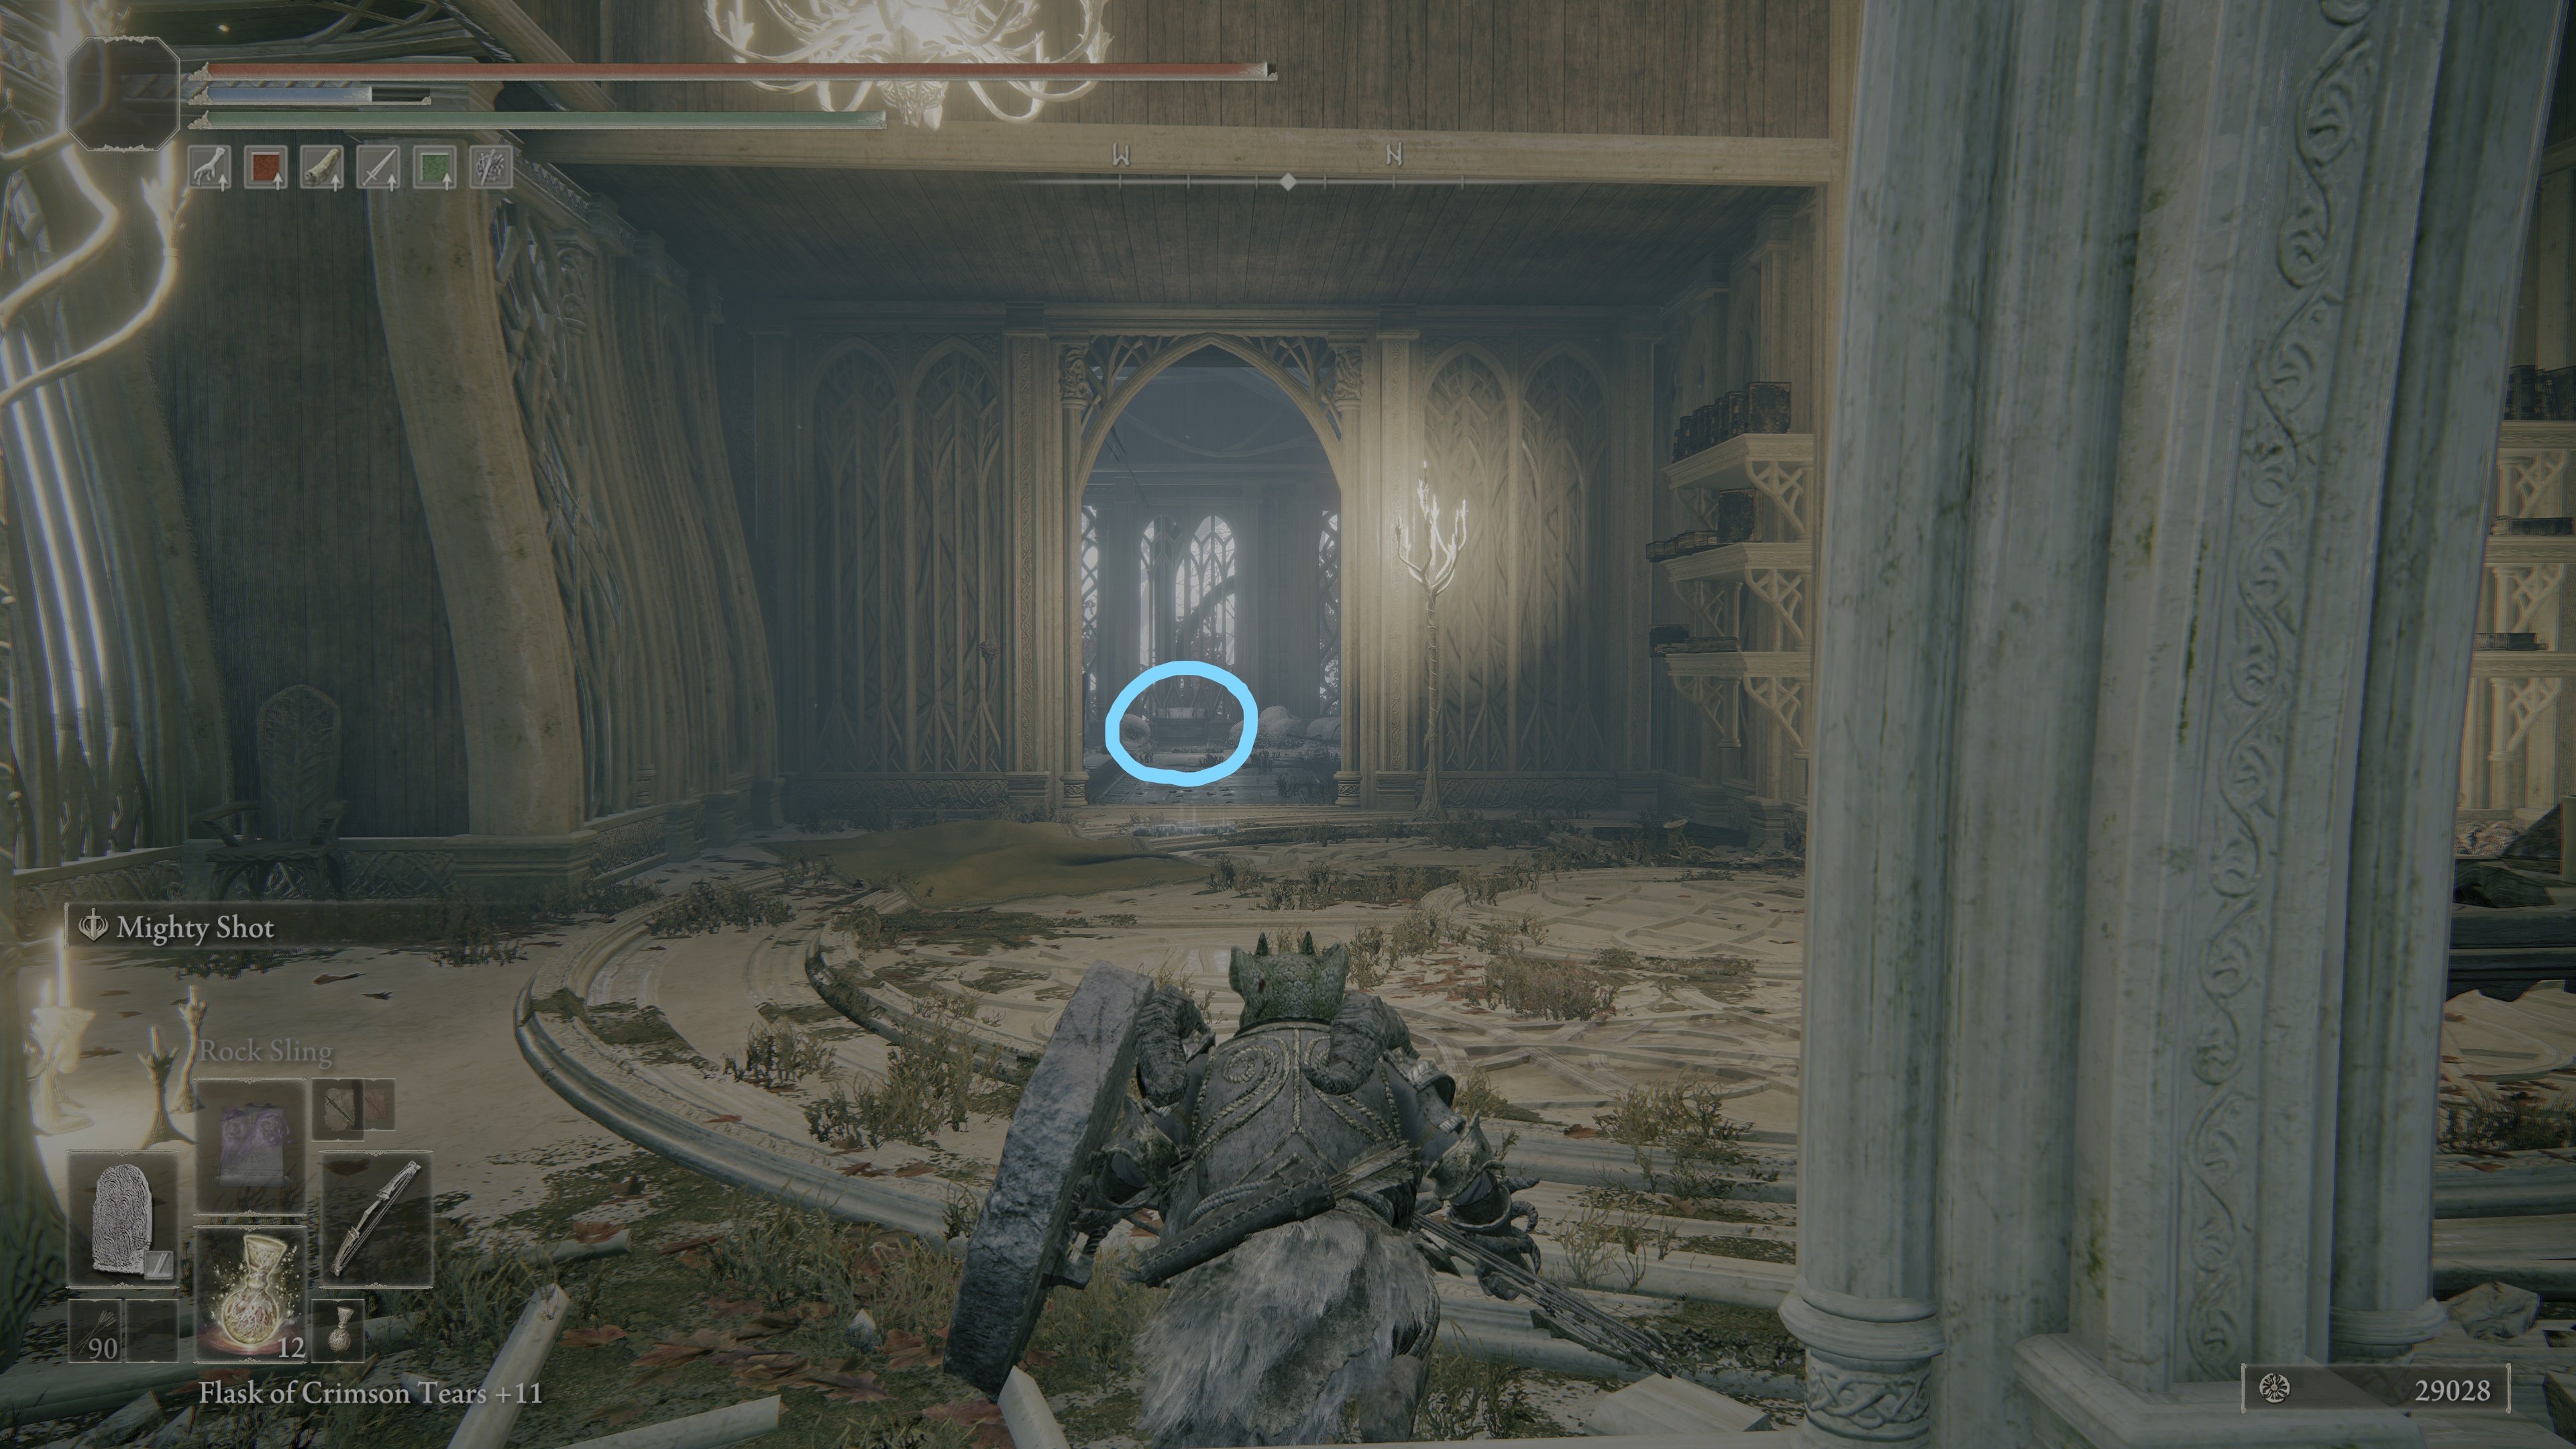
Jump back to the platform and this time head down the ladder to the east, where you'll find you can continue east, or go west. Through the western doorway is a corpse with a Sacramental Bud and a Crimson Teardrop Scarab each guarded by a large Misbegotten in their little rooms. The way forward is to the east, into the little walkway.

After defeating the two Misbegotten here, you'll find a doorway leading back outside to your left. There'll be a Battlemage just across the way inside the gazebo, and one patrolling the bridge on the right. Take these two mages out to safely cross the bridges. In front of the gazebo, you can loot a Smithing Stone [7] from the corpse, and inside you'll find a Smithing Stone [8]. If you turn around to face the bridge you just came from, you'll see two other bridges on either side. Up the leftmost bridge is a gazebo with a Hero's Rune [4] on a corpse. When you've grabbed that, cross the rightmost bridge and take the lift up. This takes you back to the Haligtree Town Site of Grace and activates the shortcut here.
After activating that, and resting at the Site of Grace if needed, head back to the gazebo through the shortcut and you'll be able to sneak past the Battlemages this time if they're back. Cross the northeastern bridge to get to a large, open courtyard.
Miniboss: Loretta, Knight of the Haligtree

When you walk into the courtyard, Loretta, Knight of the Haligtree spawns at the far end. This fight is relatively straightforward, with easy-to-read, telegraphed movements and attacks. Her biggest strength is her mobility on her horse, allowing her to close the distance between her and ranged or magic users. This boss fight is made even easier when fighting with any Spirit Ash to distract her from you. The biggest skill to look out for is Loretta's Greatbow, where she channels a large magic greatbow to shoot a powerful homing shot at you. This skill gets upgraded to Loretta's Mastery when she's under 50% health, where instead of one magic bolt, she fires four. This skill has a relatively long charging time, and you'll be able to tell when she's about to cast it when she draws her halberd like a bow. When you see this happen, create distance between you and the boss, and if dodging to the side isn't working for you, try dodging into it. Other than that, dodge her attacks and hit her in between, and you'll occasionally be able to stagger her for extra hits.
Loretta's defeat nets you 200,000 Runes, Loretta's Mastery, and her weapon, Loretta's War Sickle. The Haligtree Promenade Site of Grace is also now available where she spawned.
Getting to Elphael, Brace of the Haligtree
Defeating Loretta opens up the fog door to the north. Simply follow the path down the stairs, then down the ladder. Before going into the room to the right, head up the stairs next to it, where at the top you'll find a chest with an Ancient Dragon Smithing Stone. Head back down and take the lift in the room you passed by to emerge into Elphael, Brace of the Haligtree.
Miquella's Haligtree Map
Miquella's Haligtree Videos
Speed Run Walkthrough
After reaching Miquella's Haligtree from Ordina, Liturgical Town, immediately turn around and grab the Stonesword Key off of the corpse. Turn back around and head forward to interact with a Site of Grace. Continue forward, sneaking past the three Oracle Envoys on the left. At the third Oracle Envoy, look east and jump down onto the branch. Defeat the tall Oracle Envoy here to keep him from knocking you off and collect the Golden Rune (10) from where he was standing.
Turn left and jump down to the thick branch with Giant Ants on it. Facing south, head up the left side of the thick branch to get out of the attack range of some Oracle Envoys that may be attacking you and to deal with any Giant Ants you've alerted. If you're feeling adventurous, you can run up the thin branch to the right when facing north and follow the branch left, circling until you get the Stonesword Key off of a corpse hanging off the tip of a branch.
Facing north, head down the thick branch until you get to a corpse with 4 Warming Stones lying on some large pink mushrooms. A bit forward and to the right, you'll be able to jump down to a thin branch. Follow the branch left and you'll get to a large Oracle Envoy. Defeat him and you'll be able to access a corpse slouching under a nearby statue that has a Lost Ashes of War on it.
Head back to the wide tree branch and head down it until you find a ladder. Take the ladder down and continue forward, where you'll find another Site of Grace. Continue forward and head down the stairs. Turn right to enter a building and loot the Smithing Stone (8) off of the corpse here. Continue down the stairs and head down the ladder here. Defeat the two Giant Poison Flowers here and head up the next ladder.
At the top of the ladder, steal the Ancient Dragon Smithing Stone from under the large Misbegotten and run through the doorway in the west. In the left room, you'll find a Somber Smithing Stone (8) and right ahead, you'll find the Haligtree Town Plaza Site of Grace.
From this Site of Grace, jump down to the roof in the south and collect the Smithing Stone (6). If you jump down and into the building, you'll find a Somber Smithing Stone (9). In the area ahead, you'll find three Lesser Spirit-Caller Snails that you should defeat. After defeating them, face southeast and head to the roof's tip, then jump down to the platform in front.
Head up the ladder here and grab the Smithing Stone (6) from the corpse. Climb down the ladder to the east then continue heading eastward. Through the building, there'll be a door to the left that opens to a bridge leading to a gazebo. Run past the Battlemages here and collect the Smithing Stones (7) & (8) on the corpses by the gazebo. Facing the bridge you just took, go up the bridge to its right and head up the lift to activate the shortcut.
Head back down the lift, then cross the northeastern bridge to get to a large open courtyard. Loretta, Knight of the Haligtree spawns here and upon defeat, drops Loretta's Mastery and Loretta's War Sickle. Interact with the Site of Grace that spawns after her defeat, and head through the doorway behind it. Follow the path and before heading down the lift, climb the stairs next to its room to grab an Ancient Dragon Smithing Stone on the roof of the building. Going down the lift takes you to Elphael, Brace of the Haligtree.
Gallery
 Anonymous
Do yourself a favour and put Assassin's Gambit on an off hand dagger before going through this area

 Anonymous
"Ah yes, the truest test of skill for the true patrician Miyazaki nuthugger.. everyone KNOWS that the real CHALLENGE that sets the MEN apart from the BOYS for the souls series is PLATFORMING with a character with the same turning angle as a scooter and pretending that being pelted by a million projectiles and slogging through status ailment soup is WHAT THE SERIES IS ACTUALLY ABOUT and if you say anything negative you're just a PLEB with NO TASTE"

 Anonymous
 Anonymous
 Anonymous
Pro-tip: Use Mimic's Veil to bypass the giant ants and give yourself some headway before being spotted by the giant snowman (just work you way around the small plants in the way). Once it spots you, just sprint it.

 Anonymous
There is no area in whole soulsborne(ring) that is as beautiful and as annoying and teeth-breaking-infuriating to fight through at the same time as this god-forsaken tree. Love it.

 Anonymous
 Anonymous
If Elden Ring was made by any other company other than Fromsoft you know for a fact this area would've been cut from the base game just to be released in a DLC a month later, I ****ing love this developer man.

When I first entered this place I though 'Oh god, not more of this immensely confusing crap like Leyndell..'
Finally got to Malenia and beat her, then decided to call it a night after some upgrading. Before that I just wanted to see how much I had missed.. Turns out I only missed that big turban headpiece and a few minor items like a stonesword key, lol.. Had all nine sites of grace. Colour me surprised, but I guess by now I've just gotten so used to how brutal this game is in more ways than not that I've picked up how to strategically run around finding **** without getting lost.
Malenia was pretty easy first phase with Eleonora's Poleblade, just kept stunlocking her and only had to use one HP pot or so. The second phase was just like.. come on. This is one of perhaps three encounters where I just finally said **** this, can't be bothered spending a day and a half getting this solo *flex* down, so I just summoned my spirit ashes somewhere in phase two and got done with it. And I'm glad I didn't spend much time on her, because not only is that boss just complete bs difficult with that self-heal, but the weapon you get from her is just.. crap. Landing that waterfowl dance is just a trollfest difficult, and the animation before it is so long most times you just get hit out of it anyway. Meh. Poleblade is WAYY better and can carry you through most of the game once you get it with its insane knockback ability and right build config, I just love it.
No magic cheesing for me with this baby. In sum, this place wasn't as daunting as I was expecting, just some really annoying mobs on the lower levels.. you know the ones, with all those arms? Jesus..
Cheers all and happy gaming!
 Anonymous
Yeeting the snowmen, the misbegotten, and the zombies off with Rejection and Cannon of Haima is pretty fun and good rune farming.

 Anonymous
 Anonymous
I just found out that you can stand below the Giant Oracle Envoy and pelt him with Black Flame (I guess normal flame works too) without him being able to hit you

 Anonymous
Recently did my first NG playthrough since release and was reminded why I loved this area so much. In my first playthrough Stormveil was fantastic because at a low level it's actually a challenge and you have to move through it methodically and each grace feels rewarding. But when trying to do everything in each region and get all weapons/items in NG I feel you get overleveled pretty quickly and a lot of the games other legacy dungeons felt like I was just breezing through them and wouldn't even bother to rest at half of the graces. The Haligtree brings back that challenge and actually feels pretty rewarding to get through.

 Anonymous
imagine approving ants and bubbles being able to one shot on ng+ and beyond no matter the vigor/buffs and calling yourself a competent game designer

 Anonymous
imagine approving ants and bubbles being able to one shot on ng+ and beyond no matter the vigor/buffs and calling yourself a competent game designer

 Anonymous
 Anonymous
Hot take, but honestly if you take your time with this area it's not that bad. Just rushing through it will get you killed quickly, it's as if FromSoft knew players would do that and would punish anyone. Bring ranged weapons/spells, use Assassins Gambit, Crepsus Vial and Unseen Form and it's pretty okay to traverse. What I actually hate is how they didn't put any new or interesting enemies here and throughout Elphael. And honestly it's also very laking in the interesting items department.

 Anonymous
The Millwood armor set from DS3 report of an ethereal oak that was rotting...

 Anonymous
If you picked the balista/jar cannon/siluria's tree/bolt of gransax/giantsflame take thee/cannon of haima, you can get past the branches in easy mode. Loretta requires skill tho.

 Anonymous
Honestly , Beautiful Area
Just make sure to pick up the ball knife armour since you'll be visiting Ordina Anyways and be careful of The Giant Door Cannon At the end
 Anonymous
I arrived to this place without getting free acupunture from the locals thanks to our sponsor, assassin's gambit! Are you tired of annoying enemies and just want to run past them without burning through your flask? Welp use assassin's gambit now, with assassin's gambit you can finally show those pesky archers the one finger! Remember to use code ass-ass for 50% off when purchasing assassin's gambit at your local Zweihander, thank you assassin's gambit for sponsoring my playthrough. Now back to reading.

 Anonymous
 Anonymous
 Anonymous
The tree branches part is annoying but you can pretty much just sprint through it. Once you get to the second grace its not that bad. It's a shame they ran out of time to put some unique enemies in this area.

 Anonymous
 Anonymous
there are 3 main aspects to point out about this place.
First one being the fact that its the hardest place to even access in the game, cuz you will have to get through both Commander Niall and the Arrow Spammers of Ordina which are both a pain in the ass to go through.
Second is that this area, and by that i'm also including Elphael, has the hardest enemies in the entire game as well, meaning its somewhat of a hardmode version of Crumbling Farum Azula, cuz both are vertical-based, separated "islands" from the rest of the continental-like map, and also both have its "gravity-traps" doing to being so vertical and bottomless nearly everywhere.
Third one is that the choice for "final boss of the area" was probably totally intentional, considering that this is both the hardest area to access and the hardest area to get around in general, with the hardest enemies and stuff, so i would say its a fitting place for Malenia AKA "the hardest boss of Elden Ring according to the vast majority of the community".
Its also worth noting that Elphael has some real important items, like the Ghost-Glovewort Picker's Bell Bearing [3] and Marika's Soreseal, that's right, Radagon's Soreseal can be accessed in around 30 minutes of gameplay, without killing any major bosses, not even Margit, by just going to Caelid and running for it, whereas Marika's counterpart requires you to go all the way to this endgame-level area, getting your ass beaten and dying dozens of times on the way LOL.
Whew, makes me so thankful that i ditched the "hybrid flask-splitting" playstyle all the way back at Dark Souls 3.
 Anonymous
This place is terrible design that fan boys refuse to belive it to be true

 Anonymous
A shining example of a level designed to irritate you rather than bring enjoyment.
The game basically screams at you to run past everything here, otherwise you will fall off or get nuked by holy bullets or ant piss.
What a garbage experience, fitting for a dungeon that holds the worst boss in the game by a mile.
 Anonymous
Missing Envoy's Long Horn that drops from a large oracle envoy.

 Anonymous
Probably the most beautiful area in the game, but the combination of overtuned enemies and your Tarnished having no hops means you'll have to accept losing a significant amount of runes in here. If you're close to your next level, definitely farm that out somewhere else before entering lol.

 Anonymous
"No no, I don't want to go to the Haligtree there is a nightmare of a swordswoman there!"

 Anonymous
Can't speak for the whole tree but Bolt of Gransax can make quick work of most of the canopy. You have to be careful where your feet are but the impact knocks most of the problems over the edge or you have enough distance to take them out before they become a problem. Only had a couple of them pose any kind of threat

 Anonymous
While I was climbing the latter, retrieving runes from the broken wall, the flower did the light rain on me mid climb. Couldn't do anything to prevent dying in half a second. Fromsoft can be d*cks at times.

 Anonymous
This was a disappointing level. Nice scenery and the layout was fine but no new enemies and even the boss was recycled. I like the Loretta fight but once was enough. This makes several areas in a row with no new enemies and you start getting bored.

 Anonymous
I can't believe it... From Software has made a location worse than Shrine of Amana?! Finally, after 10 long years, they made a **** location that is less enjoyable than having your toenails ripped out!

 Anonymous
how to get to the secret room at haligtree town hall. the one below 3 summoning snails, i cant recall. the one with lighted door

 Anonymous
Unseen form can make getting you to the Haligtree town grace with minimal stress and effort. The only thing that will react are the Miiranda flowers none of the envoys will as long as you don't get too close. But it does allow players to walk down the branch and under the giant envoy just before the Haligtree town grace.

 Anonymous
Xyri257 22 Nov 21:29 Is right, Ekzykes's decay is a good choice for making an easy kill of the leonine misbegotten in Haligtree town, but it isn't the best choice if you have Agheel's flame or Borealis's mist. Both of those incantations killed the warriors significantly faster than Ekzykes's decay with the same set up for all three, Agheel's flame was especially good.
The warrior standing on an elevated platform opposite to where the Haligtree town grace is located can be killed from the chamber's exit doorway using manual aim to direct the flames, rot breath, or freezing mist up and right through the bars to kill it without having to fight it head on.
The second warrior on the circular platform is guarding an item with its back is to the doorway so it wont know you are there until Agheel's flame is already hitting it, if you use target lock you'll see it stand up and start heading towards you but it dies before getting near enough to knock you out of the cast or to land any kind of hit at all.
 Anonymous
What it says here about getting to a point on the tree where stealth is of no more use and the giant envoy will inevitably spot you isn't true. The black knife armour, which is right under the steps up to the waygate that transports players to the tree FFS and assassin's gambit, I used both, will allow you to pass right under the giant envoy who wont even twitch never mind get aggro and start blowing bubbles at you. You'd think someone who was going to stick their neck out and edit one of these pages would have tried at least the black knife armour before making a sweeping statement like stealth only gets you so far.

This area is tough. But I felt like it should be since by the time I got here everything I'm up against I should have had some kind of practice on at a lower level. Just when I was starting to get tired of farming Yelough Anix ruins for runes I hit this beautiful magical death trap and it took me losing about 100K runes 3 - 4 times to finally get through to the lift shortcut. And I haven't been able to kill everything yet. But I will... BTW, Ekzykes decay breath will one shot the leonine misbegotten on the top platform entering the town if you manage to jump down and not die before it does after it charges you.

 Anonymous
thanks so much esp, the initial getting to the first site of grace after those friggin bubble guys,,, died so many times! someone correctly suggested using sleep arrows on the last MFAKA with the bubble machine gun!!

 Anonymous
Trivia: “Hālig” in old english means Holy! Haligtree = Holytree

 Anonymous
I think I died more falling from branches here than to any other boss apart from Malenia.

 Anonymous
I'm in my first playthrough. This place and Elphael together (including Malenia) are so far my favorite region / legacy dungeon, by far. I've yet to see Farum Azula and Ashen Leyendel, but it will be difficult to beat. It's beautiful, gigantic, challenging (just enough) and therefore rewarding when you finally find the solution to go through it. I didn't read this walkthrough, so I don't know if it is accurate or not. I would suggest to newcomers to do the same: spend the time you need to observe all the paths and enemies on your way, elaborate a plan and do it. It's ok to run past enemies (like this big bubble sniper) and come back to them just after, when you are safe.
I'd recommend having all your gear fully updated and your build being optimal before coming here. I was just missing a couple smithing stones (8) to upgrade my second bandit sword to lvl 25, which you find quickly at the beginning. If leonine misbegotten are still a problem for you, you will have a hard time. If using your brain more than your fingers is difficult, you will have a hard time.
Enjoy this place, it's so nice !
 Anonymous
I want the cloth-ball set and the tuba available, so we can go ballin around and oneshot enemies with bubbles too...

 Anonymous
This one and the Leyndell Catacombs are just the same sh*t in a different toilet.

 Anonymous
There are no illusory walls in the area. I wish there were more secrets and shortcuts in both the Haligtree and Elphael.

 Anonymous
Some of this will make getting down the tree easier, rainbow stones make finding the right place to drop down to the next branch much safer, don't trust the camera perspective and your judgement of what looks like the safe place especially dropping down to the narrow branches, you'll be surprised when you see where the first stone or two land.
Rain of arrows or the weapon art on Radahn's great bow can make the biggest envoy just before the second grace easier, the arrow's reach talisman helps and arrows sting with ritual sword add a nice damage bonus.
The buildings when you get to them are not solid the walls are fancy filigree I killed the first leonine misbegotten by casting ekzykes's decay up and through the wall. I've used volcano pots to kill the misbegotten with the great axes through these same walls, poison will work too but it's tedious. If the misbegotten warriors or those with great axes are causing problems falling back on guard counter with curved sword talisman and barricade shield AoW makes them a lot more manageable and consistently killed while you take very little if any damage.
When you pass a circular area with a misbegotten warrior and two with big black wings ignore the walkthrough above its a difficult approach to dealing with the spirit caller snails and the crystalians they summon. Stay on the rooftops until you have seen where the first two snails are, the first is obvious and right in front of you the second is on a narrow ledge down on the right, kill both from the roof with ranged attacks. One summons a crystalian throwing the rings the other summons one with a spear. Don't drop down until the first two snails are killed. The third snail is to the right around the back of the tree and down on a narrow ledge like one of the previous snails, this one also summons a spear crystalian so just run past it and drop down to kill the snail as fast as you can, a mushroom putrid corpse can make this last snail difficult if it manages to grab you.
There are two battle mages before the boss fight and the lift back up to the second grace these two seem different to the others I've run into, the first didn't flinch after I hit it with a sneaky R2 and one shotted me with that gavel of haima spell. I hit both of these with fletched coldbone and serpent arrows from a shortbow with rain of arrows AoW and both of them got knocked off the wooden plank bridges from the arrows hitting them and fell to their deaths so they don't seem to have the same mad poise as the rest.
This last will be obvious to everyone who reads this wiki page first but I didn't and it caught me out, I got past the mages and I saw the open area and a boss fog door far in front of me, I thought I was safe to have a look around but as soon as I stepped off the bridge I triggered the Loretta fight. I wasn't ready for a boss fight I had a load of stuff in my quick items and only the greashield soldier spirit ashes because I'd been messing around with them in the consecrated snowfield, I was lucky it was them not the soljars of fortune. It was quite funny though Loretta's agro was focused on them for the whole fight, she hit me with the greatbow spell once before she was done.
I don't think I know better than everyone else, I know that isn't the case. I died a lot getting from the first grace to Loretta but the things I've commented here is how I made it easier for myself each new attempt until I wasn't using more than two crimson flasks.
 Anonymous
I've just got here so I'm not being a smart arse, just giving anyone who reads the comments an idea of how bad this s**t show this haligtree area is. I haven't gotten as far as the second grace yet. I used the weapon art on bolt of gransax to knock the envoys off the tree, it has a wicked knock up but you travel forward as you throw it well I've died three times so fer by not judging correctly how much branch I needed to use it and shooting myself right off the tree with the envoy I hit.
The main reason I made a comment when I only just got here is the perspective from the camera when looking down at a branch you want to drop down to, I'm wise to this from deeproot depths I don't use my judgement and drop if it looks right I use rainbow stones to make sure and its especially important when dropping down to the narrower branches of the tree. The camera makes it look like I am lined up safely but when I drop a stone they hit and stick to the side of the branch for one drop I needed four stones to find the safe spot, if I had dropped down when it looked right I would have slid down the side and dead, the stones stick to it but I don't.
 Anonymous
i have an idea where they could put a boss for miquella. ok so where miquella was sitting it would say enter the haligtree or something and you sit where miquella was sitting and the tree wraps around you. after that you enter some world and there is a boss that is miquella but like in the past. idk if this a good idea or not but it would be cool

 Anonymous
 Anonymous
 Anonymous
Method for Uba Tuba Bubby on the sweaty last stretch: Pulley Bow, Arrow’ Reach, Arrow’s Sting, Rotbone Arrows fletched and Bloodbone Arrows fletched. You can get juuuust the right placement at that initially protrusion where you maybe take one single bubble out of every 5 or so volleys. Or just take the yolo plunge path like you’re going after Yhorm in DS3. One way is easier on the hairline.

 Anonymous
 Anonymous
Worst area in the game, Elphael is especially the part that made me realize just how much i ****ing hate this place, its pretty but that's about the only nice thing i have to say about this stupid shithole, I know its supposed to be a hard optional area, but that isn't a valid excuse to justify how aggravating and sadistic this hellhole is.

 Anonymous
To those having trouble with the branches section: get the Crepus's Vial talisman and the Unseen Form spell, or the Assassin's Gambit Ash of War. Taking on this section with a stealthy or semi-stealthy approach makes it much, much, MUCH easier.

 Anonymous
 Anonymous
 Anonymous
 Anonymous
Do not bring the knife to a shootout, tarnished. Bring a bow.

 Anonymous
This area and Elphael are absolutely beautiful visually, but good god the overtuned af enemies inhabiting them can just go eat a giant bag of ****s.

 Anonymous
Just got here. I'm gonna have fun invading with the jar cannon lol.

 Anonymous
Finding the Haligtree is an amazing experience. Throughout the game you occasionally hear whispers of a hidden great tree that could possibly rival the Erdtree and be a sanctuary for lost humans and albinaurics alike. And when you find the two hidden halves of the secret medallion needed to access the path to the Haligtree and complete the yet still arduous journey towards it, what do you find? What was to be the second Great Tree is hopelessly rotted and the promised sanctuary is teeming with Misbegotten ravaging the corpses of the former inhabitants. Only Loretta and her battlemages stand between the Misbegotten and the lower half of the tree.
It’s quite the tale. Only, between Malenia, Loretta, the battlemages, the Cleanrot Knights, and the Haligtree soldiers, I find very difficult to believe the Misbegotten could really take even a small portion of the tree from them. Let alone nearly the entire upper half.
 Anonymous
 Anonymous
this section makes me want to throw my ****ing controller...this is worse than Great Hollow

 Anonymous
 Anonymous
I see they patched the Leonine Misbegotten (directly NW from Halitgree Town SOG) from falling immediately to his death. Now his 6k runes have to be earned.
Canopy is a run through to get through, skip everything. But the town is fun (in my twisted opinion) to clear out room by room. Yes it's tough, real tough, but it's doable for mid level, and if you don't make it to the next grace, you're gathering runes to not be mid level any more.
 Anonymous
Neat detail: The Haligtree can be seen from Dominula, Mt. Gelmir, and Castle Sol.

 Anonymous
Big canon +9 explosive ammo.
BOOOOOOOM!!!.
Who's getting oneshoted now mf.
Funny gameplay achieved.
 Anonymous
 Anonymous
 Anonymous
For y'all having trouble with the bubble, try the "Yeet-Yoink" approach. Collapsing Stars or Gravitas and a greatbow or gravity repulsion. Add Thop's Barrier/Carian Retaliation/Eternal Darkness and some holy resistance and you're ready to rock. Bonus points for long range with Rock Sling which sometimes works.

 Anonymous
where the corpse with the Golden Rune(13) was, i used a cotton thingie and jumped down to where the ants were, fought them and just walked up the tiny branch thats next to the path to the building. boom got to the site of grace. i had so much trouble dealing with the other path from where you get that Golden Rune (13)

 Anonymous
Either camera kills you when your foot gets stuck by a pebble near a wall or falling from a branch.

 Anonymous
It’s the Great Hollow but instead of basilisks, you get bubble men, ants, beast dudes, zombies, glowy snails and tanky mages.

 Anonymous
I tricked my friend into going here before he went on the Fire Giant and now its really funny to watch him struggle

 Anonymous
Why would you design such a beautiful looking area like this to then fill it with re-used enemies that for some reason have 1000x more health and damage than usual? the damage scaling late game is so bad

 Anonymous
This place sucks and no items of worth besides dragon somber stone.

 Anonymous
 Anonymous
What a cancerous location. At least Miquella isn't important to any of the endings and can be fought once ever and never visited again

 Anonymous
What a cancerous location. At least Miquella isn't important to any of the endings and can be fought once ever and never visited again

 Anonymous
Misbegottens and putrid corpses/zombies are the absolute most annoying enemies in the game and ofcourse this level is filled to the brim with both. Glad i didnt bother exploring everyrhing would've gotten turned around and lost.
Fun experience though.
 Anonymous
The first sight of this place alone was more than enough to compensate for the Consecrated Snowfield. Undoubtedly the most visually breathtaking area in the entire game.

 Anonymous
"After reaching Miquella's Haligtree from Ordina, Liturgical Town, immediately turn around", yep, best advice right here, lol

 Anonymous
Of course the one controller I own decides to strt having stick drift, right as I reach this area.

 Anonymous
I recommend using the Assasin's Gambit skill so you can run sneakily past the enemies if you don't want to deal with them. It's literally the only reason I ever made it down to Loretta.

These recommended levels are very, very low. At a minimum you'd want to be closer to 140-145 by this point, so you can have reached soft caps in at least 2 or 3 Stats.

 Anonymous
Really brings back dark souls memories of running and fallling until you find a checkpoint

 Anonymous
Getting to the 2nd grace on this map was literally the hardest part in this game for me. I would rather take fighting 2 Malenia's at once than having to do something compareble to that again. First time I've actually considered just dropping a souls game.

 Anonymous
Aghhh, god I hate this place. I just lost 1.3 million runes here. I was about to start NG+, wanted to grab the Envoy's Greathorn before I did. First I got blasted from behind by the ants ludicrously powerful puke spray, and then on my way back, I accidentally slipped off a branch. Once you get to Elphael it gets good again. But getting there through this place is a nightmare. Well there goes like 30 minutes of farming, ugh.

 Anonymous
a some what fun observation; switch out the "a" for "e" in halig and you get helig, which is the swedish word for holy

 Anonymous
This dungeon is a compilation of all the most annoying enemies you encountered so far. Only needs some rotten stray dogs to top it all off.

 Anonymous
Fun (and dangerous) to go knocking the tooters off the branches with Bolt of Gransax.





On this page rotten crystal sword is listed as an obtainable armament, but it's in elphael not haligtree
0
+10
-1