Shadow Keep is a Legacy Dungeon in Elden Ring. The Shadow Keep is a legacy dungeon exclusive to the Shadow of the Erdtree DLC, it accommodates the main army of Messmer the Impaler. The Shadow Keep is located at the center or the heart of the Scadu Altus region and has multiple entrances and exits, considering it to be a non-linear dungeon where adventurers will encounter many enemies such as Messmer Soldiers, Fire Knights, Giant Crabs, Giant Bats, Vulgar Militia, Black Knights, and devastating creatures. [See Shadow of the Erdtree Map]
The Shadow Keep location is divided into three sections, the Main Plaza, the Church District, and the Specimen Storehouse. Please click the links to jump to a specific section of the walkthrough.

General Information
- Previous: Castle Ensis
- Next: Enir-Ilim
- Recommended Levels: 150 - Above
- Bosses: Golden Hippopotamus, Messmer the Impaler
Shadow Keep Sites of Grace
Shadow Keep, West Sites of Grace
- West Rampart [Map Link]
Church District Sites of Grace
Specimen Storehouse Sites of Grace
- Storehouse, Back Section [Map Link]
- Storehouse, Loft [Map Link]
- Storehouse, First Floor [Map Link]
- Storehouse, Fourth Floor [Map Link]
- Storehouse, Seventh Floor [Map Link]
- Dark Chamber Entrance [Map Link]
Video Walkthrough
Shadow Keep Map
Main Gate

Main Entrance - Main Gate Plaza
Church District

Church District - Scadutree Base

Church District - "Underwater" Level

Church District - Surface Lower Level

Church District - Surface Upper Level
West Rampart
Specimen Storehouse

Specimen Storehouse - First Floor

Specimen Storehouse - Second Floor

Specimen Storehouse - Third Floor

Specimen Storehouse - Fourth Floor

Specimen Storehouse - Fifth Floor

Specimen Storehouse - Sixth Floor

Specimen Storehouse - Seventh Floor

Specimen Storehouse - Dark Chamber
Back Gate

Specimen Storehouse - Lower Back Section

Specimen Storehouse - Upper Back Section

Specimen Storehouse - East Balcony

Specimen Storehouse - Back Gate Ground Level

Specimen Storehouse - Back Gate Upper Level

Specimen Storehouse - North Balcony

Specimen Storehouse - Beams, Lower Level

Specimen Storehouse - Beams, Upper Level
NPCs in the area
Bosses
Main Plaza
Specimen Storehouse
Video Walkthrough coming soon!
Items
Talismans
Consumables
- x6 Kukri
- x6 Fire Coil
- x1 Rune Arc
- x8 Bone Dart
- x4 Golden Vow
- x1 Festive Grease
- x2 Fireproof Pickled Liver
- x1 Gold-Pickled Fowl Foot
- x2 Holyproof Pickled Liver
- x3 Shadow Realm Rune [5]
- x1 Shadow Realm Rune [6]
- x2 Rune of an Unsung Hero
- x1 Well-Pickled Turtle Neck
- x2 Silver-Pickled Fowl Foot
- x3 Furlcalling Finger Remedy
- x1 Lightningproof Pickled Liver
- x1 Leda's Rune
Weapons & Shields
- Main-gauche
- Falx
- Dueling Shield
- Fire Knight's Seal
- Golden Lion Shield
- Queelign's Greatsword
- Carian Thrusting Shield
Armor
Spirit Ashes
Ashes of War
Spells
- x2 Crab Eggs
- x8 Beast Horn
- x13 Rada Fruit
- x8 Black Pyrefly
- x2 Lump of Flesh
- x1 Spirit Calculus
- x1 Furnace Visage
- x3 Glintslab Firefly
- x1 Slumbering Egg
- x2 Revered Spirit Ash
- x6 Hefty Beast Bone
- x7 Thin Beast Bones
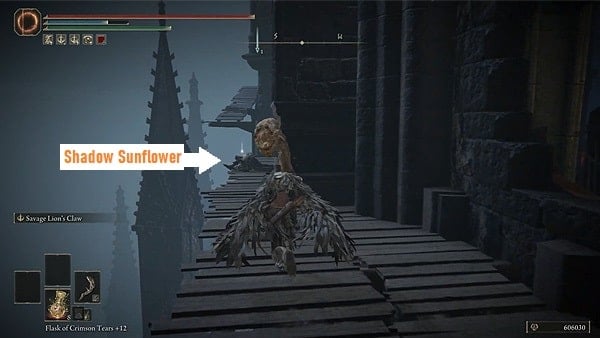
- x9 Shadow Sunflower
- x13 Ember of Messmer
- x6 Stormhawk Feather
- x6 Scadutree Fragment
- x1 Messmerfire Grease
- x2 Strip of White Flesh
- x1 Blessed Bone Shard
- x10 Smithing Stone [1]
- x8 Smithing Stone [2]
- x1 Smithing Stone [5]
- x3 Smithing Stone [6]
- x7 Smithing Stone [7]
- x8 Smithing Stone [8]
- x1 Great Grave Glovewort
- x1 Somber Smithing Stone [5]
- x1 Somber Smithing Stone [8]
- x1 Somber Smithing Stone [9]
- x1 Drawstring Golden Grease
Enemy Drops
- Crab Eggs
- Beast Horn
- Innard Meat
- Living Jar Shard
- Death Mask Helm
- Smithing Stone [2]
- Smithing Stone [3]
- Smithing Stone [4]
- Smithing Stone [5]
- Smithing Stone [7]
- Ember of Messmer
- Vulgar Militia Saw
- Strip of White Flesh
- Raw Meat Dumpling
- Vulgar Militia Armor
- Fire Knight Gauntlets
- Messmer Soldier Helm
- Messmer Soldier Armor
- Shadow Realm Rune [1]
- Fire Knight's Shortsword
Keys & Other
- x1 Iris of Grace
- x1 Letter for Freyja
- x1 Secret Rite Scroll
- x1 Iris of Occultation
- x1 Hefty Cracked Pot
- x1 Messmer's Kindling
- x1 Furnace Keeper's Note
- x1 Storehouse Cross Message
- x1 Domain of Dragons Painting
- x1 Remembrance of the Impaler
- x1 Battlefield Priest's Cookbook [1]
- x1 Battlefield Priest's Cookbook [4]
Enemies
- Crab
- Giant Bat
- Living Jar
- Giant Crab
- Fire Knight
- Black Knight
- Vulgar Militia
- Messmer Soldier
- Ignited Putrid Corpse
- Messmer Foot Soldier
- Fire Knight Captain Kood
- Lesser Ulcerated Tree Spirit
- Hornsent
Notes
- Notes go here
Full Shadow Keep Walkthrough
Shadow Keep: Main Plaza Entrance
The Main Entrance of Shadow Keep
The main entrance of the Shadow Keep dungeon is the linear path to take when traveling to the location. When you clear Castle Ensis after defeating Rellana, travel north until you reach the main entrance. Along the high road, you should find a monolith where you can grab the Scadu Altus Map Fragment, Map: Scadu Atlas [See Elden Ring Map]. Tread carefully as you approach the main gate as you'll encounter campsites of Messmer Soldiers. Before heading inside, check the east section of the fort's outer walls to find a fallen Furnace Golem where you can loot x1 Furnace Visage [See Elden Ring Map]. Next to it, you can find a tent, inside is a corpse that you can pillage to find x1 Furnace Keeper's Note [See Elden Ring Map].
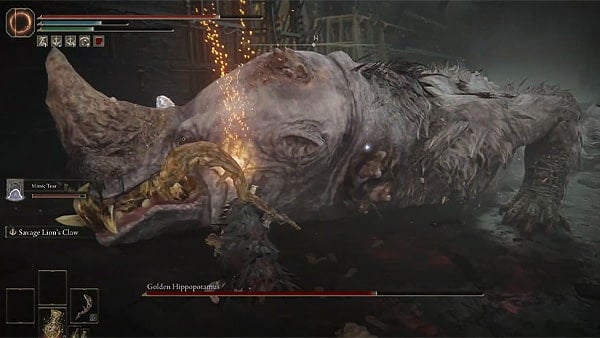
Approach the main entrance and step on the lift's mechanism to ride it to the top. When you arrive, you'll find the Shadow Keep Main Gate site of grace, interact with it, and make preparations before entering the plaza where you'll fight a Great Enemy Boss, the Golden Hippopotamus. As soon as you enter the plaza, the battle against the boss will begin. For more guides and strategies on how to defeat the boss, please click here. Defeating the Golden Hippopotamus drops x2 Scadutree Fragment and the incantation spell, Aspects of the Crucible: Thorns. Defeating this boss will also allow you to continue exploring the Shadow Keep and the Main Gate Plaza lost site of grace manifests at the center of the large room.
Past the Main Plaza
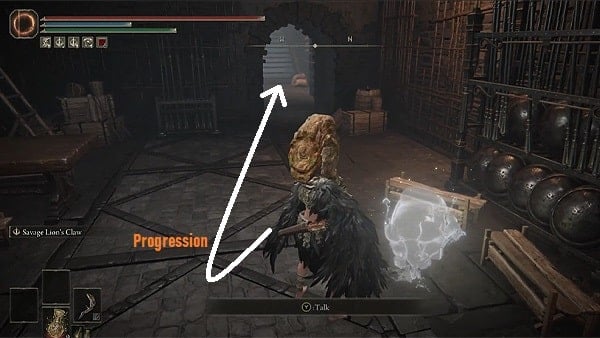
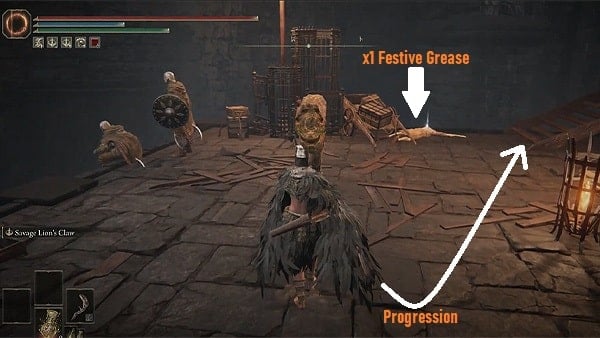
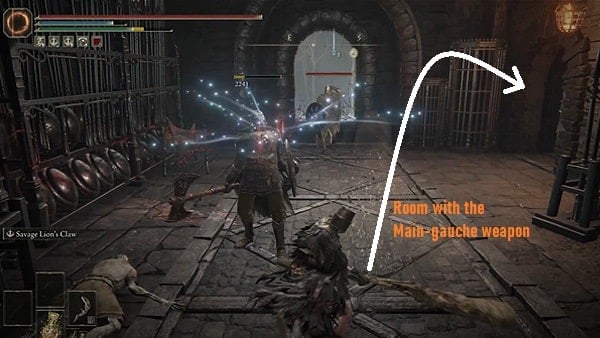
Proceed to the next section by passing through an armory room that's on the left side of the Main Gate Plaza checkpoint. Inside the room, there is a Spirit NPC you can talk to. Exit the room and walk up the stairs to enter the next room where you'll encounter two Messmer Soldier enemies on the left and another soldier patrolling the narrow stairs on the right. Defeat the enemies, and before going up the narrow stairs, loot the body near the foot of the stairs, next to some objects to loot x1 Festive Grease. Slowly walk up to the first set of stairs and you'll find a doorway on the right leading to another armory room. Inside the room, there are two Messmer Soldier enemies and a body that can be pillaged to obtain x6 Smithing Stone [1].
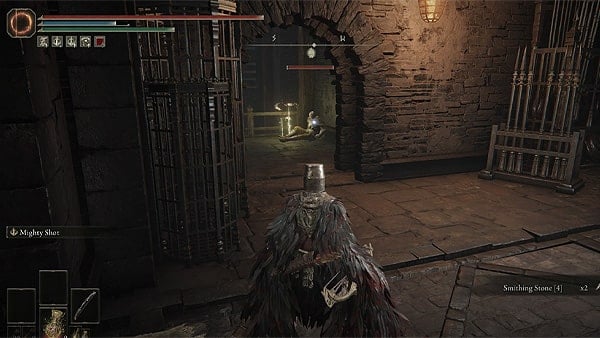
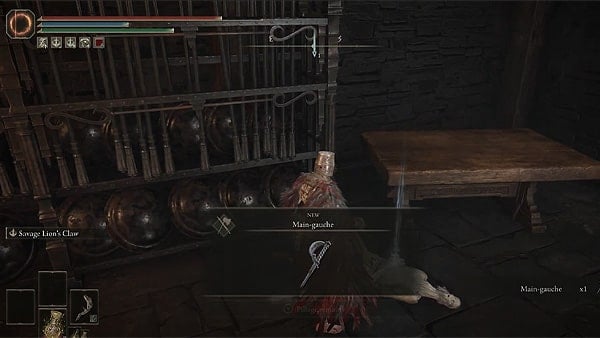
In the same room, there is another doorway on the right, tread carefully since there are two more Messmer Soldier enemies and one Black Knight wielding a double-headed spear. One of the soldiers near the doorway is sleeping, and you can gain the upper hand by using a long-range weapon like a bow to shoot it from afar, thinning out their numbers. Clear out the enemies and approach the table beside the rack of weapons, you'll find a body next to it. Pillage the body to find a dagger weapon, the Main-gauche.
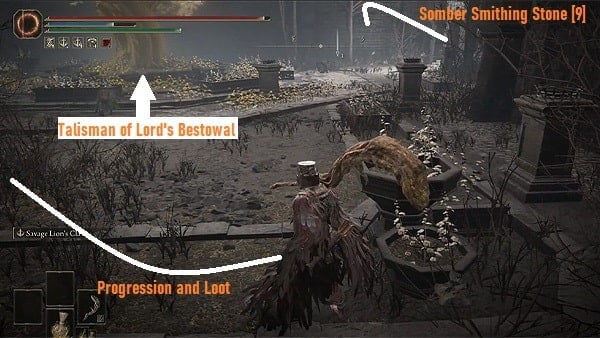
Next, go back to the previous room and jump through the window to enter a courtyard area that has a golden tree in the middle. Facing the golden tree, turn left, and you'll see a Black Knight enemy facing a corpse holding an item. You can sneak behind the enemy to attack with a critical backstab. Kill the enemy and loot the corpse to find x3 Golden Vow. Now walk up to the golden tree to find the Talisman of Lord's Bestowal. Before you progress, check the south section to find a doorway, inside is a scaffolding of wooden platforms where you can find a corpse that can be looted to find x2 Smithing Stone [8]. Now go back to the courtyard, head north to enter the doorway that was near the Black Knight enemy you killed earlier.
You'll enter another armory room where you'll encounter an axe-wielding Messmer Soldier and another Black Knight wielding a double-headed spear. After killing the enemies, before you exit the doorway on the right side of this room, check behind the rack of weapons to find a body you can loot to acquire x4 Smithing Stone [1]. Exit through the doorway to find a ladder that you can climb, this leads to a door that can be opened to find a refectory or a dining room.
East Wing of the Keep
Tread carefully in this room since there are enemies inside, a Black Knight wielding a hammer and a shield, and another Black Knight with a large bow. You can pick up x1 Golden Vow on a dead body by the opening on the wall on right side. A Shadow Realm Rune [6] can be found just by the doorway heading outside. Exit through the doorway that's on the east side of the room to exit a battlements area where you'll find lined-up boats and stacks of weaponry. On the left side just as you exit, you can pick up x1 Holyproof Pickled Liver. Be careful as you explore this section since there are multiple Vulgar Militia enemies guarding and surrounding the boats. There is one body nearby that is sitting against a boat, you can loot it to find x1 Rada Fruit. Check the east side of the battlement area. You'll find a dead body with x1 Silver-Pickled Fowl Foot and another body sitting against the eastern wall. Loot the body to obtain x3 Smithing Stone [8].
Find the Domain of Dragons Painting
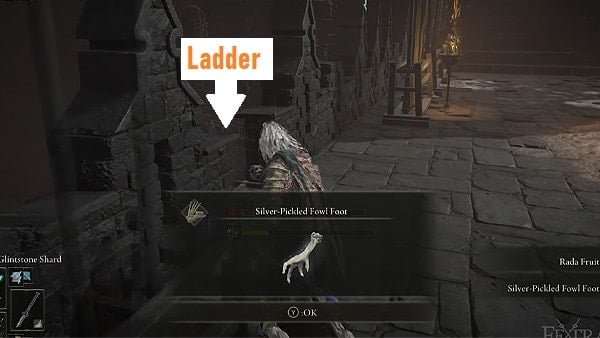
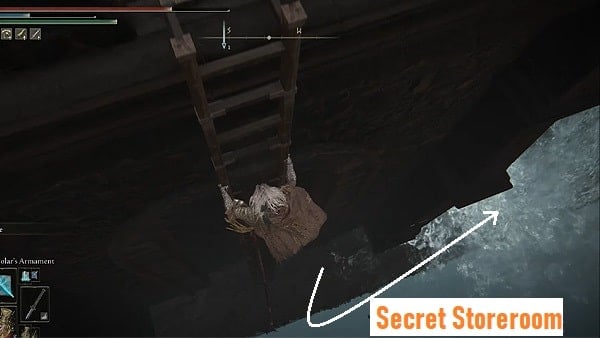
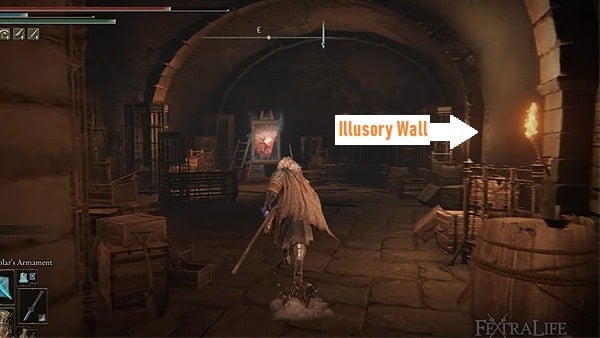
You'll find a ladder beside a body that has a Silver-Pickled Fowl Foot. Climb down the ladder and investigate behind the waterfall where you'll find another ladder. Climb the ladder to find a storeroom that has the Domain of Dragons Painting. [See Shadow of the Erdtree Map]. Approach the wall on the right and hit it to reveal an illusory wall. Beyond is a pathway leading to a sewage area where you'll find a coffin that you can interact with. Resting in the coffin will trigger a short cutscene and you'll be brought to the depths section of Scadu Altus, specifically by the Castle Watering Hole site of grace [See Shadow of the Erdtree Map]. If you're done exploring this secret room, head out of the storeroom, and then back to the waterfall area. Keep following the path going west, and you will find a dead body with x1 Somber Smithing Stone [8].
Click on the images to enlarge them.

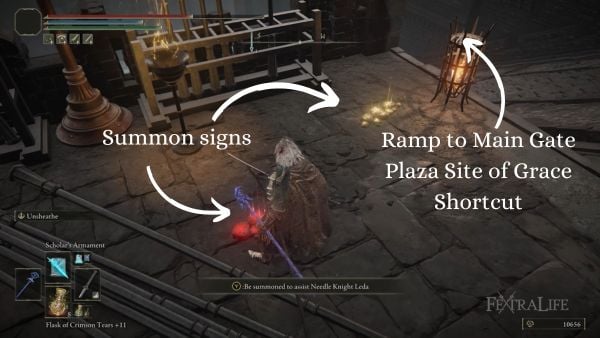
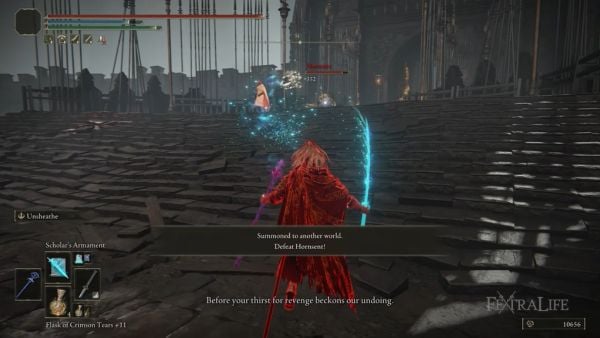
As you approach a ramp in the middle, head down to kill the Vulgar Militia enemies and loot a corpse at the bottom of the ramp to acquire x1 Drawstring Golden Grease. Also at the bottom of the ramp, you can find double doors that can be opened which leads to a shortcut to the Main Gate Plaza Site of Grace. Go back up the ramp. As you go back up the ramp, you can find summon signs. For the red summon sign, you will be summoned by Needle Knight Leda to to assist her in defeating Hornsent. After defeating Hornsent, you will be sent back to your original location. You will also acquire the curved sword Falx along with the Hornsent Set armor. For the yellow sign, you will be assisting Hornsent in defeating Needle Knight Leda. Once you have defeated Leda, you will receive the Ash of War: Swift Slash and Leda's Rune. You can only do one of them, so be careful in choosing with which reward you want. By the stairs leading to the Fire Knight, you can loot a dead body for x1 Messmerfire Grease. Kill the patrolling Fire Knight and make sure to also loot the nearby bodies to acquire x8 Smithing Stone [2] and x8 Bone Dart. Proceed north and ride the lift to enter the Specimen Storehouse of the Shadow Keep.
Shadow Keep, Church District
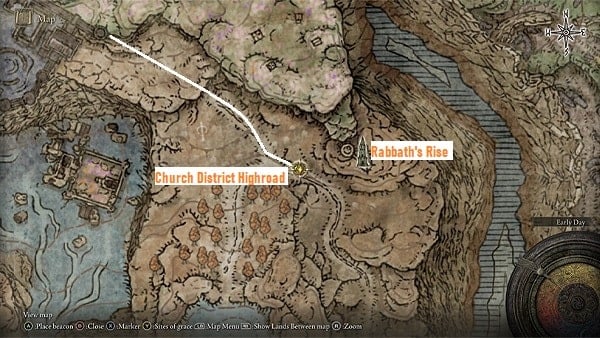
The main entrance of the Church District of the Shadow Keep is located on the east side of the Shadow Keep. The direct path to finding it is to travel from the Church District High Road Site of Grace [See Shadow of the Erdtree Map]. You'll know you'll arrive when you enter a large doorway and pass through a long hallway. At the end of the hallway is where you'll formally arrive at the church district and discover the Church District Entrance checkpoint [See Shadow of the Erdtree Map].
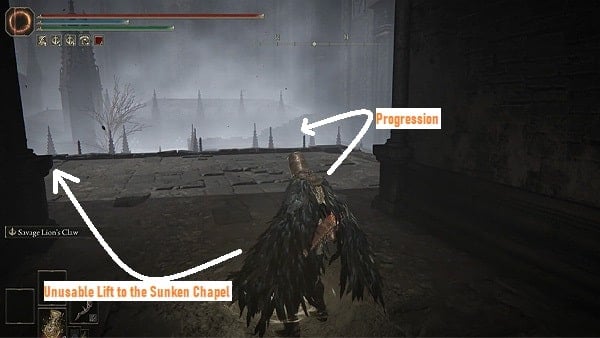
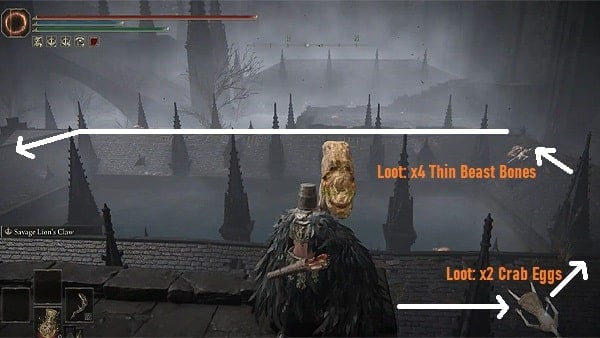
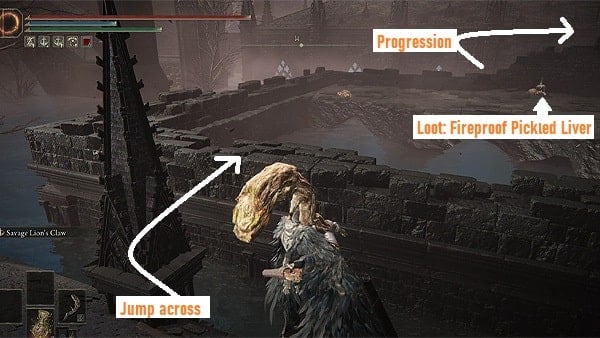
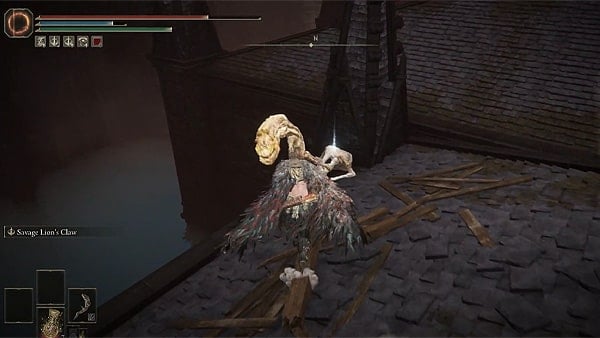
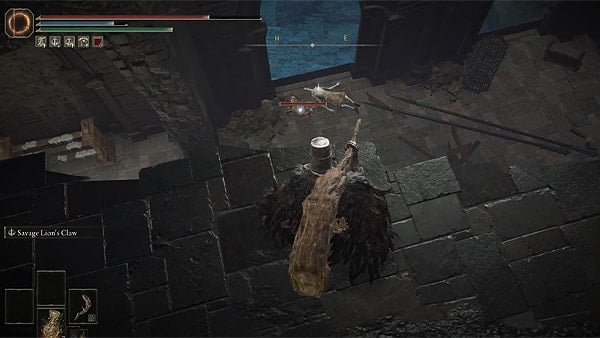
The Church District is a flooded area, and the goal is to traverse the area by using high ground and finding a mechanism that drains the water. Please take note that falling into the water will result in death. Ignore the path on the left since you won't be able to use the lift until you drain the flood. Instead, jump across (using a running jump) to land on the roof of a building, then check the right side to find a small Crab and a body next to it that can be looted to acquire x2 Crab Eggs. Continue walking around the roof to find another body that's being eaten by a Crab. Loot the body to obtain x4 Thin Beast Bones. Continue south and you'll find another body being eaten by a Crab, check the body to find x2 Strip of White Flesh.
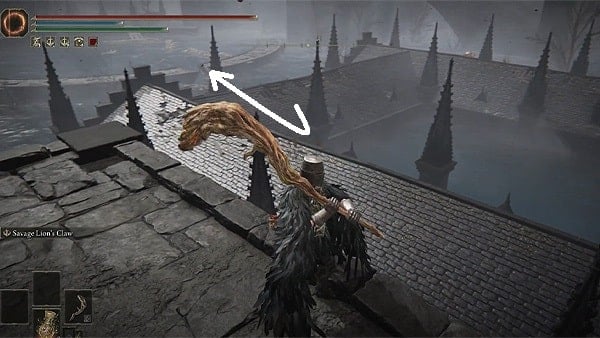
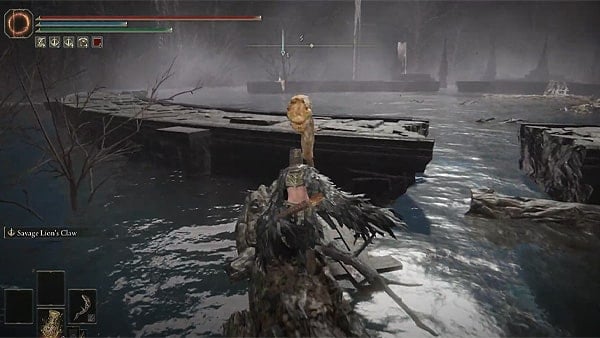
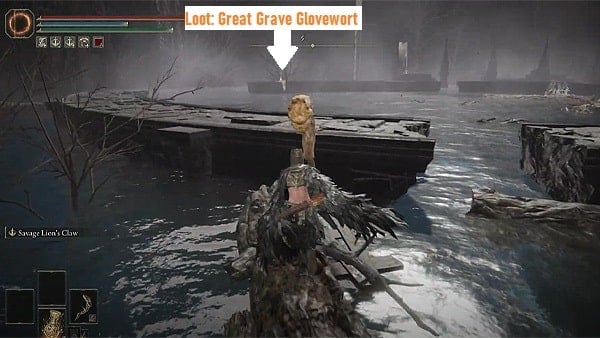
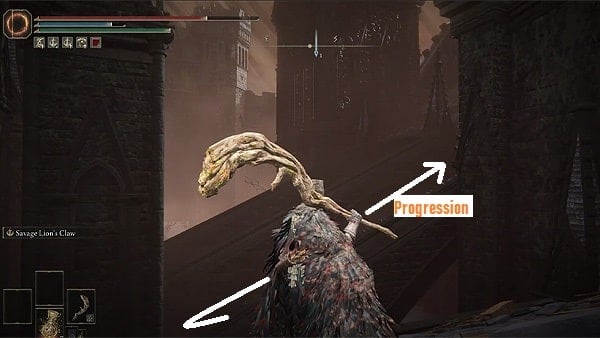
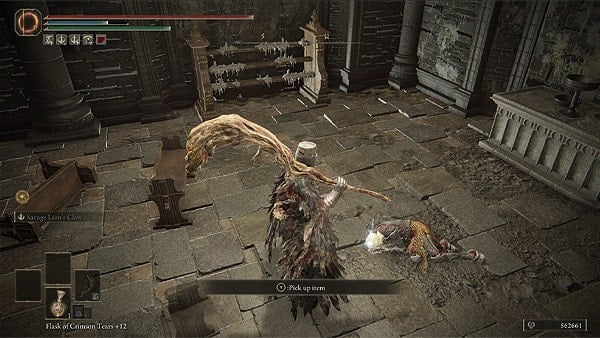
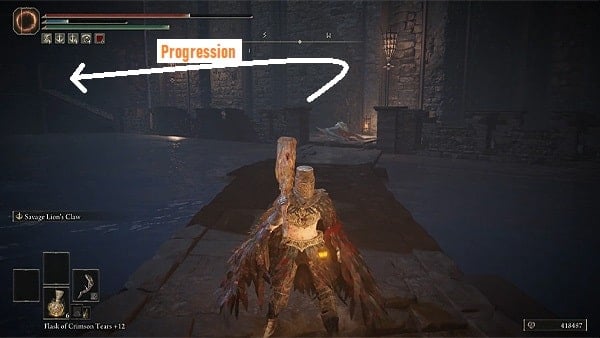
Next, jump on the floating tree trunk to reach a large broken-up circular platform. The path here is fairly straightforward, try to reach the opposite end by using the floating tree trunks and wooden platforms, and make sure to loot the body on the circular platform to find x1 Great Grave Glovewort. Retrace your steps to the rooftop of the building where you looted bodies and killed the small Crabs, and this time, head west where you can jump across to progress (see the second image above for reference).
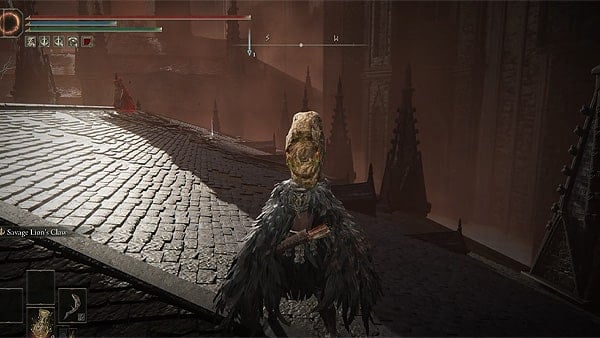
Once you're across, walk around the sides to reach the platform and loot the body that is guarded by Ignited Putrid Corpse enemies to obtain x1 Fireproof Pickled Liver. Jump back onto the sides of this building so you can walk to the top and proceed west where you'll have to do a running jump to safely land on top of another roof of a building. On the roof of the building, you should encounter a Fire Knight enemy walking around. Kill it and then loot the body that's near the spot where the Fire Knight enemy was walking to obtain x3 Ember of Messmer. Keep going straight until you reach a wall, then turn around to find a body sitting against one of the roof's structures. Loot it to acquire x1 Slumbering Egg [See Shadow of the Erdtree Map].
The Prayer Room: Fire Knight Queelign
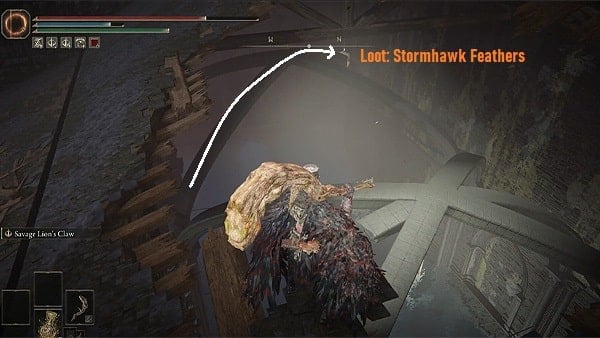
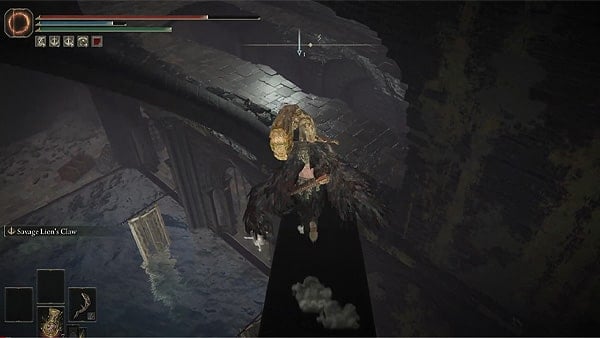
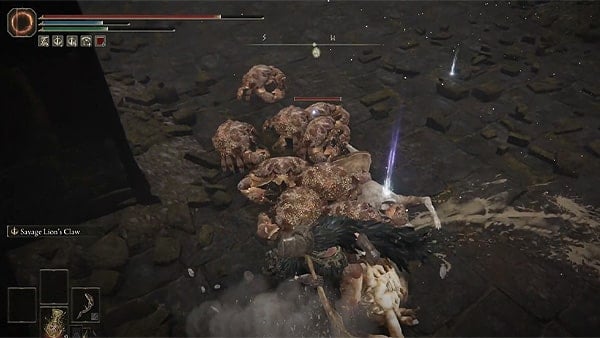
Next, face the east side of the compass and you should see a narrow ramp structure of one of the churches. Do a running jump to land on it safely, then walk to the top where you'll find two large openings or holes on the big roof. Slowly drop down onto the narrow structure that's on the right side, then you can walk down so you can safely run onto the other structure that is on the left so you can loot the body that holds x3 Stormhawk Feathers [See Shadow of the Erdtree Map]. Go back and then drop down onto the opening of a ceiling (see the third image above for reference).
Below, you should immediately see yet another corpse next to a small Crab. Loot the body to find x1 Lightningproof Pickled Liver. Go around, northeast, and you'll locate a locked door, this is the Prayer Room that requires the Prayer Room Key, a key that drops upon defeating the NPC Invader Fire Knight Queelign, encountered for the second time at the Church of the Crusade [See Shadow of the Erdtree Map]. If you have the key, you can unlock the door and find Fire Knight Queelign (NPC) in the flesh. Now, if you have an item called the Iris of Occultation, you can give it to the NPC, and after Queelign's dialogue, the NPC will drop a weapon you can loot. This weapon is Queelign's Greatsword. NOTE: If you give the Iris of Grace to Queelign, you'll receive the Spirit Ash "Fire Knight Queelign". The Iris of Occultation can be acquired in many ways, one way is by obtaining it as an item drop from defeating a Lesser Ulcerated Tree Spirit located in this area after you drain the flood.
The Flooded Church District: Draining the Flood

Exit the prayer room and proceed to the northwest doorway, but before proceeding further, be sure to enter the armory room on the left to find a body sitting against the wall. Loot the body to find x1 Rune of an Unsung Hero
. Enter the hallway and kill the first Fire Knight enemy that you see, on the left side of the hallway, loot the body resting against the wall to find x2 Furlcalling Finger Remedy, and continue straight down the hallway where you'll encounter another Fire Knight. The room ahead is not accessible at the moment and the doorway to the right where you'll notice Marika's statue that has a glowing item in its hand is unreachable, so exit through the first doorway on the left side of the hallway.
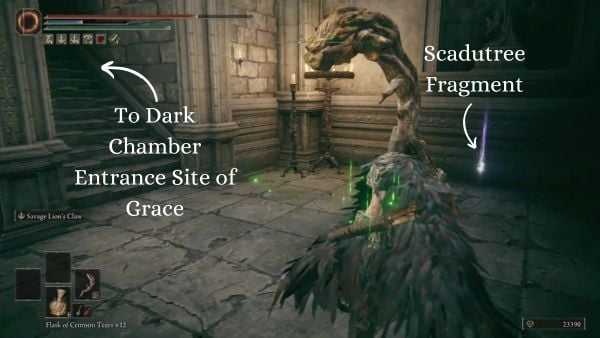
NOTE: In the same hallway, there are two doorways on the left, the far most or second doorway will lead you to a lift that takes you to the Specimen Storehouse section of the Shadow Keep. You're free to roam here, but we highly recommend returning to the Specimen Storehouse after clearing the Main Plaza and Church District of the Shadow Keep. What you can do is enter the Specimen Storehouse, and activate the nearby Site of Grace (Storehouse, Back Section) so you can just fast travel here after exploring the Church District.
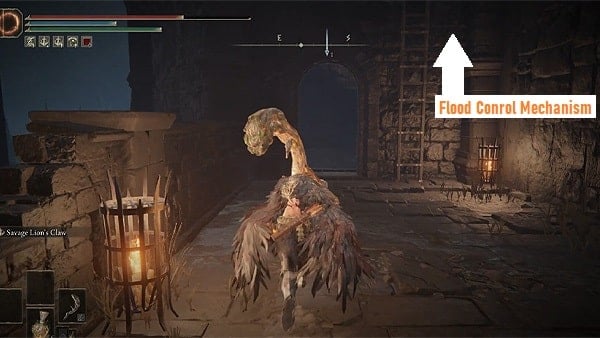
Cross the pathway where you'll encounter two Giant Bat enemies, then walk up to the short steps where you'll encounter another Giant Bat ahead. Jump over the gap, and kill the creature. Now before going straight, walk up a bit and you'll find a corner on the right. It's a dead end but there's a body that you can loot that's being protected by another Giant Bat hanging from the ceiling. Kill the enemy and loot the body to acquire x3 Hefty Beast Bone [See Shadow of the Erdtree Map]. Next, climb the ladder next to a doorway to find the mechanism that drains the water.
You can also return to the hallway to get the item sitting on the hand of Marika's statue. You can get the item by jumping on the hand, it may require a few tries as the platform that you need to stand on is quite narrow. Loot the item to acquire x1 Scadutree Fragment, then prepare to fight a group of Ignited Putrid Corpse as you jump down. Behind the same statue, you can find the Fire Knight's Seal weapon [See Shadow of the Erdtree Map]
Exploring the Sunken Chapel
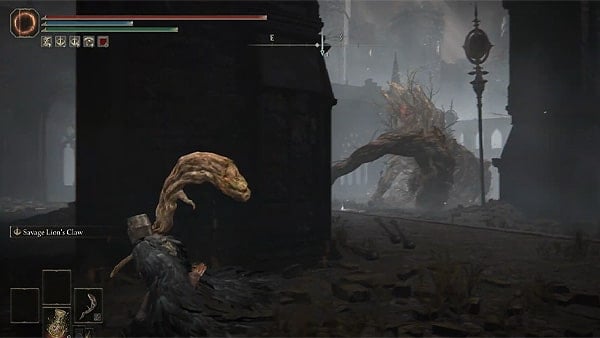
Kill the Lesser Ulcerated Tree Spirit by the Large Tree

For some clarity, we recommend that you start by fast-traveling to the Church District Entrance checkpoint [See Shadow of the Erdtree Map] since you can now use the lift near the Site of Grace. From the checkpoint, go left, use the lever to call the lift, then step on the center to ride it down. You'll now be able to explore the open area of the Sunken Chapel. At the center, you will see a large tree, only approach the tree if you're prepared to fight because a Lesser Ulcerated Tree Spirit will emerge beneath the ground. Killing it will drop the Mantle of Thorns, and resting against the tree is a corpse holding x1 Somber Smithing Stone [5].
Defeat the Second Lesser Ulcerated Tree Spirit
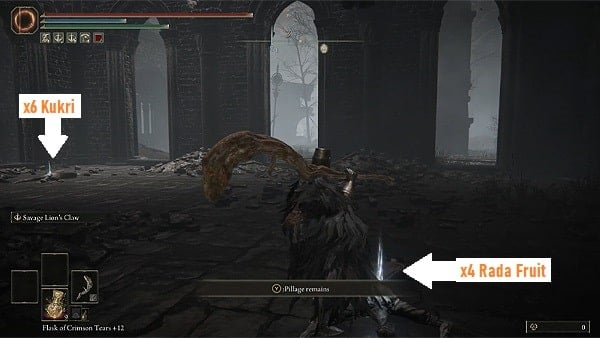
The second Lesser Ulcerated Tree Spirit is located around the east area of the sunken chapel (see the images above for reference). Defeating it will drop x1 Iris of Occultation which (if you don't have it yet) you can give to Fire Knight Queelign in the Prayer Room to obtain Queelign's Greatsword. Also in the east area, you can find open buildings. One building houses two bodies that you can loot to find x4 Rada Fruit and x6 Kukri [See Shadow of the Erdtree Map].
There is also building another where you'll find a pack of Crabs and Giant Crab enemies, one roaming around, and the other next to another body that you can loot to find x1 Shadow Realm Rune [5]. [See Shadow of the Erdtree Map]. If you continue to go around this area, you'll reach the west side where you'll find the Sunken Chapel Site of Grace [See Shadow of the Erdtree Map]
Find the Tree-Worship Site of Grace
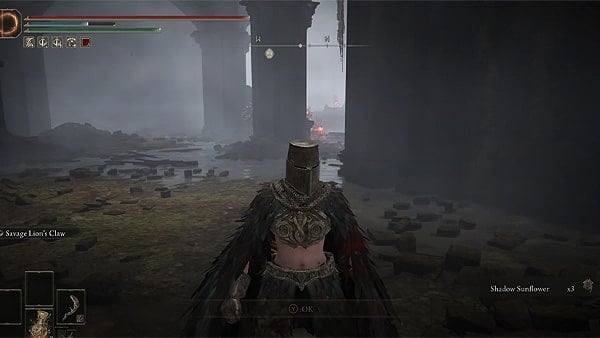
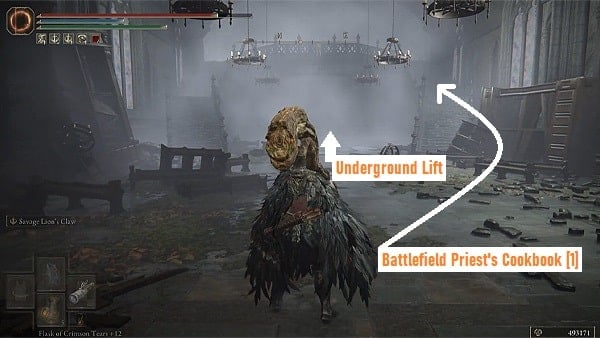
Head north towards the entrance of the main church then immediately turn left to find a corpse by a corner. Loot the body to find x3 Shadow Sunflower. Clear out the enemies then approach the small room that has Marika's statue (the same statue where you got the Scadutree Fragment and the Fire Knight's Seal weapon. Make a right and you'll enter a large room. Straight ahead, you'll see some stairs on both ends, walk up to the upper platform and investigate the railings to discover a body hanging on top of it.
Loot the body to obtain the Battlefield Priest's Cookbook [1], [See Shadow of the Erdtree Map]. Walk back down the stairs and check under the upper platform to find a door. Open that door and you'll find another lift that takes you underground. Ride it to find and activate the Tree-Worship Site of Grace — from here, (if you followed the tip earlier by activating the Storehouse, Back Section checkpoint in the Specimen Storehouse) you can fast travel to the Site of Grace to start exploring the Specimen Storehouse.
Shadow Keep: Specimen Storehouse
Storehouse, First Floor
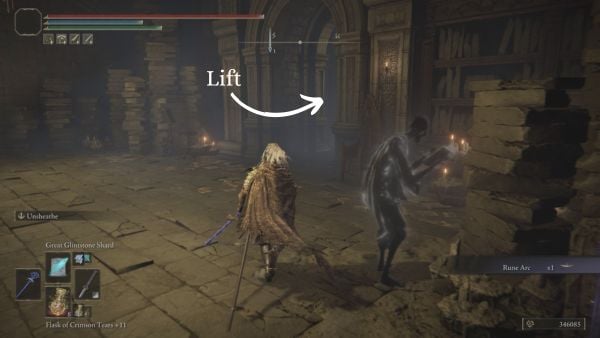
Northeast of the Site of Grace, you can loot a dead body for x1 Fireproof Pickled Liver. There will be a Shadow Undead tucked in the column behind you which will easily die in one hit. A Shadow Undead will be hiding behind the table, so you can get a jump on it as its back will be exposed to you. Head straight, and you will find a room on the western side near the Site of Grace. In this room, you will encounter Shadow Undead scattered around the room. You can loot x1 Rune Arc on a dead body near the entrance. Go past the archway on the western side, then ride the lift going down.

Finding the West Rampart Site of Grace (Detour)
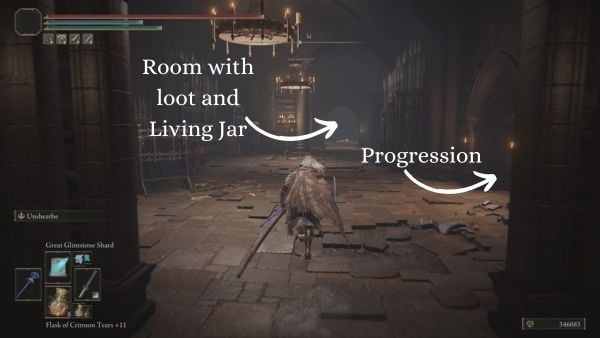
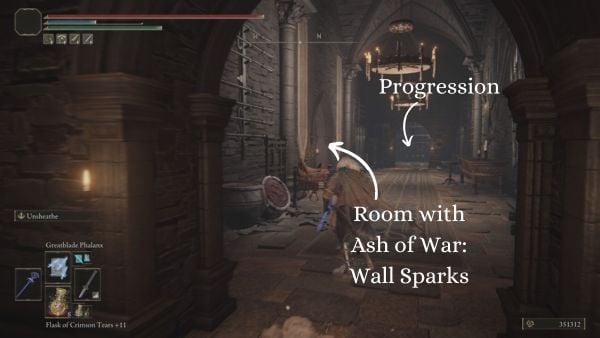
After arriving in the basement, explore the area. You'll find a dead body that you can loot for x1 Gold-Pickled Fowl Foot on the room at the end of the hallway. Be cautious as you are entering the room, as there is a Living Jar waiting for you to enter. After clearing the room, go past the doorway on the northern side of the room, just beside the lift area. You'll be in a hallway connecting two other rooms. The room on your left is a balcony that has another Living Jar waiting for you, and a dead body. Loot the dead body after killing the Living Jar for x1 Ash of War: Wall of Sparks. Exit the room, then head north to progress.
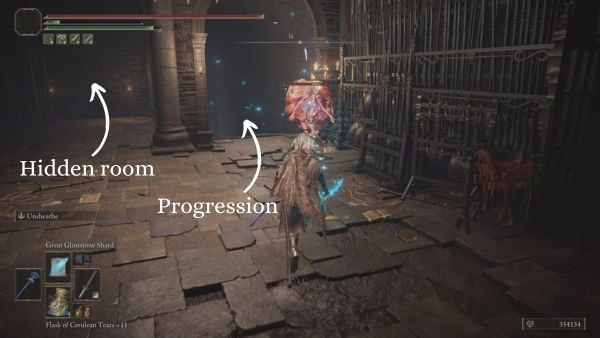
In the next room, there will be a Living Jar running up the stairs to approach you. At the end of the wall parallel to the stairs, you can hit it to reveal a hidden room. Loot the dead body in the hidden room for x1 Battlefield Priest's Cookbook [4]. After looting the hidden room, head down the stairs. You will be in an area filled with Living Jars. You can find x1 Innard Meat northwest hidden behind the jar that a Living Jar crawled out of.
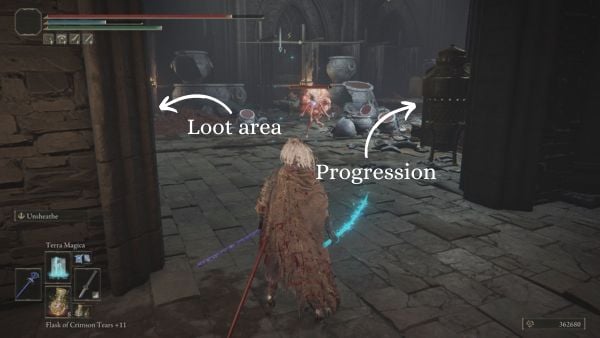
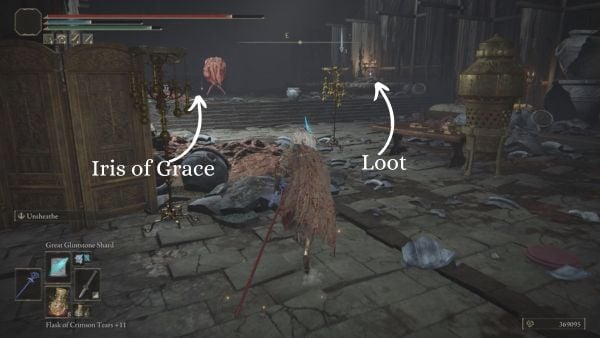
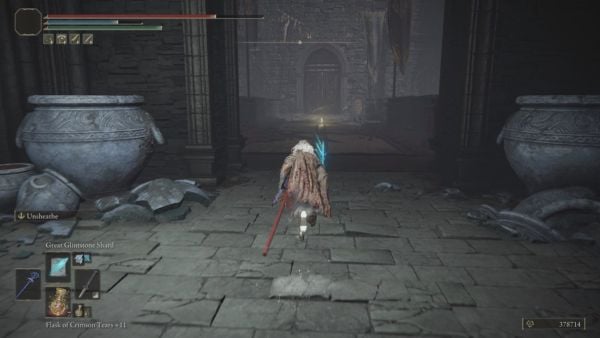
In the next room, you'll find hostile Living Jars of various sizes. On the eastern side of the room, you can pick up x1 Iris of Grace behind a Living Jar. A dead body lying on a bed will give you x1 Hefty Cracked Pot. Exit the room by the west doorway to progress. You will encounter another Living Jar right as you enter the room. After defeating the Living Jar, head down either stairs, which leads to the West Rampart Site of Grace [See Elden Ring Map]. Go back to the Storehouse, First Floor Site of Grace.
Exploring Storehouse, First Floor
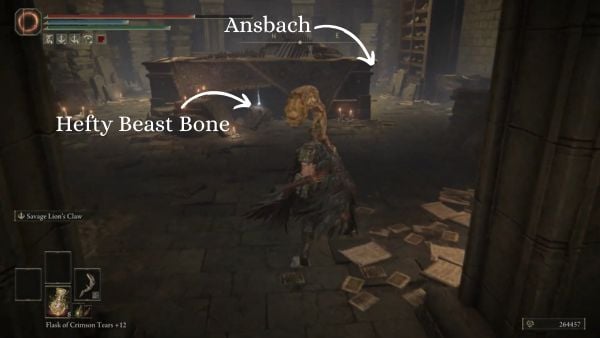
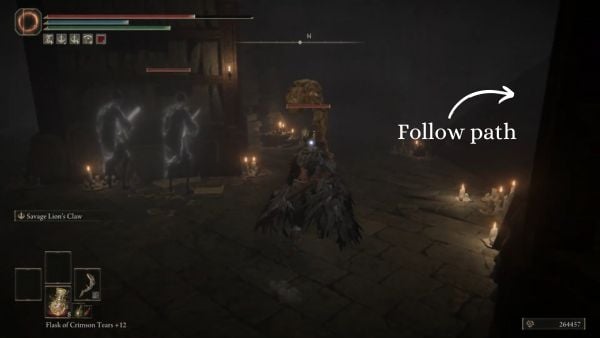
As you head north of the area, you will encounter numerous Shadow Undead in the area which you can easily dispose of as they usually die in one hit. As you progress through the area, you will have to deal with Shadow Undead while also picking up loot such as x1 Fire Coil. Go down the stairs on the northern side of the area, picking up x3 Hefty Beast Bone. In this room, Ansbach will be in the corner northeast of the room, reading scriptures. Head back out of the room, then keep going west. You'll encounter three Shadow Undead shortly. Head west past the Shadow Undead, and you will encounter a Fire Knight patrolling the area. By the southern wall, you'll find a dead body sitting with x1 Smithing Stone [6]. Go back to the stairs, then head up after clearing the area.
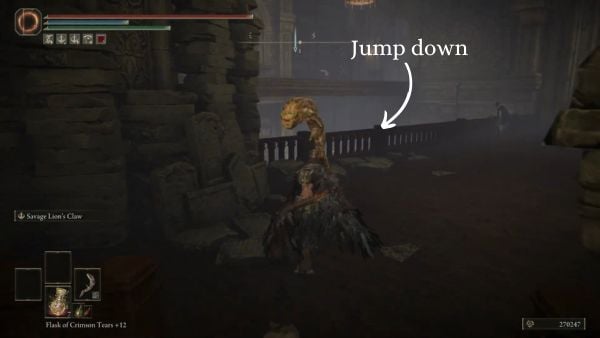
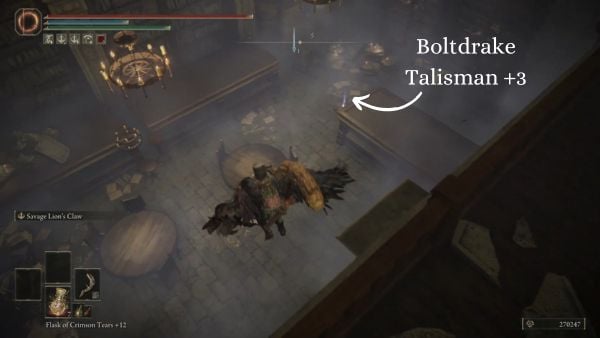
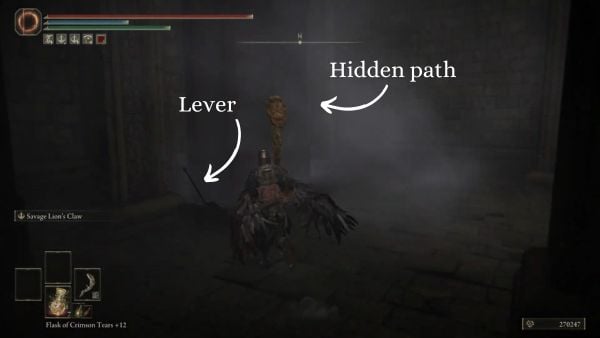
When you arrive at the top of the stairs, go to the right and keep following the path until you see a Shadow Undead looking over the railing on the east side. Behind the militiaman, you can pickup x1 Smithing Stone [5] on the railing opposite of it. Jump over the railing that the militiaman is looking over, and you can loot x1 Boltdrake Talisman +3 from a dead body in the area. On the north side of the room, pull the lever to reveal a path behind the bookcase. Go through the path, and you can pick up x2 Ember of Messmer from the body along the way. This path will lead you back to the central library.
Head back to the stairs that you went up to, then go left instead. You will encounter three Shadow Undead. You can loot x4 Black Pyrefly on the western part of the room. After getting the loot, you can head up the stairs on the north. There will be a Fire Knight under it, but you won't attract its aggro if you go up the stairs. You can pick up x4 Beast Horn on the area under the stairs where the Fire Knight is at. Once you head up the stairs, you can find another Fire Knight by the ledge, southwest of you. You can ignore it first and clear the area. At the southern section of the area, you can deal with the four Shadow Undead by the shelves, then pick up x1 Blessed Bone Shard. You can then take the Fire Knight in combat.
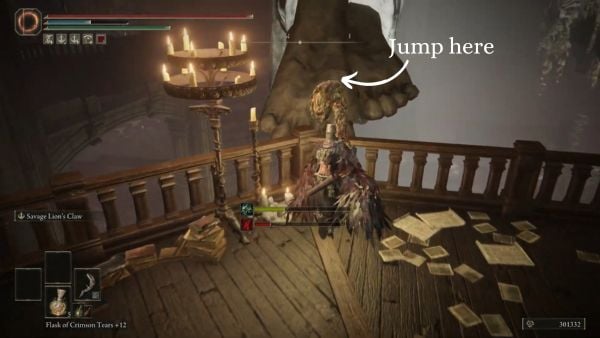
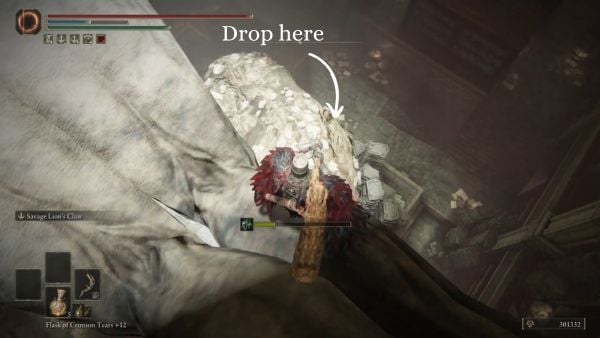
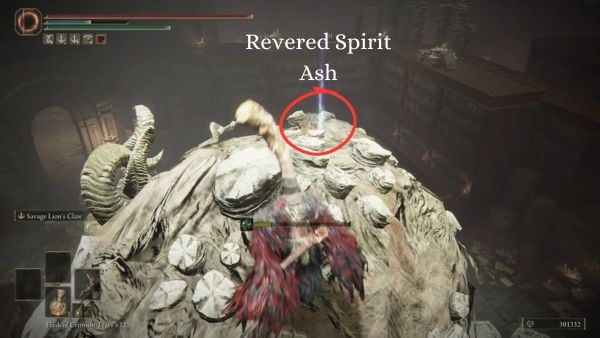
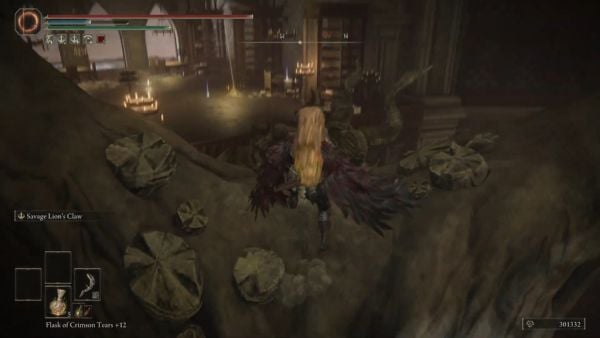
Once you have dealt with the Fire Knight, follow the southern ledge. Along the way, you can pick up x1 Furlcalling Finger Remedy. There will be Shadow Undead in the area, so be prepared to face them in combat. After defeating the Shadow Undead, you can climb on to the foot of a hanging statue. You can drop on top of another statue with x1 Revered Spirit Ash that you can pick up.
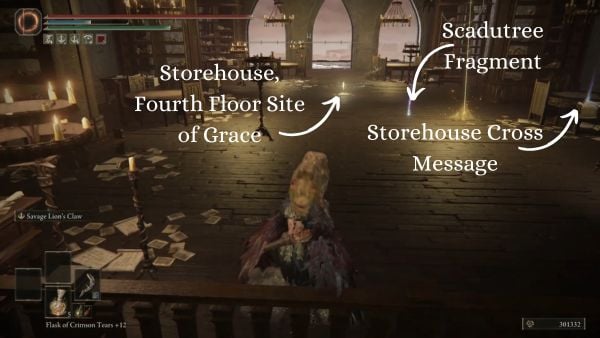
Make your way back to the statue, then look southeast. You'll find an area than you can cross to with a beam by jumping on the railing. You will find x1 Dueling Shield on a dead body sitting by the southern wall. Go back to the statue, then explore the area by following the path southwest of it. You'll encounter numerous enemies in this area, such as militiamen. Inside the small archway room, you can find x2 Lump of Flesh on a dead body. Go inside the room, and you'll come across a Fire Knight. After dealing with the Fire Knight, you can loot the dead body by the railing to get x4 Beast Horn. Go back to the statue crossing this time, and you'll find yourself in a new area. You can loot x1 Scadutree Fragment here and x1 Storehouse Cross Message. You can activate the Storehouse, Fourth Floor Site of Grace [See Elden Ring Map] in this area.
Storehouse, Fourth Floor
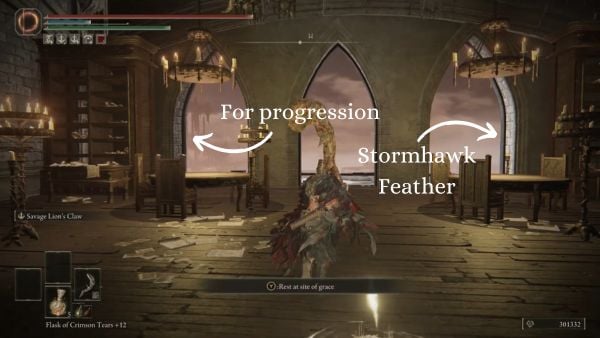
After activating the Storehouse Fourth Floor Site of Grace, there will be a body containing x3 Stormhawk Feather on the right as you head out through the arches. To continue, turn left, following the path going south. Keep following the path until you encounter a Fire Knight patrolling by the stairs. Right before the stairs leading up to the Fire Knight, you can loot x4 Black Pyrefly on the right side of it.
After defeating the Fire Knight, continue traversing the path until you see two giant bats. Deal with the giant bats, picking up x3 Ember of Messmer where the giant bats were, then enter the room on the left.

In the room, if you go left, defeat the Shadow Undead in the area. After that, you can loot a body on the western side sitting on the wall, which will contain x2 Smithing Stone [6]. If you turn right, you will be in the library again, although at a different level. Clear the area of enemies, mostly consisting of Shadow Undead. You will come across a body by a lectern, which contains x2 Fire Coil when you loot it. Eventually, you will be facing a Fire Knight. After defeating the Fire Knight, you can loot a nearby body with x3 Smithing Stone [7]. Keep following the path, clearing hostiles as you come across them.
Repositioning Specimens
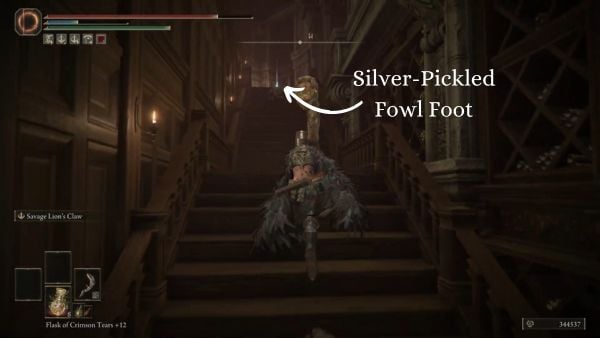
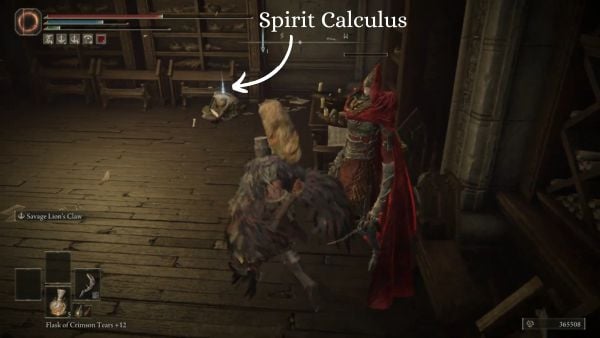
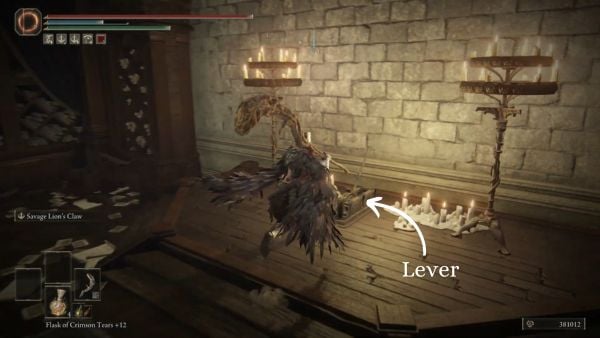
Climb up the stairs heading west. You can pick up x1 Silver-Pickled Fowl Foot on a body near the top of the stairs. On this level, you will be fighting Shadow Undead and Fire Knights. On the southwestern-most part of the level, there will be a body containing x1 Spirit Calculus, nearby a Fire Knight that you fought. If you want to clear the whole floor, you can head east past the set of stairs going up. There will be a passageway to an area on the eastern side containing Shadow Undead and loot. You can pick up x5 Ember of Messmer and x1 Shadow Realm Rune [5]. There will also be a lever at the southern wall. When you pull the lever, the structure in the middle will start to go up, bringing along the specimens that are hanging onto it.
After clearing the current floor, you can head up the highest level of Storehouse. You can loot a body on the left side of the top of the stairs containing x2 Sliver of Meat. In this floor, you will activate the Storehouse, Seventh Floor Site of Grace [See Elden Ring Map]. Redmane Freyja will be present near the Site of Grace, who is at the southwest side of the room by a stone tablet. Exhaust all dialogue options with Redmane Freyja.

Storehouse, Seventh Floor (and Backtracking)
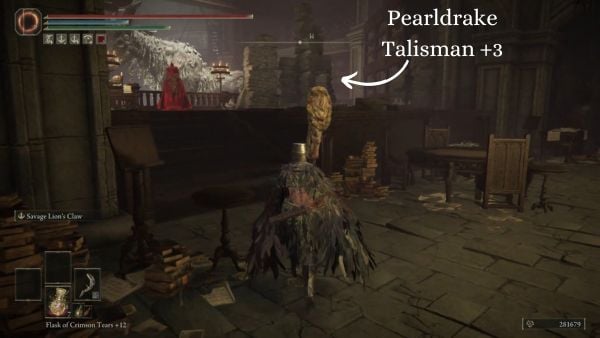
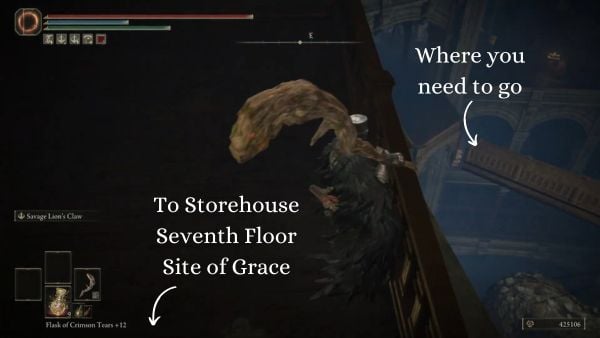
After activating the Storehouse, Seventh Floor Site of Grace, head to the eastern section of the area. Jump up the ledge, then onto the hanging statue, and you can loot x1 Revered Spirit Ash. Backtrack your way outside, then take the stairs down to go to an area that has Shadow Undead. In this room, you can get loot such as a Secret Rite Scroll lying on a desk (NOTE: only pick it up after talking to Freyja at the Seventh Floor Site of Grace) and a Smithing Stone [6]. Earlier, you talked to Redmane Freyja at the Storehouse, Seventh Floor Site of Grace. Talk to Ansbach, give him the Secret Rite Scroll, then teleport to the First Floor Site of Grace. Return to Ansbach, then he will then give you x1 Letter for Freyja. If you give the letter to Redmane Freyja, she will reward you with the Golden Lion Shield. You can also return to the ledge on the fourth floor where you found a Fire Knight. Go to the western section of it, and you can find the Pearldrake Talisman +3.

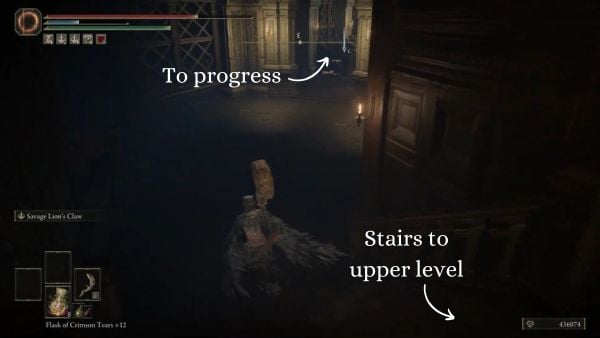
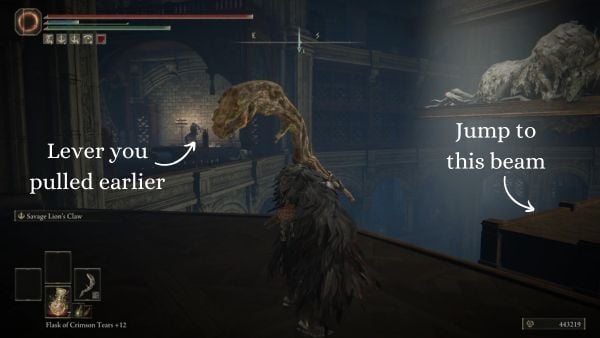
To progress, you need to go to a beam that has moved up because you pulled the lever earlier. If you look over the railing on the bridge outside the Site of Grace, you can see which beam you have to jump on. Head there by going down one level, then going to the room across the stairs. Clear the Shadow Undead you encounter along the way, then jump on the beam.
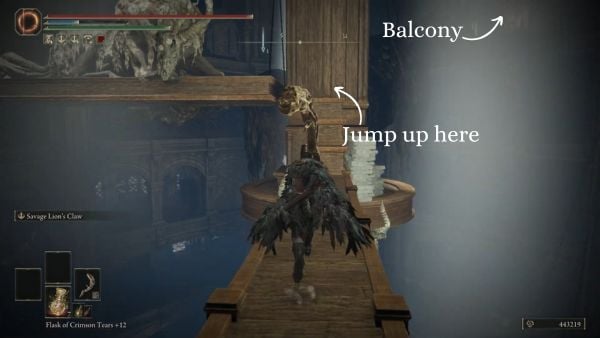
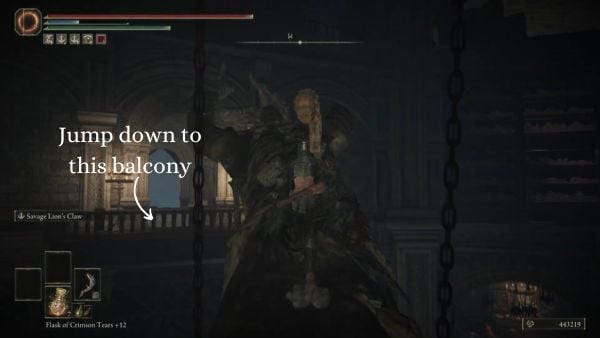
Head up the structure and its statues until you see a balcony by the head of the highest statue. The room will have three Shadow Undead and x1 Ember of Messmer that you can pick up below the southwest shelf.
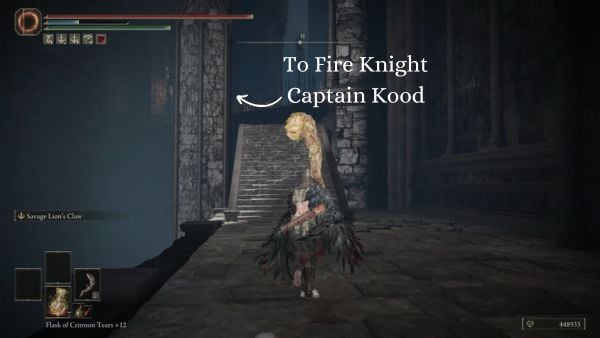
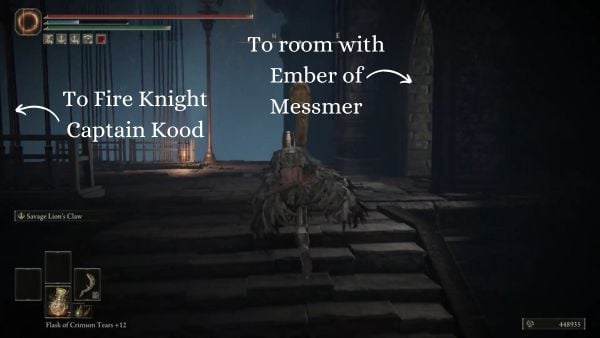
After clearing the room, head outside. Follow the path on the right side (going north), going up the set of stairs. Three Shadow Undead will be in the room on your right, along with a body that you can loot for x3 Ember of Messmer. At the end of the bridge across the room, Fire Knight Captain Kood will be guarding a door. This enemy will be a bit different from the ones you encountered earlier, as its move set will be more aggressive than the normal Fire Knight.
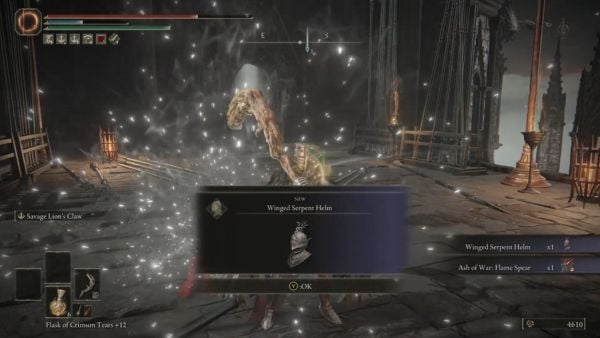
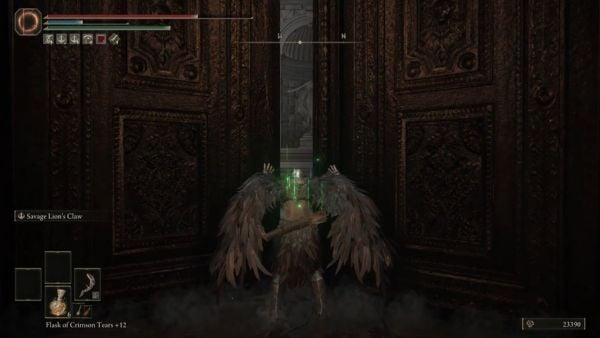
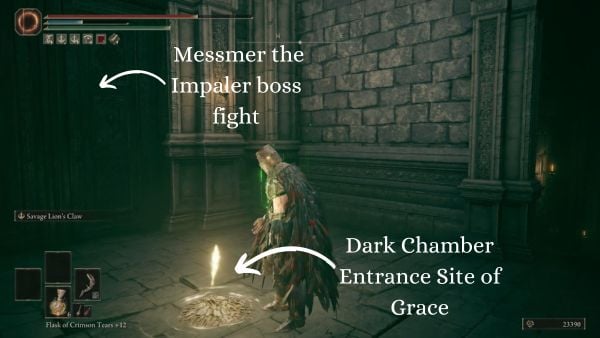
After defeating the Fire Knight captain, x1 Winged Serpent Helm and x1 Ash of War: Flame Spear will be dropped. Open the door to proceed further. Head up the stairs and you will discover the Dark Chamber Entrance Site of Grace [See Elden Ring Map].
Storehouse, Back Section
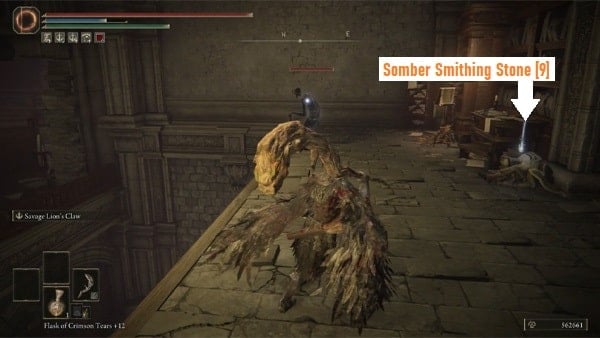
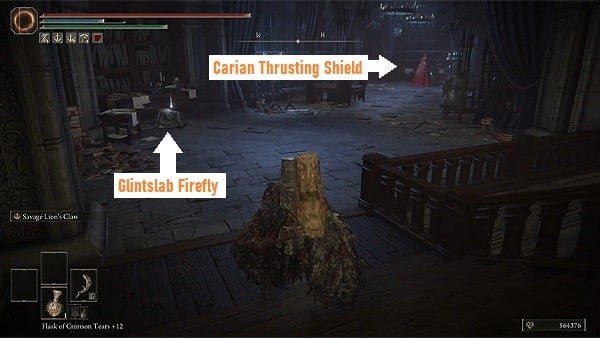
Upon entering, look to the right immediately to see a noble corpse against the wall. Loot it to obtain x1 Somber Smithing Stone [9]. Proceed to the left side, through the doorway, where you'll find the Storehouse, Back Section checkpoint. Continue moving straight until you walk past a ladder. Do not climb the ladder first, instead, keep going straight to find some items. First, look to your left to see, another noble corpse sitting against a desk, loot it to obtain x3 Glintslab Firefly. Then at the end, you'll see a Fire Knight and three Shadow Undead standing next to another corpse, kill the enemies then loot the body to acquire x1 Carian Thrusting Shield.
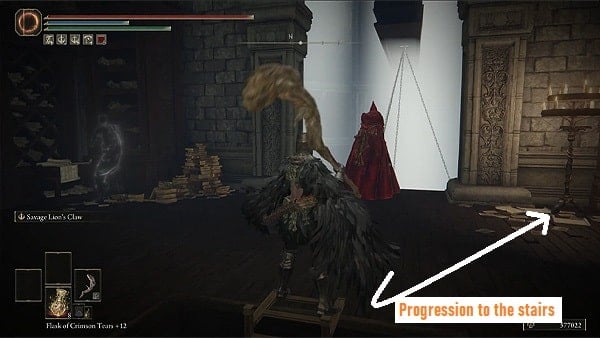
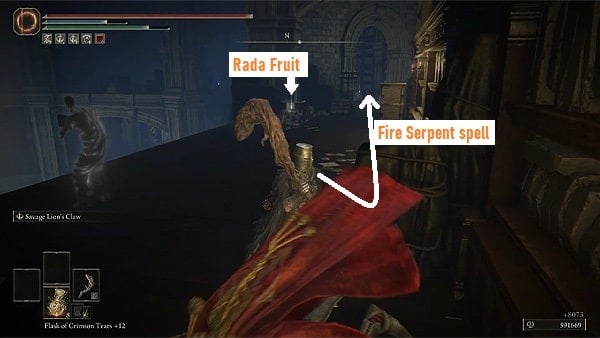
Go back and climb the ladder to the top where you'll encounter another Fire Knight and two Shadow Undead reading a book. You can sneak behind the enemies to backstab them. Continue to the right side and walk carefully up the stairs to avoid aggravating the Fire Knight, roaming the floor above. At the top of the stairs, turn to the corner on the right to find a corpse to loot x3 Fire Coil. Kill the enemies on this floor, then continue moving straight. You'll discover another noble corpse sitting against a small table, loot it to obtain x4 Rada Fruit, and go straight towards the balcony to find another noble corpse that holds the Fire Serpent incantation. Go back, and look behind the bookcase to find an opening on the wall.
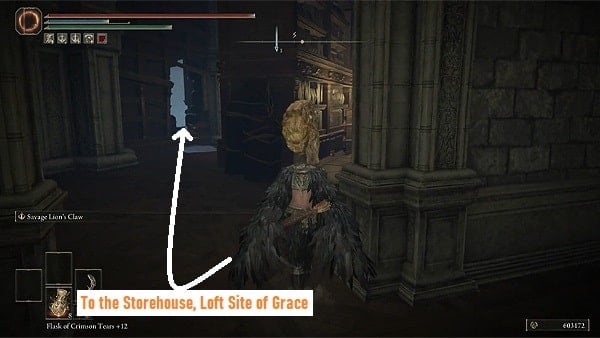
Through the opening, turn right and you'll find another noble corpse sitting by the edge of the narrow scaffolding. Loot the body to acquire x6 Shadow Sunflower. Continue going up, and by the ramp, you should find another noble corpse that you can loot to obtain x1 Blessed Bone Shard. Continue going up and you'll arrive at the loft section of the storehouse. Activate the Storehouse, Loft Site of Grace before you proceed to explore.
Storehouse, Loft
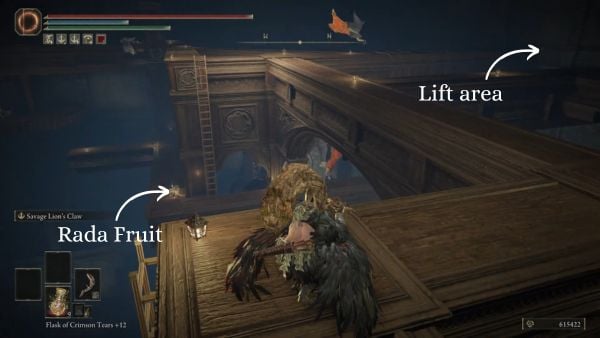
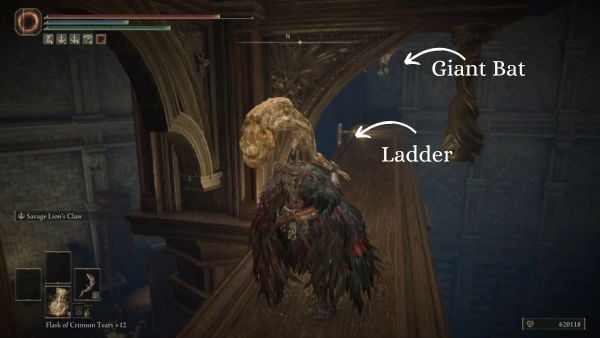
Once you have activated the Storehouse, Loft Site of Grace, proceed to the lift north of the Site of Grace to go up. You will end up on beams above the Specimen Storehouse. This level will be filled with Giant Bats roaming the area. The only path you can follow will be the one going west, so keep following it. There will be a lot of ways you can walk on the beams, but the only way you can progress through this area is through the ladder. Pick up x7 Thin Beast Bones from a body at the edge of a beam, then go up the ladder that you walk past through just before picking up the loot.

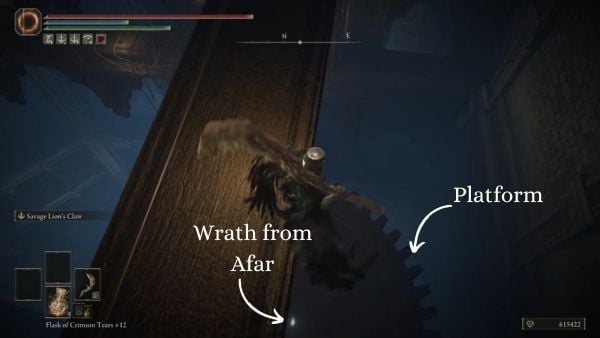
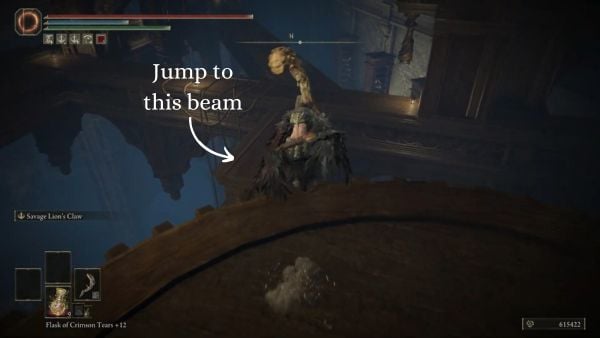
After climbing the ladder, you will arrive in a new level. If you go to the southeast section of the level, you can find x4 Smithing Stone [7] from a dead body. Following the path from the south side will lead you to a pillar blocking your way. If you look down, you can find a platform that you can jump off of, and it will contain the Wrath from Afar incantation. Next, jump on the beam to the north, then climb up the nearby ladder to the west of where you landed. You will end up on the beam that a pillar was blocking earlier. You can aggro the bats here, so be careful when attacking as you might fall off of the beams.
You can find a lift in the middle of the beam going west with an item above it, along with a Fire Knight on a nearby beam which will be hostile if you approach the lift.

If you use the lift to go down, you will end up in an area with a Fire Knight facing the other way around. You can easily dispose of the Fire Knight by backstabbing it and staggering it continuously. After dealing with the Fire Knight, you can pick up x1 Rune of an Unsung Hero on the southwestern corner of the area. The area will be clear, and you can head back up the beams using the lift. If you want to get the item above, you can ride the lift, then exit it before going down. A second lift will arrive just beside it, then do it again. Jump on the roof of the first lift just as it is arriving, and you will be able to reach the item, which is a Fire Knight Hilde summon.
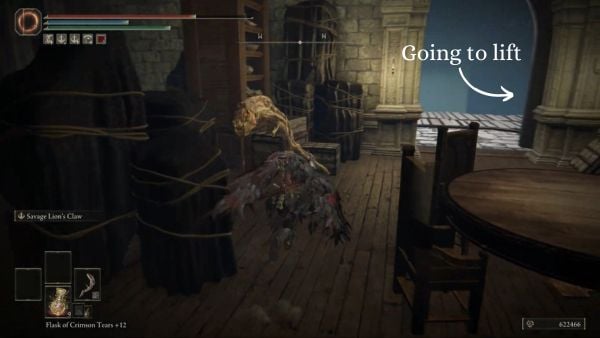
If you walk across the beam going west, you can climb down a ladder. On your left, just around the corner, you can loot a body for x4 Rada Fruit. Directly northeast of the ladder you descended on, you will find another ladder you can use to descend. You will reach an area similar to the Site of Grace.
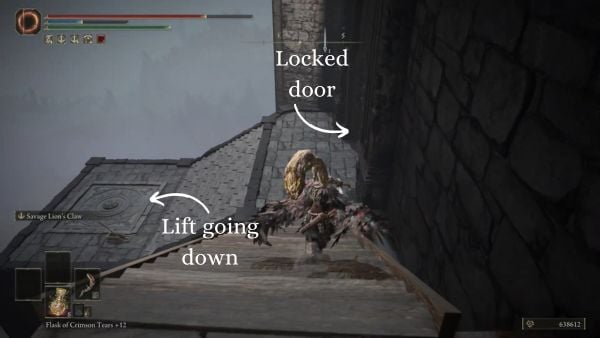
If you head outside the archway on the northwestern side of the area, you will find a lift directly on your right. Take the lift going down, then keep following the scaffolding until you reach an area with a door and a lift. You cannot open the door yet, so use the lift nearby to go down. The lift will then lead you to the Shadow Keep, Back Gate Site of Grace [See Elden Ring Map].
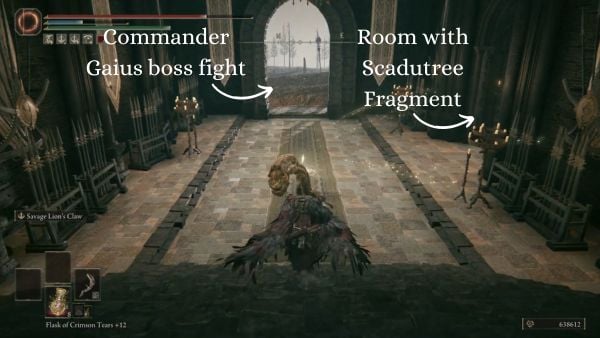
This area leads you into two areas. There is a room on the east, just beside the Site of Grace. In this room, you can pick up x1 Scadutree Fragment. After that, you will see an archway heading outside on the north-northeast side of the room. This is a boss area in which you will be fighting Commander Gaius.
The Dark Chamber
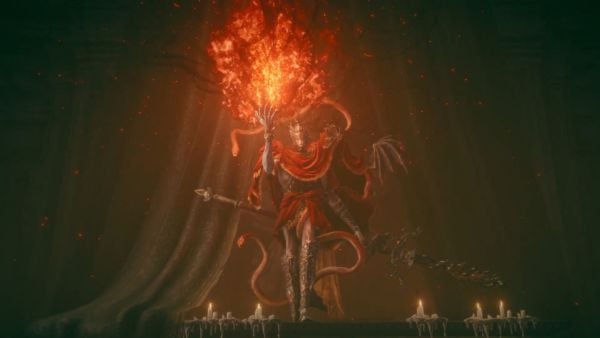
Near the Dark Chamber Entrance Site of Grace will be a door. Opening it will lead you to the boss, who is then revealed to be Messmer the Impaler. Messmer the Impaler uses a spear as a weapon, so be careful of the range of his attacks. His spear and attacks will be imbued with fire, so having fire resistance would be a good idea for this boss fight. For a more in-depth guide on how to defeat Messmer the Impaler, you can go to this page for more information.
When you defeat Messmer the Impaler, you will receive Messmer's Kindling along with the Remembrance of the Impaler. Messmer's Kindling will be used to gain access to a legacy dungeon, Enir-Ilim [See Elden Ring Map].
Shadow Keep Map
Main Gate Plaza
![shadow_keep_main_entrance2_main_gate_plaza_map_elden_ring_sote_wiki_guide_300px shadow keep main entrance2a main gate plaza map elden ring sote wiki guide 300px[1]](/file/Elden-Ring/shadow_keep_main_entrance2a_main_gate_plaza_map_elden_ring_sote_wiki_guide_300px[1].jpg)
Main Entrance - Main Gate Plaza 
Main Entrance - Yard 
Main Entrance - Bridge
Church District

Church District - Scadutree Base 
Church District - "Underwater" Level 
Church District - Surface Lower Level

Church District - Surface Upper Level 
Church District - Roof
West Rampart

West Ramprt - Lower Floor 
West Rampart - Upper Floor
Specimen Storehouse

Specimen Storehouse - First Floor 
Specimen Storehouse - Second Floor 
Specimen Storehouse - Third Floor 
Specimen Storehouse - Fourth Floor

Specimen Storehouse - Fifth Floor 
Specimen Storehouse - Sixth Floor 
Specimen Storehouse - Seventh Floor 
Specimen Storehouse - Dark Chamber
Back Gate

Lower Back Section 
Upper Back Section 
Loft 
East Balcony

Back Gate Ground Level 
Back Gate Upper Level 
North Balcony

Beams, Lower Level 
Beams, Upper Level
Shadow Keep Videos
Shadow Keep Walkthrough Video Guide
Speed Run Walkthrough
Shadow Keep Main Entrance
When you enter the main entrance of the Shadow Keep, ride the lift going up. Activate the Shadow Keep Main Gate Site of Grace, then make preparations for a boss fight. As soon as you enter the main plaza, you will be fighting the Golden Hippopotamus. After defeating the Golden Hippopotamus, you will obtain the Aspects of the Crucible: Thorns incantation, along with x2 Scadutree Fragment. Activate the Main Gate Plaza Site of Grace in this room.
Main Plaza to Specimen Storehouse
Proceed to the next section by going to the passageway left of the Main Gate Plaza Site of Grace, following the path going up. You will encounter Messmer Soldiers while traversing this path. Pick up loot that you can obtain along the way, such as x1 Festive Grease, and x6 Smithing Stone. As you go up a set of stairs, you will see a Black Knight wielding a twinblade. Enter the room, then clear it so that you can explore it. In this room, you can find the dagger Main-gauche from a dead body. In the room, you can find a window that you can drop down to so you can get to the courtyard. By the golden tree in the courtyard, you can pick up the Talisman of Lord's Bestowal just beside it. You can also loot x2 Smithing Stone [8] from a nearby room on the corner that has a scaffolding. Backtrack your way to the stairs going up, then keep following it. You can loot another room for x4 Smithing Stone [1] while progressing. You will then end up in a dining room filled with Messmer Soldiers and Black Knights.
Clear the room of the enemies, then loot the area for x1 Golden Vow and x1 Shadow Realm Rune [6]. Head out the room, and you will be on top of a rampart. On the left side, you can pick up x1 Holyproof Pickled Liver from a dead body by the dead-end. Follow the path on the right, killing the Vulgar Militiamen and any enemies that you encounter. You will see a ramp going down, which contains a door that you can open as a shortcut from the main plaza. Climb up the ramp, then explore the area filled with boats to your right. You can pick up x1 Rada Fruit, x1 Silver Pickled Fowl Foot, and x3 Smithing Stone [8] in this area. By the remains that you obtained the Silver Pickled Fowl Foot from, you can climb down a ladder leading you to a waterfall area. Follow the path, which will lead you to a dead body containing x1 Somber Smithing Stone [8]. Go back to the waterfall, then head inside the room hidden by the waterfall. At the end of the passageway, you'll obtain the Domain of Dragons Painting. Head back out, backtrack your way to the ramparts, then head up the stairs. By the ramp going down to the Main Gate Plaza Site of Grace, you can find summon signs to fight Needle Knight Leda (yellow) or Hornsent (red). When you defeat Hornsent, you will receive the Falx and Hornsent Set. Defeating Needle Knight Leda will give you the Ash of War: Swift Slash and Leda's Rune. After defeating Hornsent or Needle Knight Leda, head up the stairs. You will encounter a Fire Knight patrolling and blocking a passageway. After defeating the Fire Knight (or running from it), go inside the room then ride the lift going up.
To West Rampart
After riding the lift, you will then end up in the Specimen Storehouse. The Storehouse, First Floor Site of Grace can be activated in this area. As you explore the first floor, you can find a room on the left near the Site of Grace which leads to another lift going down.
This section of the map is filled with Living Jar enemies, so be careful in exploring this area. As you arrive at the bottom, you will immediately find loot in the other room. Grab the loot, which will be x1 Gold-Pickled Fowl Foot. Defeat the Living Jar in the room, then head back until you find another hallway on the left side. In this hallway, you can pick up the Ash of War: Wall Sparks from a dead body hanging on the railings of the balcony.
Continue heading down the path, and you'll find a Living Jar sprinting towards you from the stairs. After defeating the Living Jar, you can find a room hidden by a section parallel to the stairs, which contains the Battlefield Priest's Cookbook [4].
After looting the hidden room, go down the stairs the Living Jar was sprinting from, and you will end up in an area filled with Living Jars.You can loot the Iris of Grace in this area, which is an item needed for later. Head down the room directly opposite of the Iris of Grace, then head down the stairs to find the West Rampart Site of Grace, which is one of many entrances to the Shadow Keep. You may then return to the Storehouse, First Floor Site of Grace.
Storehouse, First Floor
Keep following the path going north until you find a room with x3 Hefty Beast Bone. Ansbach will be in the northeastern corner of the room. Talk to him and exhaust all his dialogues for later. Head out of the room, then keep going west until you see a staircase going up. There will be multiple Shadow Undead and a Fire Knight near the area. You can loot x1 Smithing Stone [6] from the section that the Fire Knight is patrolling in. Head up the stairs then go right until you see a Shadow Undead looking over a railing on the east side. Before jumping to the room, pick up a Smithing Stone [5] on the railing opposite to the Shadow Undead. Jump down to the room to get the Boltdrake Talisman +3. In this room, you can pull the lever to open a hidden path leading you back to the central library. Once the path opens, you can pick up x2 Ember of Messmer right by the opened path. Backtrack your way to the second level, then go left this time. Pick up the x4 Black Pyrefly on the western part of the room, then go up the stairs nearby.
You will encounter numerous Shadow Undead in this area and a couple of Fire Knights. After getting the talisman, follow the ledge going south. You can pick up a Furlcalling Finger Remedy along the way. Numerous Shadow Undead will be in the area. When you get to a specimen that you can jump on its foot, look on the other side of the railing to find an area that contains the Dueling Shield south of it. Return to the area with the hanging specimen, then follow the path going to another room. In this room, there will be a Fire Knight alongside Shadow Undead enemies. After clearing the room of enemies, you can get x2 Lump of Flesh and x4 Beast Horn here. Go back to the hanging specimen, then jump on its feet. You can drop down to a structure to obtain a Revered Spirit Ash.
Storehouse, Fourth Floor
Climb back up to the specimen, then cross it to an area in which you can activate the Fourth Floor Site of Grace. In the Site of Grace area, you can pick up a Scadutree Fragment and a Storehouse Cross Message. Head outside, and you can loot x3 Stormhawk Feather immediately on your right after heading out. Follow the path going left until you encounter a Fire Knight. Before the stairs where the Fire Knight is at, there's x4 Black Pyrefly on the right side of the stairs. After defeating the Fire Knight, keep following the path until you encounter two giant bats. Afterwards, you can progress by entering the room near where you fought the giant bats.
In this room, you'll encounter numerous Shadow Undead and a couple of Fire Knights. Climb up a staircase heading west, in which you'll find x1 Silver-Pickled Fowl Foot on a dead body at the top of the stairs. In this level, you'll find a room that has a lever that you can pull to move the structure inside the specimen storehouse up, giving you access to its final level. Pull it, then in the same room that you pullled it, you can jump onto a beam that leads to progression. Do not go there first, as you can explore the area to find the Storehouse, Seventh Floor Site of Grace, which is found after you go up another set of stairs near where you went up.
Storehouse, Seventh Floor
After discovering the Storehouse, Seventh Floor Site of Grace, you can find Redmane Freyja nearby. Talk to her, then backtrack your way to a staircase going down. In this room, you can pick up the Secret Rite Scroll (make sure to talk to Freyja first before picking this up) along with a Smithing Stone [6]. Give the Secret Rite Scroll to Ansbach back on the first floor, then teleport to the first floor Site of Grace. Return to Ansbach, and he will give you the Letter for Freyja. Go back to Redmane Freyja, then give her the letter. You will receive the Golden Lion Shield.
After giving the letter to Redmane Freyja, you can head down the stairs near the Site of Grace, then head straight to go to the lever room. Jump on the beam to traverse the structure, going up until you find a balcony that you can jump off to. After jumping to the balcony, clear the Shadow Undead as you go forward. Follow the stairs going up, and you'll end up in a bridge with a Fire Knight guarding a door, and a room opposite of it. If you choose to clear the room, you can find x3 Ember of Messmer here. The only way to progress is to fight the Fire Knight captain blocking the door. Defeat the Fire Knight Captain, and you will receive x1 Winged Serpent Helm and the Ash of War: Flame Spear.
Open the door to progress. Immediately after opening it, you'll find a Scadutree Fragment. Head up the stairs, then you can discover the Dark Chamber Entrance Site of Grace. If you open the door near the Site of Grace, it will lead to the fight with the final boss of this area, Messmer the Impaler.
After defeating Messmer the Impaler, you will receive the Remembrance of the Impaler along with the Messmer's Kindling, a key item to enter the next legacy dungeon, Enir-Ilim.
Church District
You can access the Church District by approaching the Shadow Keep from the east side. The Church District High Road Site of Grace's path directly leads you to the entrance of the Church District. Enter through the access on the eastern side, and you'll find the Church District Entrance Site of Grace. Traverse through the rooftops, in which you can find items such as Crab Eggs, Thin Beast Bones, and Strips of White Flesh. From the dead body that you looted the Strips of White Flesh, head west then make a jump to progress. Once you are across, you will encounter enemies such as an Ignited Putrid Corpse and a Fire Knight. Keep heading deeper to where the rooftops lead you, and you will find a Slumbrering Egg.
Next, head east and you will see a ramp-like structure in one of the run-down churches. Do a running jump to get to it, and you'll find two openings. Drop down the structure on the right side, then loot the body containing x3 Stormhawk Feathers. Afterwards, drop down to the opening of the ceiling. As you explore the area, you will find a locked door that needs the Prayer Room Key to enter. This can be obtained by defeating Fire Knight Queelign at the Church of the Crusade. If you unlock the door, you can find Fire Knight Queelign (NPC). If you talk to her if you have the item Iris of Occulation or Iris of Grace, you can receive items from her. The Iris of Occulation can be obtained as a drop from a Lesser Ulcerated Tree Spirit later on.
Proceed northwest of the doorway to progress through the Church District. You can find an armory that has x1 Rune of an Unsung Hero along the way. Keep heading down the hall, and you'll encounter a Fire Knight. You'll also find a room that is inaccessible for now, and you'll see a statue of Marika that has an item which you can't reach (for now). In this hallway, the second doorway on the left side will lead you to the Specimen Storehouse through a lift. You'll find the Storehouse, Back Section Site of Grace if you go far enough that path. To progress, exit through the first doorway on the left side of the hallway.
Keep following the path, while also killing the Giant Bats you encounter. You'll come across an archway with a ladder beside it. Climb up the ladder, and you will find the mechanism that will drain the water from the flooded section of the Church District. Use the mechanism to clear the flooded section of the Church District to gain access to sections that were once submerged in water. After the water has been drained, you can go back to the statue of Marika to acquire a Scadutree Fragment. Be careful when jumping off of the statue, as there are Ignited Putrid Corpses. Behind the statue, you can find the Fire Knight's Seal.
Exploring the Sunken Chapel
Go back to the Church District Entrance Site of Grace to immediately access the once-submerged area. From the Site of Grace, go left, then use the lift to go down. In this area, you can explore the grounds for loot. You'll see a large tree at the center of the church ground. If you approach the tree, you will encounter a Lesser Ulcerated Spirit Tree. After defeating the tree spirit, it will drop the Mantle of Thorns sorcery. You'll also find a dead body by the tree containing x1 Somber Smithing Stone [5].
East of the chapel grounds, you can fight another Lesser Ulcerated Tree Spirit, which drops the Iris of Occulation. You can give this to Fire Knight Queelign in the prayer room once you have it unlocked. If you give it to Queelign, she will give you Queelign's Greatsword. You can freely explore the area to find x4 Rada Fruit, x6 Kukri, and x1 Shadow Realm Rune [5]. If you head north towards the main entrance of the main church, you can find various items lying around. You can pick up x3 Shadow Sunflower and Battlefield Priest's Cookbook [1] around the area. In a room inside the church, head down the stairs and check the upper platform to find a door. This room contains a lift that you can ride down to an underground section of the area. You will find the Tree-Worship Site of Grace in this area. Afterwards, you can teleport to the Storehouse, Back Section Site of Grace if you activated the Site of Grace earlier.
Storehouse, Back Section
Once you have arrived at the Storehouse, Back Section Site of Grace, follow the path until you come across a ladder. Keep going straight, not going up the ladder, to find loot such as x1 Glintslab Firefly and the Carian Thrusting Shield. Backtrack your way to the ladder, then climb up. You'll encounter a Fire Knight and two Shadow Undead. Continue walking down the path and onto the stairs, being cautious of the Fire Knight roaming on the floor above. Kill all the enemies that you'll encounter, while also looting items such as x3 Fire Coil, x4 Rada Fruit. On the balcony, you can loot a corpse for the Fire Serpent incantation. Go back, and you'll find an opening behind the bookcase. Go through the path, then keep going up the ramp. You'll find x6 Shadow Sunflower and a Blessed Bone Shard as you are traversing through the scaffolding. You will eventually arrive at the Storehouse, Loft Site of Grace. Activate it, then you'll be ready to explore this section.
Storehouse, Loft
Use the lift north of the Site of Grace, and you'll be at the beams at the top of the Specimen Storehouse. As you explore the beams, you'll see a ladder across the beam where you first arrived. Go to the ladder, making sure to loot the body nearby it for x7 Thin Beast Bones, then go up the ladder. In the level you are currently at, you can find a Smithing Stone [7] at the southeastern section. You can also find a giant gear that you can jump off to to obtain the Wrath from Afar incantation. Jump to another beam from the giant gear, and you'll find a lift with the Fire Knight Hilde summon on top of it. You'll encounter Fire Knights in this area, so be cautious. The lift going down will lead you to an area with x1 Rune of an Unsung Hero, and a Fire Knight that you can get a jump on. Return to the level above, then keep exploring the area. Across the beam connecting to the lift, you can find a ladder. Climb down using the ladder, and you'll find a dead body with x4 Rada Fruit. Near the ladder, you can find another ladder that you can climb down of to get to a platform.
If you head out of the archway northwest of the platform, you can ride a lift going down. Follow the path, take the stairs going down, and you will end up in an area with a lift and a locked door. Since you can't open the door from this side, you can use the lift to go down. Once you have arrived at the bottom of the lift, you'll end up in a room with the Shadow Keep, Back Gate Site of Grace. If you go outside, you can fight Commander Gaius. The other room will contain a Scadutree Fragment.
 Anonymous
Somehow I ended up way west of the dungeon after the viaduct minor tower and I don't know how the hell I bypassed almost everything in this guide.

 Anonymous
So yesterday I was exploring the loft and after going back I died so I came here because I couldn't find the way to retrieve runes, turns out this place isn't mentioned here.
Basically on loft area there should be a lift or a ladder that allow you to go through an area with a corridor at the end there is a fire knight and a really long ladder
 Anonymous
I didn’t think fromsoft would be able to top Stormveil but they did. This dungeon is amazing. So large and fun to explore.

 Anonymous
You can't do both Leda and Hornsent's fight. I just fought Hornsent in the same section as Leda and Leda's sign disappeared after the fight.

 Anonymous
 Anonymous
guide says you can do both invasions but after doing red sign, both disappeared.

 Anonymous
"You can choose to do both, so you won't have to make a choice in which one you want to assist."
Is this true?
I helped Leda kill Hornsent but cannot do the other choice.
 Anonymous
On one hand I'm tempted to say this ia their best dungeon ever. On the other, it's just massive and gives me anxiety.

 Anonymous
Can anyone check if the Great Grave Glovewort on the ring circular monument becomes inaccessible once you drain the water? I managed to get it before I opened the dam in my playthrough, but other players may have missed it and can no longer get it after the water is drained.

 Anonymous
This place is so good. One of the best areas in Souls. Difficult, but fair, labyrinthine, massive.

 Anonymous
what does it mean if the lever in the 'reposition specimens' part doesn't want to work?

 Anonymous
PSA, for anyone that hates the hippo, you can backtrack starting from the Moorth village ruins pit all the way to the chapel entrance. You CAN reach the coffin without beating him! Just spent hours finding an alternate path. When you go down the giant lift from the specimen storage first floor grace, take a right. there should be 3 vulgar militia. Once you deal with them, turn around and face where you just came from the lift. Below is a waterway area with a small walkway, jump down, follow the waterway around to a ladder and boom. Coffin access without giant spike elden beast mobile janky camera boss!

 Anonymous
these directions seem to describe a different location, at times. you skip huge steps between areas and seem to forget where you are at times.

 Anonymous
If you come in to the keep from the main entrance, after clearing Castle Ensis, and then travel up to the Storehouse, the Pearldrake +3 is not where this guide says it is. I searched elsewhere online, and it says you have to clear the 7th floor (and pull a lever?) to be able to reach it. Can anyone verify? I searched all over the 3rd/4th floor, before the grace, and couldn't find it anywhere.

 Anonymous
 Anonymous
IMO best dungeon in complete souls history (can't count ringed city bcs of its own area).

 Anonymous
 Anonymous
Huh, strange. I exhausted all my dialogue options with Ansbach (and Freyja) and was never given a letter to take to Freyja. I wonder what I did wrong...

 Anonymous
Fire Knights suck but like the Black Knights you can make it easier on yourself with the Darkness incantation. You can chain backstabs by casting it while they get up from the last one. It's not pretty but neither is what I saw in the basement of this place.

 Anonymous
If you try to jump up the stone tablets in specimen storehouse you can glitch and get stuck in the wall and die.

 Anonymous
For the record YOU MUST APPROACH FROM THE CATHEDRAL OF MANUS METYR IN THE EAST to access the other half of this dungeon. Coming in the back door from the eastern side will put you in the flooded Church District, from there you loop around back to the Storeroom area's backside, and end up climbing ladders and elevators all the way to the top and then back down out the north side where you will encounter Commander Gaius and get killed 50 times trying to dodge his charge.

 Anonymous
hey the room with the painting has a secret wall inbetween the two torches.

 Anonymous
hey that room with the domain of dragons painting has a hidden wall in between the two torches

 Anonymous
 Anonymous
I somehow missed almost everything in this walkthrough after Golden Hippo and found Unte Ruins and Rauh Ruins through here instead

 Anonymous
 Anonymous
There's an item that you need to get on top of the elevator to reach,,, anyone figured out how to do that? It's at the top of the tower

 Anonymous
 Anonymous
how do I get the thing that's stuck to the statue's head? bow didn't work.

 Anonymous
 Anonymous
Ok, this drove me crazy, so here is how you get to the back-half of the shadowkeep. East of Fort Ensis and south of the shadowkeep is Moorth ruins. If you explore the ruins you will eventually find a tunnel (not the obvious one in the center of town) that eventually leads to a ladder that brings you to Bonny Village. Things are more straightforwards from here, just head NE and then north until you get the church district highroad site of grace. NW of there is your entrance to shadowkeep's back half. Also, there is a cathedral to the south that unlocks some optional areas as well. Crazy that like half of altus is hidden behind a tunnel but it is what it is.

 Anonymous
 Anonymous
Does anyone know how to open the door before the elevator that leads to Commander Gaius?

 Anonymous
When i approached shadow keep i got message "great rune was broken, powerful spell is lifted" or something like that.
Did i failed some kind of questline?
 Anonymous
so can i not get the secret rites scroll after i pulled the lever or am i reading something wrong? cant for the life of me find it

 Anonymous
so can i not get the secret rites scroll after i pulled the lever or am i reading something wrong? cant for the life of me find it

 Anonymous
>get the nearby grace back section
>doesnt say where back section is
thanks fextra
 Anonymous
 Anonymous
i pulled the switch that moves the specimens and now i cant get to the 4th floor wtf

 Anonymous
 Anonymous
 Anonymous

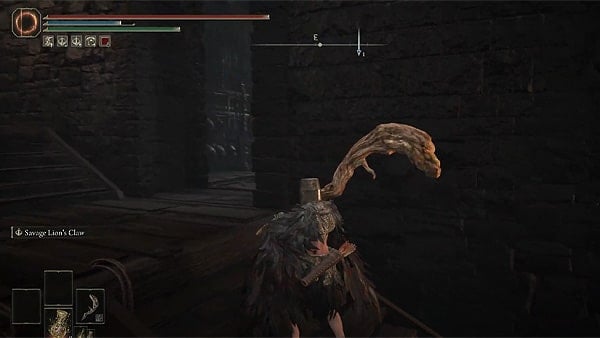
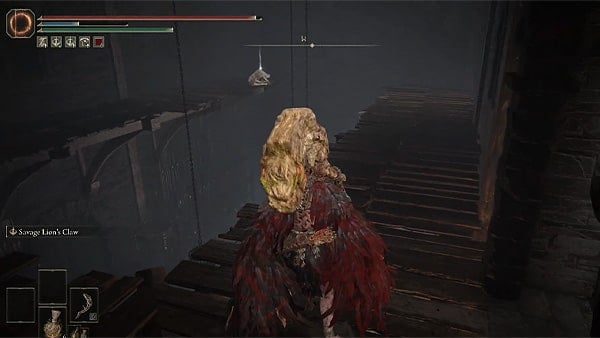
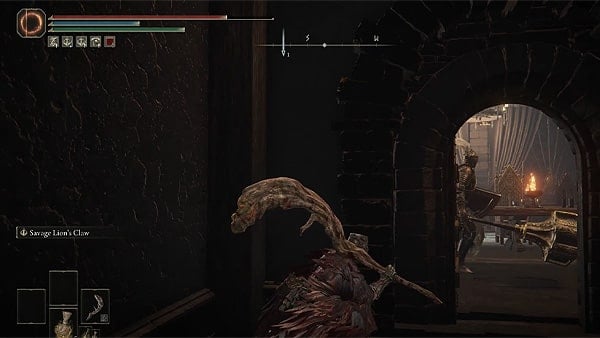
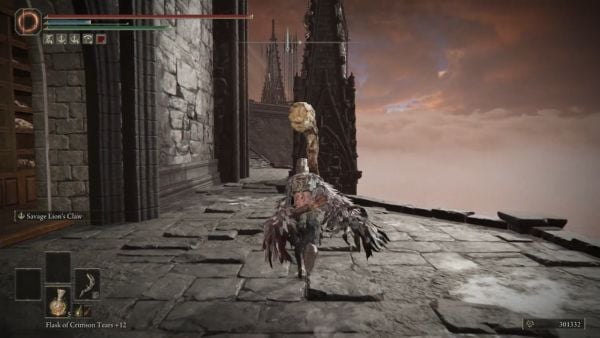
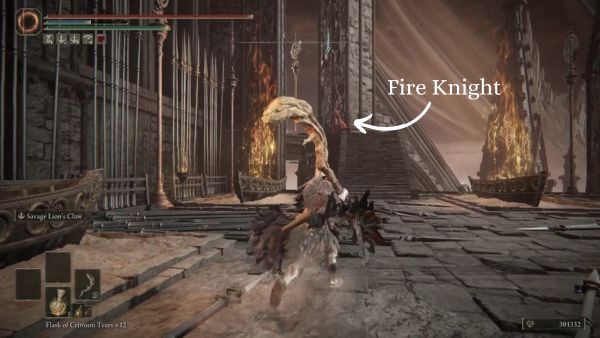
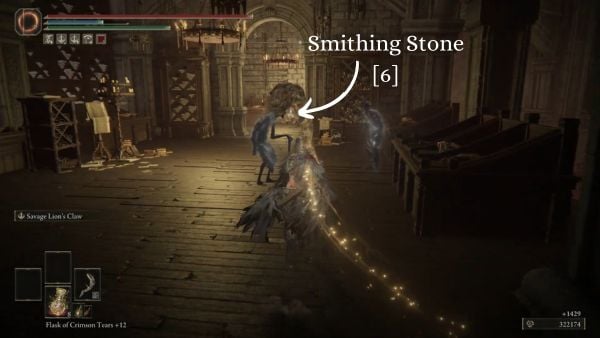
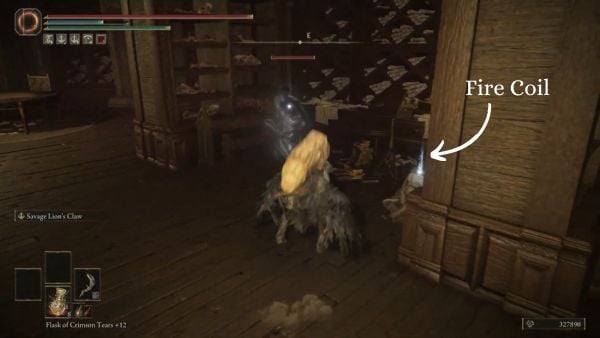

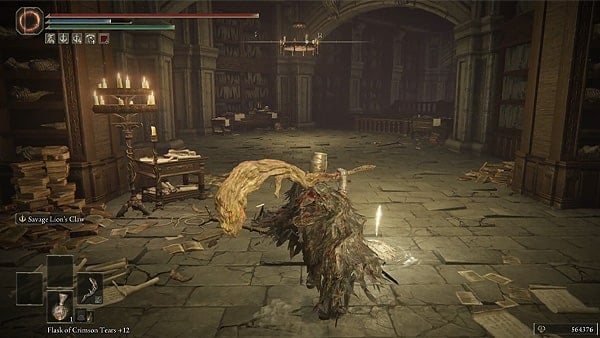
One of the giant horned bodies hanging from the ceiling of the library has an item in the "beard". can be seen from below. I have no clue how to reach it though.
1
+10
-1