Guardians' Garrison |
|---|
 |
|
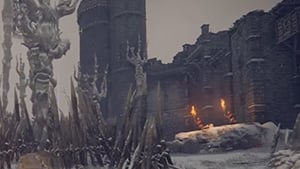
Guardian's Garrison is staffed by the Flame Guardians, who zealously watch the road leading to the Giant's Forge |
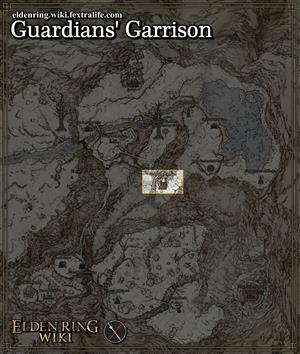
Guardians' Garrison is a Location in Elden Ring. The Guardians' Garrison is found in Mountaintops of the Giants, on the higher areas connecting the northeastern frozen lake to the Giant's Forge.
Guardians' Garrison Map
Past the frozen northeastern lake, find the Whiteridge Road site of Grace, and follow the path south. Elden Ring Map here.
All NPCs and Merchants in Guardians' Garrison
- No NPCs or Merchants found in this location.
All Items in Elden Ring's Guardians' Garrison
Elden Ring Guardians' Garrison Creatures, Enemies, and Bosses
Field Bosses and Bosses
Guardians' Garrison Walkthrough
From the White Ridge Road Site of Grace, you can make your way towards the Garrison, weaving through the wooden barricades. You can ignore most of the enemies here as they do not aggro unless very close. However, there is a Flame Monk guarding the main staircase into the garrison. You can run past him and fight him from atop the stairs where you have the higher ground. Inside the fort, head out the balcony and kill the Rotten Stray on the right. Check behind the crates on the opposite side for a corpse with a Golden Rune (10). Head back inside and take out the Rotten Stray near the camp and then engage the Flame Guardian. These guardians aren't overly difficult and they are highly susceptible to sorcery spells.
Go up the steps ahead and check the corpse by the brazier for 6x Smolderin' Butterfly. There are a couple of Rats in this area as well. Jump down the ledge opposite the corpse with the brazier and climb the ladder behind you to reach the upper floor. Follow the wooden walkway and head up the steps at the end to find another Flame Guardian. There is another one at the very end of this walkway. Check the corpse at the end for a Smithing Stone (7). Backtrack a bit and look for a broken section of the Garrison's walls where you can jump through onto a wooden platform outside. Follow this platform around the tower to reach the top floor of the garrison where you will find Chief Guardian Arghanthy waiting. In the tower to the left of the entrance to this platform, there is a pair of Strays. Deal with these before fighting the boss, or find a way to avoid them entirely.
Arghanthy is a very difficult opponent that uses some very advanced fire spells. His most dangerous one is a flame burst that he uses when players get too near, dealing massive damage at close range. He also has a long flamethrower spell that has decent tracking but can be sidestepped. Finally, when he plunges his hands into the ground, stay clear of the immediate area as flame pillars will burst forth from below. Consider using fire protective gear and consumables when fighting this opponent, as well as powerful Spirit Summons to distract him. Upon defeat, he will drop his One-Eyed Shield.
After defeating Arghanthy, head inside the tower he came out of in the southwest and climb up the ladder. At the top is a chest containing the Giant's Prayerbook.
Elden Ring Guardians' Garrison Gallery and Notes
[other images go here]
 Anonymous
 Anonymous
I wish this place was the legacy dungeon for Mountaintops. It would be cool if the Fire Prelate was a boss that guarded the bridge over to the Flame Peak, and dropped the Candlestand.

 Anonymous
Gravel stone can be found here, in a rather difficult location: the idea is that you want to get on top of the wooden rooftop that covers the first ladder you've encountered, to do this you need to jump on the walls on your left of the dark room where 2 dogs are eating. Once you've reached the rooftop, you will only need to follow a corpse into a sort of hallway made by the outer wall of the castle. You will find a corpse with 2 gravel stones (I guess they are 2 I can't remember)

 Anonymous
Summon your mimic near the first Fire Prelate. It will stay with you the entire time that you clean out the Garrison since the enemies are so evenly dispersed.

 Anonymous
Found ash of war prelate's charge from a scarab hanging from a tree around the right side of the entrance to the garrison. Kinda in the middle of the barricade walls before crossing the big chain to the south-west.

 Anonymous
 Anonymous
The main guy has a pretty nasty AoE attack if you aren't ready for it. Luckily your summon will climb with you to the top so they can keep him busy. Died the first time but easy second time around. Just make sure to kill the damn strays, they almost got me.

 Anonymous
Argy got shieldbashed and (charge up) poked to death. Rinse and repeat. You'll need to backstep to avoid his AoE spells. I cleared the area on my first go and I am a filthy casual. Or I got real lucky.

 Anonymous
This place is complete ****ing horseshit, one of the worst places in the game imo.

 Anonymous
 Anonymous
I got lucky with Arghanthy going by what it says about him here. Someone had left a message warning about dogs so I was looking for them but even knowing they were around somewhere they aren't all that easy to spot, the tower is dark and I don't think I would have seen them if I hadn't used target lock to make sure.
I used a bone dart to try drawing it away from the boss without him getting agro as well but it didn't work, I don't know exactly what happened I don't know if I hit Arganthy while trying to kill the dog or if he did it himself, but he fell between the walkway and castle wall and none of his fire incantations could hit me, I was able to kill him with no trouble at all.
The point is this might be repeatable, using noble presence or wrath of gold to purposefully knock him off that walkway, it would make it a lot easier if that is a reliable way of dealing with him.
 Anonymous
A comment mentions the beast repellent torch not working here, it was the same with the dogs up the hill from the first church of marika. It worked on the way up but I was chased by two t-rex dogs back down to the church and I forgot to equip the torch for the smaller rabid strays. After I reset at the grace the torch wasn't working at all, I fast travelled around a few times but those dogs were agro every time, the torch made no diference.

 Anonymous
I drew him and those dogs into the small room with the ladder and used Stormcaller AoW. Easy peasy.

 Anonymous
Is this where the war surgeons were abducted from? Bunch of dead dudes in white robes with the blood thorns, and the npcs are sort of invaders.. the flame guardian kind of looks like a white mask but theirs are still gold

Guide doesn't mention that there's a pair of strays to the left of where you enter the bossfight area. I feel like it should; strays are tough.

 Anonymous
 Anonymous
There is a bit more loot that you can get and is not listed here (not really worth the hassle though).
When facing the final tower that gives the giant prayerbook you can drop to the left and follow a wooden path in 2 part to a body that gives smoldering butterfly, but that's not all ! By going back to the first part of the wooden path that is slighly higher you can make a tricky jump on the lower part of the wall and follow it to the roof of the small shack in the corner by the other watch tower.
Follow the path near the wall then and on the left there is a body with 2 gravel stone.
Bad reward for such a well hidden item but oh well.
 Anonymous
Warning: The dogs here are glitched and the beast-repellent torch does not work on them at all. Kill them without mercy.

 Anonymous
There is a gravel stone as well tucked away on a corpse on the left side you have to parkour on the wall and walk to where it is.

 Anonymous
 Anonymous
As a lvl 100+ INT/Faith mage with 22 Vigor, it goes without saying that I fought Arghanthy like a man and most certainly did NOT resort to summoning Mimic Tear, casting Unseen Form, rushing into the tower to get the prayerbook, and fast travelling away. No sir!

 Anonymous
There is also a Silver Scarab hanging from one of the large thorn Idols in this area. You have to shoot it down and it gives AoW: Prelate's Charge.

 Anonymous
"Go up the steps ahead and check the corpse by the brazier for 6x Smolderin' Butterfly."

 Anonymous
I spent 10mins wandering around looking for the boss because I didn't realize I killed him. He got knocked off the tower almost instantly after ambushing me lol.

 Anonymous
Not much of an opponent. Bolt of Gransax. Bolt of Gransax. Bolt of Gransax. Bolt of Gransax. Hard for him to cast when he's flat on his back.

 Anonymous
I didn't even know this guy could cast spells because I never gave him a chance.
Approached with stealth for a free backstab and then blitzed him using the Great Stars hammer with Wild Strikes. Dude was staggered, bled, and dead within seconds.
 Anonymous
For a cheese, fall between the gap between the castle and the stairs. You will land of a ridge and can jump unharmed to the bottom of the castle. He will follow but fall off the cliff..

 Anonymous
After Arghanthy, if you jump out through the broken wall on some wodden platforms: On the last bigger platform there is a part of the wall that is slightly damaged. You can jump on it walk and jump on top of the roof from the inner shack and then progress further on the sidewalk. Nothing special there. Just i think Gravel x2 but for all the completionists out there that want to know.

 Anonymous
If you have the Spirit Mimic Tear...and you should by now...call it in early to assist clearing the area all the way up to final boss.


Fairly important thing is that killing the strays automatically aggros the guardians. You can't pick them off one by one, so you've got to quickly kill the strays ideally at range before moving on to the guardians.
Arghanthy also doesn't give a single ****, I fell off the narrow walkway leading to his area once and he followed me down there and proceeded to chase me all around the castle. May be a way of cheesing him by luring him there, idk.
0
+10
-1