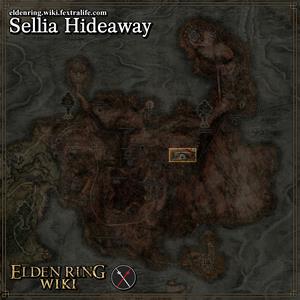
Sellia Hideaway is a Location in Elden Ring. The Sellia Hideaway is found in North-East Caelid, near Sellia town proper. It is in the border Region of Caelid and Dragonbarrow but it is slightly into Dragonbarrow.
The location of this secret cave is revealed by Note: Hidden Cave.
Sellia Hideaway Location Map
Entrace found behind an Illusory Wall. To reach the entrance, start at the Church of the Plague site of grace and head north up the hill and straight under the wooden arch. Look to the North-East for a small graveyard with a single sorcerer enemy wielding a staff and a club. Behind the main headstone, along the cliffside, there's a secret door you can reveal by rolling or attacking it. [Elden Ring Map Link]
All NPCs and Merchants in Sellia Hideaway
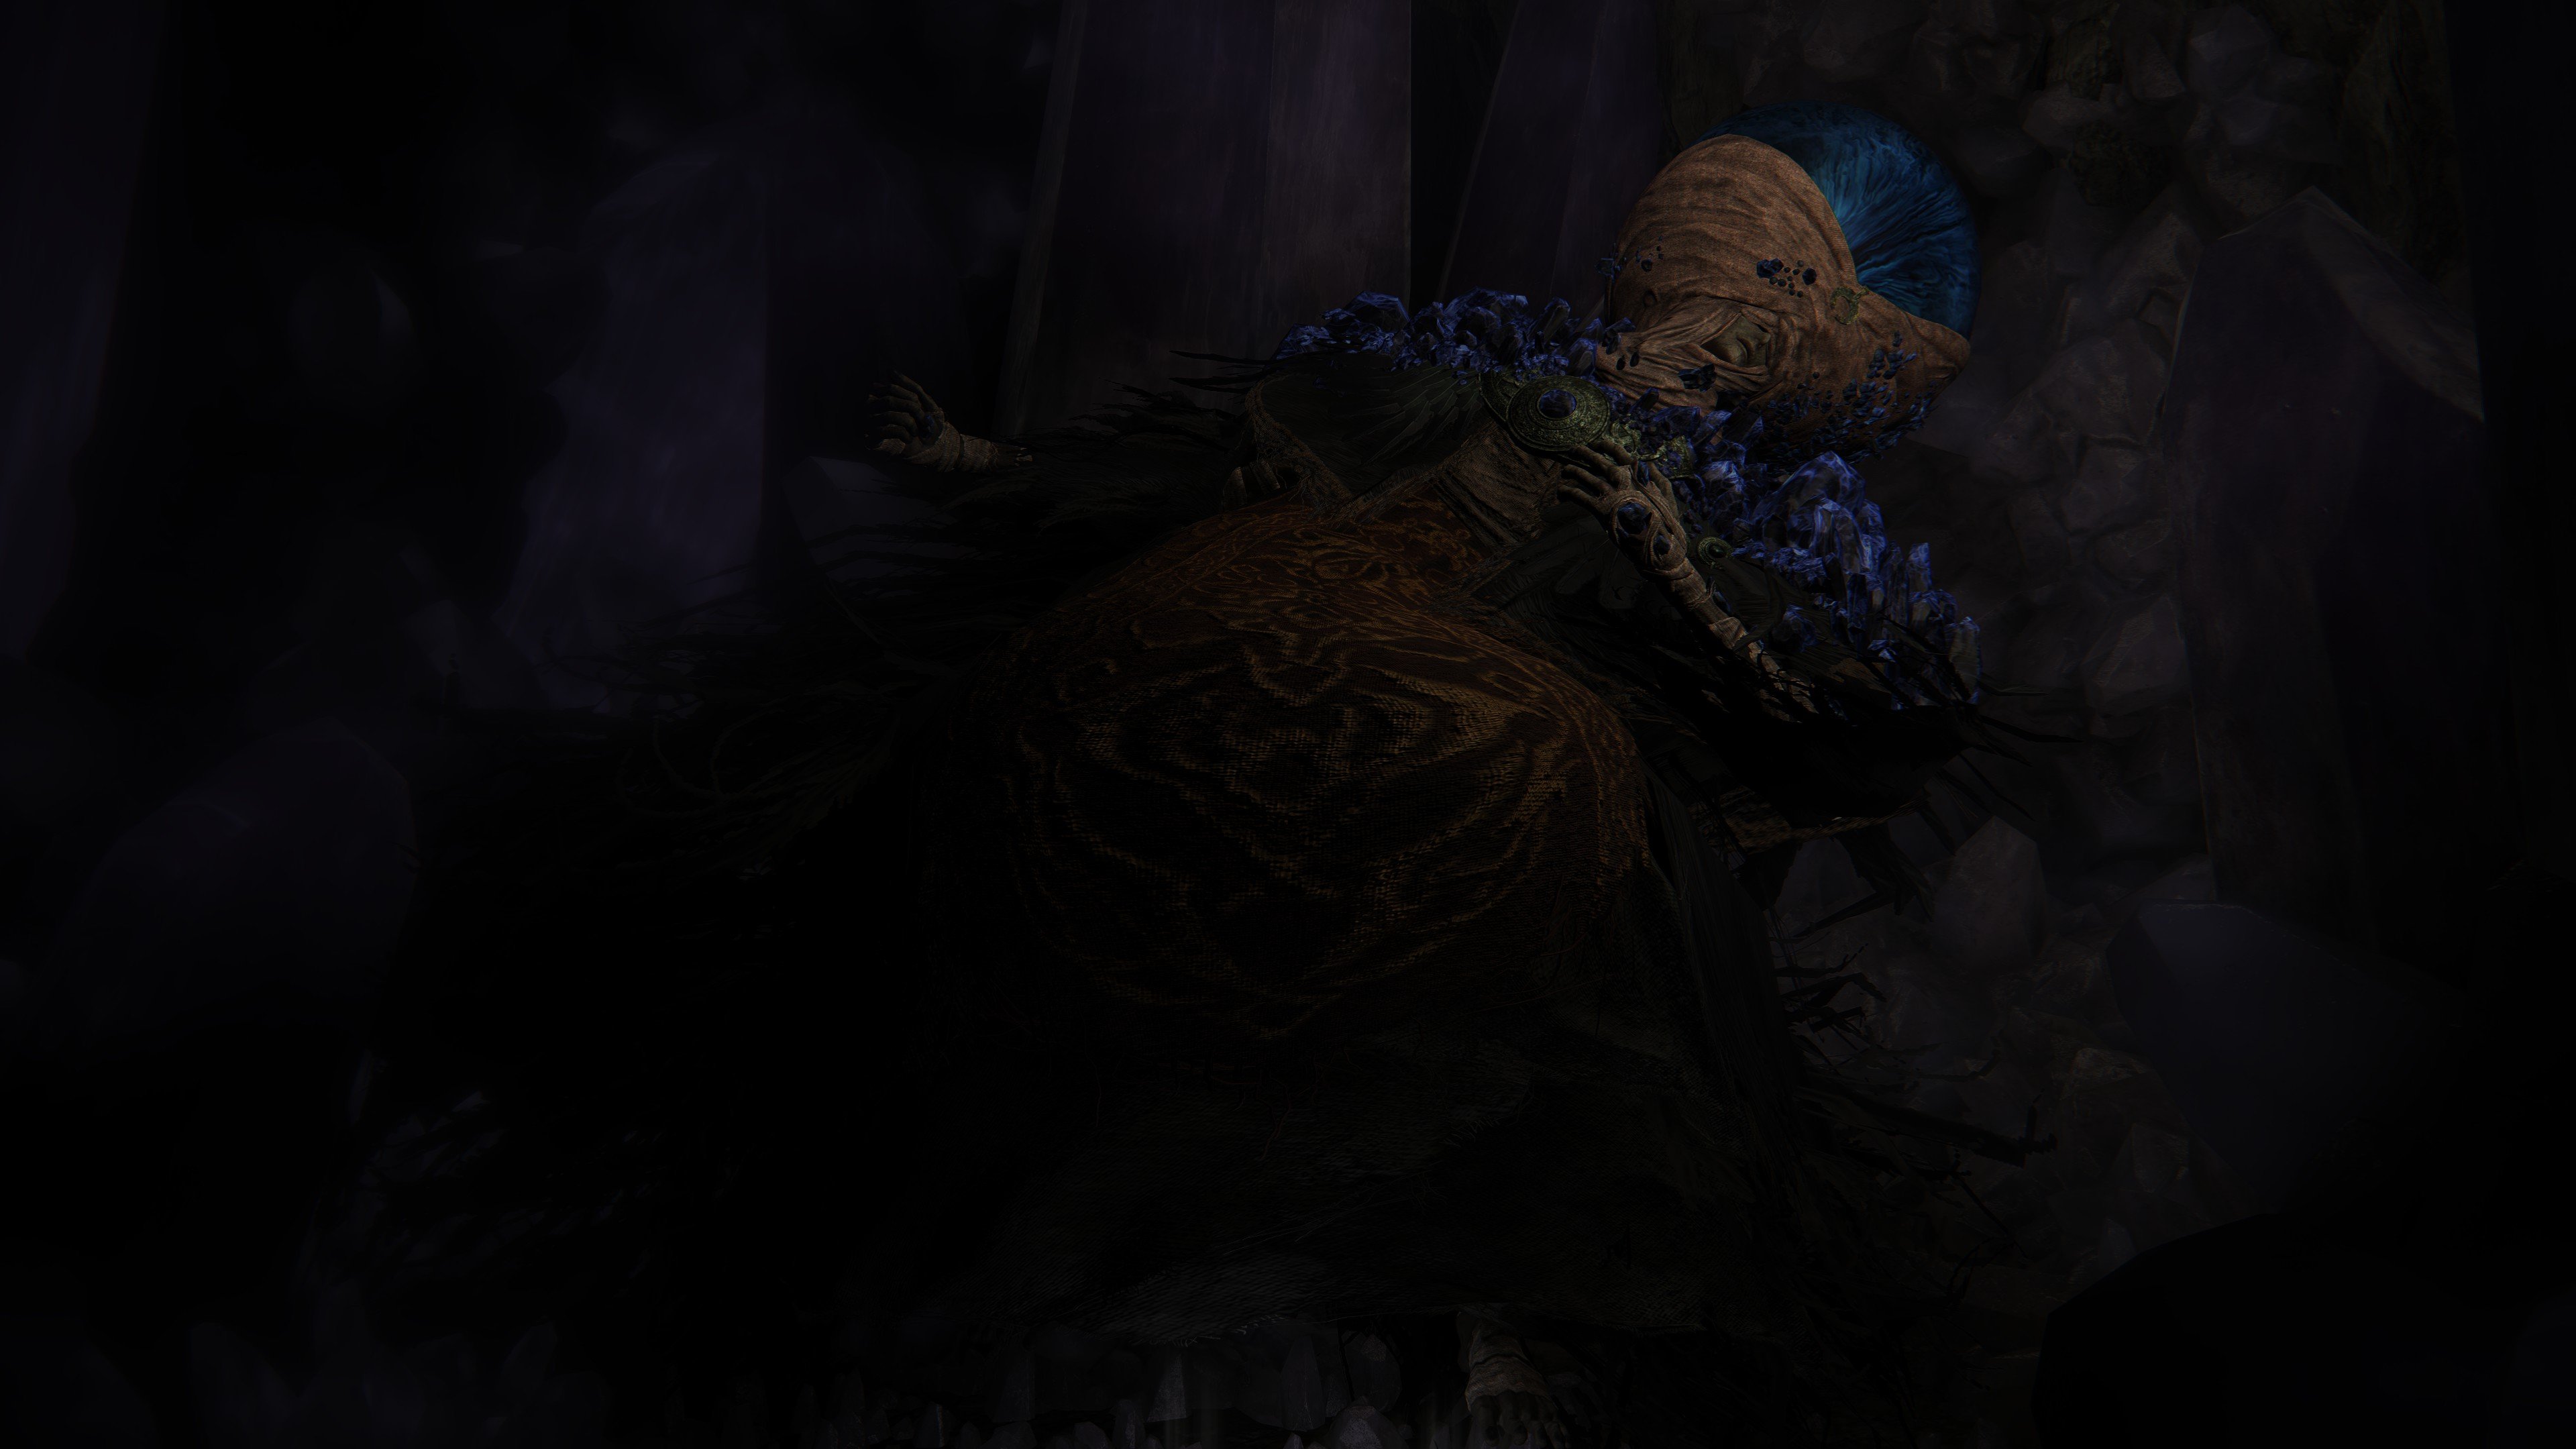
- Master Lusat
- Part of Sellen's questline. Find him locked away behind an Arcane barrier. See instructions below on how to locate him.
All Items in Elden Ring's Sellia Hideaway
Gather & Farm Items
- Budding Cave Moss
- Crystal Cave Moss
- Crystal Dart
- Golden Rune (5)
- Golden Rune (3)
- Glowstone
- Preserving Boluses
- Stimulating Boluses
Equipment and Magic
- Stars of Ruin (quest reward)
- Crystal Torrent (Boss drop)
- Crystal Spear
Elden Ring Sellia Hideaway Creatures, Enemies, and Bosses
Field Bosses and Bosses
Sellia Hideaway Walkthrough
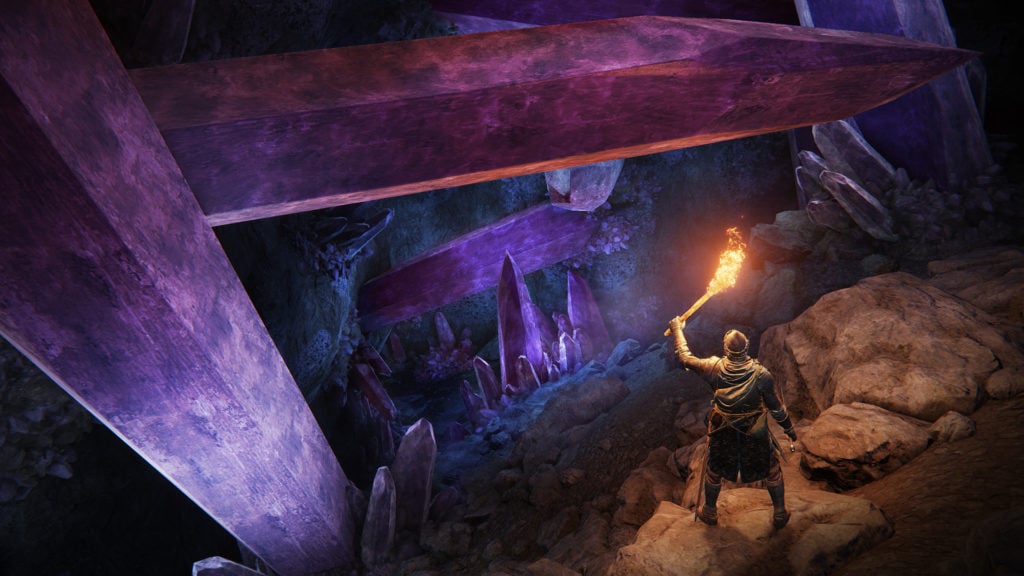
Upon entering the cave past the site of grace, you will encounter a Glintstone Miner. Past the Golden Rune (3) slightly further in, there is another illusory wall you need to roll through. Another Glintstone Miner and illusory wall await you. Past this, there is a large cave with massive purple crystals. Head right to find another miner, then go across the crystals and to the left towards the next miner guarding a Golden Rune (5). Go back by jumping above the crystals to the right, then go across the large crystal again, this time heading right. Turn right again and drop down onto another shorter crystal, the jump onto a longer one and drop down into the pit. You should be able to see the magic barrier associated to Sellen's quest from here. If you have the key, go through and talk to Lusat who will give you Stars of Ruin. Turn around and walk over the crystal where you encounter a Revenant. Loot the Stimulating Boluses, Golden Rune (5), and Lost Ashes of War. Turn around and towards the Silver Fireflies, along the path back upwards is a Somber Smithing Stone (4). When you drop down from the crystal at the end, there will be three Crystal Snails waiting for you. Turn left, where you will encounter two sorcerer miners, one of them has more health and a charging attack. Loot the Glowstone x4, then jump across or onto the crystal below, then head into the corridor on the right, passing a Stake of Marika (where you can respawn at should you die).
You'll enter into quite a large crystal formation cave. Hug the right wall, climbing up and over the rocks and rubble. You'll pass on your left shoulder, two (2) very large crystal shards growing from the floor with the third one at a gentle angle. Walk onto this third massive crystal shard and continue walking until you're a few feet away from the tip.
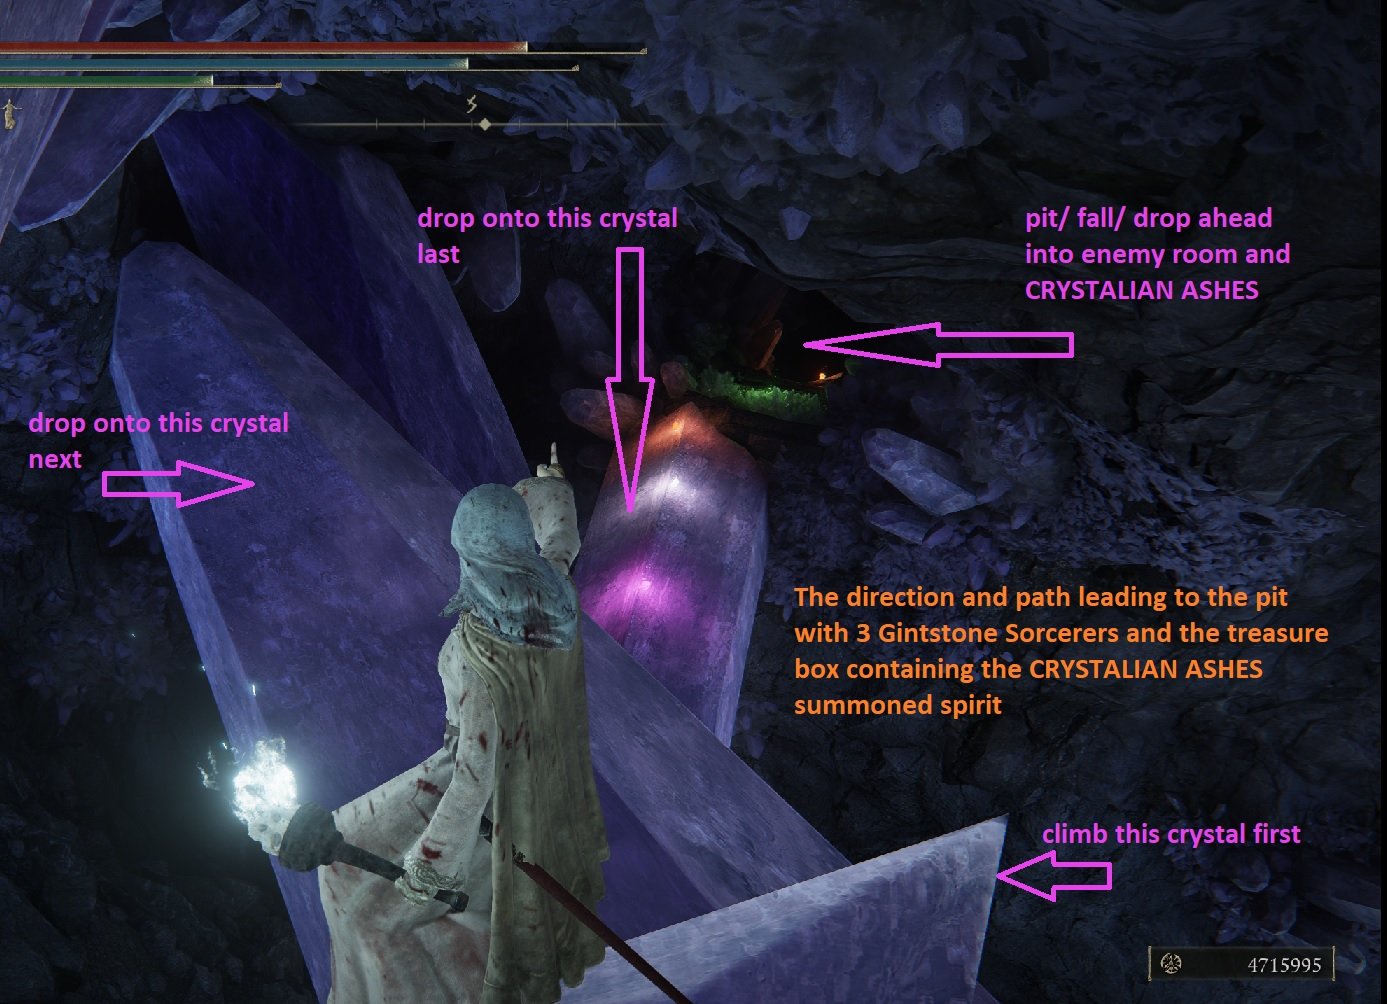
Walk off to your right, jump onto a little crystal and then floor to face a Preserving Boluse and an illusory wall leading to a chest containing Crystal Spear. Head back and this time, walk off to your left, which will make a very short drop onto another crystal (short drop to the south). From here, head south and take another very short drop onto yet another crystal shard. Follow this up and until you're on solid ground. There is a pit with some light barely noticeable at the bottom, a campfire, and a room full of several Glintstone Sorcerers (a couple will make use of shields and engage you in melee while the third will casts spells at you). Clear this room and you can claim the Crystalian Ashes, among a few other crafting mats. There is only one exit to take, so head out, make a small drop, and you'll come across a single miner. Once dealt with, you'll be at another short drop with two choices: left, going southwest or right, going northeast. You'll want to turn right, after you drop, heading in a northeast direction. This will take back into the room you did your crystal shard climbing/ dropping to reach the Crystalian Ash summons. Make your way back into the large crystal shard room, dealing with Crystal Snails and you can claim Crystal Dart x10. Nothing more to note in here so, head back into the tunnel, moving southwest towards the fog wall/ boss. Before the boss you will be ambushed by four more snails. Prepare for the boss accordingly: Three (3) Putrid Crystalians who inflict Scarlet Rot on hit. There is a mage, one with a ringblade, and the last one with a lance. Per usual with Crystalians, blunt weapons will crack their shell fast, enabling frontal/ rear backstab and for subsequent better HP damage on them. Your reward is the spell: Crystal Torrent.
Master Lusat's Location
To get to Master Lusat, you'll first need to have talked to Sorceress Sellen and progressed the questline enough to where you will be asked to search for Master Lusat on her behalf (refer to her questline page for more information).
From the room with the overlapping crystals, fall down to the ground and fight the Royal Revenant. In the northwest side of the room, you'll find two small steps leading to a small cavern.
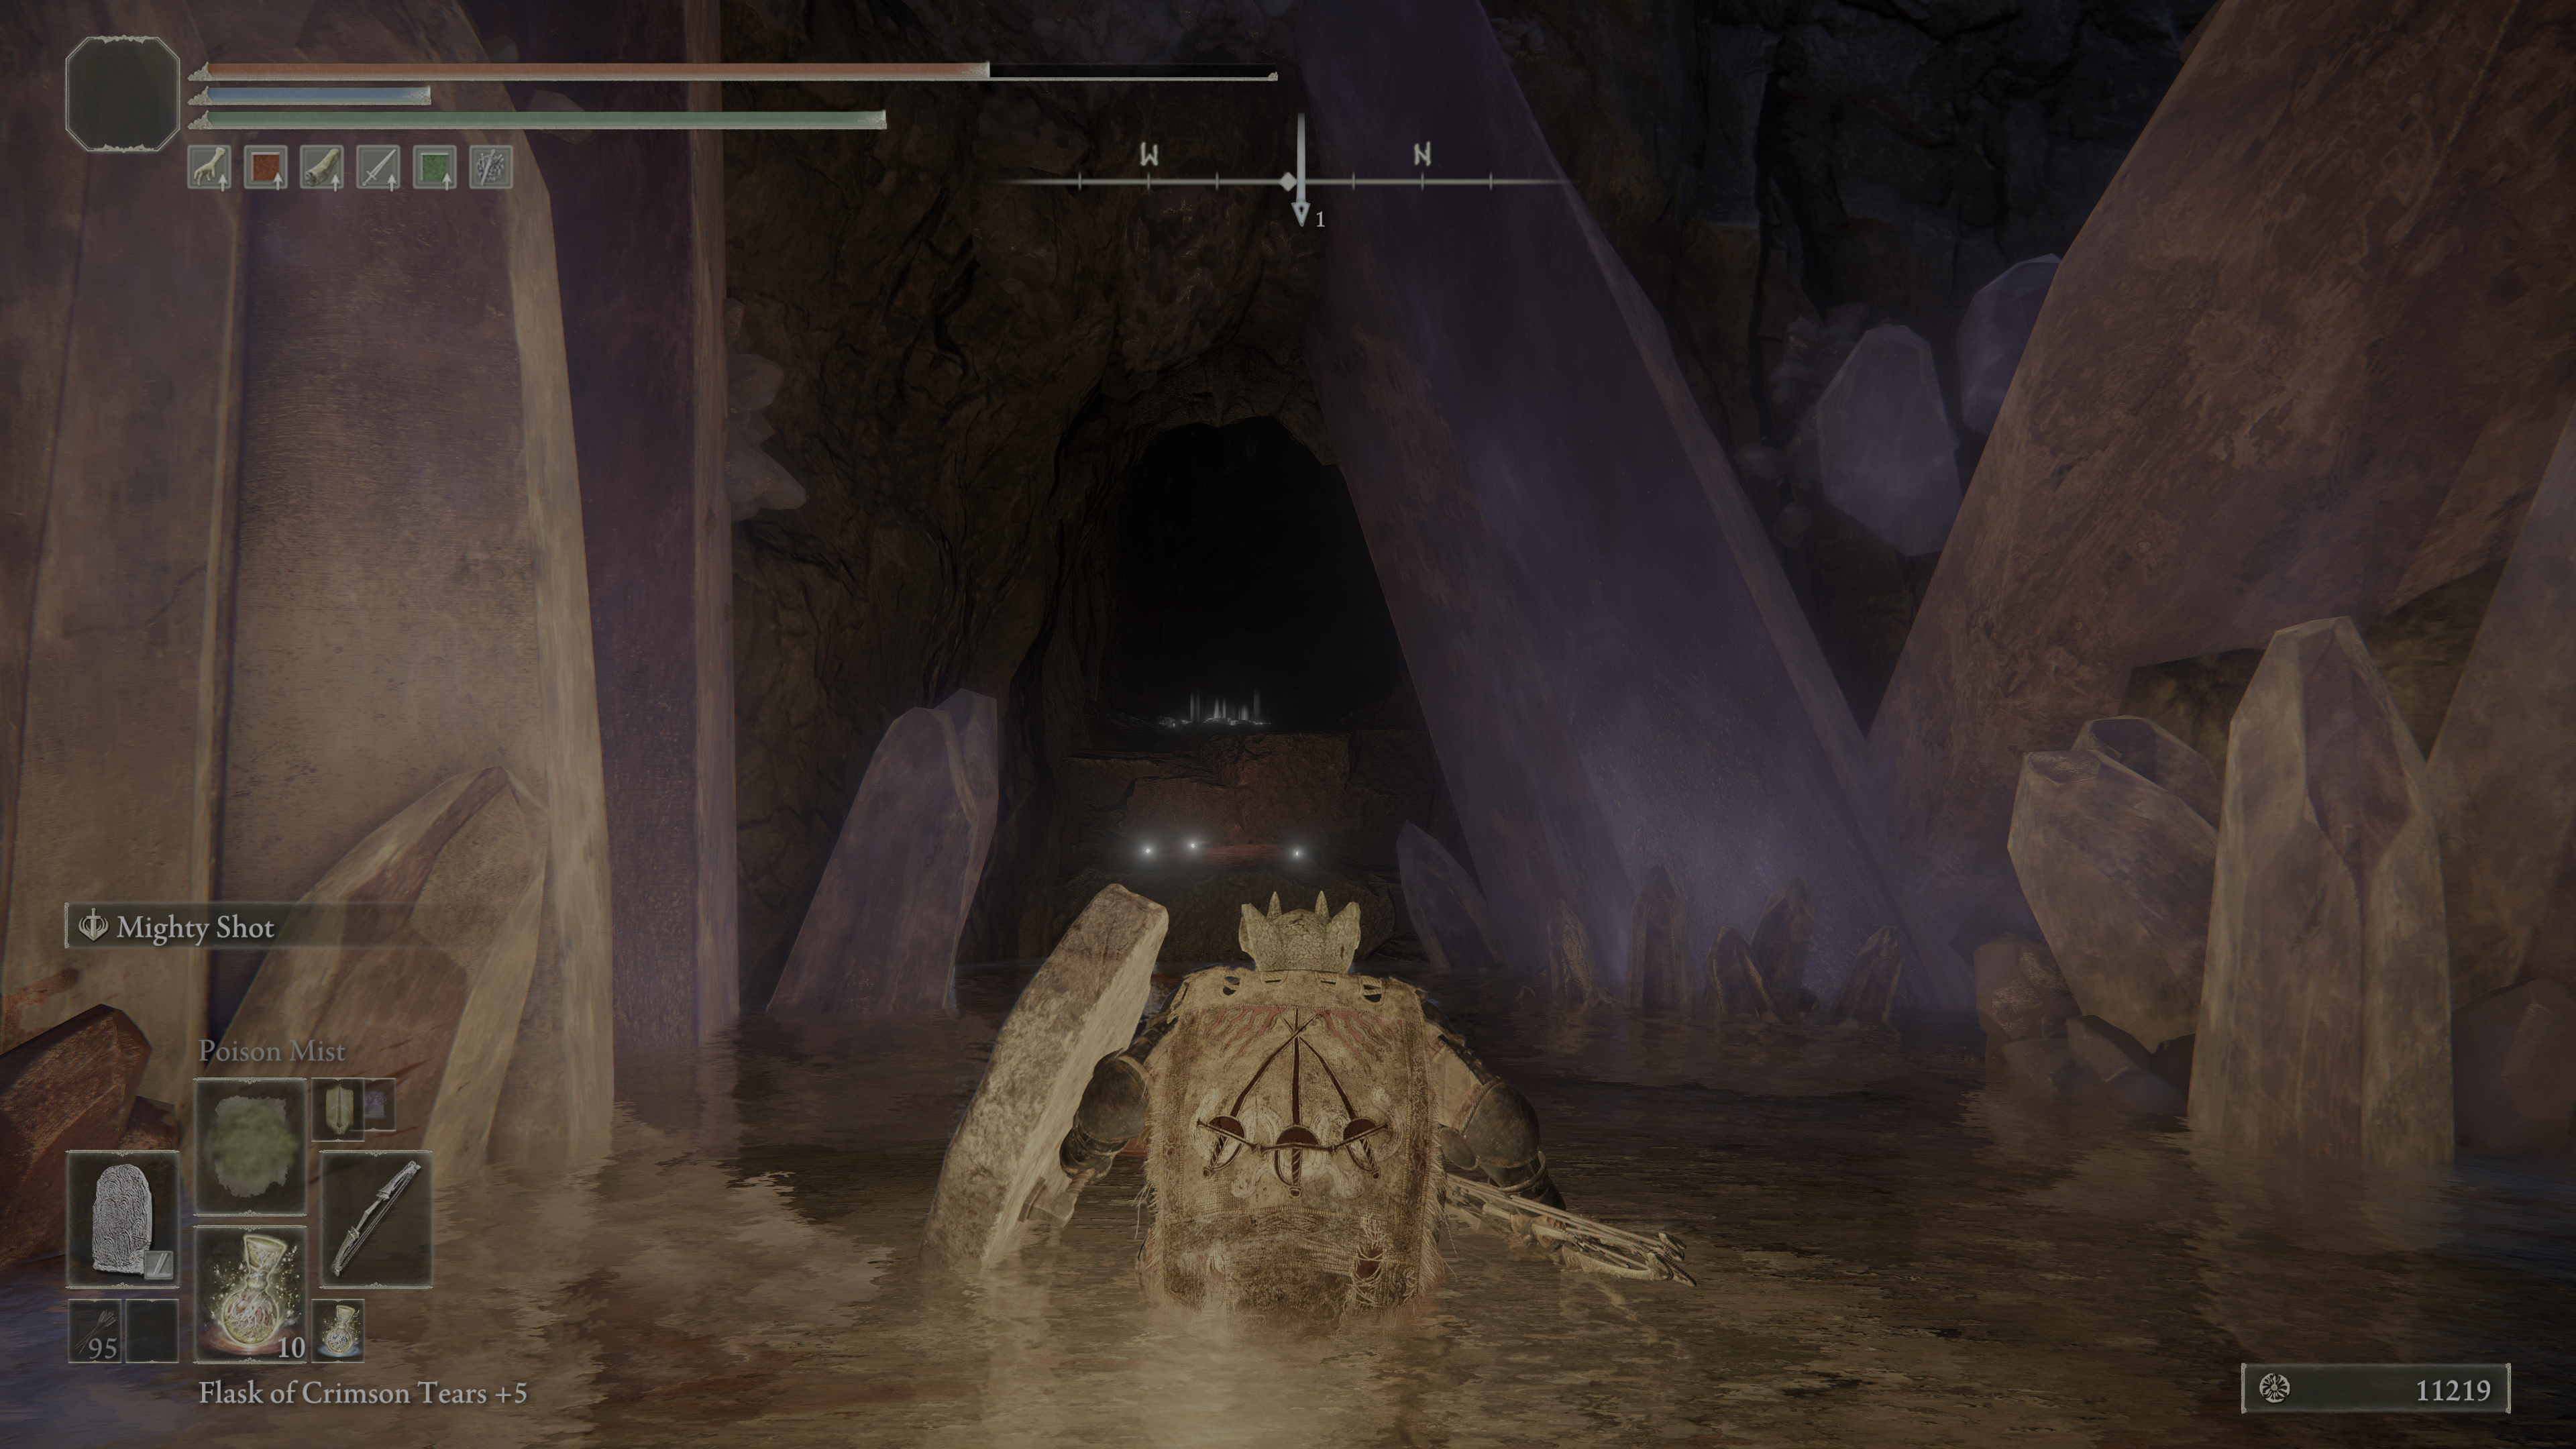
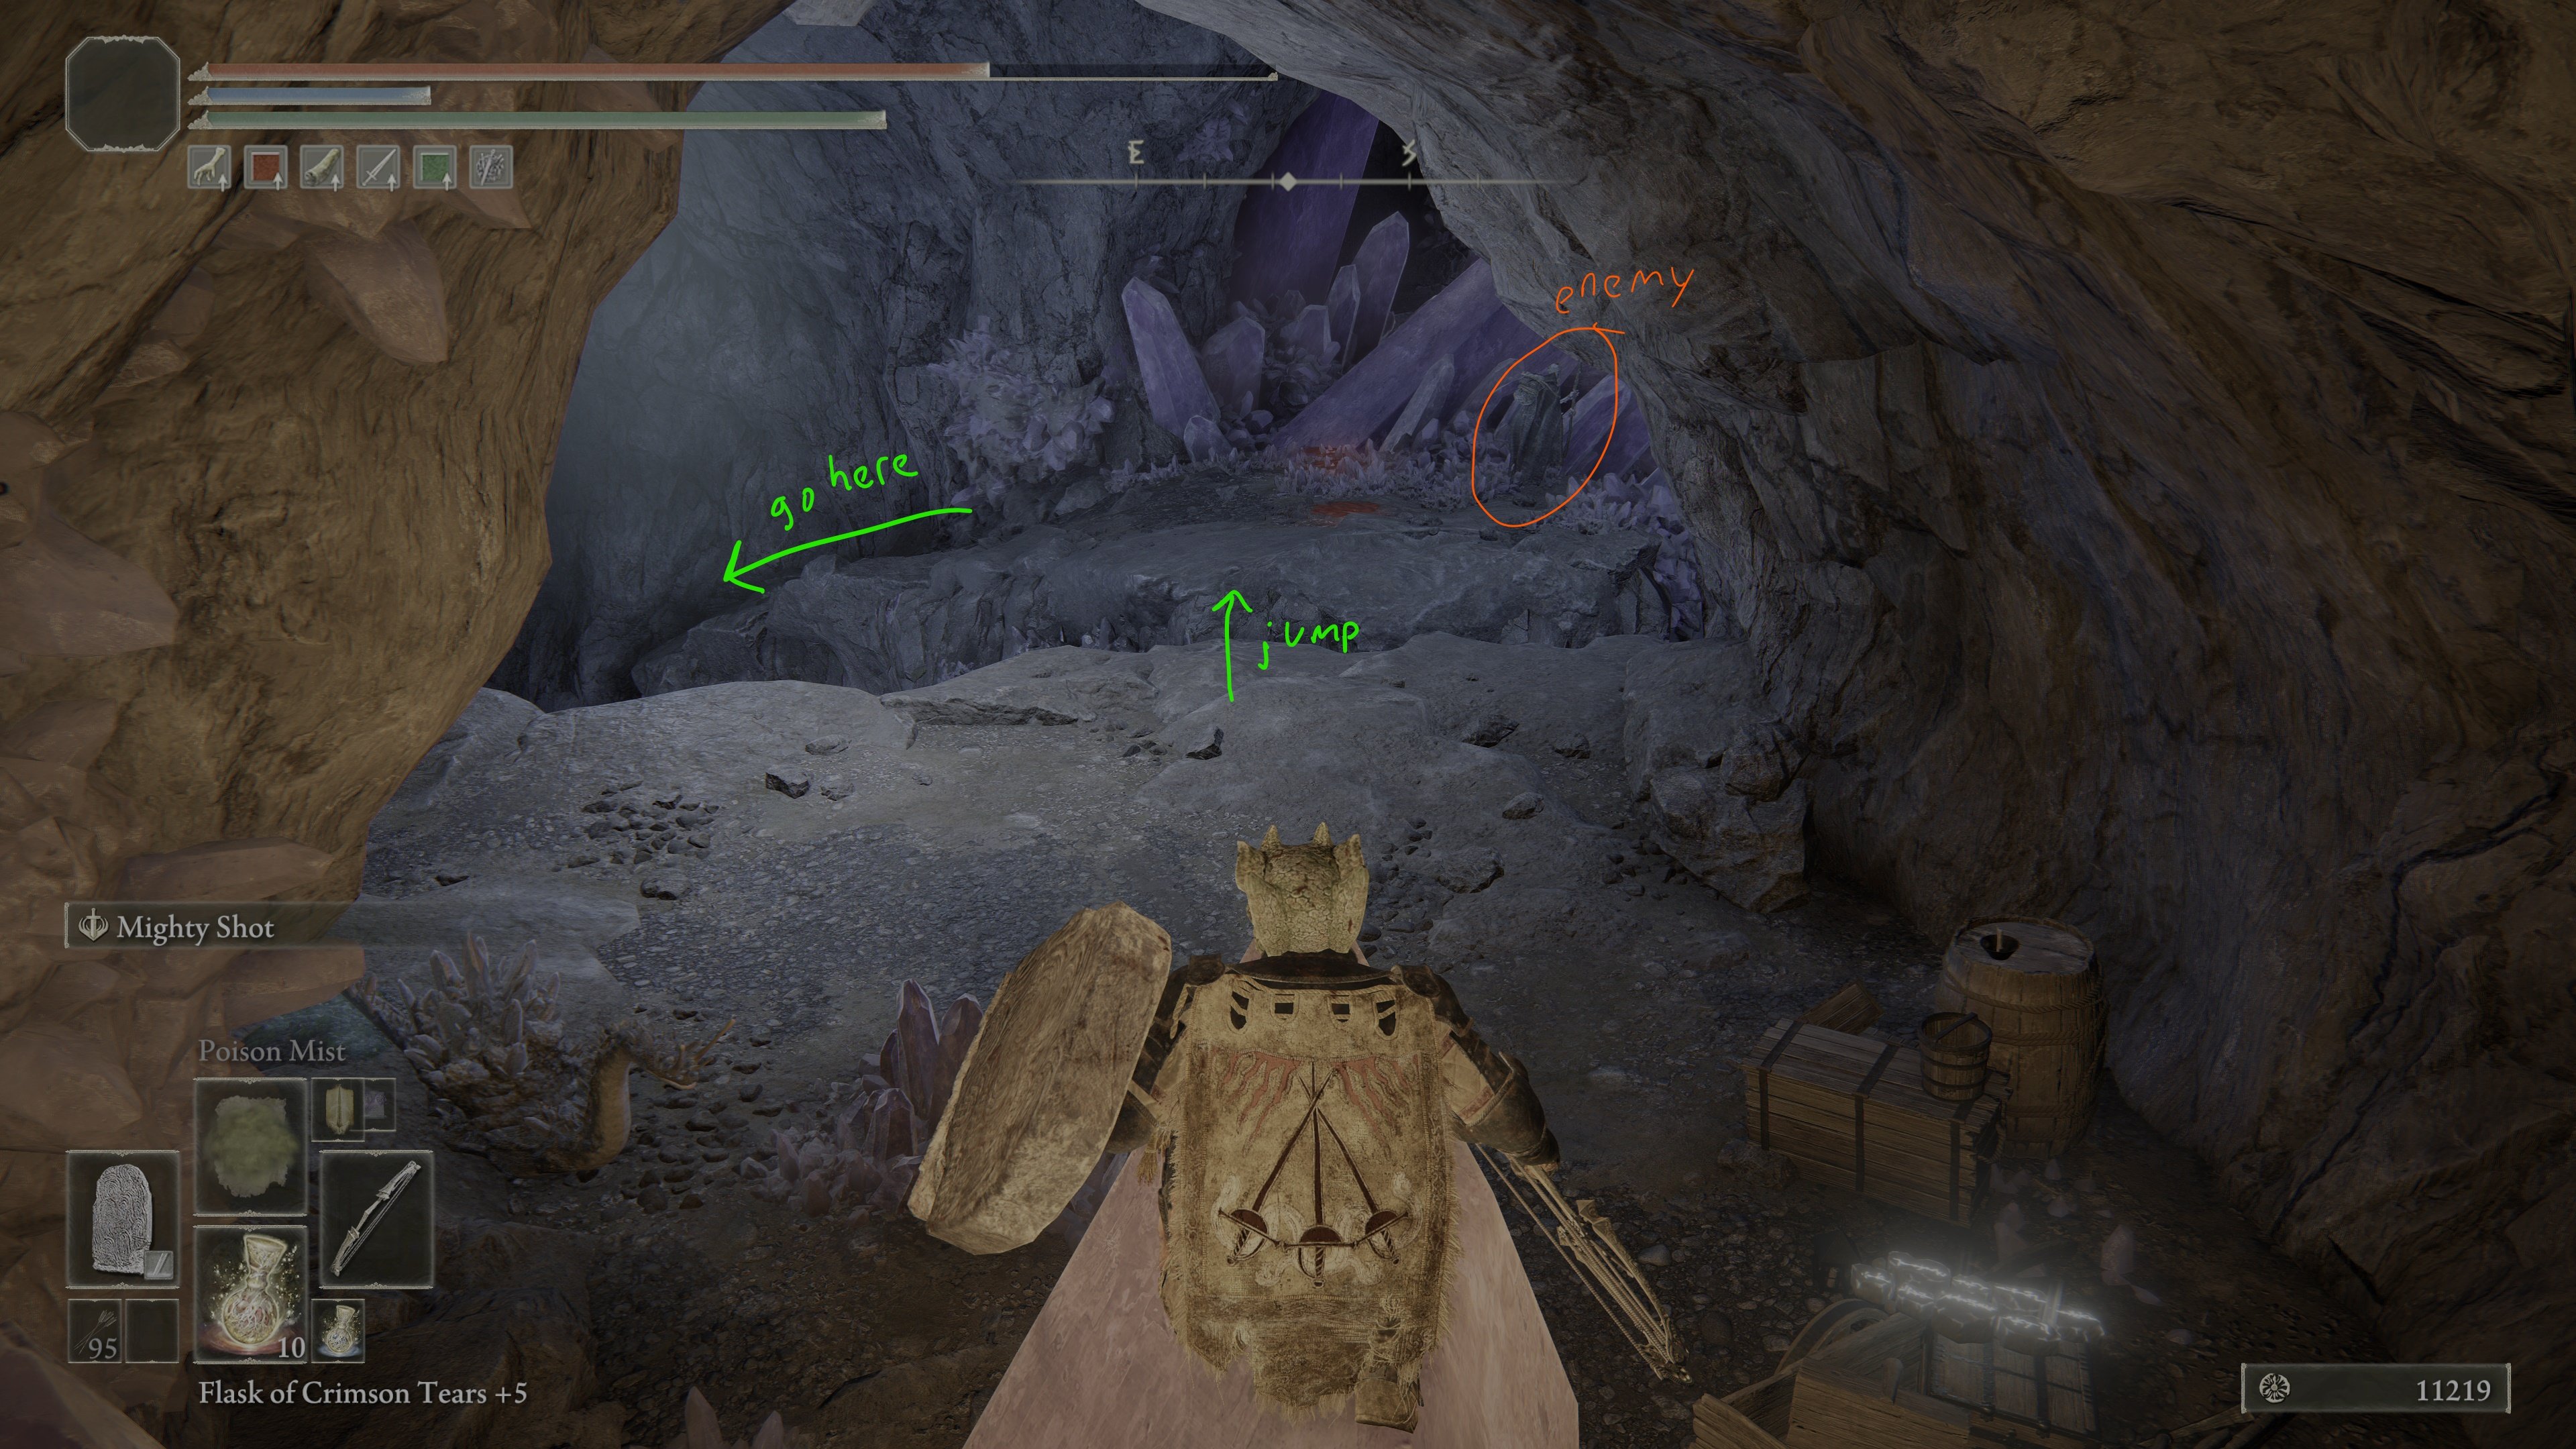
Follow through the cavern, and eventually you'll find yourself walking atop a crystal, with another ledge and a Crystal miner off in the distance. Hop to the other ledge, then head to the leftmost side of the platform.
Looking down off the ledge, you'll see two crystals, connecting you to where a snail sits. Jump down off the ledge, land on the first crystal, then walk along it and jump over to the second crystal, where you can fight the snail. Your goal is to defeat the snail without falling off, then get to where the snail was standing and go a few paces up.
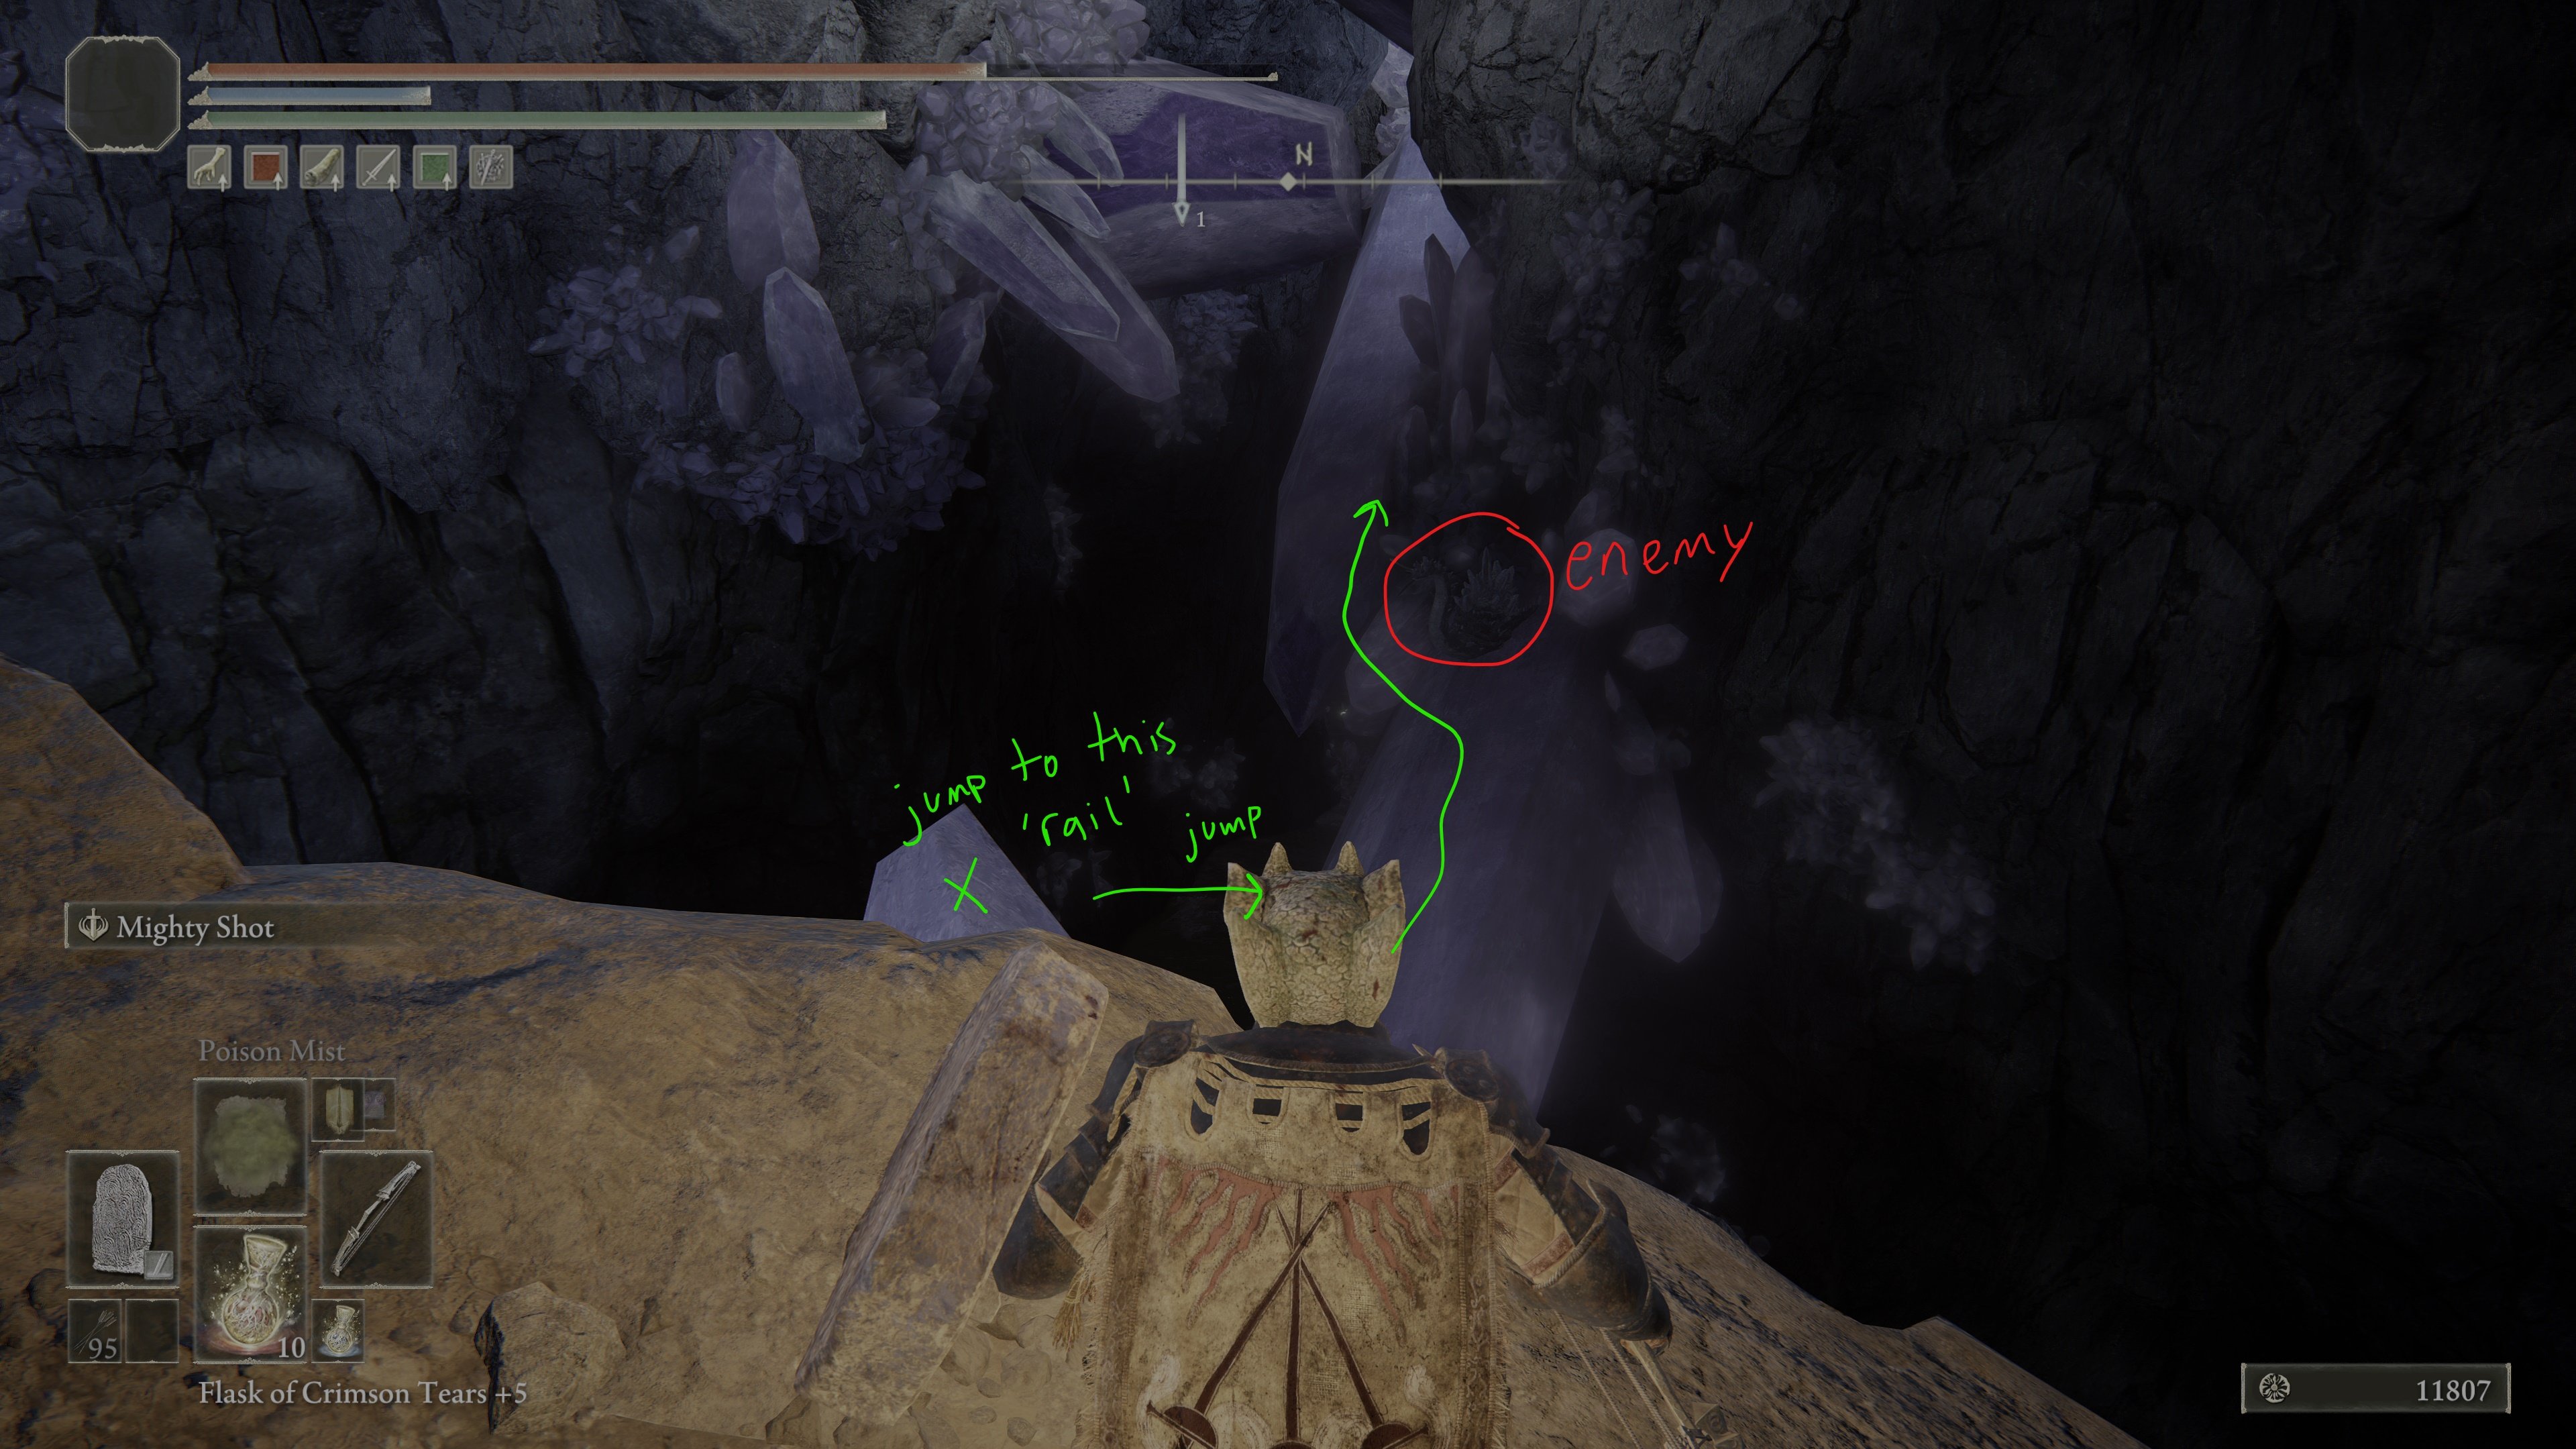
As you walk towards to the snail, you'll notice on the bottom left corner there is a gate guarded by Sorcery. That is the ultimate location you are trying to get to.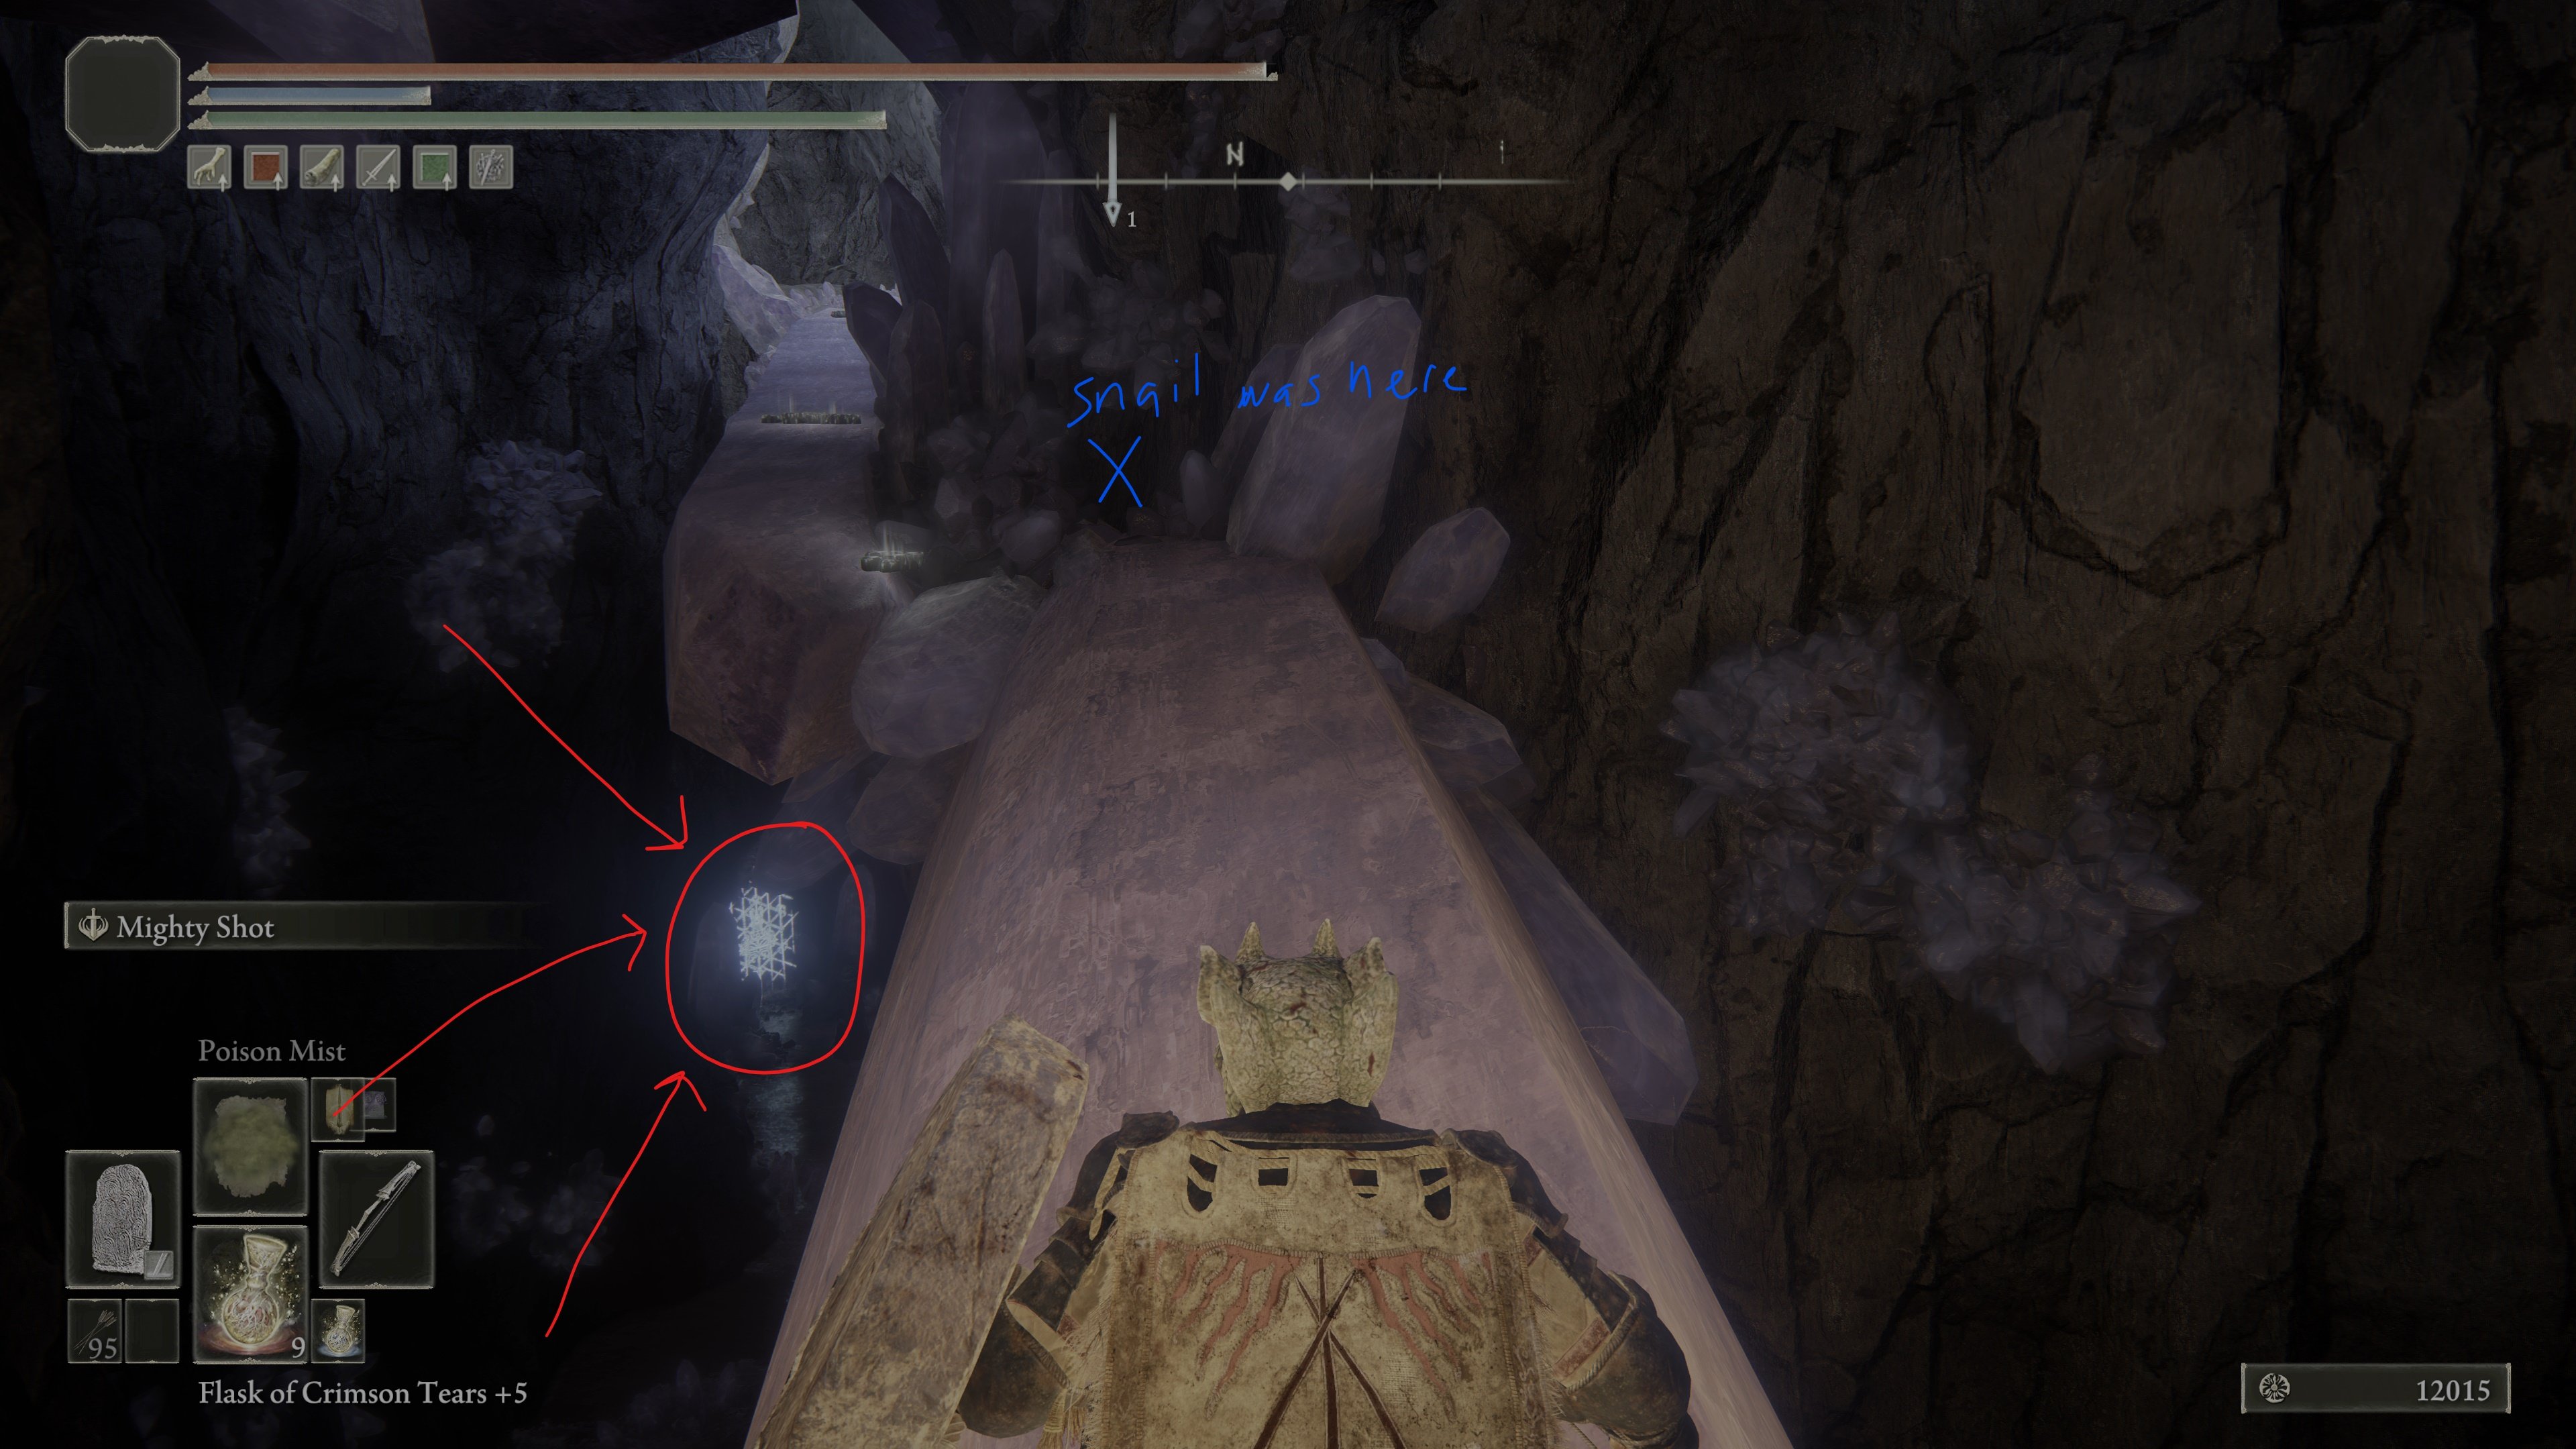
Once you get to around where the snail you killed was, it is safe to drop down, and begin your approach to the door -- but note that it is guarded by a Glinstone Sorcerer.
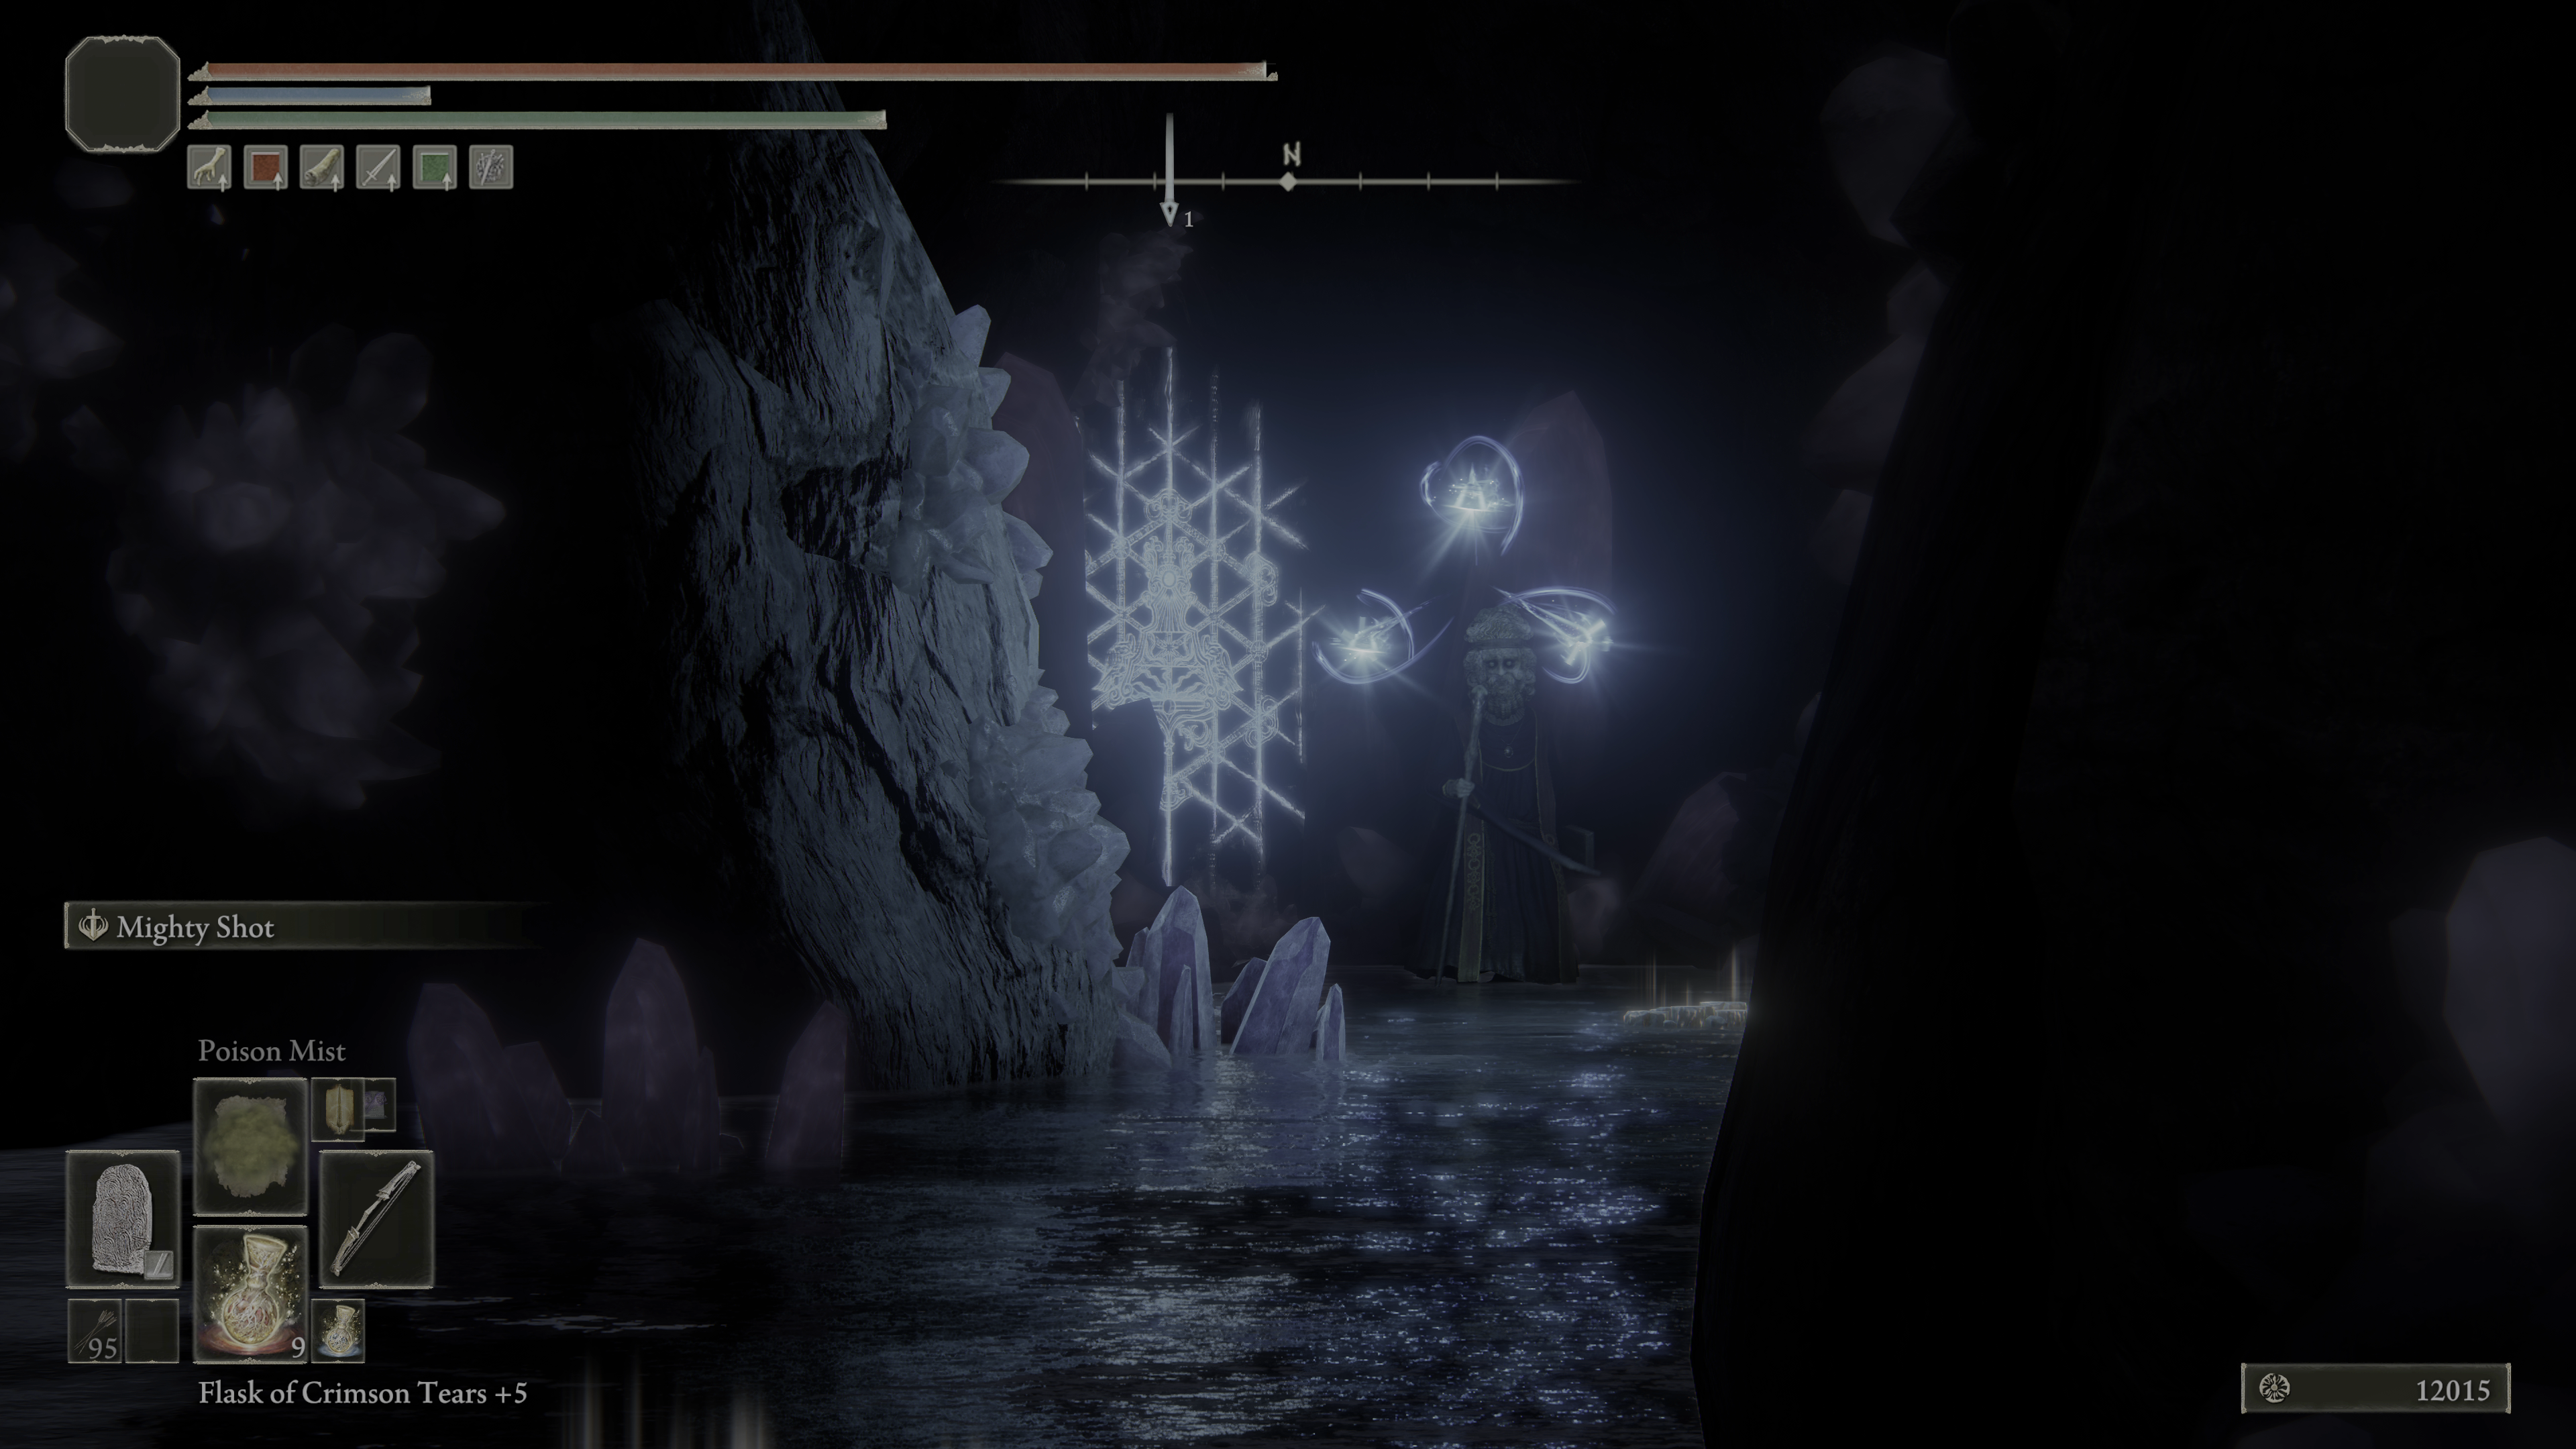
Lastly, walk up to the door and examine it, and the door will open, revealing a short cave.
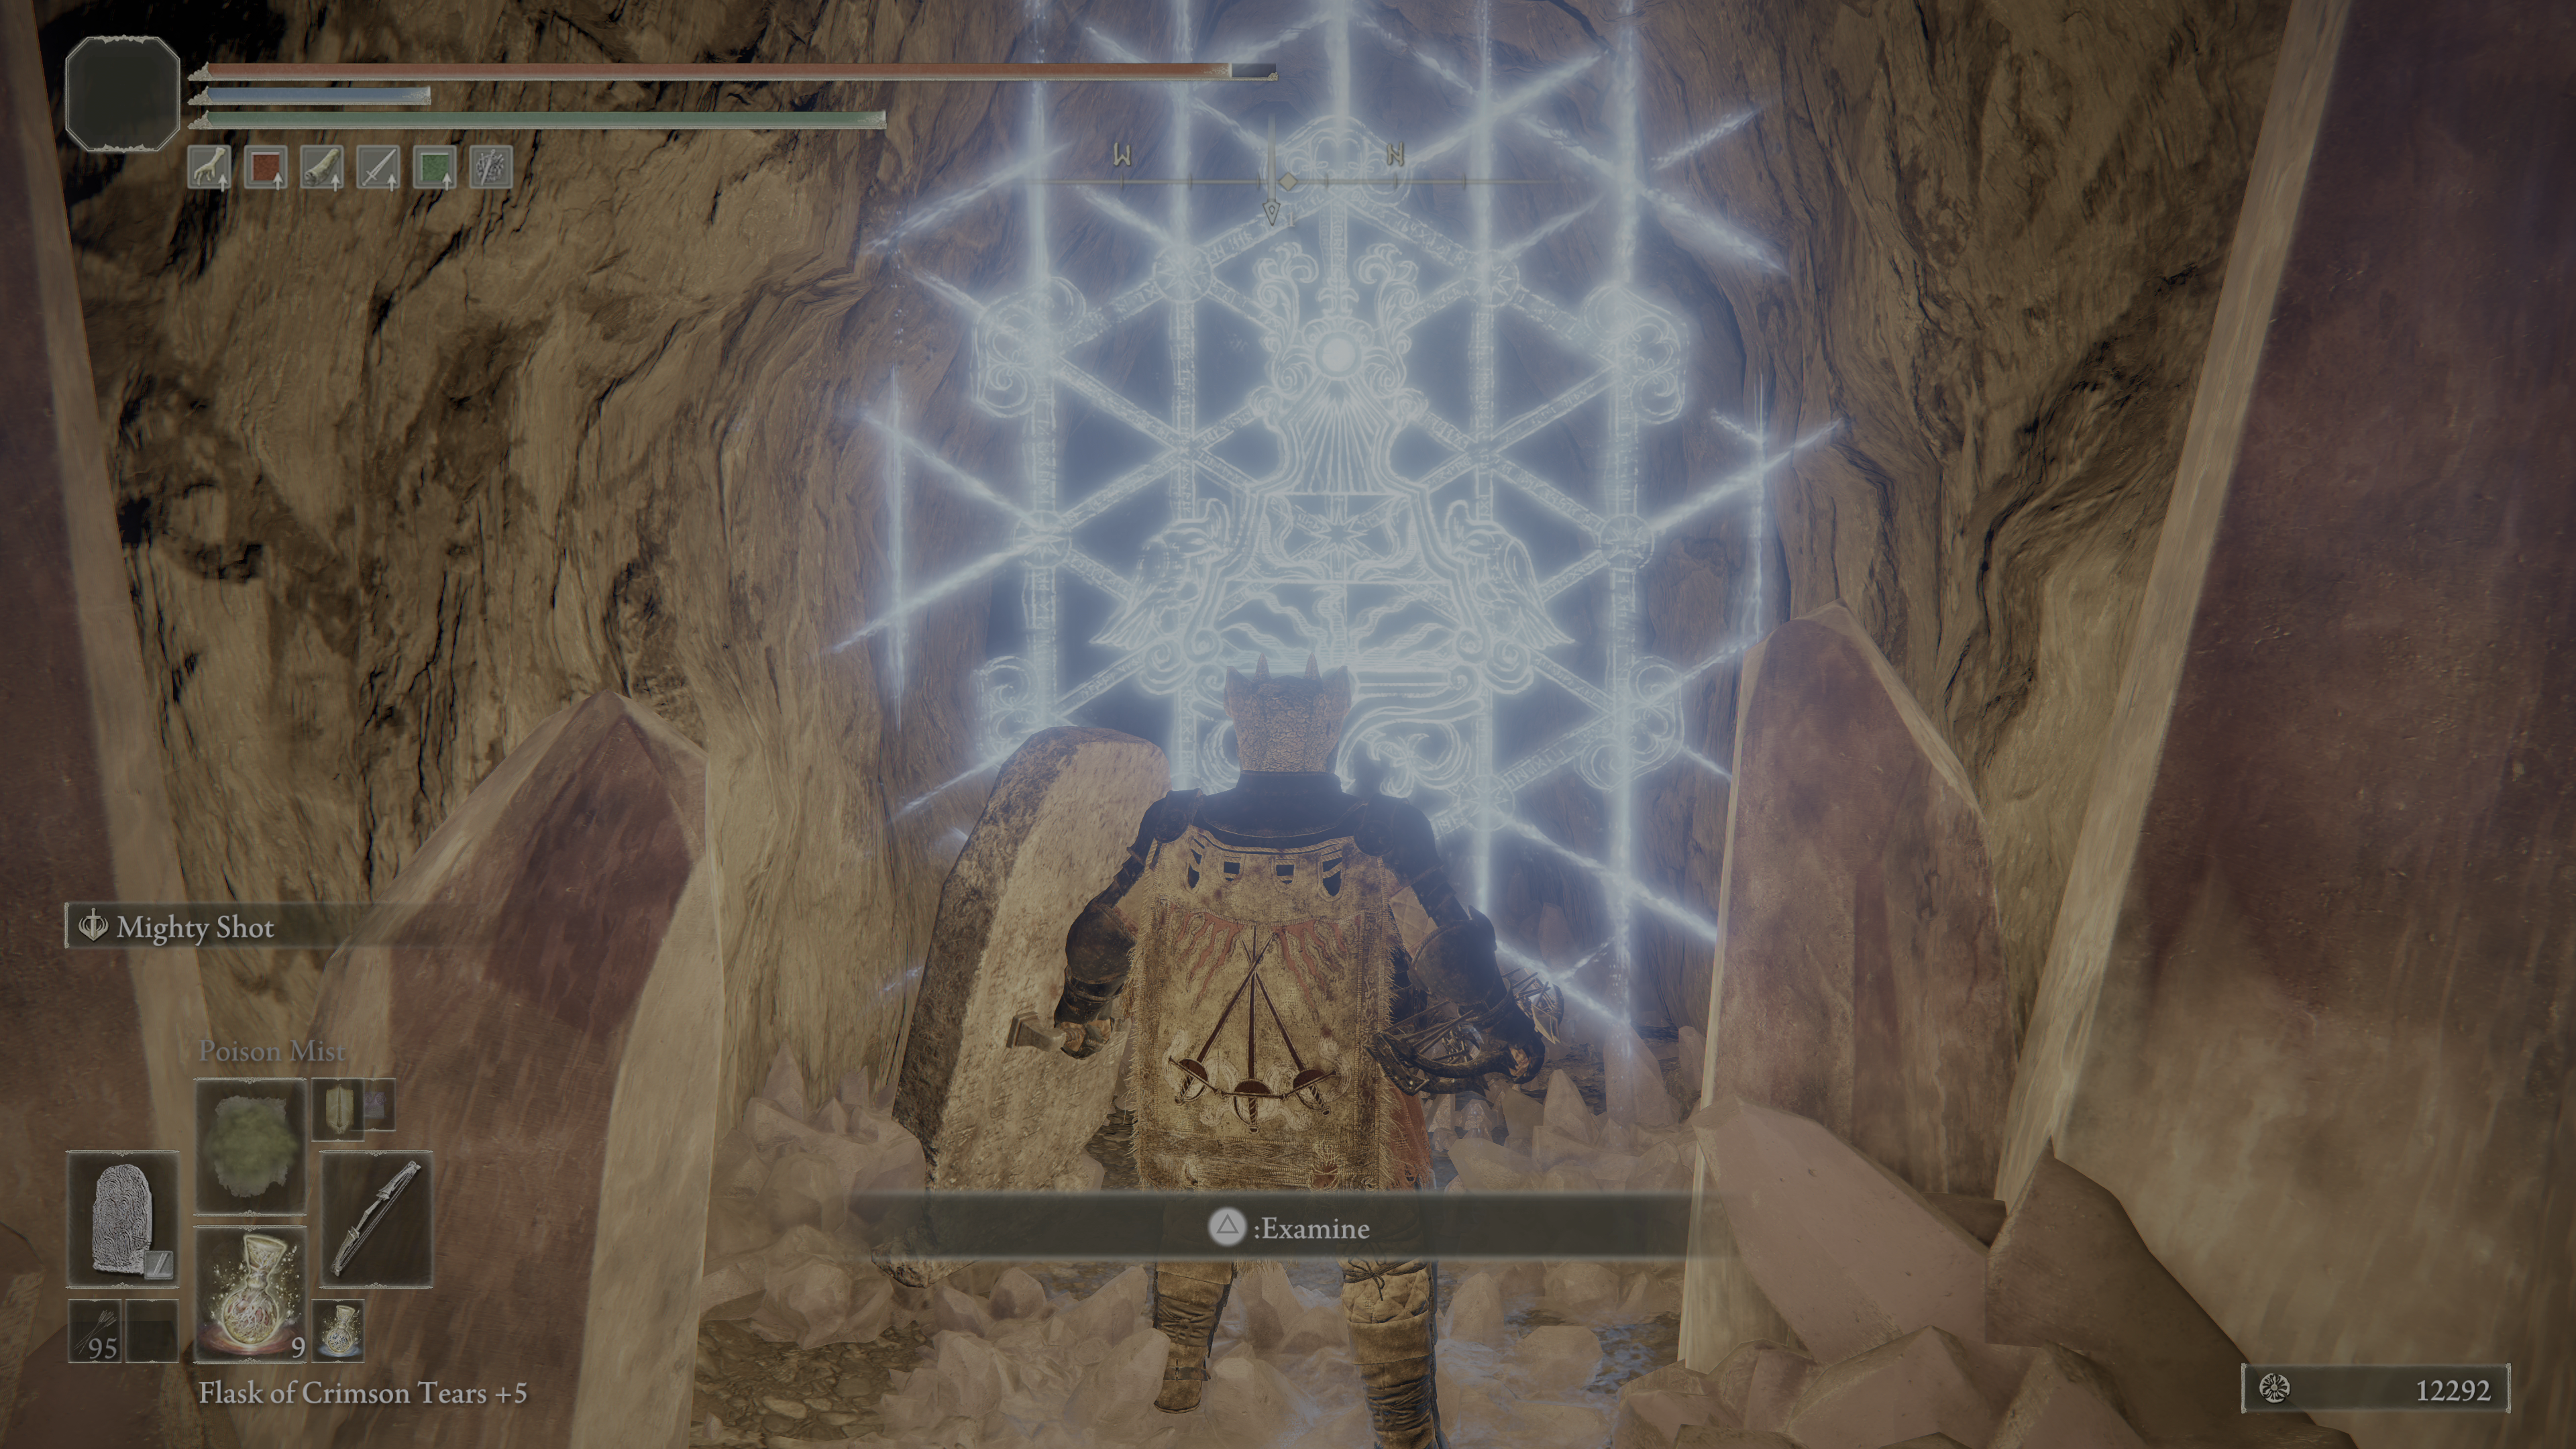
Proceed through the end of the cave, and Master Lusat will be there waiting for you.
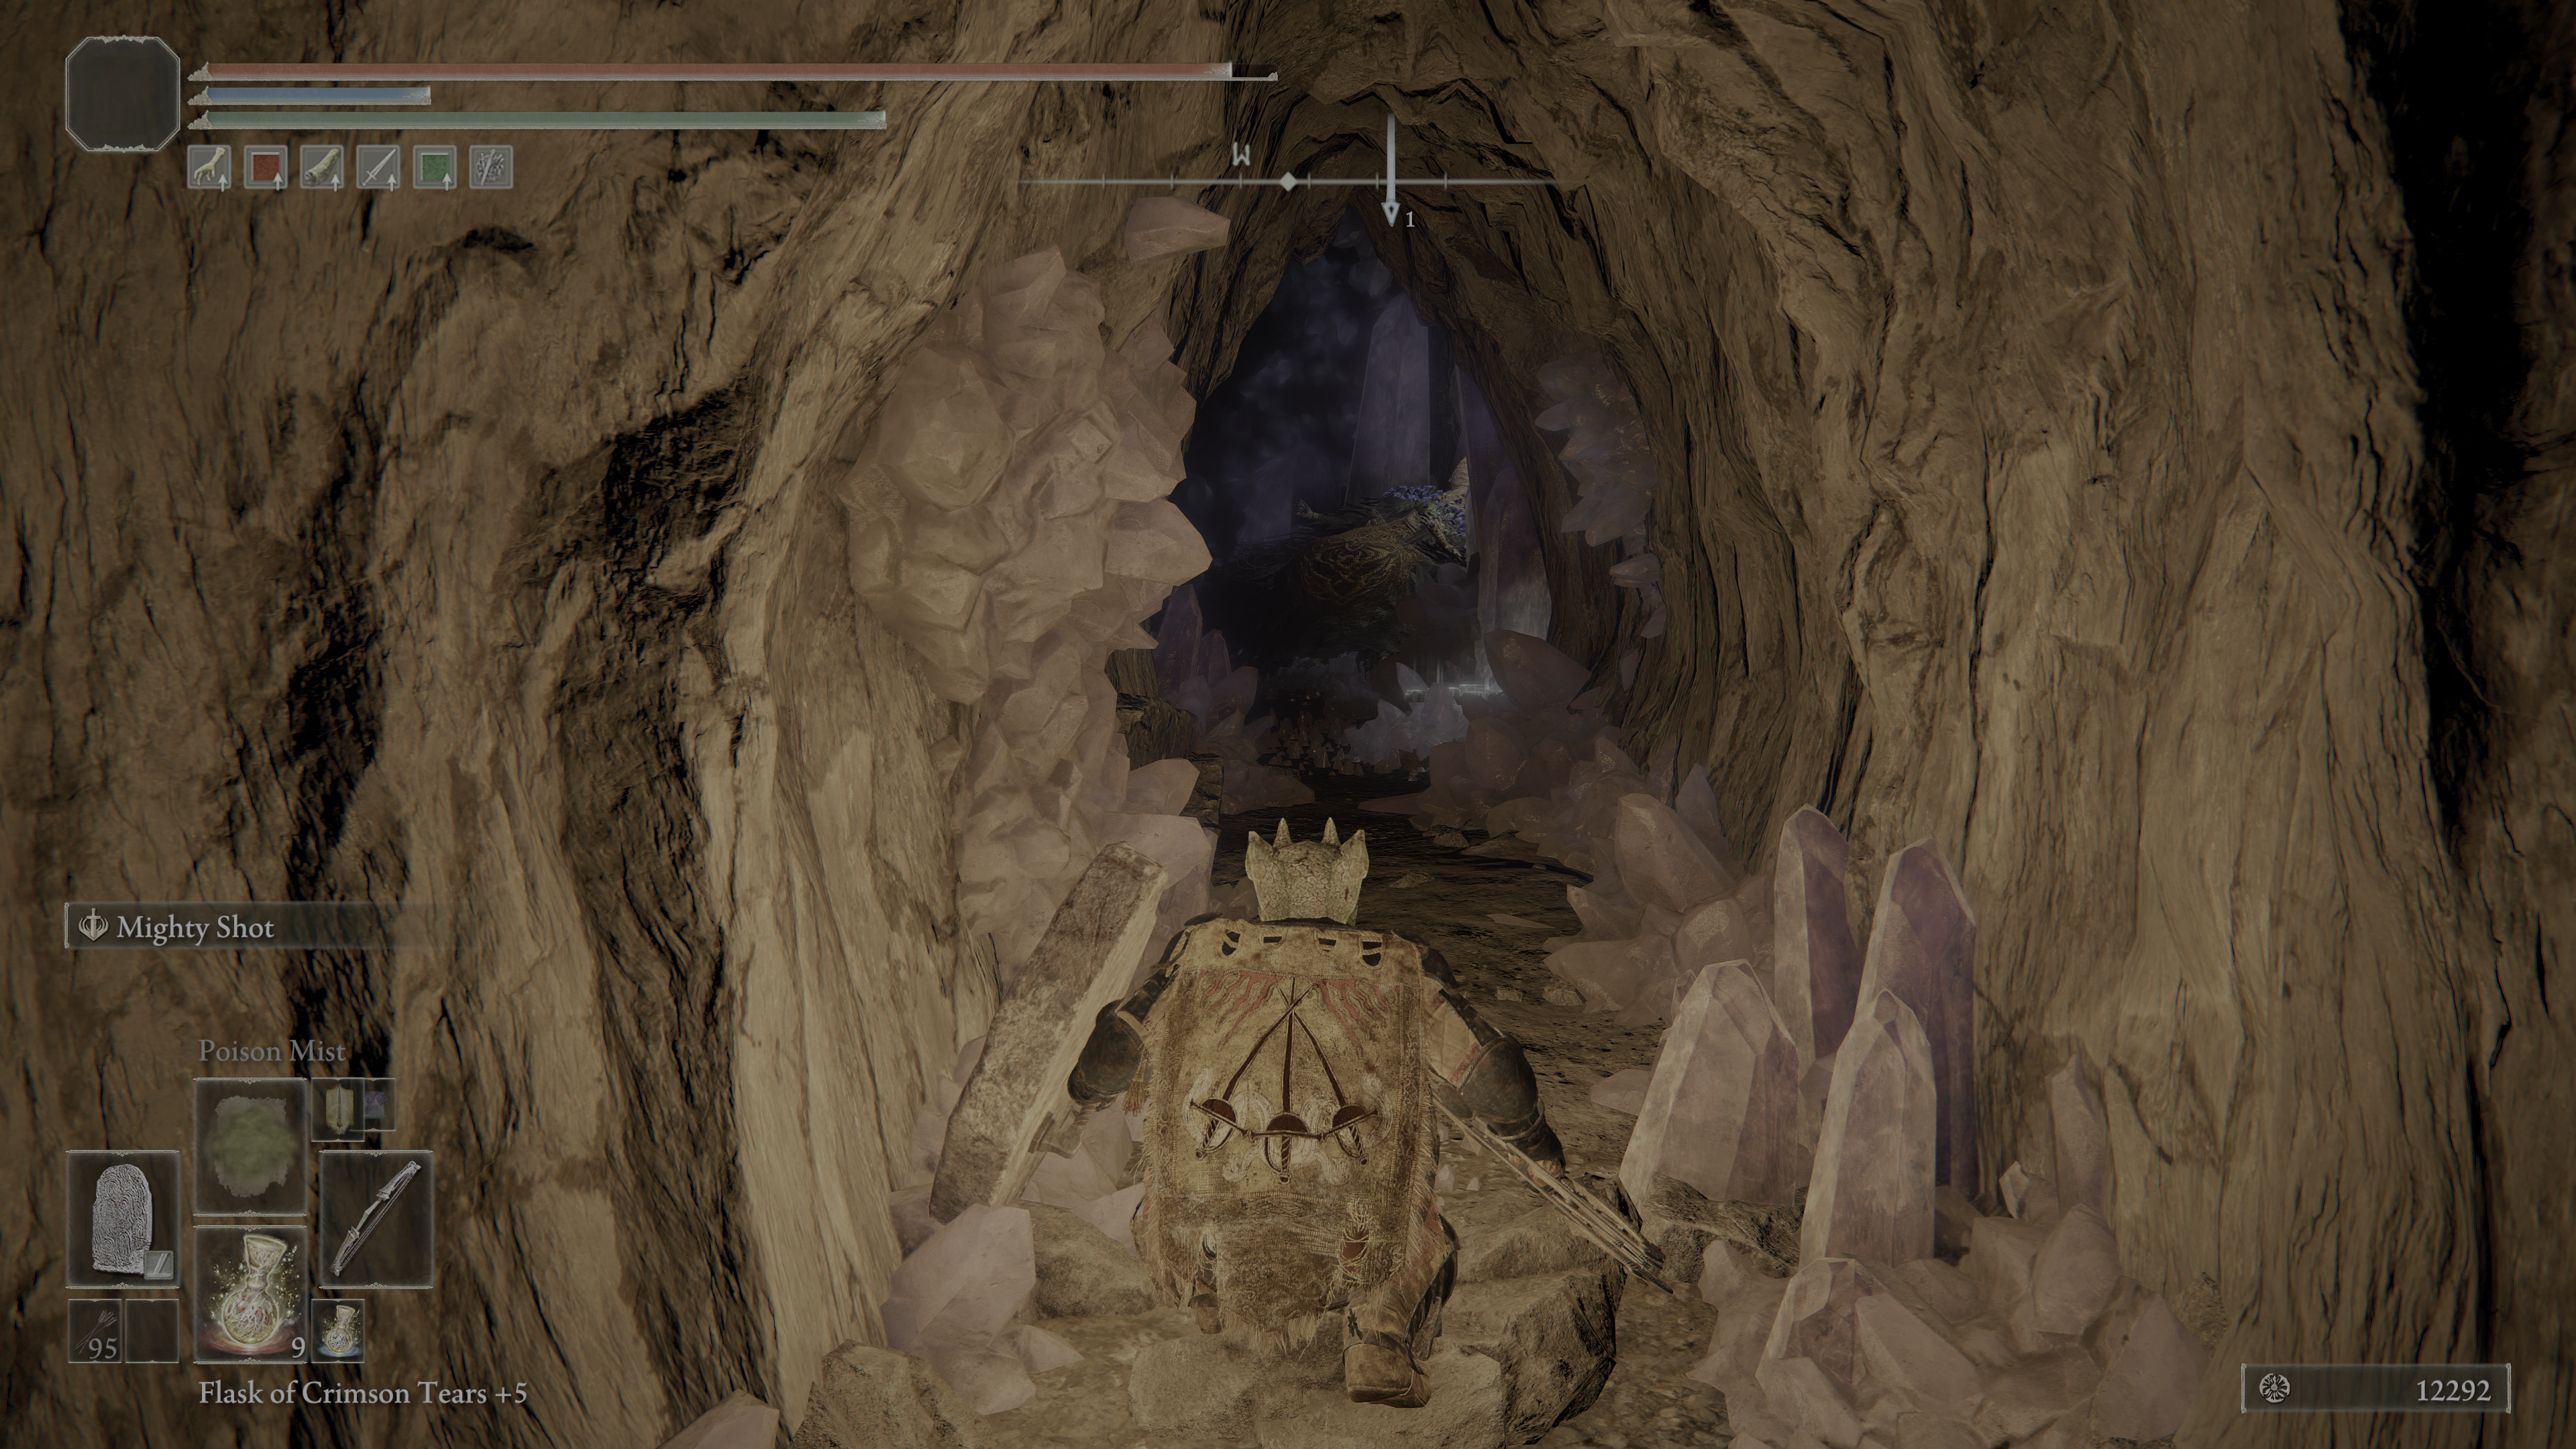
Approach him, and interact to Talk with him.
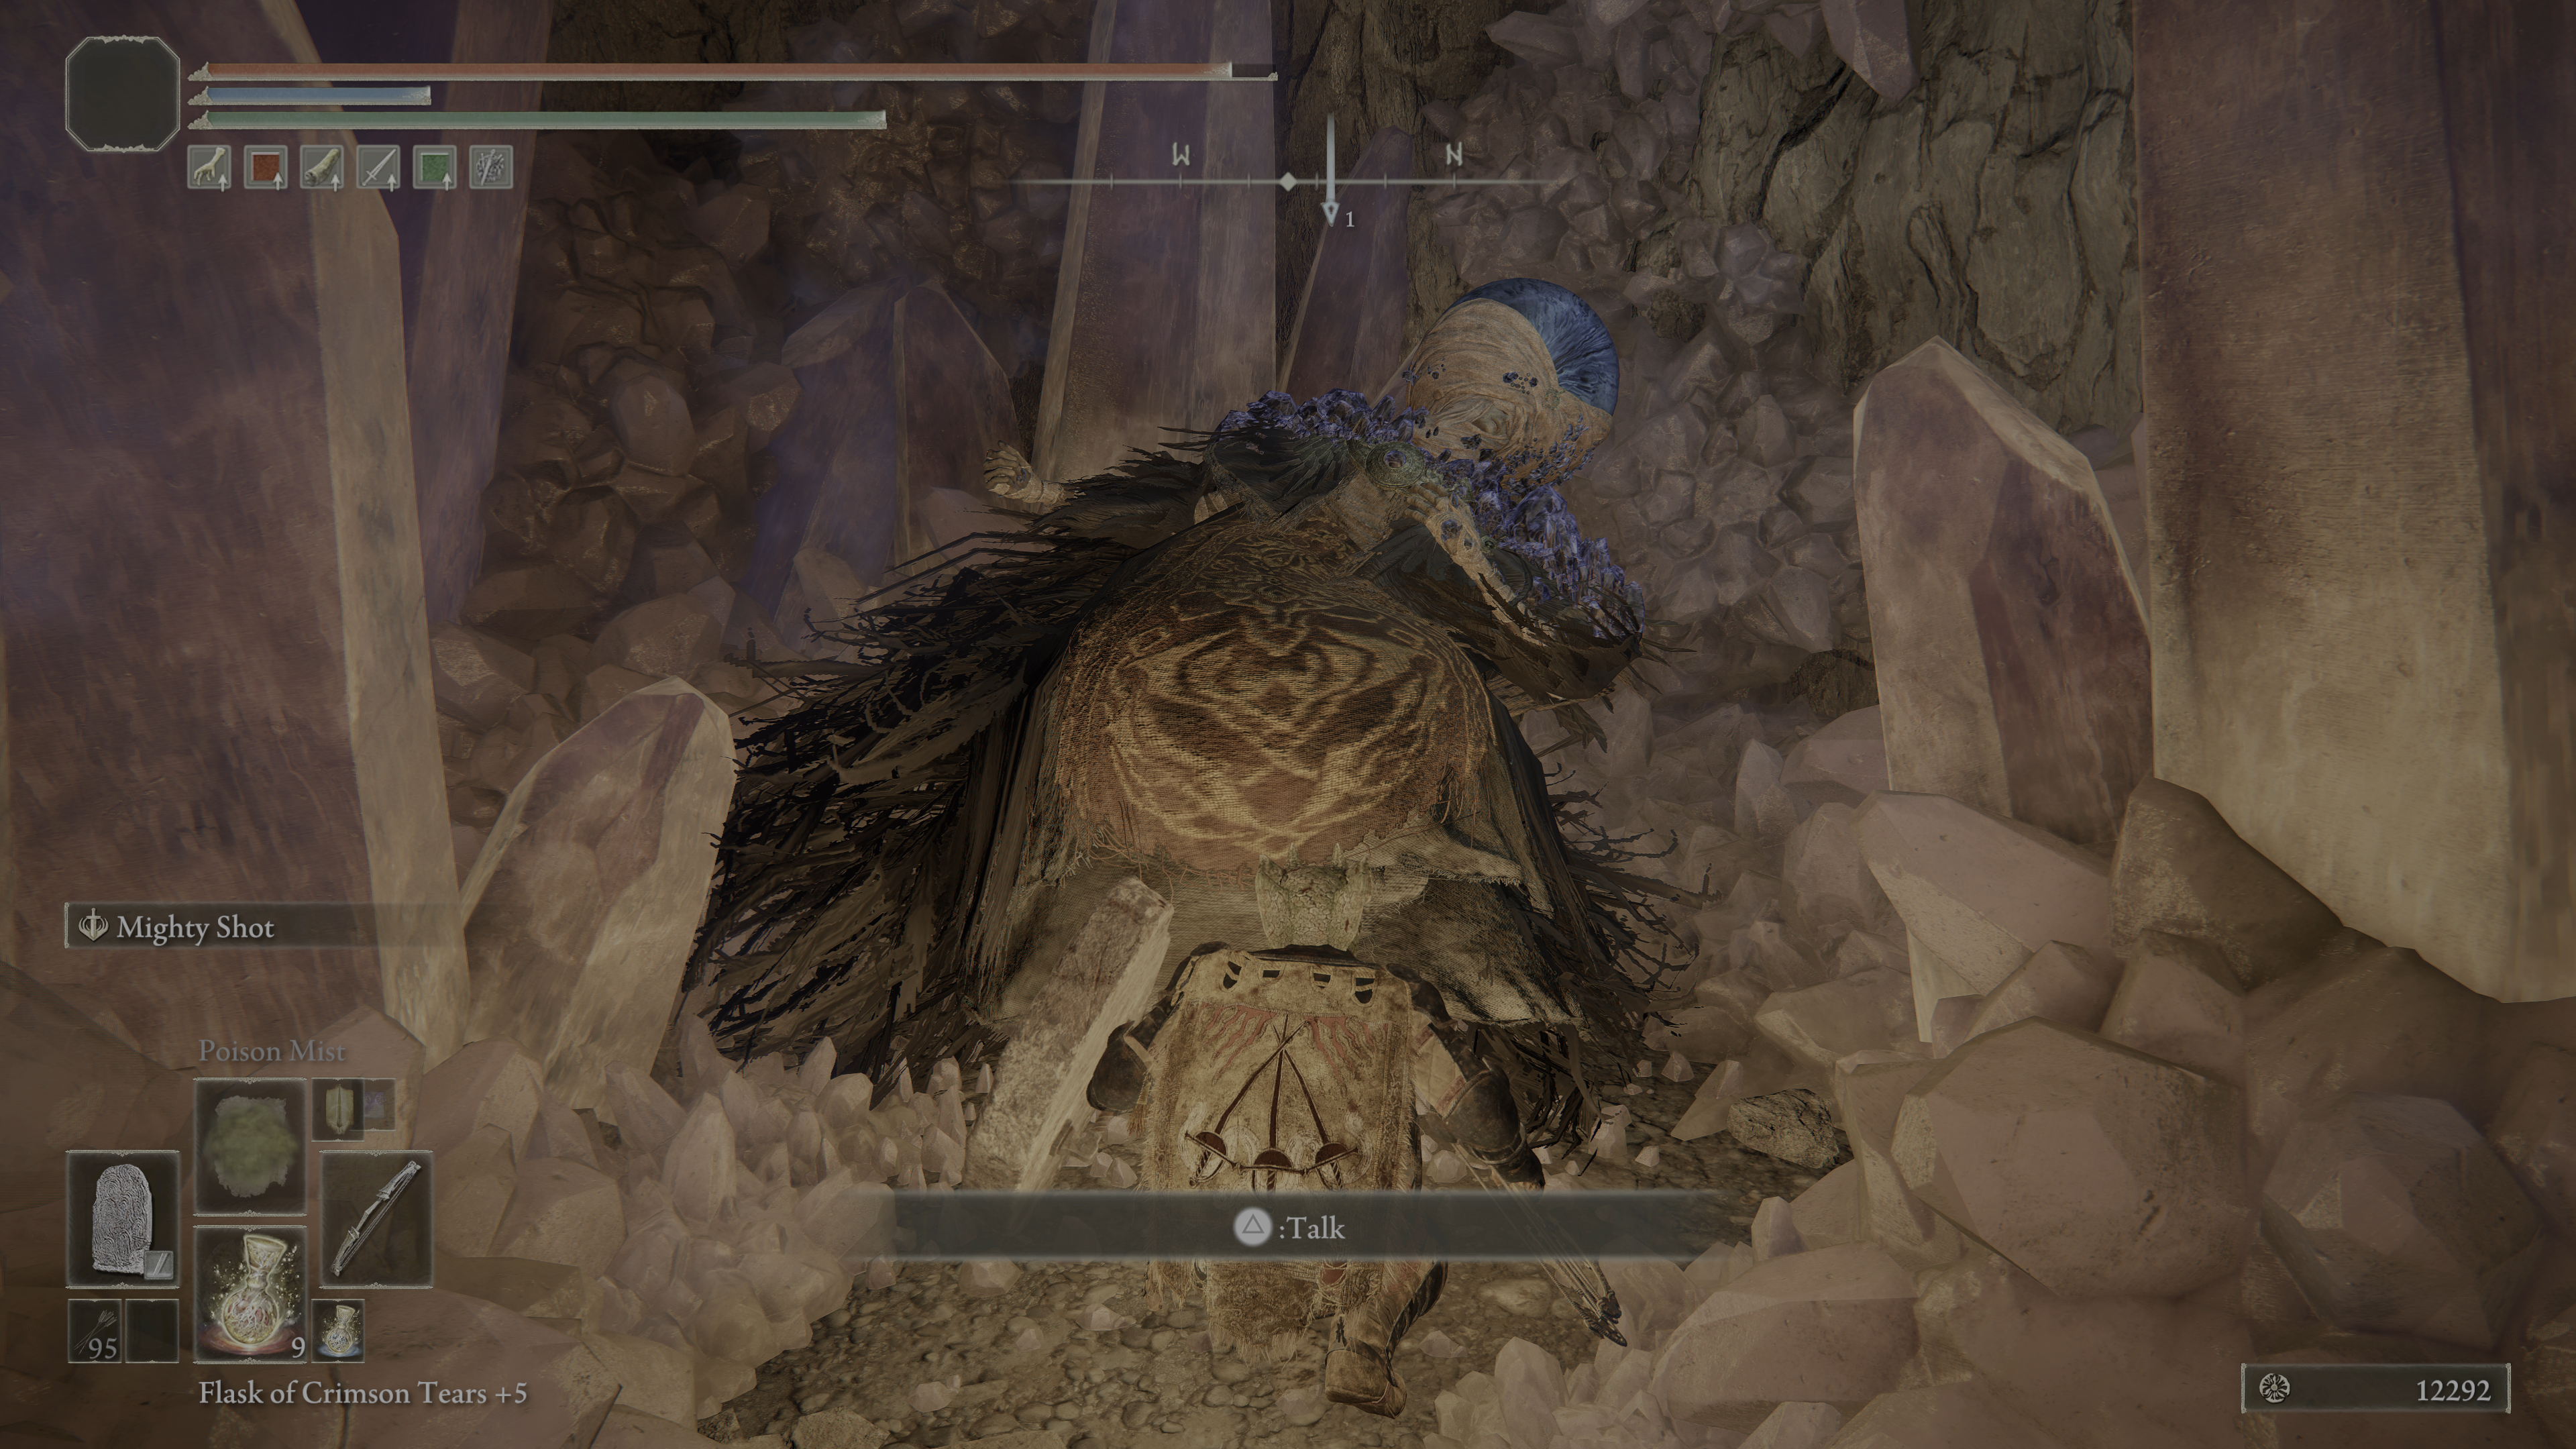
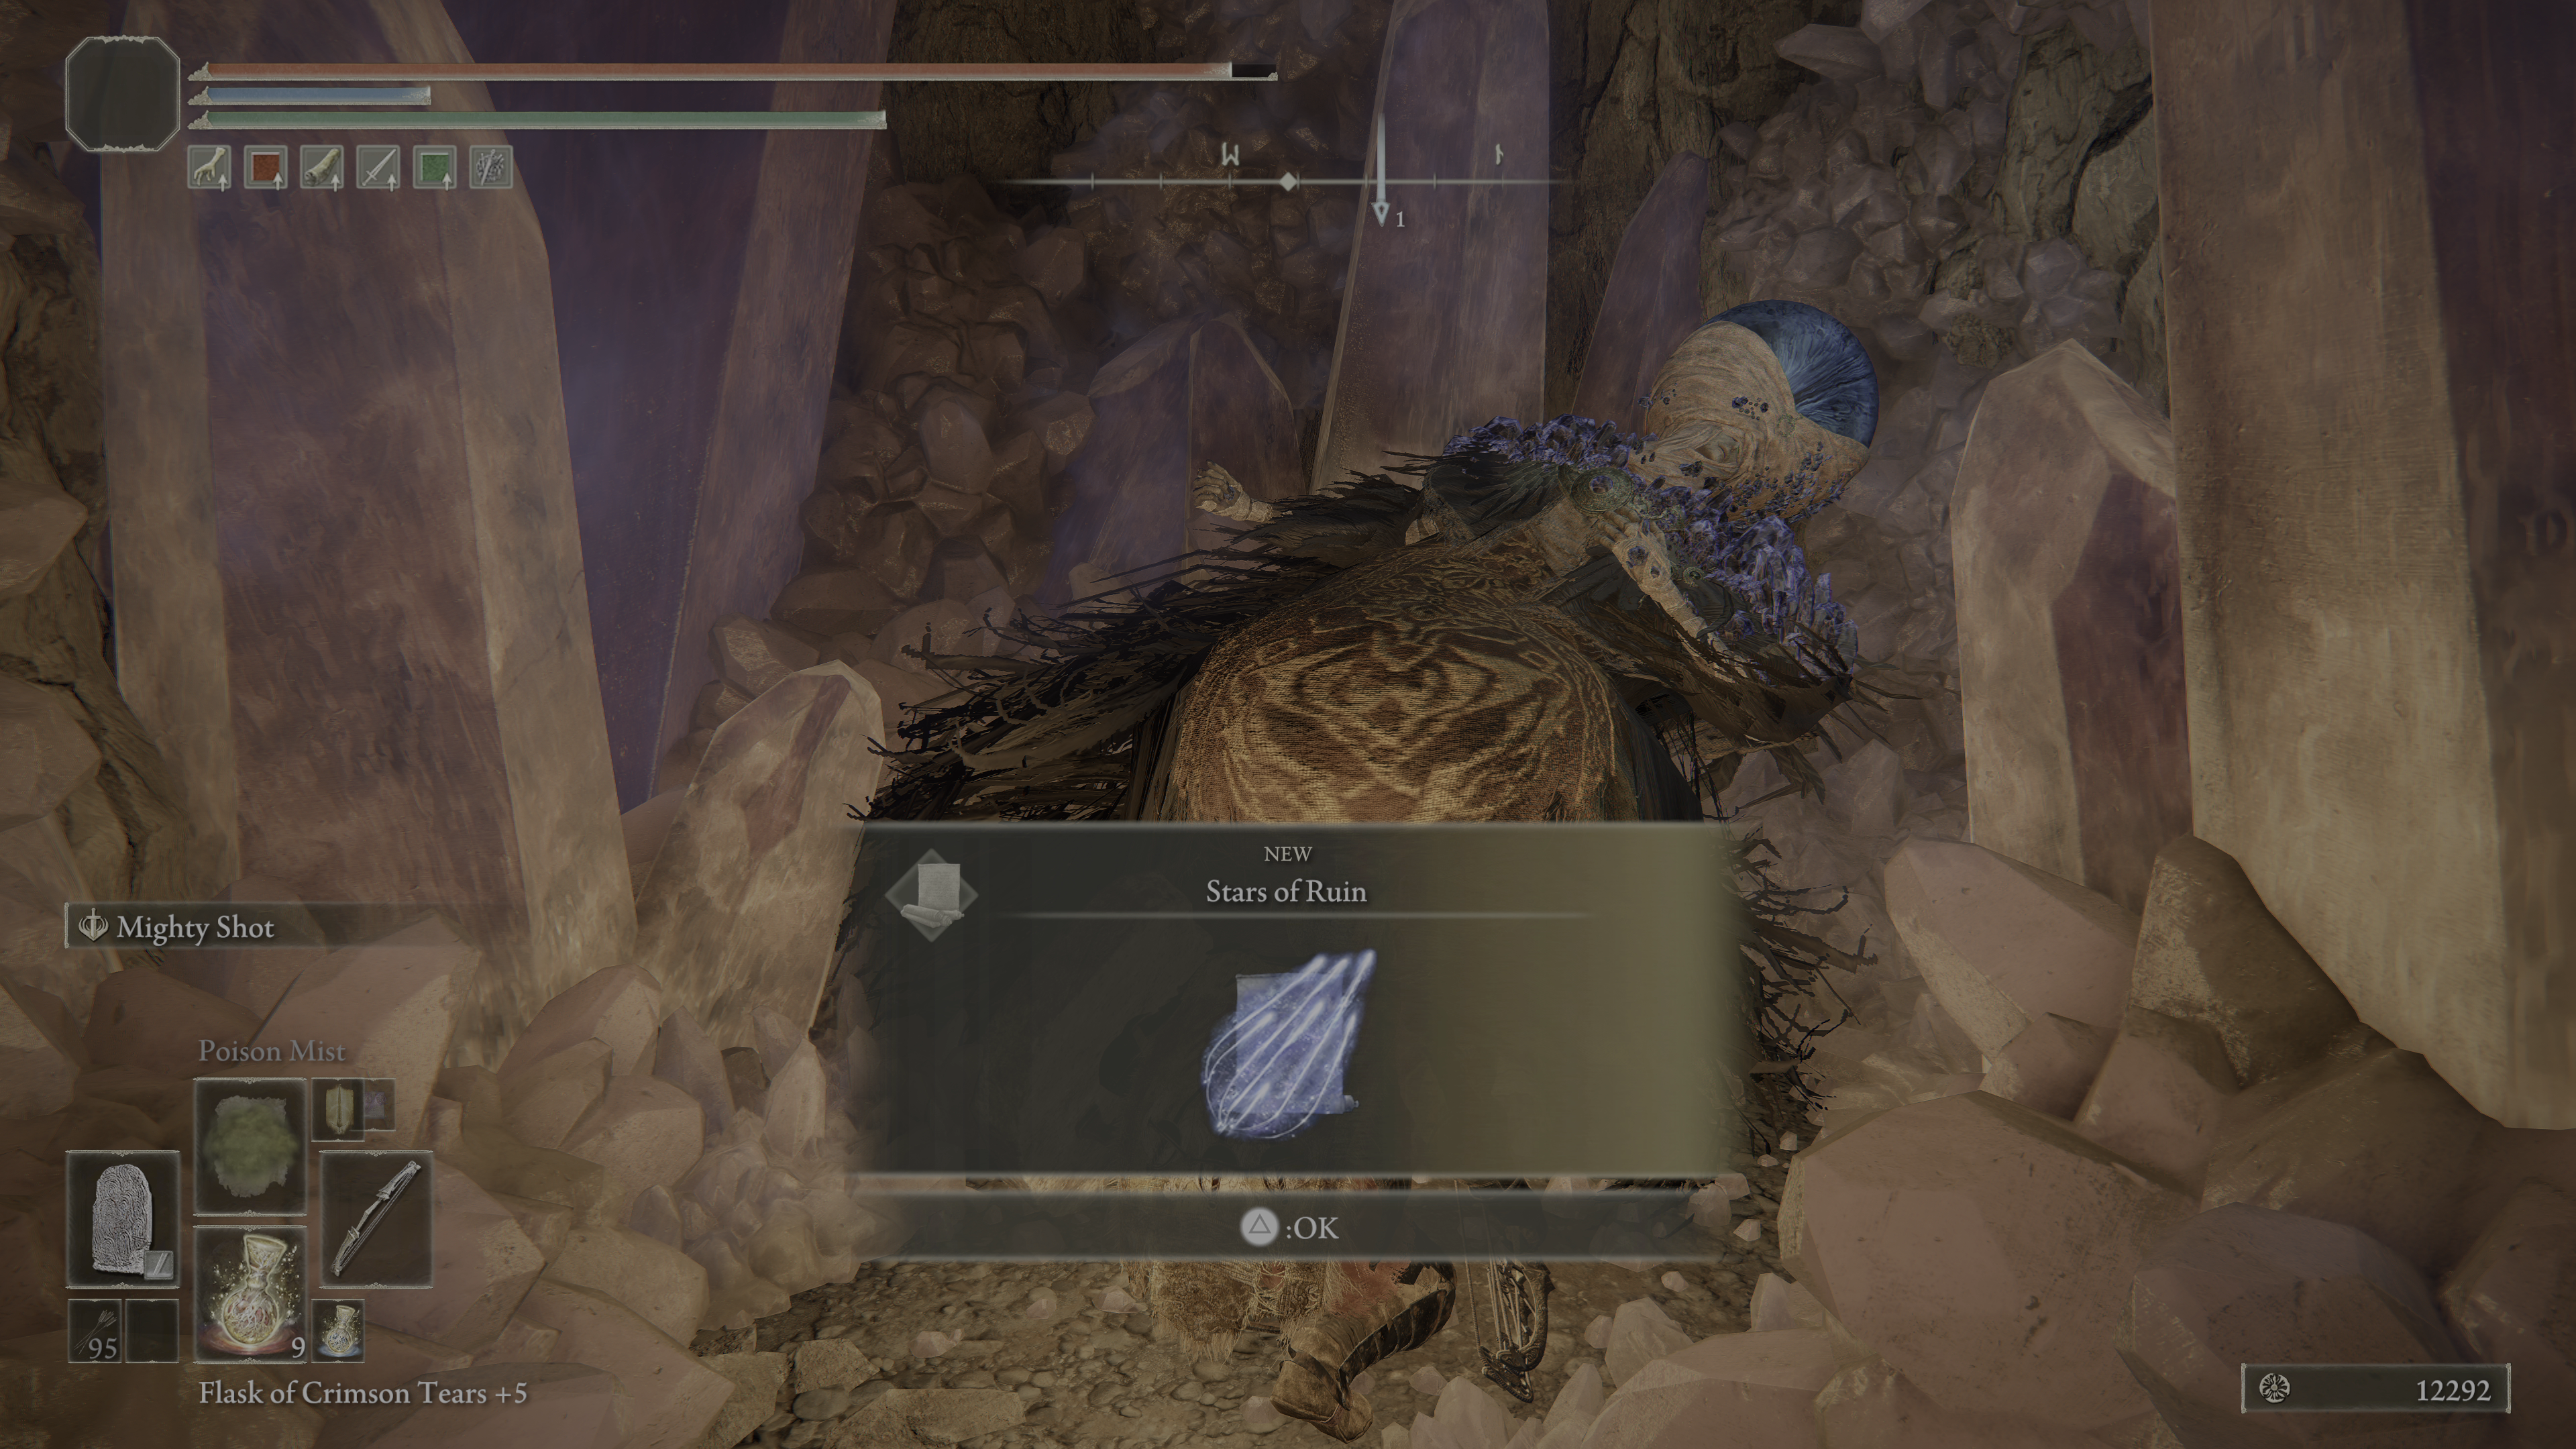
After "talking" with him (he won't say anything), you'll receive Stars of Ruin.
Elden Ring Sellia Hideaway Gallery and Notes
Master Lusat
 Anonymous
 Anonymous
 Anonymous
did you try checking for illusionary walls along every single mountain outside???

 Anonymous
Gavel of Haima saved me here. Especially if Crystaloids group together you can hit all 3 of them repeatedly, so just hit, stagger and stab closest one to you. Just need to be careful when you run out of stamina/FP.

 Anonymous
Dunno if anyone has already said but if you are looking for this place, if you have fort farroth just head south and follow the cliffs to your right, go down the spirit sping and follow the cliff back to your left and it will take you right to it. Maybe 20 seconds from the fort farroth site of grace.

 Anonymous
I don't know why, but when I saw THREE health bars when I reached the boss room, I got reminded of that blonde girl sorrounded by black dudes. Thank god for Banished knight Oleg lol.

 Anonymous
Another so called ‘boss’ fight where they just take a known enemy and add 1 or 2.. feels a bit lame for me

 Anonymous
Nothing I had actually hurt these guys, so I had to run around and spam black flame tornado

 Anonymous
 Anonymous
For the boss, I went tanky, with striking weapon. Im fth/arc right now, but those aren't effective against this boss (these bosses?) save for Flame Cleanse Me.
I went after the caster first while my mimic kept the other occupied. The spear came after me, so I had to hit and run on the caster. After the caster, I beat up on the ring thrower that was occupied with the mimic. And last the spearman.
That was my third attempt... and worked well.
 Anonymous
Playing sorceror and I've never been as pissed as this fight. Stuck in a room the size of a rat's urethra while getting wailed on by three guys you cant do damage to initially

 Anonymous
My headcanon is that this is an illegal mining operation, which is why it's hidden behind a fake wall

 Anonymous
From the Church of the Plague, Torrent out the door and turn up the right side above the path. Continue in the NE direction under an arching root and you'll see a hooded sorcerer who will cast on sight. The club becomes a Glintstone hammer with quick, multiple attacks.
The illusory wall is directly behind the distinct headstone as stated.
 Anonymous
 Anonymous
Just Lions Claw these guys - 1 and a charged heavy breaks them.

 Anonymous
There is a bunch of graveyards above Sellia, but the one hinted in the note is the most remote one. I didn't even connect it to Sellia. Only found out the cave by googling.
I mean, if I wanted to hint on a location, I'd use more intuitive language that wouldn't riddle people. Unless I was a troll specifically interested in giving my players a headache.
 Anonymous
Love those Crystalian bois. They are so annoying to fight, but fun to punch at with the Grafted Dragon arm :D

 Anonymous
Someone has already asked and got no reply, but I'm wondering what armour set is that in the photos as well? it looks like the elder imp head elm but I don't recognise the design on the cape.

 Anonymous
 Anonymous
How do I edit this wiki entry? the fastest way to the hideaway isn't from the church of the plague. The fastest route is to go south from Fort Faroth, take the spirit stream off the cliff. it's less than a 2 second walk, and plus you should have the grace for Fort Faroth to get the Medallion anyways, and may not have the grace for church of the plague depending on how early into your playthrough you are or if you intend to do Millicent's questline at all. IGN: Killingfame / KillingfameTTV.

 Anonymous
Stumbled into a decent tactic for the Revenant. Drop a glow stone in his hole so you can see him. Then hit him with Night Maiden's Mist. Bye Bye.

 Anonymous
For as many times as I've been through here (twice each play through) it's still an effin maze.

 Anonymous
 Anonymous
If you're following their "100 percent" walkthrough because as with any of these games finding anything alone is a nightmare, then you probably ended up here after failing to do Sellen's questline properly before both Renala and Radahn. If that's you join the club... RIP Stars of Ruin. Perhaps in the next playthrough...seriously though the NPC quest details are half the game.

 Anonymous
The crystallians lose their innate defence buff when their posture is broken, by ANY source.
You can run up to them and hit them with flame of the redmanes twice to break their posture and even the playing field. No need to use a striking weapon.
 Anonymous
Great Shield Soldier Ash and Rock Sling. The boys do an excellent job of tying up mid size (physical) bosses, at least one, maybe two, allowing me to Rock Sling enough to break their poise armor and finish them.
Still hate the maze of a cave though. Finding the Crystillian Ash is a major pain.
Just trivialized this boss, used Fanged Imp Ashes +9 and Lansseax's Glaive, didn't even buff my incantations. no Rune, if you hit them with the glaive they get interrupted and KNOCKED down, also the imps are aggressively battering their shields, did the usual anti rot prep (boluses & Liver) but. the Glaive incantation was amazing. Did a Coup de Grace on the Spear and Ring with Regalia of Eochaid.

What a ***show of a boss. I probably spent in the range of 8-10 runes before I got them down. I knew they were vounerable to Night Maiden's Mist, but found it extremely hard to avoid their hits even with different ashes tried.
In the end I managed to circle around them, spamming mists in front of me whenever I got the chance. And then just kept circling around. Luckily this did the trick in the end. Safe to say I won't be returning anytime soon ;-)
 Anonymous
The boss does not appear susceptible to the crystal dart confusion effect

 Anonymous
 Anonymous
Good way to deal with the triple boss for mages: Night Maiden's Mist bypasses their derp armor, Pumpkin spirit is tanky enough to keep them busy (at +5 at least). Took 'em down on the first try this way.

 Anonymous
Just FYI if you stand on the ledge above the revenant right when you walk into the room with purple crystals and try to pick it off from up there, it can teleport behind you. Only happened once, when I came back after Sellen’s quest but it was a surprise.

 Anonymous
Honestly, I wouldn't be surprised if all the crystal caves just blurred in my head together, but I could've sworn I fought a Bloodhound here as a boss instead of the trio that people, reasonably, are having a ****ing terrible time with.
Keep in mind, I only did Sellen's questline post final boss, for completion's sake, to see how it plays out, and when I saw the bloodhound, I just thought, "weird choice, but ok"
No one here has mentioned it's existence or that there was a change to the boss at some point, so I either imagined it or I'm thinking of another crystal cave?
As of 1.04 the bosses here were nerfed into the ground. They're extremely unaggressive and rarely attack. i wrnt for the Staff one first and RingBlade and Spear sat around picking their noses and attacked maybe one every 15 seconds. I think even From realized what a mess this fight, was but I don't know if this was the best way to fix it.

 Anonymous
 Anonymous
 Anonymous
There are upgrade materials in this cave. There is a somber smithing stone 4 in a hard to reach smaller cave, where you have to jump up to before the bossroom.

 Anonymous
I have absolutely NO CLUE how FROM ever expected anyone to EVER find this place on their own. All you're told is that Lusat went back to Sellia. So..what would you do?? Go to Sellia and start looking around. You wouldn't go quite a ways North-East of Sellia and decide to explore this random graveyard that has nothing to do with anything. And even if you did do that for some reason, and you decided to go up to that corner of it, all you would find is a unique enemy who you've never seen. You kill him and go "Hm..that was interesting, wonder who that was" and you leave. You are not going to decide to run up to the meaningless cliff behind him and start smacking all around on the cliff wall that is no different from the thousands of other cliff walls in the game that has 0 hint or identifying feature whatsoever. You aren't even told that you're looking for an illusory wall! I guess the idea is that you were supposed to find that unique sorcerer and connect that he is guarding the entrance to the cave, but..no. Telling you to look in Sellia for Lusat is like telling someone to go to NYC and find someone who is hidden under a fake sidewalk that is painted identically to any other sidewalk in the city. Obviously SOMEONE found it, but I have no idea how. Looking in the game files maybe?
Honestly, as much of a breathtaking masterpiece as this game is, without guides, 90% of the content would stay hidden. Most questlines are like this where the next location is just some random spot somewhere in this massive open world with no way of knowing when, where to go or how to trigger it. I honestly don't feel bad looking at guides because I'd never find any of this stuff myself, just little bits and pieces.
 Anonymous
No idea how someone could find that cave, nothing hints where it is.

Put the somber stone and the lost ashes of war in the summary

Put the somber stone and the lost ashes of war in the summary

 Anonymous
This fight is useless now. Might as well have no boss fight since it's such a joke even without any summons. They ruined this fight.

 Anonymous
This fight is useless now. Might as well have no boss fight since it's such a joke even without any summons. They ruined this fight.

 Anonymous
The triple boss was much easier than expected. They will probably adjust it again. I was able to mostly attack one with the two others doing almost nothing. They went from aggro beasts to almost not caring about me being there.

 Anonymous
The triple boss was much easier than expected. They will probably adjust it again. I was able to mostly attack one with the two others doing almost nothing. They went from aggro beasts to almost not caring about me being there.

 Anonymous
The triple boss was much easier than expected. They will probably adjust it again. I was able to mostly attack one with the two others doing almost nothing. They went from aggro beasts to almost not caring about me being there.

 Anonymous
Easy fight with shield crash and any blunt weapon imbued with ice. Once frozen, the guys stagger even with a light attack and are stun locked from that point. Remember to swap out the shield with an actual weapon for crits then swap back after.

 Anonymous
I don't see it listed t but there's anther creature other than the miners, sorcerer miners, and snails. Idk what it is but apparently it can teleport to you when you attack it if you're not standing on a crystal.

 Anonymous
Missing quite a few enemy types in the list: royal revenant, sorcerers, snails.

 Anonymous
Def nerfed, it's a lot easier to handle the boss. Went in with a Staff of the Avatar with no summons. Spear was still annoying, but the Staff and Ringblade won't do sh-t unless you're near. Focus on the Spear first so the mofo would start walking towards you while the other two move at a slower pace. Kill the Spear first and everything will be a cakewalk. To be fair, I was still hit with the rot due to recklessness but as long as you got boluses or the Flame, Cleanse me, you'll be fine.

 Anonymous
The 3 crystalian boss fight are a joke now. They only attack one at a time, two standing still while you beat the one of them into submission.

I'm pretty sure they nerfed this boss fight. Hard. The spear one is much much less aggressive, and the thrown discs have worse tracking

 Anonymous
 Anonymous
this guide is as useful as just walking around everywhere and hitting random walls until you figure it out on your own

 Anonymous
The most annoying triple boss designed with fast attacks in all three ranges: close (spear poking dude), medium (stays behind throws rings that interrupt your actions) and long range - that damn mage. Needs proper strategy - here is mine that I used after quite a few fails, rage quit and returning later.
WEAPON: blunt damage, need to brake these shells, slice/pierce fails. I used great mace - hits like truck, fast as sword.
WEAPON ART: stamp(upward cut) IMPORTANT - this is the only way to interrupt their actions, they have infinite poise!
SUMMONS: Greatshield Soldier Ashes - it's five of them, pull attention of all three crystalians and tank it
Fight strategy: enter with two-handed blunt, summon ashes and run on left side towards back. All three bosses will have their attention concentrated on shield soldiers, while you run to mage and throw him in the air with upward cut. While he is on ground add damage with jump strike and set up next upward cut. Repeat until dead (for me it was two cuts and jumps with one added to finish). Now run to front where shield soldiers are tanking other two. Properly set upcut can throw both remaining bosses in the air. Finish spear dude first, then ring one - summons help with damage and stunlock.
For me fight was over in 20 sec. Try it.
 Anonymous
might i suggest adding an image of the specific place where you need to attack to reveal the illusory wall? would be easier to find if people didn't need to hit everything along that cliffside for 2 minutes straight...

 Anonymous
if you're a caster, gavel of Haima is one of the only spells to do blunt damage and also knock them down every hit. If your summon can occupy all 3 and you get to wailing on em then the armor will break and you can switch to a ranged spell if you'd like

 Anonymous
 Anonymous
this bossfight awards 7100 runes and crystal barrage. ridiculous .

 Anonymous
Thank you to whoever appraised my message during the fight, saved me from that spear ****

 Anonymous
Advice for faith/melee builds : Aspect of the crucible : horns helped me win this fight :)
Don't loose hope !
 Anonymous
Wonderous physick: Tear that heals you gradually, and other of your choice (I used the bubble to stop first hit). Summon: Your choice, ideally one that brings multiple to keep the other crystalians busy (I used dogs, weirdly). Method: Go in like Mike Tyson using a souped-up Flail with Wild Strikes. Get punched but punch back harder. Be prepared with the healing flasks and take them down one by one. I didn't plan which one to get down first. It just happened to be the hopping spear nutter as they were the most aggressive, obnoxious psycho out of them. Then came the olympic discus thrower as they thought they were a match for me. How they regretted it. Then it was just the lonely mage who went down like a Black Hawk in Somalia. I struggled so many times barely inflicting anything on this self righteous trio. On first attempt of using the technique described above, they were down and begging for mercy. Number of Runes wasn't worth it. Spell I received after defeating them was out of my IQ range. 2/10. Wouldn't visit again.

 Anonymous
what a creative and amazingly executed boss, 3 “types” of the same enemy youve already fought 10 times, and a boring scarlet rot gimmick aswell. man they really got the gears turning with this one

 Anonymous
Miyzaki: Boss ideas?
Employee: 3 crystalians
Miyazaki: I'm listening...
Employee: That also inflict scarlet rot
Miyazaki: Give that man a promotion
 Anonymous
Use mimic tear to draw their agro, and night maiden’s mist to melt them. Made it this boss a LOT less annoying.

 Anonymous
Alright so i found a pretty good method for the Putrid Crystalians, that doesn’t require too much on the player’s end during the fight except focusing on the mage alone. So i used the Greatshield Soldier Ashes+7, the golden vow ash of war to buff them, and some warming stones. They deal all blunt damage, are tanky, and most importantly tend to push fights into a corner, so you summon them, buff them, then go backstab the Caster Crystalian, hopefully with a blunt weapon (i had a nightrider flail) then check on your greatshield soldiers keeping the ring and spear ones attention if most of them are clumped in a corner, go drop a warming stone in the middle of them then go back to wailing on the Caster.
Repeat til Caster is dead, then focus on the Ring one since they can dodge behind, your summons’ shields, and repeat the method til it’s over, it’s not too hard this way, just becomes a small dow race before your soldiers may die!
It was simple enough this way, however my backup addition was to go get the perfumer cookbook 1, and also use the Uplifting Perfume on the soldiers for some extra buffing which should help
 Anonymous
Use and upgrade both the boneclub and crystalian ashes found before and in this cave. The crystalian will tank and the boneclub will do damage. After many frustrating rounds this one worked wonders. Also, cleansing fire for the sarlet rot.

 Anonymous
Parry the one with the spear, when he does the repetitive thrust, then crit him with. When you kill this one everything gets easier.

 Anonymous
 Anonymous
**** this bossfight snd **** the spear guy in particular with his constant hopping

 Anonymous
Worse ****in bossfight in the entire game, and i mean it. It's just 3 dudes with 2 moves each and high resistance to most damage types + rot as a gimmick. All this in a room that isn't that big. Also i should mention that the thrown discs are kinda hard to see with the environing purple crystals. In short you either know what to expect when traversing the fog and bring the right loadout and summon, or you get dumpstered. Awful design all the way

Couldn't do **** with the Greatsword, got wrecked so hard. They gangsta until I brought Gaint-Crusher +15 (Lion's Claw) into the boss room. Dragonbolt Blessing can make their physical attacks bounce off, interrupting their combos. They broke in like 2-3 minutes and I didn't even try hard. Damn, the weakness on them is pretty extreme I guess.

 Anonymous
'Aspects of the Crucible: Horns' incantation knocks them down, do it and punish them with a blunt weapon. Use summon to draw aggro obviously.

 Anonymous
Didn't end up finding this on my first playthrough, found it in NG+ but after defeating the boss and it showing the reward, it is not in my inventory. Anyone else have this issue?

 Anonymous
Greatshield Army we’re really helpful in the boss fight; aggro’d all 3, allowing me to focus on 1 at a time.
I used the beam from the sword of night and flame to knock them down and follow up with a jump attack - a couple of those breaks their shell and makes em ripe for a bashing
 Anonymous
beast claw did the trick for me, with radagons icon it cast faster, it breaks their shield eventually and also hits more than one sometimes, took a few more tries than I liked

 Anonymous
this walkthrough fails to mention the Crystal spear and the bolus's. How to edit:
where it says: "... and you can claim Crystal Dart x10. Nothing more to note in here so, head back..." change it to:
"... and you can claim Crystal Dart x10. Continue climbing to the top of this room and using the short crystal, get on the large crystal again. This time turn right and follow it a few steps north. From here, you can go north west and land on some jutting crystals to fall on a short platform with a crystal snail and some preserving boluses. Hit an illusionary wall behind it to reveal a chest containing the Crystal spear. With nothing more to note in here, head back..."
 Anonymous
Well... At least these dungeons are still better than Bloodborne chalice dungeons... I guess.

 Anonymous
For anyone looking for Lusat, in the section where you walk on crystals, you can drop off of them to a space below. In that space is a Grafted Scion along with a Raya Lucaria Sorcerer guarding a seal you can open with Sellen's key. Lusat is just through the seal.
Hope this helps.
 Anonymous
For anyone looking for Lusat, in the section where you walk on crystals, you can drop off of them to a space below. In that space is a Grafted Scion along with a Raya Lucaria Sorcerer guarding a seal you can open with Sellen's key. Lusat is just through the seal.
Hope this helps.
 Anonymous
In the room where you find snails for the first time, there are some Preserving Boluses and just jext to them another ilusory wall with a crystal spear

Pro tip: The Stake of Marika is so far back it's practically just halfway to the boss if you know what you are doing. Which means, feel free to leave and go gather things and/or get spells, equipment, etc because you aren't losing much especially with this very un-generous stake location. Also I feel like a lot of people forget you can summon other people to help, summoning human players is better than any spirit ashes. Ultimately I left the cave, forged a +9 greathorn hammer (which is 9/25 so it still sucks) and whipped it. Spec wise it does 300 dmg compared to my +10 bloodhound which is 700 dmg, but in this fight a hammer rules them all. Seriously don't let it keep you from besting these dastards, just bring a hammer. If it still ain't enough, go back to the start and summon at the pool. I get a strong feeling many bosses like this were intended to be co-op'd especially considering how early you can end up here.

 Anonymous
I can't summon ashes here... I can't interact with the statue either.

This is the most annoying fight in the whole game. Truly just awful.
I put on the Assassin's crimson dagger, reinforced a club (or other STRIKE weapon) as high as it could go and a greatshield. Crit fish and pray for RNG-sus until they're dead.
 Anonymous
great how this site doesn't bother to describe how to get to the Sorcerer

Updated walk-through with image as well as descriptive step-by-step to help players understand how to reach and subsequently acquire the CRYSTALIAN ASH (friendly spirit summon)

Updated this zone with an image and additional explanatory text in order to explain how players can get to and claim the Crystalian Ashes summons; was neglected being mentioned/ described within the walkthrough

The reason you dont do damage to boss is because you use slash/pierce damage type. You need blunt damage (maces, colosal weapons) that inflict lots of damage to them

 Anonymous
it must've been take your kids to work day when they came up with this one oh boy

 Anonymous
The sealBreaker barrier can be broken by first obtaining comet azur, then talking to sellen about it. Exhaust her dialogue and she will give you the sealbreaker.

 Anonymous
If you have the greatshield ashes they will trivialize the boss. Even unupgraded they can tank for days.

 Anonymous
Perfect example of the difference between actual difficulty in video games and brute force difficulty. Is there going to be an expansion where we fight 5 of them and they have 4x the health? Come on From Software, you are better game designers than this... just embarrassing honestly.

 Anonymous
A trio that are difficult to poise break, that inflict scarlet rot... Well, good job mimic tear exists otherwise half of this game's fights would be insufferable wastes of time

 Anonymous
 Anonymous
Is this boss supposed to be a nod to the ruin sentinels from DkS 2. Cuz those guys where cool af the first time you fought them. Didn't like this fight at all

 Anonymous
The reason the Mage guarding this dungeon has a stone club is so you can use it against the Crystalians if you were not carrying any strike weapons.
I put the Cragblade Ash of War on it, and stun locked them hard. I went Lance > Mage > Ringblade. For reference, I only had 16 Strength, since I'm a mage.
 Anonymous
If you have it the Assassin's Crimson Dagger really helps with the Rot.
Mage > Lance > Ringblade is the order I take.
Using the Demi-Human Ashes helps take agro for a good amount of time (I had +3 and stalled for most of the Mages life)


verbalase
1
+11
-1