Limgrave Tunnels |
|---|
 |
|
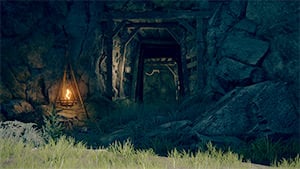
A deep tunnel used by many to mine smithing stones. Its zealous miners never dare to venture into its hidden chambers, for fear of the great Troll within. |
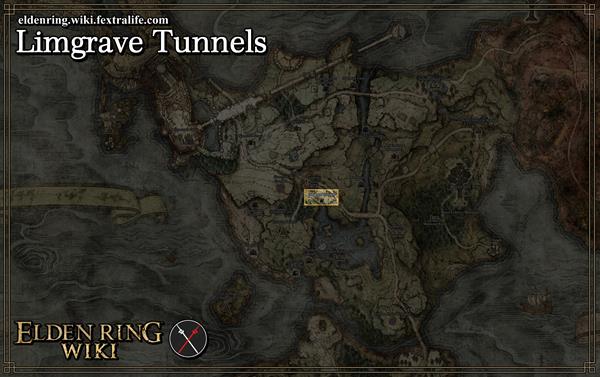
Limgrave Tunnels is a Location in Elden Ring. The Limgrave Tunnels is found in Limgrave, on the northern area of the Agheel Lake, just south from "Agheel Lake North" grace.
Limgrave Tunnels Map for Elden Ring
Elden Ring NPCs and Merchants in Limgrave Tunnels
- No NPCs in this area
All Items in Elden Ring's Limgrave Tunnels
Gather & Farm Items
Unique, Ashes and Keys
- There are no key items in this location
Limgrave Tunnels Creatures, Enemies and Bosses in Elden Ring
Field Bosses and Bosses
Walkthrough for Limgrave Tunnels in Elden Ring
The Limgrave Tunnels can be found on the southeast side of the map from the Gatefront Ruins [Map Coordinates Here]. NOTE: Bring a Torch to light up some sections that are dark. Upon arriving at the Limgrave Tunnels, you'll see a lift that will take you down, step on the button platform and you'll find a Site of Grace there to rest or use as a checkpoint. Notice that when you ride the lift down from the entrance, you'll see that there are two pathways that you'll pass as you go down to the section with the site of grace.
First go back to the top, and on the left (west) side of the lift, you'll see that you can drop down onto the pathway below from the ledge. This is a dead-end, instead, drop down to the other pathway just below and you'll find a corpse at the end, you can pillage it to find x1 Golden Rune (4). Head to the lower section where the site is by dropping onto the platforms that are lit with candles.
Now, proceed north from the checkpoint and you'll encounter Miner enemies. These enemies with their stone skin are resistant to slashing and piercing damage, but weak to strike. Kill the first three on the wooden path, check the locations of the two miners picking at the wall to find x2 Smithing Stone (1). Then head down, turn right and check the nearby corner. There is another Miner there and in front of it, you can pick up x1 Smithing Stone (1). Check the south section where you'll see another Miner and at the tunnel path, there are three Rats and another body that you can pillage to find x1 Smithing Stone (1) - go back to the opposite tunnel path near the wooden steps and ride the elevator down.
You'll notice as you move down that there is another pathway. Check this later, for now, investigate this section. Go straight when you reach the lower level where you'll see a small shack that is being guarded by a Zombie Dog inside, another one of that hound under the shack, as well as more Miners. Kill the enemies and loot the corpse inside the shack to find x5 Large Glintstone Scrap, also, make sure to check the spot where the Miner enemy was mining to find another Smithing Stone (1) that you can pick up. Also, if you check the back of the shack, there's a tight path that you can pass through, at the end is another Smithing Stone (1). This area is now clear, go back to the lift, and make sure you are facing southeast as you go up - be ready to dodge roll or jump off the lift when you nearly pass the mid pathway of this elevator.
Move forward and you'll see more Miners here. There is one in front, another on the right, and three more at the path on the left side. Before going left, check the path on the right which is a dead-end, you'll find another body that can be pillaged to find x3 Glintstone Scrap. Next, go to the path on the left (make sure to check the sides of the wall to pick up Smithing Stones), and you'll find the third lift that goes down even further. The lower-most level contains a closed gate, and on the other side of it is the boss of this location.
As you were riding the third lift down, you should notice that there are some platforms here, one of it, having a corpse that holds an item, and a another smithing stone that you can pick up. To easily reach these platforms, ride the elevator back to the top, then start to drop down to the platforms below from the left (south) side of the lift. First, you'll find x1 Golden Rune (1) from the body and on the platform below the corpse, you can pick up x1 Somber Smithing Stone (1) - go all the way to the lower-section where the gate is.
From the closed gate (leading to the boss arena), go right towards a dead-end to find x1 Smithing Stone (1). When you're ready to fight the boss, simply open the gate and the battle against the Stonedigger Troll will begin.
Slashing weapons and presumably pierce damage work fine. You can check out Stonedigger Troll page to find more guides and strategies on how to defeat this enemy - successfully defeating it rewards the player with x1 Roar Medallion and 1800 Runes.
To leave the boss arena, walk up to the portal mist and use it to return to the entrance.
Elden Ring Limgrave Tunnels Gallery and Notes
[other images go here]
 Anonymous
Use dual wielding sword and jump attacks for final boss makes it very easy. Use summon wolves to make it even easier for distractions

 Anonymous
So many troll messages talking about secret passages in this dungeon. i had to look it up. F those people.

 Anonymous
Dont open the gate. Use rot breath to aggro and then poison mist to cheese him. When it deaggros go to the left of the gate and hit it until the troll walks forward again.

 Anonymous
Top Tip - When you reach the Marika statue before the boss (just before the chamber with 4-5 miners and the last lift), you can just sprint past the miners to the lift. Wait at the bottom and 2 or 3 of them will jump after you and die, often giving you extra Smithing Stones as loot.
BUT - Before you go into the boss, stand on the lift button to send it back up, then jump off before you go up. That way if you die and return to Marika the lift will be at the top on your next run.
 Anonymous
As of March 13, 2022 the tunnels on PC are still bugged and will despawn the ores on co-op.

 Anonymous
 Anonymous
After you beat the boss and return to the cave, the miners will no longer be mining.

 Anonymous
Fighting this boss as if I was on horseback (Going back and forth) made it easier

 Anonymous
Funny enough, the layout of this place reminds me of demon souls tunnel city. The part right after the iron spider.

 Anonymous
Do the yellow Smithing Stone pickupable veins on walls respawn?

 Anonymous
 Anonymous
It’s definitely possible to beat the boss with melee weapons. You just have to use thrust attacks (with a sword a charged heavy attack does plenty of damage) and you’ll be fine.

 Anonymous
beat the boss with uchigitana, bleed decimates him after a while

 Anonymous
So, not sure what exactly caused this, but after being summoned to help someone clear this place I went back myself, and none of the smithing stones were there on the walls. Huge bummer.

 Anonymous
Is there a way to escape the tunnel with my souls after I reach the boss gate? It looks like a point of no return.

 Anonymous


I am level 99, why am I still being summoned here?
1
+10
-1