Auriza Side Tomb |
|---|
 |
|
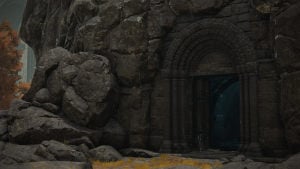
Catacombs that have been overtaken by Living Jars, who seek fresh bodies to stuff themselves with. |
Auriza Side Tomb is a Location in Elden Ring. The Auriza Side Tomb is found in the Capital Outskirts in the Altus Plateau. Can be accessed by dropping to a spiritspring below Capital Rampart site of grace and then going northeast or simply going northeast from Auriza Hero’s Grave entrance.
Online multiplayer is disabled in this dungeon.
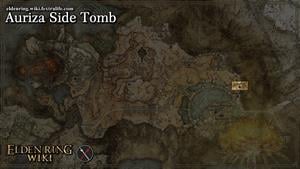
Auriza Side Tomb Map
Auriza Side Tomb Location: See it on the Elden Ring Map here.
All NPCs and Merchants in Auriza Side Tomb
- There are no NPCs or Merchants here
All Items in Elden Ring's Auriza Side Tomb
Equipment and Magic
- List of available Equipment and Magic here
Unique, Ashes and Keys
- Soldjars of Fortune Ashes (dropped by Grave Warden Duelist)
- Cracked Pot x 4 (2 less if the Keepsake item is the Cracked Pot )
- Ritual Pot x 2
- Perfumer's Cookbook (3)
Elden Ring Auriza Side Tomb Creatures, Enemies, and Bosses
Field Bosses and Bosses
Auriza Side Tomb Walkthrough
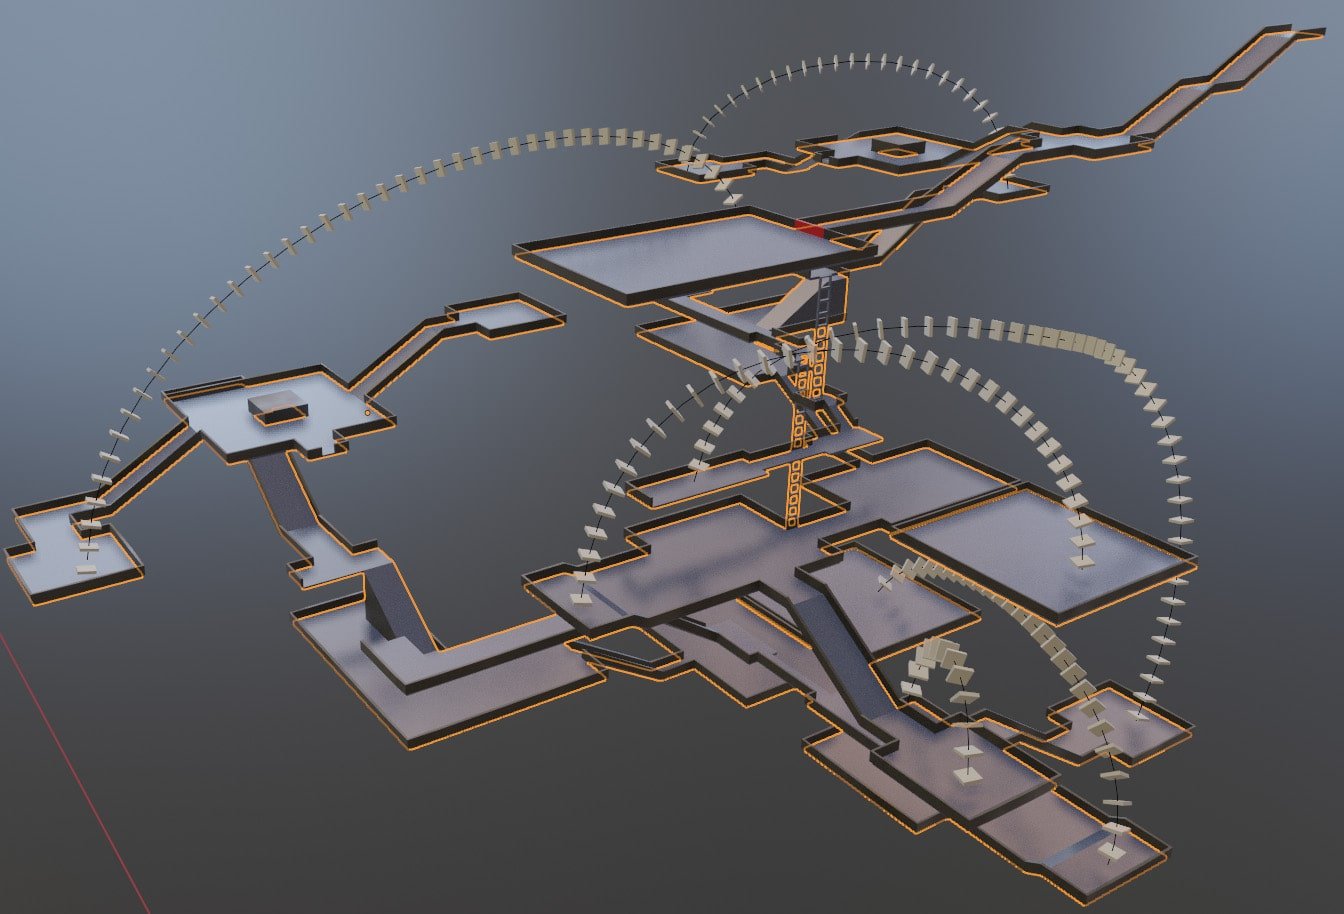
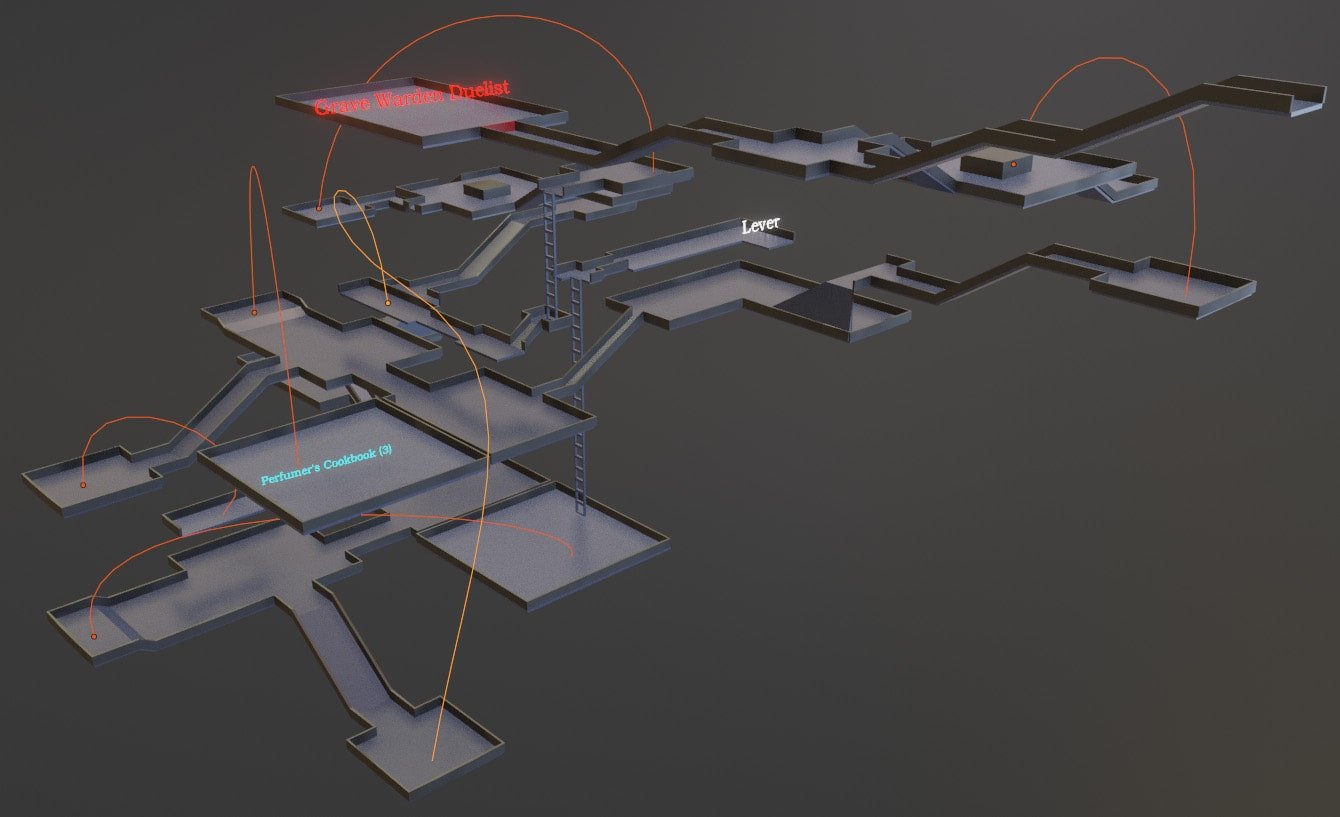
Auriza Side Tomb's gimmick is its teleporting chests sending you between inaccessible areas. Furthermore, these catacombs contain two copies of the same set of rooms, arranged only in slightly different configurations.
Walkthrough directions
From the grace, the first room has a couple of small jars and a window to the left.
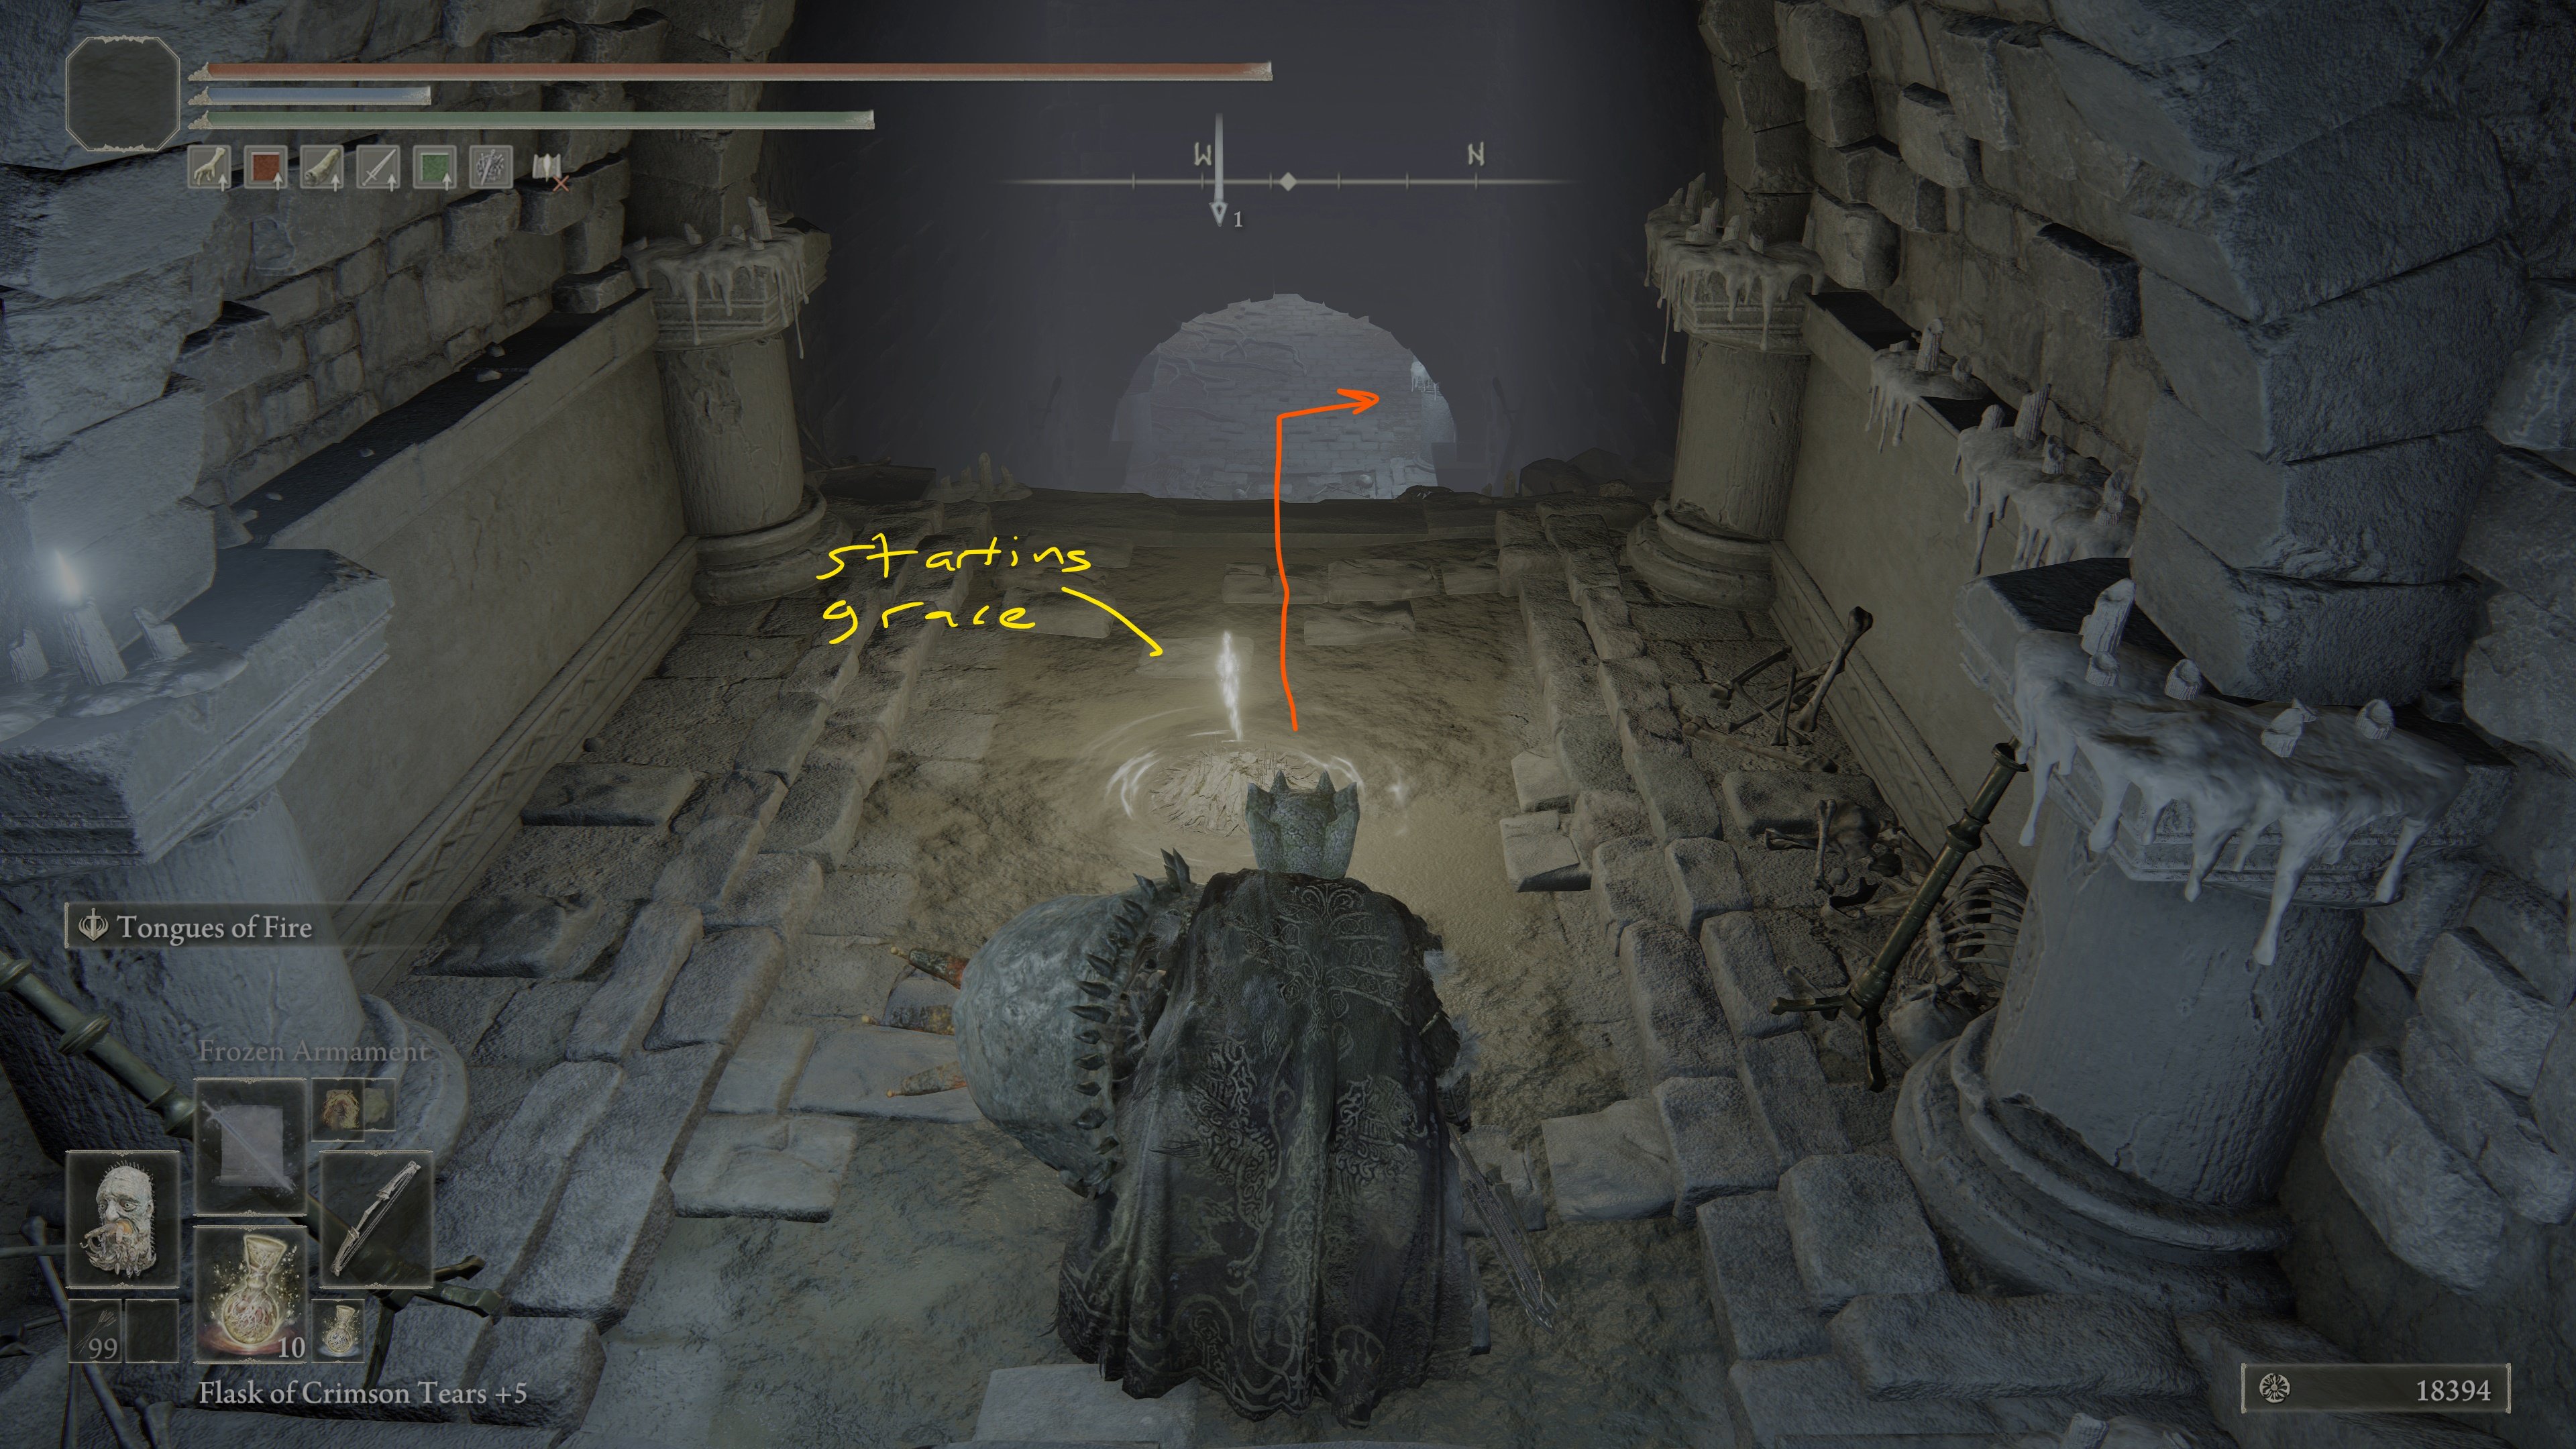
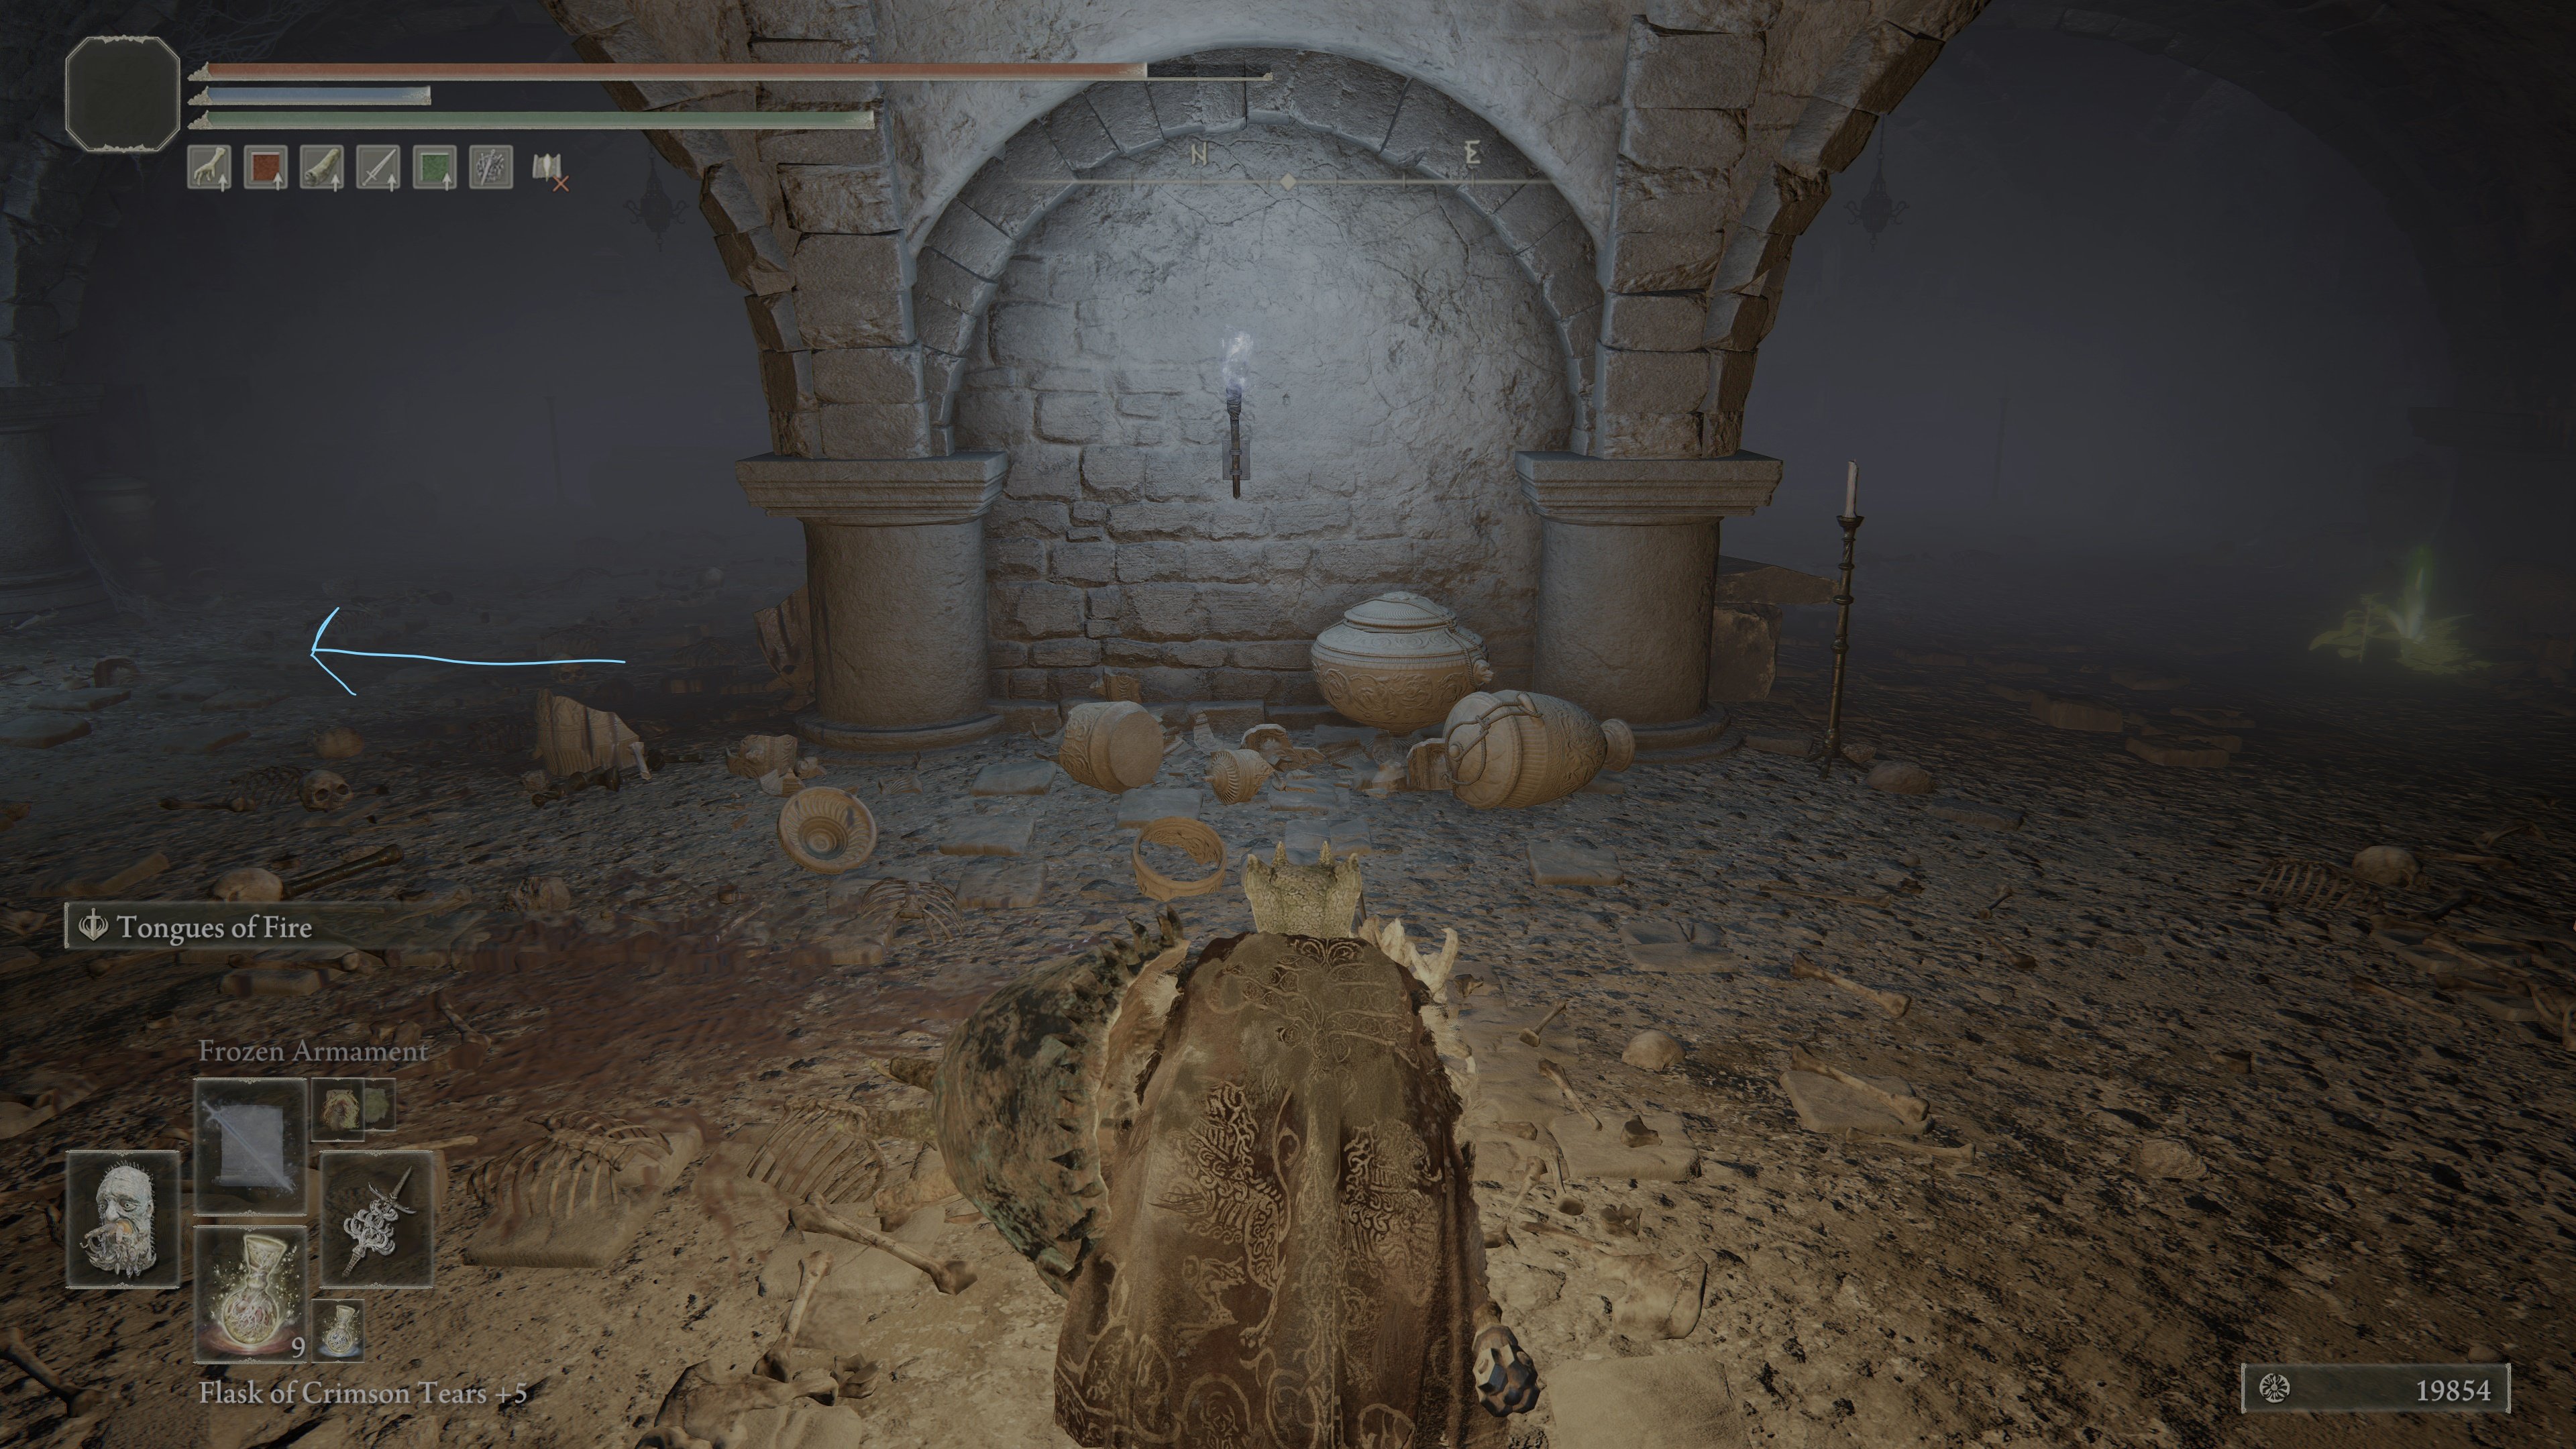
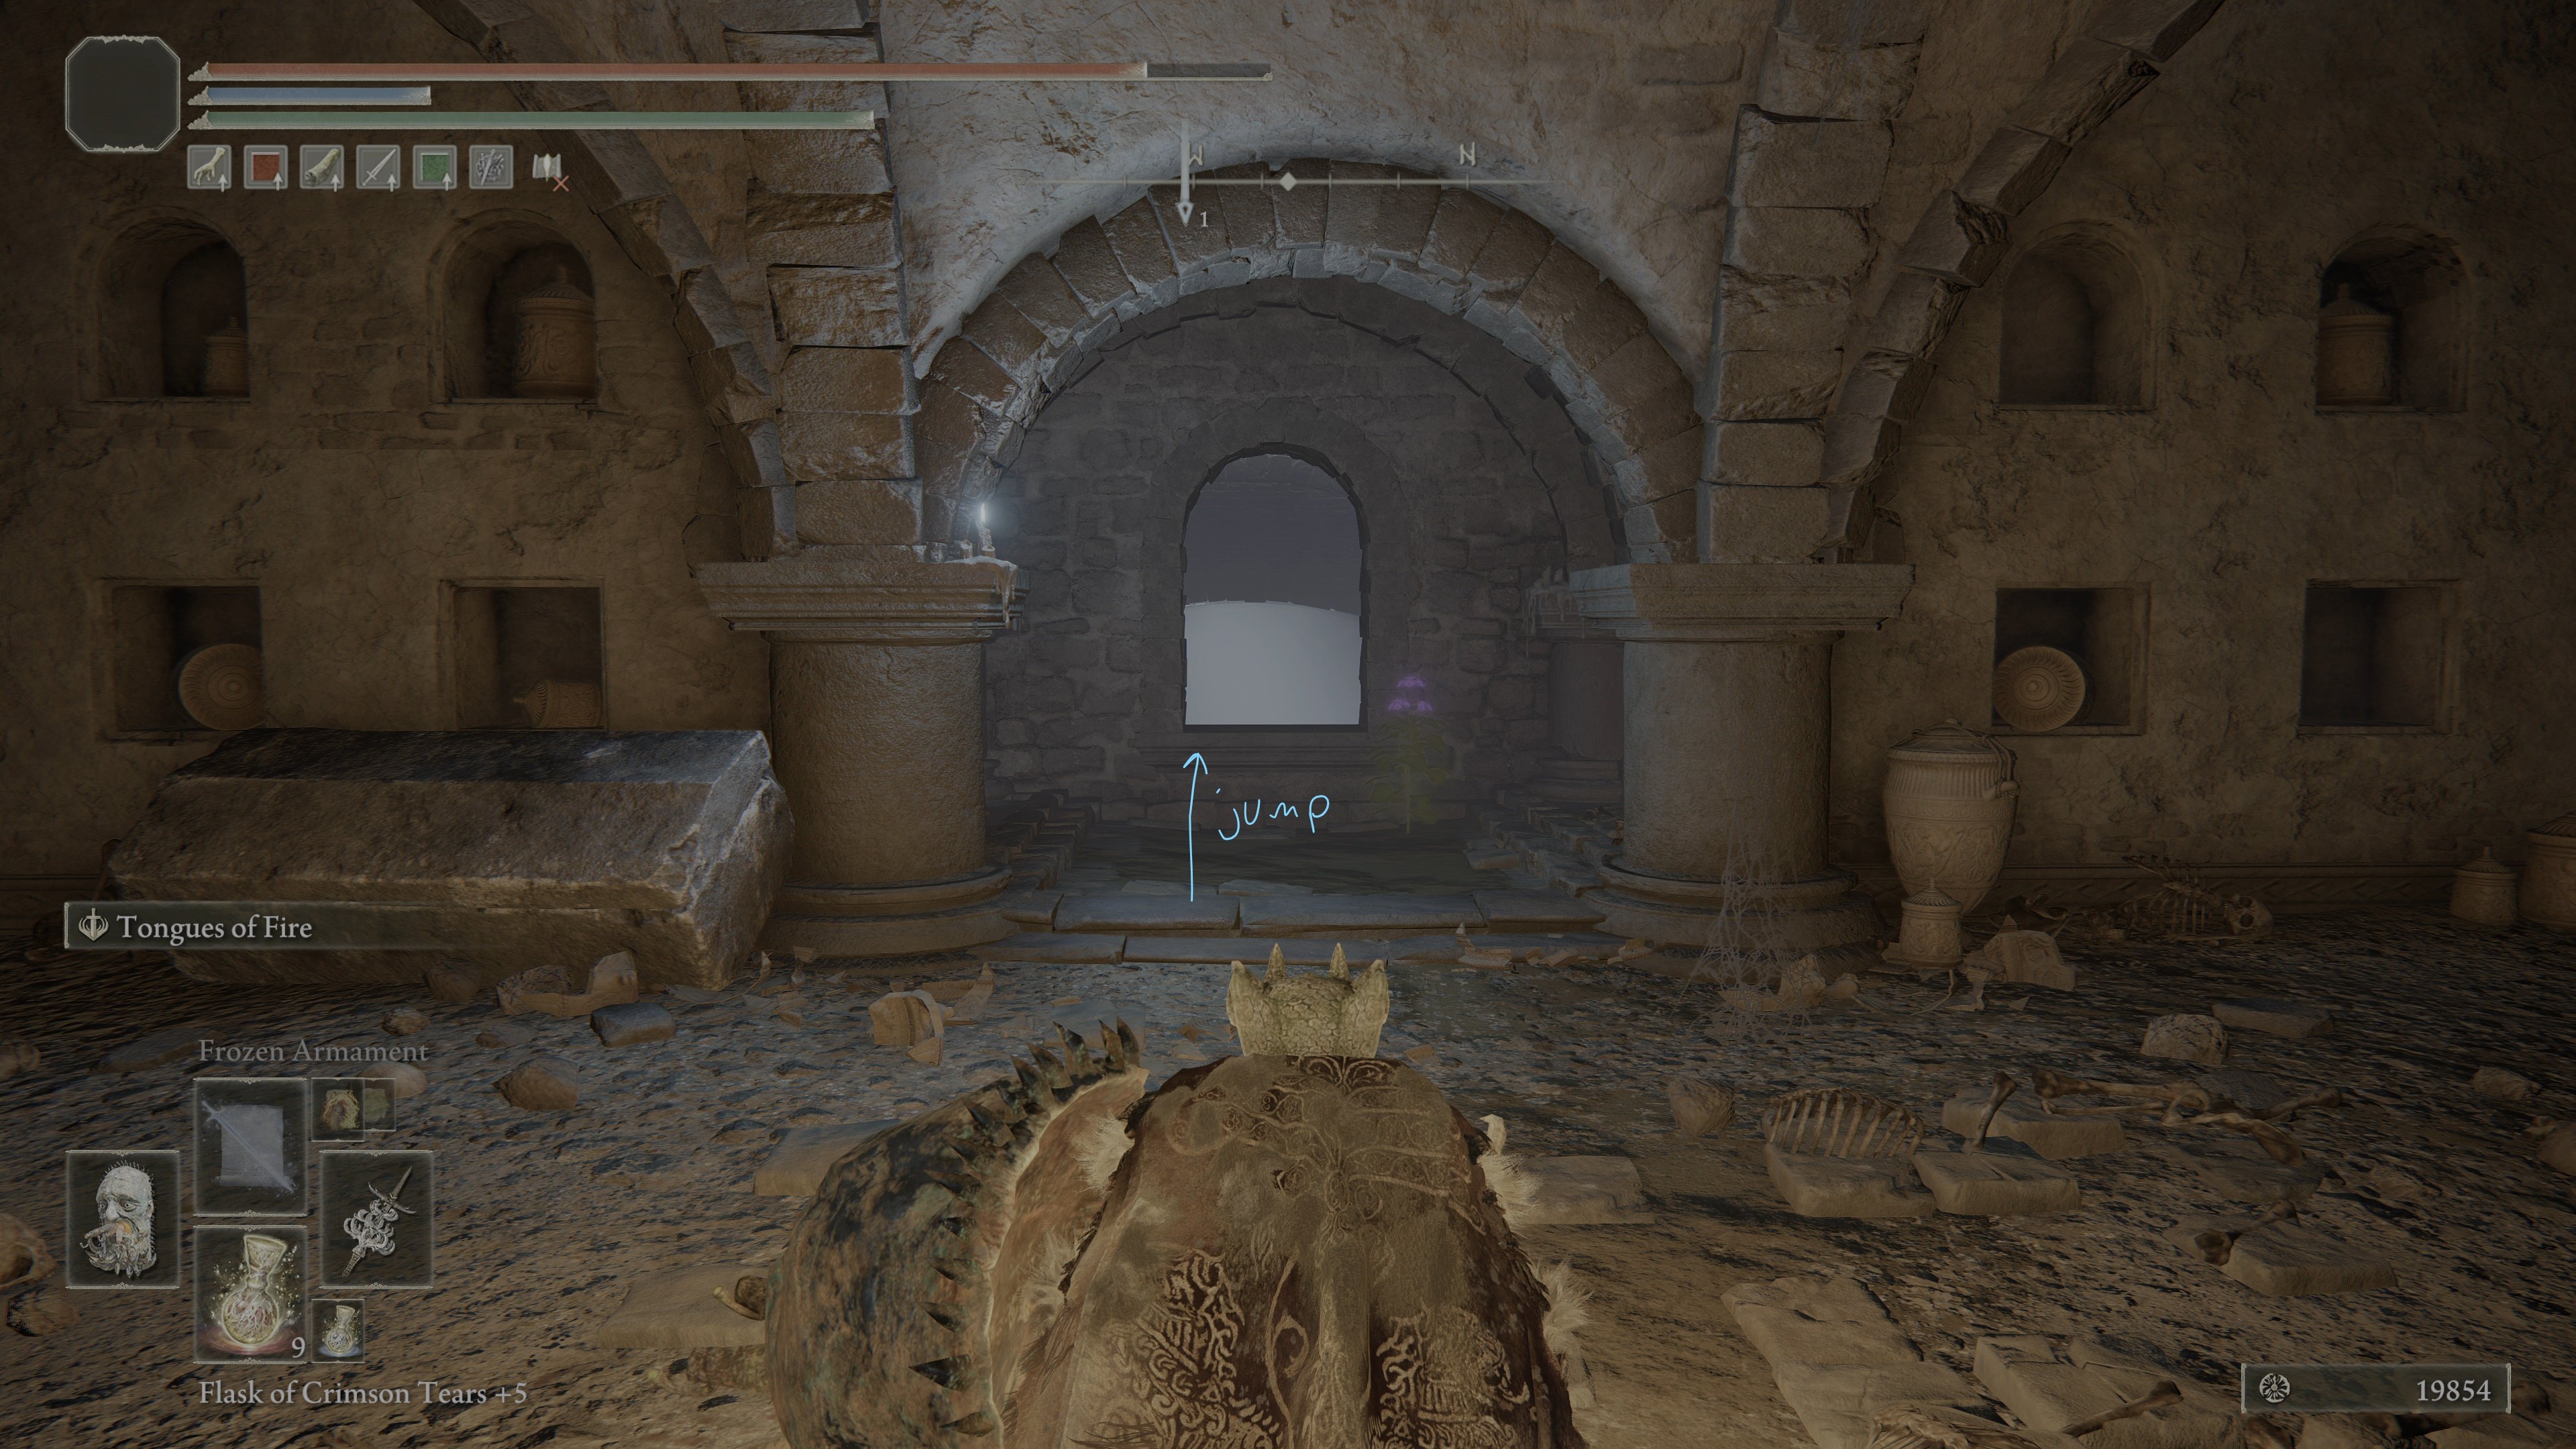
Jump through that window. Head down the stairs there are 3 Fanged Imps. Take care of them and go into the next room with water, and then into a cathedral.
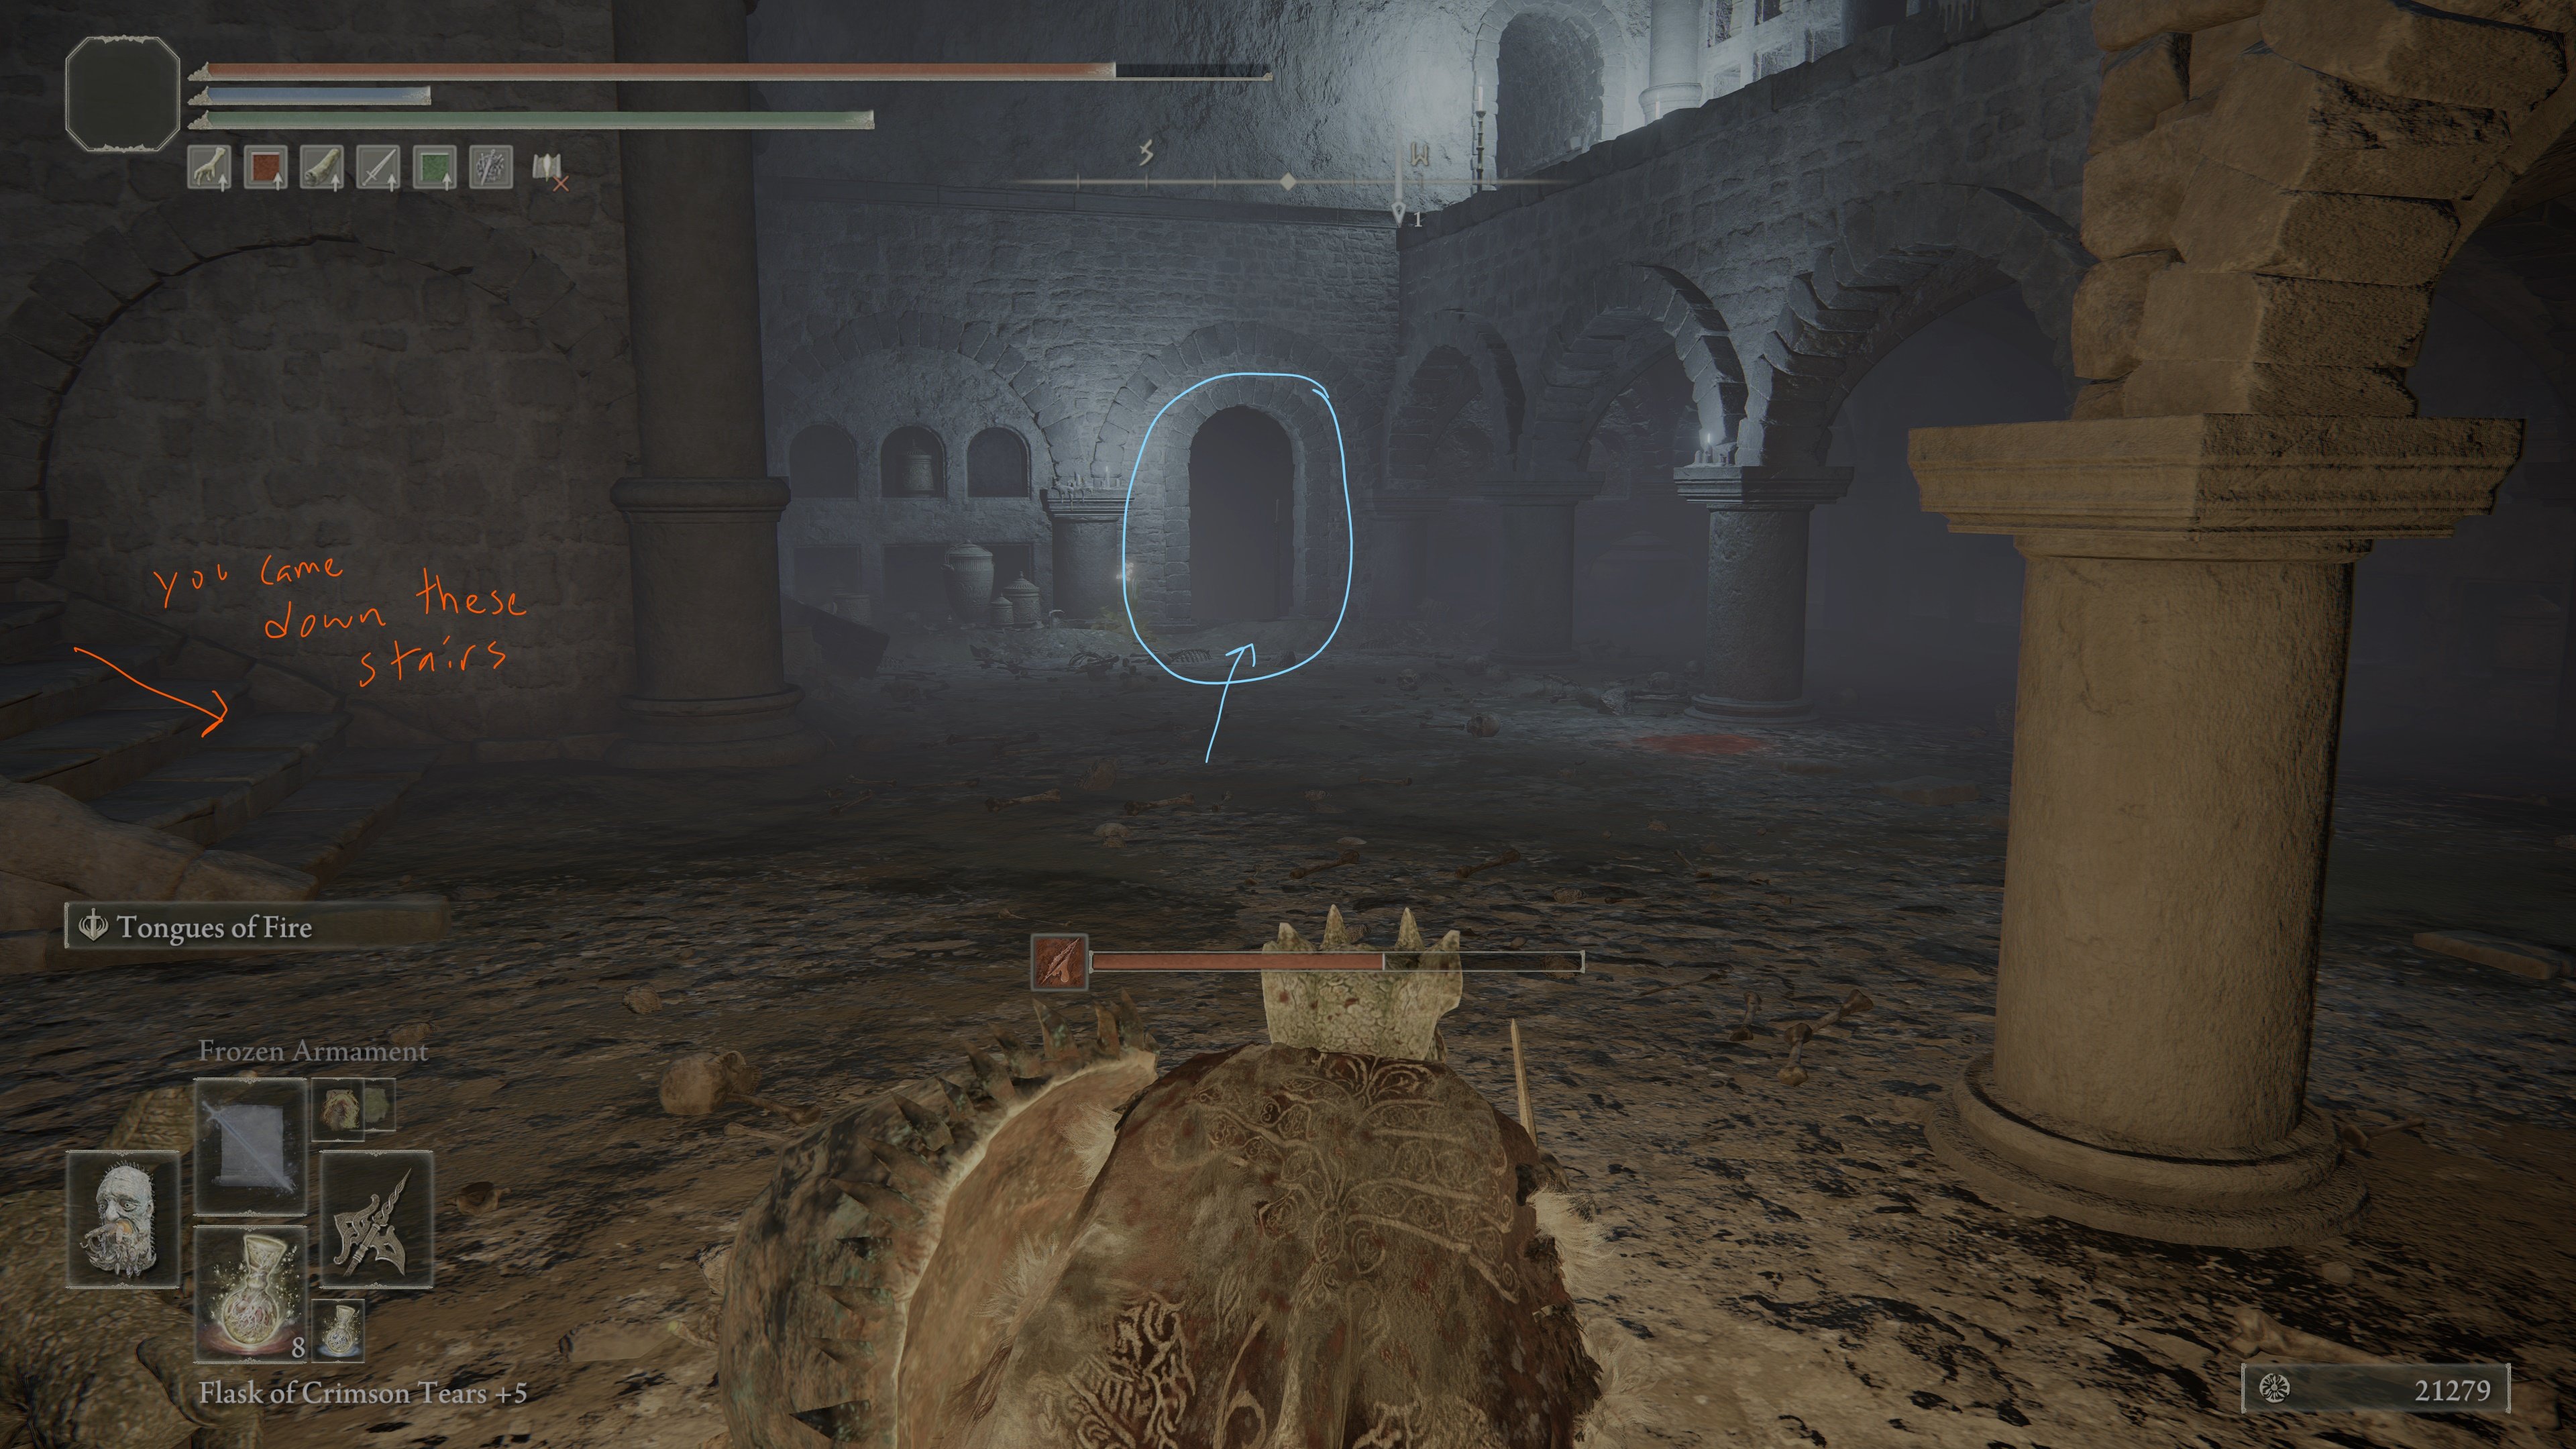
Watch for an imp above you as well as the one on the floor. You will see a chest a ways out in front of you where an altar might be, an alcove to your left and an elevated walkway to your right. The door to the room with the chest in it is locked, but proceed through the walkway.
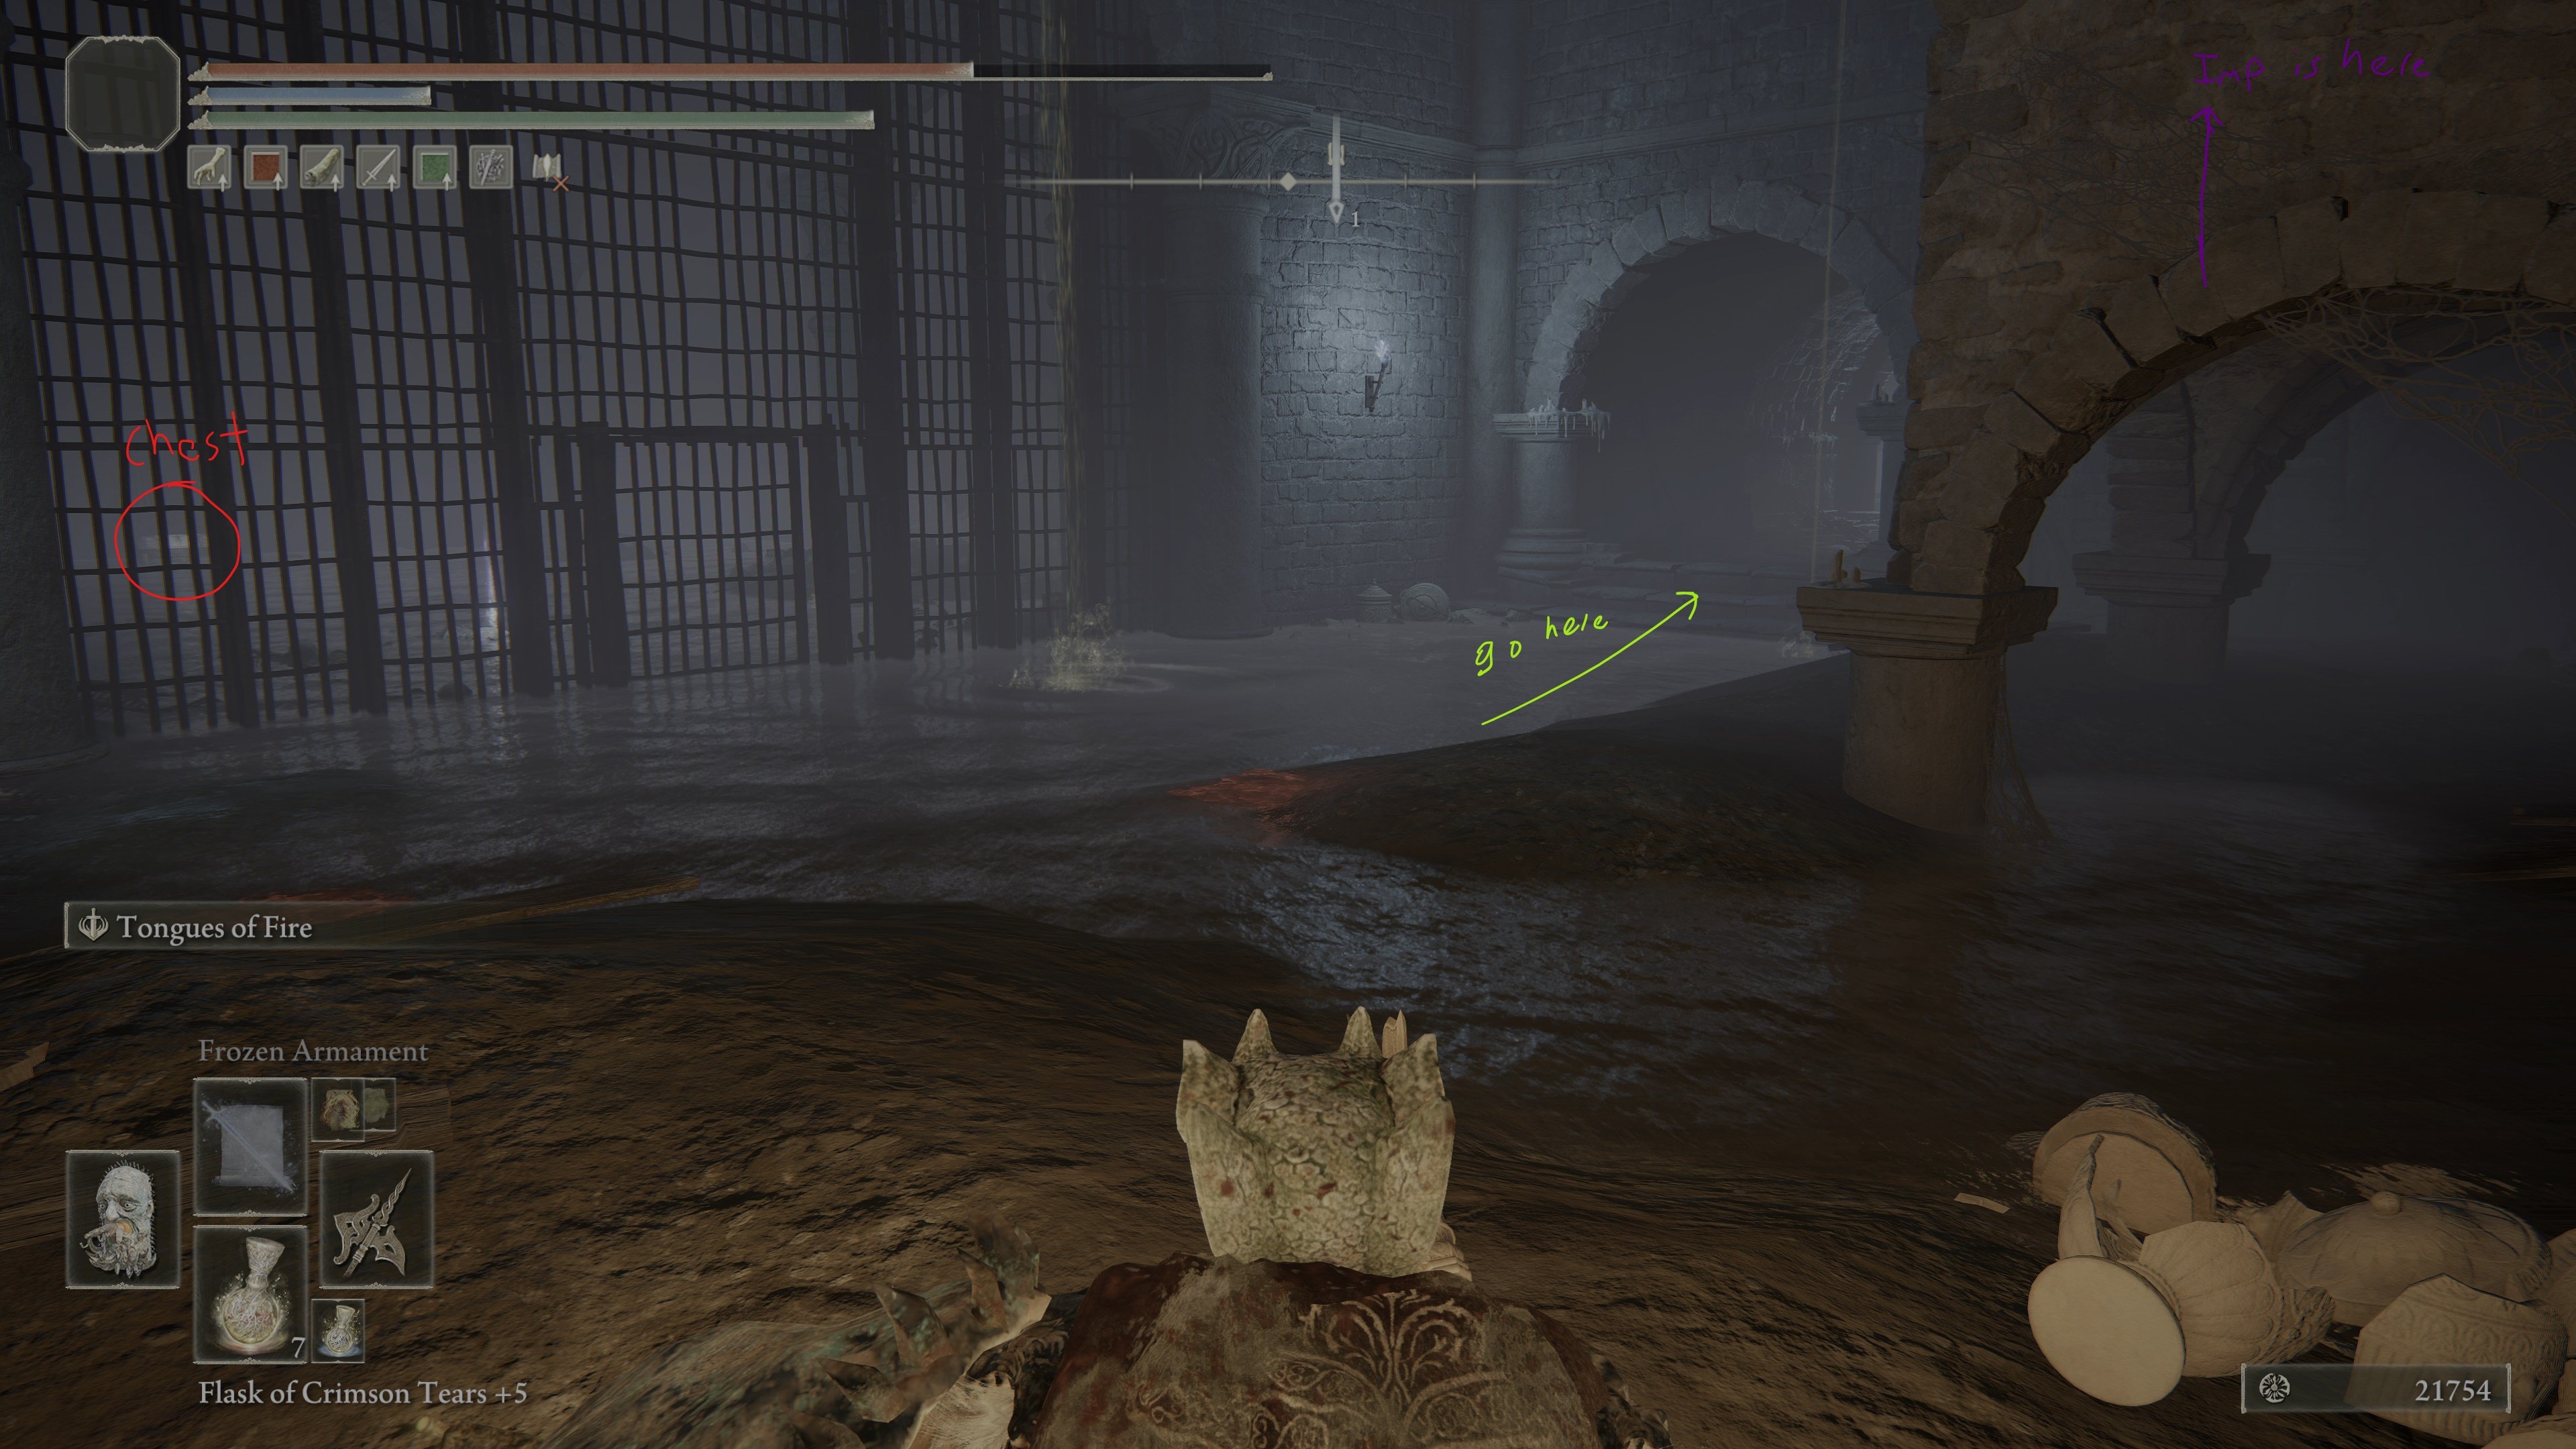
Go forward to the chest in front of you, looking out for the Imp to your left. Open that chest, it is a transporter trap that takes you to a room with 2 large jars, the Perfumer's Cookbook (3), and 2 Cracked Pots.
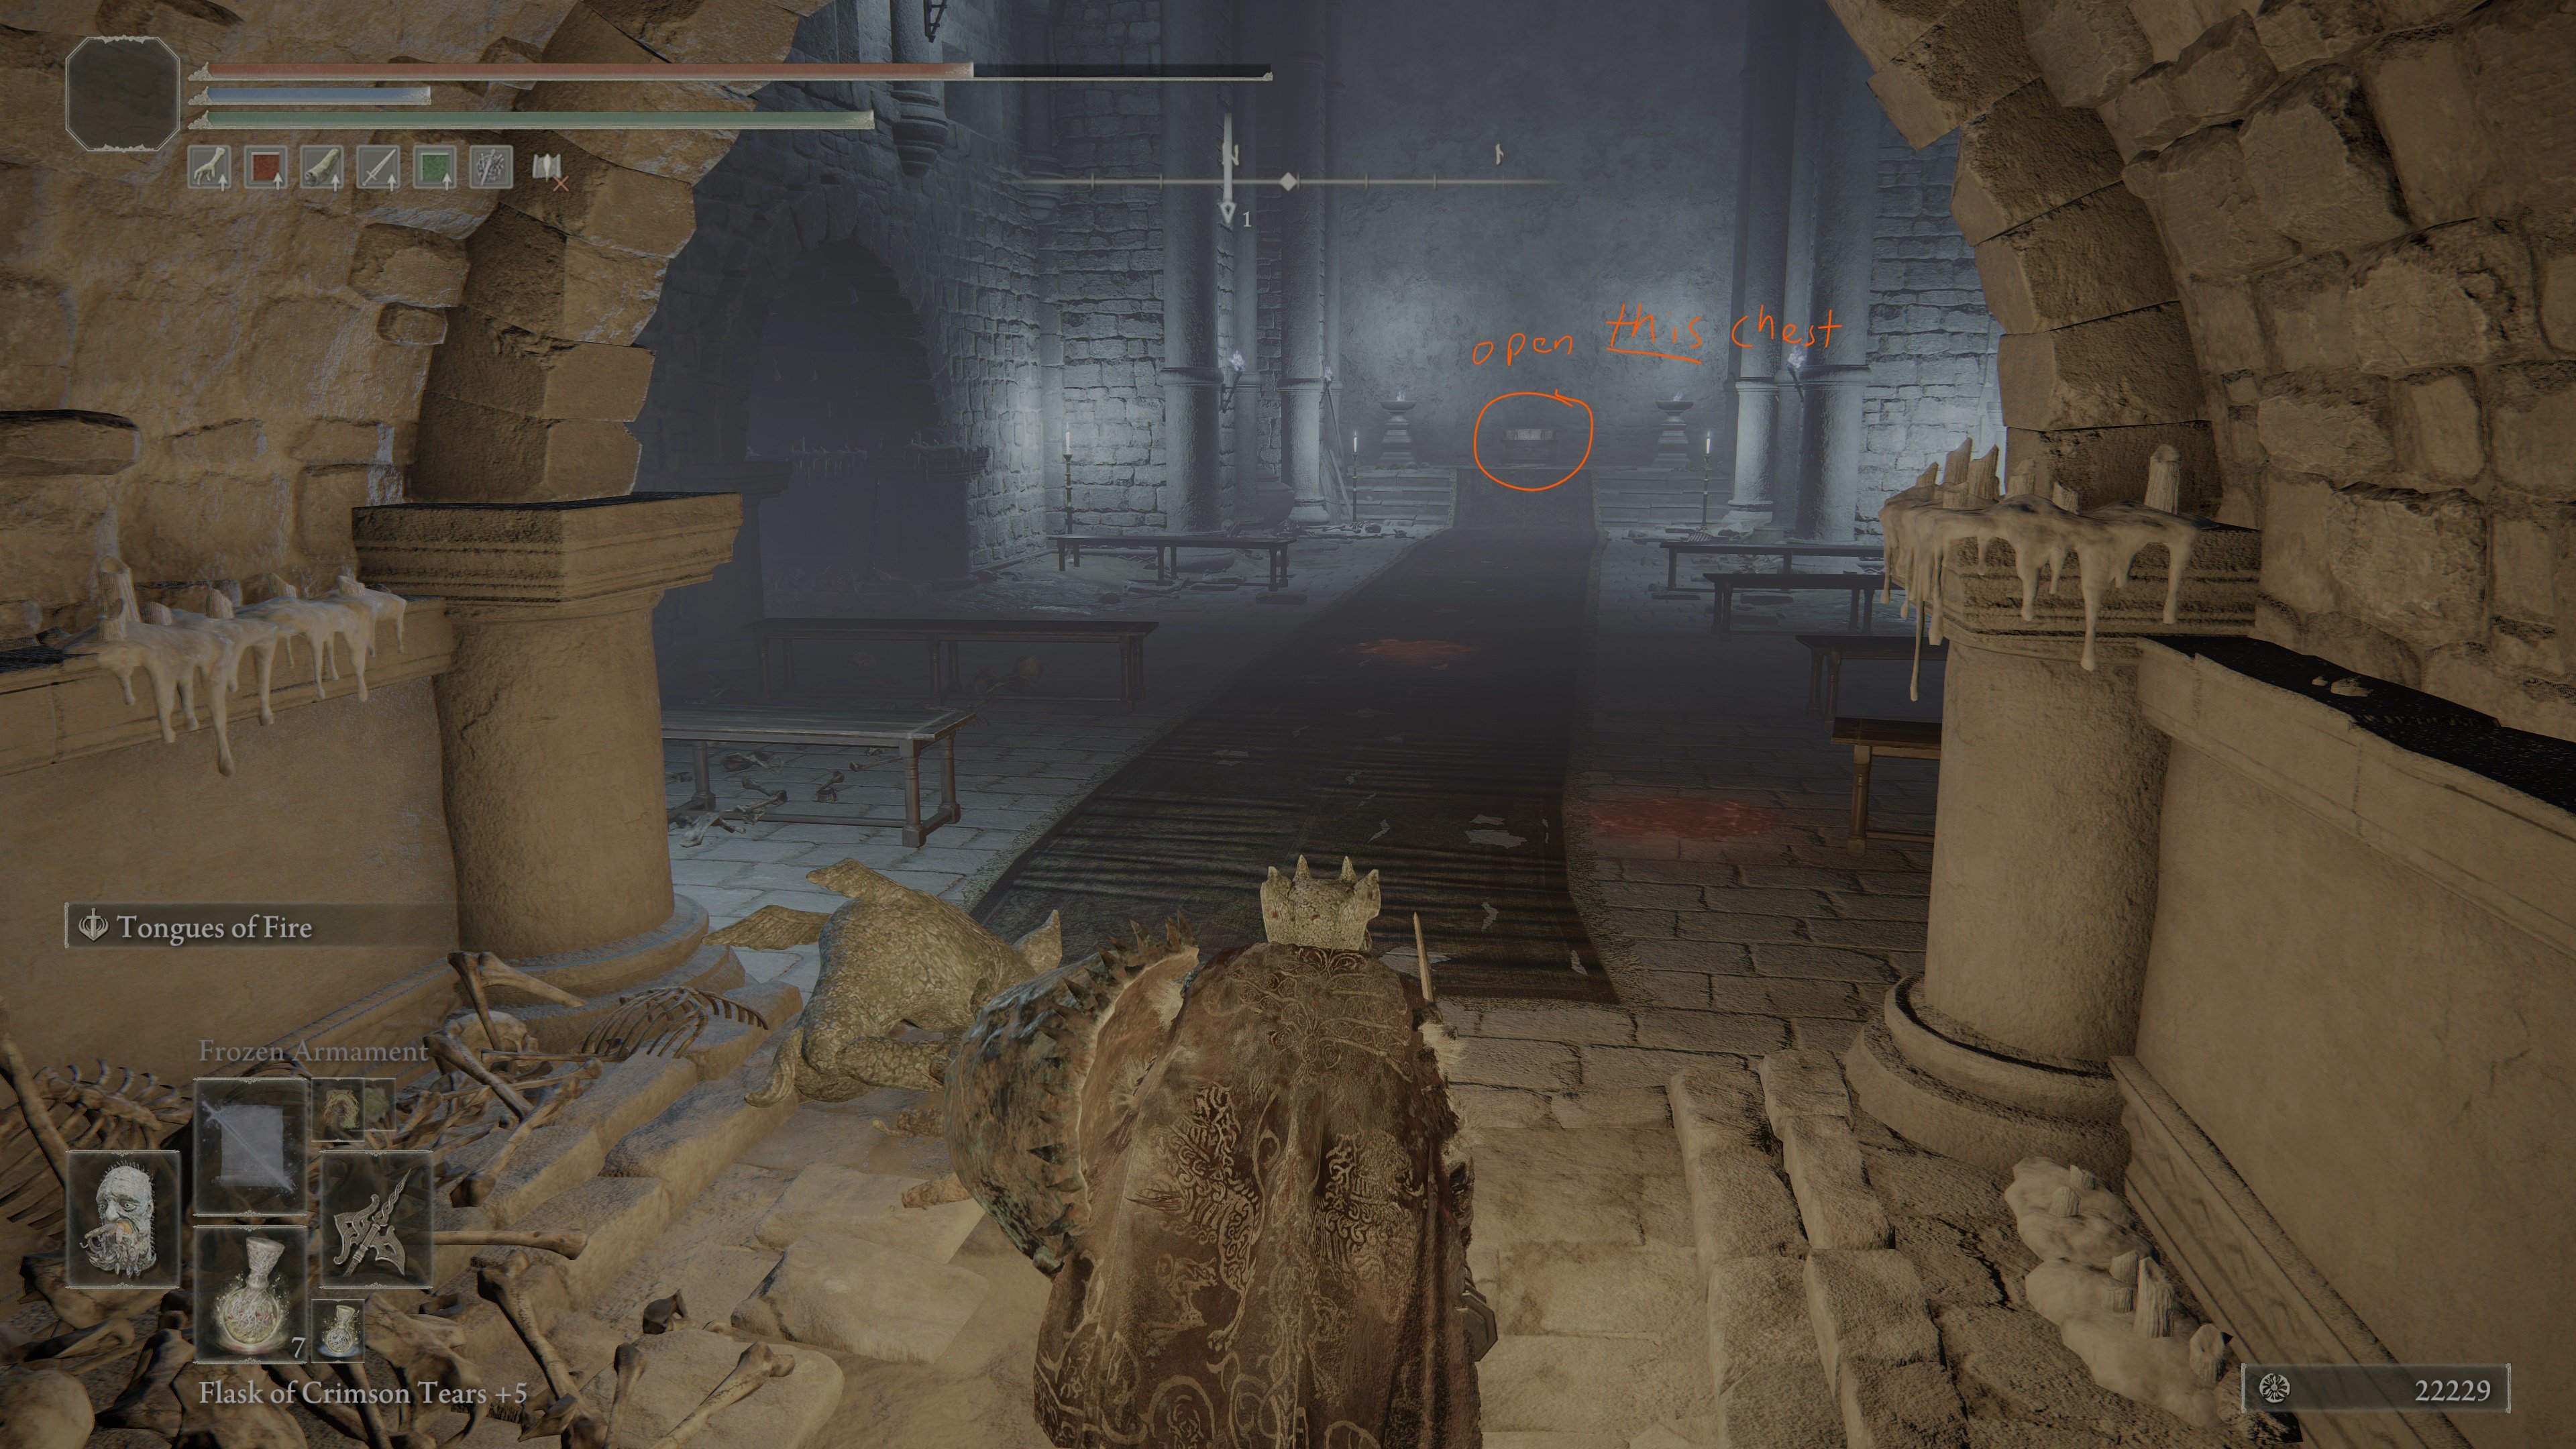
The only way back is via the same chest you came in from, so this is a dead end.
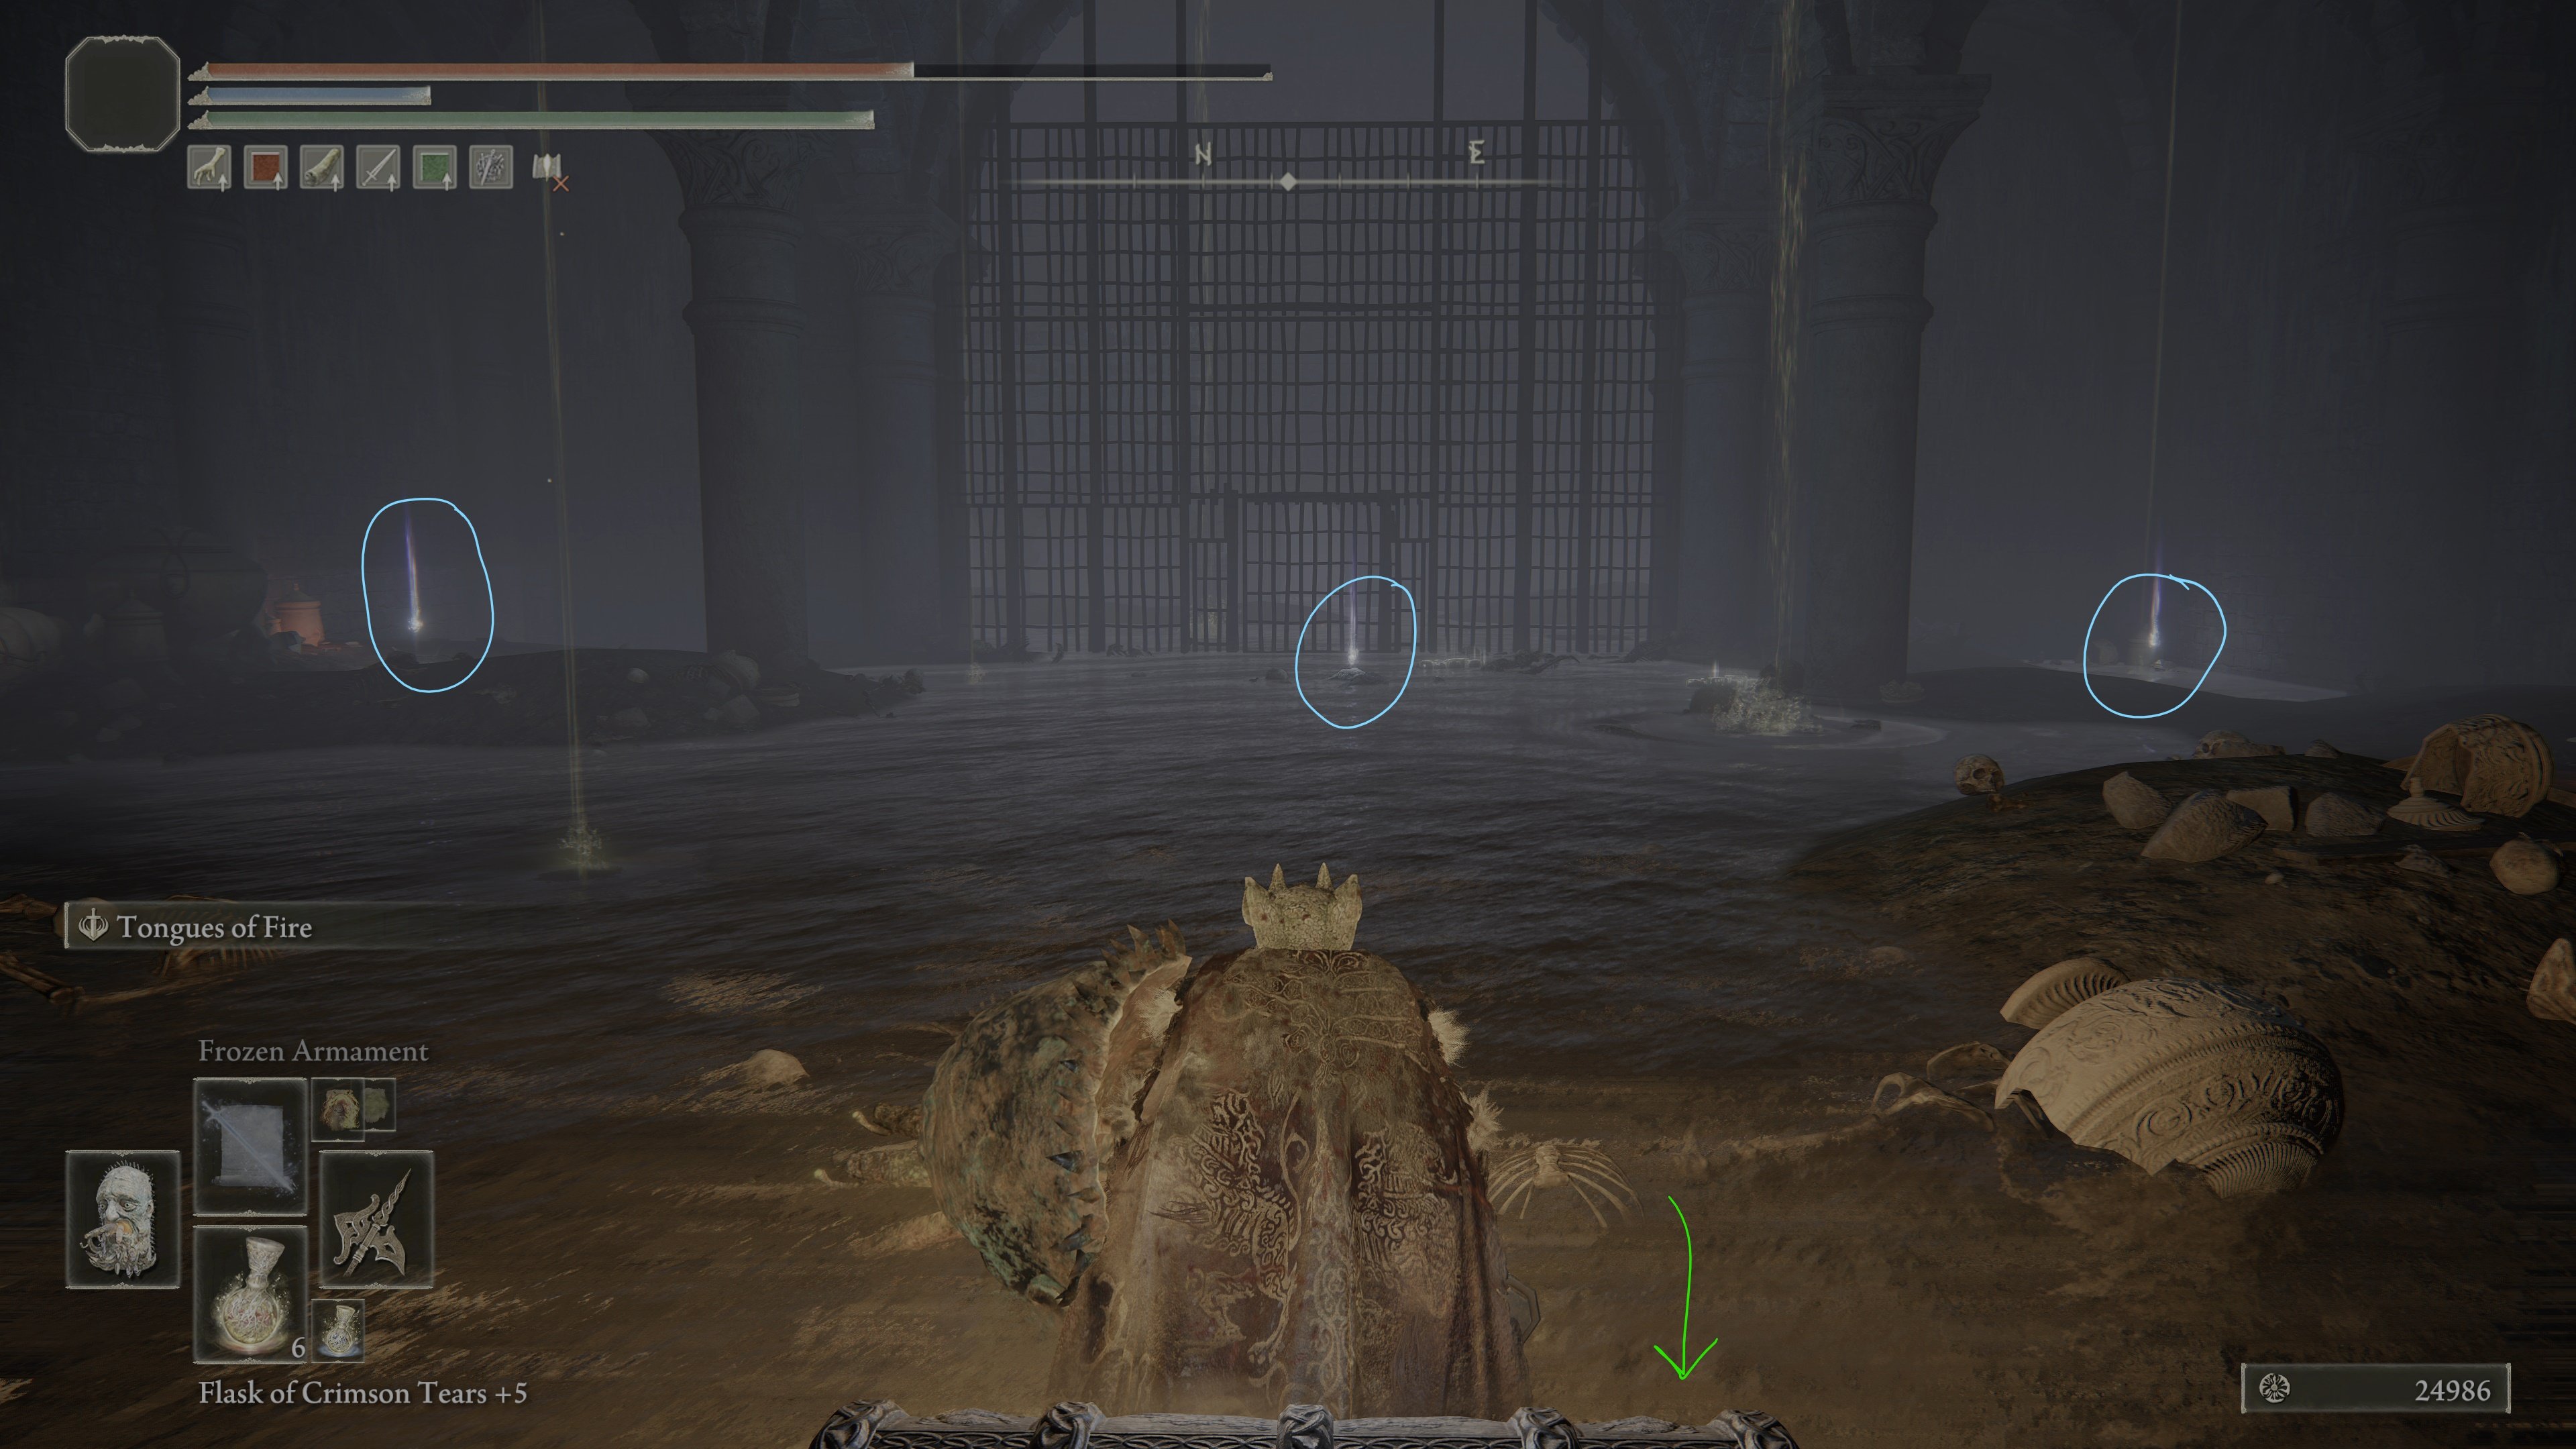
Go back, and in the cathedral room you just vacated, there is an alcove on the left as you enter the room with a hidden wall with a chest.
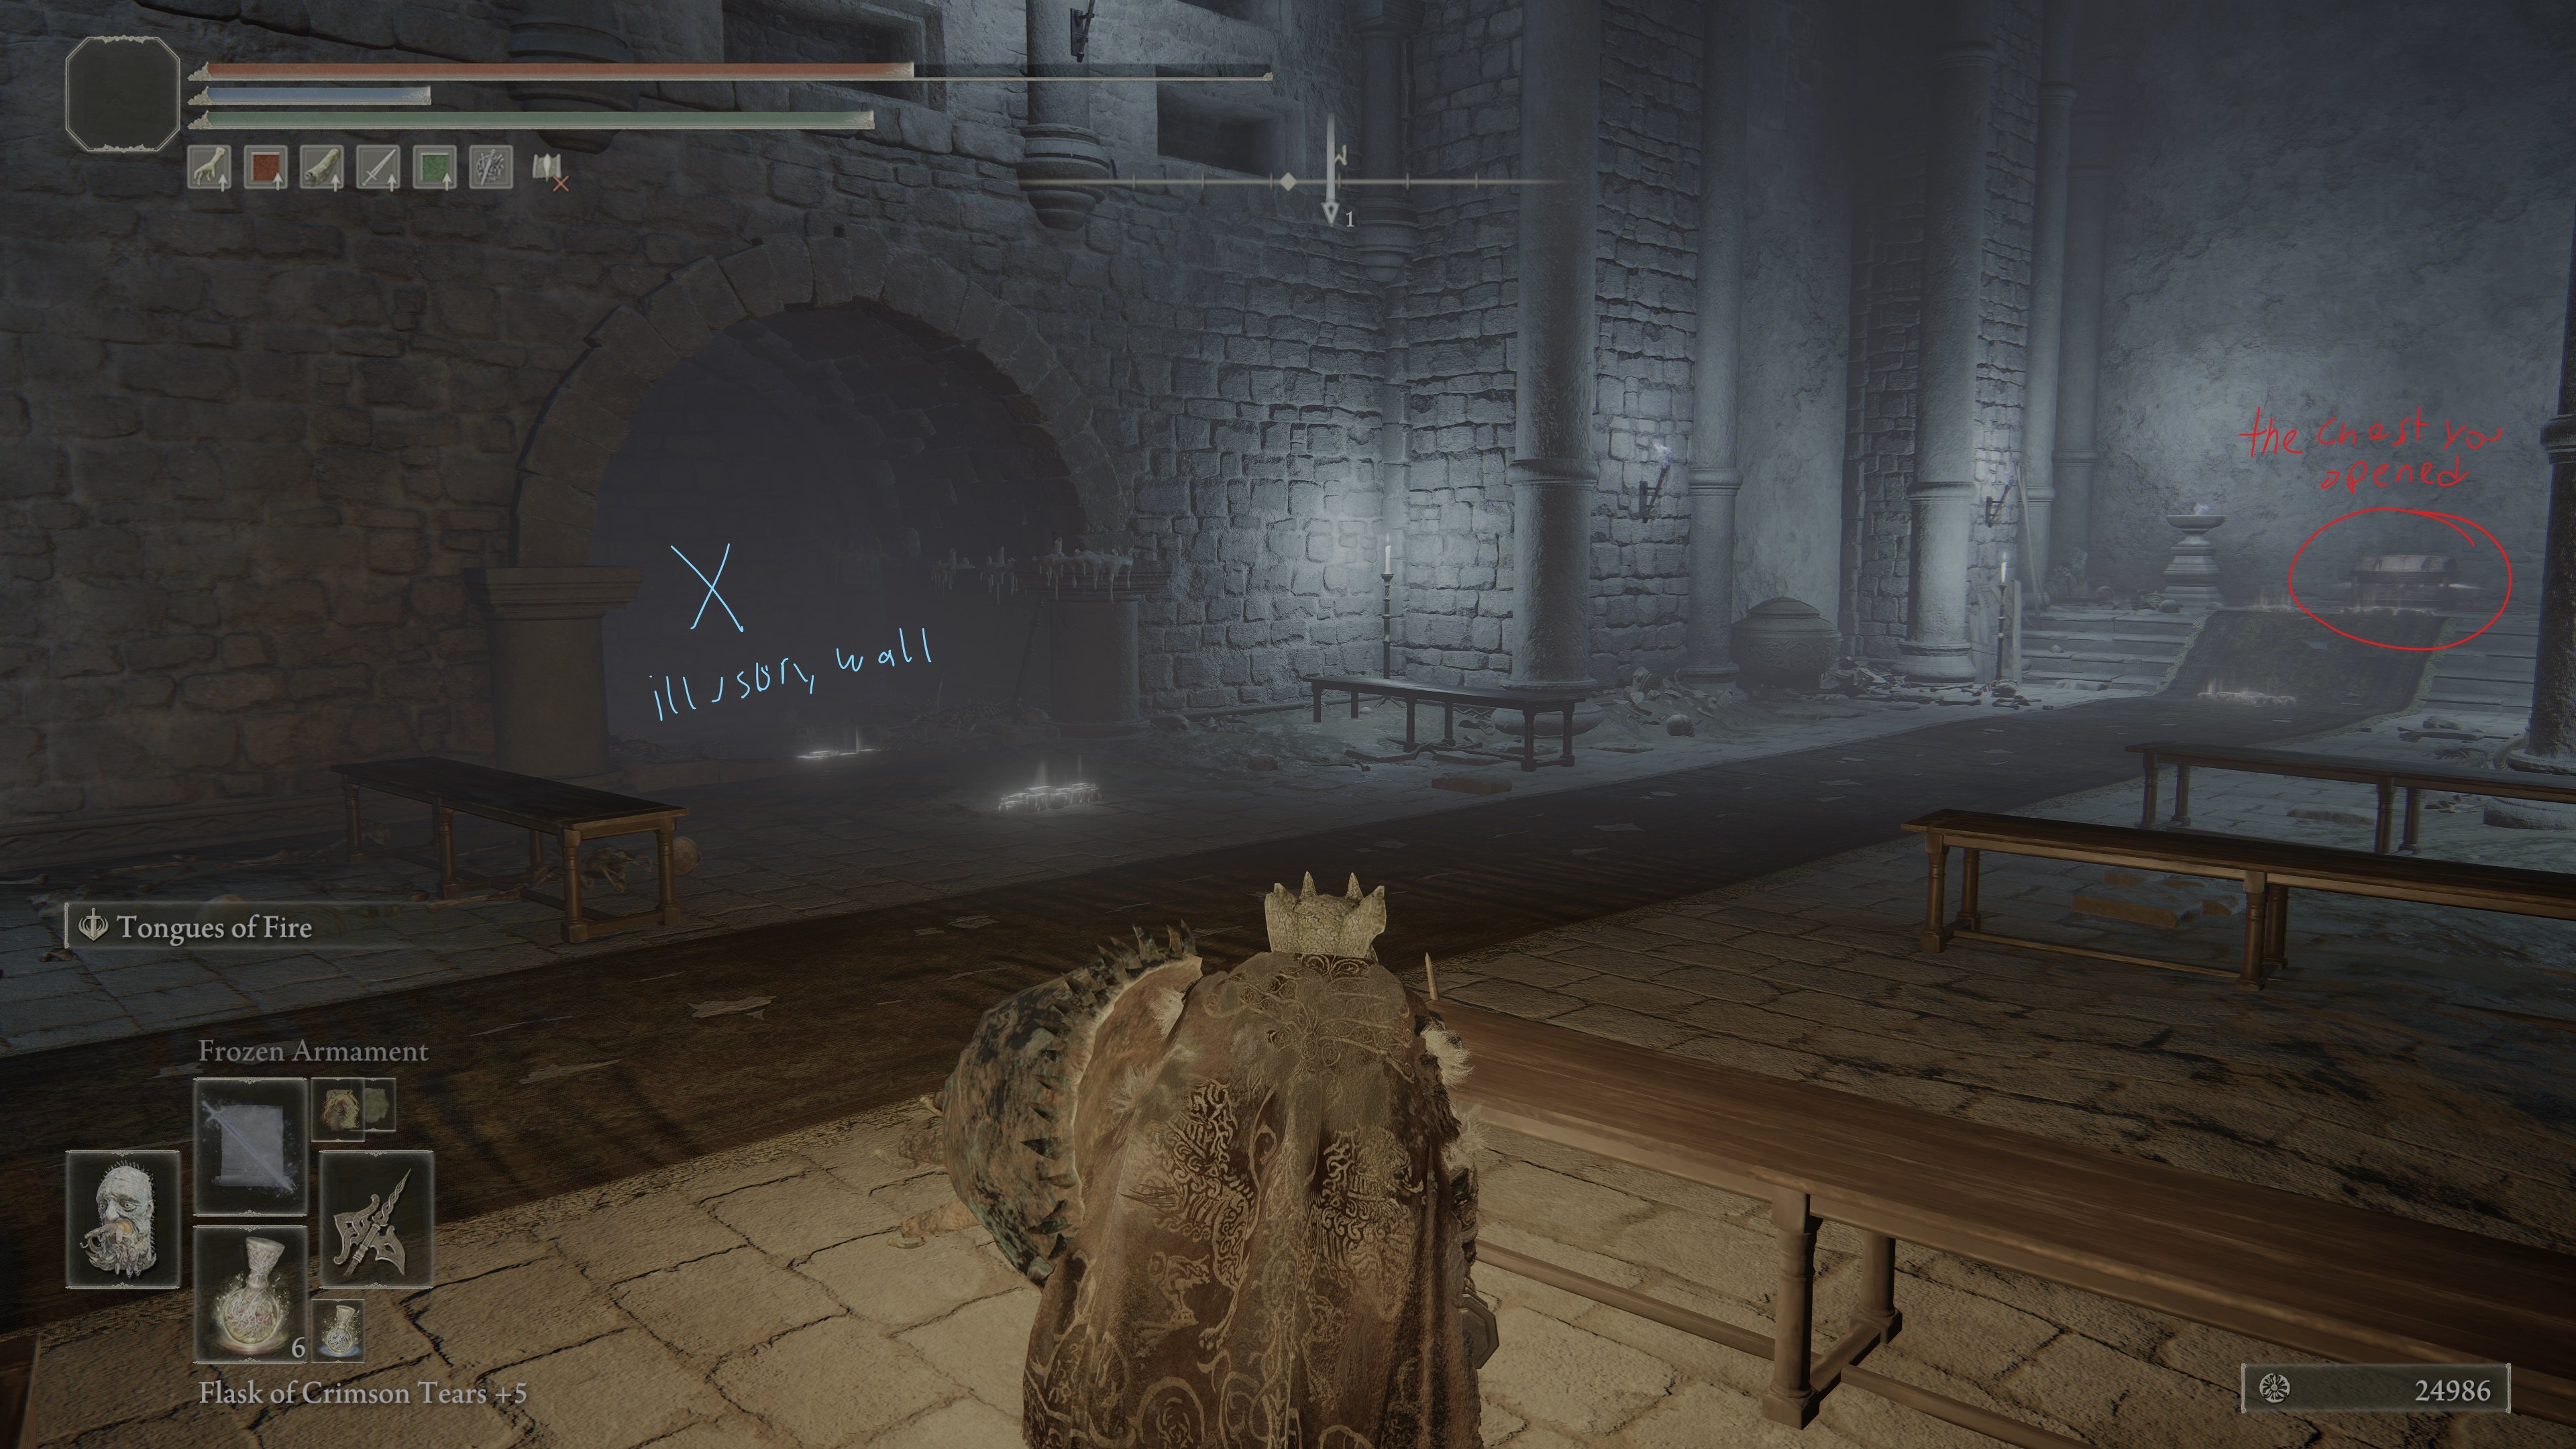
There is a glovewort in the hallway of this chest, which can help you keep track of which room you are actually in, since the other version of this room does not have it..

There are also two exploding jars in this room. Open that chest and it ports you up on a walkway with 2 Imps. This area looks the same but it is not.
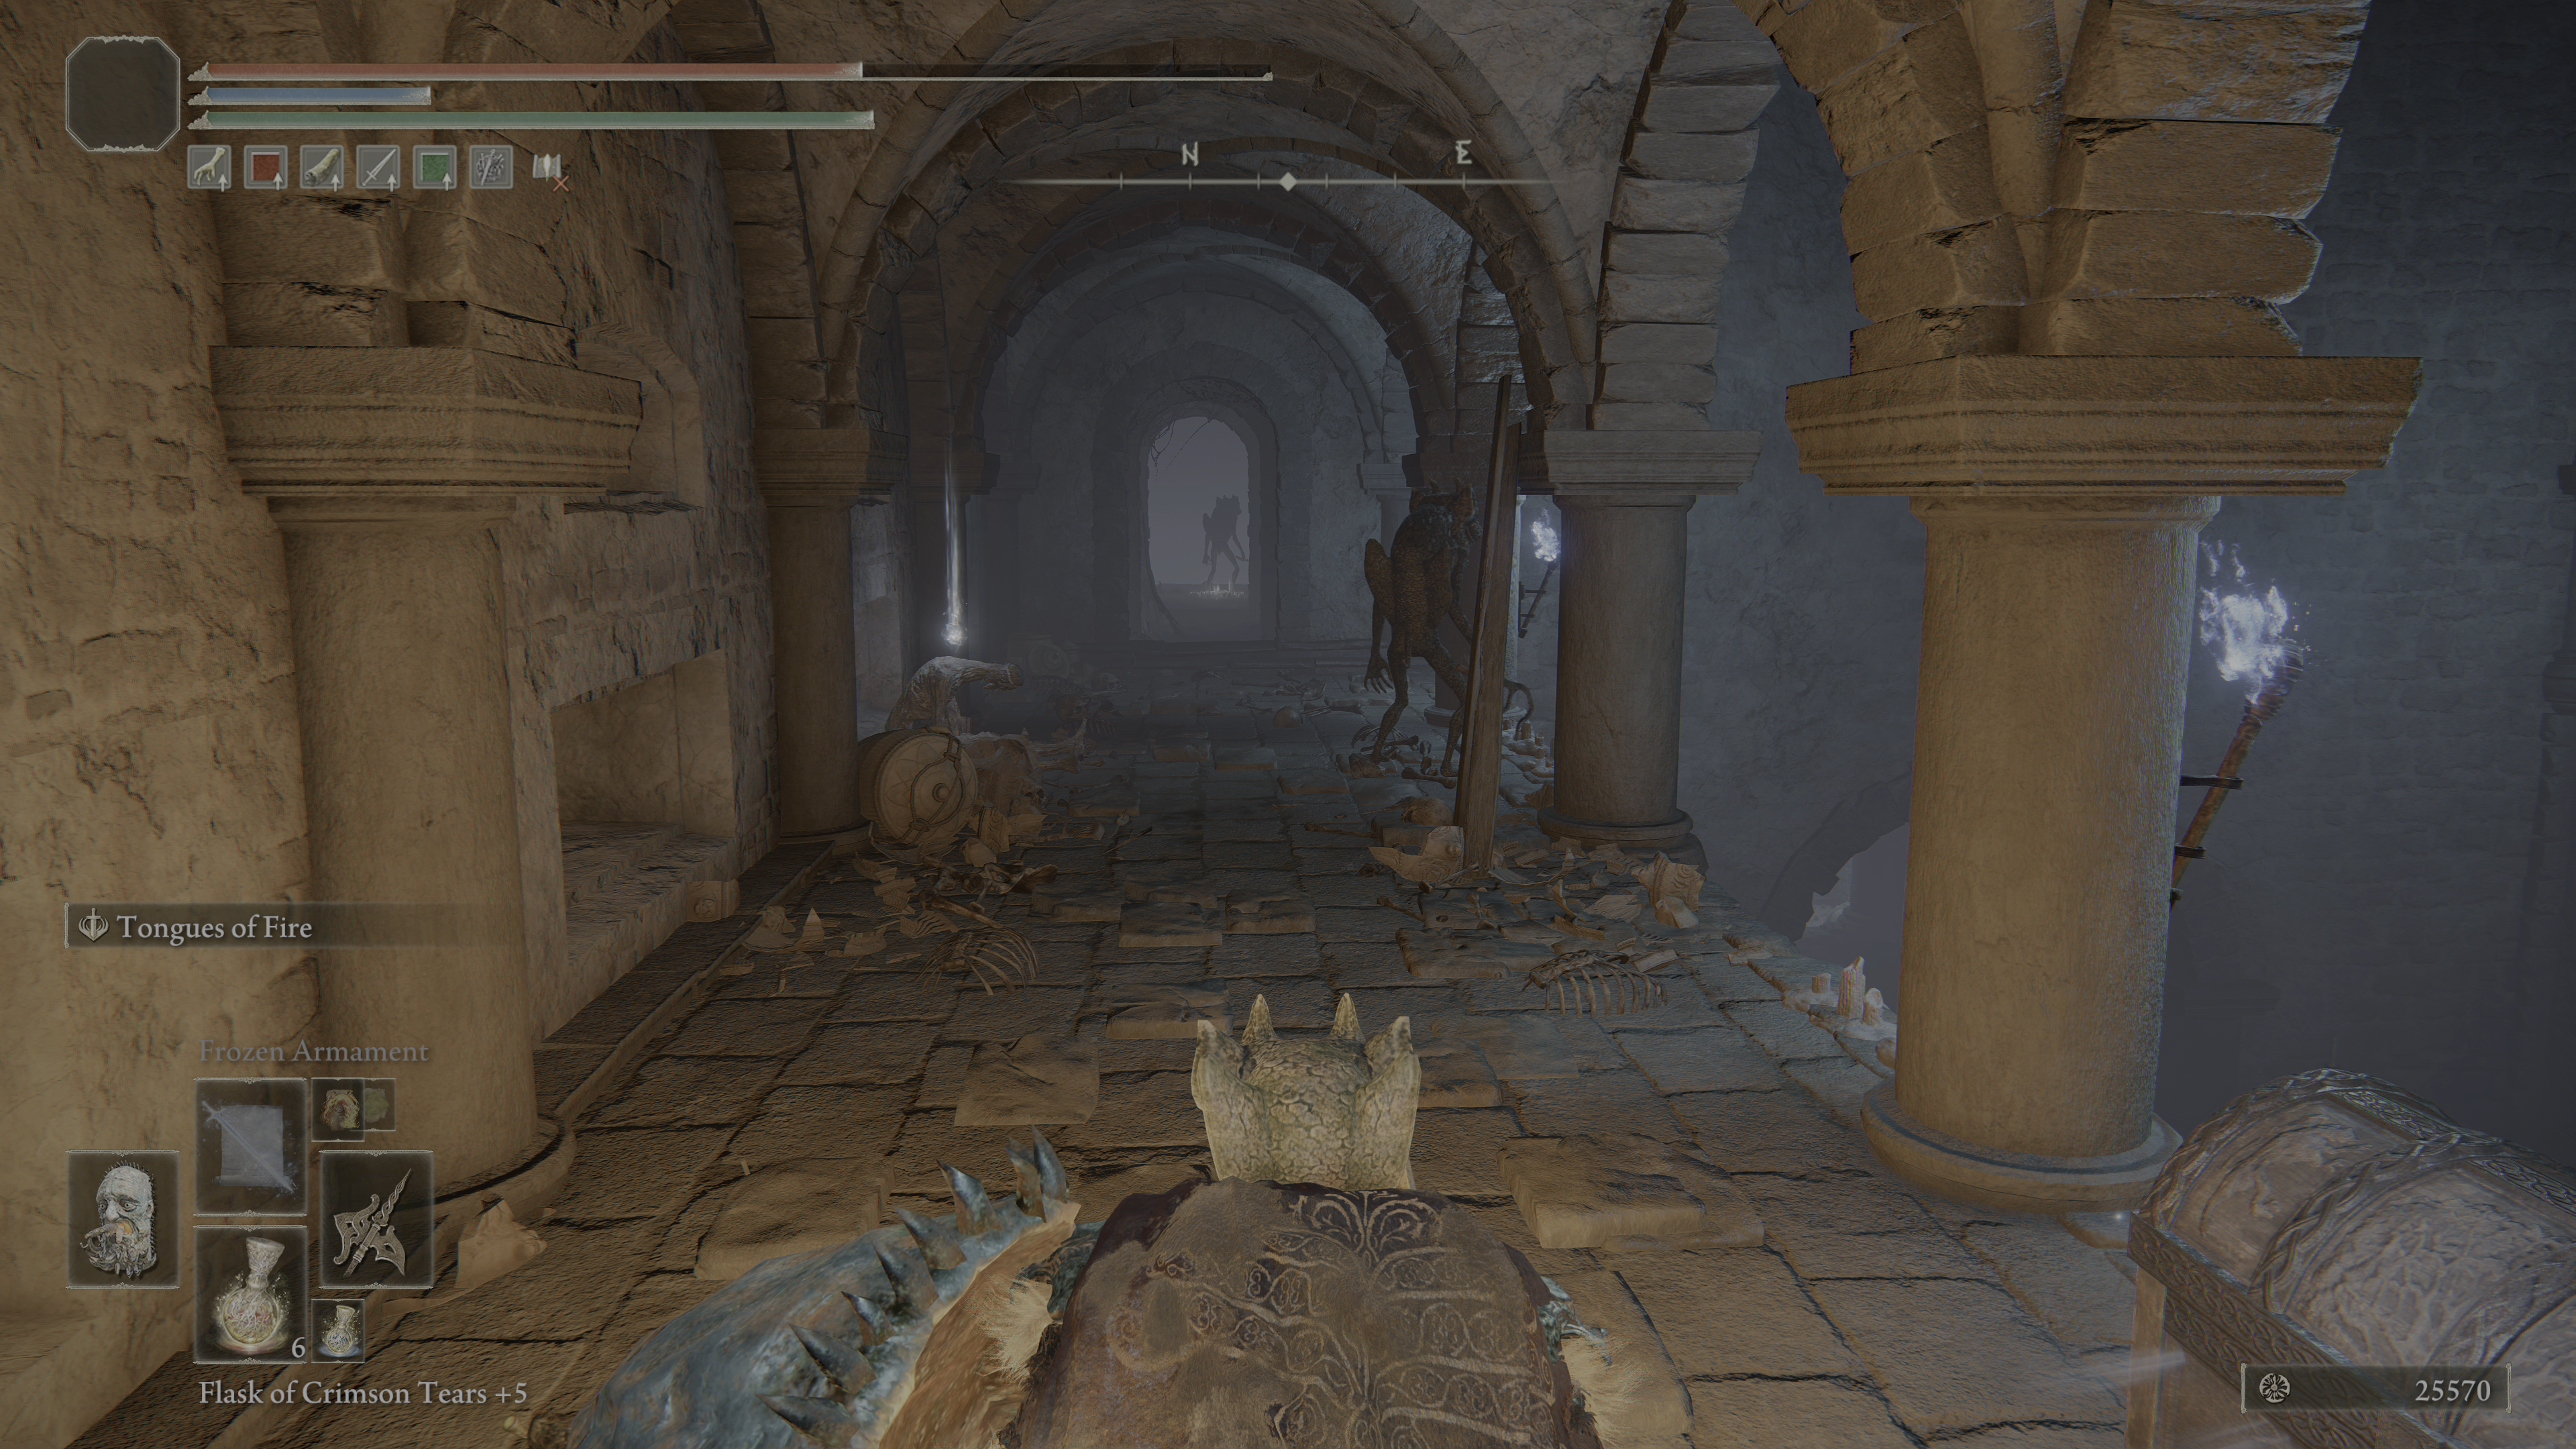
Drop down and proceed backwards like you are going back to the starting grace, going through the water room and up the stairs. When you go up the stairs at the end you will see a large jar and in front of him is a Ritual Pot.
After looting, backtrace your steps, through the water and back into the cathedral and take the alcove to your left again. Opening this chest takes you again up on a walkway, but this time staying up on the walkway and to your left you will find a ladder.
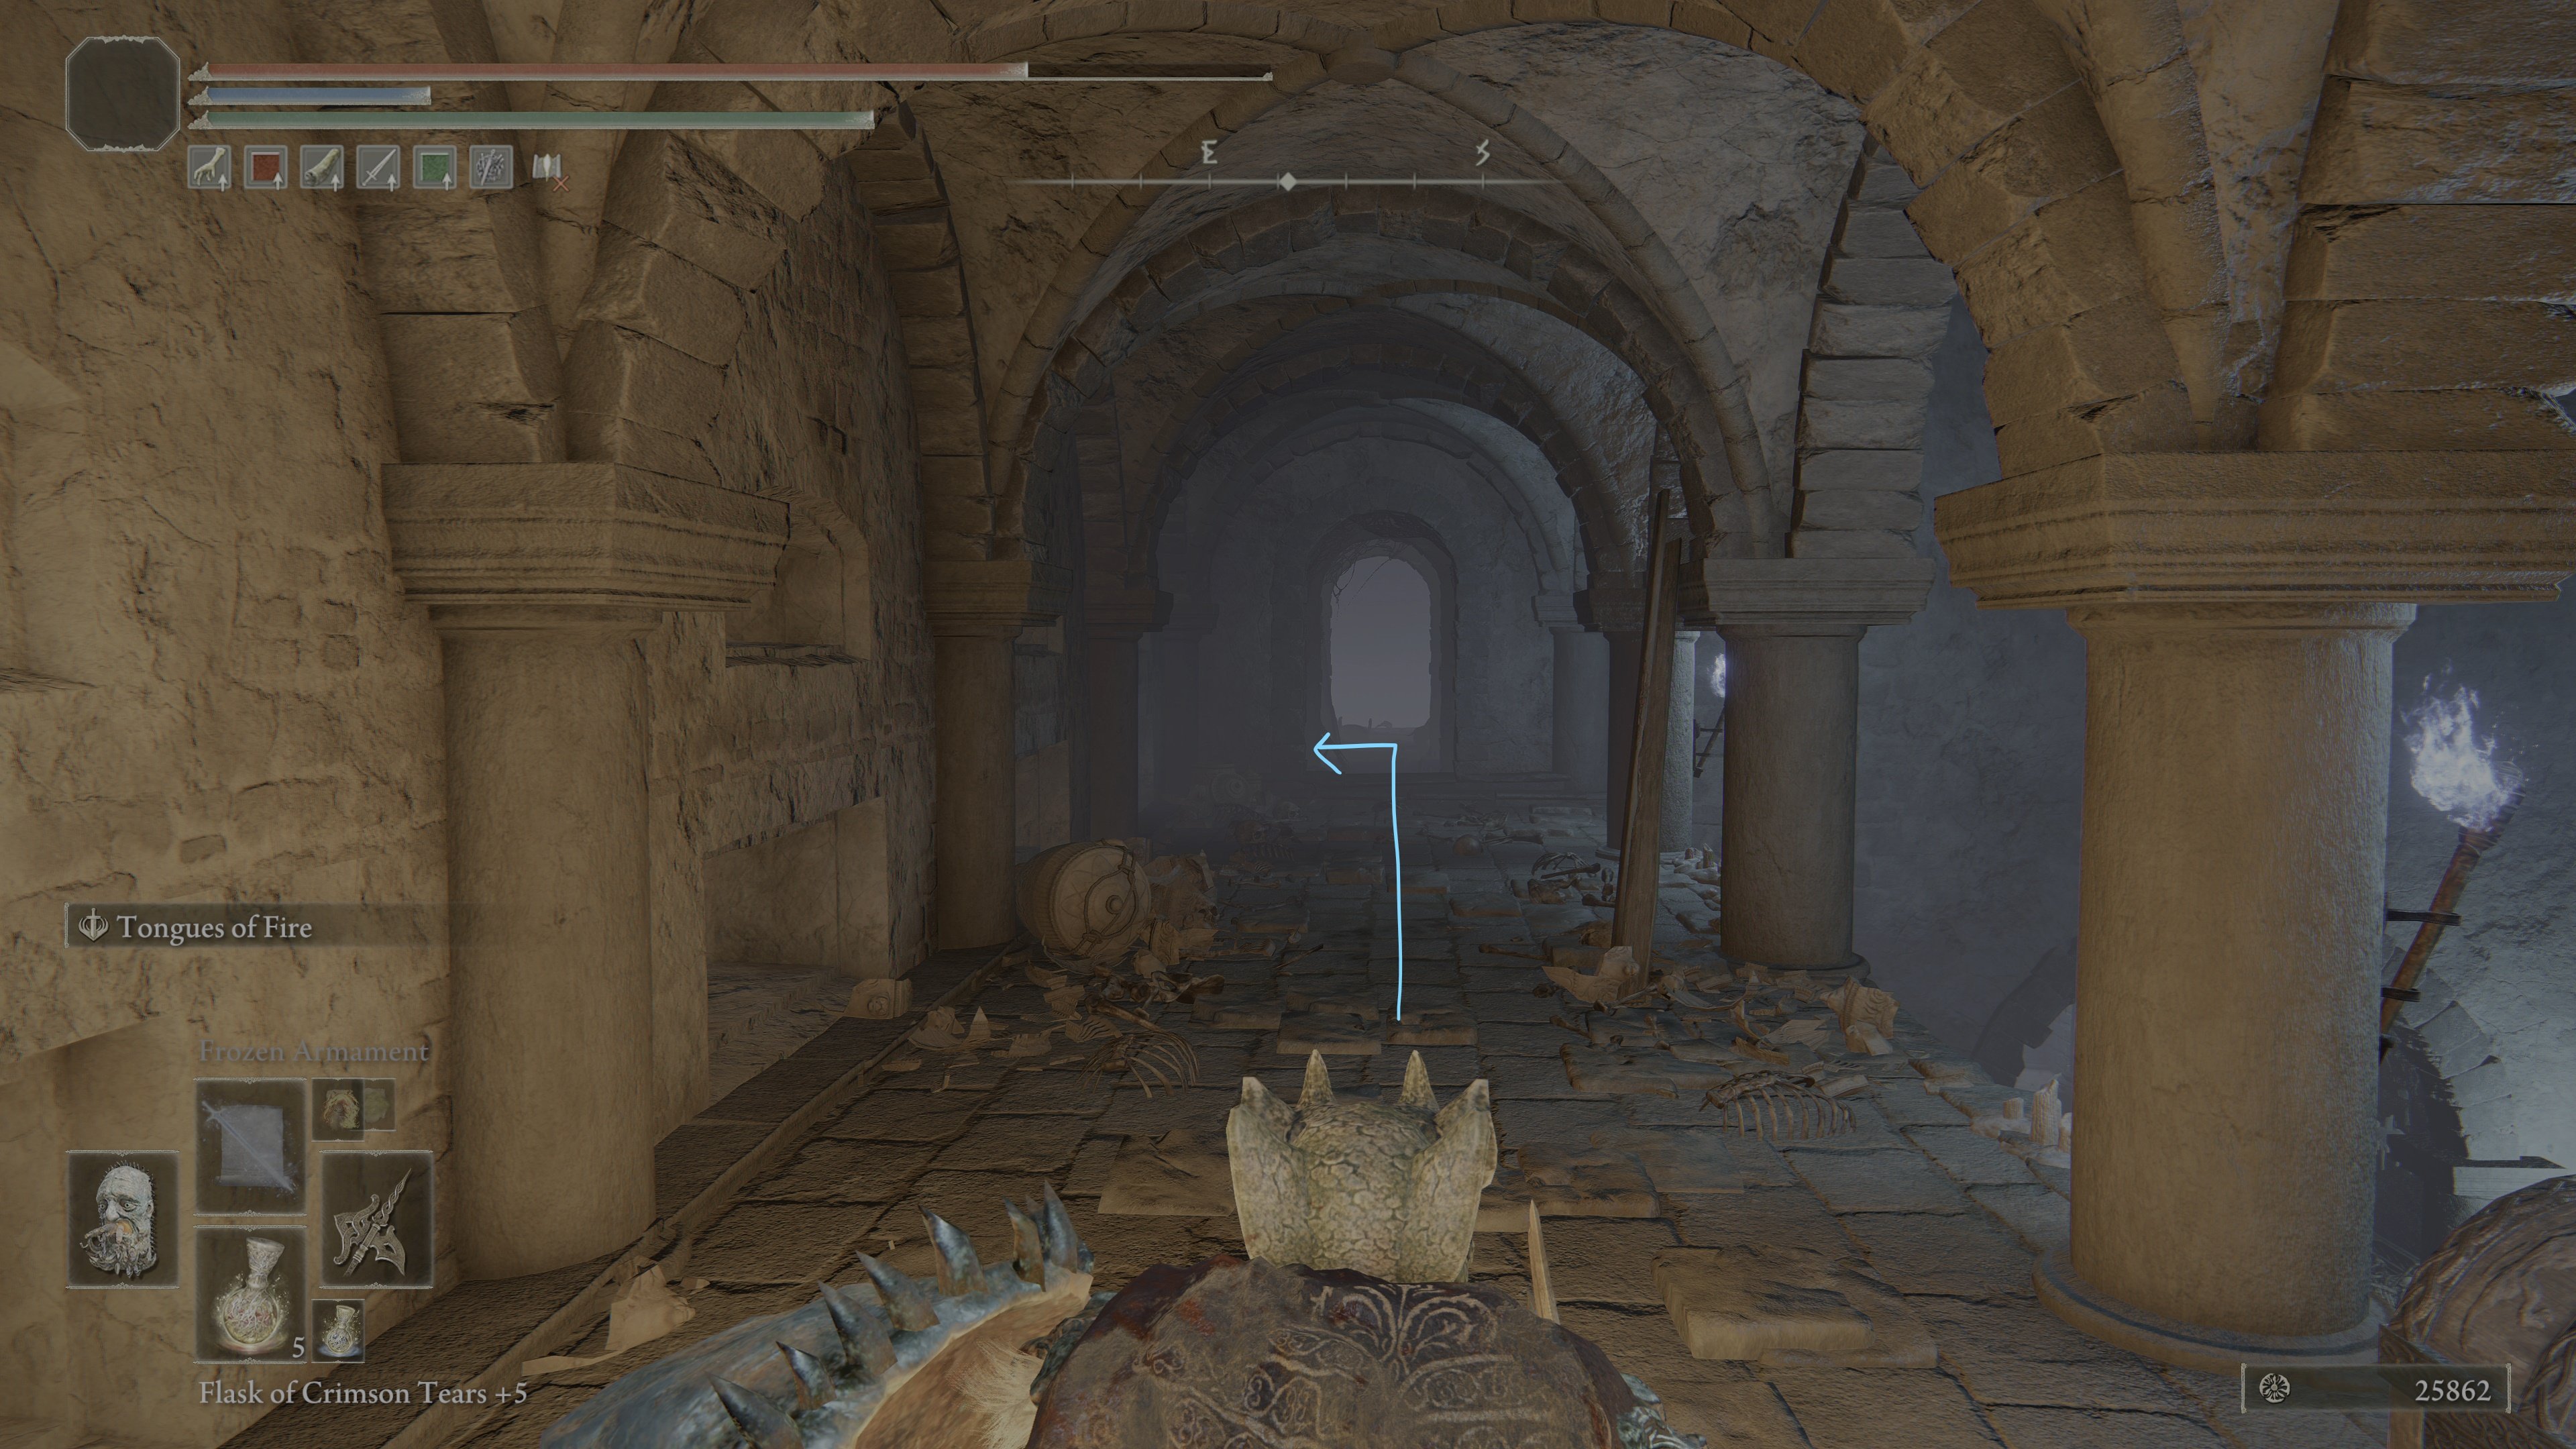
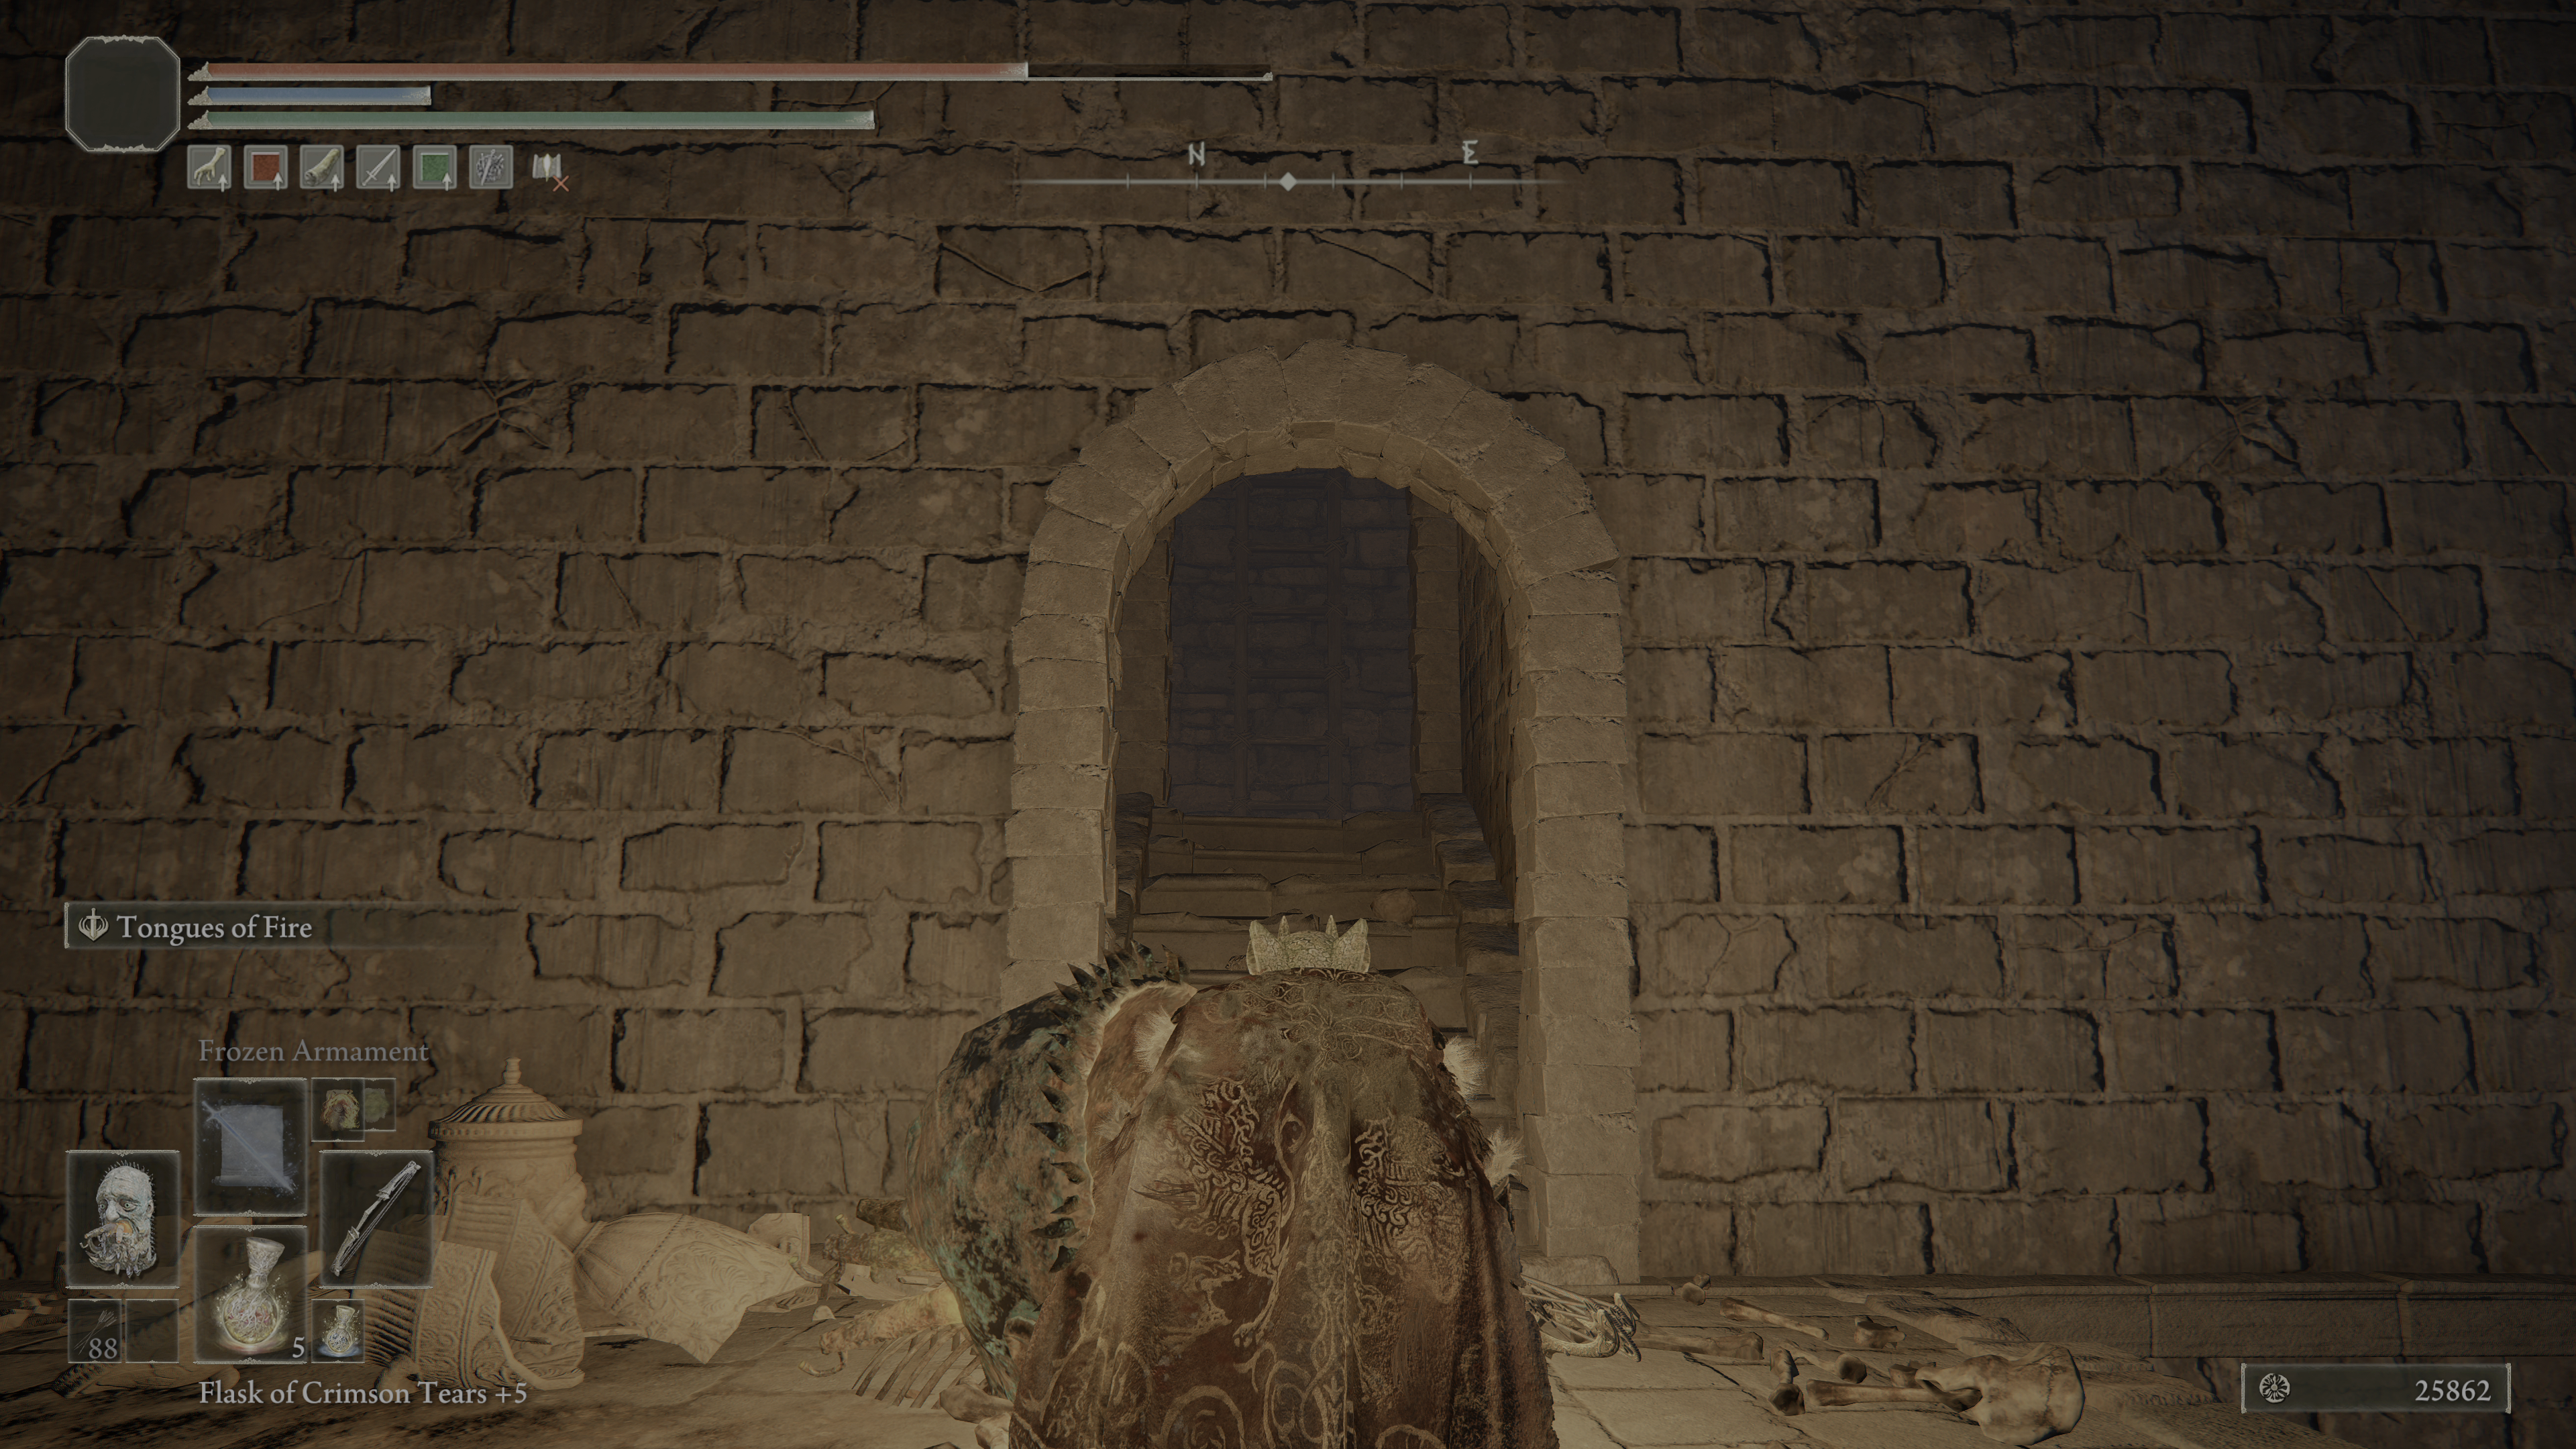
Following the ladder up, you'll reach a prayer room -- there'll be a chest, and a coffin on both the left and right wall, with a small statue flanked by two blue lanterns in front. As anticipated by now, the chest is another trap.
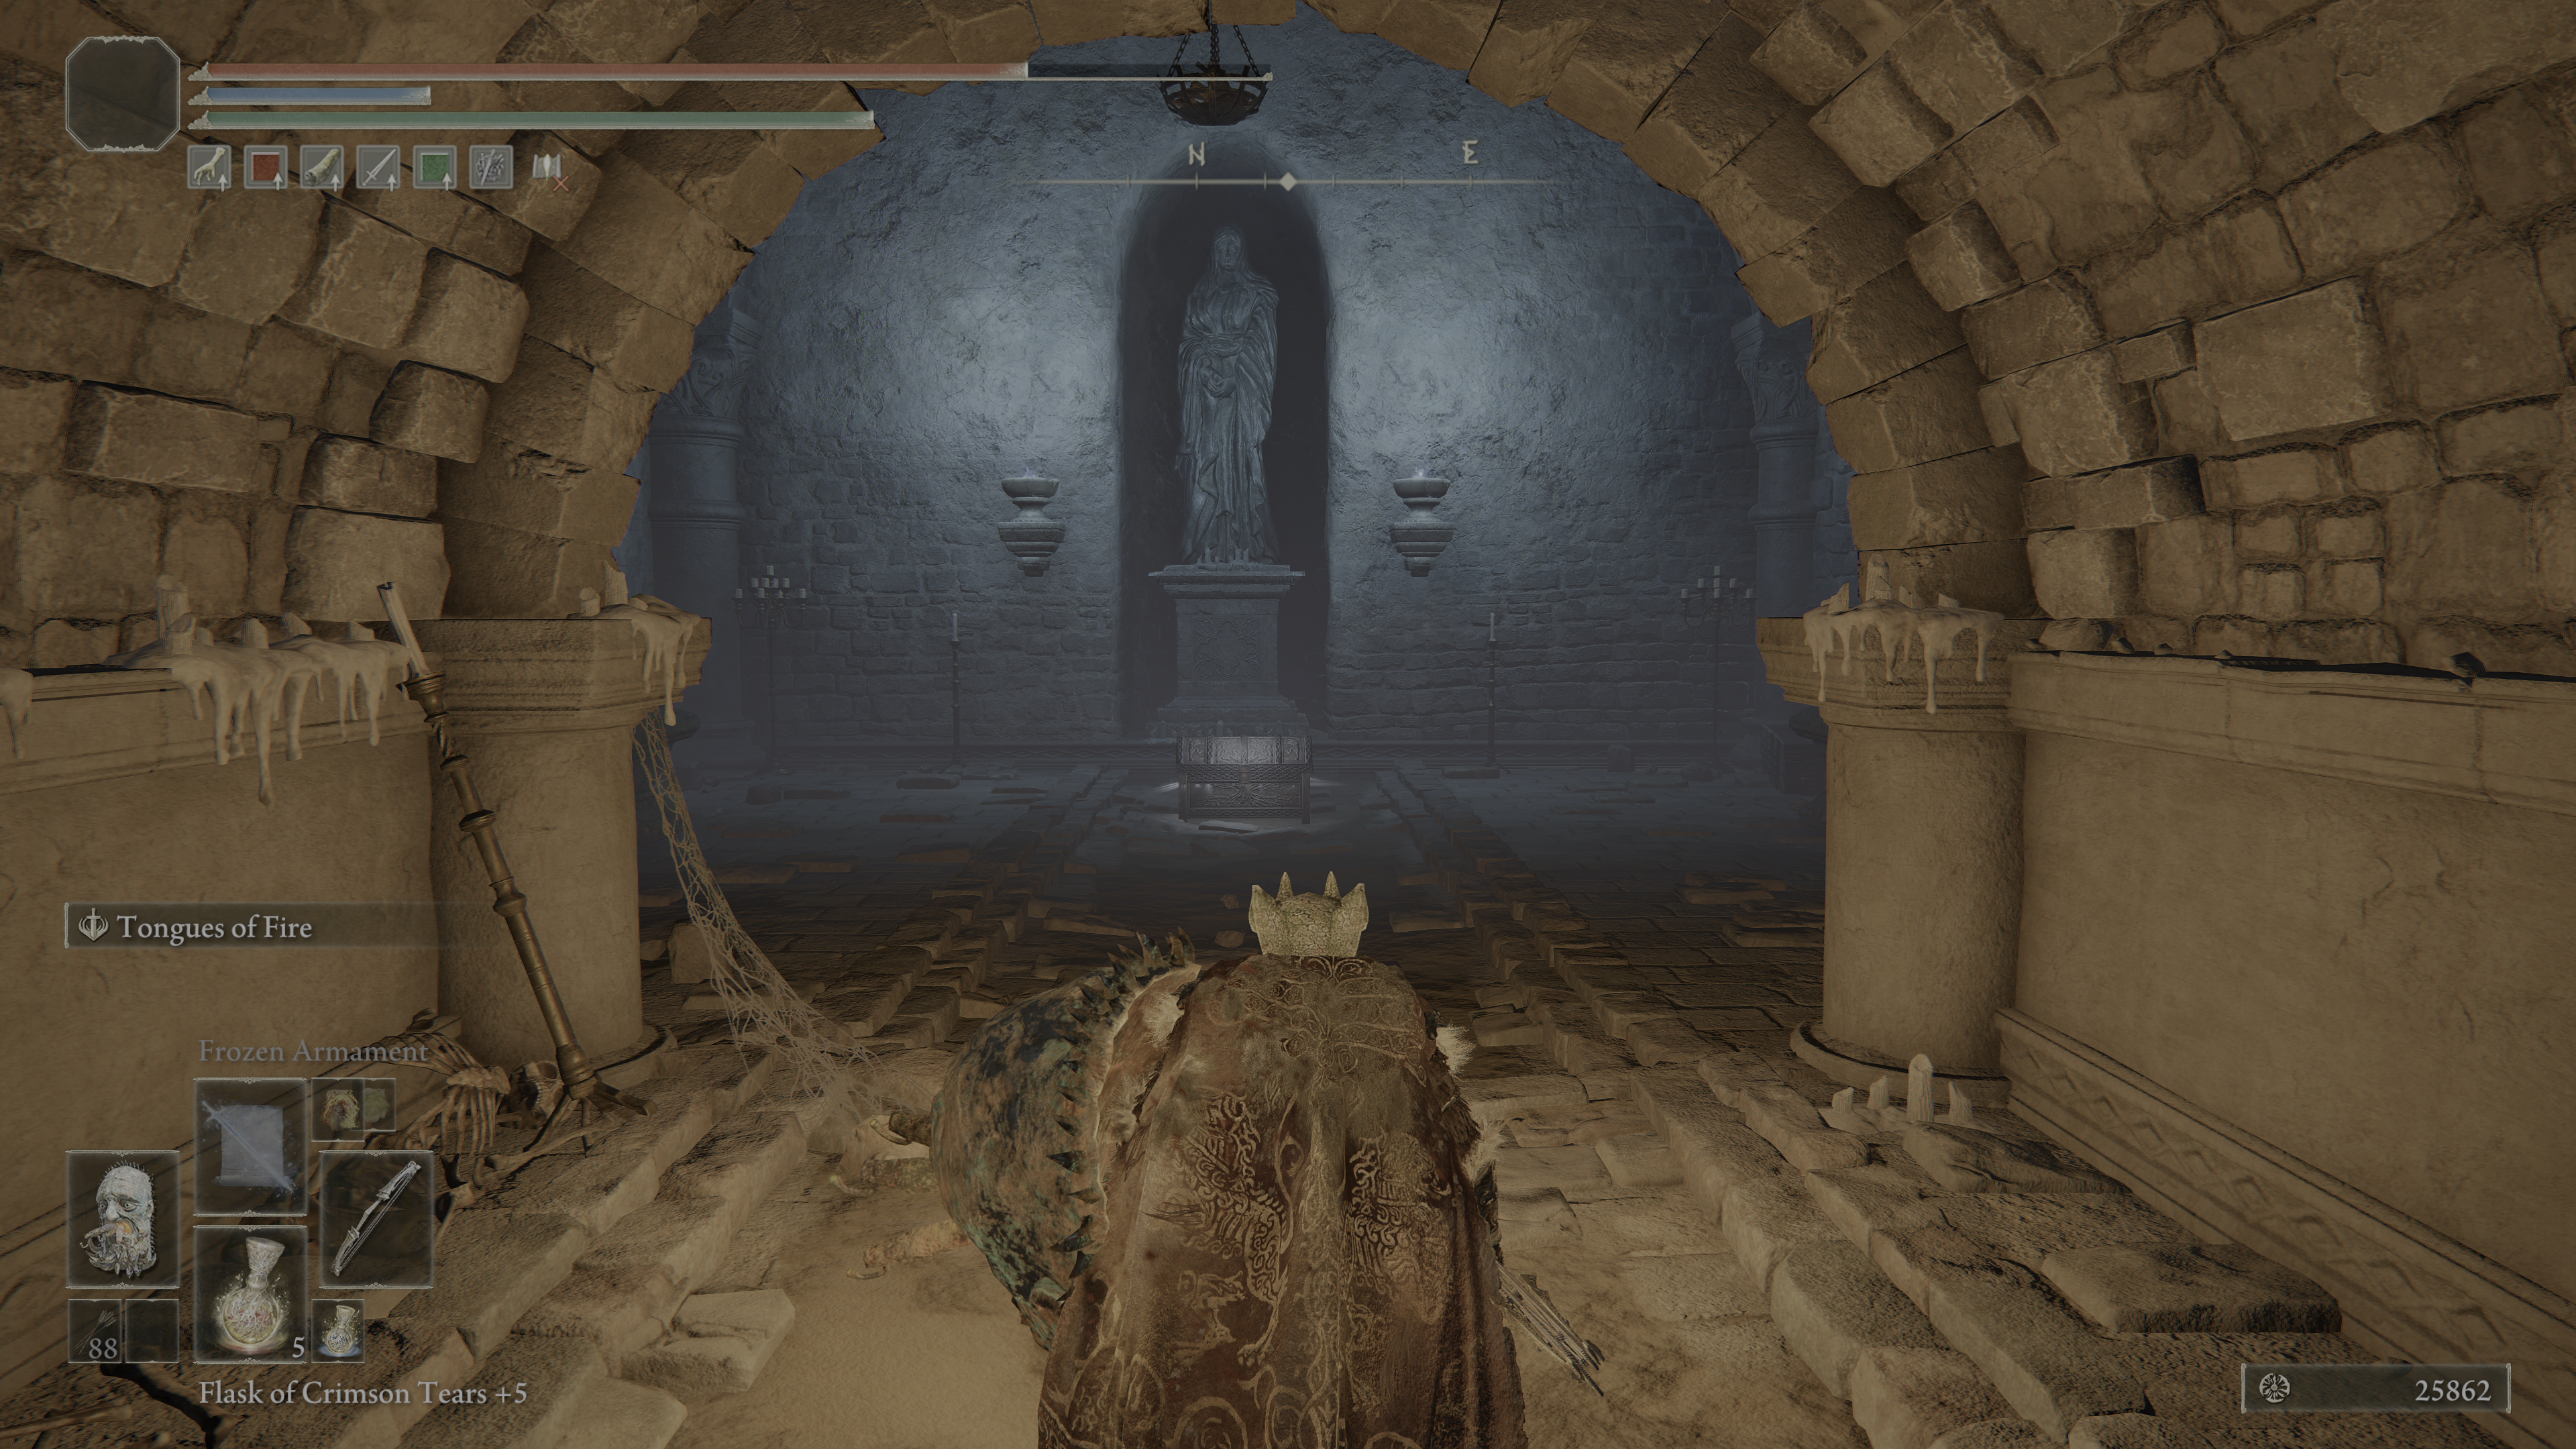
Enter it, and you'll be transported to what looks like the area shortly after the starting site of grace.
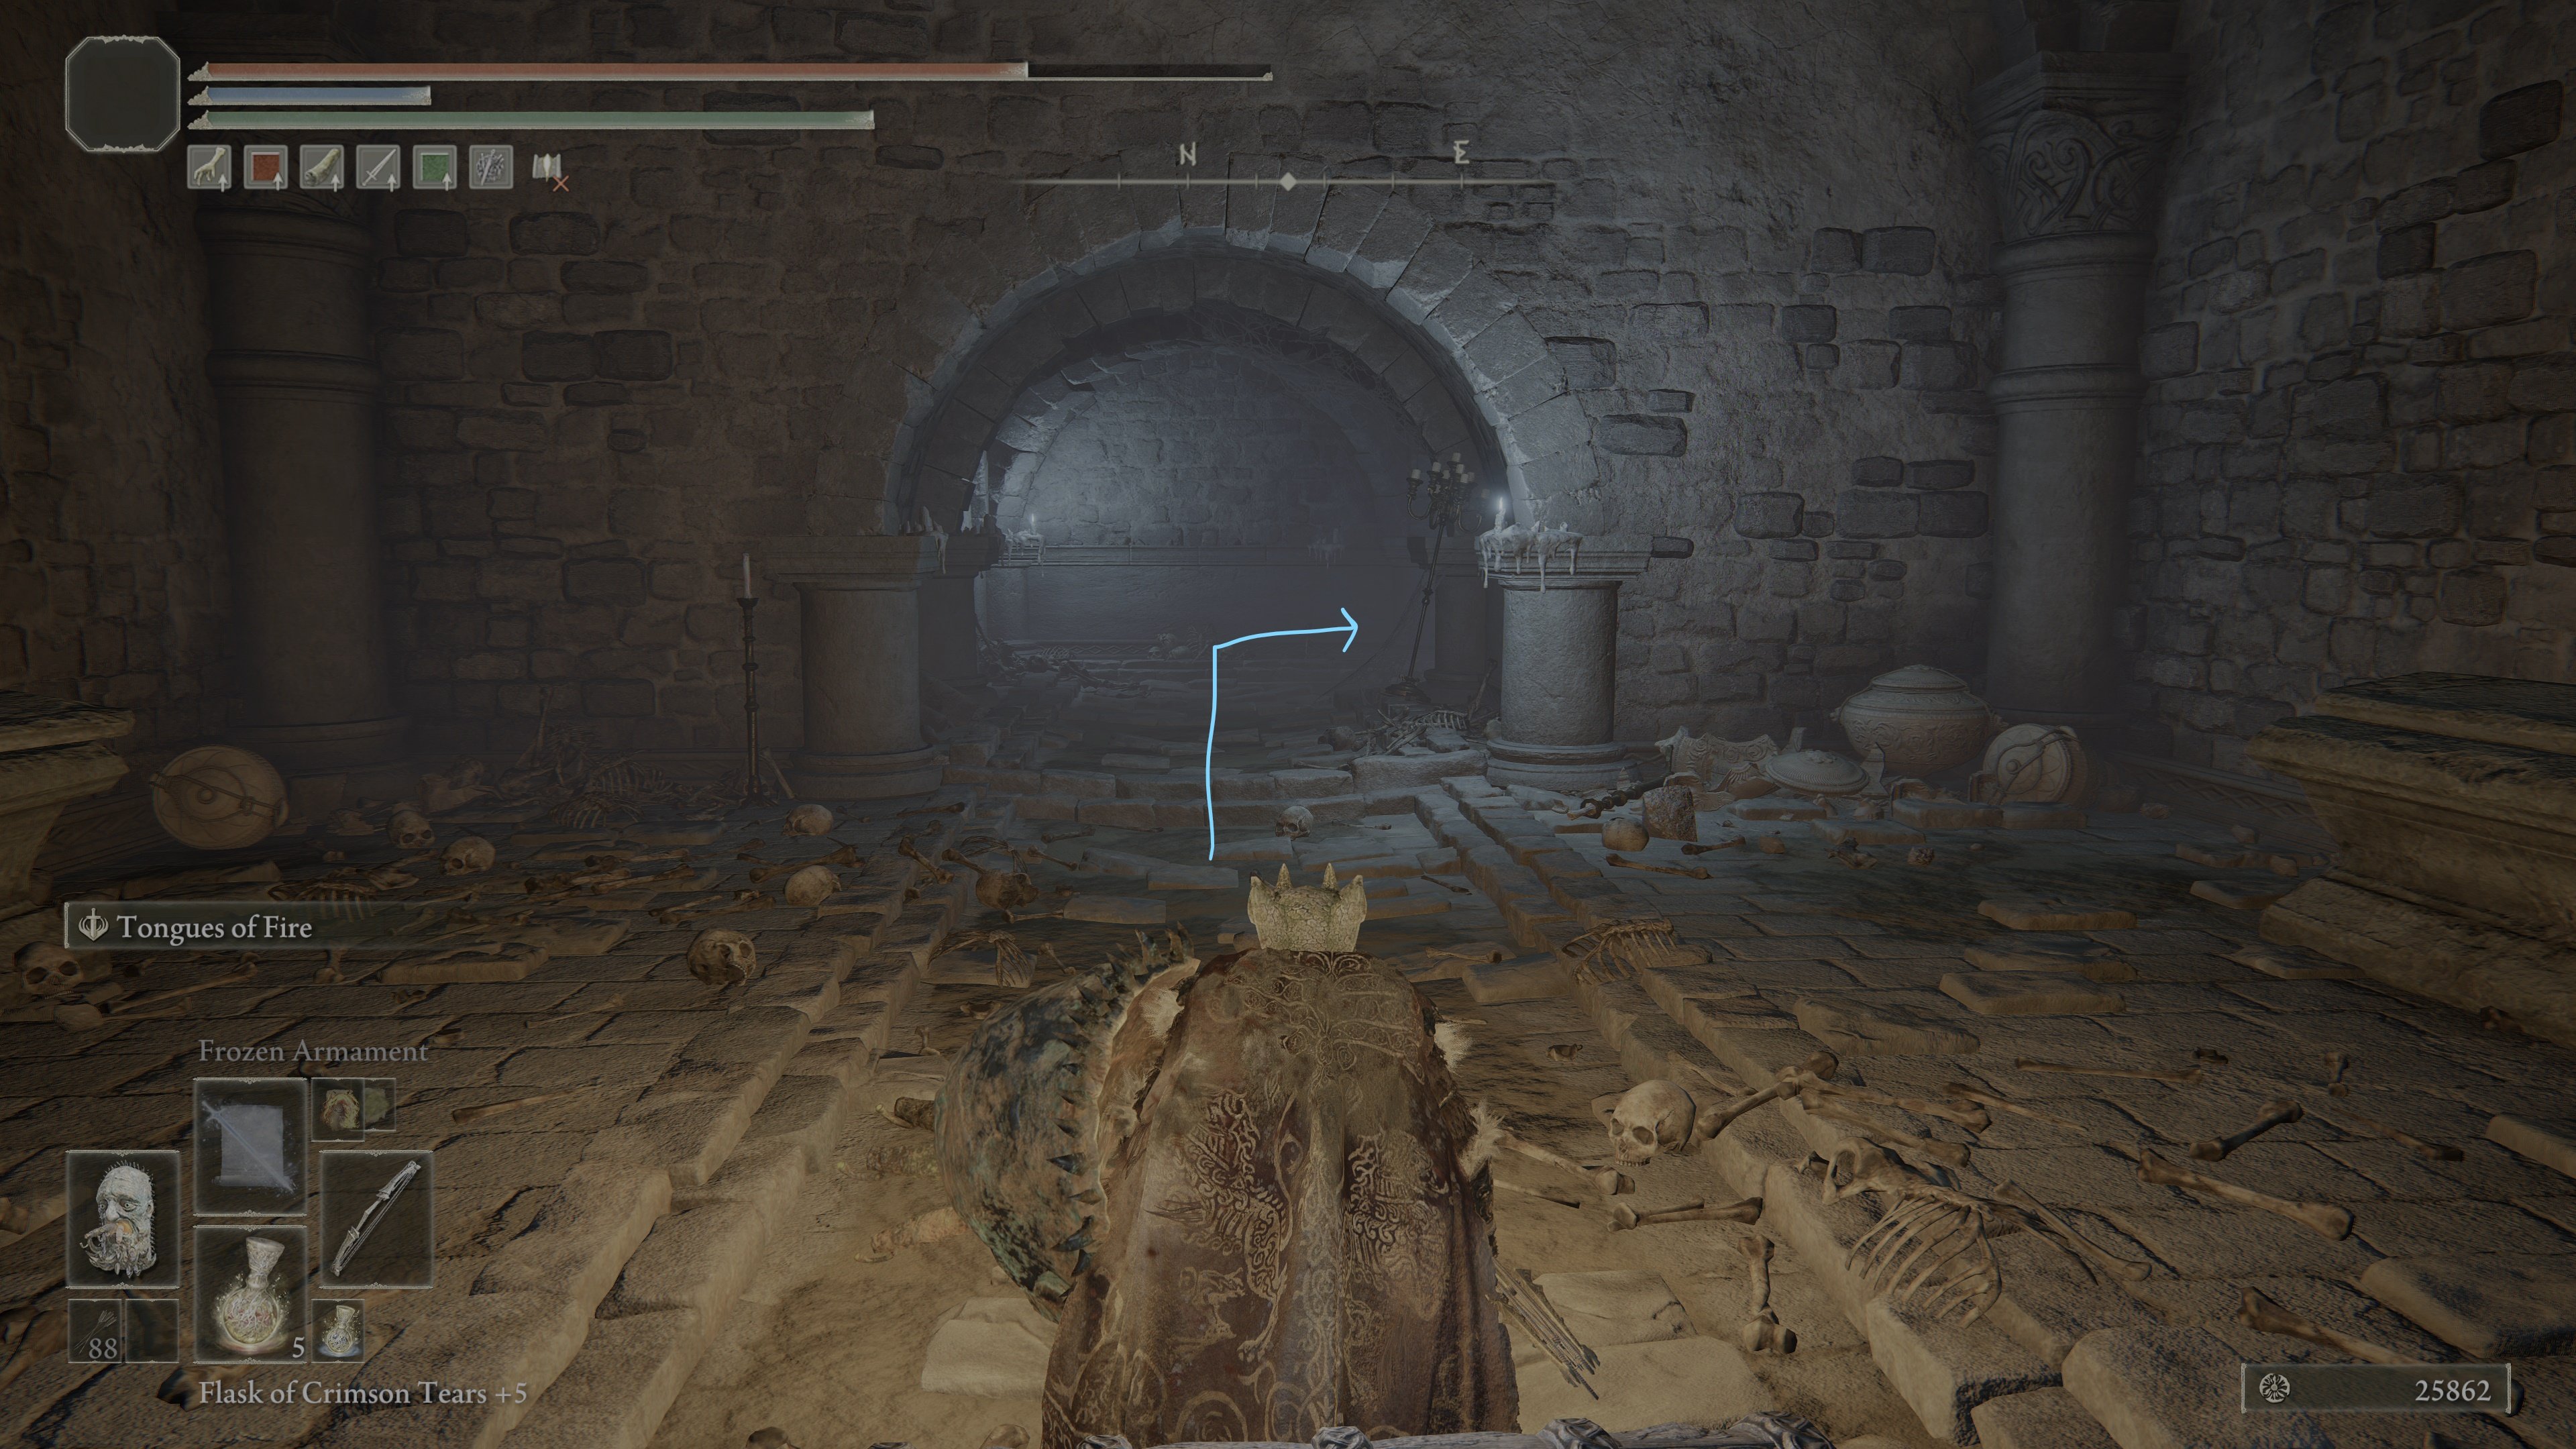
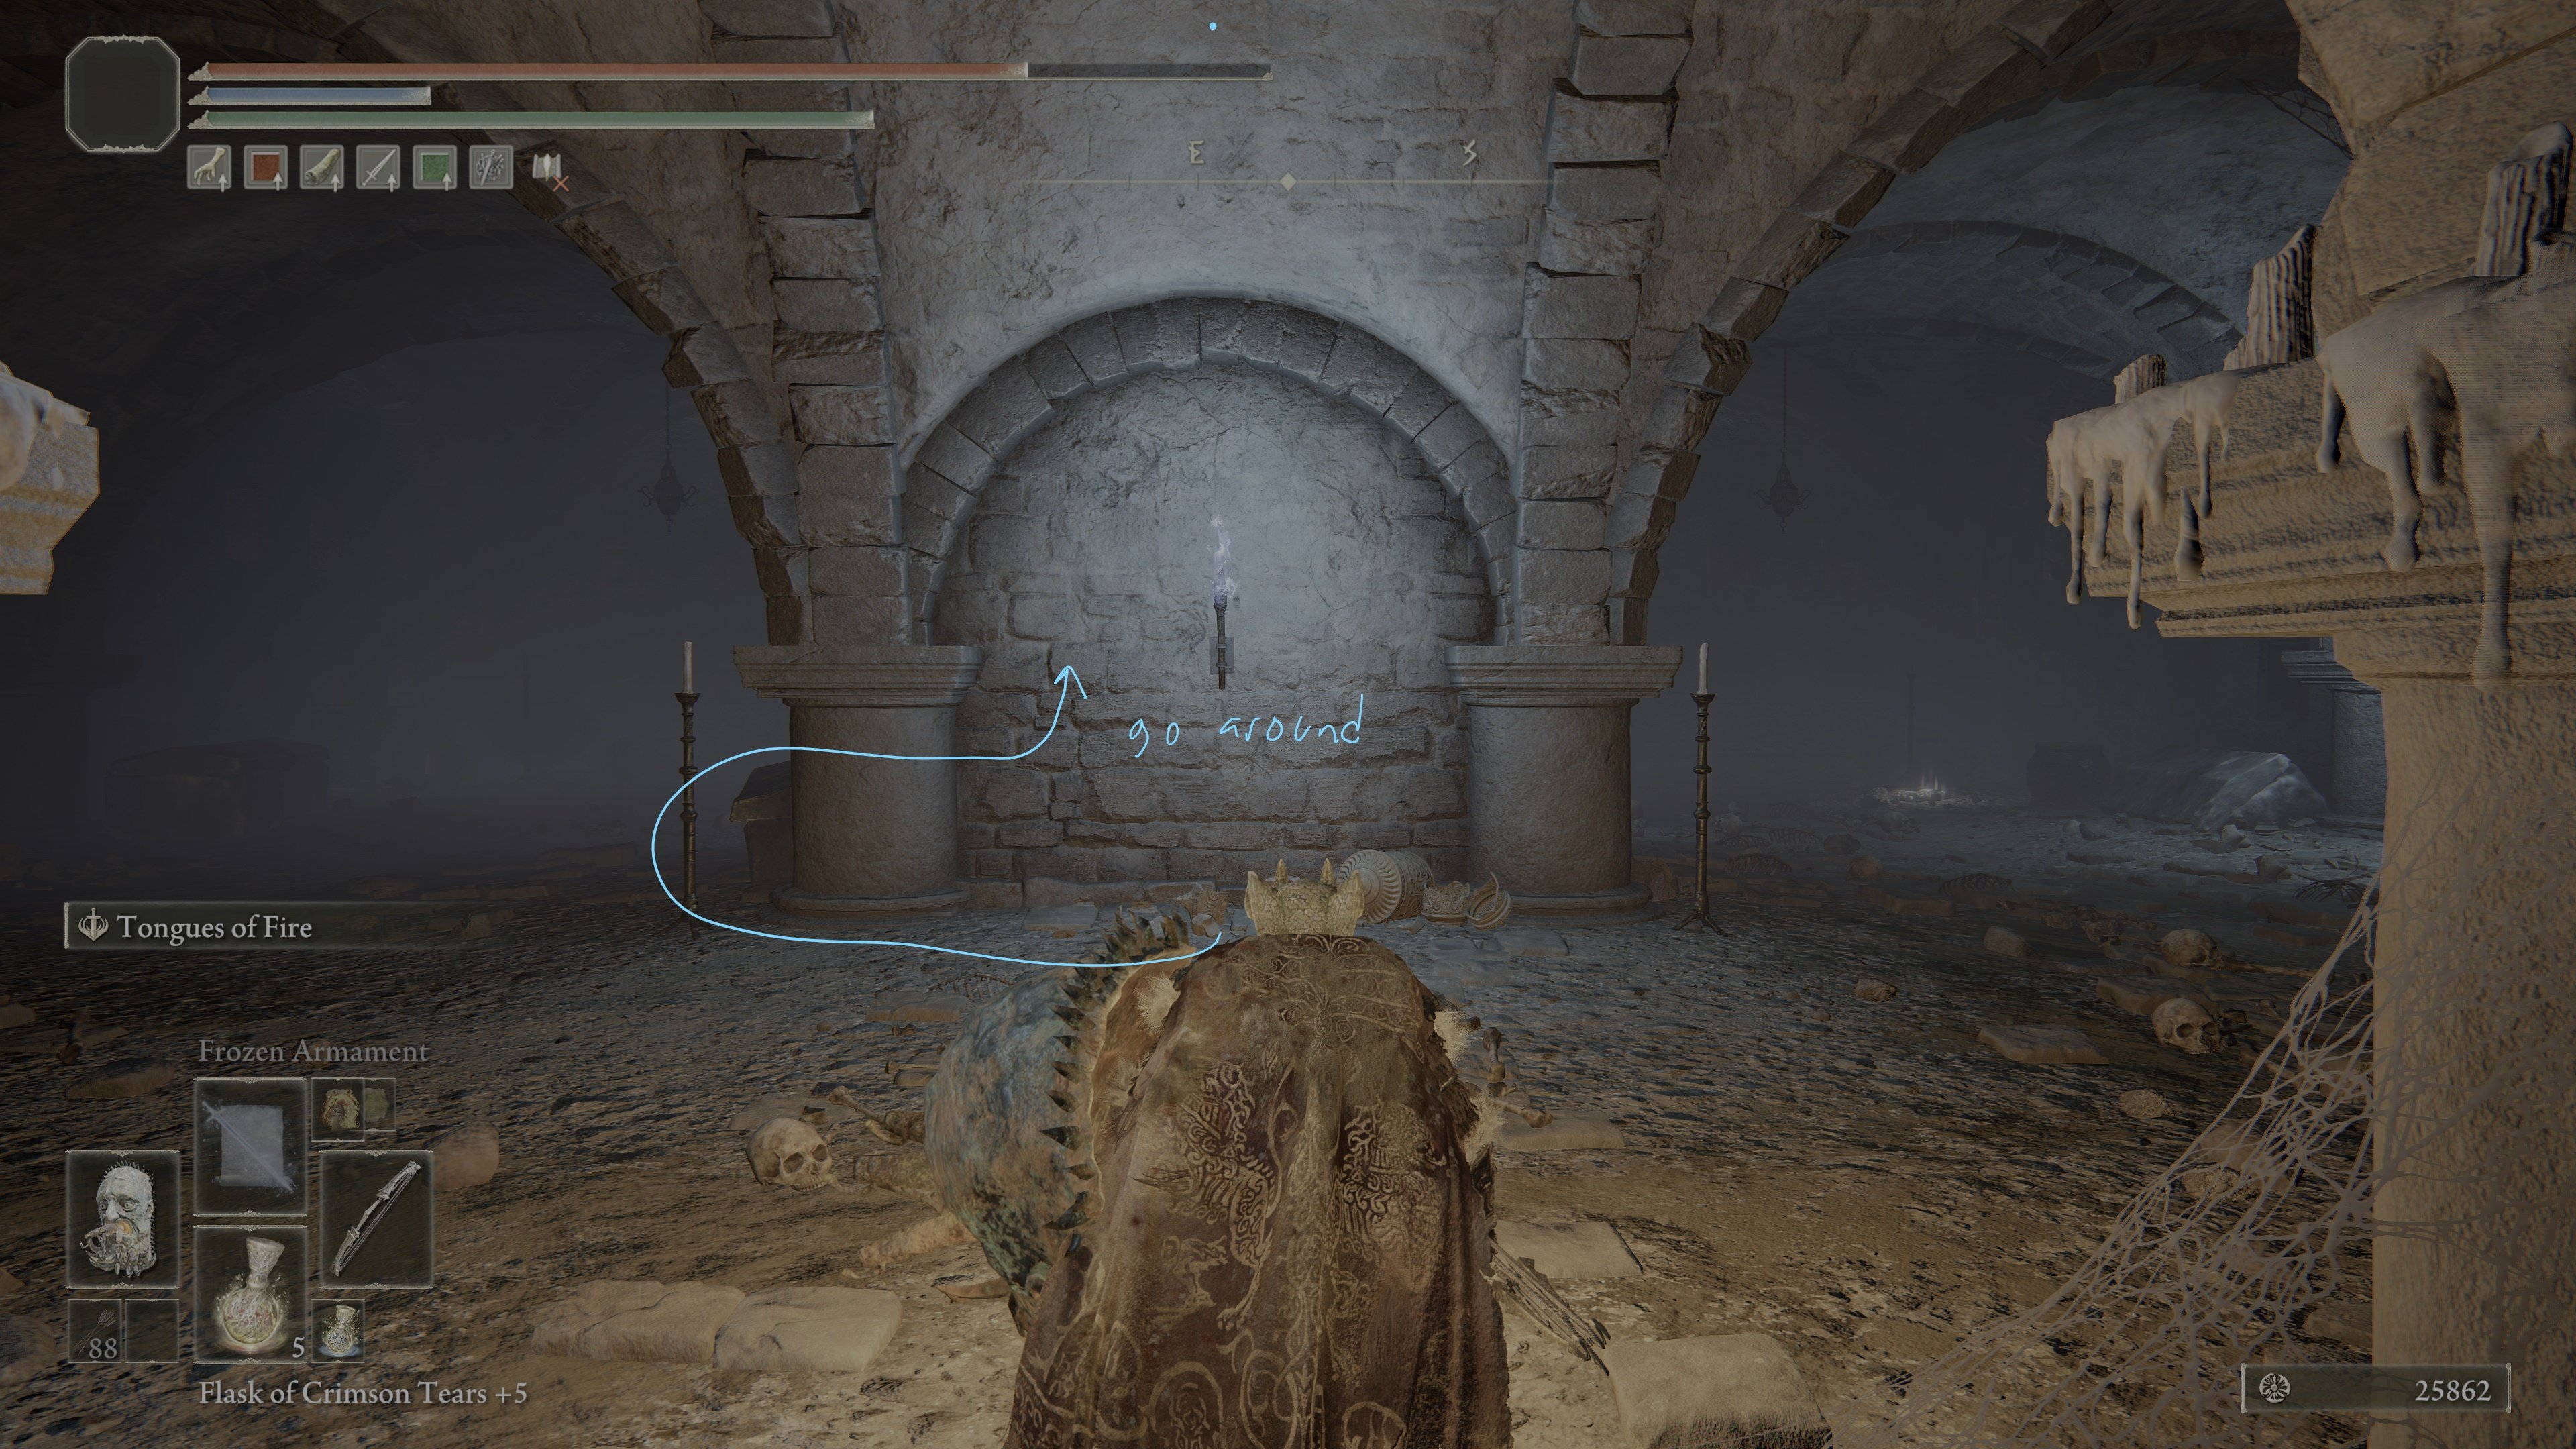
Go straight, then turn right, and proceed up the stairs to a room similar to the starting room, but instead without any living jars, it is a large room with cubic arches, there'll be a small wall (formed between two pillars) with a lantern on it in front of you. Go right around the wall, and then up the stairs. Once you reach the stairs' threshold, you'll be able to see loot a few feet in front of you, which is this dungeon's second Ritual pot. There is be a large Living Jar to your left, though, so watch for the ambush.
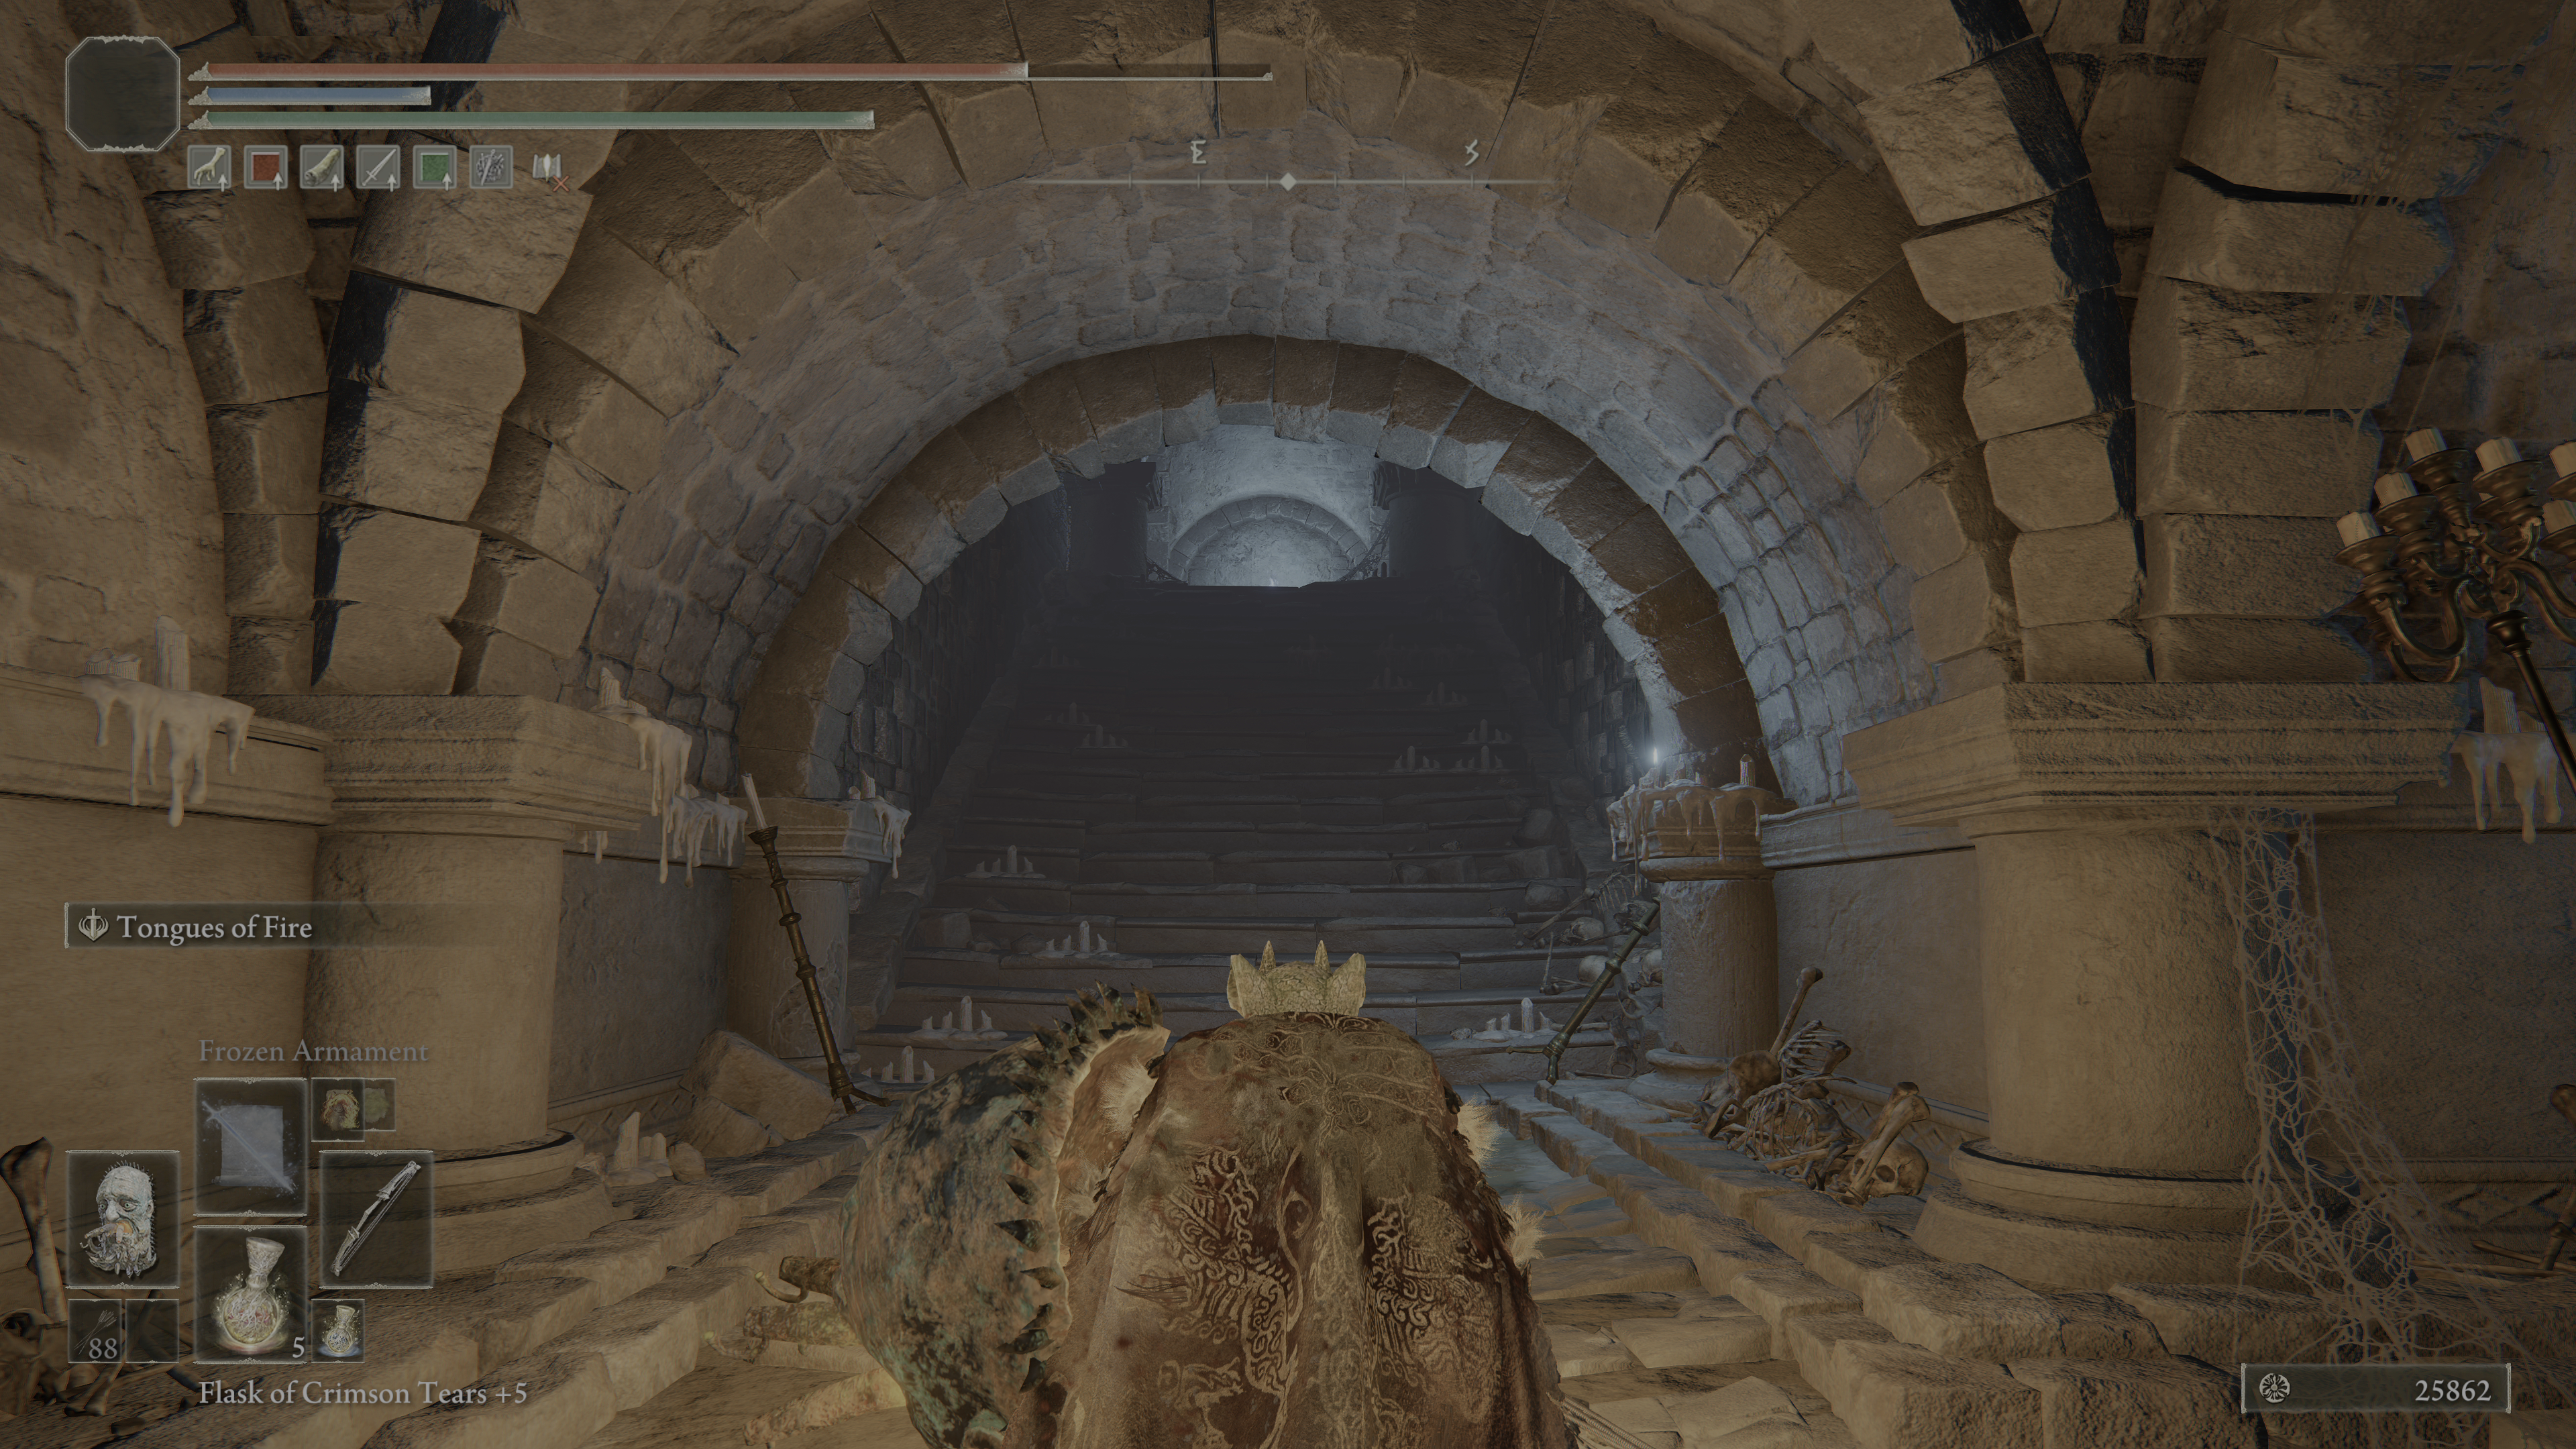
As you exit the room (coming down the stairs), to your left will be a window -- just like before, jump out of it, then head all the way back to the cathedral room and use the chest in front of the room.
This will take you to a water room with 2 small living jars, 2 Cracked Pots and a ladder in the right side of the room.
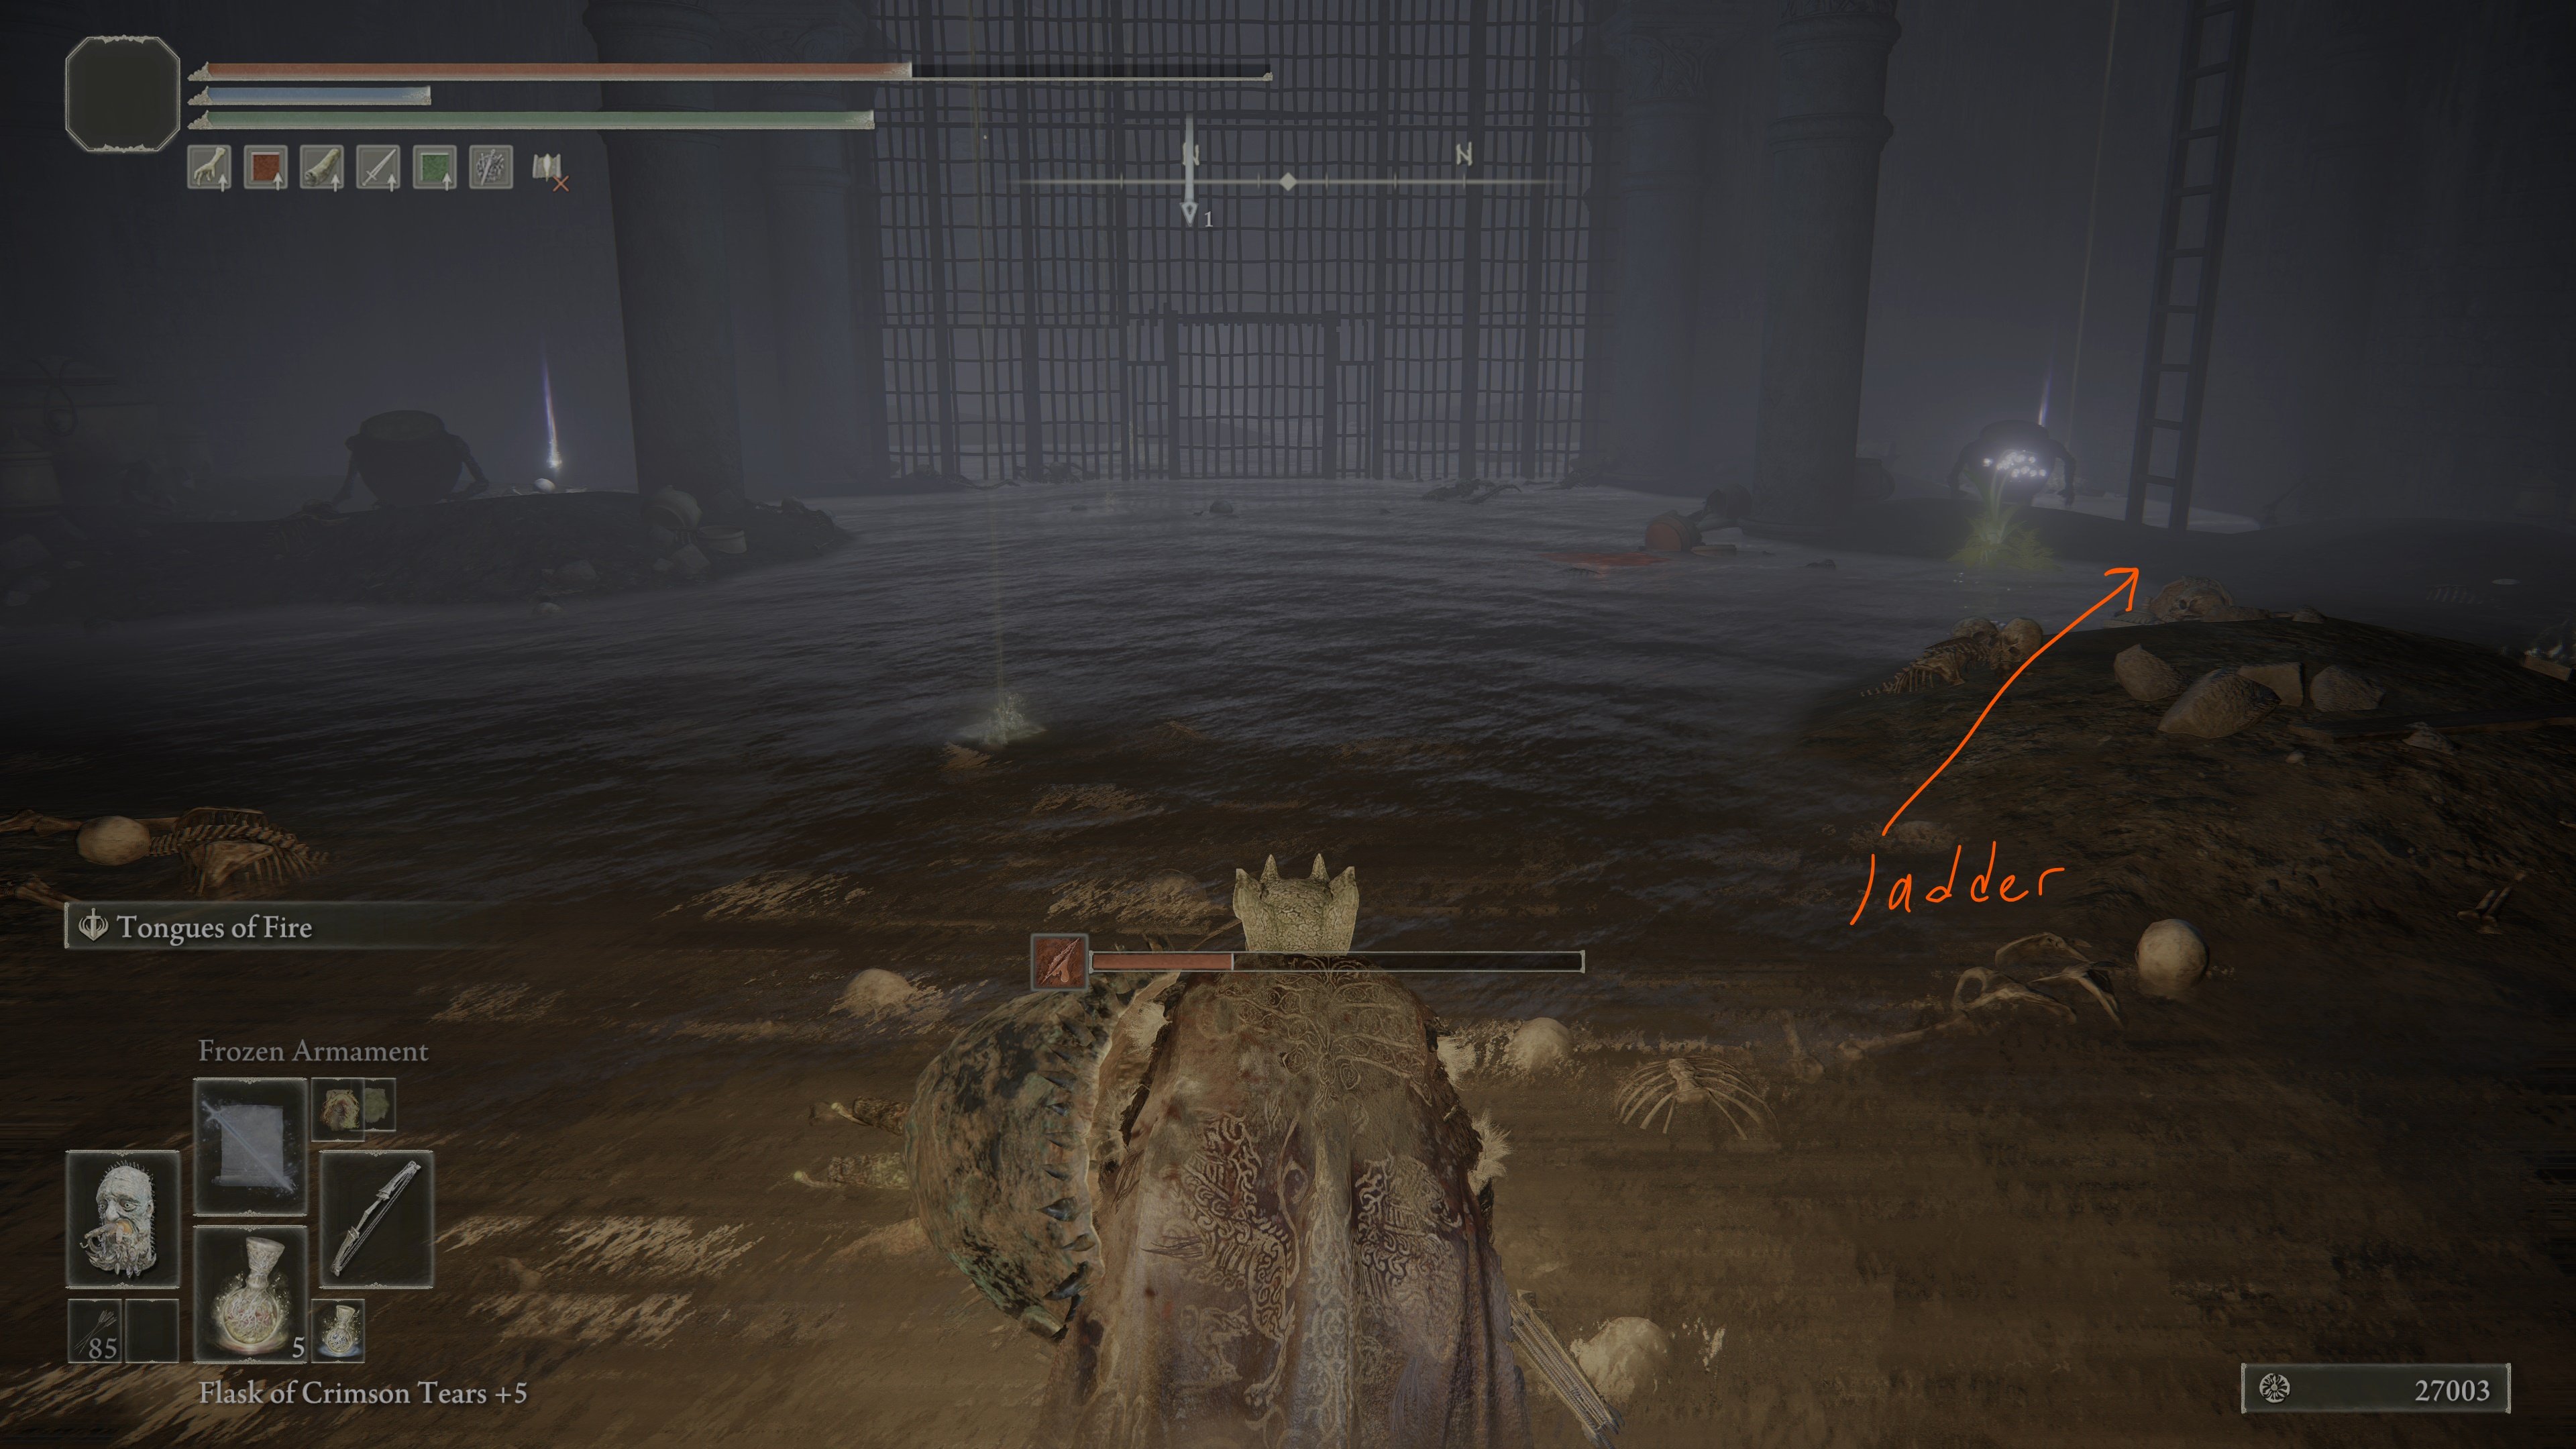
Climb the ladder, then proceed forward -- on your left will be a statue with a lever in front of it; this opens the boss gate.
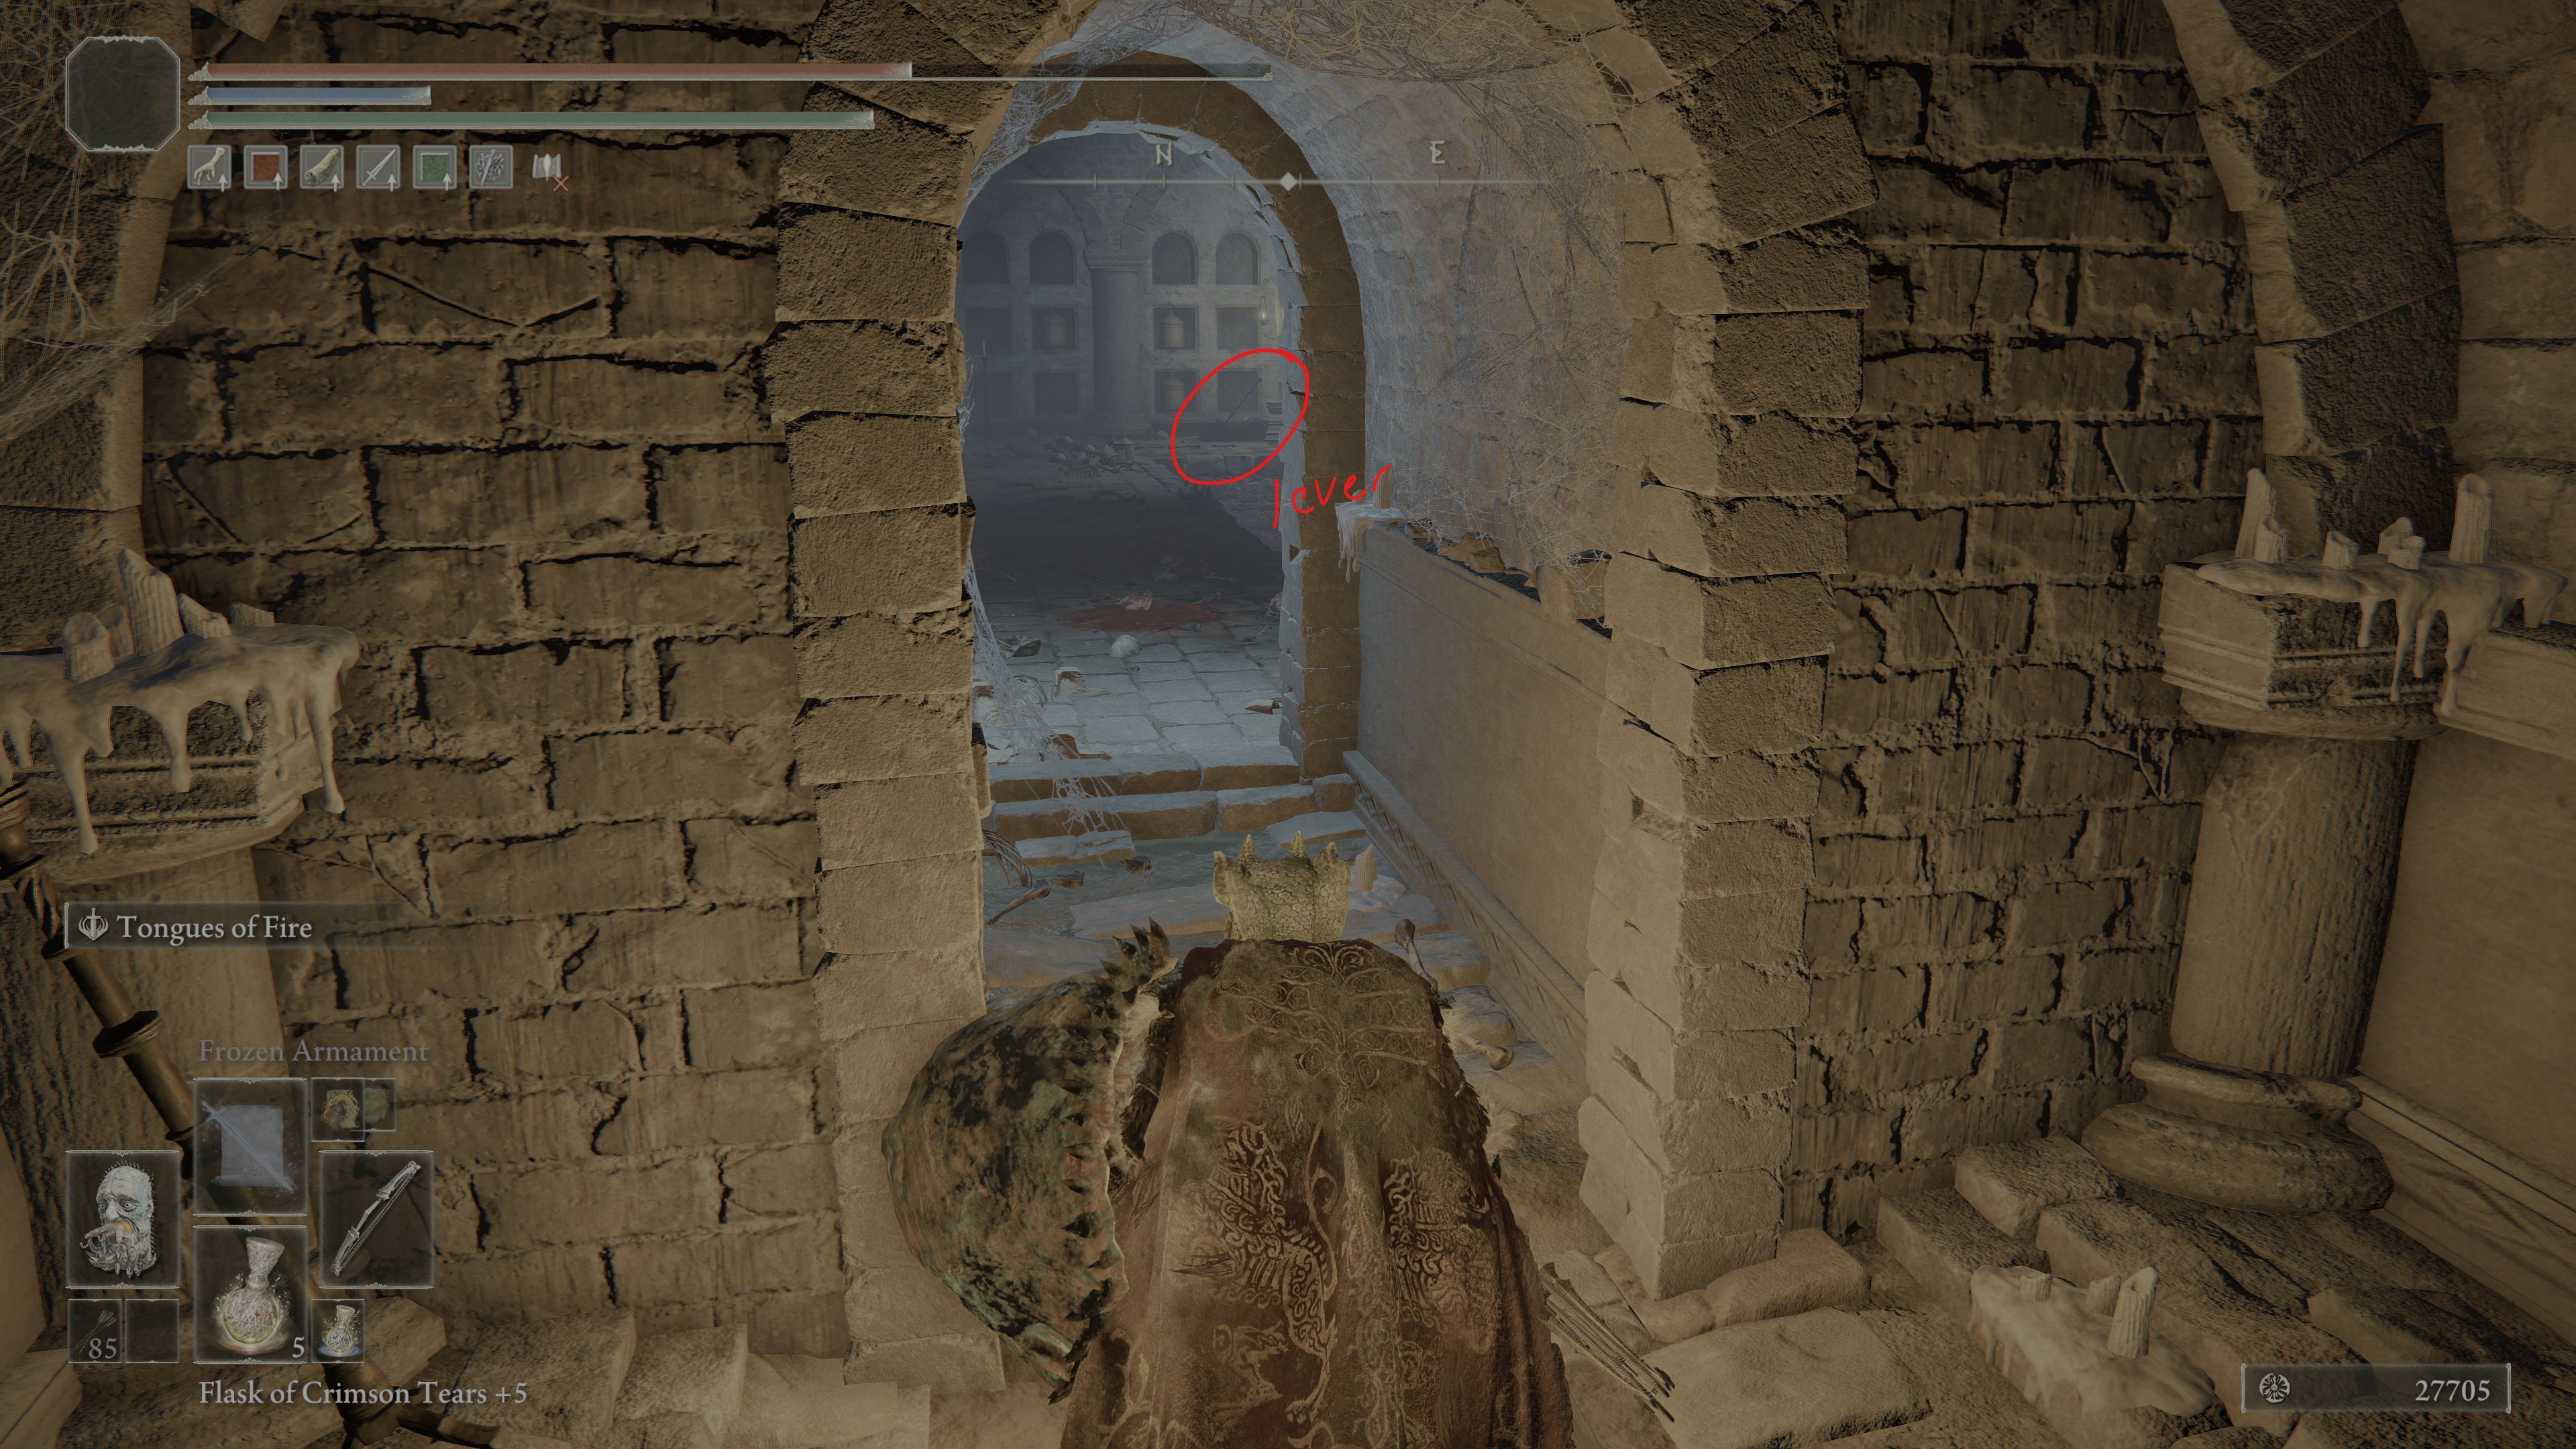
With the boss gate open, jump off the platform, and run back up the stairs to the chest (do NOT go down into the water room's chest).
When you exit the chest, you'll be in the stage similar the starting configuration, where you can go forward, then turn right, and then you'll see the cubic arches with the wall in front of you.Going straight (around the wall), and up the stairs will lead you to the entrance to the boss gate.
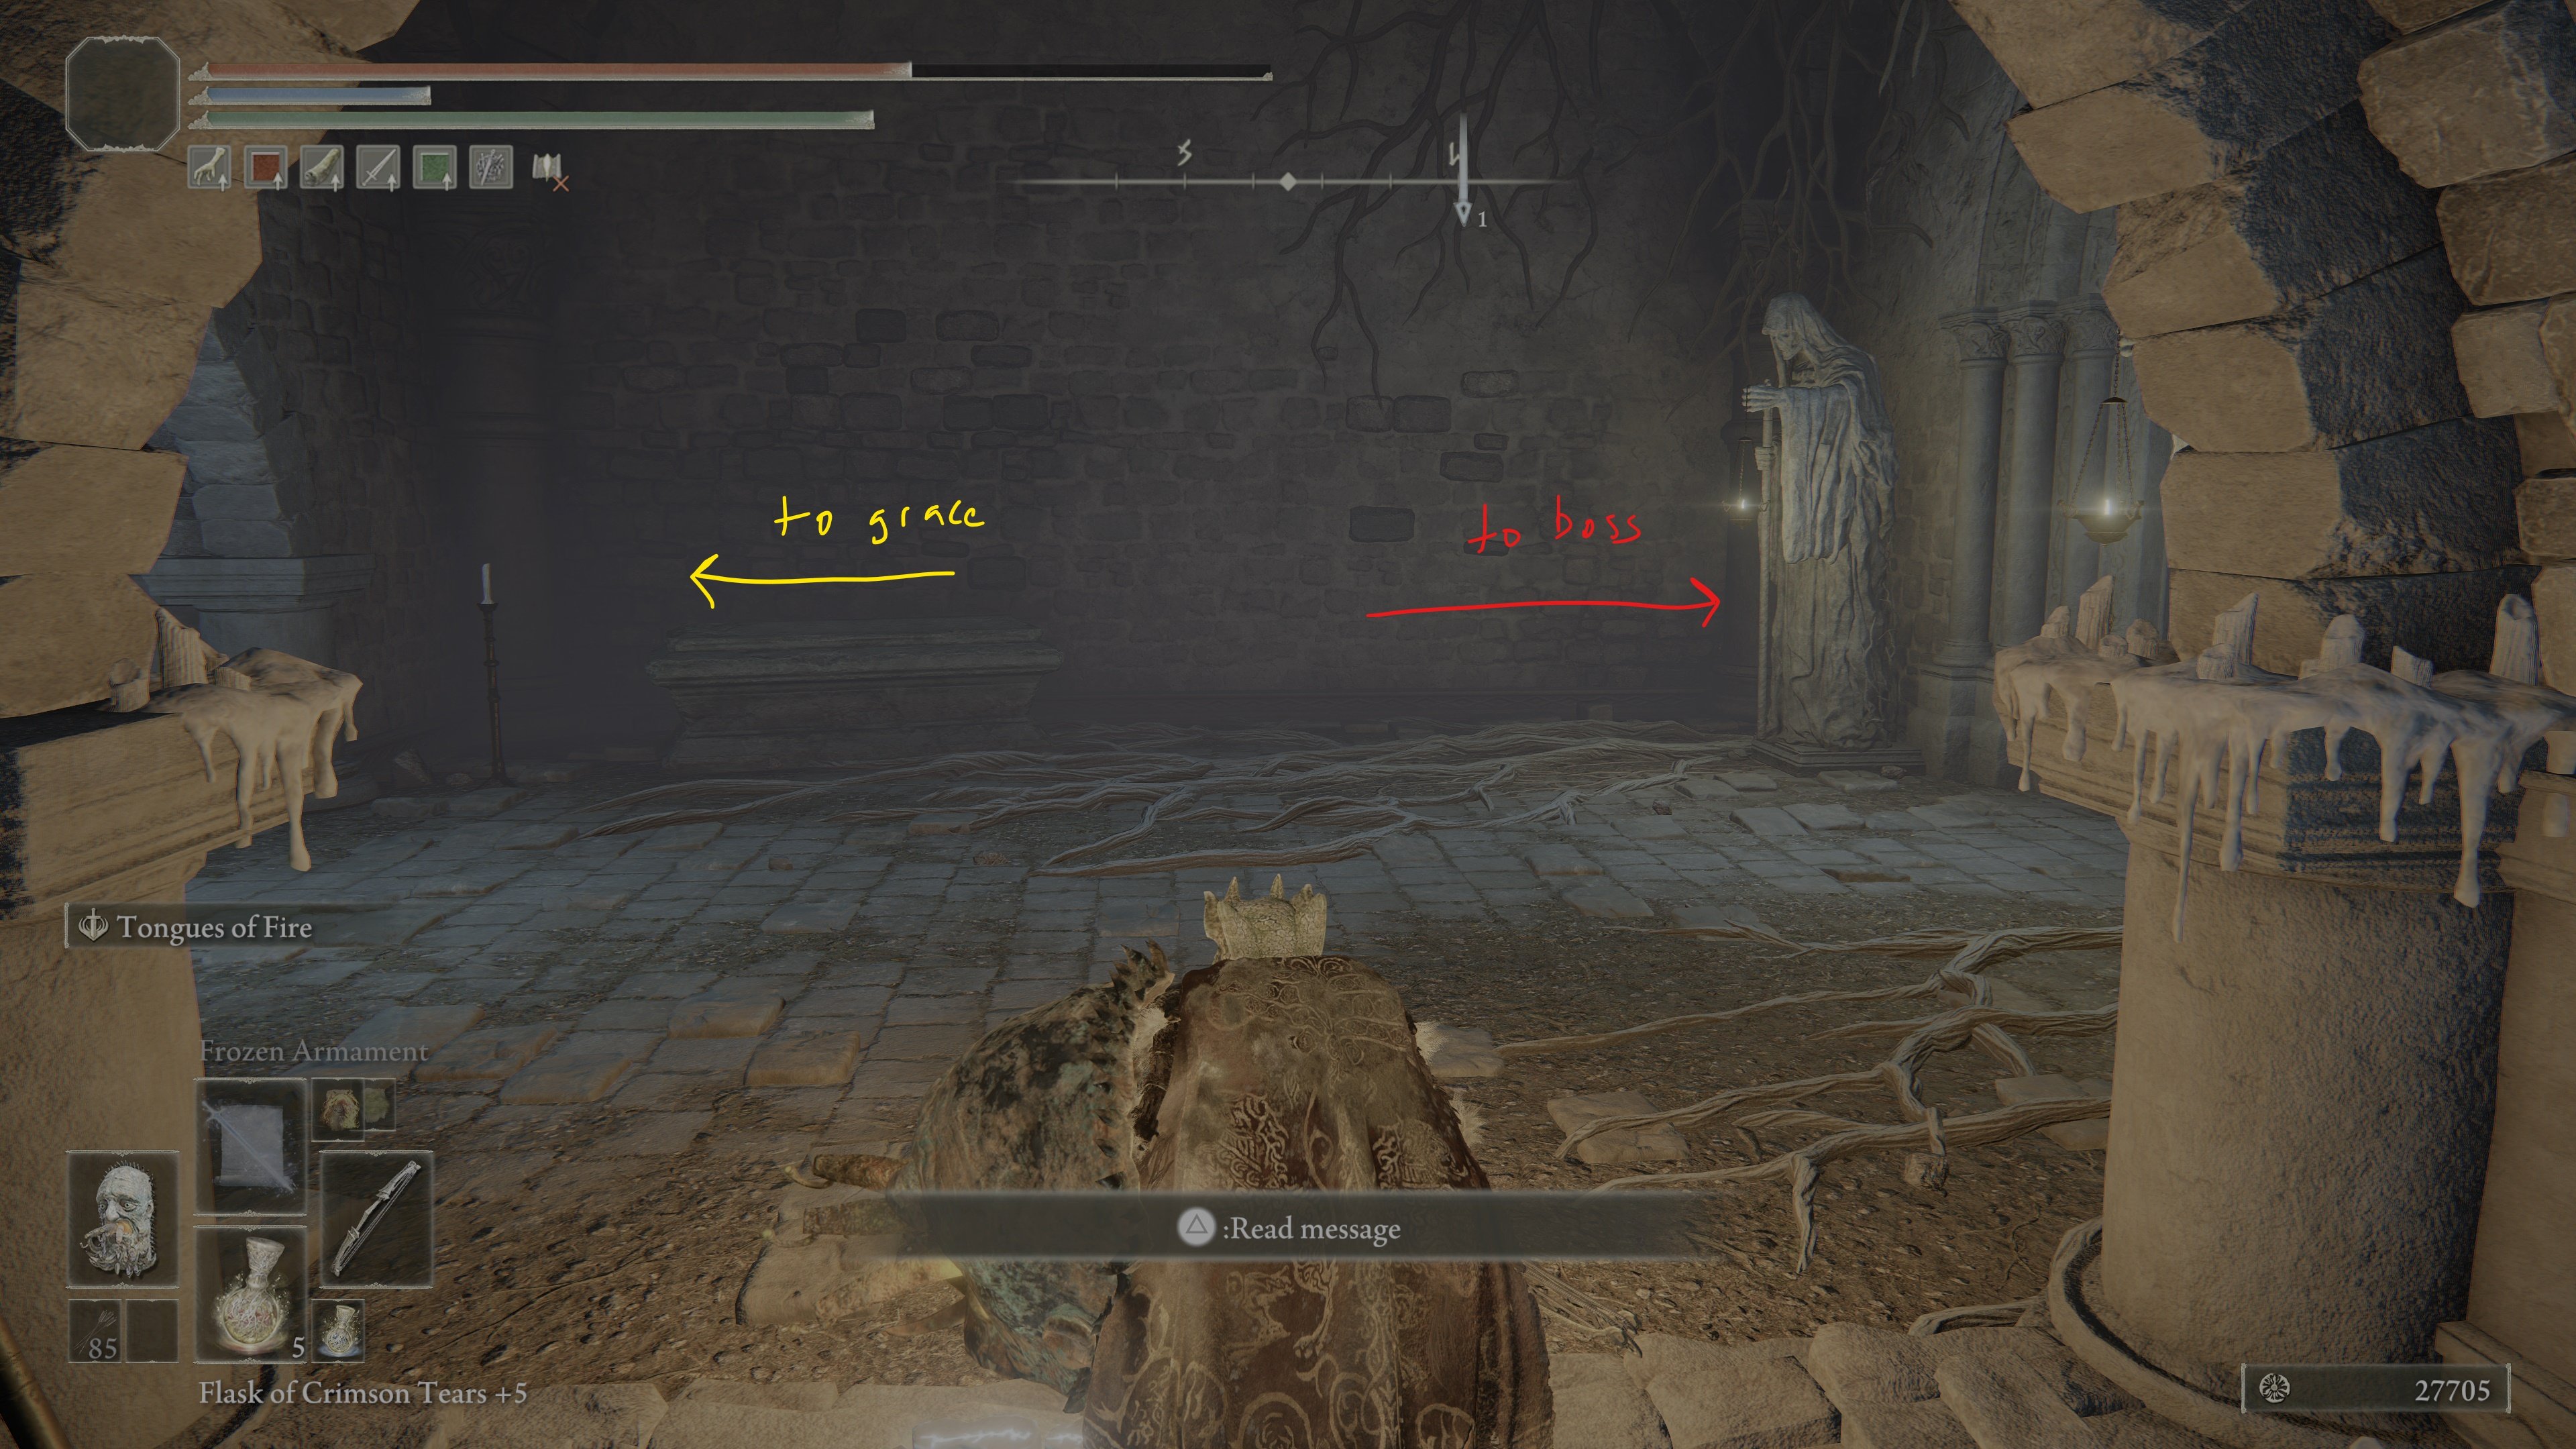
There are also Ghost Gloveworts throughout the dungeon.
The boss of this Dungeon, Grave Warden Duelist, also has a few living jars in his arena that will attack you. Kill him to acquire the Soldjars of Fortune ashes.
Elden Ring Auriza Side Tomb Gallery and Notes
Other view:
 Anonymous
Elden Ring players when a light bit of puzzle solving appears:

 Anonymous
Elden Ring players when a light bit of puzzle solving appears:

 Anonymous
 Anonymous
the sign outside said "be wary of madness" so I equipped my focus talisman but I was not prepared for this ********

 Anonymous
the layout of this dungeon hits harder than the runebear outside of it

 Anonymous
holy ****, i didnt even know this place existed and i've already done 4 playthroughs wtf

 Anonymous
I solved this by using rainbow Stones. That's how I realized there was two copies of the rooms I would set a rainbow stone down in one and take note of the color and then transport to the other room and repeat the process.

 Anonymous
The simple way to think about this dungeon is that there are 2 versions of everything ( A & B)
The teleporter at the end of the chapel always takes you to that versions flooded room
The teleporter behind the hidden sidewall of the chapel takes you to the other version
The lever to finish the dungeon is accessed though a ladder in Version B's flooded room.
 Anonymous
I had no idea those chests would teleport you. I kept reading "trap" from everyone's nonsense in game lol. I'd open it and back away, then spent the next 15min pondering. Sometimes those messages help, but they sure get get annoying

 Anonymous
 Anonymous
The puzzles aren't hard, you can complete it and find the lever without really putting much thought into it, whats hard is possibly dying and having the navigation be a pain to find your runes again.

 Anonymous
I had a hunch there is only four raw meat dumplings, so I used a freecam and could not find a fifth large jar.

 Anonymous
 Anonymous
 Anonymous
Massive thank-you to the person who made that guide. This is the kind of dungeon that turns my brain into sludge trying to complete without one.

 Anonymous
Notice the Ghostflame has color here and no where else in game? It's right above Godwyn. And there's no Marika golden summons here, only the old way works, with cremated remains, ashes. Death was once burned in the death flame and it lost its color. Godwyn, First of the Dead, is occupying this forsaken kingdom.

 Anonymous
 Anonymous
Night Maiden's Mist clears dungeons easy, you can kill enemies through walls, like the giant jars waiting behind the gate room with the lightning pot throwing imp, put the mist on the brick walls to the left and right of the gate door. Imp above can be killed from below by putting mist above you as you walk under him.

 Anonymous
 Anonymous
 Anonymous
"Love" that these f...ing imps can still kill you AFTER you open the teleporter chests. Brilliant. And I can't kiil them bc I'm doing a summons only run. Whoever designed this: F YOU!

 Anonymous
 Anonymous
 Anonymous
I just wish being teleported was quicker. Every time I open a chest I alt-tab to watch hentai because of how long it takes.

 Anonymous
Anybody getting some Chalice vibes? *chills* (but good chills)

 Anonymous
another sprawling dungeon filled with useless loot and a lame boss :(

 Anonymous
I never understood what the right path was, so I literally just completed it by being lucky, but I think it was fun to be lost for a while

 Anonymous
imagine being so forgettable you get buried in the auriza side tomb instead of the heros grave

 Anonymous
 Anonymous
I don’t understand people complaining that this dungeon is confusing. I reached the lever in less than 15 minutes, first try, no guides.

 Anonymous
Is there no effigy of the martyr in here? Looked everywhere can't find one, how are you supposed to be summoned to help?

 Anonymous
Unpopular opinion but we need more maze-like dungeons like this one. Even though it was frustrating as hell, it feels really satisfying when you finally manage to complete it. This is what I would call a real dungeon.

 Anonymous
Am i the only one to see the build on the guide
If anyone is able to recognise it will give me a great experience in PVP
 Anonymous
This is what you call a puzzle, not by putting on a random helm and gesturing in a certain way!

 Anonymous
Try doing this dungeon with out no assistance from wiki or youtube or Reddit… i bet ppl could spend days in here lol

 Anonymous
 Anonymous
How to make this dungeon easy:
1. Put a prism stone on top of each chest before you go through it.
2. Double back through each chest after you go through it.
 Anonymous
 Anonymous
 Anonymous
Took me 5 minutes to find the exit of this god forsaken hell hole.

 Anonymous
 Anonymous
 Anonymous
Fair play, whomever wrote the wiki for this dungeon went above and beyond. I would have just been going round and round in circles with no idea what was going on from one chest to the next, hoping I'd get lucky and get it right.

 Anonymous
Took me more time to do the puzzle than to beat the boss, i swear im going to beat the dev team that does these puzzles

 Anonymous
Perfumer Cookbook vs. Soldjars of Fortune ash. Hmmmm. Should I risk runes on the boss or just leave once I have the real treasure?

 Anonymous
 Anonymous
 Anonymous
My favorite catacombs area. Gives the same amount of confusion as the ghost houses in super mario world.

 Anonymous
godricks great rune heals you with the vigor and mind increase for every chest teleport. v1.04

 Anonymous
what possesses a man to go through the effort of making a 3D map of a dungeon and then NOT mark the place where the lever is?

 Anonymous
 Anonymous
to make this easier, i left a single prism stone in only catacomb B, in the water area
just so you know if you're in A or B
 Anonymous
beat it in one try without guide. no idea that this tomb even existed lmfao

 Anonymous
I solved this area by dropping glass shards along the floor of one of the identical areas. It makes this place much easier to navigate when there are items that you dropped scattered around in one area, and nothing in another. You can use glowstones or rainbow stones too, but they don't last as long.

 Anonymous
This needs to be edited to add the Perfumer's Cookbook [3] to the unique item list; it's in the room behind the grate that has the two large jars and 2 cracked pots in it. That cookbook's pretty important since it gives you the Ironjar Aromatic recipe. It might also be helpful to add the cookbook as a side note in the guide, and as an aside, it might be good to add another picture of the layout with the teleporter chests labelled the same way that the guide labels them. (One side A one side B when it flip-flops to the other layout)

 Anonymous
It took awhile tbh, but eventually i was able to make sense of the walkthrough. grave warden duelist is an absolute pushover. just kept hitting him with glintstone cometshard and he went down pretty fast. the payoff for this dungeon isn't worth the effort though.

 Anonymous
 Anonymous
 Anonymous
this walkthrough makes absolutely zero sense. 1A? 2B? What the?

 Anonymous
 Anonymous
This is the worst goddamn walkthrough description I think I have ever seen. Good lord take it down.

 Anonymous
Takes the cake as the most annoying area in the game. Solved this "puzzle" on my own, but can't find the way out.

 Anonymous
 Anonymous
This dungeon is proof that rainbow shards and arrows are finally useful in a Souls game beyond just calculating if you’ll survive a fall.

 Anonymous
My suggestion is to keep a twiggy cracked tear physick ready, so you can just suicide down the long fall (ladder to water) after you activate the lever. That way, you can start from the grace and go to boss.
(Assuming you've already got all of the items you wanted by wandering, and the lever is the last step)
 Anonymous
 Anonymous
there are 4 cracked pots here some one needs to update this one. also if you picked up the starting item cracked pot you wont see 2 of the 4.

There are 4 cracked pots, not two.
Every single part of the dungeon has two parts, and this includes if you try and go to the entrance.
I found four cracked pots in this place, two each in both alternative waterlogged rooms behind bars. So two in the room with a ladder leading to the lever. And another two in the room with the Perfumer's cookbook [3]

 Anonymous
This ****er nearly drove me mad last night. I had to start dropping rainbow stones next to the chests I’d gone into and come out of, and even then it took me a good long while to find the way out.

 Anonymous
 Anonymous
 Anonymous
WARNING: KILL THE IMPS BEFORE YOU USE A CHEST! They can still hit you while you're in the teleporting animation. Even when your body isn't there, they CAN still hit you.

 Anonymous
For those confused about this its pretty easy once you understand it, there's simply 2 duplicated catacombs with the teleporter chest that takes you back and forth between them. The only chest that will take you to the 2nd decoy catacomb is behind the fake wall. Once you go through there you can either jump down the right tp chest to get 2 more cracked pots near small jars instead of big ones w/ a ladder to real lever. To get the 2 ritual pots go through the fake wall chest twice aka it tps you up, you jump down and go through it again. run straight to where the lever should be and you should find a ladder to climb. take that tp chest and run up to where the exit / site of grace should be, and you'll find a ritual pot and big pot enemy in the corner, go down jump through the window on the left and turn around to get the 2nd one in front of a big pot enemy

 Anonymous
Another confirmation of 2 ritual pots. Here are the directions to the ritual pot most people are missing:
-Once you find and pull the lever, DO NOT JUMP DOWN. Go back down the ladder you came up.
-Use the chest in the caged water room. You are now in long carpet room B.
-Walk forward and take the first right in the room. This is where the fake wall used to be (or never was, since it's the B dungeon).
-Go down the stairs and open the chest. You are now on the platform in long carpet room A.
-Walk forward through a door, to the end of the next platform. Look to your left for stairs. Go up the stairs.
-At the end of the short stairs is a tiny room with a ladder. Go up the ladder.
-You should see a chest directly in front of you. Open the chest. You are now in the room that looks like the first trick chest room from A, but this is the B version.
-Go out the door, through the hall, it makes you take a right, and you will end up in the room where the first exploding jars were. It's the room with the window you jumped out of in A, except this is B.
-Ignore the window on the right and go to the door that has stairs, as if you were going back to the start of the dungeon.
-Up the stairs, you come to a dead end room with some pots to fight and a ritual pot to pick up. If you see a boss door, you are in A somehow. You need to be in this same room, except in the B dungeon.
 Anonymous
IMO the best dungeon in the game. Located right next to the worst one

 Anonymous
The boss here gets staggered with any large weapon, and the jars are very slow. He's very easy solo. I have no issues with gank bosses like these.

 Anonymous
For those confused about this its pretty easy once you understand it, there's simply 2 duplicated catacombs with the teleporter chest that takes you back and forth between them. The only chest that will take you to the 2nd decoy catacomb is behind the fake wall. Once you go through there you can either jump down the right tp chest to get 2 more cracked pots near small jars instead of big ones w/ a ladder to real lever. To get the 2 ritual pots go through the fake wall chest twice aka it tps you up, you jump down and go through it again. run straight to where the lever should be and you should find a ladder to climb. take that tp chest and run up to where the exit / site of grace should be, and you'll find a ritual pot and big pot enemy in the corner, go down jump through the window on the left and turn around to get the 2nd one in front of a big pot enemy

 Anonymous
Pretty sure there aren't two Ritual jars but there are 3 cracked jars that arent recorded. There is one Ritual jar by a large pot but the guy in the comments talking about a ladder that leads to one doesn't exist. There is only 1 ladder and it leads to the real level in the original dungeon. There is no ladder in the copy dungeon.

 Anonymous
Oh yea, a gank boss, exactly what i'd expect from a dude who's title is "duelist".
That being said his pot friends are just droning around.
 Anonymous
Oh yea, a gank boss, exactly what i'd expect from a dude who's title is "duelist".
That being said his pot friends are just droning around.
 Anonymous
 Anonymous
Please add Perfumer's Cookbook [3] to the list of items that you can get there. It is hidden behind the bars in an "alternative dungeon" to which you're teleported by opening a chest behind an illusory wall.

 Anonymous
My Auriza Side Tomb has two crucible knight as bosses... Wtf.

 Anonymous
My Auriza Side Tomb has two crucible knight as bosses... Wtf.

 Anonymous
For those confused about this its pretty easy once you understand it, there's simply 2 duplicated catacombs with the teleporter chest that takes you back and forth between them. The only chest that will take you to the 2nd decoy catacomb is behind the fake wall. Once you go through there you can either jump down the right tp chest to get 2 more cracked pots near small jars instead of big ones w/ a ladder to real lever. To get the 2 ritual pots go through the fake wall chest twice aka it tps you up, you jump down and go through it again. run straight to where the lever should be and you should find a ladder to climb. take that tp chest and run up to where the exit / site of grace should be, and you'll find a ritual pot and big pot enemy in the corner, go down jump through the window on the left and turn around to get the 2nd one in front of a big pot enemy

 Anonymous
For those confused about this its pretty easy once you understand it, there's simply 2 duplicated catacombs with the teleporter chest that takes you back and forth between them. The only chest that will take you to the 2nd decoy catacomb is behind the fake wall. Once you go through there you can either jump down the right tp chest to get 2 more cracked pots near small jars instead of big ones w/ a ladder to real lever. To get the 2 ritual pots go through the fake wall chest twice aka it tps you up, you jump down and go through it again. run straight to where the lever should be and you should find a ladder to climb. take that tp chest and run up to where the exit / site of grace should be, and you'll find a ritual pot and big pot enemy in the corner, go down jump through the window on the left and turn around to get the 2nd one in front of a big pot enemy

 Anonymous
For those confused about this its pretty easy once you understand it, there's simply 2 duplicated catacombs with the teleporter chest that takes you back and forth between them. The only chest that will take you to the 2nd decoy catacomb is behind the fake wall. Once you go through there you can either jump down the right tp chest to get 2 more cracked pots near small jars instead of big ones w/ a ladder to real lever. To get the 2 ritual pots go through the fake wall chest twice aka it tps you up, you jump down and go through it again. run straight to where the lever should be and you should find a ladder to climb. take that tp chest and run up to where the exit / site of grace should be, and you'll find a ritual pot and big pot enemy in the corner, go down jump through the window on the left and turn around to get the 2nd one in front of a big pot enemy

 Anonymous
For those confused about this its pretty easy once you understand it, there's simply 2 duplicated catacombs with the teleporter chest that takes you back and forth between them. The only chest that will take you to the 2nd decoy catacomb is behind the fake wall. Once you go through there you can either jump down the right tp chest to get 2 more cracked pots near small jars instead of big ones w/ a ladder to real lever. To get the 2 ritual pots go through the fake wall chest twice aka it tps you up, you jump down and go through it again. run straight to where the lever should be and you should find a ladder to climb. take that tp chest and run up to where the exit / site of grace should be, and you'll find a ritual pot and big pot enemy in the corner, go down jump through the window on the left and turn around to get the 2nd one in front of a big pot enemy

 Anonymous
For those confused about this its pretty easy once you understand it, there's simply 2 duplicated catacombs with the teleporter chest that takes you back and forth between them. The only chest that will take you to the 2nd decoy catacomb is behind the fake wall. Once you go through there you can either jump down the right tp chest to get 2 more cracked pots near small jars instead of big ones w/ a ladder to real lever. To get the 2 ritual pots go through the fake wall chest twice aka it tps you up, you jump down and go through it again. run straight to where the lever should be and you should find a ladder to climb. take that tp chest and run up to where the exit / site of grace should be, and you'll find a ritual pot and big pot enemy in the corner, go down jump through the window on the left and turn around to get the 2nd one in front of a big pot enemy

 Anonymous
For those confused about this its pretty easy once you understand it, there's simply 2 duplicated catacombs with the teleporter chest that takes you back and forth between them. The only chest that will take you to the 2nd decoy catacomb is behind the fake wall. Once you go through there you can either jump down the right tp chest to get 2 more cracked pots near small jars instead of big ones w/ a ladder to real lever. To get the 2 ritual pots go through the fake wall chest twice aka it tps you up, you jump down and go through it again. run straight to where the lever should be and you should find a ladder to climb. take that tp chest and run up to where the exit / site of grace should be, and you'll find a ritual pot and big pot enemy in the corner, go down jump through the window on the left and turn around to get the 2nd one in front of a big pot enemy

 Anonymous
For those confused about this its pretty easy once you understand it, there's simply 2 duplicated catacombs with the teleporter chest that takes you back and forth between them. The only chest that will take you to the 2nd decoy catacomb is behind the fake wall. Once you go through there you can either jump down the right tp chest to get 2 more cracked pots near small jars instead of big ones w/ a ladder to real lever. To get the 2 ritual pots go through the fake wall chest twice aka it tps you up, you jump down and go through it again. run straight to where the lever should be and you should find a ladder to climb. take that tp chest and run up to where the exit / site of grace should be, and you'll find a ritual pot and big pot enemy in the corner, go down jump through the window on the left and turn around to get the 2nd one in front of a big pot enemy

 Anonymous
For those confused about this its pretty easy once you understand it, there's simply 2 duplicated catacombs with the teleporter chest that takes you back and forth between them. The only chest that will take you to the 2nd decoy catacomb is behind the fake wall. Once you go through there you can either jump down the right tp chest to get 2 more cracked pots near small jars instead of big ones w/ a ladder to real lever. To get the 2 ritual pots go through the fake wall chest twice aka it tps you up, you jump down and go through it again. run straight to where the lever should be and you should find a ladder to climb. take that tp chest and run up to where the exit / site of grace should be, and you'll find a ritual pot and big pot enemy in the corner, go down jump through the window on the left and turn around to get the 2nd one in front of a big pot enemy

 Anonymous

Cool catacombs, lame rewards
1
+11
-1