Laskyar Ruins |
|---|
 |
|
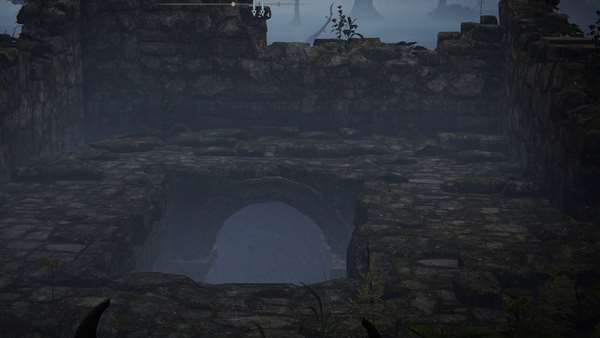
Ruins of a sunken structure beset by fog, found amidst the marshes of south Liurnia. |
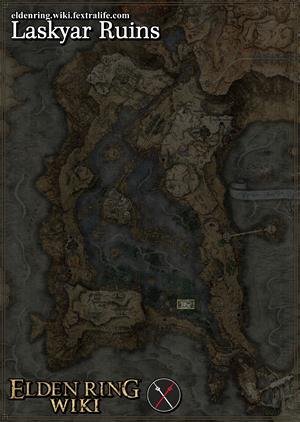
Laskyar Ruins is a Location in Elden Ring. The Laskyar Ruins is found in Liurnia of the Lakes, in the southern portion of the shallows. This location is easily accessible on foot or on horseback.
Laskyar Ruins Map
The Laskyar Ruins are situated on the southern tip of the lake. [Elden Ring Map Link]
All NPCs and Merchants in Laskyar Ruins
- There are no NPCs or Merchants at this location
All Items in Elden Ring's Laskyar Ruins
Elden Ring Laskyar Ruins Creatures, Enemies, and Bosses
Field Bosses and Bosses
- There are no Bosses at this location
Laskyar Ruins Walkthrough
- Search the northern section for a corpse with a Ritual Pot. It is sitting in front of a set of pillars.
- Go to the northwestern section of the ruins to find a set of stairs leading to a dark underground hall. There is a room at the end of this hall with a chest containing the Wraith Calling Bell.
- There is a gazebo in the center of the ruins with a Waygate that transports users to the entrance of the Raya Lucaria Academy, you will need a Glintstone Key to proceed through the gates. There is a Smithing Stone [3] on the corpse outside the gazebo. Map Link.
- Glintstone Craftsman's Cookbook [2] can be looted from a corpse amongst the ruins in the southern part of this location. Elden Ring Map Link.
- Beware the powerful enemy that spawns in the middle of the ruins, in front of the gazebo.
Elden Ring Laskyar Ruins Gallery and Notes
[other images go here]
 Anonymous
 Anonymous
I kill all the weak ones first , then stood behind teleport , I used fire arrows.

 Anonymous
 Anonymous
Two Fingers Heirloom + Commoners Simple Garb is enough to get any class the 12 Faith required to use Heal. Heal will kill Royal Revenants in 2 casts. Very easy.

 Anonymous
Too many players complain he's unbalanced....shift your build then. Get a modicum of magic you can use (faith heals or grav staff and rocks) and all revs die easy.
You have two arms, you can't stand and bang with something that has 10+. Trying to make every fight fit YOU is a horrible plan...be adaptable.
Casting Heal twice was enough to kill the big enemy, and I used the Raya Lucaria Soldier Ashes as a distraction. I don't think I took any damage.

Do yourself a favor and run to grab the stones, bell and pot and then GTFO.

 Anonymous
has anyone else had a boss spawn in the under ground section next to the chest? He killed me and i was not able to trigger him again

 Anonymous
It was way easier to defeat the many armed enemy with +4 Oleg and before letting the many armed guy spawn, killing all the wraith callers around the perimeter.

 Anonymous
people who say the boss is easy on horseback got lucky he didn't spam teleport. commenters who say it's unbalanced are wrong, it's not unbalanced, it's broken. also not worth it.

 Anonymous
If you agro the boss it’ll chase you go a loooong time. I almost got to the Site of Grace north of the ruins, turned to look back, and it was right there to end me.

 Anonymous
Summoning a tanky ash spirit(or mob of them) is clutch here, and being on horseback also changes the fight a lot. DON'T run toward the raised platform while the old noble abomination is alive as you risk getting trapped against geometry and a flurry of substantial hits. There's a clue bought from a merchant on the high road to Raya Lucaria that says healing will damage this type of enemy, but I haven't tested it here. I'm thinking you might be able to drop a warming stone and pop a physik or other regen effect to deal with some of the damage while also standing in an AOE HOT that works like a DOT against Ugly Johnny

 Anonymous
The enemy with many arms dropped a ghost glovewort (2) the first time i killed it, he respawns so i guess its possible to farm them. I dont know the drop rate though ( dont want to fight it ever again) .

 Anonymous
I mean, there's challenging, and then there's just straight up flipping players the bird. That human centipede thing is outrageous. Way too fast, strong, and has no openings. It's also surrounded by mobs with homing attacks. And you don't even get anything nice for winning.

 Anonymous
For the broken creature in the middle, run around him in close range with your horse(goat) nonstop and attack him. Never, ever, stay at 180 degrees towards his face, even at longer distance, unless you're super far away the closer you are the better but don't forget to make him spin trying to catch otherwise he'll one-shot you. Fighting without the horse is a lot harder because he'll blink and use the poison that has a huge area of effect. The fight gets simple once you cheese him just by running around him and utterly broken if you don't, this enemy is probably unbalanced by design force you to cheese or run.

 Anonymous
This creepy amalgamation of arms has a near instantanious jump attack with extreme range. On top of that it can turn itself invisible, which when he does teleports him DIRECTLY BEHIND YOU in an attack animation. Whoever thought this guy deserved no rewards for defeating him, I hope they get eaten by the dogs in the tomb of the giants.

 Anonymous
dont waste your time on a "spider" mini-boss, skip it, NO LOOT, no use, extremly imbalansed, needs fix

 Anonymous
For the mages out there... it's way easier to fight in melee range instead of far away.

 Anonymous
The gigantic enemy here is an absolute tumor. The best solution I can think of is using the Turtle Shield and keeping it's weapon art up permanently. It consumes less stamina and will cause some of the faster attacks to bounce. **** this enemy.

 Anonymous
 Anonymous
The boss that spawns is quite nuts. It's reach is absurd so you can't back away but it seemingly has no stamina. It doesn't have a lot of health though. Pretty nuts lol

 Anonymous
You can aggro the big enemy from behind, then run back in order to fight the enemy without all the projectiles.
Also I think dodging to the left helped me
 Anonymous
 Anonymous
there was a boss in the room before the chest under ground. i tried to recreate the even by running here thrice with morning, noon, and nightfall selected. nothing. must be at an explicit time of the day

 Anonymous
Let the amount of bloodstains be a warning that the enemy in the middle, along with all the ads, is no joke.

 Anonymous
The ****ing giant enemy that spawns here is a joke. Ridiculous to just put it here, it’s boss level and doesn’t give you an actual chance to get a single attack in.


For the big one just run in there and cast heal twice asap. The damage heal does to these isn't based off your faith scaling, so as long as you have the 12 faith necessary you can kill it with the two casts of heal. (worst case you can use the faith-knot crystal tear).
0
+10
-1