Subterranean Shunning-Grounds |
|---|
 |
|
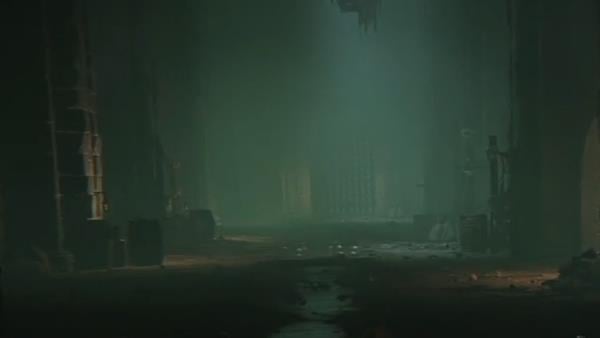
The unseen underground of the Royal Capital, where the forsaken Omen were sent to rot in obscurity. |
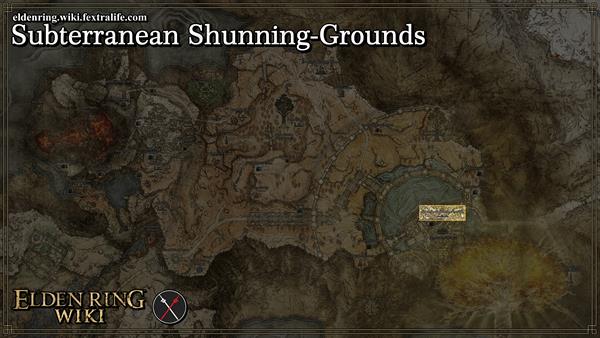
Subterranean Shunning-Grounds is a Location in Elden Ring. The Subterranean Shunning-Grounds is found in Leyndell, Royal Capital (or later, Leyndell, Ashen Capital). It is accessible by descending the stairs at the Avenue Balcony Site of Grace and immediately turning left out of the double grate doors. First walk to the railing, and then move northwest until the rooftops are directly to your left. Hop over the railing onto the rooftops, then descend into the plaza. From the plaza's center, face due North. The well's wooden structure will be visible between a dilapidated ruin and the walkway.
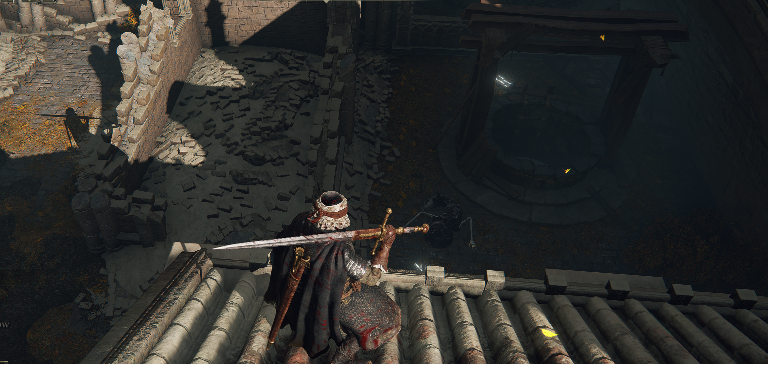
Subterranean Shunning-Grounds Map
Elden Ring Interactive Map Link
All NPCs and Merchants in Subterranean Shunning-Grounds
- Dung Eater - His corporeal form can be found in a sewer-gaol. From the Underground Roadside site of grace, head North-East and find a grate in the floor leading to the aqueducts/sewers.
- Continue North past the Rats and 3x Giant Miranda Sprouts to find a ladder. At the top of the ladder is a room where Lesser Fingercreepers and a Fingercreeper will emerge from the ground. At the back is the cell. It requires the Sewer-Gaol Key to unlock which is also given by Dung Eater at the Roundtable Hold. See his NPC page for more details.
Subterranean Shunning-Grounds Video Guide
All Items in Elden Ring's Subterranean Shunning-Grounds
Gather & Farm Items
- Fire Grease
- Freezing Grease
- Silver-Pickled Fowl Foot
- Poisoned Stone Clumps
- 1x Eye of Yelough
- Glass Shard
- Golden Rune (11)
- Golden Rune (10)
- Golden Rune (8)
- Strip of White Flesh
- Preserving Boluses
- Rainbow Stone Arrow (Fletched)
- Grave Violet
- Fireproof Dried Liver
- Grace Mimic
- String
- Warming Stone
- 8x Poisoned Stone
- Dappled Cured Meat
- Golden Centipede
- Living Jar Shard
Upgrade Materials
- Somber Smithing Stone (8)
- Somber Smithing Stone (7)
- Somber Smithing Stone (6)
- Smithing Stone (8)
- Smithing Stone (7)
- Smithing Stone (5)
- Ghost Glovewort (6)
- Furlcalling Finger Remedy
Equipment and Magic
- Rune Arc
- Shadow Bait
- Mohg's Shackle
- Bloodsoaked Mask
- Bloodsoaked Manchettes
- Erdtree's Favor +1
- Haligdrake Talisman +1
Elden Ring Subterranean Shunning-Grounds Creatures, Enemies, and Bosses
Regular Creatures and Enemies
- Basilisk
- Giant Crayfish
- Fanged Imp
- Lesser Fingercreeper
- Fingercreeper
- Omen
- Rat
- Giant Rat
- Miranda Sprout
- Giant Miranda Sprout
- Putrid Corpse
- Revenant
- Wraith Caller
Subterranean Shunning-Grounds Walkthrough
How do I get to the underground sewers Elden Ring?
Entry Points
To find the Subterranean Shunning-Grounds, start from the Avenue Balcony Site of Grace in Leyndell, Royal Capital. Head down the stairs, then immediately head left after you get attacked by the greatbow-wielding Leyndell Knight. Jump over the balcony towards the golden Teardrop Scarab that yields Ash of War: Thunderbolt. Fight off the Albinaurics that are crawling around the area, and look for a well in the northern corner. (If you've wandered to a place that overlooks a large open sewer area guarded by a Broken Statue, you've gone too far. Backtrack and try again.) Drop down this well, pick up a Rune Arc, then look northwest for a passage that eventually leads to the Shunning-Grounds. Before you descend the ladder, you can pick off the Omen patrolling the main path before climbing down.
If you've already completed Crumbling Farum Azula and Leyndell is now Leyndell, Ashen Capital , the Shunning-Grounds is still perfectly intact and accessible. Walk downhill to the center of the area to an open manhole. Jump in and carefully descend down, and land on a support beam that has the Crimson Amber Medallion +2. From this beam you can drop down onto the balcony that overlooks the main area.
Once you've gotten down onto the main path, head northeast. On your left hand side is the Underground Roadside Site of Grace. This will serve as your main checkpoint as several routes open up shortcuts that lead back here.
To Leyndell Catacombs
Leave the room with the Grace and turn left. Follow the main path northeast a bit and you can see an alcove on the opposing side past the Omen. If you can dash past or defeat this Omen, the corpse it's looking over has the Bloodsoaked Mask and Bloodsoaked Manchettes. Descend the ladder in the alcove and you'll enter a large room with several pipes and many Fanged Imps waiting to ambush you. Deal with them in any manner you fancy to clear the way forward.
The platform you start at has some Freezing Grease. Jump onto the closest pipe and follow it to the next wooden platform for some Serpent Arrows. Pick off the Imps from afar, then follow to the next platform (mind the Fanged Imp ambush) and collect a Fire Grease. If you follow the pipe forward and down its incline, you can collect a Somber Smithing Stone (6) at the end. The other branch leads to wooden platforms on the opposite side of the room and has a corpse with a Smithing Stone (7). Go in the doorway and head up the stairs.
Once you peek out the doorway, you'll be at a room with a corpse on your left. That corpse holds the Shadow Bait incantation but is guarded by an Omen. To your right is a lever that opens the giant grate next to it so you can access this side of the pipe room from the Site of Grace without needing to traverse Fanged Imp territory.
Go back to the Pipe Room from this end, and look down. You can see a large pipe that you can safely jump onto. Hop down the large pipes and reach the watery floor of the area. Use the pipe sections to find safety when the Giant Crayfish attacks you. You can skip the lobsters by running into these pipe parts. Follow the wall southeast until you reach an opening where you can access the Leyndell Catacombs Site of Grace and take shelter from the Giant Crayfish. If you head back out, you can find Mohg’s Shackle up against the southeast wall. If you can take out the Giant Crayfish, the corpses in this area contain a total of 2x Smithing Stone (7) and 2x Somber Smithing Stone (7).
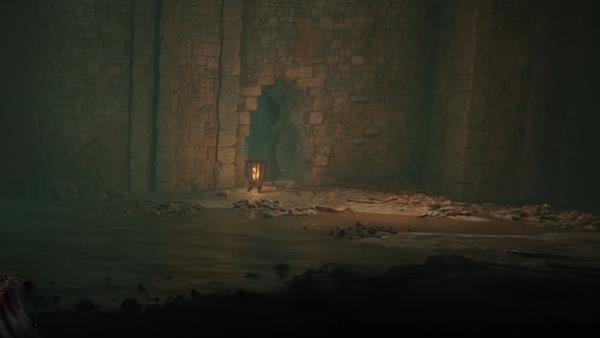
From the Leyndell Catacombs Site of Grace, you can proceed down the stairs to clear that dungeon. Otherwise, you can head up the stairs and turn right to a lift. Ride it up, running past the infinitely-respawning spectral soldiers that harass you. Underneath the flight of stairs that you see here are illusory walls. Hit them to open up a space beneath the platform, then look left and hit the next wall to find a Haligdrake Talisman +1. Take out the white slug here to stop the soldiers from respawning. Climb up the stairs, grab the Golden Rune (11) on the way, then pull the lever at the end of the corridor to open up a shortcut to the room that held the Shadow Bait incantation.
To the Dung-Eater
From the Underground Roadside Grace, head out the room and turn left. Go as far as you can to the end of the main road until you see a hole in the grates on the floor. Drop down this hole.
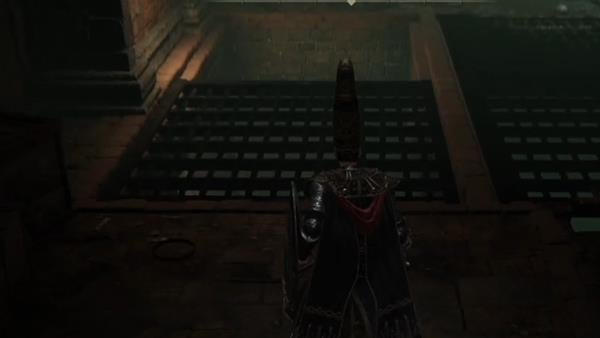
At the bottom of this drop, look southeast for some Preserving Boluses at the dead end. Then turn around, fight through the rats, and follow this tunnel all the way to the end until it turns left. You'll see a total of three Giant Miranda Sprouts on the way forward. Burn them down, then climb the ladder at the end. Pick up the Rune Arc and then follow the tunnel to a right turn. The corpse has a Lost Ash of War but is guarded by a Fingercreeper. Run past this and you can find the Dung Eater's cell. Note that you must have the Sewer-Gaol Key to open this door. This key can be obtained from the Dung Eater in the Roundtable Hold while you have a Seedbed Curse in your possession. If you intend to finish the Dung Eater's quest, he will be found here in this cell to receive the Seedbed Curses to create his Mending Rune.
The Next Shortcut
After dropping down the open grate, instead of making the left turn to the Dung Eater's cell, on the wall on your right is a pipe. This leads to a labyrinthine section of the Shunning-Grounds.
Follow the pipe forward and drop down the first hole you see. You'll end up in a room with a grate that has a few Wraith Callers. Deal with them and then pick up a Stonesword Key at the far end of the room. After picking up the Stonesword Key, turn left and open the cell door. Past this door, follow the path and turn left and go along an upward incline. To your right should be the hole that you fell down previously - now you're on the other side of it. Turn left and proceed, but be wary of another hole in the ground. This one drops you into a large chamber with a Revenant. Jump over this hole, pick up the bunch of Rainbow Stone Arrow (Fletched), and then turn right at the next junction. Follow the pipe downwards and to the end, picking up the Fireproof Dried Liver on your right on the way. You'll then reach a room with an Omen atop the ladder at the end. The item you see before you is a Somber Smithing Stone (8).
Dispatch or run past the Omen, and climb up the ladder to reach another large room. The corpse on your immediate left has a Smithing Stone (7) that's guarded by two Omens, while there is a lever on your right that opens a grate that leads back to the main path and provides a shortcut to the Underground Roadside Grace. The way forward is the doorway that you see right ahead. This leads you to the rim of a large cylindrical chamber. Turn right and follow the broken stairs down to pick up some Grace Mimics, but the actual way down is on your left from this entry doorway. Look over the edge and you can find a ledge below you that you can safely drop onto. You'll find a silver Teardrop Scarab that yields a Somber Smithing Stone (6) after you kill it. Follow the broken stairs to the end to find some String, then enter the next doorway you see.
Follow the corridor, taking out Putrid Corpses and Miranda Sprouts on the way, until you've descended a set of stairs to the Fire Grease guarded by a pair of Miranda Sprouts. You'll see a ladder and a Giant Miranda Sprout that you can snipe from this vantage point. After you've taken it out, descend to fight off some Basilisks and pick up some Poisoned Stone Clumps in the room. The doorway out leads to a short platform that holds the Nomad Ashes and a Basilisk ambush. Climb back up the ladder and you'll notice a pathway that goes under the stairs. Follow it into another pipe. Travel through it, taking out a couple of Basilisks and a Commoner on the way. Note the locked door here - it's a shortcut you can open much later. Follow the pipe to the end and you'll find another open room with a single Omen in it. Kill this Omen for the Omen Bairn, loot the bodies and then climb up the ladder. Cross the wooden platform, picking up another batch of Poisoned Stone Clumps on the way, then open the double doors to find yourself on the opposite side of the Underground Roadside Site of Grace.
To the Cathedral of the Forsaken
With that door now open, start at the Underground Roadside Grace and proceed straight through the door you just opened. Rather than going back to the room with the ladder that leads to the Omen, instead look to your right and step onto the pipe. Follow it all the way to a wooden platform at its end, taking out more Fanged Imps on the way, then drop to your left onto another large pipe. Make a break for the long wooden platform northeast, then turn around and take out any Fanged Imps that are chasing you. Mind the Fanged Imp ambush from the doorway that faces the Golden Rune (10). Go through that same doorway, kick down the ladder to your left to open a shortcut that bypasses Fanged Imp territory on return trips, then turn around and walk to the end of the platform. Look to your left for a large square platform that you can jump down to, then walk on the pipe and jump into the upward-facing opening.
This is another labyrinthine set of pipes, but thankfully the last. You may notice a rat scampering away. If you want to go straight to the end of this area, skip the next paragraph and start following the rat.
Head the other direction from the scampering rat. This section of the pipe maze is virtually devoid of enemies and has several Crimson and Cerulean Teardrop Scarabs you can refill your flasks with. Once you see the first branching point, mark the spot with a Rainbow Stone, then take the right branch, then first left, then head to the end of the pipe and turn right to find some Eye of Yelough. Backtrack, ignore the first right turn, then turn left at the T-junction. Follow the pipe all the way down, picking up the Warming Stones on your left. At the T-junction, turn left then right in quick succession, then follow the path to a Smithing Stone (8). Backtrack all the way to your Rainbow Stone and turn right. Follow the pipe down, making a U-turn that leads to a Golden Rune (8) at the intersection. Turn left at this intersection and follow it all the way to a Smithing Stone (7). This pipe also opens back to the large Pipe Room. If you've kept up with the guide this far, backtrack all the way to your Rainbow Stone and now go straight ahead.
Follow the rat down the pipe. When you reach the next branching point with the Golden Rune (11), turn left and drop down the hole (watch out for the Commoner who will attempt to backstab you). If you go straight instead you'll end up on the wrong side of the locked door and have to do more backtracking. If you went down the hole on the left, take out the Commoner, pick up the Smithing Stone (5), and open the locked door on your right. Head straight down the pipe instead of through the door you just opened, descending the stairs and ladders until you reach a room filled with Living Jars, with a Ritual Pot near the large Living Jar. Take the exit you see on the right, and then ride the elevator down to the bottom of the giant cylindrical chamber. The Site of Grace you see is the Forsaken Depths Grace, and directly ahead is the room where you fight Mohg, the Omen.
Mohg, the Omen Strategy
- Melee: Equip Mohg's Shackle in your items and buff before entering the arena, summon your ash of choice right away then wait for him to approach. When he is close and about to strike, use the Mohg's shackle item to interrupt him then unleash some charged attacks on him. You may need to trade a hit or two, but you should be able to stagger him with all of that time and get a critical strike. Feel free to run away and rebuff if needed, let your summon take aggro and dodge through his attacks. Land a charged attack while he is busy with your summon then immediately use the Mohg's Shackle again--note that you can only use it TWICE each time you fight him. Then land some heavy or charged attacks afterwards. It should be easy to stagger him at this point and now you get to face him with substantially less health. From here on just read his attacks and throw out some light attacks in between or run and gun if you would like to (the pillars can stop his bloodsplatter ability if they aren't knocked down yet). Might be tricky to get down but with the hammer talisman and the flask of wondrous physick that buffs charged attacks+stance break I was able to brea
- Magic: For magic and ranged users, you need to be careful when casting spells/incantations or using ranged skills, his trident has a long reach and can clip you where you think you might not get hit. He also has a couple of bloodflame spells that can be used as projectiles. Try casting spells/incantations that are quick or heavy-hitting and make sure you're either at a safe distance, or when he's casting a spell as well, but do not trade blows with him when he's casting a spell as it is not worth it. Only do so if you think you're safe, you can take advantage of the pillars from the area to hide from the projectile. If you're using a bow and arrow, you can safely jump and shoot from a safe distance while kiting him around the area. You can also use Mohg's Shackle then cast the spell/incantation of your choice, note that you can only use the shackle twice each time you fight him.
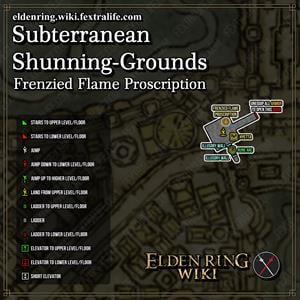
After the boss fight, loot the treasure chest for an Erdtree's Favor +1, then activate the Cathedral of the Forsaken Site of Grace and rest. Attack the wall behind the chest and a secret passageway should open. If you haven't beaten Morgott the Omen King, the way forward from here will be sealed off. If you have, though, you can proceed forward to a very difficult platforming puzzle, leading to the Frenzied Flame Proscription, the final location for Hyetta's questline. See the Cathedral of the Forsaken page for more details of the loot that can be found beyond, and for details on completing the platforming puzzle.
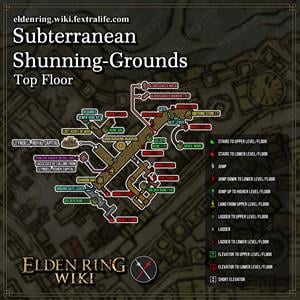
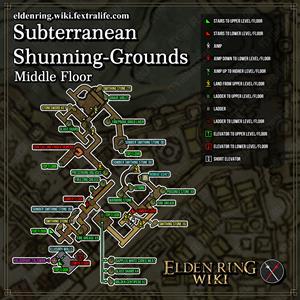
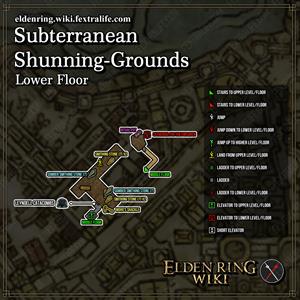
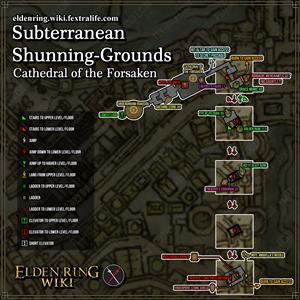
Subterranean Shunning-Grounds Dungeon Maps
The player starts exploring this Dungeon from the Top Level entering from Leyndell, Royal Capital's Underground Floor or by falling from Leyndell, Ashen Capital.
Elden Ring Subterranean Shunning-Grounds Gallery and Notes
How do I get to Frenzy Door Elden ring?
- This area is accessible from this location: Subterranean Shunning Grounds.The door is at the lowest part of this location. You may follow the walkthrough down until you reach Mohg, the Omen. From here, you will need to return to the back of his boss room. Loot the chests, activate and use the Cathedral of the Forsaken Site of Grace and rest. Attack the wall behind the chest to take down the wall and reveal the passage. Here is where you will need to use your platforming skills descend. leading to the Frenzied Flame Proscription, the final location for Hyetta's questline. See the Cathedral of the Forsaken page for more details of the loot that can be found beyond, and for details on completing the platforming puzzle.
Platforming Walkthrough
- Enter the area and cross the wooden planks to descend to the lower levels. You may notice a few tents on the way - these can be broken by the wandering Nomads' Frenzy attacks. The first one you find contains the Nomadic Merchant's Set, while the next one has 5x Eye of Yelough. You'll eventually reach a point where you need to drop between two perpendicular planks before you can proceed further; the Frenzied's Cookbook (2) can be obtained in an alcove after you've dropped to the lower plank.
- You'll be at the last wooden beam on the southern side of the shaft. There'll be a Nomad on the final southern platform playing a violin. Where this enemy is is exactly where you need to drop off to start dropping down the gravestones on the eastern shaft wall. Look carefully and you will see a tiny gravestone jutting out in the corner - carefully walk over without jumping or rolling to drop onto that gravestone.
- From this gravestone, the next one to drop onto is further down on the eastern wall. Face your character to the southern wall and backstep. Ensure that you're positioned and angled properly to not bump the geometry on the way down.
- It is possible to skip the platforming with Longtail Cat Talisman, however, you will not acquire the incantation hanging at the lowest platform before the floor. Simply have it equipped and jump down, you will fall to the floor causing you to die and break the floor. Respawn and jump again to reach the floor unharmed (the talisman is not required after breaking the floor).
-
Then, face north and backstep. You should fall onto the next gravestone without issue. Face south and backstep again, and this should land you on a gravestone with a corpse holding the Inescapable Frenzy Incantation. Walk into the hallway, turn right. Beware of the nomad that is sitting facing the dark corner. Pick up the Fingerprint Stone Shield at the end of the corridor. Behind the breakable tent here is Note: Miquella's Needle. From the lowest possible level, you can safely jump to the floor - it will crumble and you will land in the Frenzied Flame Proscription. This is Hyetta's final quest location, and there is a Site of Grace nearby too. You can also speak to Melina here.. To the left of where Hyetta is standing is an illusory wall. Roll into the wall to reveal a short corridor with a chest at the end. The chest contains 1x Rune Arc. The wall behind the chest is also an illusion. Rolling into it opens up the passage into a large cavern. Drop down to arrive at the Root-Facing Cliffs site of Grace, part of Deeproot Depths.
[other images go here]
 Anonymous
I lost 50k runes to the room of a thousand imps and I will never, ever stop being tilted about it. It wasn't even to an imp, I just ****ing fell off

 Anonymous
They should have made the water where the prawns are poisonous. Fight me about it.

 Anonymous
Everyone is upset at the directions. All you need to know is what you’re looking for is in that pipe, past that rat

 Anonymous
i wanna stick a fork in the eye of whoever thought it was a good idea to make the omen on top of the ladder near the shortcut able to aggro you while you're fighting (not running through) the omen at the bottom of the ladder. omens are fine, fun even. but thats 1v1, any more than that and its sht.

 Anonymous
That moment when you find a shortcut, but it's guarded by 3 omens so you just take the long way

 Anonymous
I'm good with everything except the second prawn. Why two. Why.

 Anonymous
 Anonymous
I swear to god I have to look up where the well is every playthrough cuse I keep on forgetting

 Anonymous
This is unironically my favourite level in the game. So bleak. So labyrinthine. Absolutely blew my mind on my first playthrough with how it just keeps going...

 Anonymous
You say that after you drop down, instead of going left to dung eater’s cell ,there’s a pipe to the right that leads to the labyrinth. It’s not. To the right is two rats that kill you. There is no pipe. It does not lead anywhere. It’s a dead end and I have zero clue how to get to Mohg negate these instructions are false and unclear. There’s even a picture of the grate you drop into that leads to dung eaters cell, and that’s the place where there’s insane a pipe on the right. So where the hell is this pipe? It’s not in the open grate where, instead of going left to dung eaters cell, there’s a pipe to the right, because there is no pipe to the right. Only two rats. I hope this is clear enough Denise the directions aren’t.

 Anonymous
Only reason I picked frenzy ending for first play thru was so I didn’t have to go through this again

 Anonymous
this dungeon sucks, as is the destiny of all sewer levels, but I guess I should just be grateful that they at least resisted the urge to make the water poisonous

 Anonymous
Typo fix for whoever writes the guide: I think by hammer talisman you probably meant axe talisman? The hammer talisman buffs stamina damage against blocking enemies. The axe talisman buffs charged attacks. Since the boss guide was suggesting you use charged attacks, the axe talisman is probably what you're thinking of.

 Anonymous
I enjoyed encountering so many dead ends until I figured out my way out of this miserable and stinky place. I never thought I would say this but... this area made me miss being cursed in the depths of Dark Souls without having a clue on how to cure it. Ahh, those were really good times.

 Anonymous
 Anonymous
Knowing that i have to go through this place is the only reason i don't play Elden Ring as much.

 Anonymous
 Anonymous
awful awful awful not good not good tilted tilted what the **** were htey thinking with those imps on the pipes jesus lol

 Anonymous
Everyone talking about how much they hated this area, meanwhile I have fond memories of my first time navigating through it, finding Dung Eater and smashing his ass in his cell, running for my life from the Omen, navigating through all the pipes and opening all the doors and memorizing the layout, the mind**** looping catacombs located at the bottom of the sewers, and then the even further descent into Hell leading you to fake Mohg, and then the illusory wall leading even further into Hell with the Frenzied Flame Proscription, where I became witness to an unfathomably cruelty and dark secret.
This was a 10/10 area and was peak Fromsoft dungeoneering from both a layout and lore perspective.
 Anonymous
It's like everyone forgot rainbow stones are a thing. Also how are y'all getting rekt by imps and Omens?

 Anonymous
So the level is Mario reference? All pipes and severs, final boss is the bad big guy who uses fire, kidnapped a prince(ss), and has an army of cute reprilian followers. Oh, and the jump puzzle at the end.

 Anonymous
This is the most dark souls area of the entire game. And I love it.

 Anonymous
"You may notice a rat scampering away."
And if you DONT see this rat? Are you just ****ed? Bc Ive been in these pipes multiples pipes and ive never seen this rat
 Anonymous
Basically everything in this area should have been dialed back one notch. Maybe the Omen shouldn't have over 5000 hp, a grab, two jumping attacks, and a ranged attack. Maybe the rats shouldn't materialize from nonexistence. Maybe one less giant Miranda flower with more hp than the rest of the game combined. Maybe little wider platforms for maybe fewer imps. Maybe one shrimp instead of two.
And a few road signs in the pipes wouldn't hurt.
 Anonymous
I love this area from a lore perspective, despise it from a gameplay one. But fighting Mohg is cool.

 Anonymous
Why are the sewers filled with piles of corpses? Is it customary in Leyndell to flush the deceased down the toilet?

 Anonymous
God DAMN do the directions for this dungeon suck. I was just trying to get to Mohg following the directions in this guide, and it led me straight into a Basilisk ambush.

 Anonymous
 Anonymous
I am a new player to this game working my through this game on my first playthrough, this level has me going "are you effing kidding me" every few moments as I enter a new area as see a group of new omens or imps. all in service of the three fingers

 Anonymous
This place is the single reason why I've only played one bleed build. If that was the point of putting Lord of Blood's Exultation here, good job FromSoft.

 Anonymous
I love exploring this area, pretty fun maze and all, but the dozens of imp ambushes + the omens on steroids really test my patience when I use certain builds.

 Anonymous
the only bad thing is the platforming to get frenzy flame. the rest of the area is not hard or confusing at all

 Anonymous
 Anonymous
 Anonymous
Can't believe they expect me to pay attention to where I'm going. Smh Miyazaki fell off.

 Anonymous
 Anonymous
There are no words to describe how much this area made me want to skin myself alive

 Anonymous
Hands down my favourite level in the game. Very fun to explore. The Omen fights were tough, but once you're coming past them for the 2nd or 3rd time you can sprint past most of them.

 Anonymous
 Anonymous
 Anonymous
Ah yes, add all the worst enemies, hard layout, bad arena, and mediocre rewards. Make it necessary for Platinum.

 Anonymous
Most fun location to invade in the entire game. Love hiding behind corners and pipes and then hitting the host with a faceful of Waterfowl Dance or RoB

 Anonymous
Sword and Board build with Square Off will stunlock the Omens reliably.
Avoiding them whenever possible works wonders also.
 Anonymous
It's like playing mario, except it's dark souls with a god awful jump .

 Anonymous
 Anonymous
Despite having a revenant, this is my favorite legacy dungeon in the game

 Anonymous
there were definitely moments where i was like ok i really have to focus to keep track of where i am and then i ended up at the bottom of that area and i couldn't reliably go there a second time

 Anonymous
This area is trash. Full of annoying enemies like imps and omens that are waiting to spam you to death. I always hate going here each new playthrough. Only redeeming factor is sewer Mohg boss fight but his arena sucks.

 Anonymous
Why would they put the place where they lock away the undesirables in the middle of the city?

 Anonymous
unironically my favorite are in the game with interesting level design, this area was a blast to explore for the first time.

 Anonymous
Spells with knockback like giantsflame take thee are super effective in the area with imps and pipes. If you don't knock them into the crayfish put, the imps will often clip through the pipe walls and get stuck inside.

 Anonymous
I unironically think that Elden Ring is at its best when it is platformer. Navigating these dungeons by jumping and finding new shortcuts is so fun.

 Anonymous
Are these maps accurate? I'm trying desperatly to follow them but nothing connects up like the maps say they are supposed to.

 Anonymous
This place is great besides the tedious platforming after mohg

 Anonymous
Oh, damn. Here is From thinking they can impress gamers with complex level design. Silly From, gamers don't care about good level design. They only care about checklist tasks in an open world followed by a boss that makes them dodge for 30 minutes. I hope they fix their antiquated approach in Demon's Souls 6.

 Anonymous
 Anonymous
" The other branch leads to wooden platforms on the opposite side of the room and has a corpse with a Somber Smithing Stone (7)."
Just did this; it's a regular Smithing Stone 7. Pls fix :)
 Anonymous
Recently did this dungeon and boss at rune level 1 because I wanted the erdtree favor +1 at the end to try and carry a zweihander and black knife on a lvl 1 naked wretch while retaining light load and I still can carry them both together without going up to medium lol oh well..
But from that run I can say that if you want an easy time of this area you can run past most / all enemies and use the weapon art of the black knife to beat the boss fairly easily even with min requirements and at rl1 if you are into that sort of thing
 Anonymous
 Anonymous
The omen aren’t that bad if your build can inflict status effects and break enemy posture reliably I was RL130 with 30 vig and managed

 Anonymous
 Anonymous
Completly missed the area on my first STR/FTH character.
Visited it during my mage walkthrough on level 85.
I get why the place get that much hate, but for me it was one of the best areas in ER. Well-designed map, cannot save your ass with horse, hard, but fair platforming, just like enemies.
Very similar to DS1 vibes, with close corridors, plenty of planning ahead, tight fights on small pipes, ambushes everywhere and environental traps (random holes in pipes, finding small entrances in vast areas).
Enemies were simple, but lore-wise fine - **** snails were funny, random soldiers lost in pipes just like me, omenkiller at the entrance, imps dwelling on small areas, giant lobsters in sewers, and everpresent annoying rats, they all made sense.
True that Omens are tough, but no one forces you to fight them every time. Often you can outsmart them or range-kill them.
PROTIP FOR MAGES - you can invisbiility to easily sneak next to them.
 Anonymous
One of my favourite locations in the game - Yes, the Omens are very hard, but that just makes this place so much more dangerous and scary, i loved it

 Anonymous
i get the place is late game, supposed to be challenging, but having this many tanky as hell Omens, in tight spots, with a tendency to gank, due to proximity, can be fighting one, but one roll the wrong direction, and you find yourself with a second one, or two more on your back before you realize, poise breaking in two hits, abusing their magic attacks, getting killed in 3 hits, (before anyone says "level up your stats" or "git gud", level 139, stats are 40, 10, 40, 35, 35, 20,20, 18, while using a dragonscale blade +9) to the point they feel unfairly OP, even Mt Gelmir trolls, or crucible knights feel like pushovers next to them
tho the place does have some positives, design is creepy, nauseating and disgusting, in a good way, music is pretty good, simple, but haunting
only really would need a nerf for the Omens, and would be a more enjoyable, as can be, place, still challenging, and easy to get lost in here, but not as infuriating after getting mauled the second you step out a site of grace
 Anonymous
Spontaneous irrelevent thought - why not separate sprint and roll, instead implementing quickstep as a tap input and a roll as a hold. Free up that aow slot and allow use of more weapons. Still rewards composure while offering more decisions to the user.
TLDR: Got salty after misinputting sprint as opposed to rolling and am still yet to understand the lack of options to rebind sprint away from roll.
 Anonymous
Definitely a harder area for this game but at the end you get to feel like the end of Shawshank when you crawl out of that river of **** and never go back

 Anonymous
For all the complaining about the enemies being too hard in this area, if that's the case for you can't you just run/roll past them all and hit the grace/shortcuts/grab items without fighting most of them then just fight mog and move on? There aren't a ton of enemies in this game that you can't run by / skip, I find this method useful for any area I want to fight the boss of or get items out of but want to save time and don't care about actually exploring

 Anonymous
I've done the descent after the boss 61 times, I don't have good hands and I can't get down. the margin of error on some of the challenges in this game does not help people. There aught to be a item or item and make item combo that will successfully soften the fall or float enough because the challenge is a waste of time unless you are completely able bodied.

 Anonymous
 Anonymous
 Anonymous
So nice to see a fully actualized sewer labyrinth stage by From.
Theyve come a long way since the Depths in DS1.
UwU
 Anonymous
There are awful areas in this game. And there is this area. Bloody hell! What a pain in the ***!

I dont like this place...what did they think? There are so many unbearable Areas in this game. Lake of rot, Shaded Castle, Miquellas Haligtree...why cant we just have fun while playing? Some parts of Elden Ring took a little bit to much Inspiration of ds2. I dont know, most of the consecrated snowfields is kind of unfair as well. Enemies deal so much damage, even at vig at 50-60. And leveling past it isnt rewarding. What did they think? I want to be able to make mistakes. I want it to be my own fault that i die. Elden Ring is not perfect. 9/10 balancing issues.

 Anonymous
Revisited this place at level 115 and found the Omens are still basically indestructible juggernauts. Definitely feel like you're supposed to evade them, not fight them.

 Anonymous
One of the worst areas in the game, besides Miquella's Hellholetree.

 Anonymous
One of the worst areas in the game, besides Miquella's Hellholetree.

 Anonymous
I keep getting an error message every time I go into this place. Anyone else's screen say YOU DIED and spawn you back at the beginning?

 Anonymous
Use Rainbow Stones to note where you have and haven’t been. It helped me with finding my way through, it was quite a nice change of pace over just running through the overworld.

 Anonymous
For the infinite spirit soldiers. Its actually a spirit caller snail summoning them. He is behind a magic wall before you go up the stairs in the room where there are mutiple spirit ash soldiers

 Anonymous
Unsuprisingly being a sewer, this place sucks so hard, littered with awful enemies particularly the stupid imps and those Omens are way ridiculously strong for how many of them there are, absolutely gigantic,very confusing, just screw this place.

 Anonymous
 Anonymous
 Anonymous
One of the best dungeons from soft has made imo. The dark omen-filled sewer, concentrated level design and difficulty to boot. Not to mention you discover entire hidden hidden areas that really feel like they mean something. This is one crazy reward for exploration.

 Anonymous
Fully convinced now that FromSoft shat this area out of their ass. This alone proves that ER is full of unbalanced garbage, and definitely doesn’t deserve GOTY.

 Anonymous
May the man who suggested jump attacks be blessed by the Erdtree.

I can't edit but this is wrong
"The other branch leads to wooden platforms on the opposite side of the room and has a corpse with a Somber Smithing Stone (7). Go in the doorway and head up the stairs."
it is a normal 7 not a somber.
 Anonymous
You can bully the Omens fairly reliably with Giant Hunt, as it gets knockdowns on them. Just be aware there are times when they will tank it and hit you back. I'm not sure if this is related to my positioning or some portion of their attacks makes them less likely to get knocked down, but with practice you can shut them down pretty reliably. Still hate these things though

 Anonymous
The revenant in the large room in the pipe maze section drops a ghost glovewart, I think it was no.6 but only the first time its killed. It can be pulled back to the doorway and hit with a heal incantation's AoE but needs to be watched because it can come far enough into the pipe to hit you with its slap attack that has stunlock. If it does cross the doorway into the pipes it wont come very in and it wont chase you.

 Anonymous
This is the only dungeon I've needed to use the rainbow stones to have any idea where I had already been, I was dropping three at junctions of the pipes and keeping notes in my phone of what was at the end of each pipe. It wasn't my idea of fun.

 Anonymous
Is there a merchant down there somewhere? I thought there was but not mentioned here?

 Anonymous
There is no somber smithing stone(7) it’s a regular smithing stone (7)

 Anonymous
Man I love this area. Sure, the Omens are ****, but the atmosphere, design and interconnectivity is superb. The best thing about it though is the entire secrets within secrets feel, finding the sewer hidden away in Leyndell, and then finding out about an entirely new sub-level underneath that goes even deeper. Haven't had that feel since the Blight Town, Great Hollow, Ash Lake trio n DS1. The area could have had some more unique armour and weapons to loot though.

 Anonymous
Not enough of these subterranean dungeon crawls in ER. (No, the copypasted "catacombs" don't count.) It's a fun dungeon. A fungeon, if you will.

 Anonymous
I have two questions about the Omen near the underground roadside grace. Is it possible to sneak from the grace and drop down through the grating without being seen by the Omen?
Also if they do see me and agro will they drop down the grating after me? I
 Anonymous
Blighttown for the modern century. You will either love it or hate it. Personally, I hate it. It is a giant maze filled with annoying enemies and no map. Best part of this zone is that it is optional so I won't do it again after my first play through



you are just like a RAT, jumping around the corner looking for a foood!
1
+10
-1